Fabrication
#1
 06-11-2009, 04:32 PM

Fabrication
So I was bored. I had not picked up my Crew cab from paint and I ran out of stuff to do with the girls Bronco, so I decided that I was just not into doing any body work.
What else is there? Fabrication and some "bling". I was in need of some rear diff covers, and some disc brake brackets, so I began to take some measurements. After opening a cold adult beverage, I worked up some courage to get this stuff started.
During my fabrication I find it difficult to remember to remove my gloves and take some pictures.
I guess the end result is all that matters.
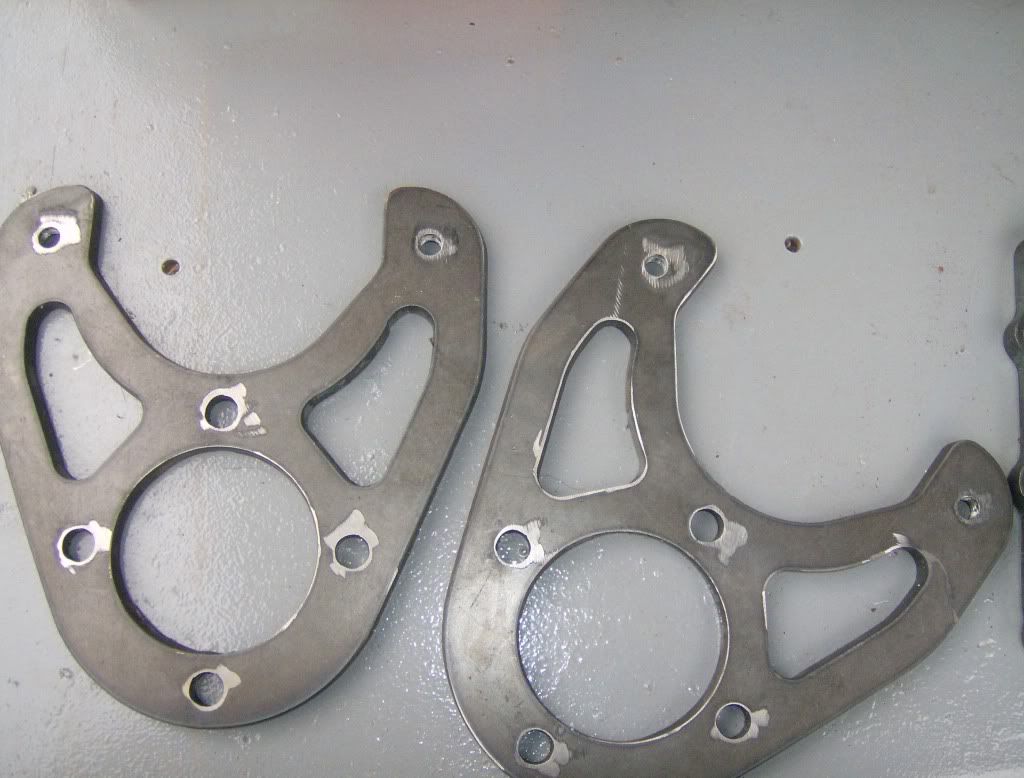
Here are some prototype disc brake brackets for a 14B FF:
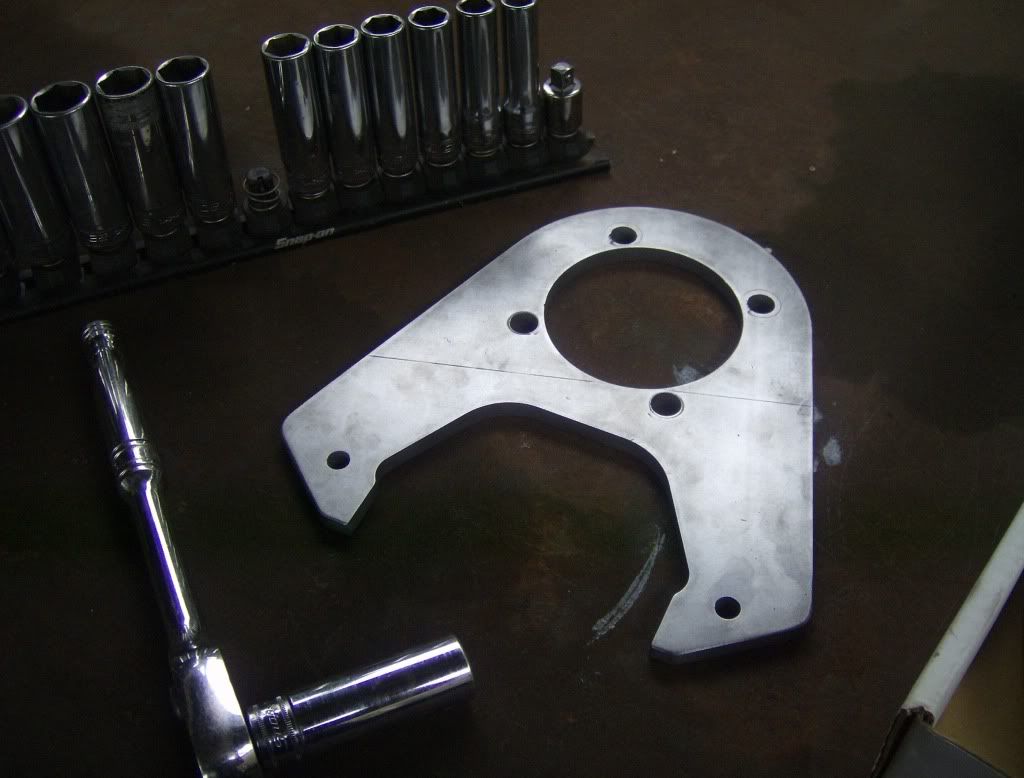
This is what the caliper and rotor looks like on a 14B FF using a "B" type hub:

This was my first bracket, and already I had to change it. Notice that the mounting holes are different. The fix: rotate the pattern 45 degrees so that I can keep the caliper higher on the rotor, and maximizing ground clearance:
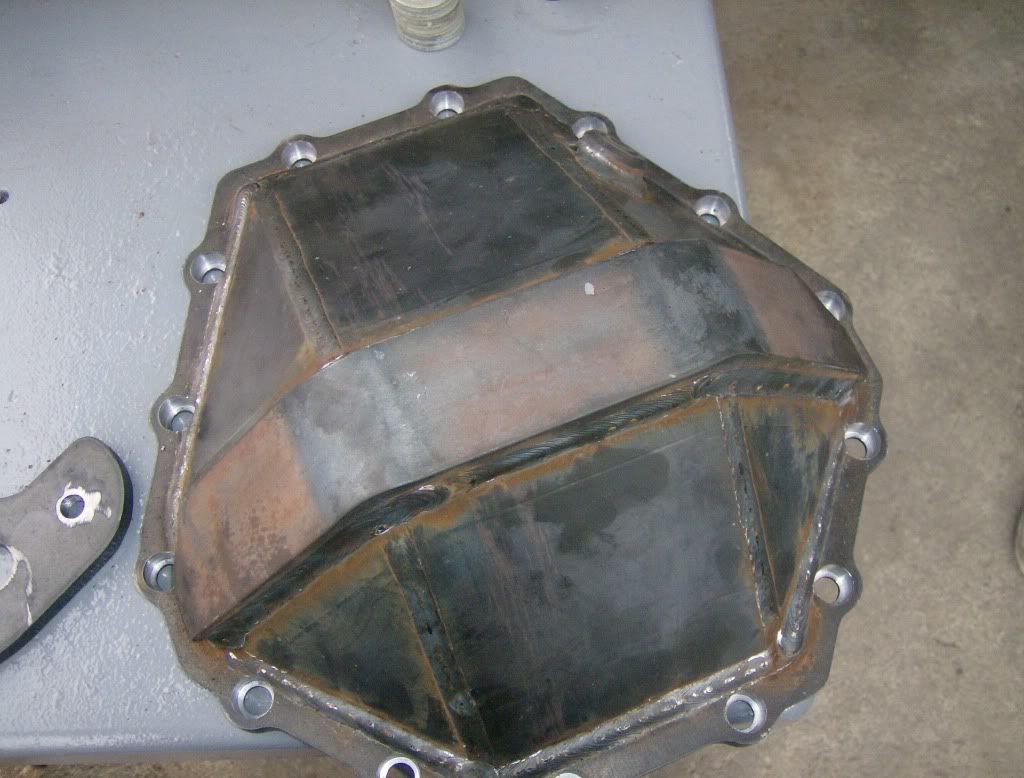
Here is my "Killer" diff cover. This this weighs a ton but should hold some additional fluid and take a beating on the rocks!
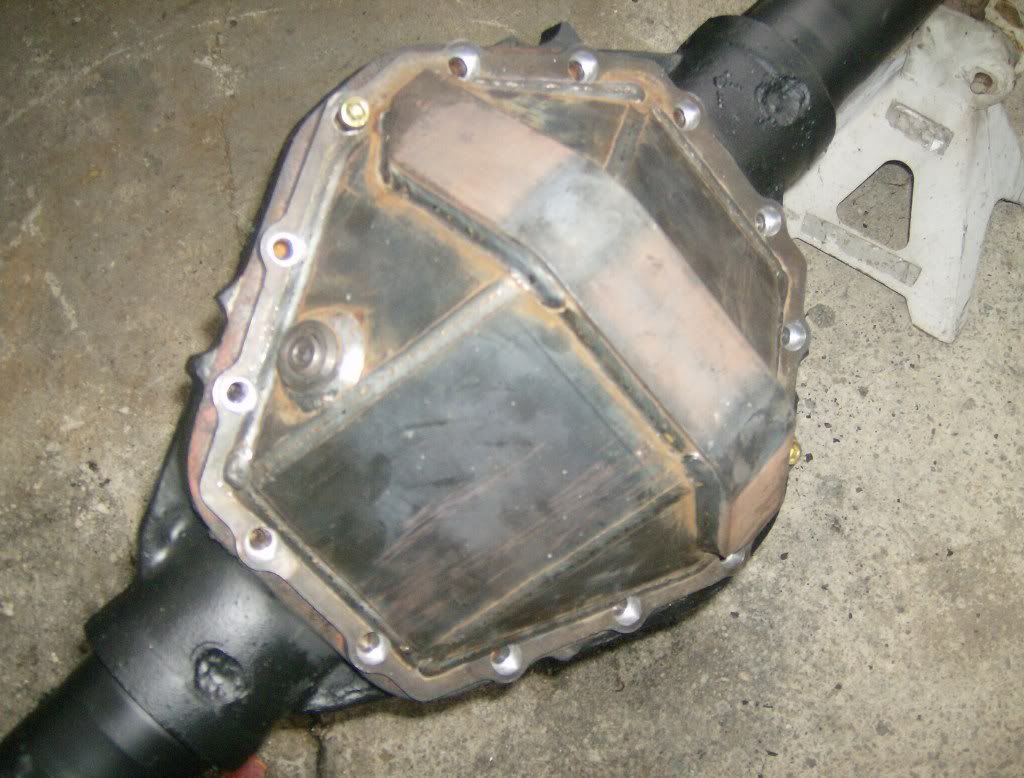
The cool part, I mean the real cool part, is that it fit! Yes there was a little doubt. I am always worried about that. I mean 14 holes means that there is a chance that something could go wrong and that it may not bolt up. lol
What else is there? Fabrication and some "bling". I was in need of some rear diff covers, and some disc brake brackets, so I began to take some measurements. After opening a cold adult beverage, I worked up some courage to get this stuff started.
During my fabrication I find it difficult to remember to remove my gloves and take some pictures.
I guess the end result is all that matters.
Here are some prototype disc brake brackets for a 14B FF:
This is what the caliper and rotor looks like on a 14B FF using a "B" type hub:
This was my first bracket, and already I had to change it. Notice that the mounting holes are different. The fix: rotate the pattern 45 degrees so that I can keep the caliper higher on the rotor, and maximizing ground clearance:
Here is my "Killer" diff cover. This this weighs a ton but should hold some additional fluid and take a beating on the rocks!
The cool part, I mean the real cool part, is that it fit! Yes there was a little doubt. I am always worried about that. I mean 14 holes means that there is a chance that something could go wrong and that it may not bolt up. lol
#3
06-11-2009, 05:32 PM
Thanks man. I countersunk these because I busted a couple of fasteners on the last set I made. I ended up using some button head bolts, and they worked for a while, except that they eventually got smashed up to the point that an allen wrench would no longer fit,,,,,,sooooooo maybe this will help.
Just for conversation, that center ring gear guard thing is 1" flat bar. 1"! Thats on top of the already too thick 3/8" thick plate steel that the center section is made from. This center section is 1 piece too, not that cheesy multi piece stuff that I see being sold.
The ring is 1/2" thick cut from A50 plate steel and I may have the urge to make some cool stainless steel units. I kind of like the look and many of my components on the truck are SS already.
The concern was that the thing would twist up real bad during the "glue" phase, so it was bolted down to a fixture and permitted to cool while under tension. This kept it straight and true with minimal warpage.
Kind of diggin this one. I have yet to decide whether or not I will install a drain plug.
G&J aircraft provided the bung for the fill hole. That thing is a giant, and I plan to run an even larger vent so that I can run the fluid as high as possible.
Fun stuff. I like to fiddle with this kind of junk.
#4
06-11-2009, 06:21 PM
Postmaster
Join Date: Jul 2003
Location: Rep. of Texas
Posts: 2,976
Likes: 0
Received 0 Likes
on
0 Posts
you weren't kidding about that thing being heavy, i can't imagine.
Didn't notice how large the fill plug was. I like how high it is, the vent idea is good too though. The only reason I might lean towards a drain is the weight of the cover could be a PITA to line up during reinstall. Maybe not though.
Awesome that its one piece too. Do you have a hydraulic brake press?
#5
06-11-2009, 07:22 PM
Yeah, it boarderlines being to thick. I believe that the same result could be achieved with thinner materials, but this is a done deal now. I made three of them and I will be making some for the front D60's. I have to be real careful with clearance though. Larger diameter tie rods might make clearance an issue. We will see. I have some work to do before I can cut the rings yet, but next time I have a few too many beers and get bored, I will probably sit and draw them out so I can begin that process. That takes so long.
Yes, I do have a giant brake, however it struggled with this material. My dies are a little on the long side so making the small bends was difficult, so I used an actual hydraulic pressand a fixture under the cover to create the bends. Then I tack welded it together, and made sure that it would stay before I put any real heat to it.
Probably will Tig weld the next ones and leave a real nice pattern. Maybe I will use the "walking the cup" method that I use for stainless pipe / tube in food process.
I guess I could have whipped the Mig and created some coin stacks, but ehhh, straight welds with a Mig are actually stronger than the whip or pulsed type welds. Even though they lay flat and dont quite look as impressive as a stacked coins look, they are durable welds and should take quite the impact.
Unfortubately, and as you know, the stacked coins look may leave some pin holes in the center of the weld,, and if it is too cold will eventually crack.
Doubt that this cover will ever see this type of stress, so we will see how I feel on the next run.
MIght actually throw in some style for the added wow factor.
On the left is my brake and sheer.
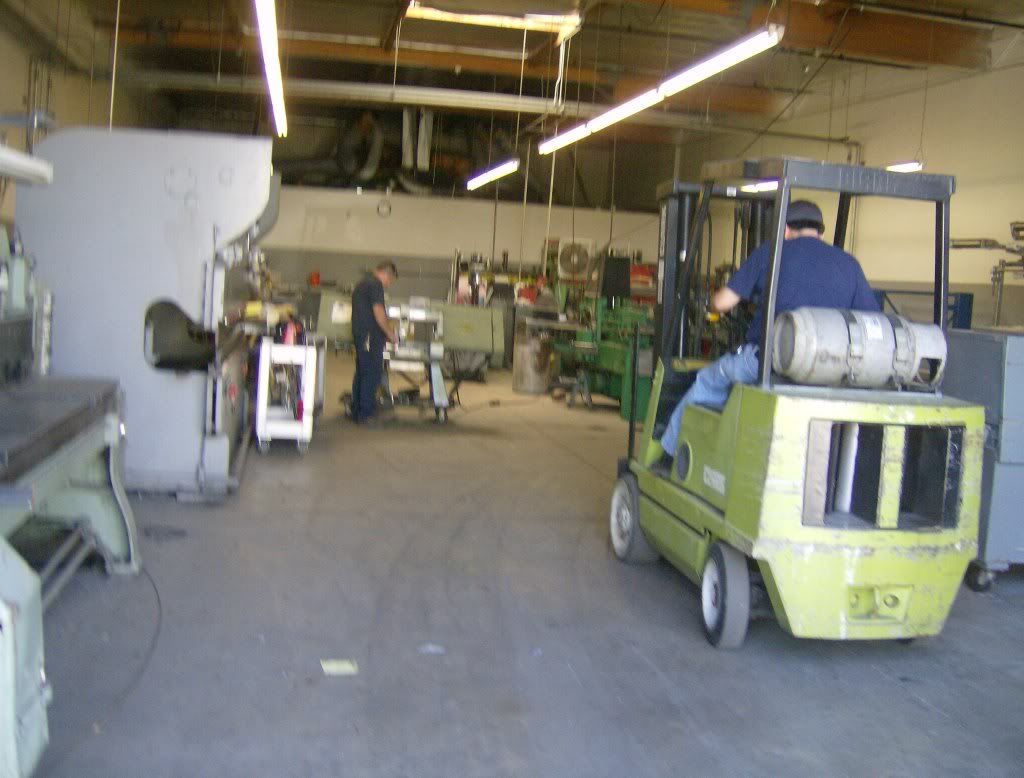
My metal muncher (Ironworker):
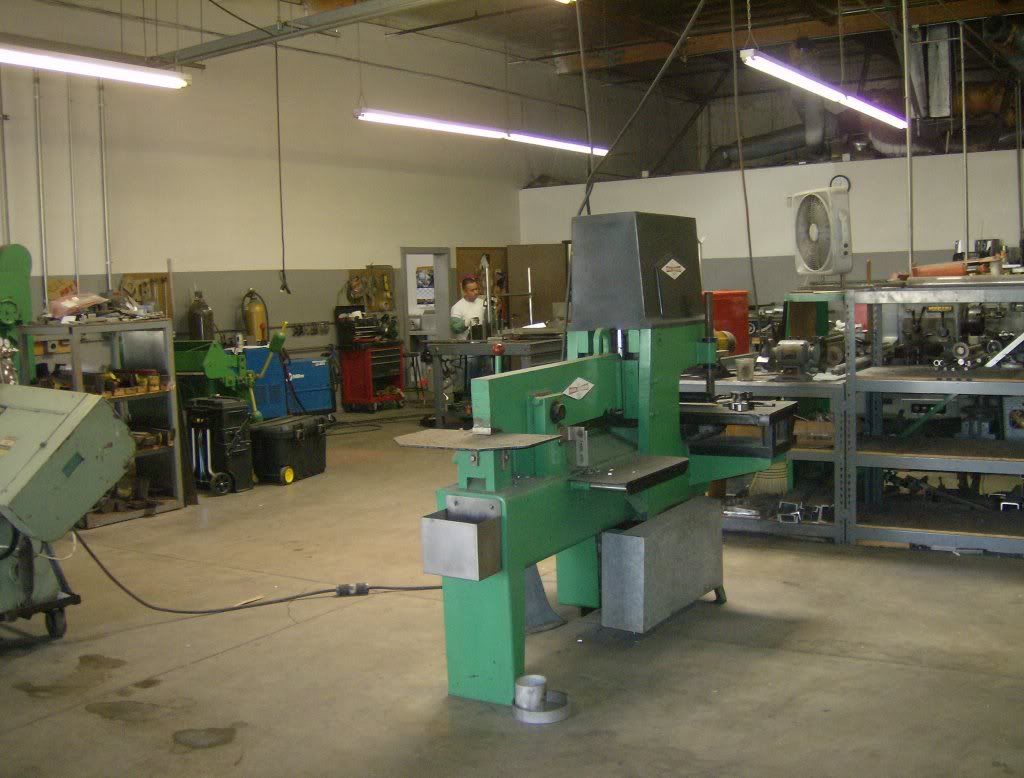
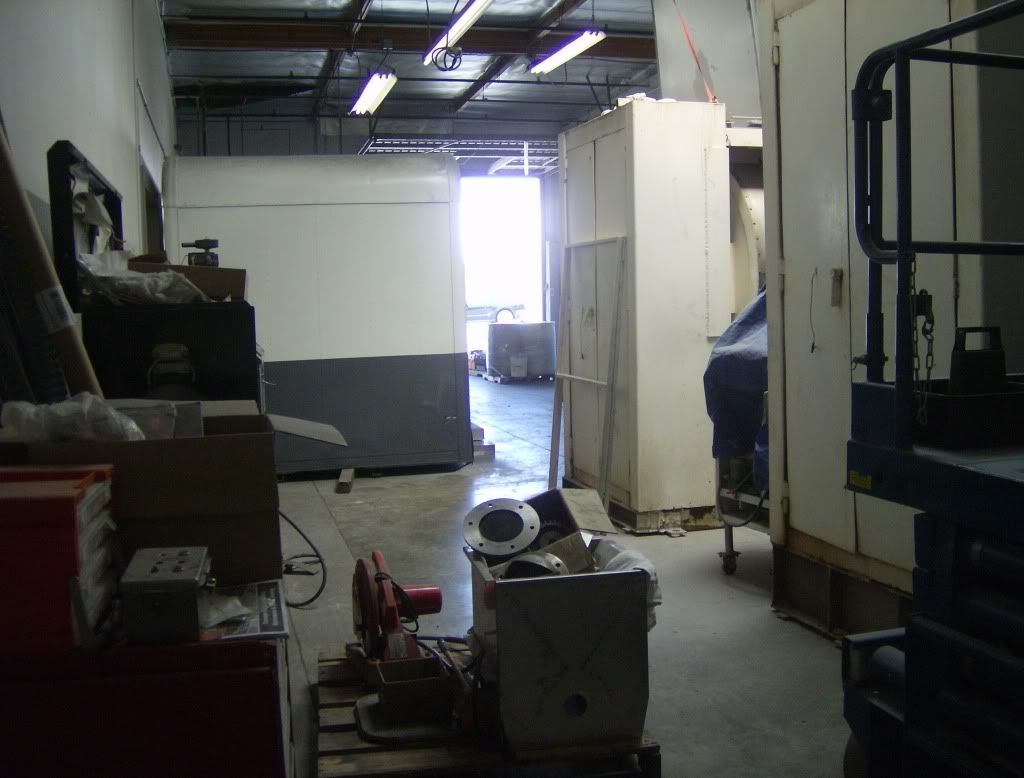
New shop:
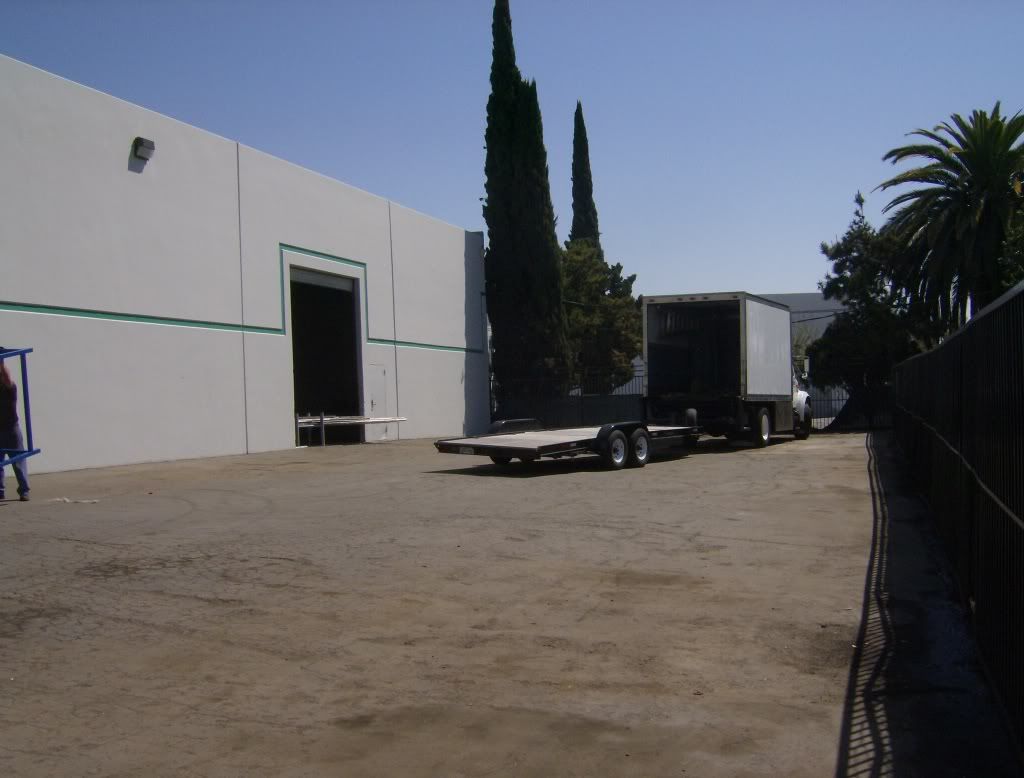
More space than tools now:

Just jokin! Machines are not in there yet.......
Yes, I do have a giant brake, however it struggled with this material. My dies are a little on the long side so making the small bends was difficult, so I used an actual hydraulic pressand a fixture under the cover to create the bends. Then I tack welded it together, and made sure that it would stay before I put any real heat to it.
Probably will Tig weld the next ones and leave a real nice pattern. Maybe I will use the "walking the cup" method that I use for stainless pipe / tube in food process.
I guess I could have whipped the Mig and created some coin stacks, but ehhh, straight welds with a Mig are actually stronger than the whip or pulsed type welds. Even though they lay flat and dont quite look as impressive as a stacked coins look, they are durable welds and should take quite the impact.
Unfortubately, and as you know, the stacked coins look may leave some pin holes in the center of the weld,, and if it is too cold will eventually crack.
Doubt that this cover will ever see this type of stress, so we will see how I feel on the next run.
MIght actually throw in some style for the added wow factor.
On the left is my brake and sheer.
My metal muncher (Ironworker):
New shop:
More space than tools now:
Just jokin! Machines are not in there yet.......
#6
06-11-2009, 07:50 PM
Postmaster
Join Date: Jul 2003
Location: Rep. of Texas
Posts: 2,976
Likes: 0
Received 0 Likes
on
0 Posts
Nice shop, and nice equipment too!
I'd probably just go w/ the proper MIG and forget the stacked coins... Your MIG welds look perfect as they are anyways.
I did the stacked coins on a lot of my suspension components and looking back, I don't know why. Nothing has cracked, but its not worth the risk. Besides, after you paint the welds you have to look really close to tell what type of weld it is anyways. Might as well be the strongest type, imo.
I think those covers are bad ***... still can't believe the 1" haha. I'd hate see what you'd have to run into to deform that thing.
#7
06-11-2009, 09:40 PM
Senior User
Trending Topics
#8
06-11-2009, 11:23 PM
Thanks fellas. My lil shop keeps me busy. The old shop was getting small, and it was divided. It was actually three small shops next to each other, and to be honet was sort of a pain. Now the shop has a 7500 square foot warehouse, and enough space to breathe. More offices than I had before, and a lunch room for the guys. Shower in the shop as well as the big office inside. We have enough space to accomodate 53 foot trailers now, and a fully gated yard. This means the trucks have a home too. The city wont let me put any containers outside for additional storage, but I am working out some other storage ideas.
Sure is nice to have everything under one roof.
I have a 40 foot conrainer that I do all of my sand blasting in, and this rolls outside when I blast. I've worked out a dust collection system but I have to work out some of the bugs. All in all its a cool place for me to get some work done, and make a little money. Sometimes it seems like it is very little money, but bills get paid so that keeps everyone happy.
Here was the blast trailer in the old shop:
Just an old truck box that I picked up for nothing, and decided that it would make a decent room for sand blasting.
#9
06-12-2009, 12:34 AM

#10
06-12-2009, 01:13 AM
Good question. In this shop we fabricate custom food process equipment, and production lines. We build control and process control panels for older equipment as retro fit upgrades.
Small one off business, but there is pretty stiff competition. We survive.
Most of my equipment is old. My Lathes and mills are some oldies, but they hold a decent tolerance and work well for my application.
This gives me a chance to fiddle with my trucks when I have some spare time.
Fun stuff, and good times.
#11
06-12-2009, 05:46 AM
Senior User
We built a new shop 2 years ago, It sure feels strange moving into the new digs at first. Especially the offices, we didn't have much office space before. After a few months you will feel like you've been there your whole life. It sure is nice having a business that can lend itself to your truck hobby.
#12
06-12-2009, 06:44 AM
#13
06-12-2009, 07:04 AM

#15
06-12-2009, 12:14 PM
Thanks guys for all of the compliments.
As far as this debate, this has been a welders debate for quite some time, and while I am not a pro, my certifications provide me the ability to make some semi educated opinions. Alright maybe not even close to educated, but I can tell you that I dont stick weld too much anymore. I find myself burning some rod once in a while just to get back to the old school basics, or when I am teaching someone to weld. But as far as strength goes, bot have equal limitations, and if performed incorrectly, each can provide terrible welds, and each can provide an equally strong weld.
There are a lot of variations of wire welding like flux core with gas or no gas but we will have to keep things simple and talk about bare wire mig welding VS stick (electrode) welding. I am still going to have to break this answer down into a few random thoughts because there are so many variables:
� The 70 in E70s6 bare wire and the 70 in 7018 stick rods means they are the same strength. 70,000 psi tensile strength is as strong or stronger than most steels you will weld.
Penetration is another subject in mig bare wire vs stick welding. For downhill welding on 3/16 and thicker a 6011 stick rod will penetrate much deeper than bare wire.
� For vertical uphill welding the mig will penetrate just as well as stick if it is set hot enough and the wire stickout is kept short. But that�s the thing, with stick welding, there is a built in safety net in that you have to set the machine at least hot enough to keep the rod lit. With Wire, or mig welding there is no such limit and it is possible to set the machine really cold and make a pretty weld that does not even nip through the mill scale on hot rolled steel. This is common with many fabricators, and we sort of hit on that above. Notice the smooth welds on my cover, and notice that they lay down and do not offer the "stacked coin" appearance. Typically stacked coins are a result of a cold weld, or a sign that some sort of trigger method was being used. While surely a different technique can be used, and actually I can whip the nozzle to achieve this "look" it is not any stronger than what I already have.
Much of this is for cosmetics only, and sometimes cosmetics get put in front of a functional weld. I cant stand dirty cobbled up welds, mainly because they are simply not functional. I also dislike the term "it aint pretty but it will hold". Thats simply a sign of a welder with just enough ability to stick some letal together and these pieces will probaly fail at some time or another. I have plenty of poor welds that I created myself that can prove this statement, lol.
Stick welding can be more forgiving povided that the electrode selection is correct. Small machines can put down some heat, where the equally sized mig machine may not.
The stick welder is cheap and easy to use. Perhaps not any easier than a properly set up mig machine, but again the mig has to be set up properly.
Equal wire VS equal electrode and using appropriate amps can provide an equally strong weld.
Old school welders will call foul, and stick by (pun intended) the arc method, whereas the younger generation will provide an adequate arguement that their mig is superior.
In the right hands, and all things being equal, they can produce equal results.
Most learn with a stick because of the costs associated with the initial purchase of a machine. Much emphasis is placed upon just buying a machine, and this is probably why we see more do it your selfers using an old type buzz box at home.
Notice how many arc welding machines are being used outside of the garage? With the exception of pipe fitters and larger structural stuff, we see the majority of mig in the automotice field.
With the popularity of recent TV programs, the TIG process is becoming super popular. Again, old timers will call this Heliarc, and while there is no debate, this process is a fantastic process that offers localized heat, no slag, and nothing that can fall and catch fire. Real nice for welding around stuff that can get burned.
As far as the debate which is better. I believe that this has too many variables to answer specifically, but the thing that is true is that each can provide suitable welds.
Best words of advice that I have recieved, and the best three steps to a functional weld.
First step: Practice
Second step: Practice
Final step: Practice.