Cool Tips and tricks
#256
 09-20-2012, 12:43 AM

For my trip to Truckstock I wanted to use my GPS and charge my cell phone. I wanted to use a cigarette type power port. The problem is my truck is stock 6 volt with positive ground. I started looking around on the net on how to do this the easiest way possible but most posts suggested using a power inverter to boost the power to 12 volt and then insulate the power port from the sheet metal of the vehicle. The inverters are pricey. I then hit on a few posts over on the Ford Barn's Model A board in which the posters said they used direct 6 volt power to power their GPSs and cell phones. The newer chargers are smart chargers and since most electronic equipment like GPSs and cell phones run on 5 volts all you need is 6 volts. As long as the chargers can detect, I think they said, 7-8 volts they'll convert it to the needed 5 volts. Our generators put out 7-8 volts at full charge.
I bought a dual outlet power port, inserted a piece of plastic between it and the bottom of the dash on my truck to insulate it from the truck's sheet metal and fastened it with two 1/4" nylon bolts and two steel Keps nuts. I then cut the fused wire, the positive wire, the red wire, and grounded it to the dashboard under one of the steel nuts. I soldered the fused wire I cut off to the black wire, which was the negative ground, and hooked it up to my ignition switch so it turned on and off with my key.
I just came back from the 1500+ mile trip and it worked great.
#257
09-20-2012, 08:39 AM
Posting Guru
Join Date: Dec 2008
Location: Waleska, GA
Posts: 2,352
Likes: 0
Received 0 Likes
on
0 Posts
Glad to hear that you made it home. Next time, I'll feel like a big sissy if I don't drive my truck after you put 1,500 miles on yours!
Oops, I just realized this isn't the Truckstock thread. So....thanks for sharing your 6 volt work-around. I'll keep it in mind when I inherit my in-laws 54 Chevy coupe (if I don't check-out first).
Oops, I just realized this isn't the Truckstock thread. So....thanks for sharing your 6 volt work-around. I'll keep it in mind when I inherit my in-laws 54 Chevy coupe (if I don't check-out first).
#258
09-20-2012, 07:18 PM

Lead Driver
I bought a dual outlet power port, inserted a piece of plastic between it and the bottom of the dash on my truck to insulate it from the truck's sheet metal and fastened it with two 1/4" nylon bolts and two steel Keps nuts. I then cut the fused wire, the positive wire, the red wire, and grounded it to the dashboard under one of the steel nuts. I soldered the fused wire I cut off to the black wire, which was the negative ground, and hooked it up to my ignition switch so it turned on and off with my key.
I just came back from the 1500+ mile trip and it worked great.
I just came back from the 1500+ mile trip and it worked great.
#259
10-13-2012, 04:12 PM
How to Use and Interpret a Vacuum Gauge
Pn 0/9/12, this thread, post# 243 was a picture of vacume gauge operation. The above link is an animated version with different scenarios.
Very helpful, I thought
JimG 1098
Pn 0/9/12, this thread, post# 243 was a picture of vacume gauge operation. The above link is an animated version with different scenarios.
Very helpful, I thought
JimG 1098
#260
10-13-2012, 04:45 PM

#261
10-14-2012, 01:55 AM
How to Use and Interpret a Vacuum Gauge
Pn 0/9/12, this thread, post# 243 was a picture of vacume gauge operation. The above link is an animated version with different scenarios.
Very helpful, I thought
JimG 1098
Pn 0/9/12, this thread, post# 243 was a picture of vacume gauge operation. The above link is an animated version with different scenarios.
Very helpful, I thought
JimG 1098

#263
11-04-2012, 03:36 PM
 :
:https://www.ford-trucks.com/forums/1...l#post12300701
#265
11-08-2012, 09:38 PM
#266
11-18-2012, 05:23 PM
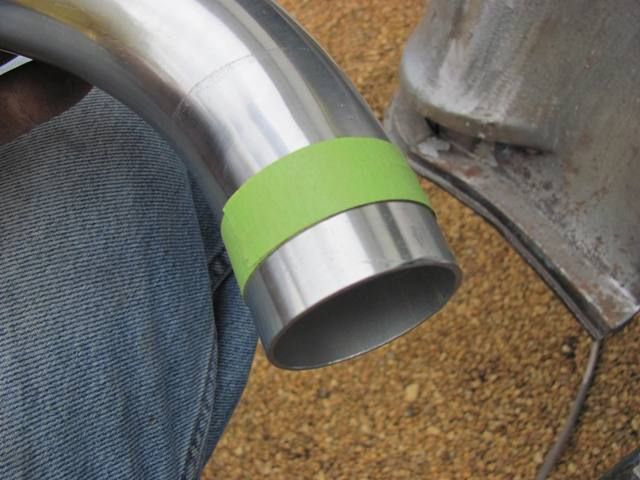
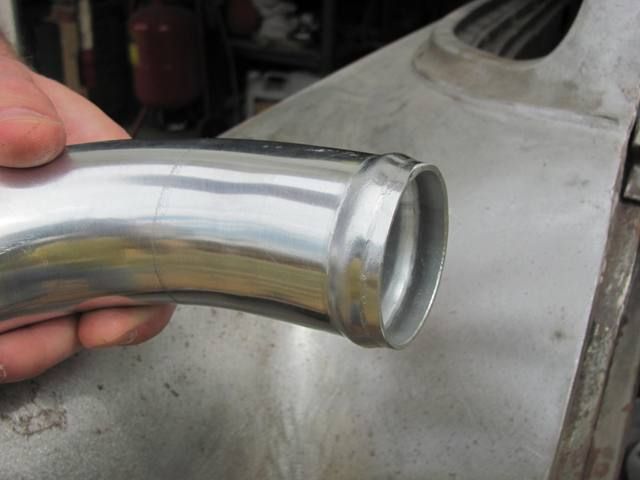
Had someone stop by the shop needing to add a bead to the end of the aluminum tubing he had to install in his Cobra project. He had trimmed one end for a better fit and needed to replace the bead for the fuel fill hose...
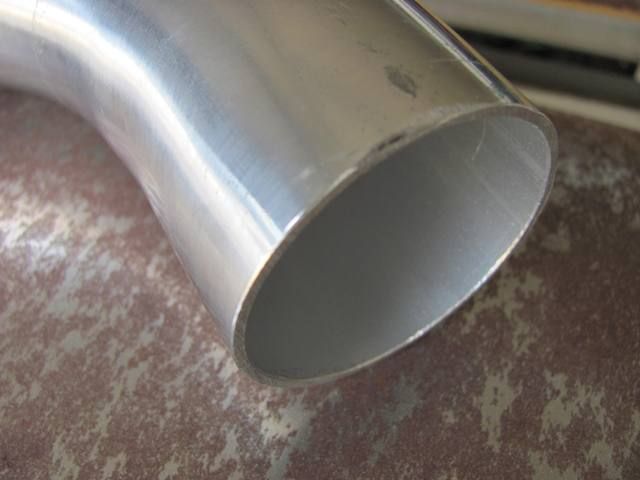
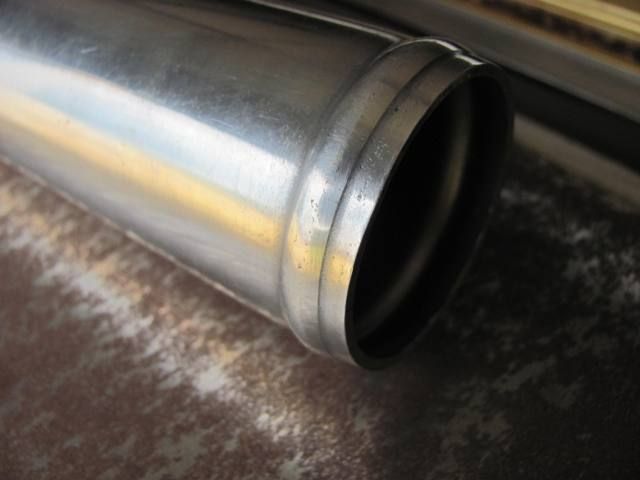
......to match the other end.
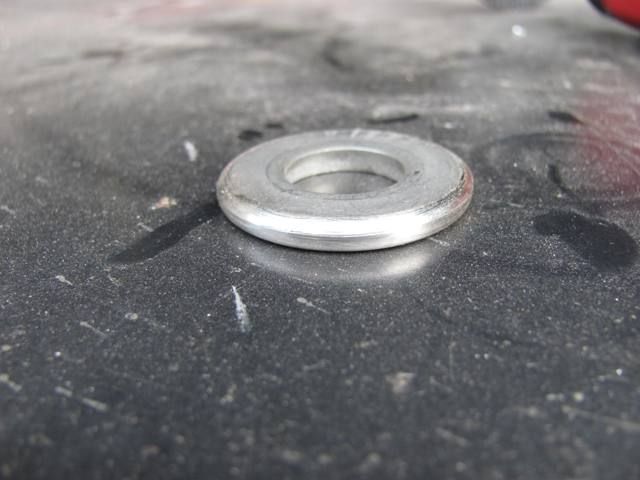
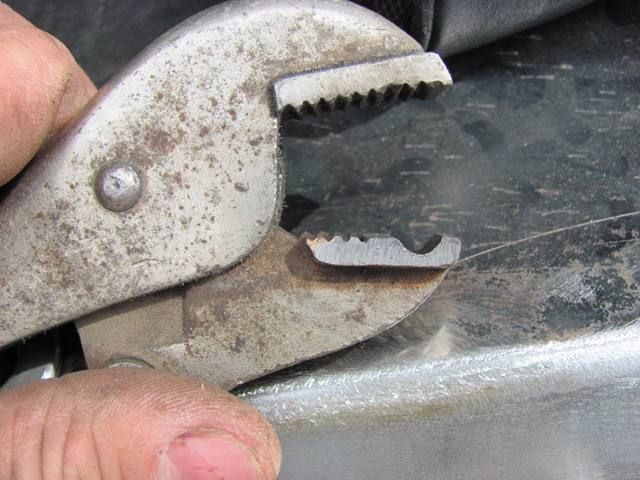
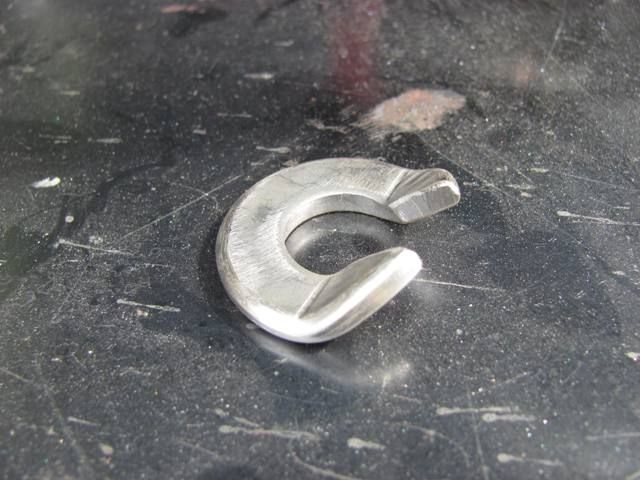
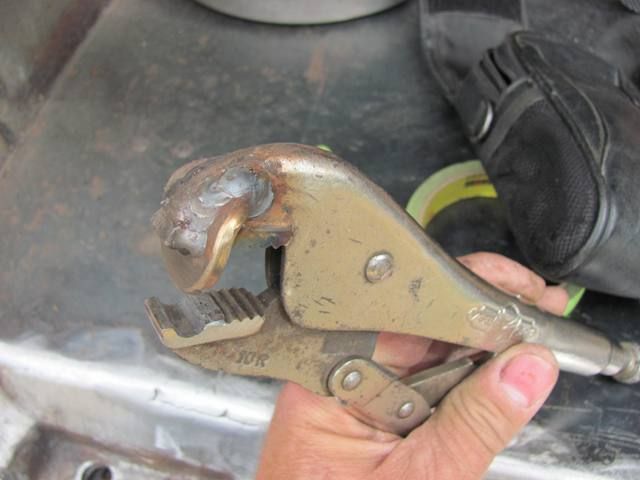
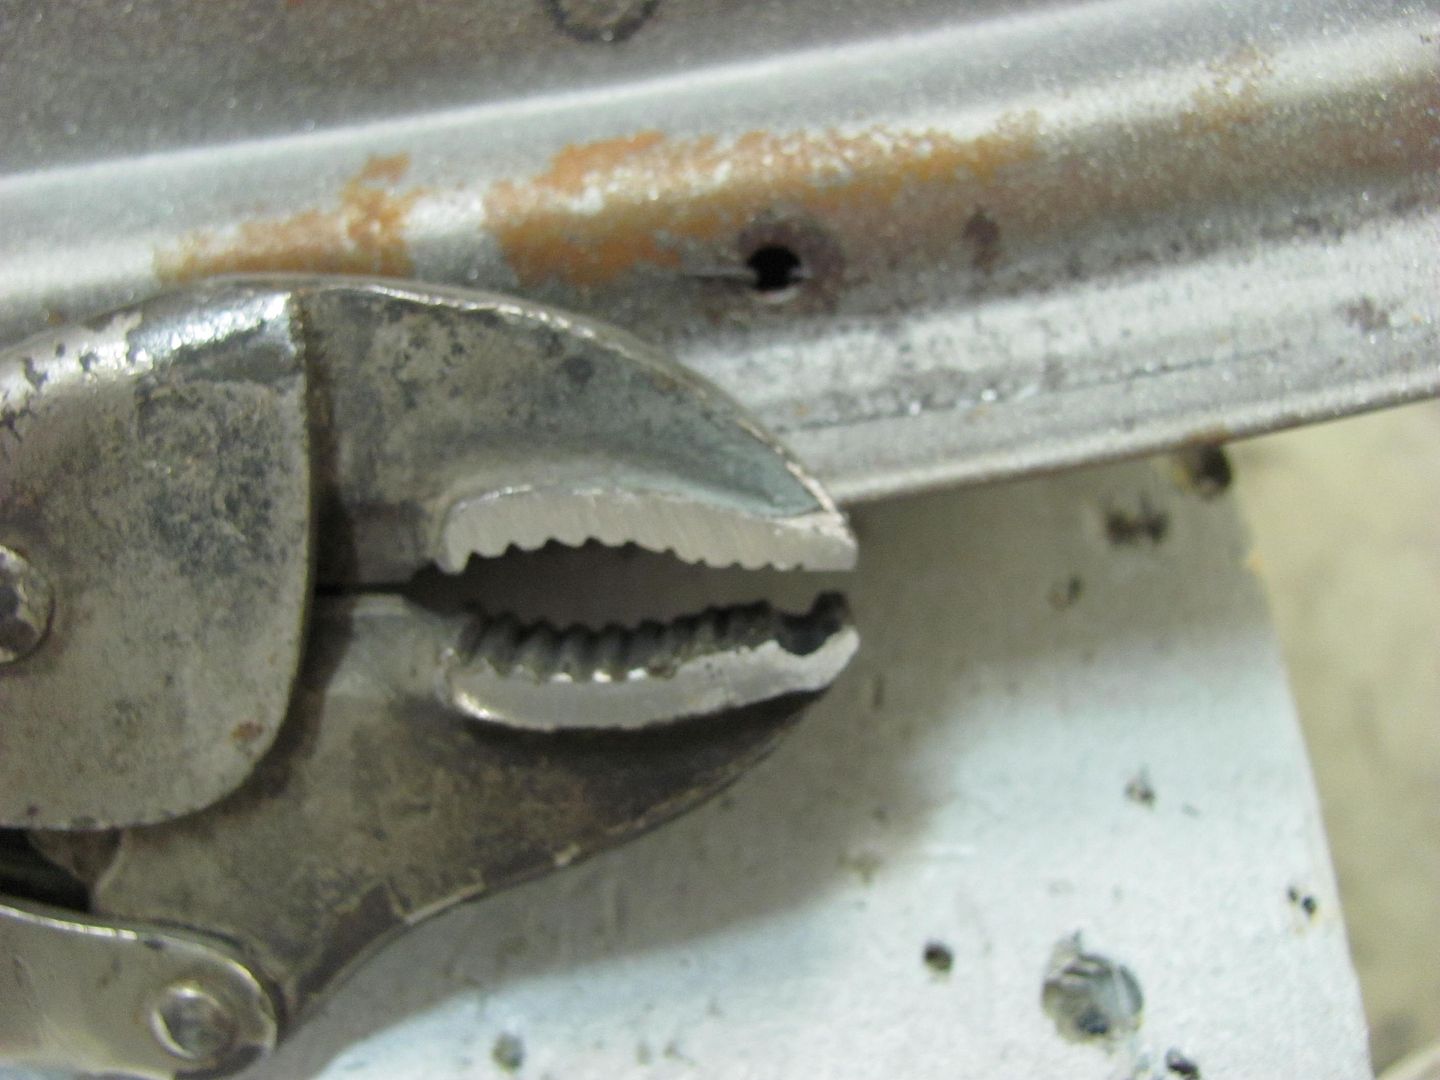
The dies on my bead roller were much too large in diameter, so I thought to make a manual device out of a pair of vise grips... Once the teeth start to wear these make ideal candidates for purpose-built tools. For the punch part of the tool, started with a thick 5/8 washer and gave the edges a nice radius in the lathe.
The vise grip bottom teeth were welded in and sanded smoothed to provide a flat area for the punch to push against (for less marking of the tubing), then an 1/8" thick 3" dia cut off wheel provided the recess in the lower jaw of the vise grips.
The washer was notched and bent to better fit the vise grips for welding....
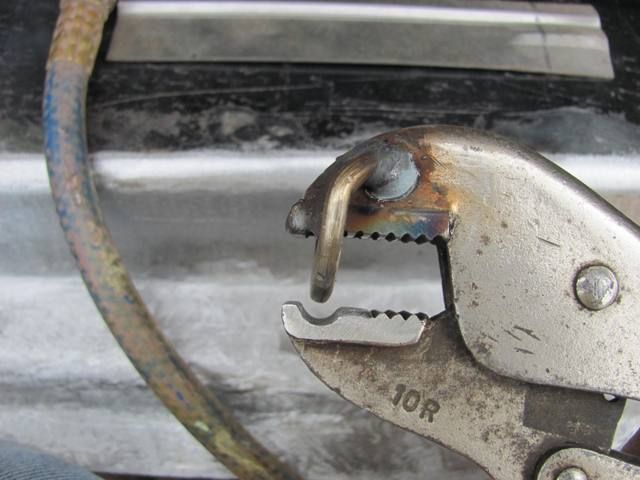
Masking tape added (multiple layers) to use as a reference/stop mark to align against end of vise grip jaw without marring the finish.
The vise grips with their adjustable jaw setting work well to make one revolution, then adjust tighter, repeat..
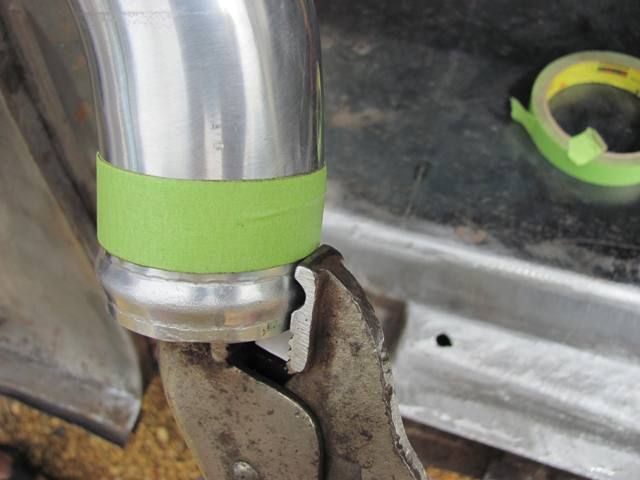
Finished product....

......to match the other end.
The dies on my bead roller were much too large in diameter, so I thought to make a manual device out of a pair of vise grips... Once the teeth start to wear these make ideal candidates for purpose-built tools. For the punch part of the tool, started with a thick 5/8 washer and gave the edges a nice radius in the lathe.
The vise grip bottom teeth were welded in and sanded smoothed to provide a flat area for the punch to push against (for less marking of the tubing), then an 1/8" thick 3" dia cut off wheel provided the recess in the lower jaw of the vise grips.
The washer was notched and bent to better fit the vise grips for welding....
Masking tape added (multiple layers) to use as a reference/stop mark to align against end of vise grip jaw without marring the finish.
The vise grips with their adjustable jaw setting work well to make one revolution, then adjust tighter, repeat..
Finished product....
#268
11-18-2012, 06:58 PM
#269
11-19-2012, 10:55 AM
#270
11-21-2012, 06:56 AM
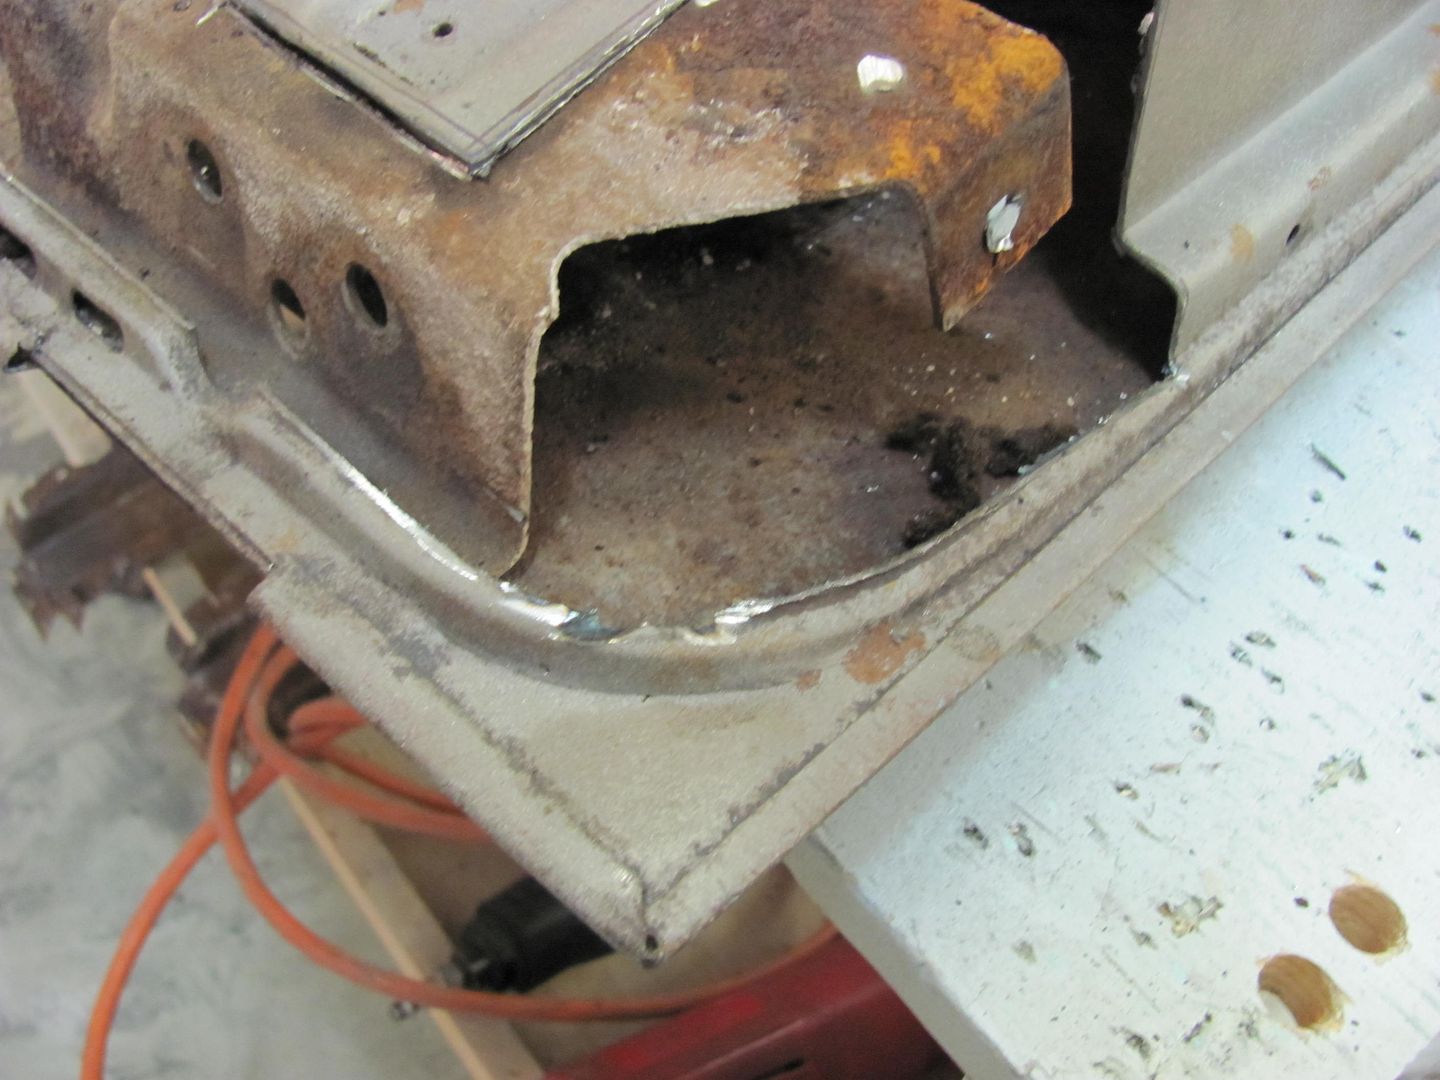
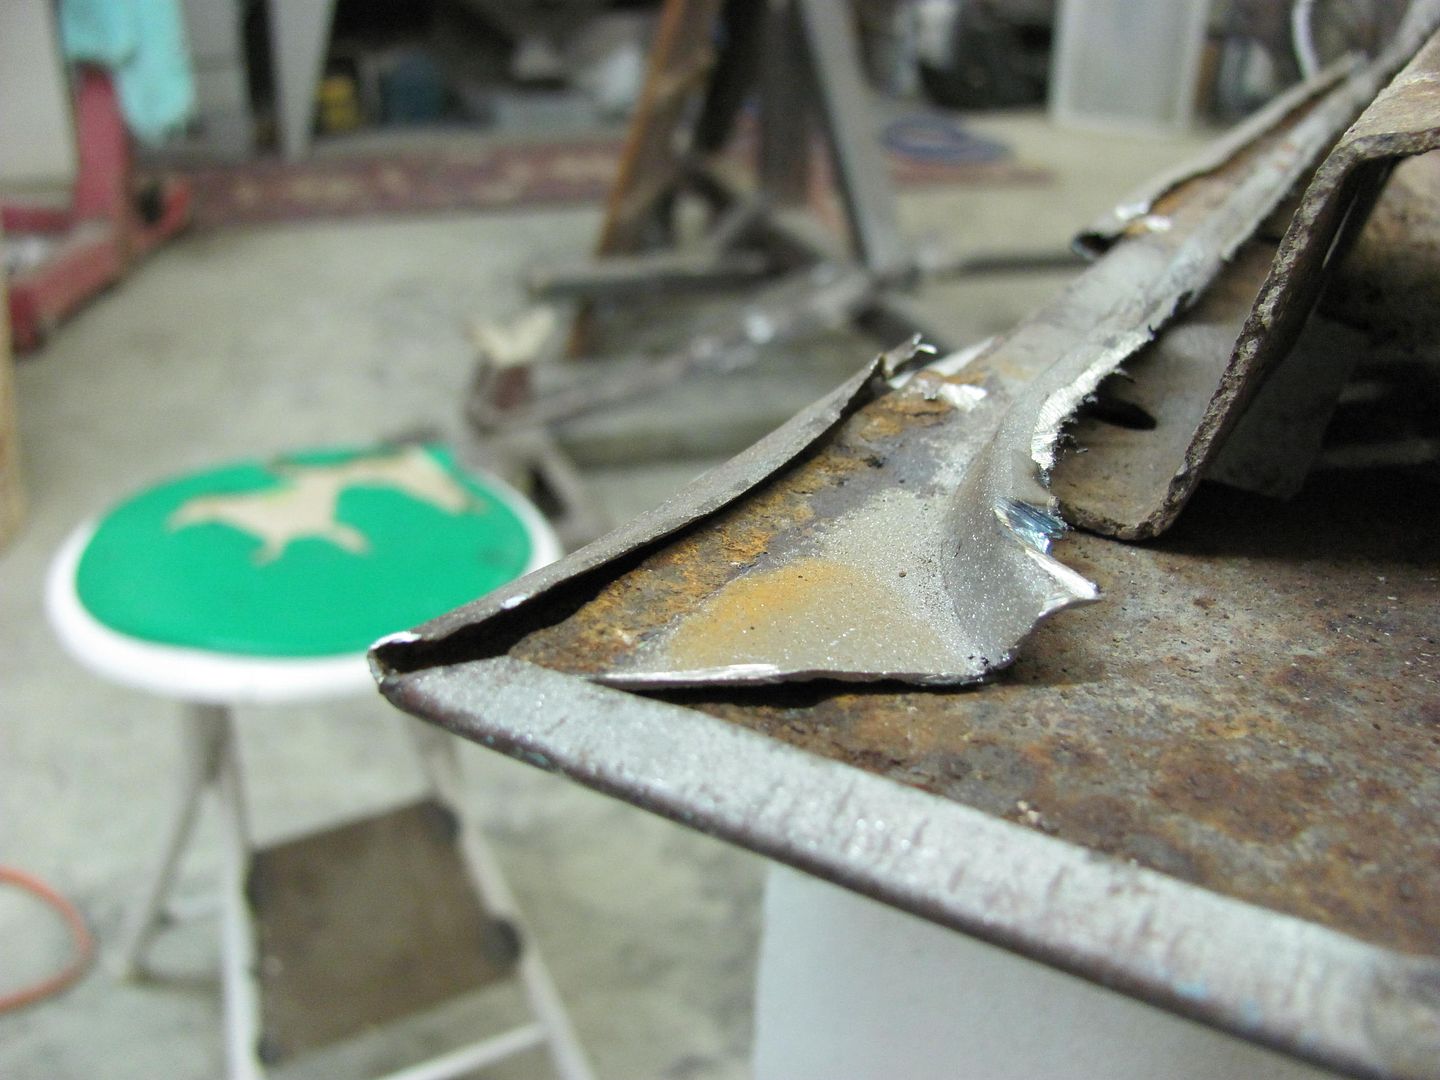
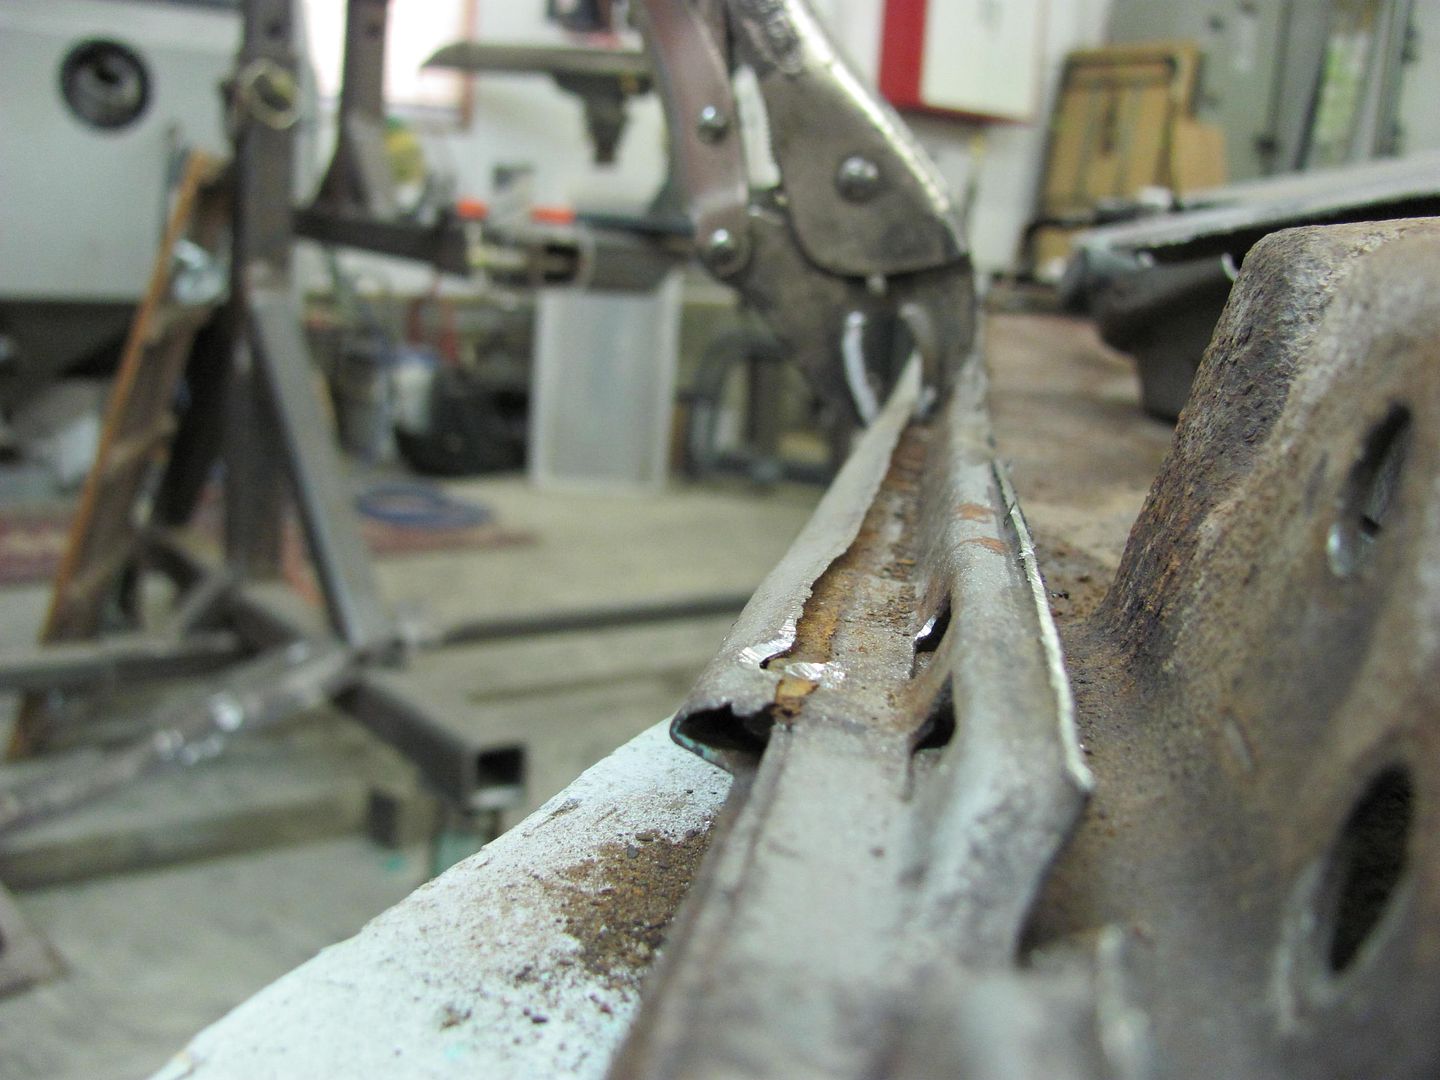
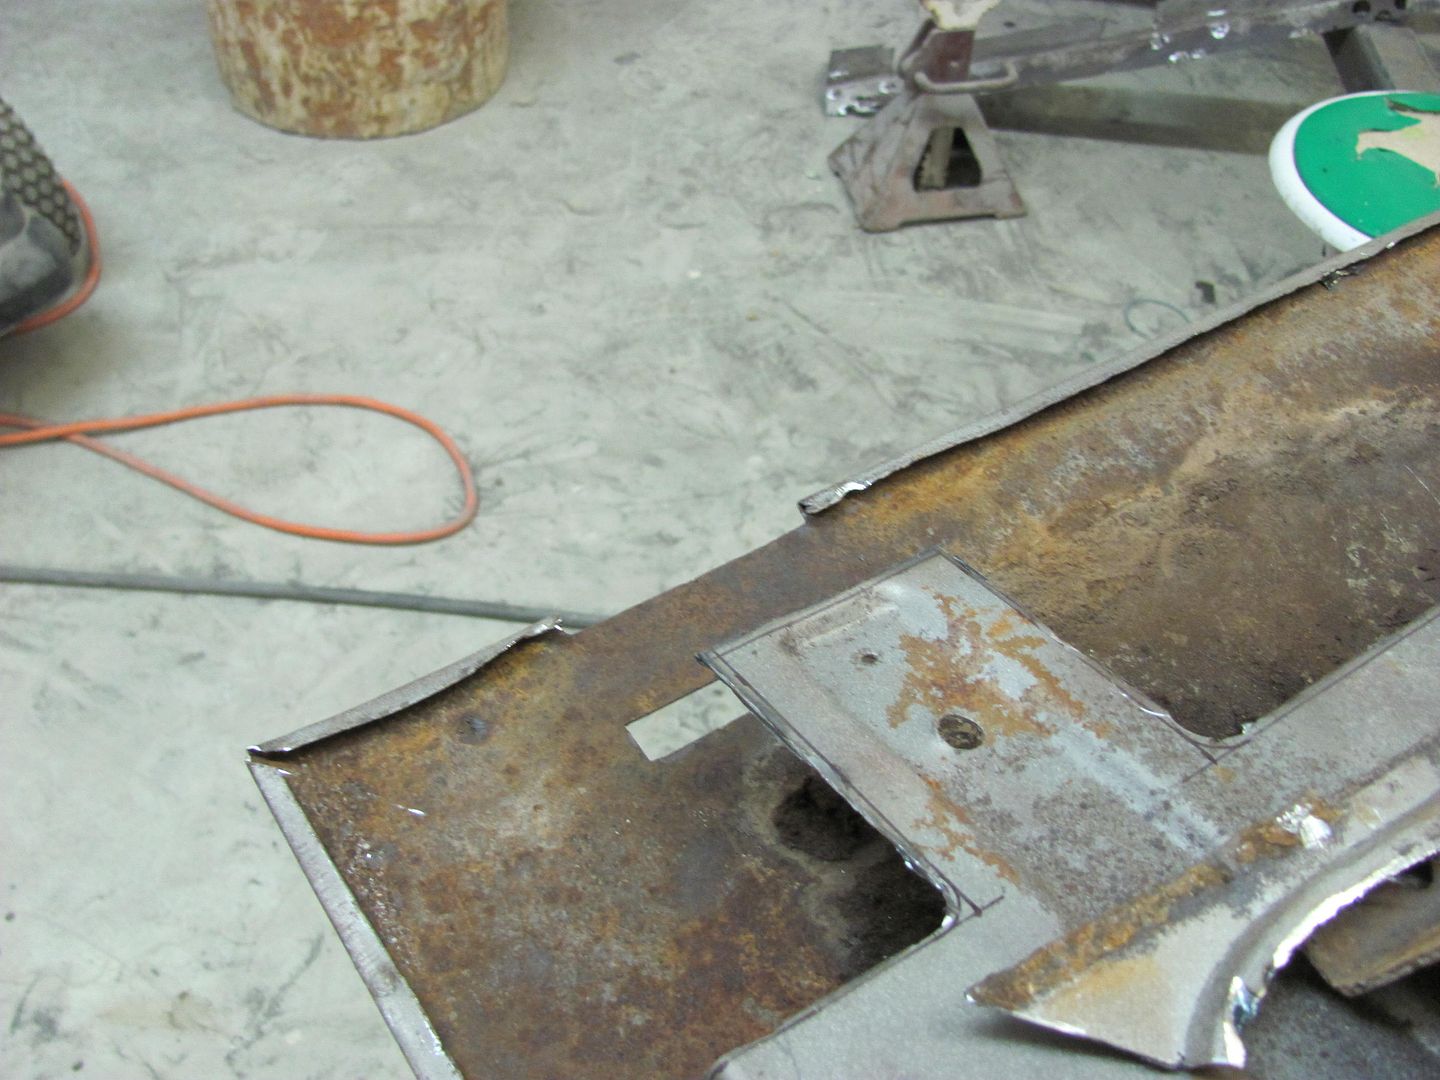
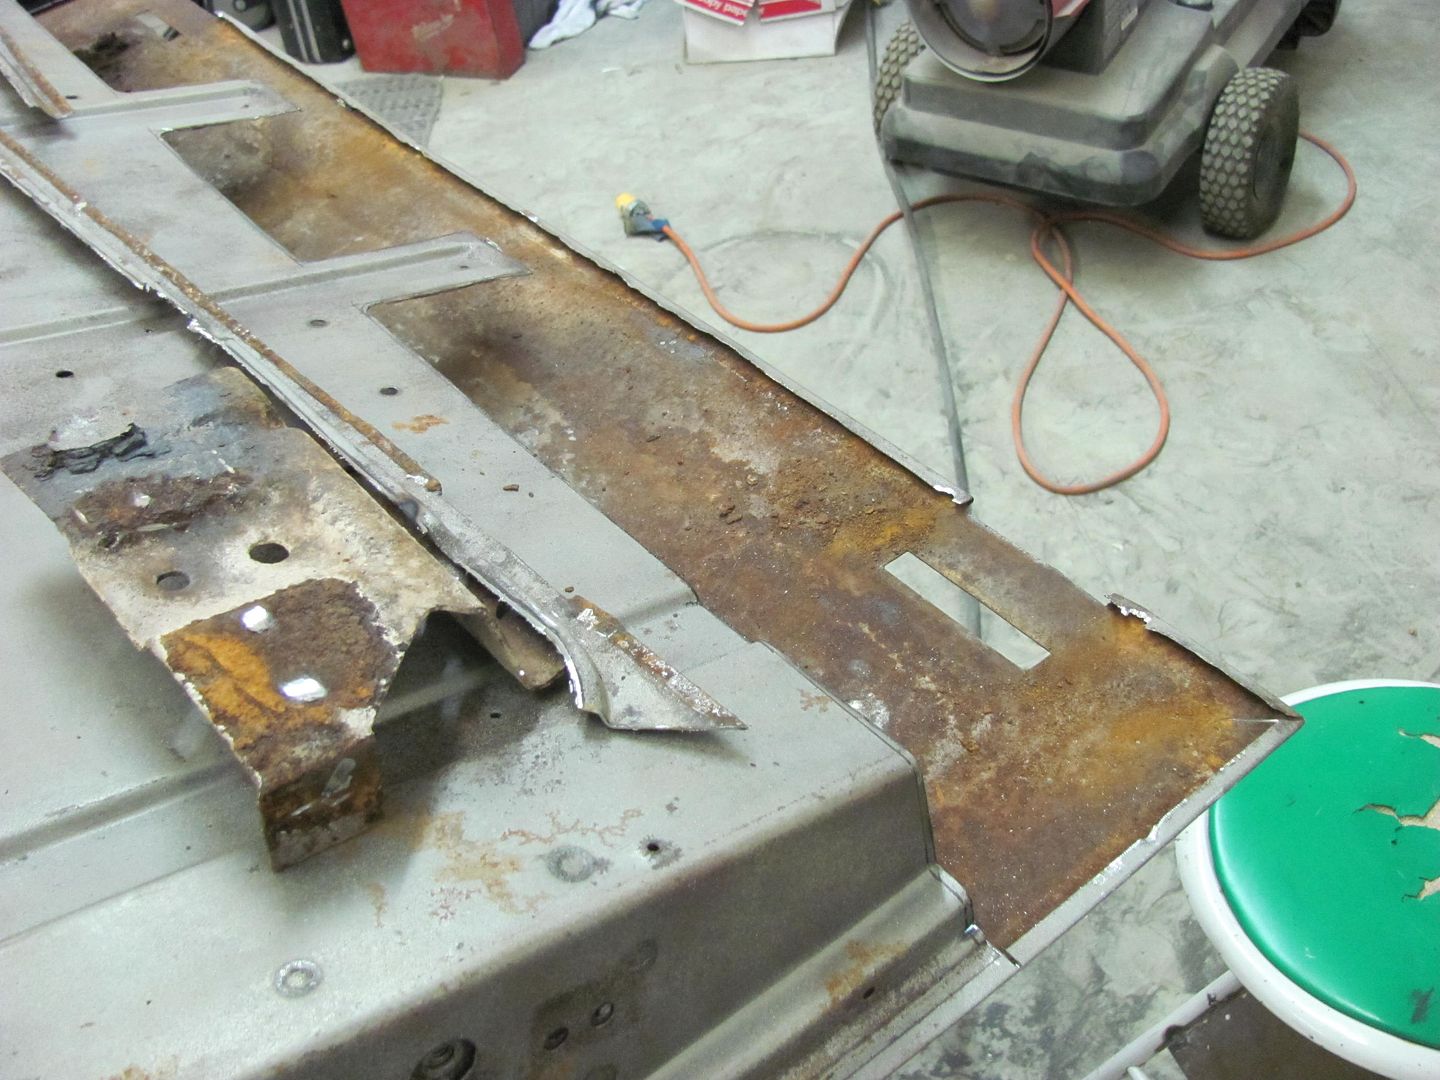
Thanks for the comments guys. Here's another along the same lines, especially helpful if needing to keep a door skin intact while reworking the inner door...
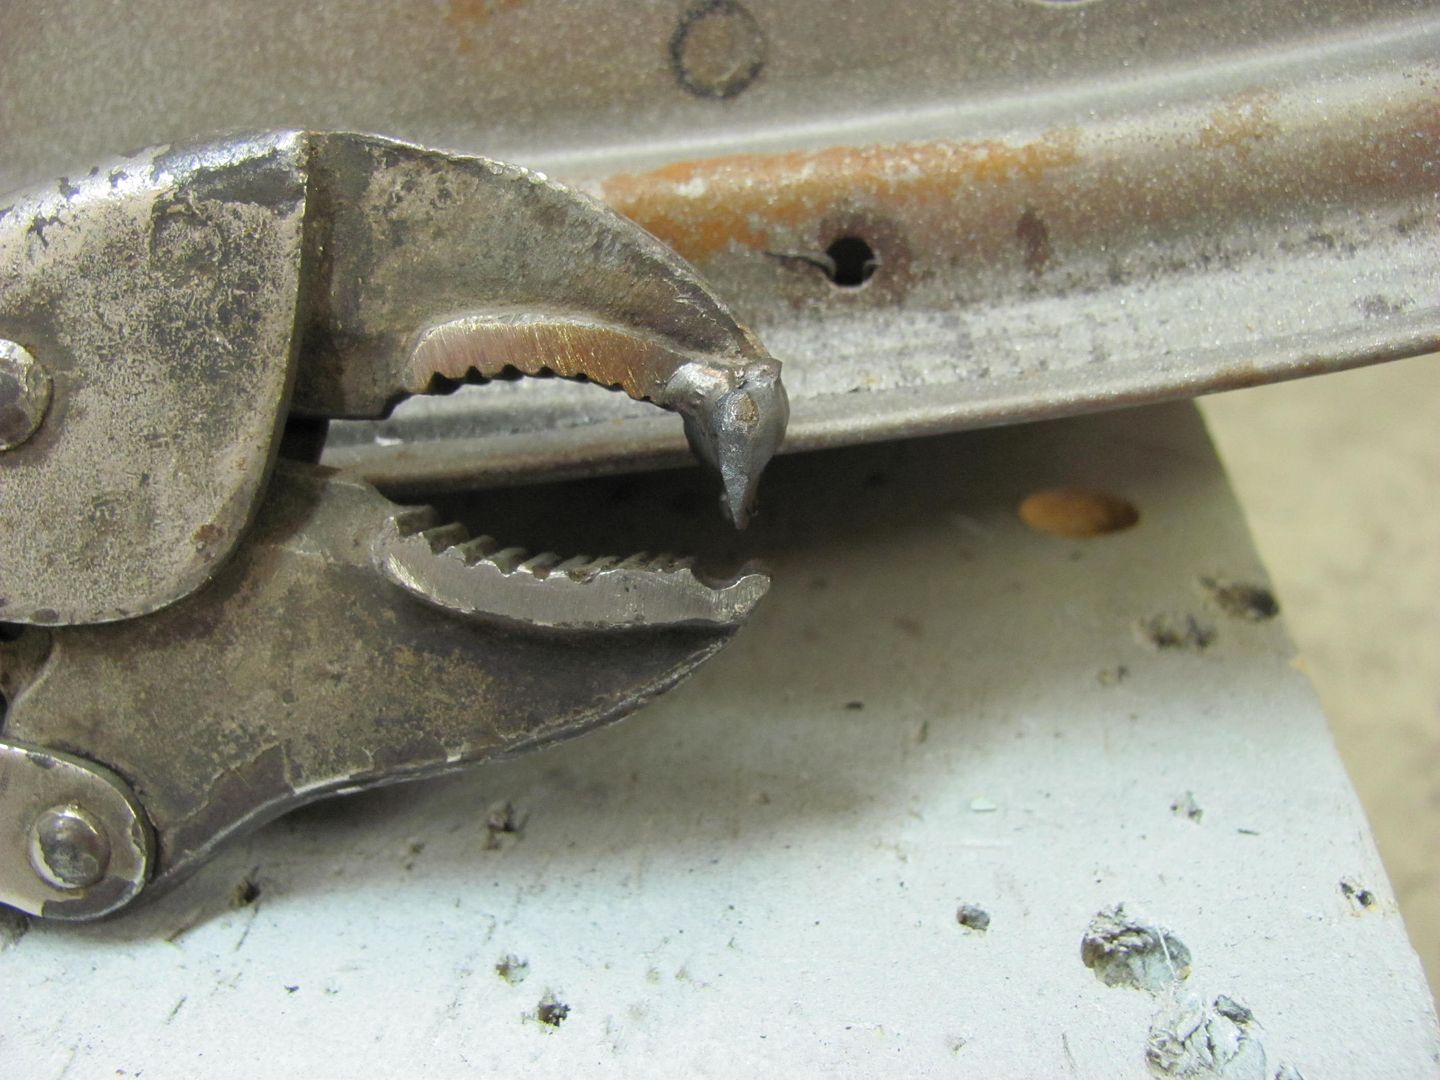
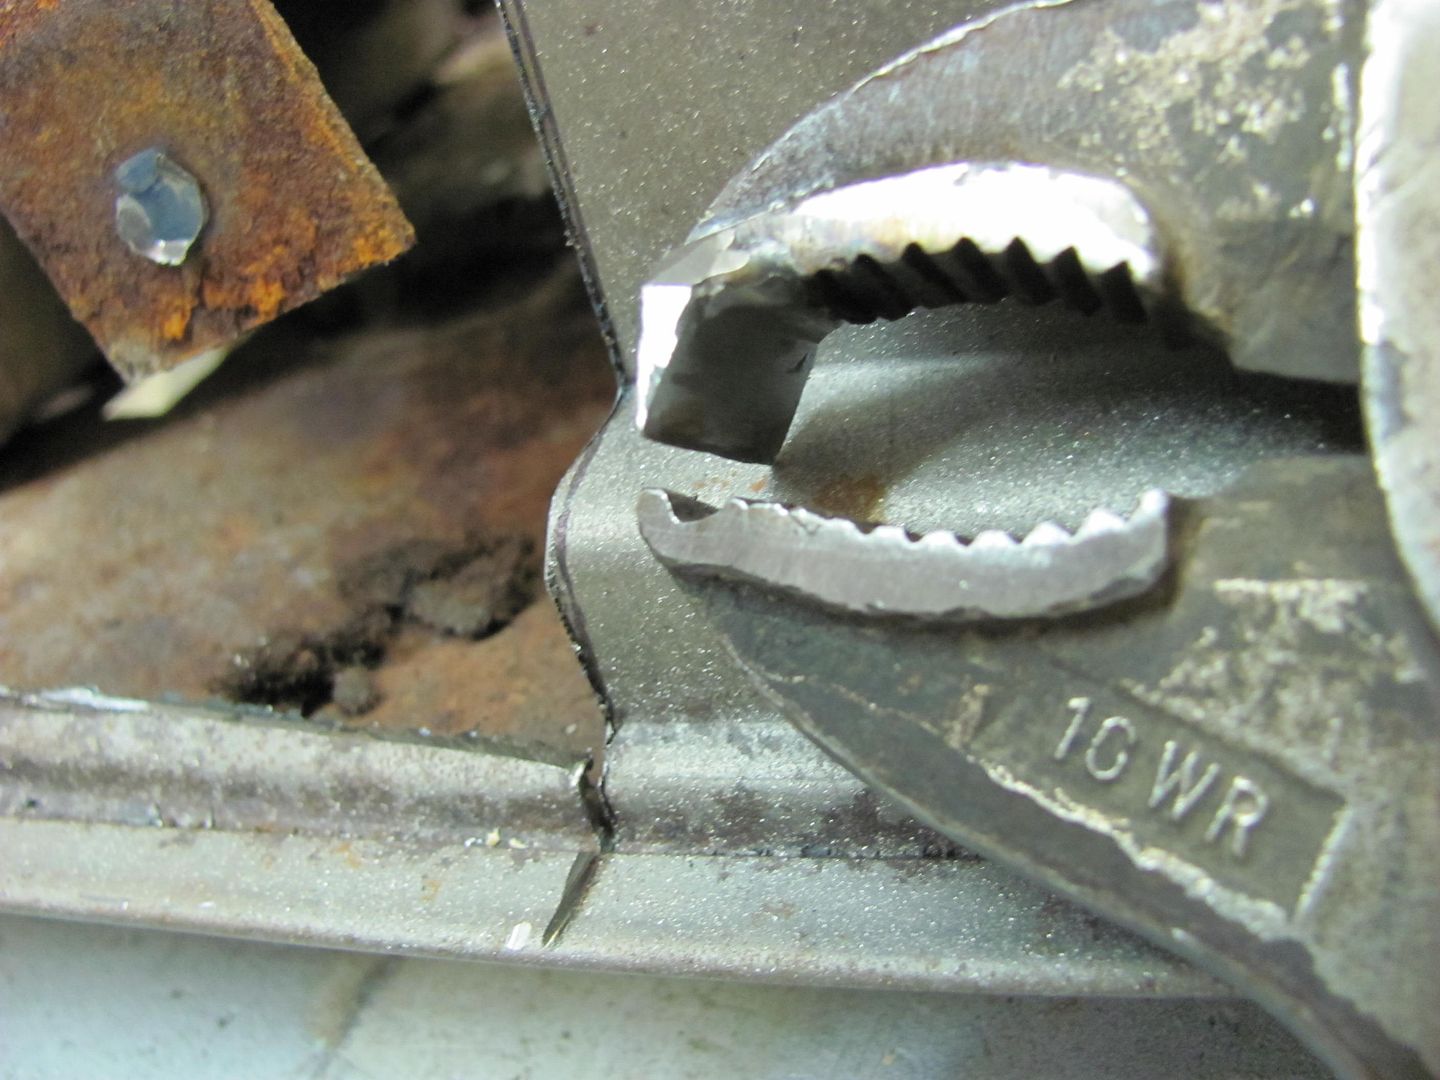
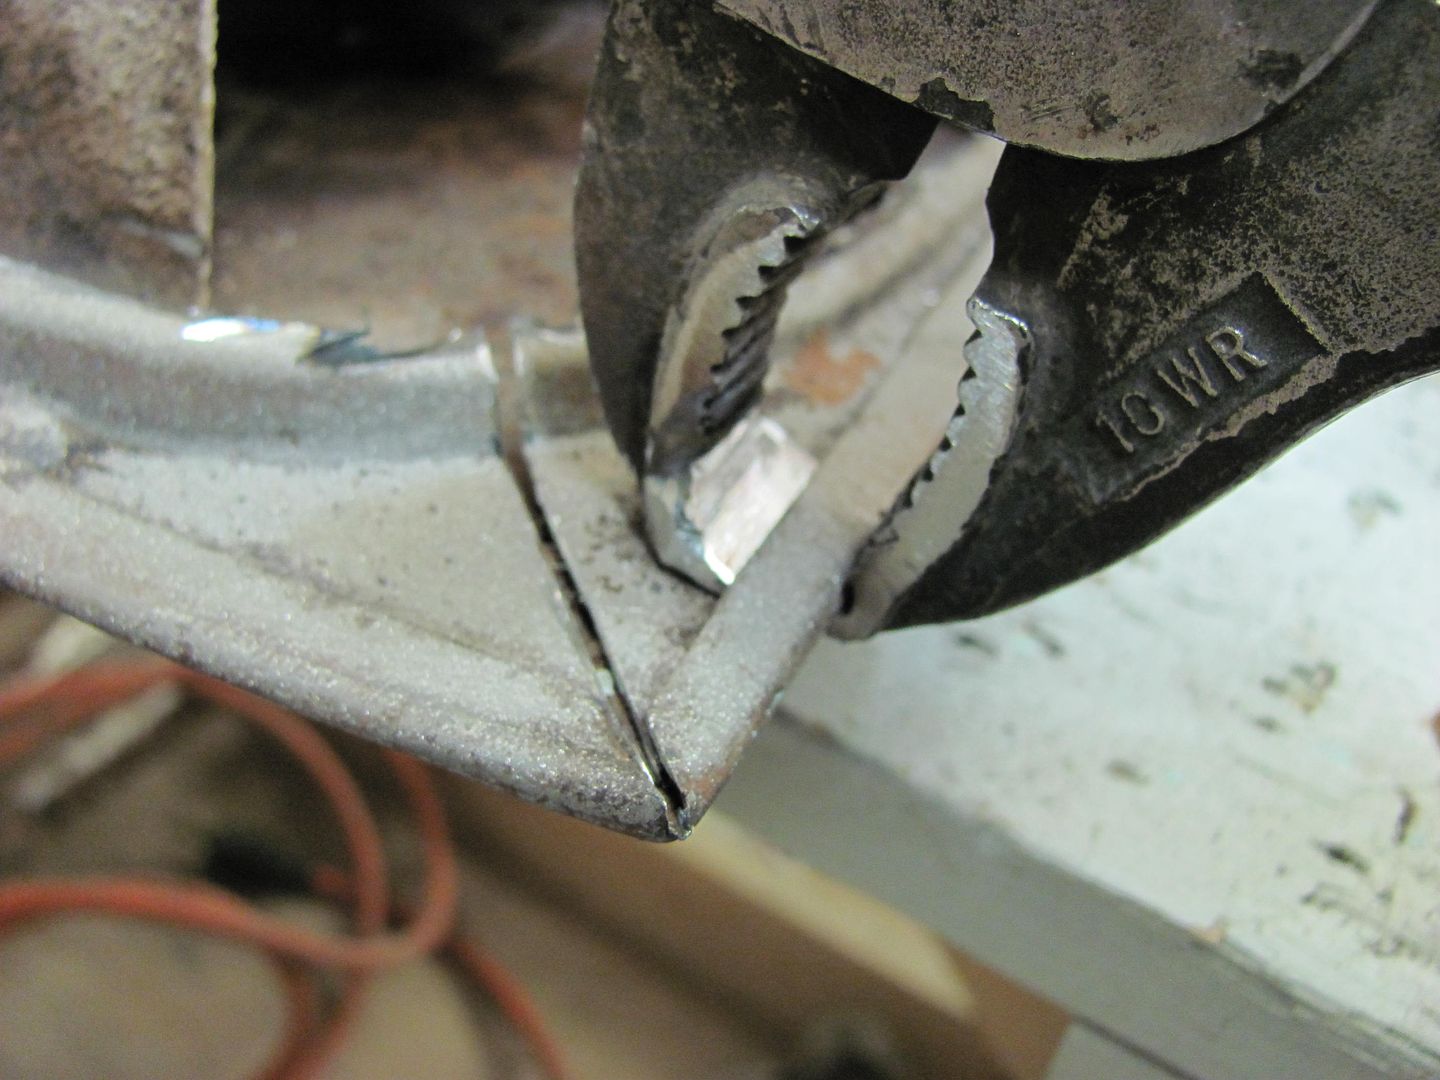
Probably one of the biggest challenges in taking things apart for repairs is doing so without inflicting more damage. I had seen a recent post on pliers used to remove door skins, and thought they would come in handy here on the bottom of the tailgate I was repairing at the time. I have used vice grips on many occasion to fabricate purpose-built tools, with the largest benefit being the screw adjustment that provides accuracy in keeping the jaw squeezes consistent.
The lower jaw is modified to receive the edge of the door skin...
Then a suitable "blade" is found....
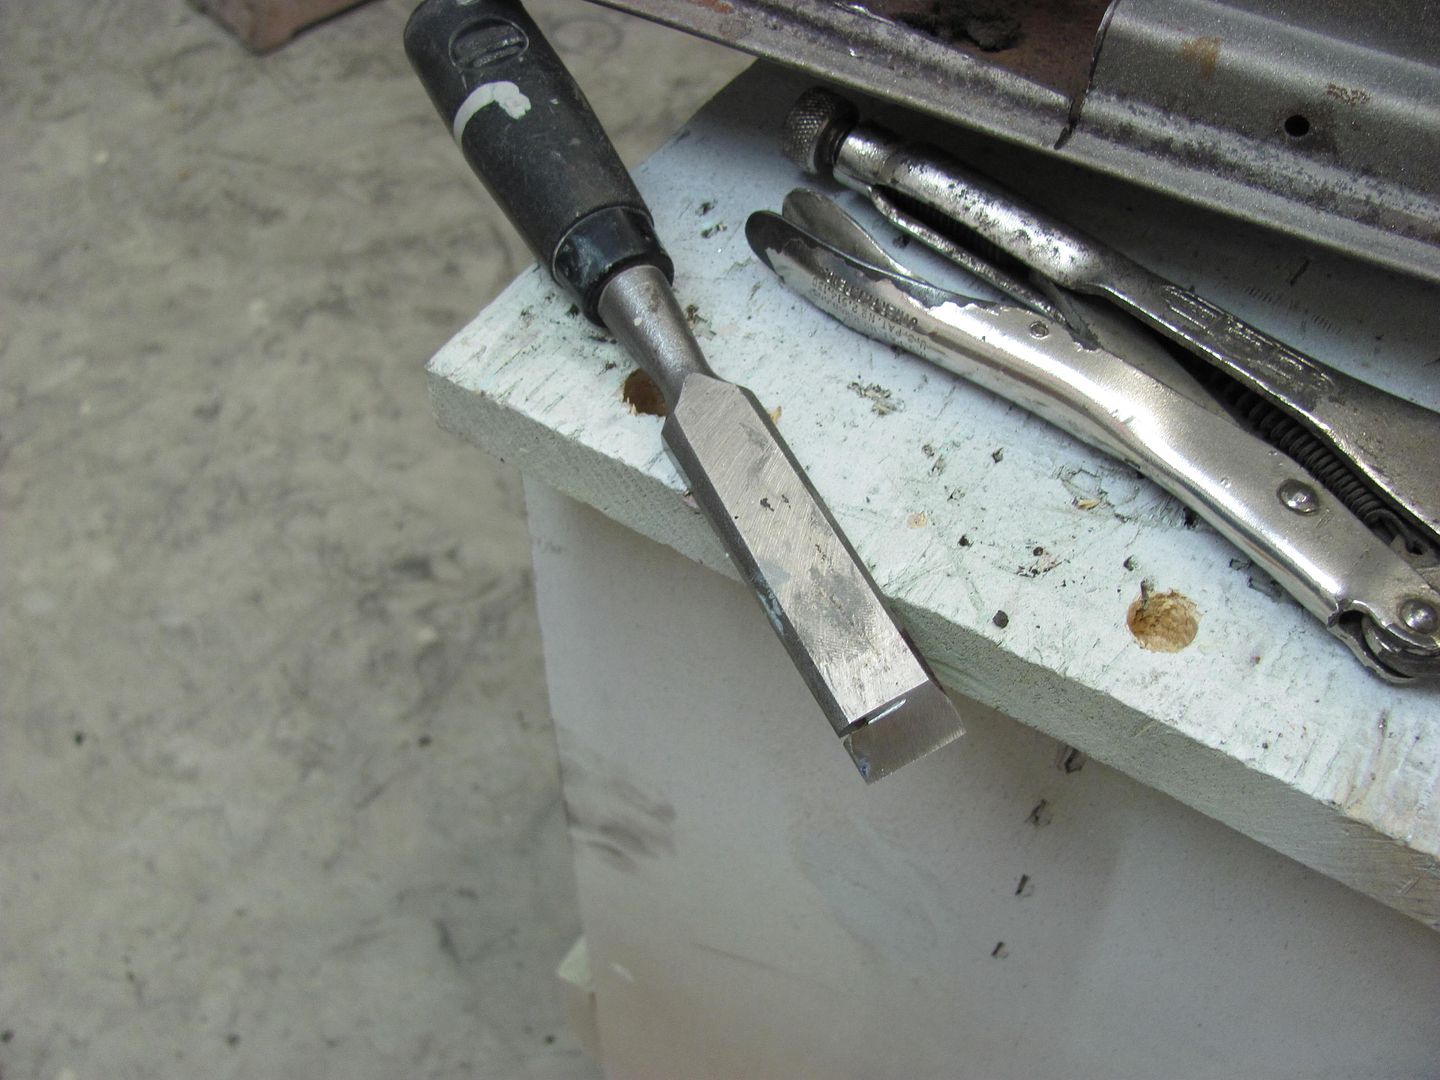
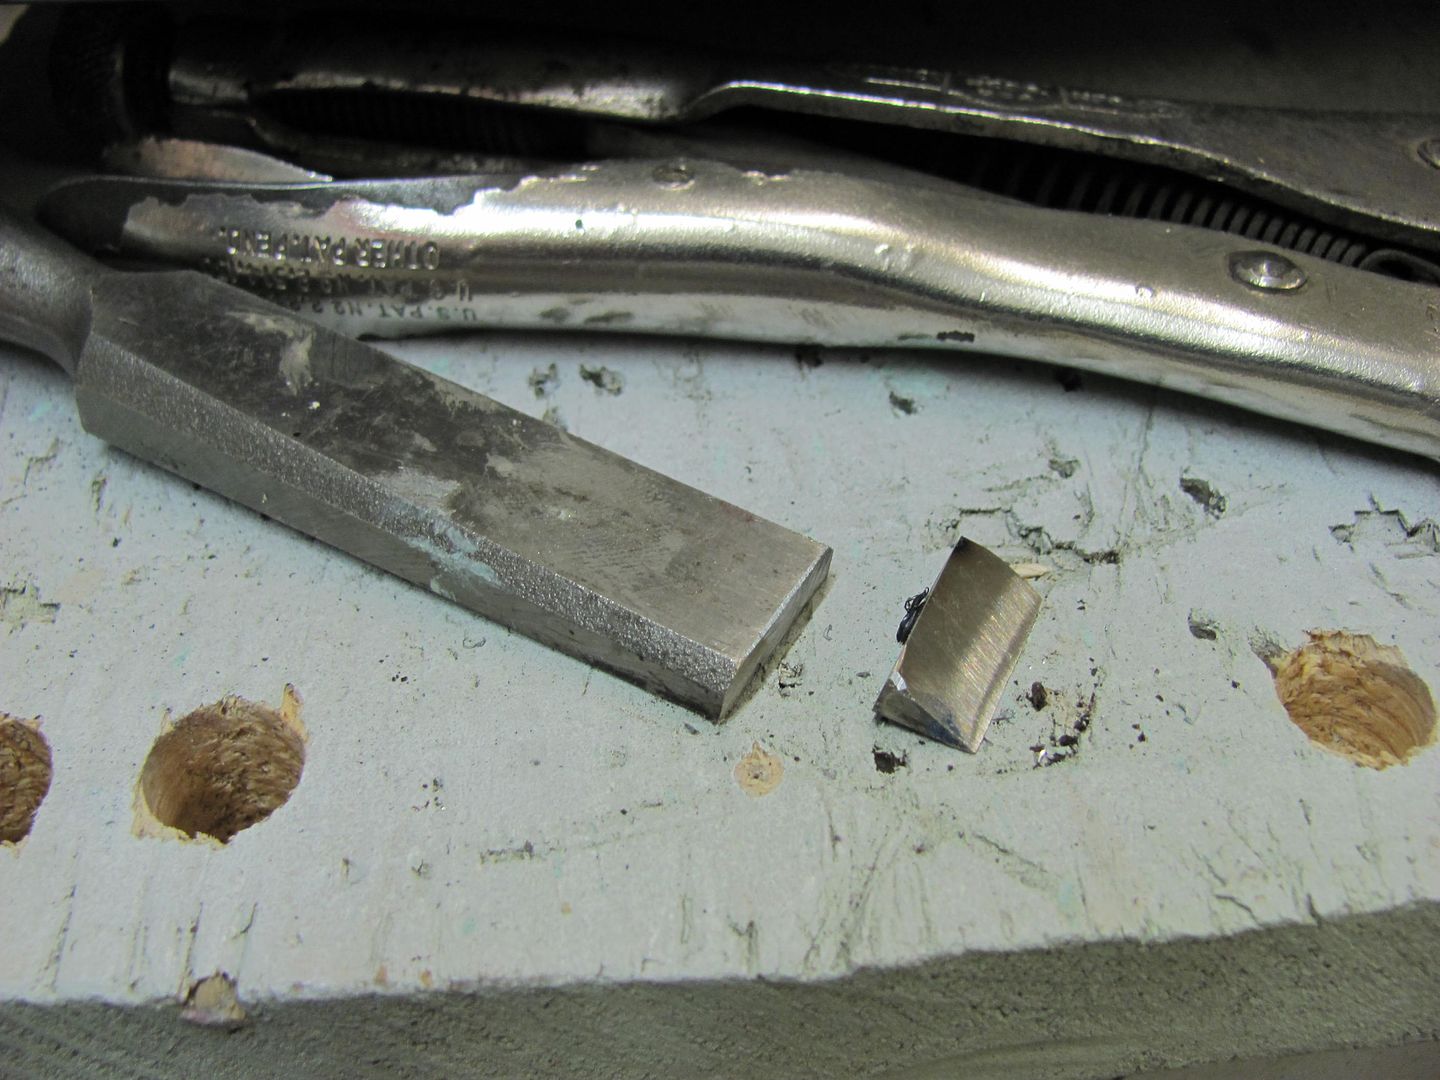
Some welding and grinding, and we have a new body tool.....
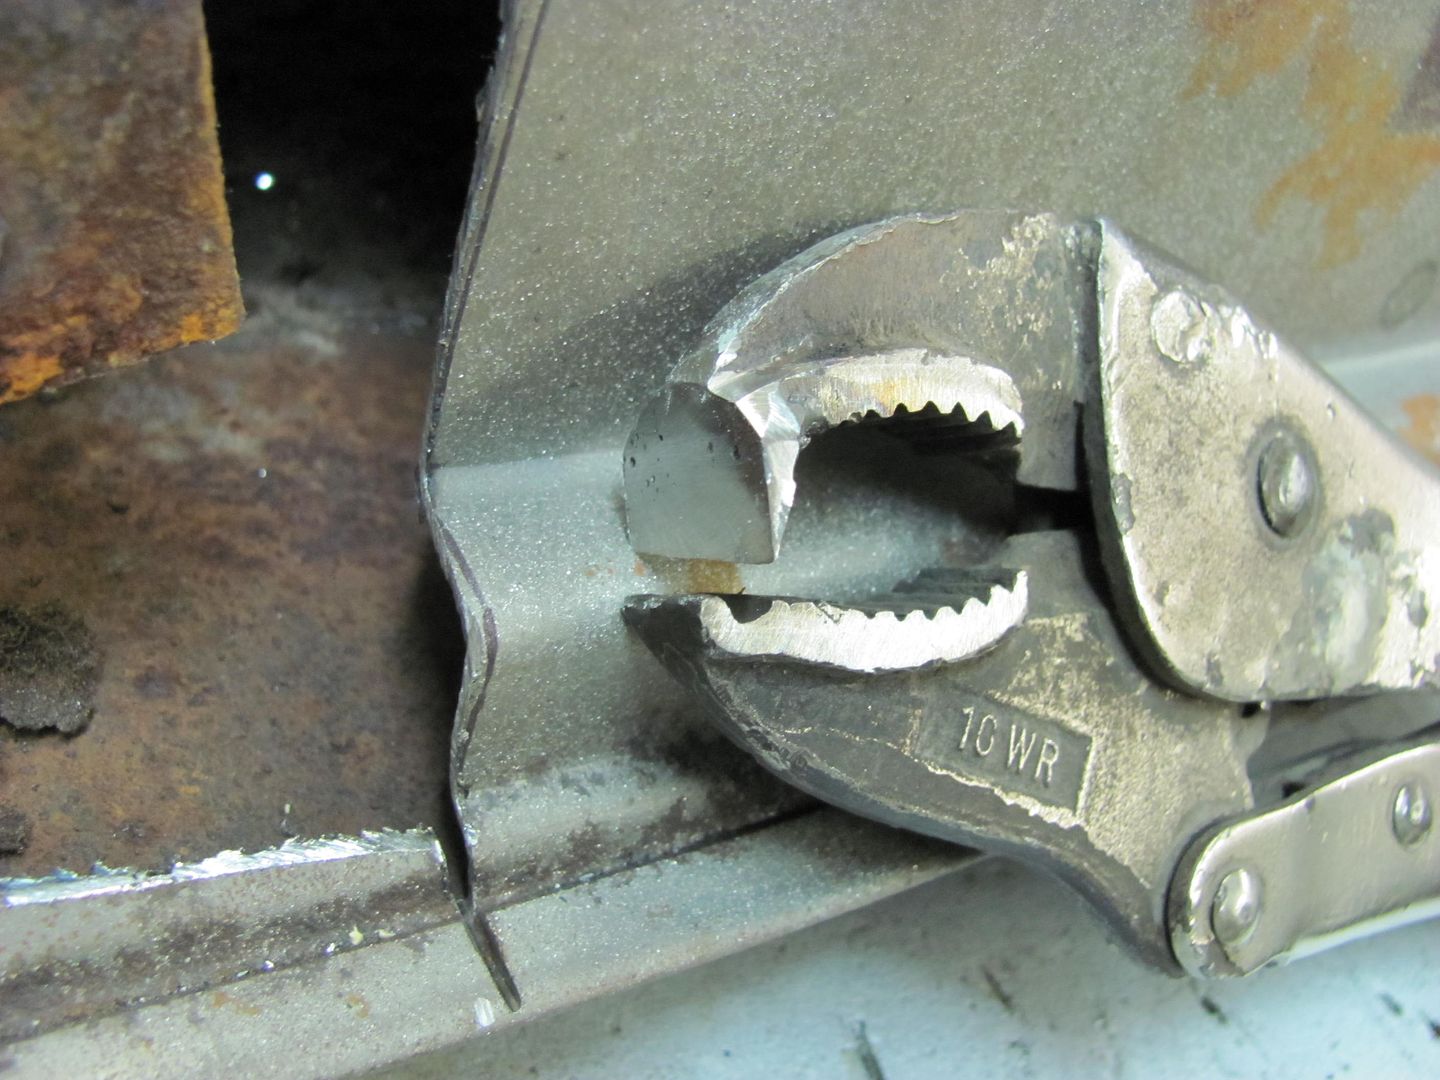
Starting at the corner, a diagonal slice is made in the inner panel so it will remove easier...
....and merely squeezing the the tool will gently pry up on the flange of the skin..... After one pass, tighten adjustment screw and repeat as needed..
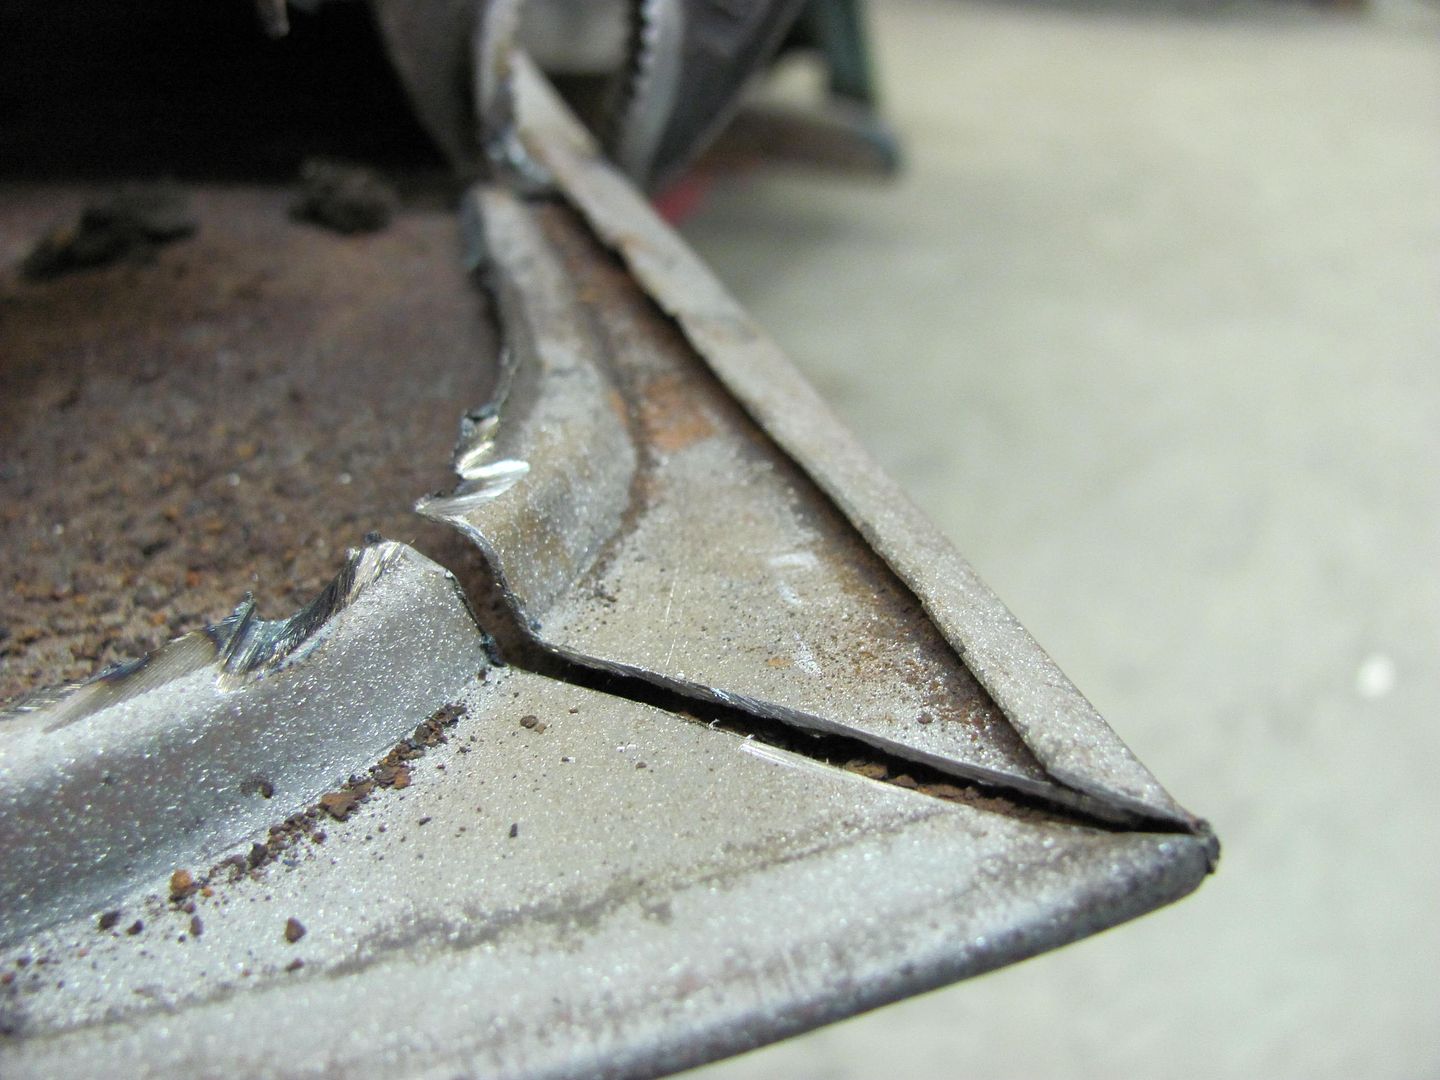
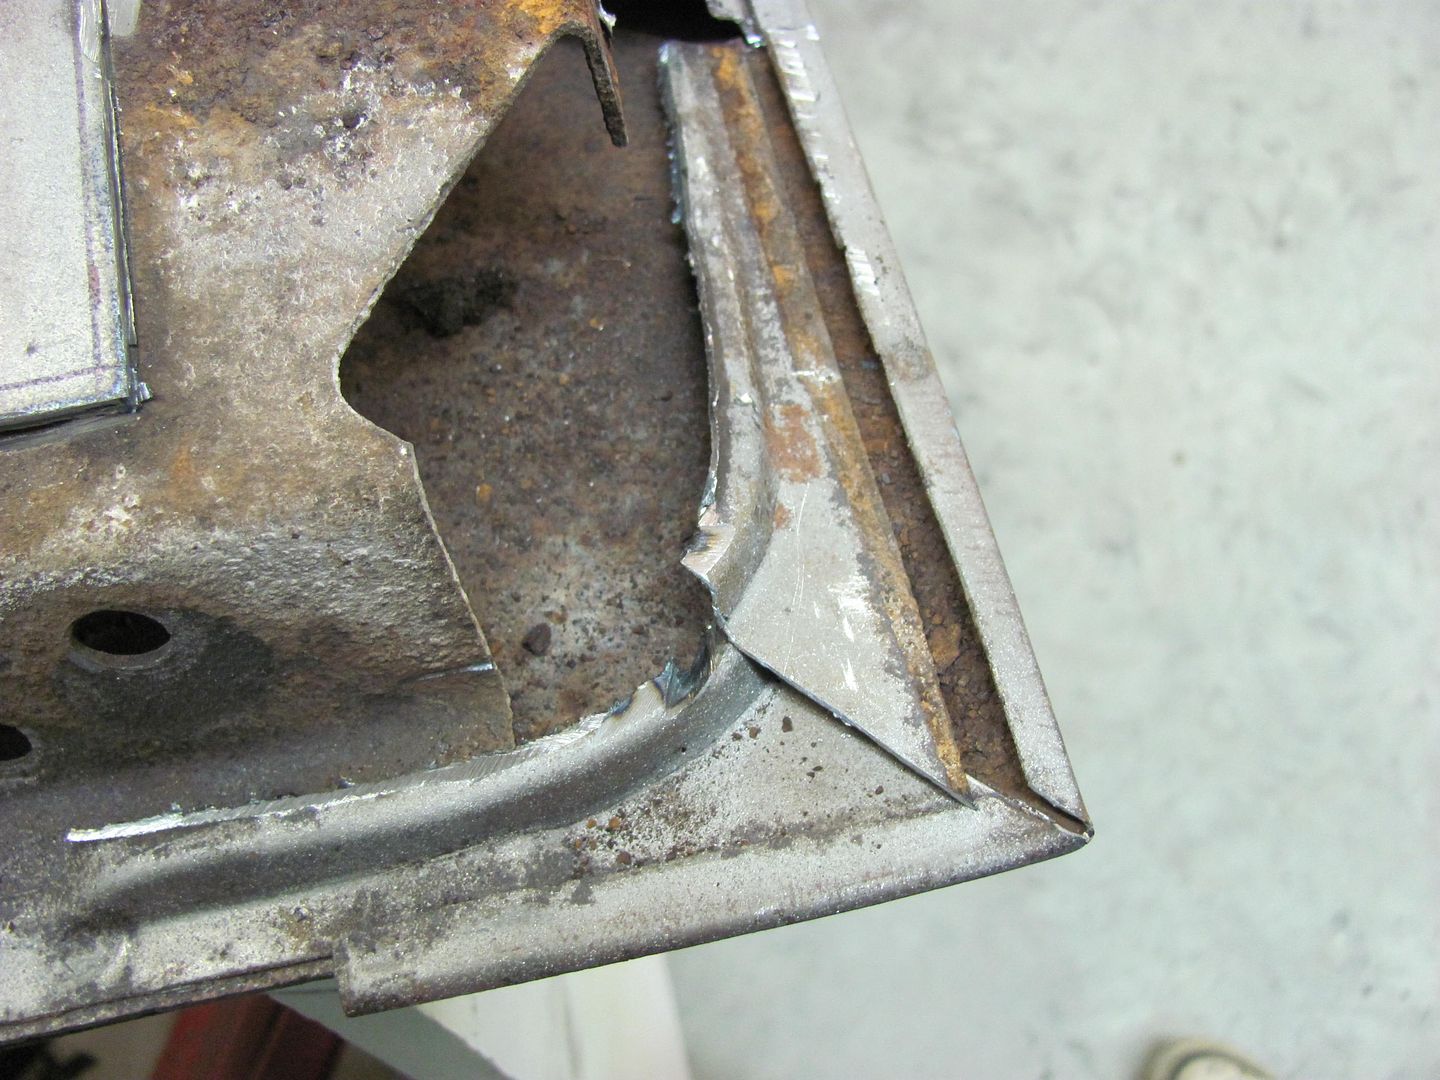
In the event you can reuse the door skin, spot welds can be removed with a burr grinder, in an attempt to keep the damage (and hole diameter) to the skin flange at a minimum. On many of these spot welds, just using the tool in the vicinity caused the spot weld to release.
Probably one of the biggest challenges in taking things apart for repairs is doing so without inflicting more damage. I had seen a recent post on pliers used to remove door skins, and thought they would come in handy here on the bottom of the tailgate I was repairing at the time. I have used vice grips on many occasion to fabricate purpose-built tools, with the largest benefit being the screw adjustment that provides accuracy in keeping the jaw squeezes consistent.
The lower jaw is modified to receive the edge of the door skin...
Then a suitable "blade" is found....
Some welding and grinding, and we have a new body tool.....
Starting at the corner, a diagonal slice is made in the inner panel so it will remove easier...
....and merely squeezing the the tool will gently pry up on the flange of the skin..... After one pass, tighten adjustment screw and repeat as needed..
In the event you can reuse the door skin, spot welds can be removed with a burr grinder, in an attempt to keep the damage (and hole diameter) to the skin flange at a minimum. On many of these spot welds, just using the tool in the vicinity caused the spot weld to release.