1997 Ranger Instrument Panel Light Bulb Replacement
#1
1997 Ranger Instrument Panel Light Bulb Replacement
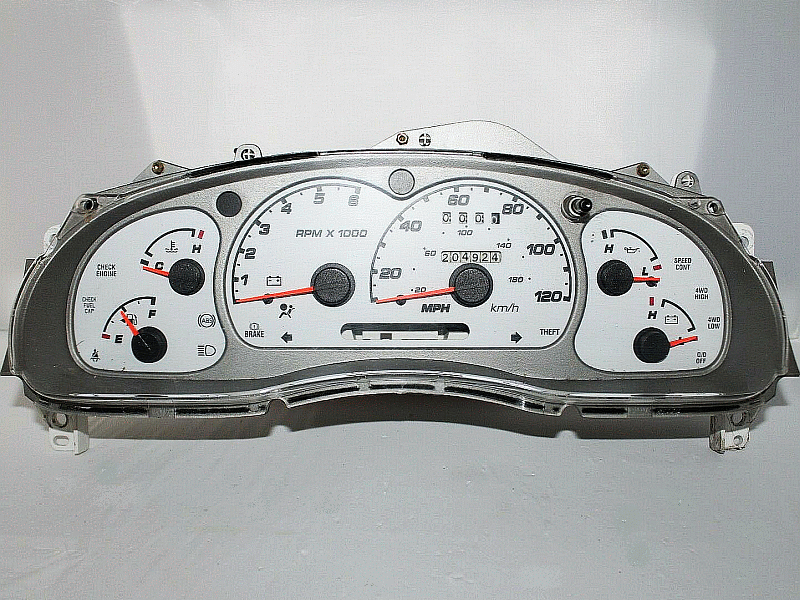
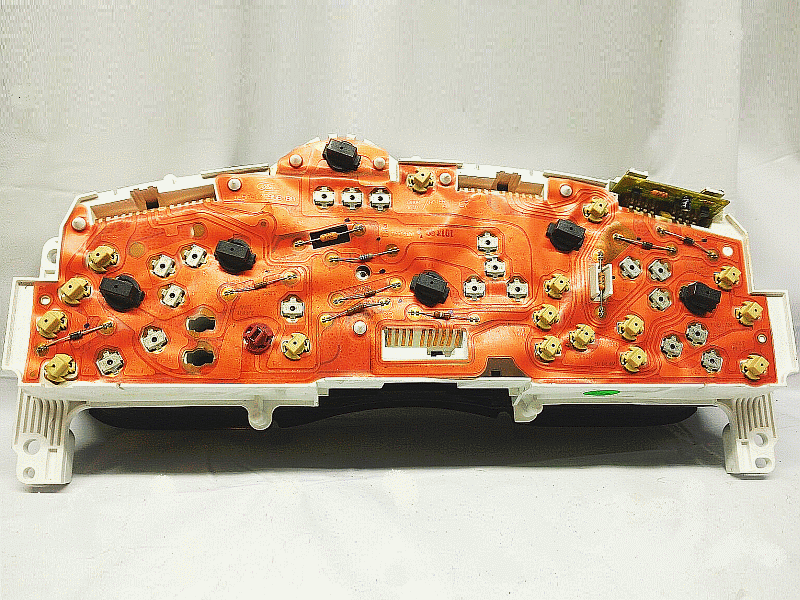
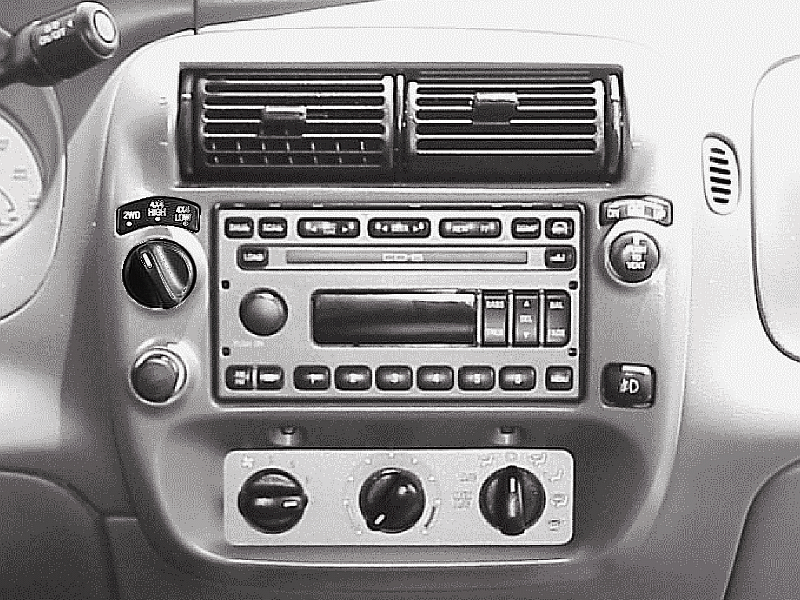
I just finished replacing the instrument panel light bulbs on my 1997 Ranger XL, 2.3L, 2WD pickup. I wanted to share how I did this as I was searching earlier on the forum. Thought this might help somebody. First of all, if you never have done this before, please go slow and take your time removing the dash panels as they are plastic molding and break easily. Allow yourself about an hour to complete the task. You will need smaller sized hand sockets to remove the screws. The very first thing you should do is remove the negative battery cable from the battery. This way you will not risk shorting out anything electrical as well as possibly triggering the airbag in the steering wheel column. The key piece in starting the process is to remove the radio first and then central console panel that houses the radio. It pops out very easily by gently prying it out in the four corners. Once you get that piece out remove the screws the support the lower knee panel. In order to get that piece off you will have to remove the two screws the hold the hood release lever in place. Get under the dashboard and look up as you lay looking upward near the brake pedal. Pull the hood release lever and you will see the two gold screws. Remove them. This will free up the panel on the under side. The top side of the panel will pop out if you pry it gently on the top two corners. Next, you will see a metal panel underneath the knee panel. Remove this metal panel as well. Now you will be able to remove the instrument cluster panel piece. There are some visible screws holding this in place, remove them and gently pry the cluster panel out. Once the cluster panel cover is out you will have to actaully remove the gauge cluster itself by removing the the four screw bolts that secure it in place. After the screws are out, gently work it out of the dash slowly as you will need to disconnect three electric plug harnesses in the back. After it is unplugged and out, on the backside of the instrument cluster you will see some round, black colored thumb screw bulb housings that house the light bulb. Just twist them and turn making sure to go in the right direction. Feel it out for the direction, I cannot remember which way it turns. The bulb housings are labeled "ILL" on the circuit overlay. I recommend you replace all the bulbs as you might not want to have to do this again in the near future. Once all the bulbs are tightly seated and installed just reverse the above process for installation. This is a fairly easy job and like I said it takes about an hour. Make sure you test the lights after finishing. Hope this helps somebody out there. Best wishes.
#4
Thanks for the post!
Having just done this on my '98 XLT 3.0L 2WD, I'll just add in that these instructions apply verbatim to this model as well.
Most of the fasteners are 9/32", though the metal plate behind the knee panel requires a 5/16"s. I found a screwdriver handle to be much more convenient than a ratchet.
Also, once apart, I found that the instrument illumination bulbs (marked "ILL") are all 194's. There are six of them. The sockets are removed by twisting about 1/8" turn to the left, and this is much more easily done with a pliers than by hand.
The other bulbs, for all of the indicator lights, are much smaller. None of mine were out and Walmart didn't have anything that matched them, so I didn't replace them. I suspect that they are 161's. There are 16 of them on my meagerly-optioned Ranger, and I suspect that trucks with more options may have a few more indicator lights.
Just figured I'd add in these few details. It would have been handy to have the bulbs on hand before taking the dash apart, but I didn't know which type I needed. Hopefully the next person finds this useful.
-Bob
Having just done this on my '98 XLT 3.0L 2WD, I'll just add in that these instructions apply verbatim to this model as well.
Most of the fasteners are 9/32", though the metal plate behind the knee panel requires a 5/16"s. I found a screwdriver handle to be much more convenient than a ratchet.
Also, once apart, I found that the instrument illumination bulbs (marked "ILL") are all 194's. There are six of them. The sockets are removed by twisting about 1/8" turn to the left, and this is much more easily done with a pliers than by hand.
The other bulbs, for all of the indicator lights, are much smaller. None of mine were out and Walmart didn't have anything that matched them, so I didn't replace them. I suspect that they are 161's. There are 16 of them on my meagerly-optioned Ranger, and I suspect that trucks with more options may have a few more indicator lights.
Just figured I'd add in these few details. It would have been handy to have the bulbs on hand before taking the dash apart, but I didn't know which type I needed. Hopefully the next person finds this useful.

-Bob
#5
I will add these a few tips. The back of the instrument cluster is a fragile circuit board so be careful handling it. The black removal sockets are small and since they were plastic, I wrapped the plier jaws with a little tape to reduce the risk of damage as indeed they are hard to remove by hand. Get the longest life bulbs you can afford. Most recommend Sylvania Long Life as they claim they last up to twice as long.
#6
#7
Gents,
Thank You. I have a 1997 Ford Ranger XLT extended cab. I recently noticed some instruments were not lit and figured it was the bulbs. They have never been changed. You all just told me exactly what I was looking for with great tips, especially, the bulb sizes, to change all the bulbs, and the socket sizes. I haven't done this yet, but I think with all your instructions, I should be ok.
Again, Thanks
Clark
Trending Topics
#8
😇
I just finished replacing the instrument panel light bulbs on my 1997 Ranger XL, 2.3L, 2WD pickup. I wanted to share how I did this as I was searching earlier on the forum. Thought this might help somebody. First of all, if you never have done this before, please go slow and take your time removing the dash panels as they are plastic molding and break easily. Allow yourself about an hour to complete the task. You will need smaller sized hand sockets to remove the screws. The very first thing you should do is remove the negative battery cable from the battery. This way you will not risk shorting out anything electrical as well as possibly triggering the airbag in the steering wheel column. The key piece in starting the process is to remove the radio first and then central console panel that houses the radio. It pops out very easily by gently prying it out in the four corners. Once you get that piece out remove the screws the support the lower knee panel. In order to get that piece off you will have to remove the two screws the hold the hood release lever in place. Get under the dashboard and look up as you lay looking upward near the brake pedal. Pull the hood release lever and you will see the two gold screws. Remove them. This will free up the panel on the under side. The top side of the panel will pop out if you pry it gently on the top two corners. Next, you will see a metal panel underneath the knee panel. Remove this metal panel as well. Now you will be able to remove the instrument cluster panel piece. There are some visible screws holding this in place, remove them and gently pry the cluster panel out. Once the cluster panel cover is out you will have to actaully remove the gauge cluster itself by removing the the four screw bolts that secure it in place. After the screws are out, gently work it out of the dash slowly as you will need to disconnect three electric plug harnesses in the back. After it is unplugged and out, on the backside of the instrument cluster you will see some round, black colored thumb screw bulb housings that house the light bulb. Just twist them and turn making sure to go in the right direction. Feel it out for the direction, I cannot remember which way it turns. The bulb housings are labeled "ILL" on the circuit overlay. I recommend you replace all the bulbs as you might not want to have to do this again in the near future. Once all the bulbs are tightly seated and installed just reverse the above process for installation. This is a fairly easy job and like I said it takes about an hour. Make sure you test the lights after finishing. Hope this helps somebody out there. Best wishes.
Awesome man. I've messed around with the dash all around before but never the the dash display. What you said was to the T and bam! All fixed. Cheers!
#9
I have come to learn this job on the Ranger is far easier than other vehicles. I've taken to using one of those plastic boxes with the separations in them and I used a marker to write numbers 1 through whatever on the top, each time I remove a different fastener, it goes in a new compartment consecutively so on reinstall you can just reverse it. Sure am glad newer vehicles use LED's.
#11
bitsy
To the person who talked about thig light, code 27. I just finished taking out my cluster on my 2002 ford ranger and changing all the bulbs including the air bag. Put everything back started the truck, light for air bag is out now!!!!! Yay!!!!. But now my blinker front and back on drivers side is not working. They were working before. So I hope this just means my bulbs are out. What else would cause this? Any answers? This web sight is great! Just joined 1 day ago.
#12
Troubles
I just finished replacing the instrument panel light bulbs on my 1997 Ranger XL, 2.3L, 2WD pickup. I wanted to share how I did this as I was searching earlier on the forum. Thought this might help somebody. First of all, if you never have done this before, please go slow and take your time removing the dash panels as they are plastic molding and break easily. Allow yourself about an hour to complete the task. You will need smaller sized hand sockets to remove the screws. The very first thing you should do is remove the negative battery cable from the battery. This way you will not risk shorting out anything electrical as well as possibly triggering the airbag in the steering wheel column. The key piece in starting the process is to remove the radio first and then central console panel that houses the radio. It pops out very easily by gently prying it out in the four corners. Once you get that piece out remove the screws the support the lower knee panel. In order to get that piece off you will have to remove the two screws the hold the hood release lever in place. Get under the dashboard and look up as you lay looking upward near the brake pedal. Pull the hood release lever and you will see the two gold screws. Remove them. This will free up the panel on the under side. The top side of the panel will pop out if you pry it gently on the top two corners. Next, you will see a metal panel underneath the knee panel. Remove this metal panel as well. Now you will be able to remove the instrument cluster panel piece. There are some visible screws holding this in place, remove them and gently pry the cluster panel out. Once the cluster panel cover is out you will have to actaully remove the gauge cluster itself by removing the the four screw bolts that secure it in place. After the screws are out, gently work it out of the dash slowly as you will need to disconnect three electric plug harnesses in the back. After it is unplugged and out, on the backside of the instrument cluster you will see some round, black colored thumb screw bulb housings that house the light bulb. Just twist them and turn making sure to go in the right direction. Feel it out for the direction, I cannot remember which way it turns. The bulb housings are labeled "ILL" on the circuit overlay. I recommend you replace all the bulbs as you might not want to have to do this again in the near future. Once all the bulbs are tightly seated and installed just reverse the above process for installation. This is a fairly easy job and like I said it takes about an hour. Make sure you test the lights after finishing. Hope this helps somebody out there. Best wishes.
#13
#14
unsure if you've got the version with\wOut the Tach?
If replacing traditional Bulbs with LEDs, you're asking for trouble;
several circuits are not compatible (LEDs flicker dimmed, glow when should be off, burn out in short order);
"LEDs are more efficient & last longer" is just FalseAdvertising for overpriced unreliable SnakeOil.
For Cluster+CenterPanel, Sylvania\Equal Bulbs, 8ea #161\194\LongLife for BackLamps, 18ea #906\912\LongLife for DutyLamps.
There are other Bulb#s of same dimension but have HigherWattage ratings; they will melt the plastic socket & surround!
If trying to substitute LEDs to make a fashion statement, good luck; let us know part#s used & result after a few weeks.
Click here for more info.


Thread
Thread Starter
Forum
Replies
Last Post
super 6.8
Explorer, Sport Trac, Mountaineer & Aviator
1
08-04-2007 12:10 AM


