Frame Off Restoration, Ranger V8 Sport
#31
 01-31-2017, 06:00 PM


Join Date: Jan 2017
Posts: 157
Likes: 0
Received 0 Likes
on
0 Posts
#32
01-31-2017, 06:01 PM
Join Date: Jan 2017
Posts: 157
Likes: 0
Received 0 Likes
on
0 Posts
#33
01-31-2017, 06:02 PM
Join Date: Jan 2017
Posts: 157
Likes: 0
Received 0 Likes
on
0 Posts
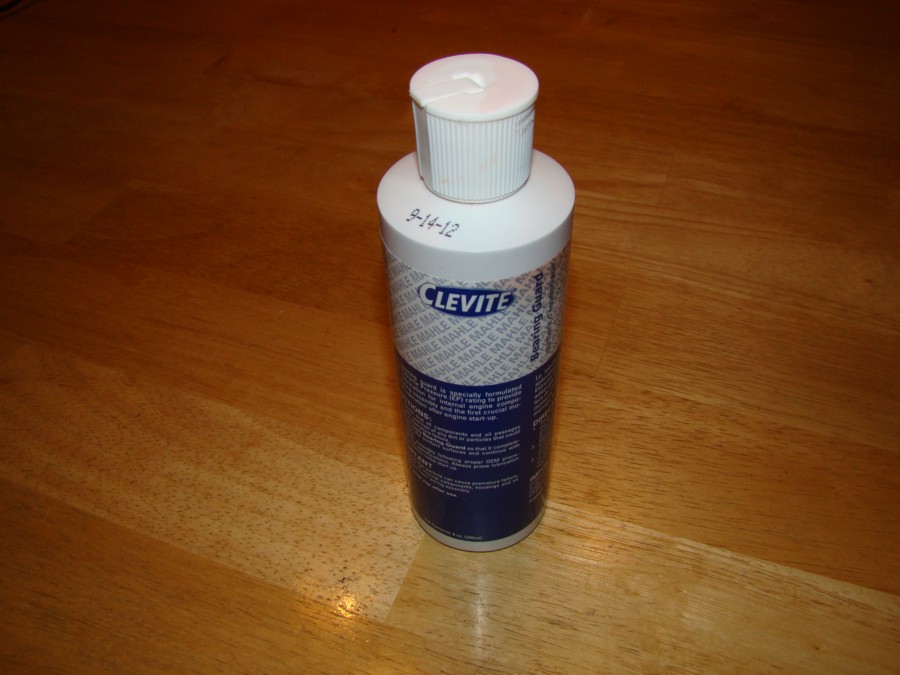
As the engine assembly date grows closer I am still adding last minute items to the build list. Christmas 2012 was good and many of these items were dropped at the front door by Santa over the past week.
Clevite Assembly Lube
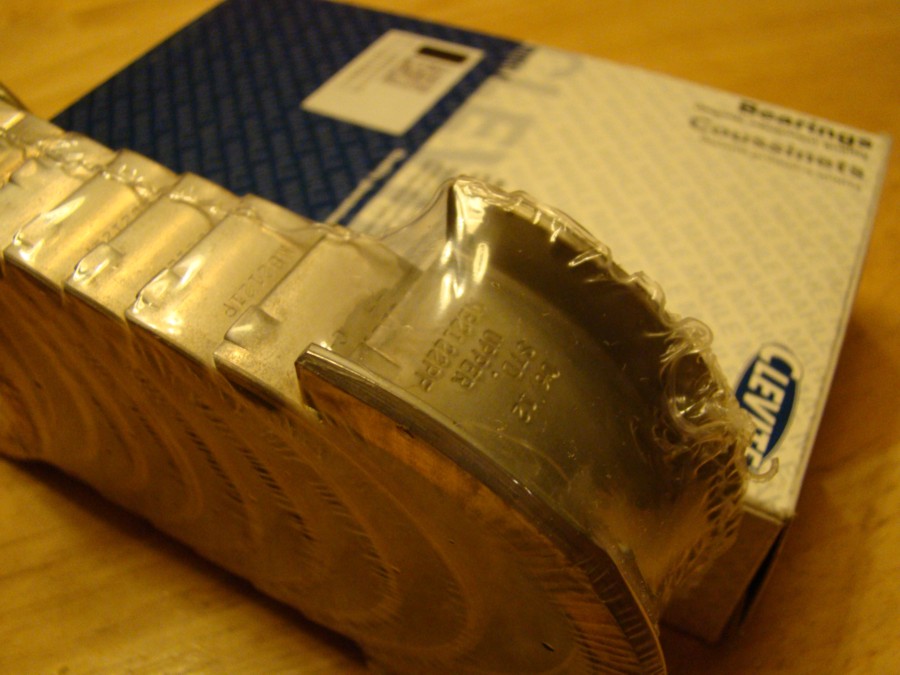
Clevite 77 rod bearings, CB-634 P Standard size

Clevite 77 main bearings, MS-590 P Standard size
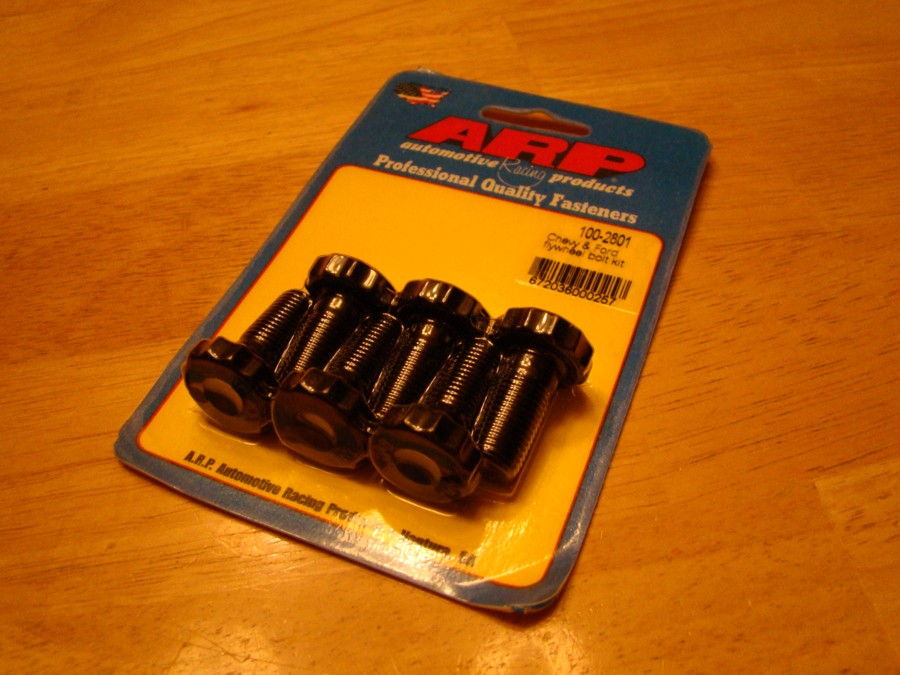
ARP flywheel bolts
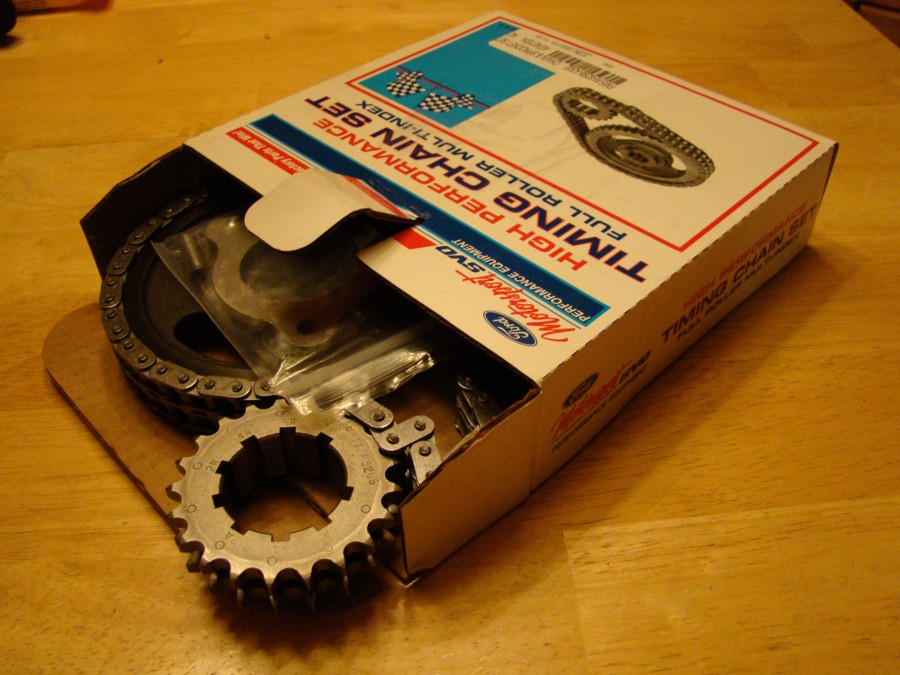
Ford Racing timing chain set
Fel Pro valve cover gaskets
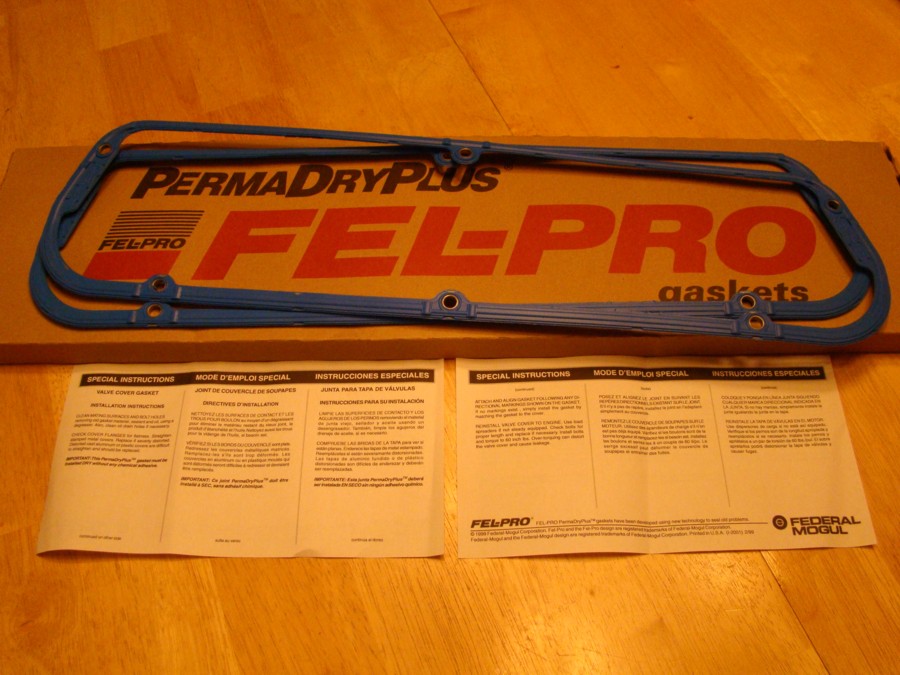
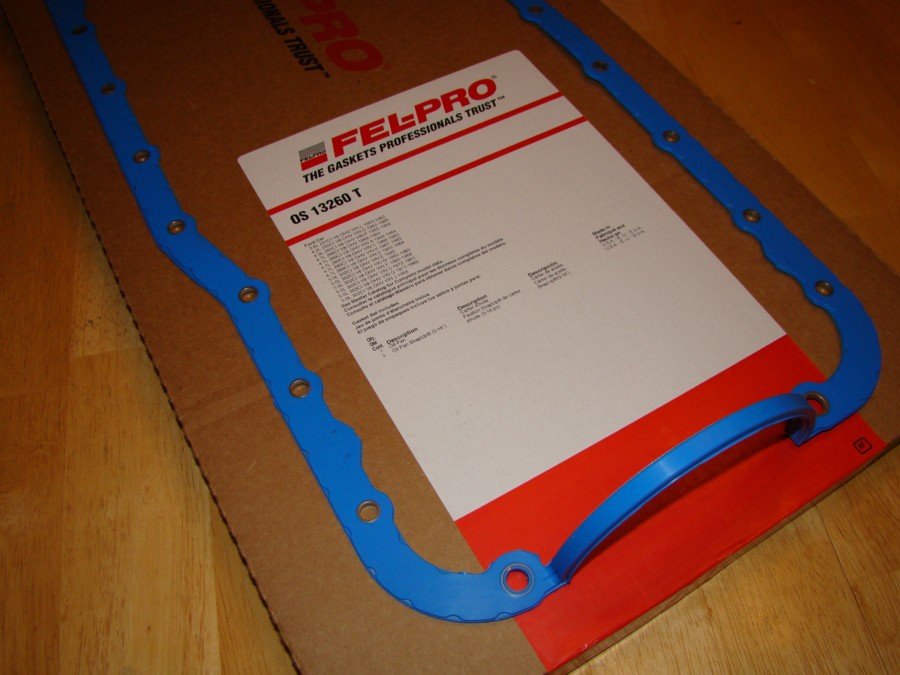
Fel Pro oil pan gasket
Clevite Assembly Lube
Clevite 77 rod bearings, CB-634 P Standard size
Clevite 77 main bearings, MS-590 P Standard size
ARP flywheel bolts
Ford Racing timing chain set
Fel Pro valve cover gaskets
Fel Pro oil pan gasket
#34
01-31-2017, 06:03 PM
Join Date: Jan 2017
Posts: 157
Likes: 0
Received 0 Likes
on
0 Posts
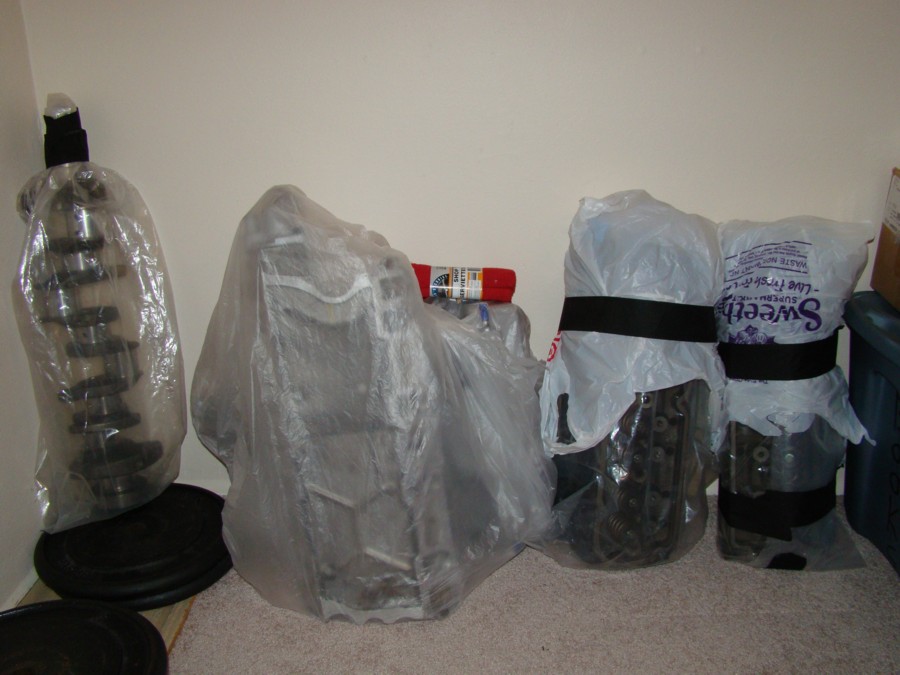
I picked up the crankshaft from the machine shop after being polished. Once a few quick photos of the finished work were collected I took a couple measurements with a micrometer to verify everything was still within spec. 2.248" main journals and 2.123" rod journals.
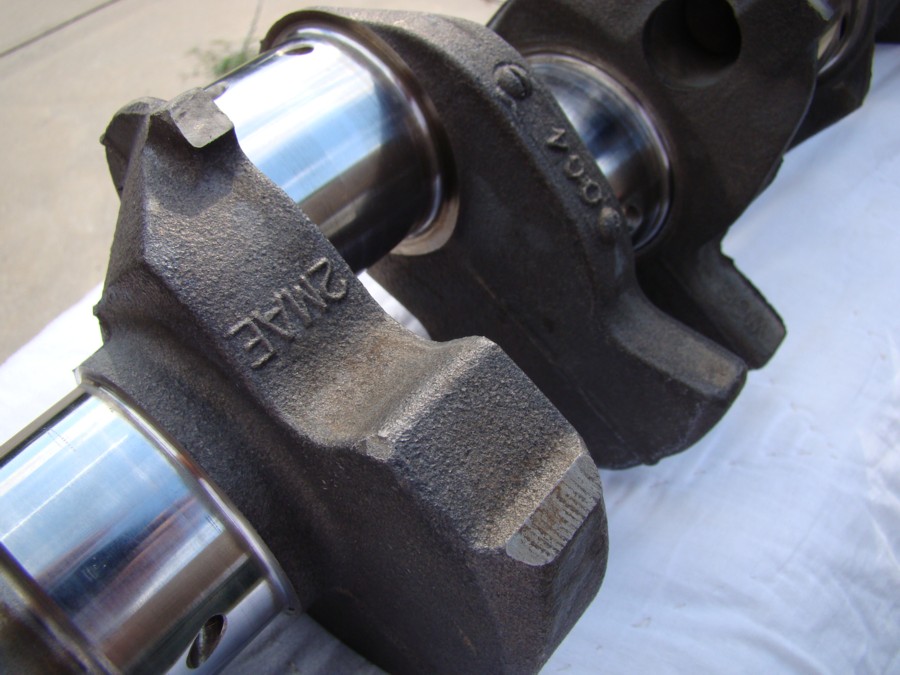
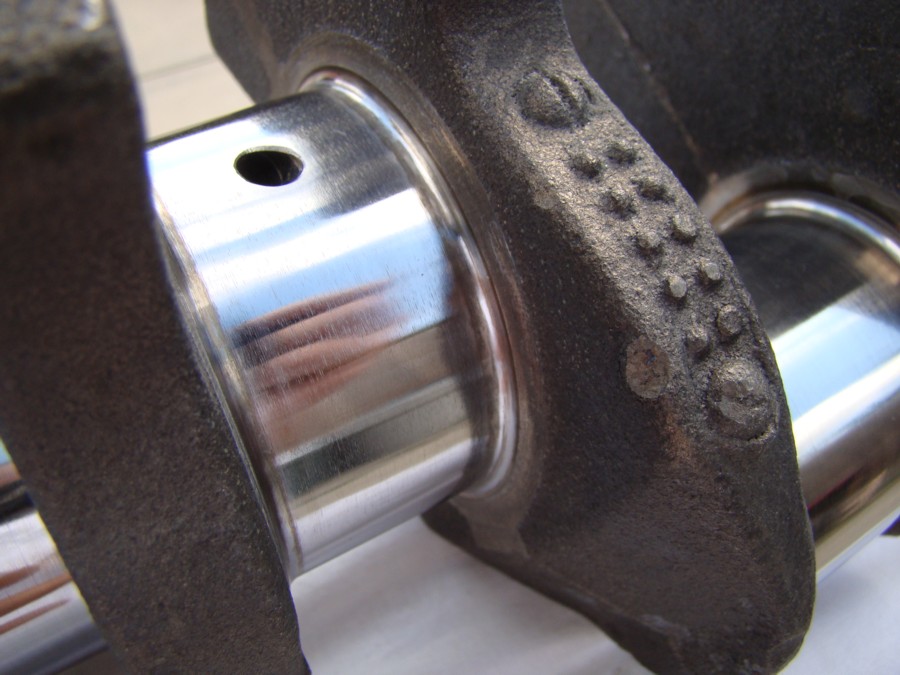
After that the crankshaft was cleaned and lightly oiled then bagged and stored away alongside the heads and intake.
After that the crankshaft was cleaned and lightly oiled then bagged and stored away alongside the heads and intake.
#35
01-31-2017, 06:04 PM
Join Date: Jan 2017
Posts: 157
Likes: 0
Received 0 Likes
on
0 Posts
The block is now at the machine shop going through the paces. First step is a run through the thermal cleaning process. File photos.
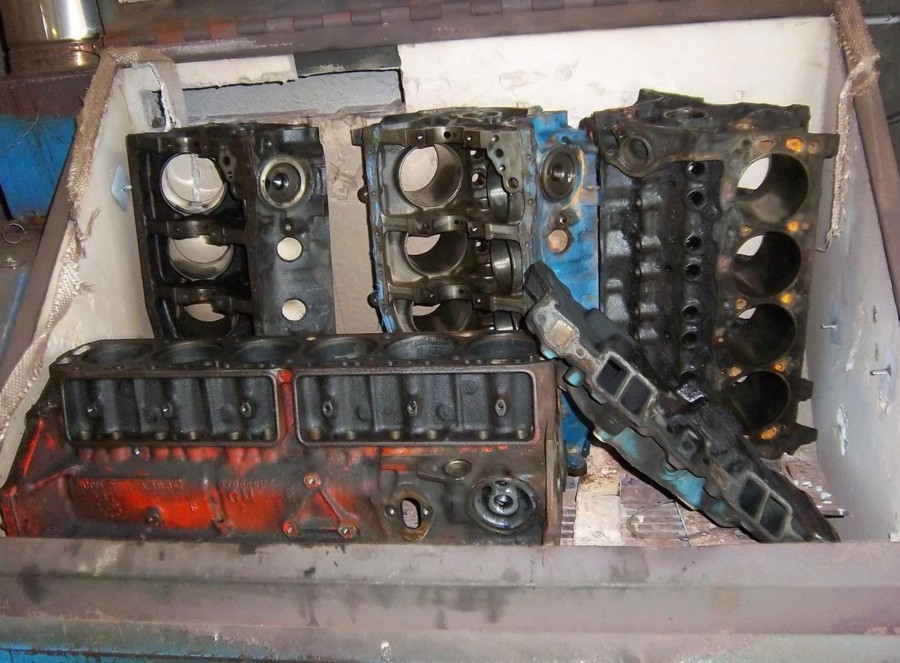
Now out of the oven and ready for the next step.
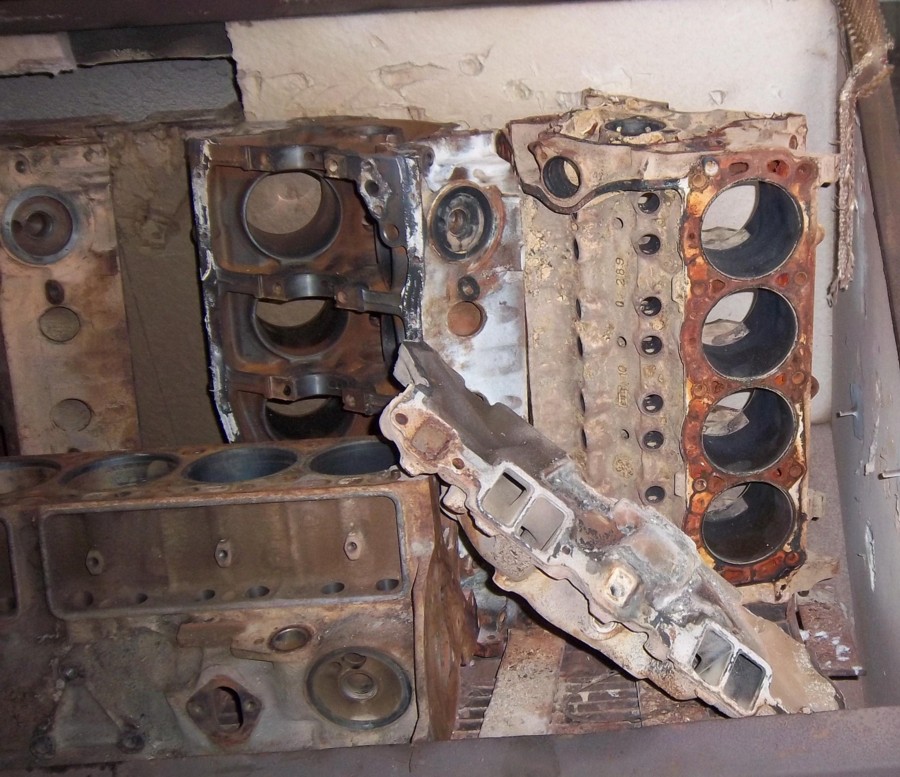
Then the block was rotated inside a blast cabinet while being hit with steel shot to clean off the ash and any excess material.
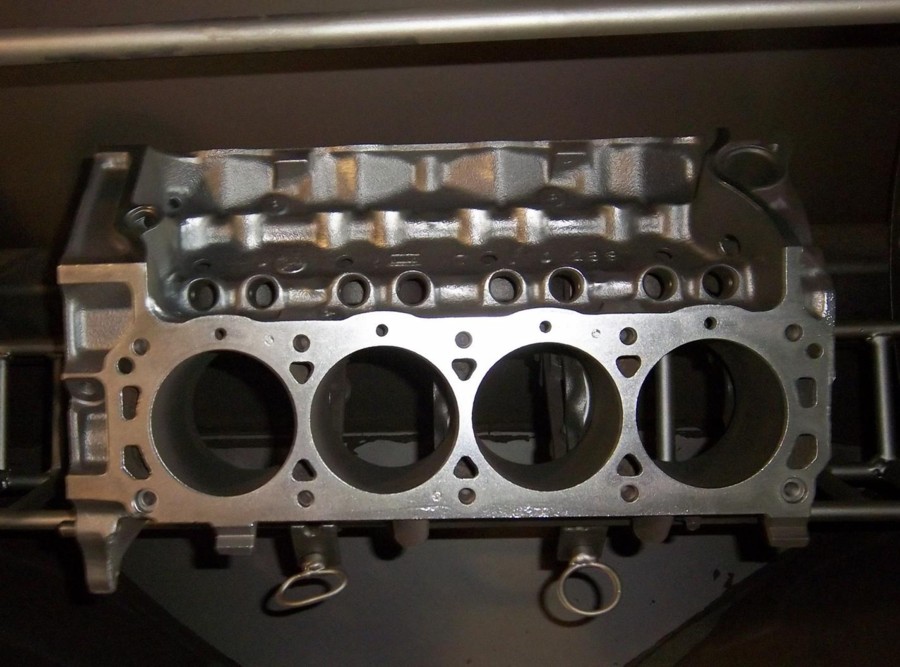
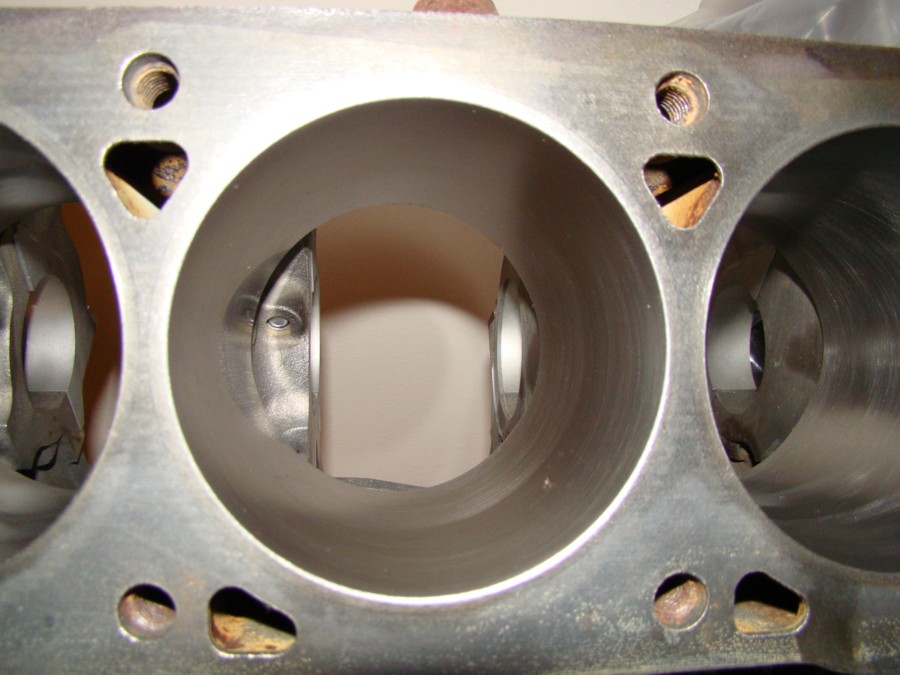
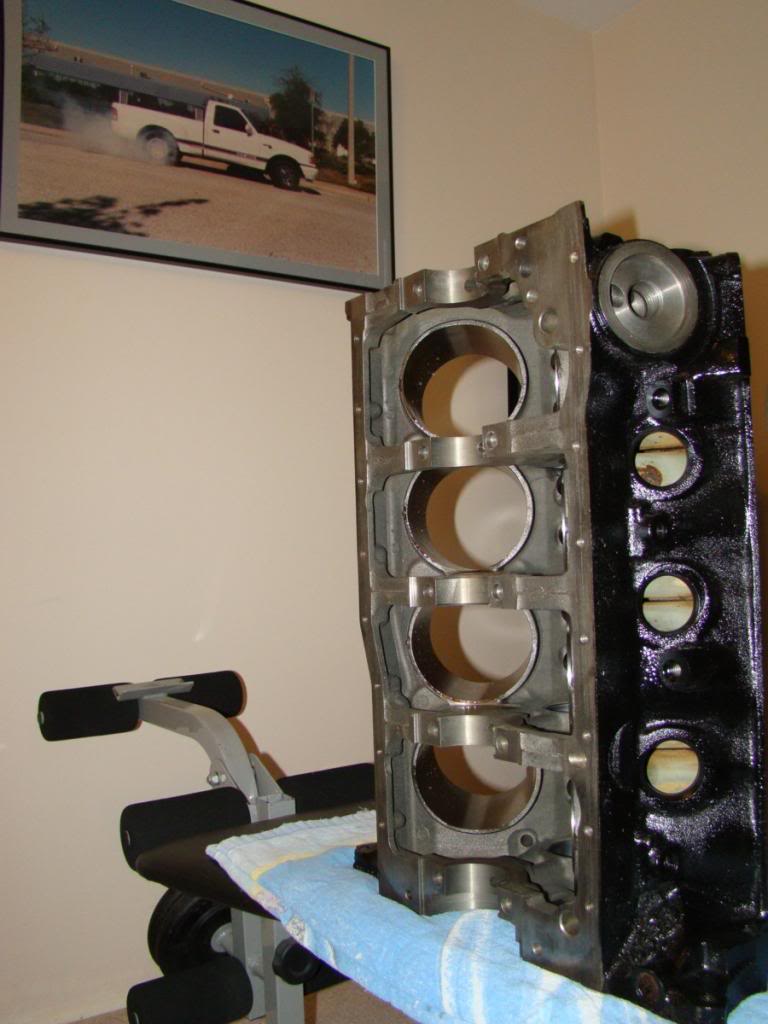
Next step is a .030 overbore, bringing the old Explorer 5.0 block up to 306 cubic inches.
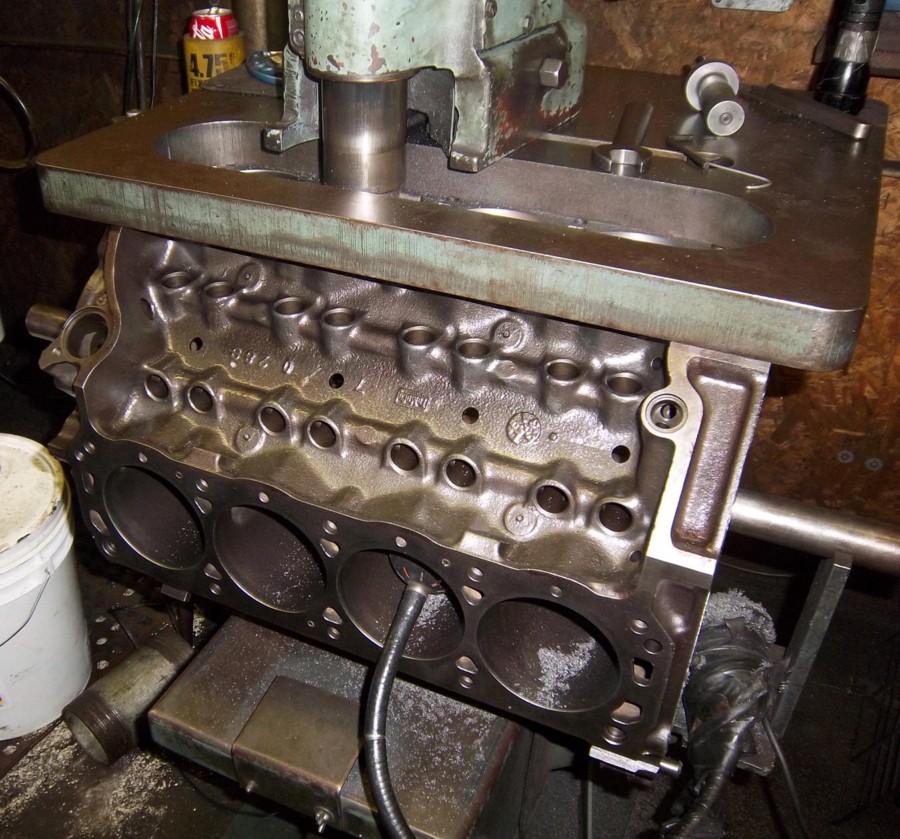
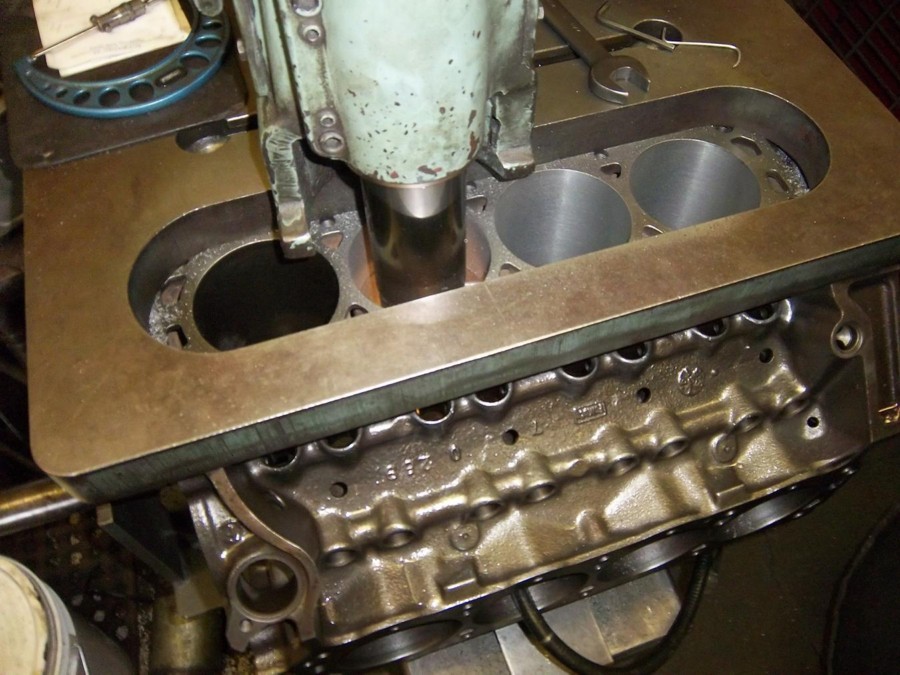
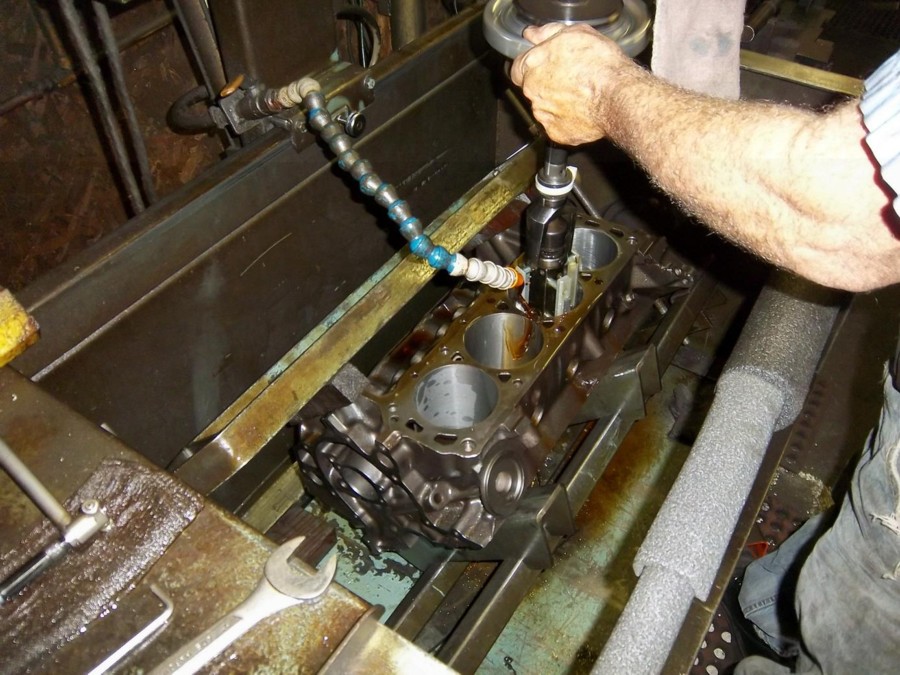
Last step is a final hone to bring the bore diameter and bore finish up to perfectly match the diameter of the oversized Silvolite pistons.
Now out of the oven and ready for the next step.
Then the block was rotated inside a blast cabinet while being hit with steel shot to clean off the ash and any excess material.
Next step is a .030 overbore, bringing the old Explorer 5.0 block up to 306 cubic inches.
Last step is a final hone to bring the bore diameter and bore finish up to perfectly match the diameter of the oversized Silvolite pistons.
#36
01-31-2017, 06:05 PM
Join Date: Jan 2017
Posts: 157
Likes: 0
Received 0 Likes
on
0 Posts
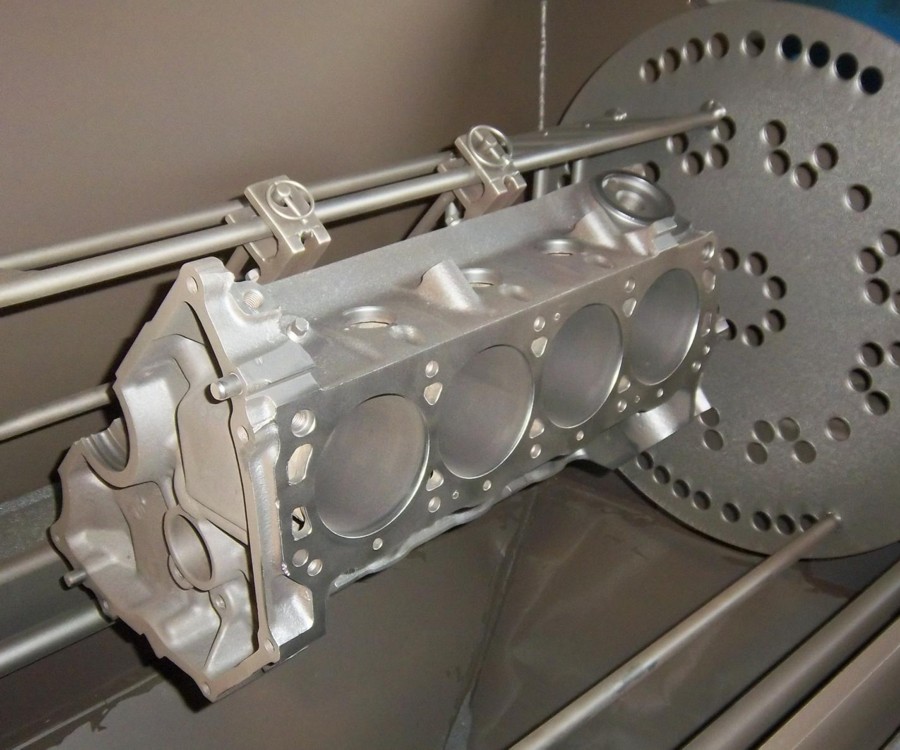
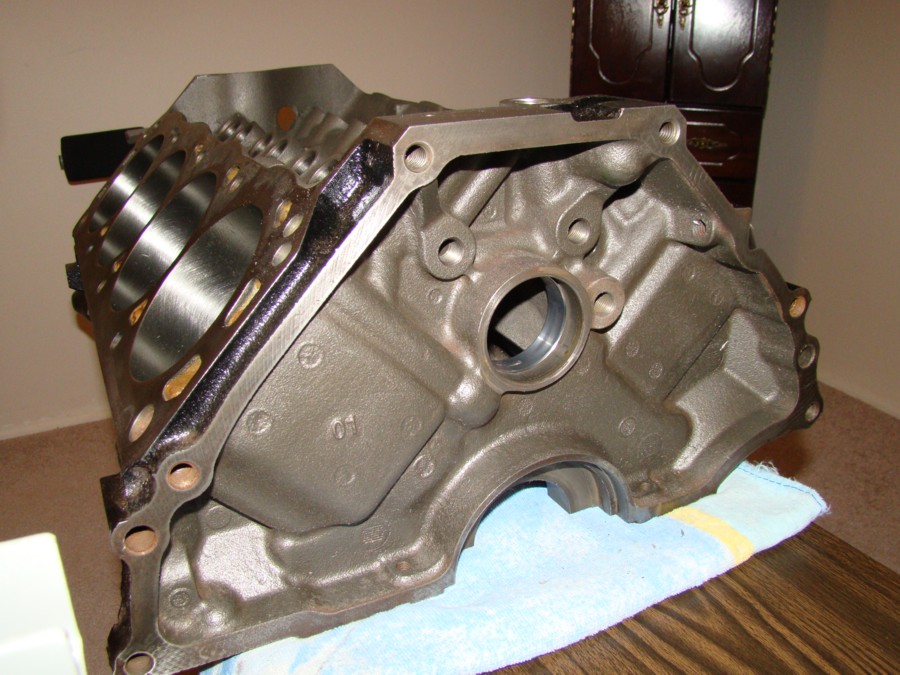
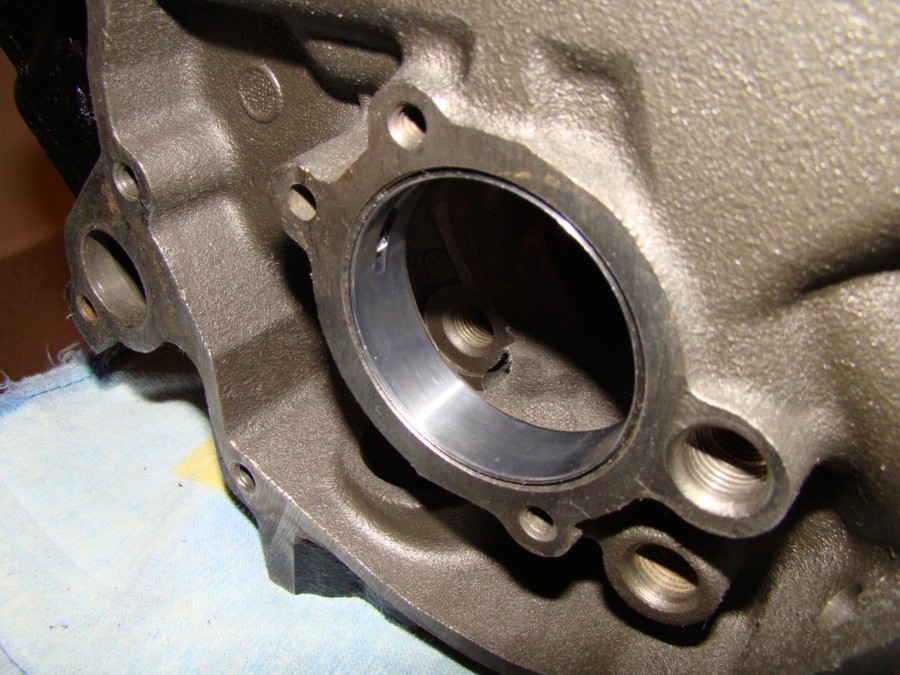
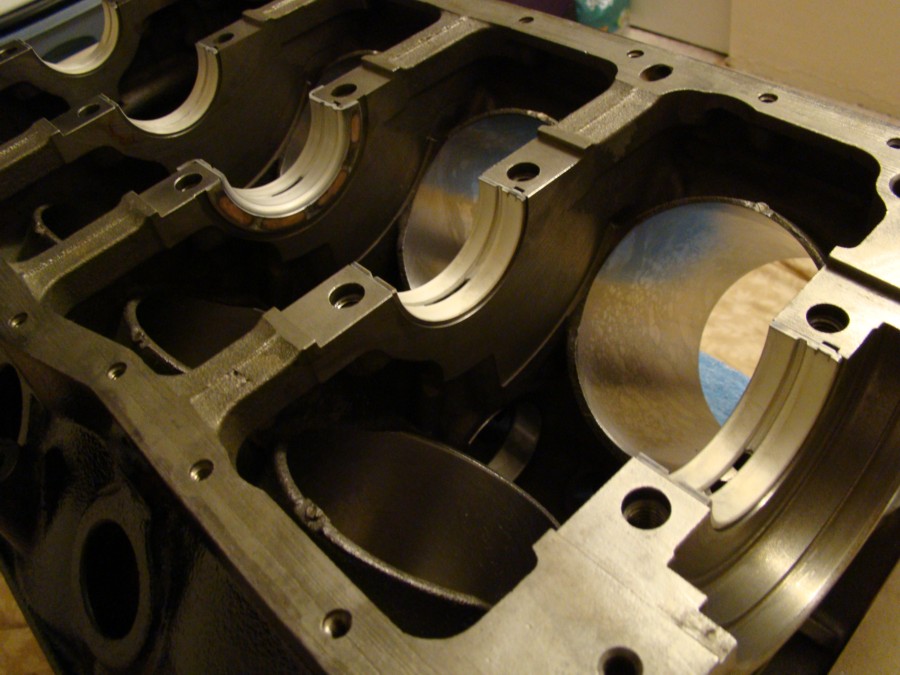
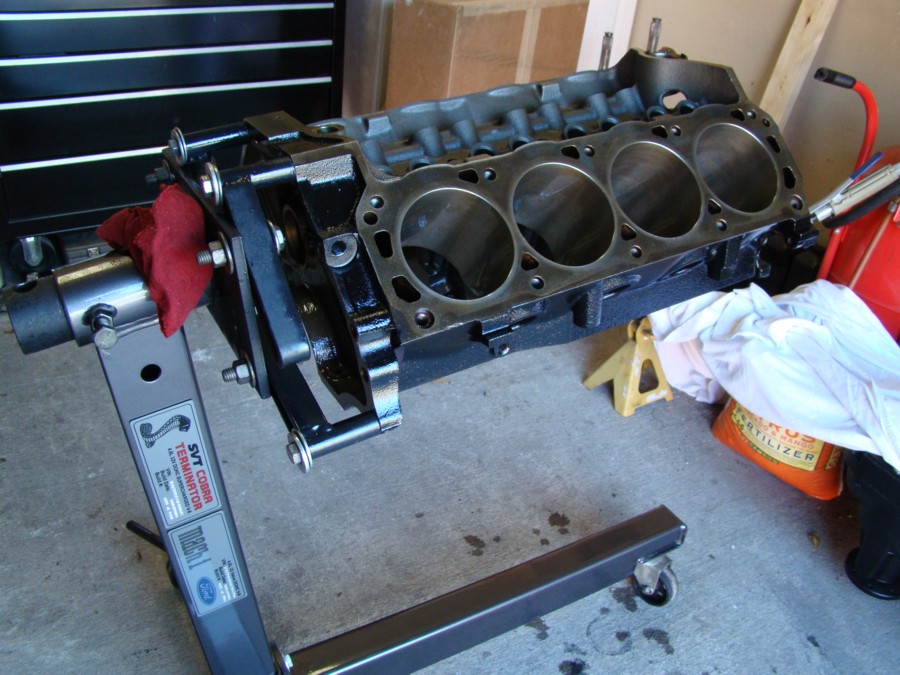
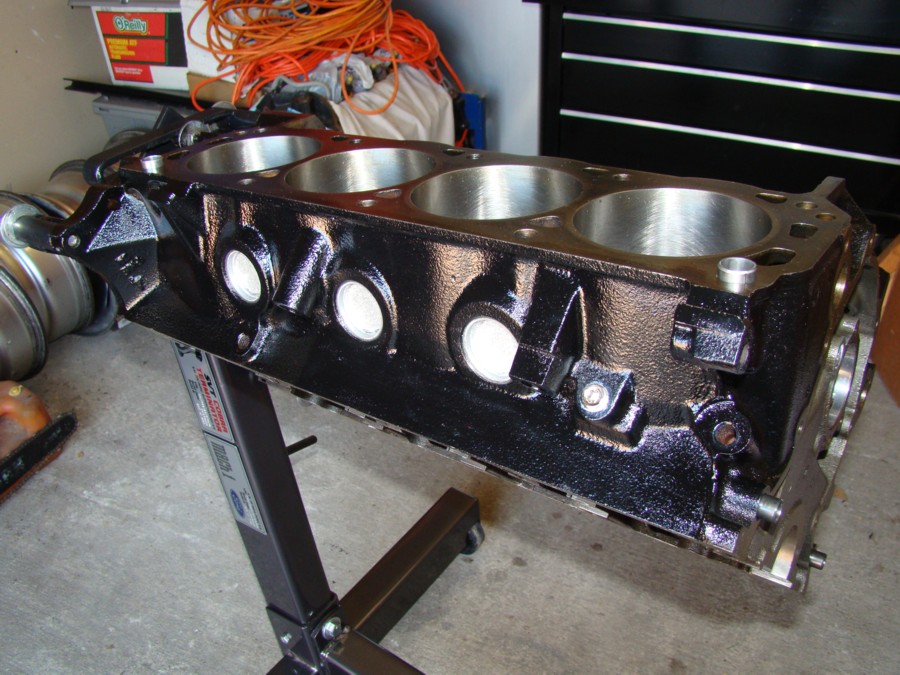
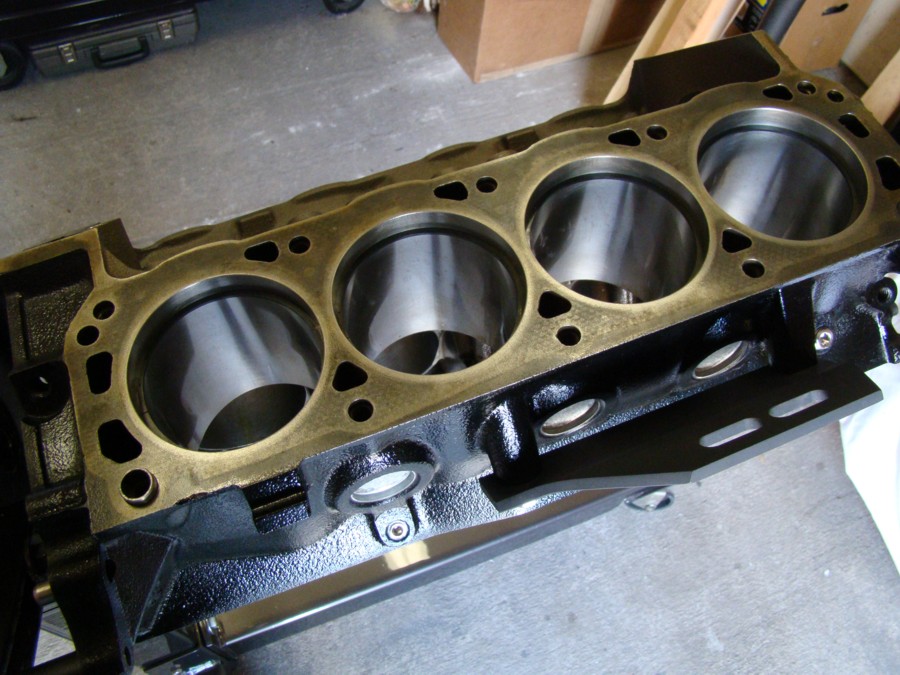
The machine shop took a few extra days finishing up the work on my 5.0 block. They called to let me know it would be ready at 4:00pm today. I picked it up, got it home early this evening, lightly oiled the machined surfaces, and managed to collect a few photos. It is currently located inside my house next to the crank, intake, and heads.
#37
01-31-2017, 06:05 PM
Join Date: Jan 2017
Posts: 157
Likes: 0
Received 0 Likes
on
0 Posts
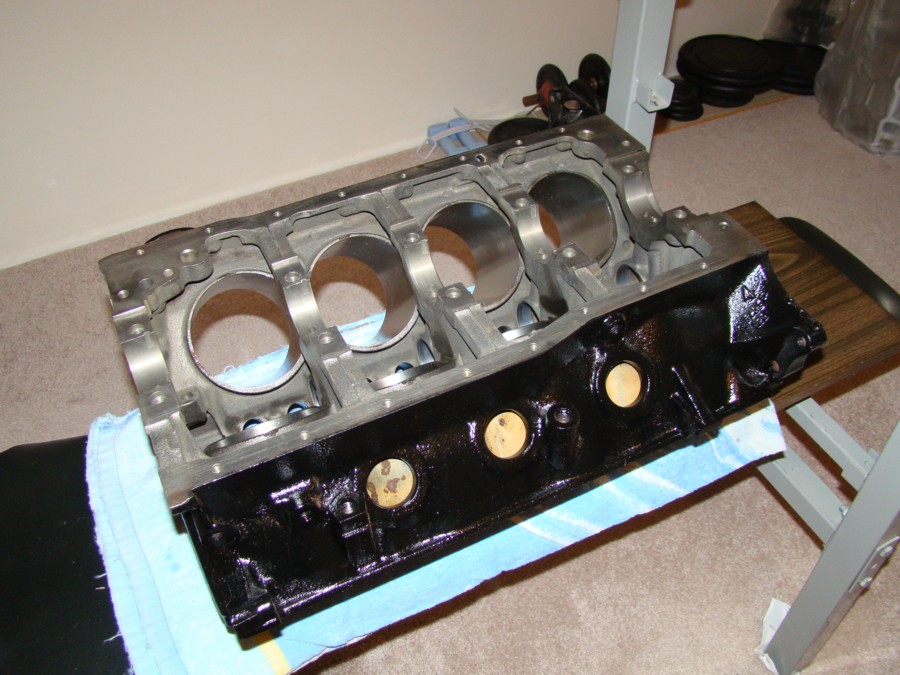
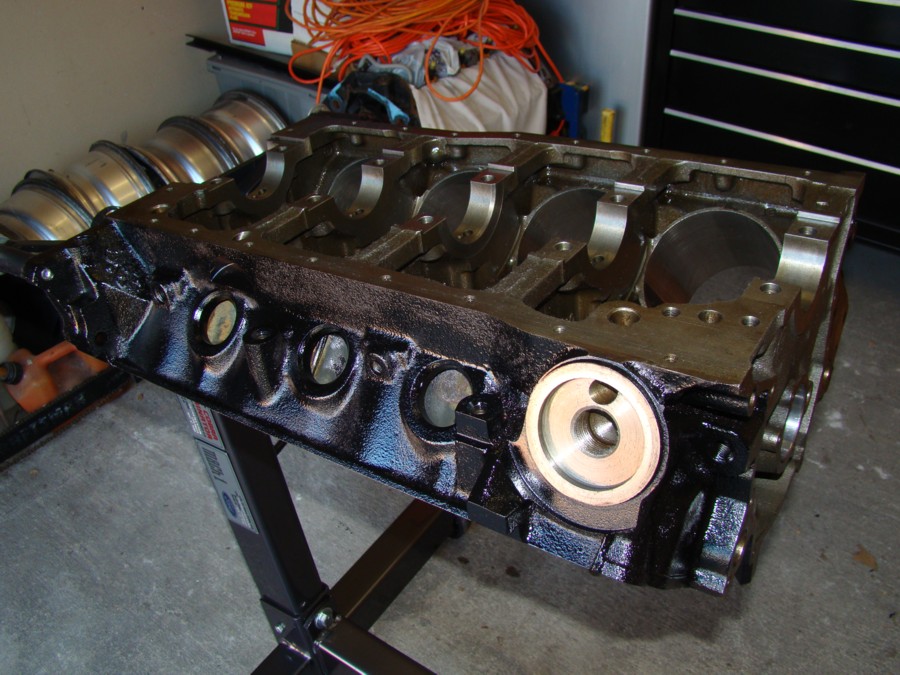
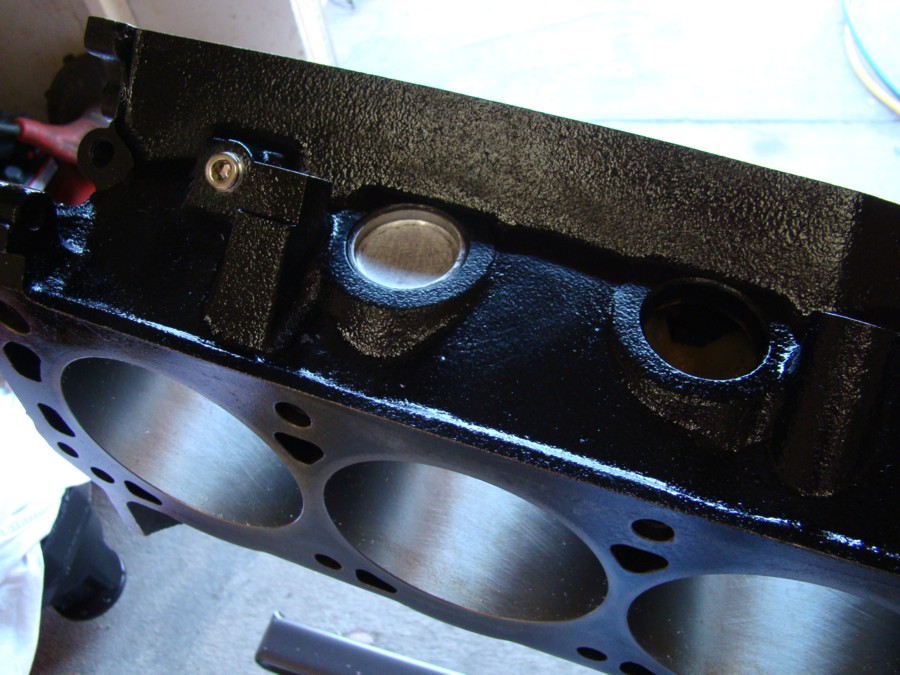
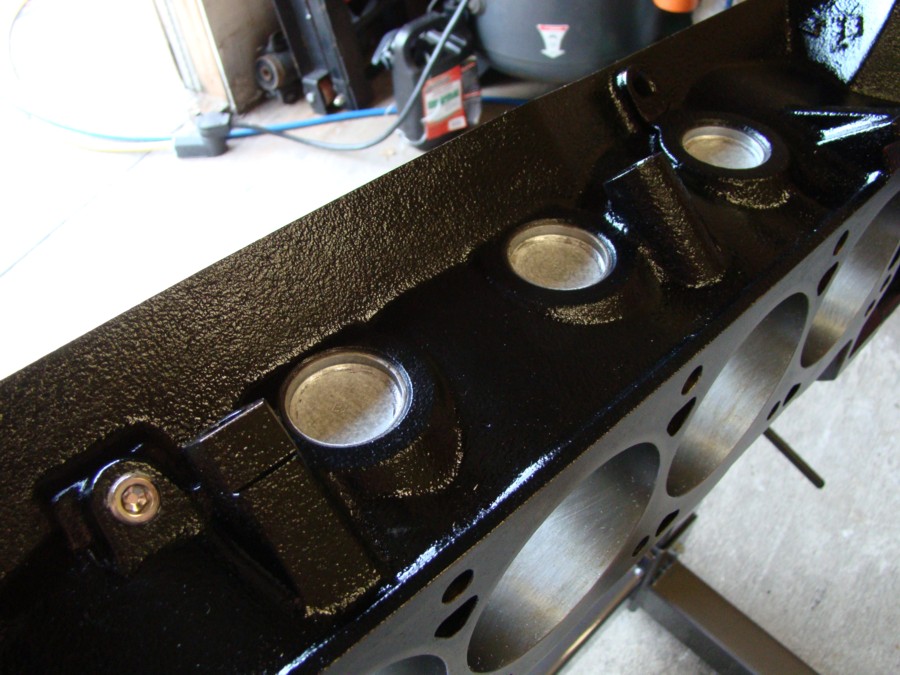
I did some minor clean up on the block today and double checked to make sure I covered all the machined surfaces with a good light coat of oil the other night. It was late when I got it home and rushed through the process a bit quicker than I would have liked. After that I went ahead and painted the exterior black and moved it back inside the house where it will be measured once again just to verify the machine work is accurate.
Lets hope my wife doesn't need anything from the second bedroom! She won't like this! Getting away with this sort of thing is all in the details. A new hand truck was secured so no dirty wheel marks made it on to the carpet. Then a quick reminder note to run the vacuum over the wheel impressions and poof! they are gone! Now the block can go in and out of the house with ease.
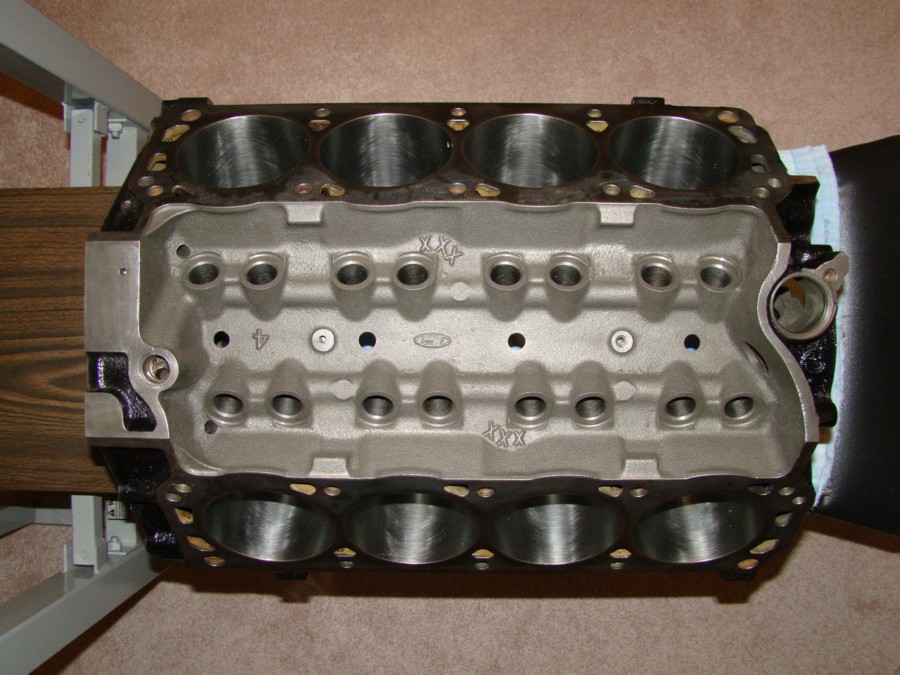
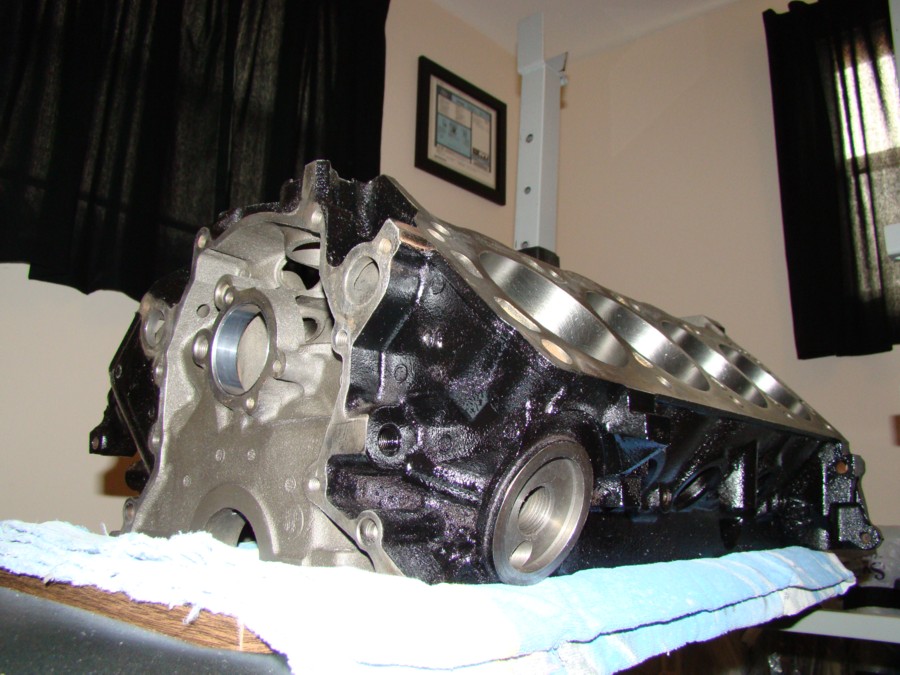
This is one of my personal favorites. It shows my new 306 block along with a photo of my first V8 Ranger leaving work under throttle.
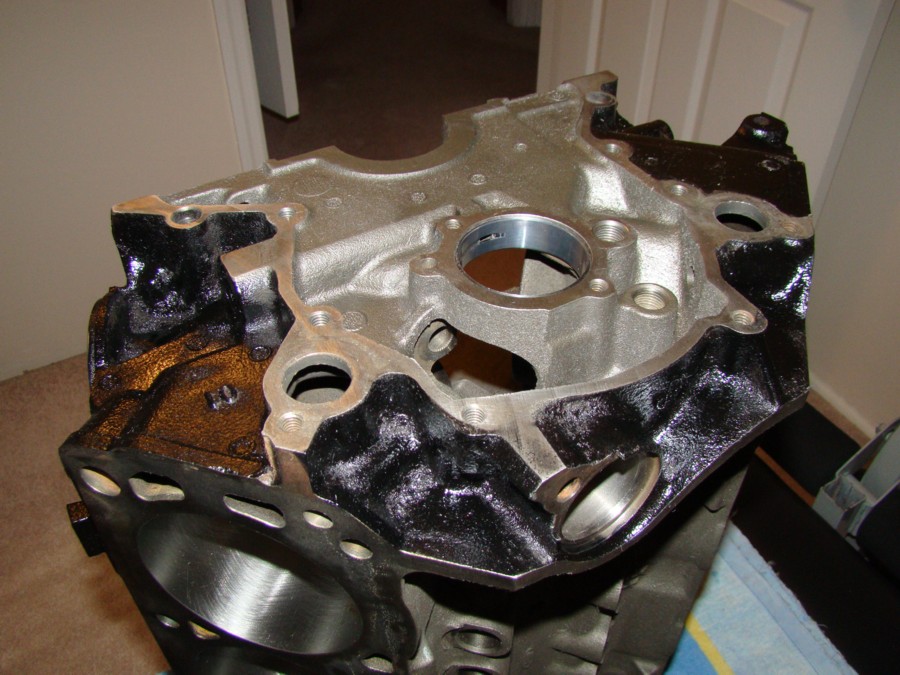
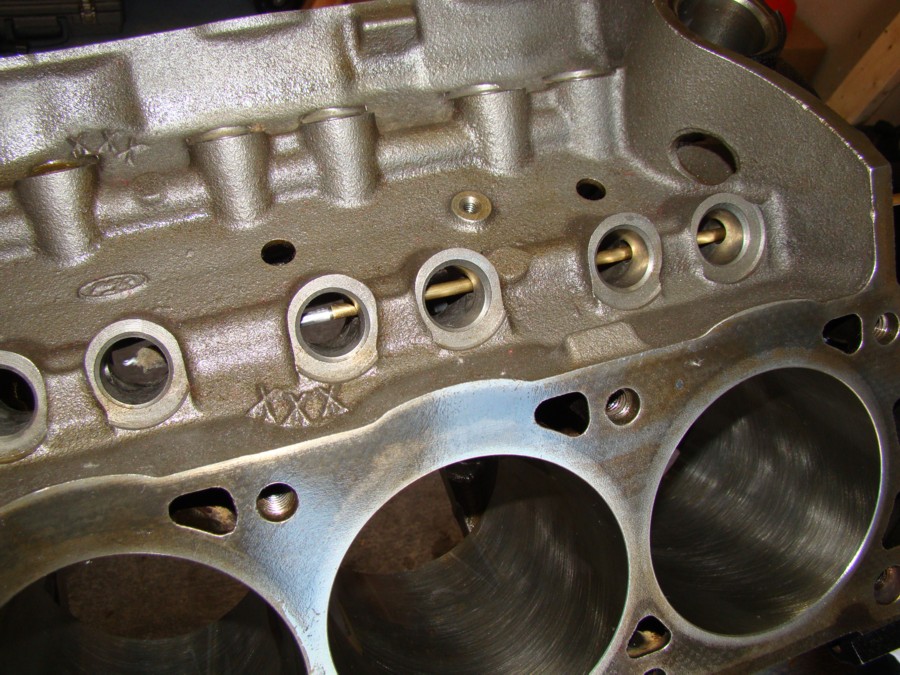
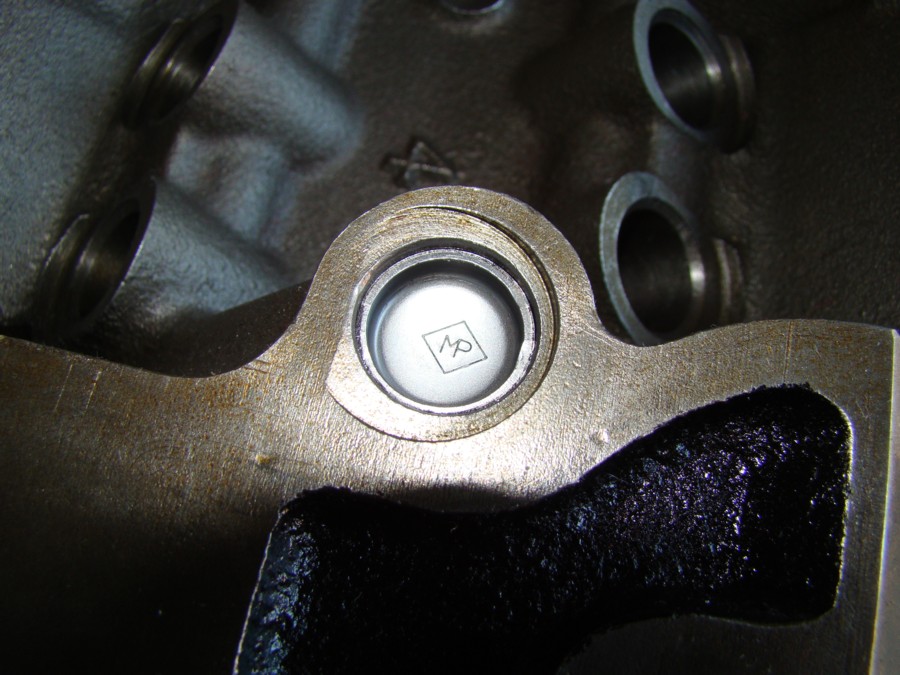
New Clevite cam bearings installed.
Lets hope my wife doesn't need anything from the second bedroom! She won't like this! Getting away with this sort of thing is all in the details. A new hand truck was secured so no dirty wheel marks made it on to the carpet. Then a quick reminder note to run the vacuum over the wheel impressions and poof! they are gone! Now the block can go in and out of the house with ease.
This is one of my personal favorites. It shows my new 306 block along with a photo of my first V8 Ranger leaving work under throttle.
New Clevite cam bearings installed.
#38
02-01-2017, 03:24 PM
Join Date: Jan 2017
Posts: 157
Likes: 0
Received 0 Likes
on
0 Posts
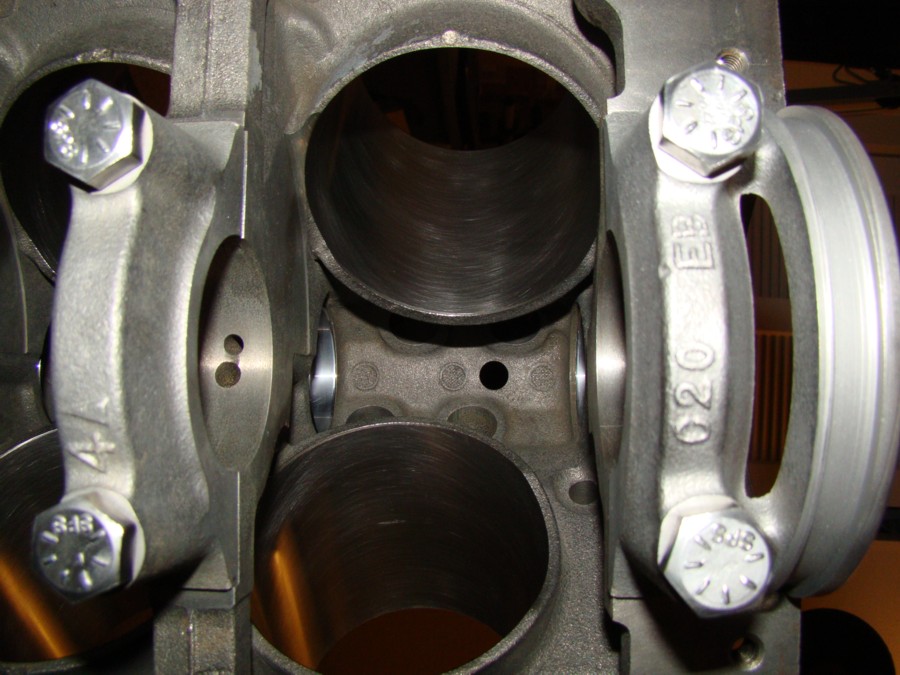
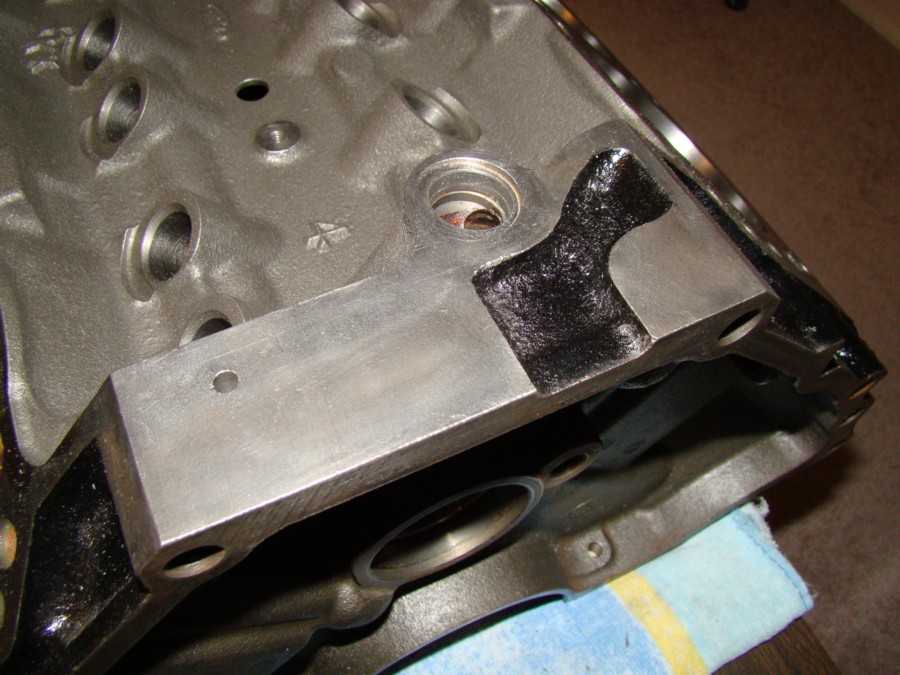
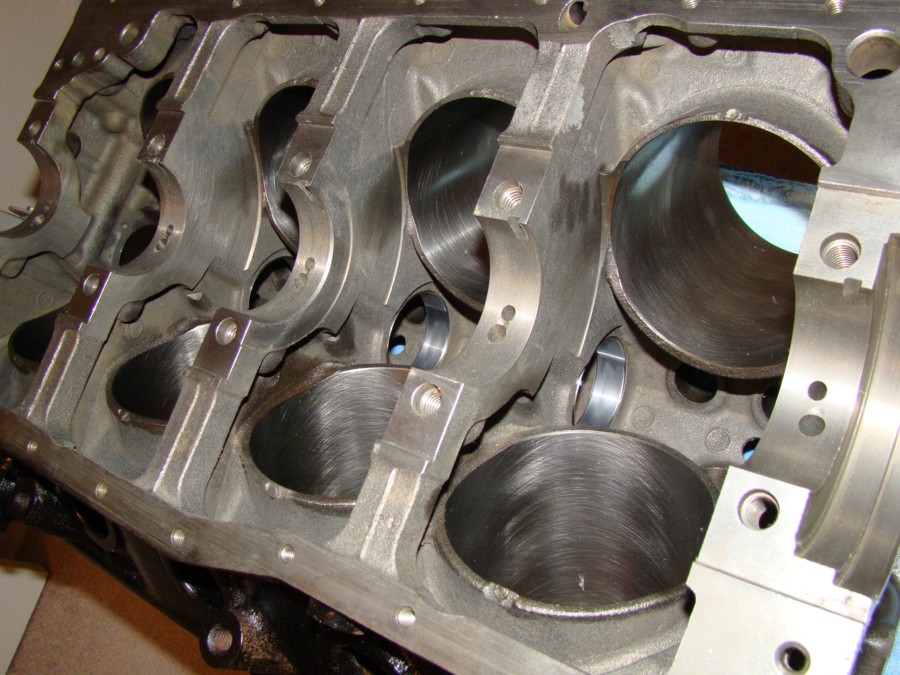
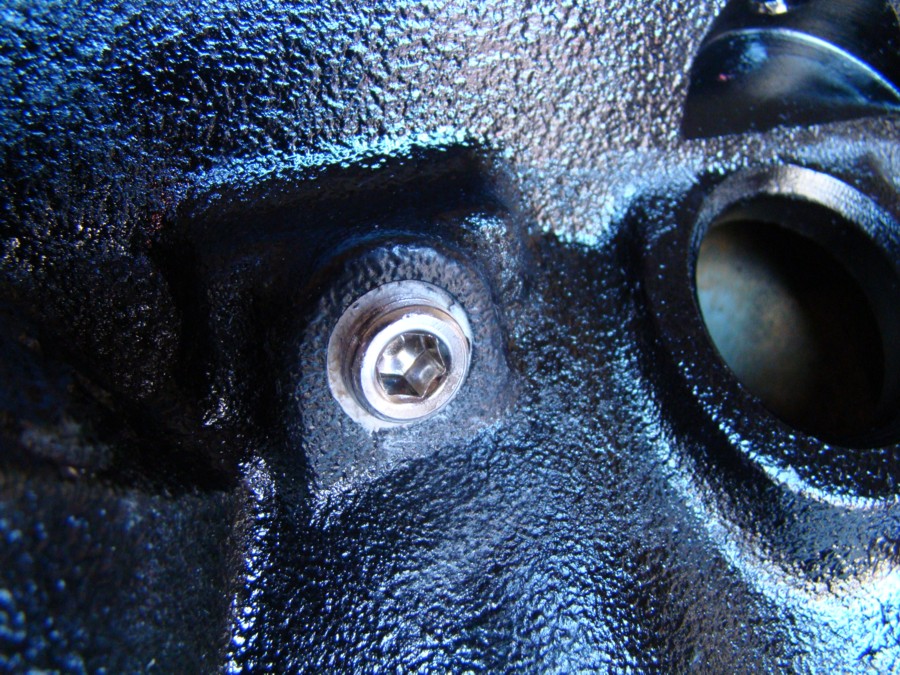
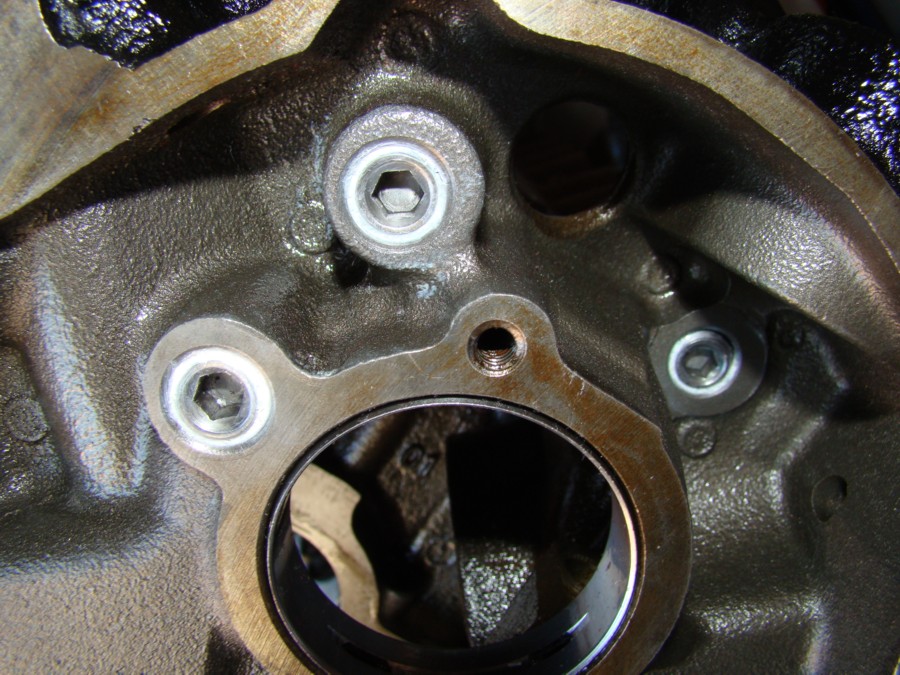
I started today’s task list with cleaning and chasing the main cap threads in the block. First a good shot of brake cleaner down the bolt hole, then a swipe or two with a wire brush, followed by a well oiled main cap fastener threaded deep into the hole.
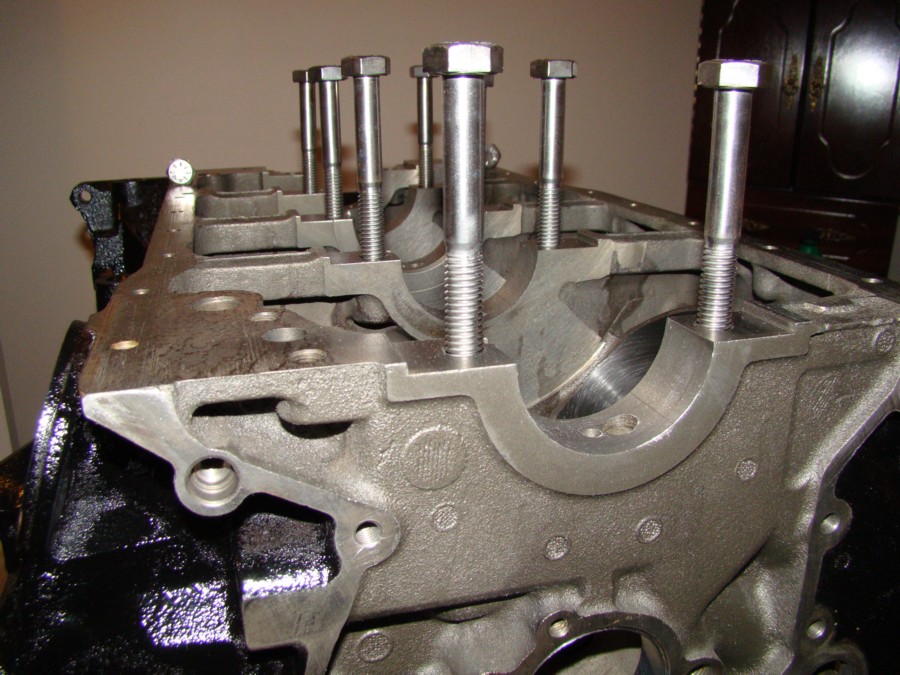
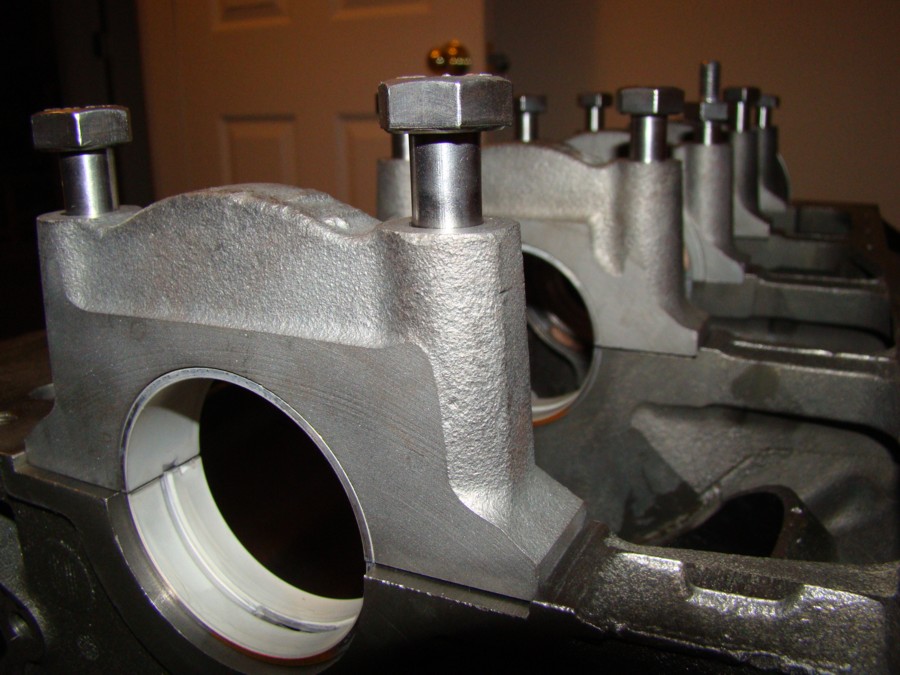
After all of the holes were chased I carefully wiped them down with a clean cloth and then wiped down all of the main cap fasteners. Then I test fit the main bearings into the block and each of the main caps.
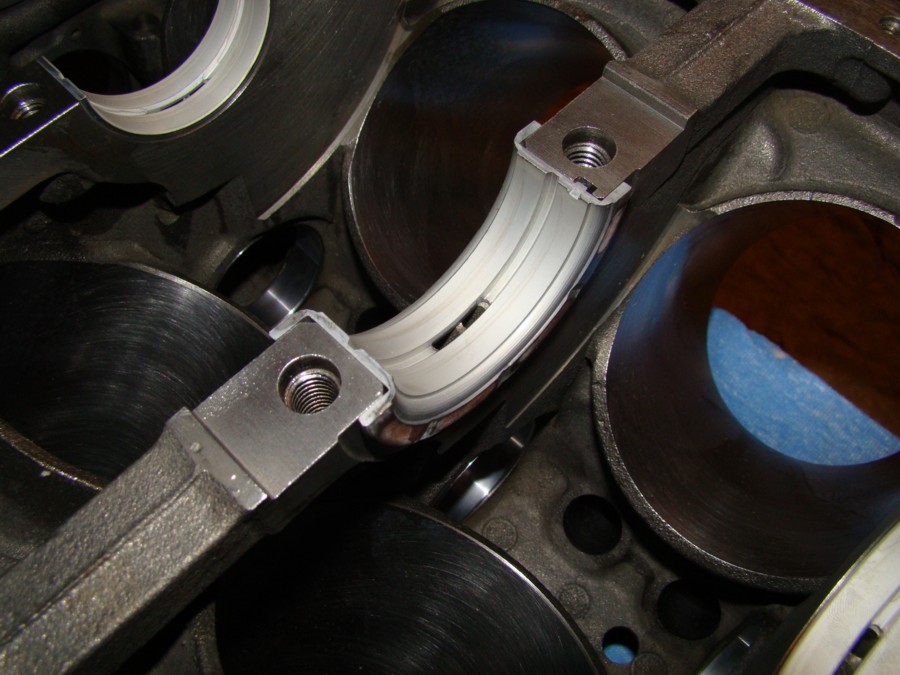
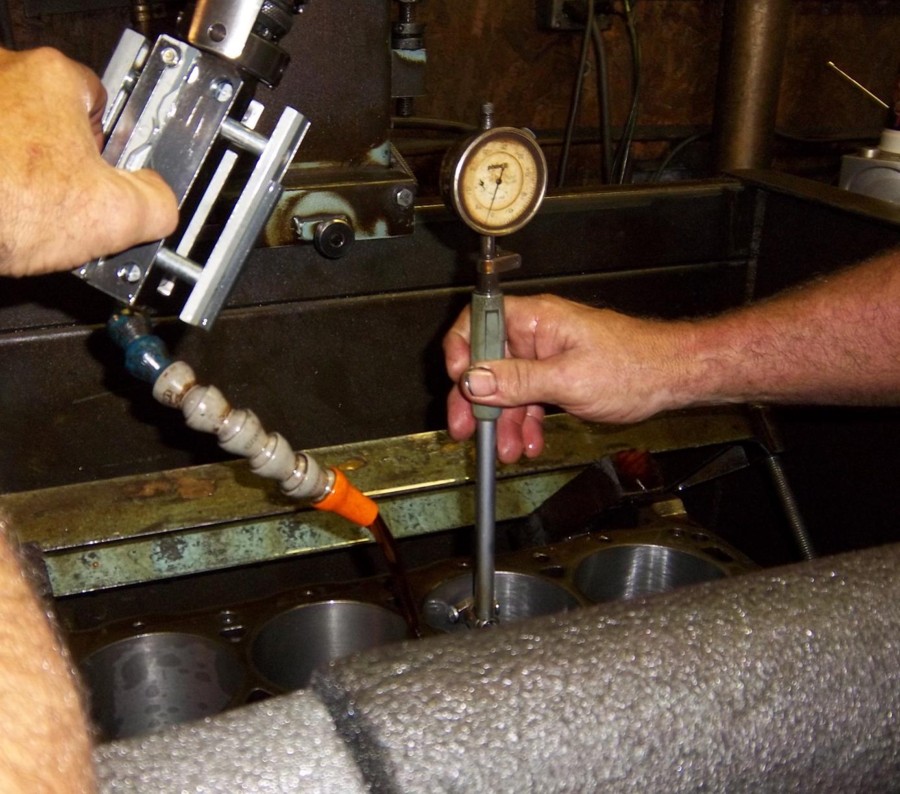
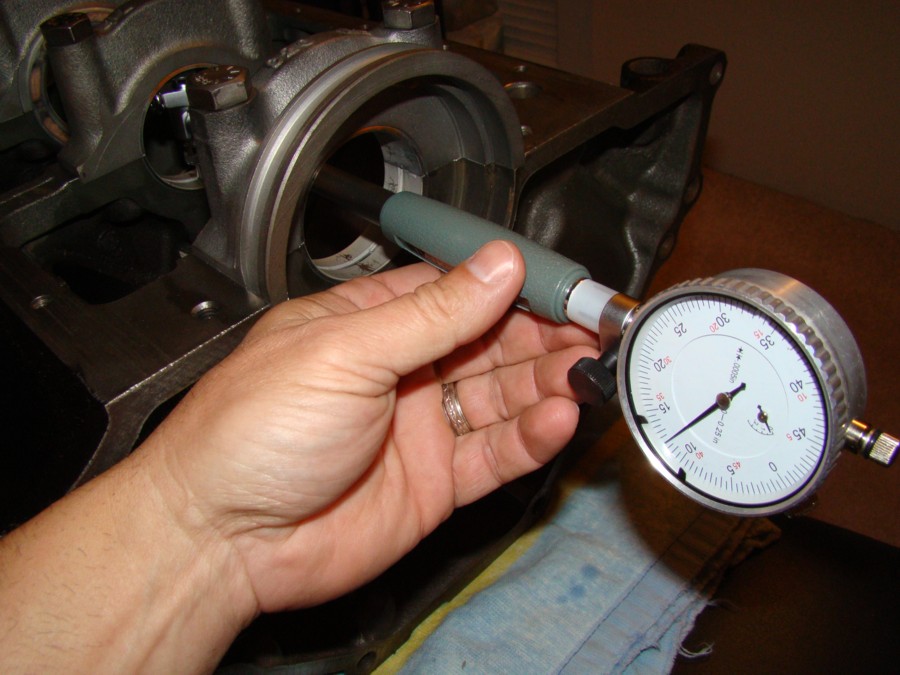
Then I lightly set the main caps and torque them down to 65lbs per square inch and moved on to measuring the main cap bore diameter with the Clevite bearings installed. After the math was done I ended up with .0025 of oil clearance on each of the main bearings at 90 degrees from the parting line.
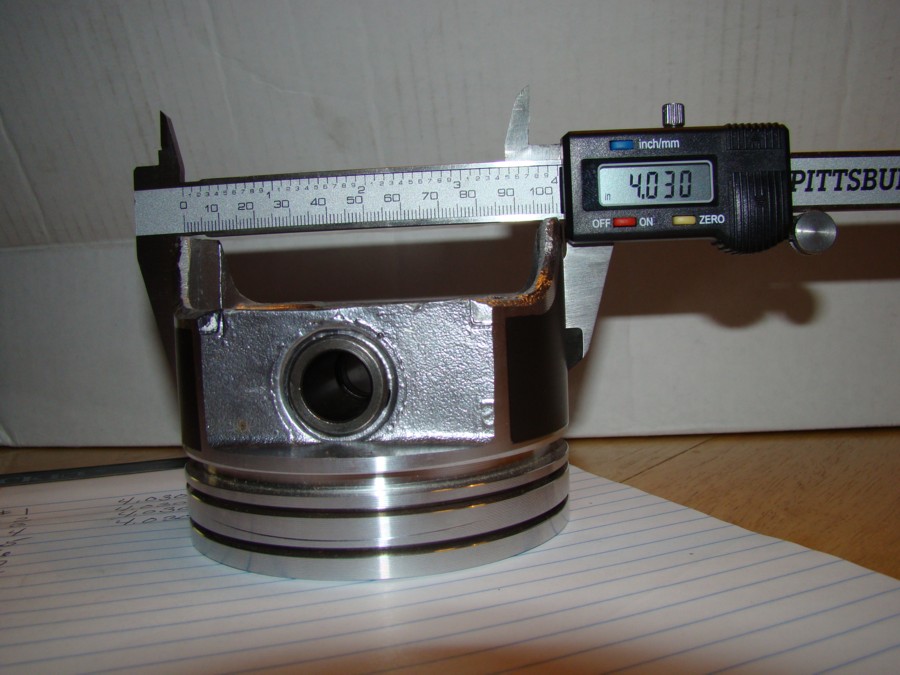
Then I moved on to measuring the piston diameter. I came up with 4.030 across the board on each of the eight Silvolite pistons.
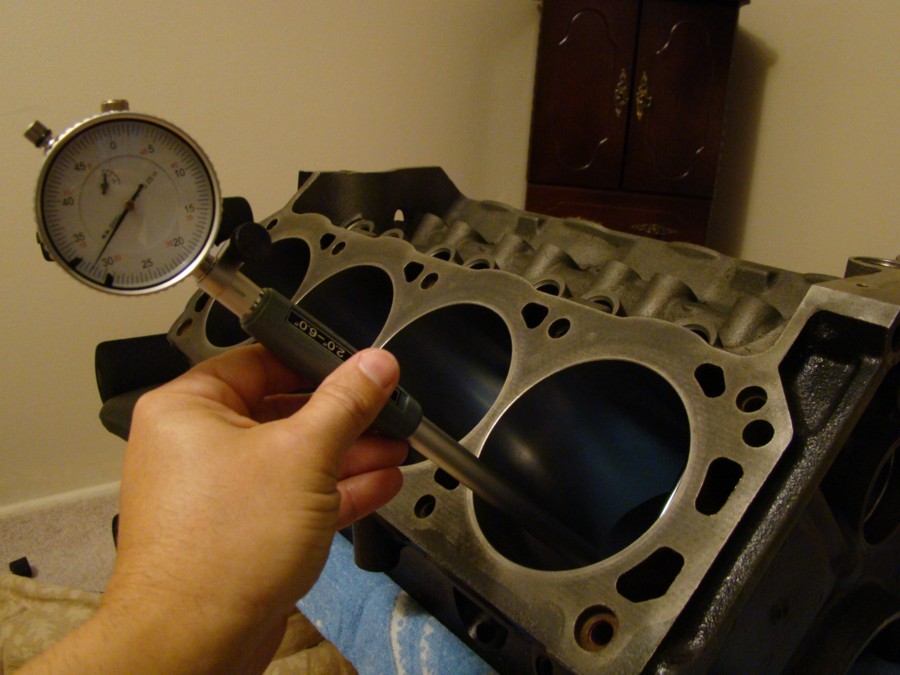
Next step was to check the cylinder bore diameter to verify piston to wall clearance. I zeroed the dial bore gauge and moved forwarded in the same manner as with the main bearing oil clearance.
Now that several of the critical measurements have been established and the machine work has been verified as correct the block is ready to be fully washed and prepared for final assembly. The main caps will be removed and the main bearings will be numbered by location and individually bagged and sealed until they are needed.
After all of the holes were chased I carefully wiped them down with a clean cloth and then wiped down all of the main cap fasteners. Then I test fit the main bearings into the block and each of the main caps.
Then I lightly set the main caps and torque them down to 65lbs per square inch and moved on to measuring the main cap bore diameter with the Clevite bearings installed. After the math was done I ended up with .0025 of oil clearance on each of the main bearings at 90 degrees from the parting line.
Then I moved on to measuring the piston diameter. I came up with 4.030 across the board on each of the eight Silvolite pistons.
Next step was to check the cylinder bore diameter to verify piston to wall clearance. I zeroed the dial bore gauge and moved forwarded in the same manner as with the main bearing oil clearance.
Now that several of the critical measurements have been established and the machine work has been verified as correct the block is ready to be fully washed and prepared for final assembly. The main caps will be removed and the main bearings will be numbered by location and individually bagged and sealed until they are needed.
#39
02-01-2017, 03:26 PM
Join Date: Jan 2017
Posts: 157
Likes: 0
Received 0 Likes
on
0 Posts
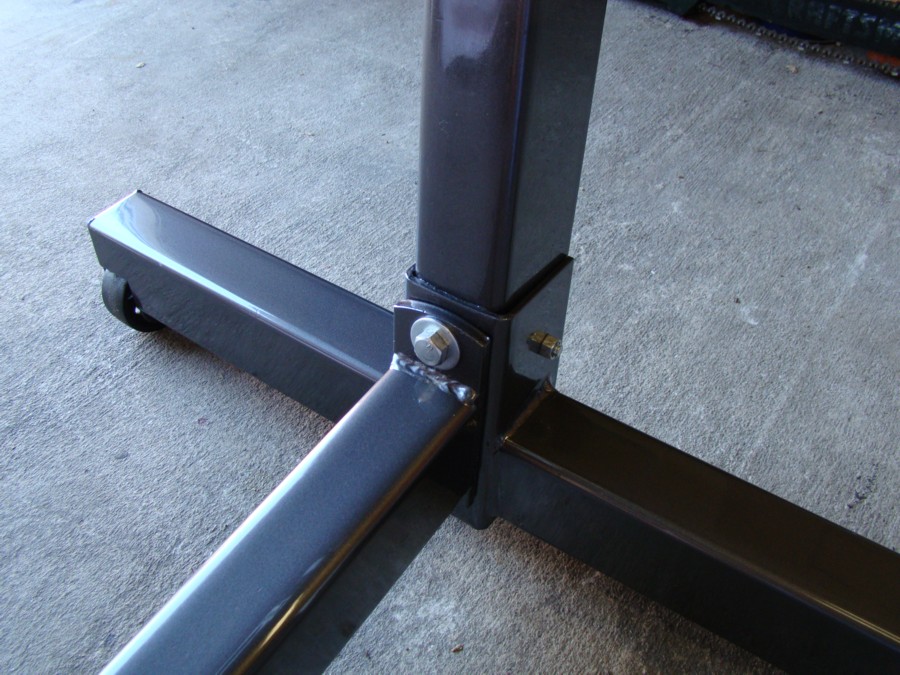
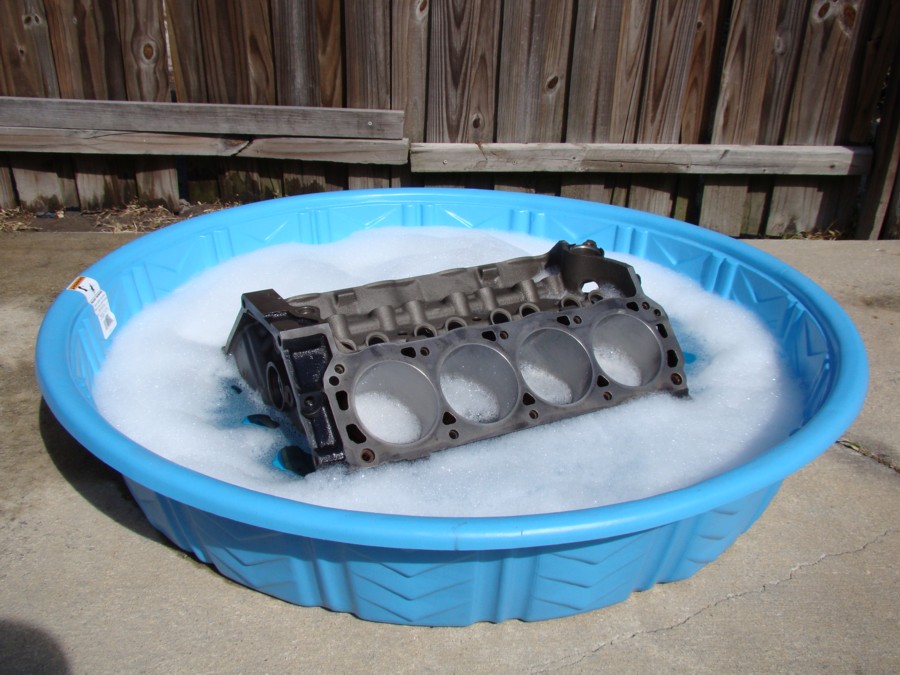
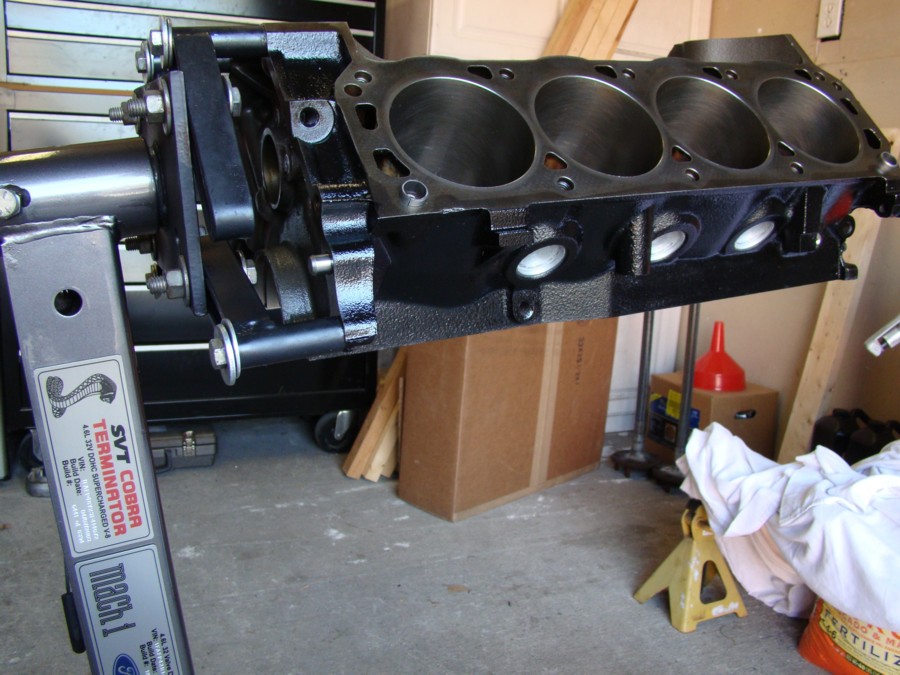
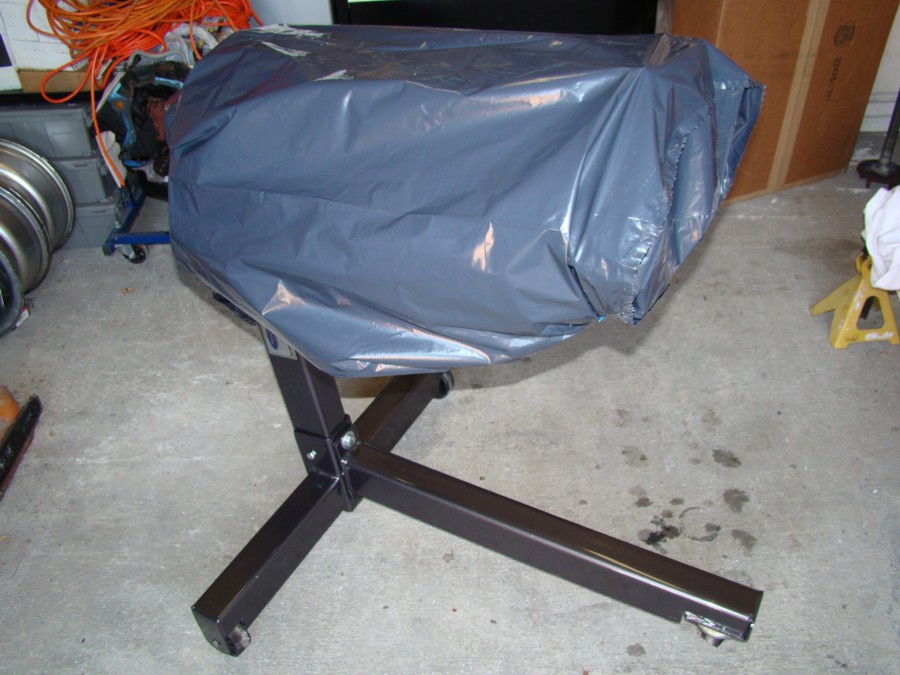
While I was collecting everything I needed to wash the block I decided to paint my 25 year old engine stand. I carefully disassembled it and washed all of the bolts and hardware just as an added sense of security. I wanted to have a clean work station and make sure everything close to the block was as clean as possible. Before I reassembled it I shot two fresh coats of Dark Shadow Grey followed by two coats of clear. After a week of drying time the engine stand has been fully assembled and is ready to go. Speaking of ready, the block is going for a swim!
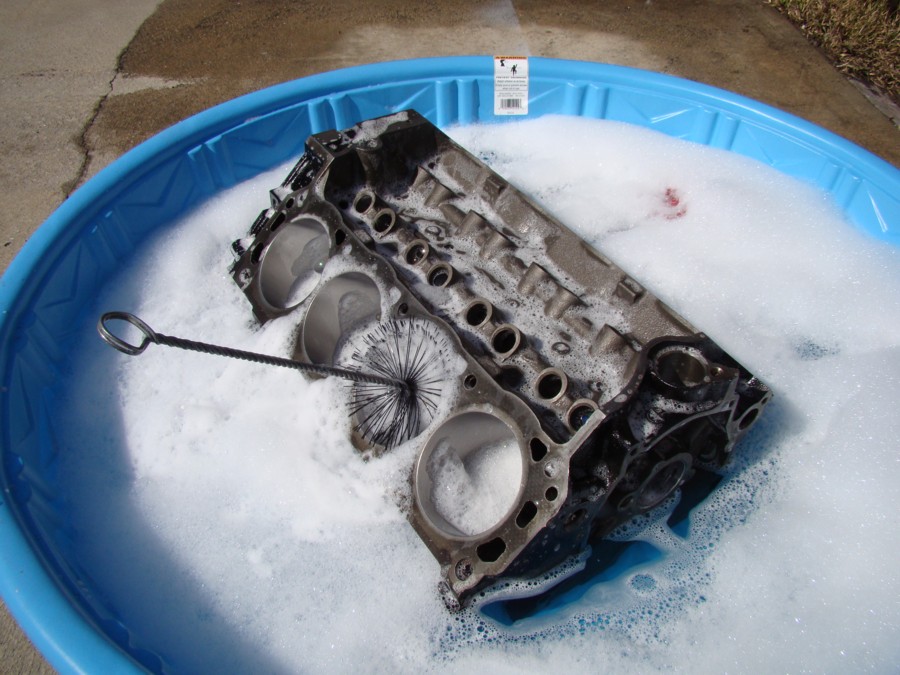
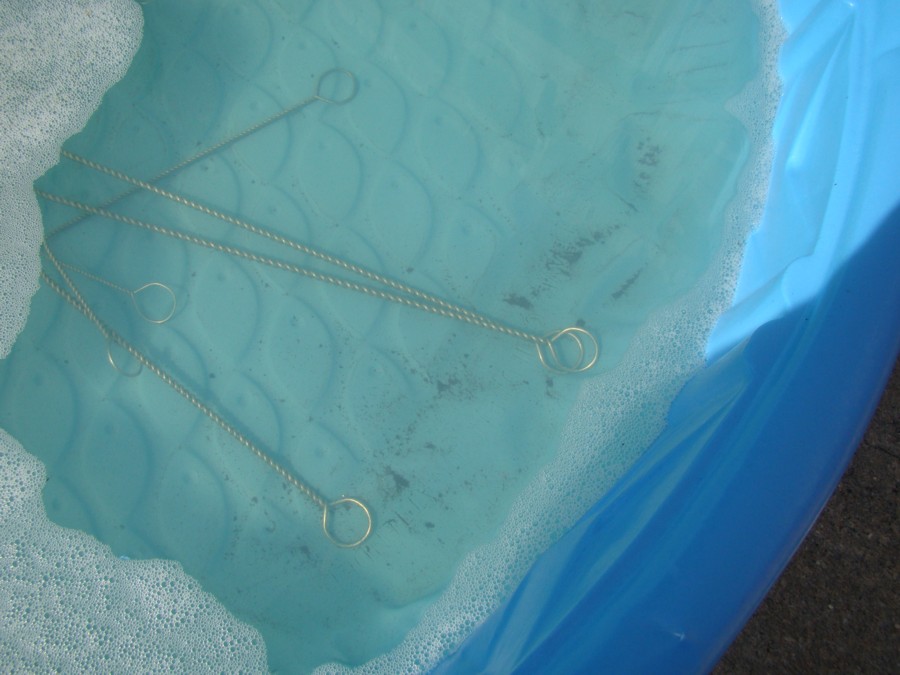
I used an entire bottle of Dawn dish soap and went to town with a couple clean rags, a handful of engine brushes and a regular scrub brush. After going around the block three times, carefully cleaning every hole/passageway and rinsing well between cycles, the block is ready to come out of the water.

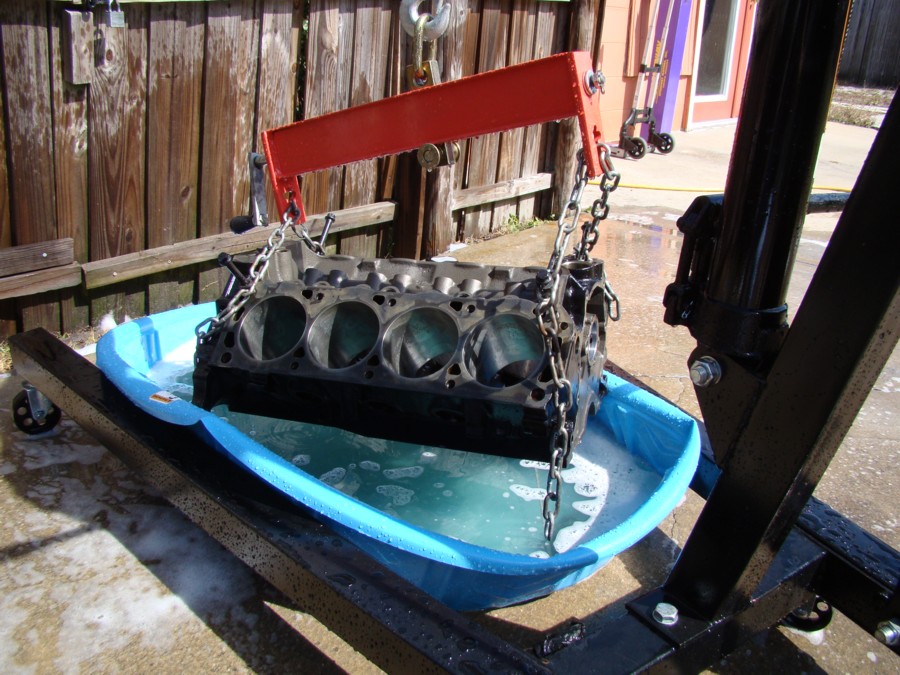
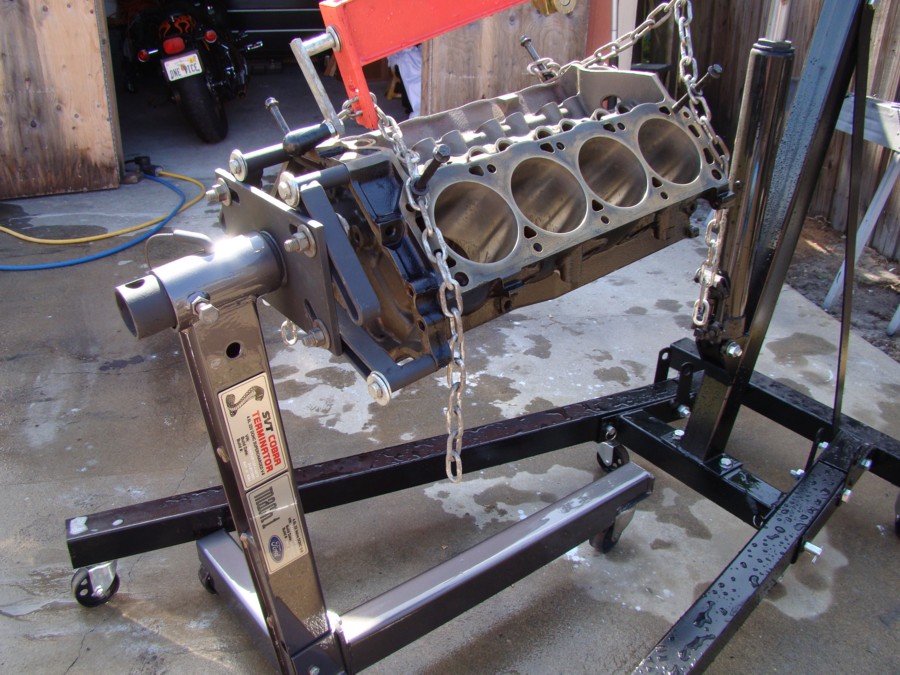
After hanging it on the engine stand I quickly hit it with compressed air and then the spray lubricant to make sure no water sat for any length of time. The lubricant helped dissipate the water and stop any rust from forming. I then wiped the entire block down with several clean rags and hit it again with more compressed air and spray lubricant. Then wiped it down again to make sure everything was dry of water, clean, and well sealed with oil.
Once confident that the main surfaces were wiped clean I went ahead and used a gun cleaning kit to get into all of the oil passages and recesses I wasn’t able to reach by hand. I started with a clean cloth made a few passes and then switched to one wet with oil.
I used an entire bottle of Dawn dish soap and went to town with a couple clean rags, a handful of engine brushes and a regular scrub brush. After going around the block three times, carefully cleaning every hole/passageway and rinsing well between cycles, the block is ready to come out of the water.
After hanging it on the engine stand I quickly hit it with compressed air and then the spray lubricant to make sure no water sat for any length of time. The lubricant helped dissipate the water and stop any rust from forming. I then wiped the entire block down with several clean rags and hit it again with more compressed air and spray lubricant. Then wiped it down again to make sure everything was dry of water, clean, and well sealed with oil.
Once confident that the main surfaces were wiped clean I went ahead and used a gun cleaning kit to get into all of the oil passages and recesses I wasn’t able to reach by hand. I started with a clean cloth made a few passes and then switched to one wet with oil.
#40
02-01-2017, 03:27 PM
Join Date: Jan 2017
Posts: 157
Likes: 0
Received 0 Likes
on
0 Posts
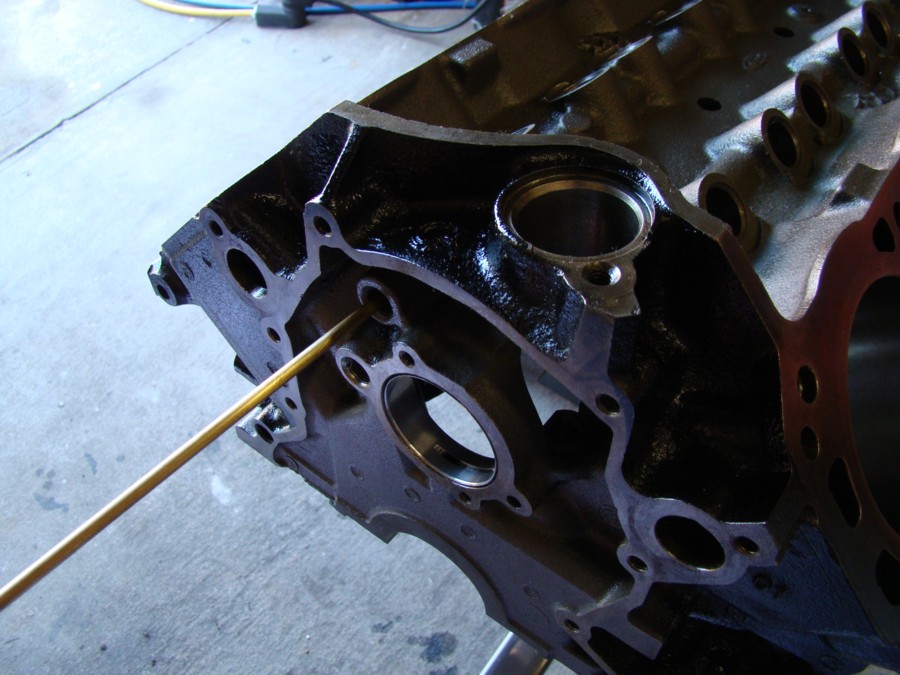
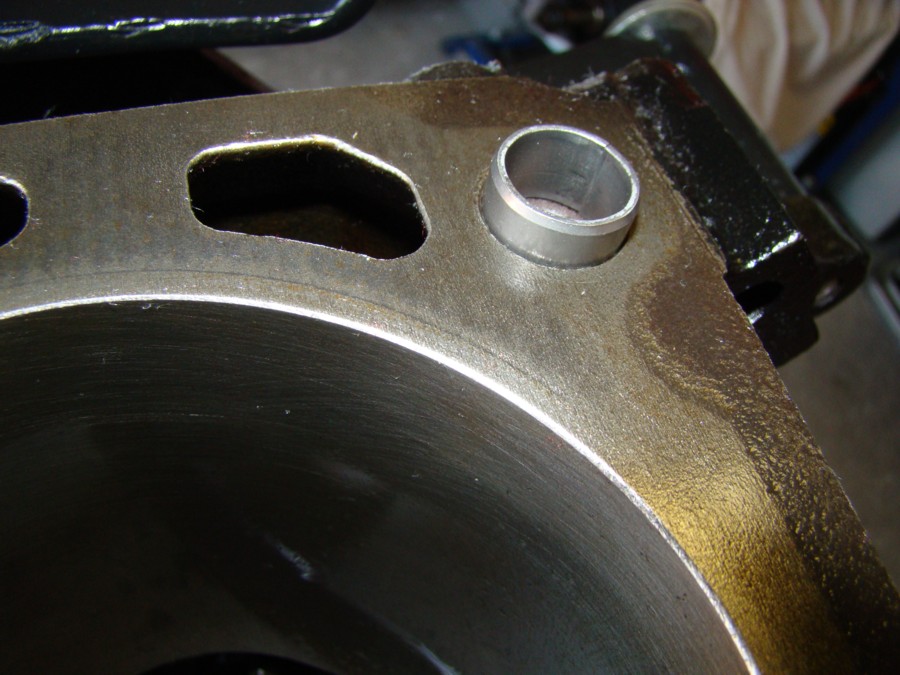
After the cleaning process was complete I moved on to installing the pipe plugs, freeze plugs, and dowels. Then one more pass with a clean rag and the block was ready to be sealed until more work can be done later this week.
Even though the block looked very clean before I started today you can still see machining debris in the bottom of the pool where it had settled a few hours after the block was removed.
Even though the block looked very clean before I started today you can still see machining debris in the bottom of the pool where it had settled a few hours after the block was removed.
#41
02-01-2017, 03:28 PM
Join Date: Jan 2017
Posts: 157
Likes: 0
Received 0 Likes
on
0 Posts
#42
02-01-2017, 03:28 PM
Join Date: Jan 2017
Posts: 157
Likes: 0
Received 0 Likes
on
0 Posts
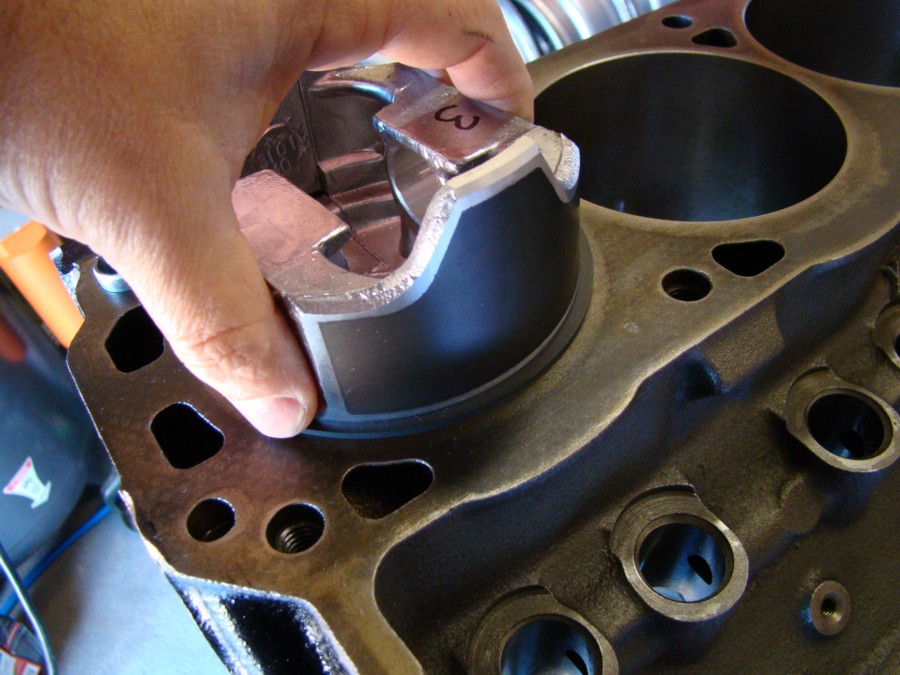
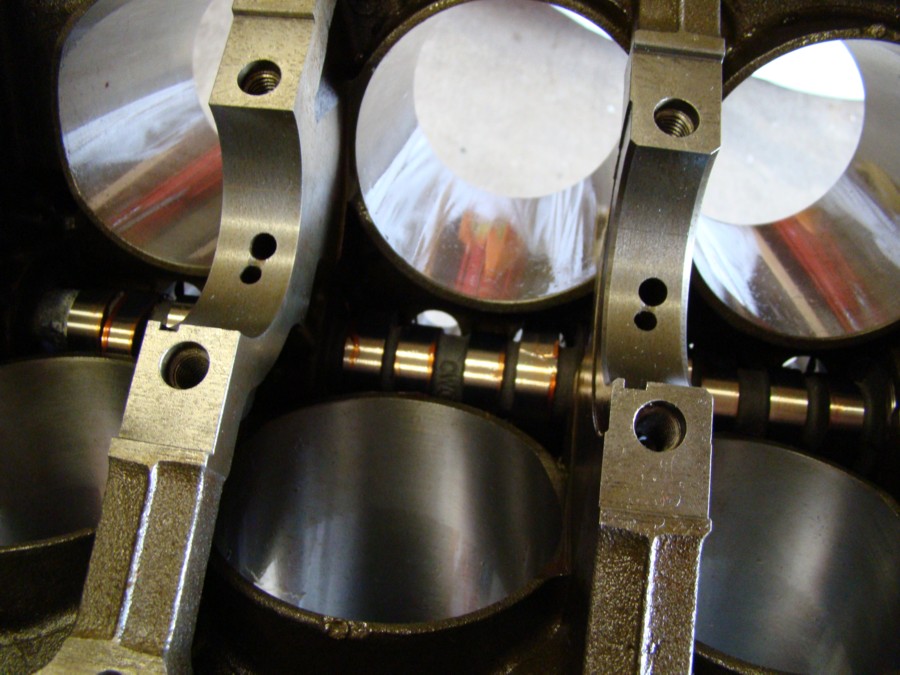
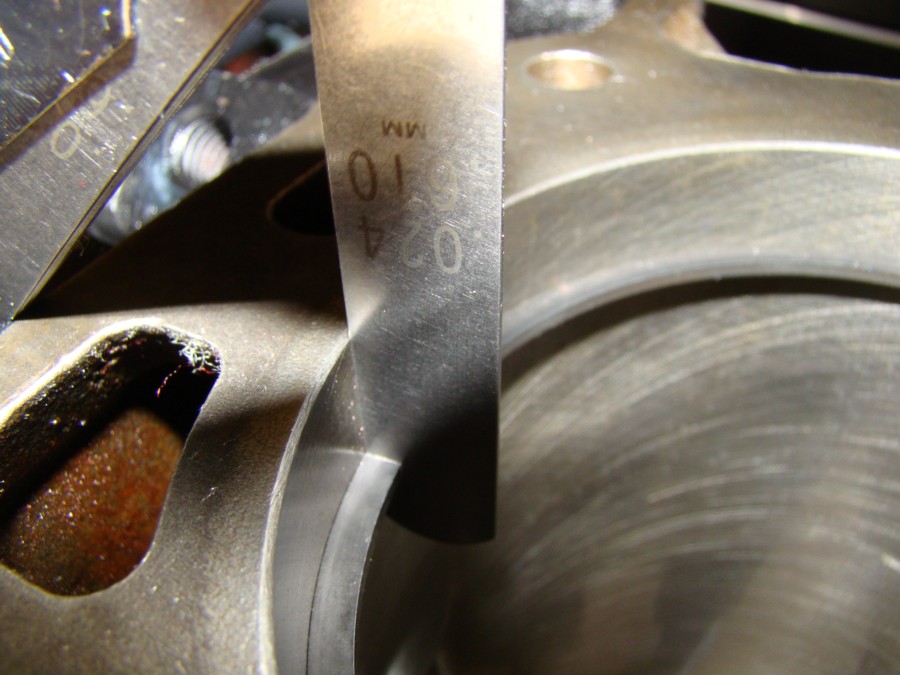
We had some cold weather today but I still managed to get some engine work done this morning. I cleaned the cam retaining plate and fasteners then test fit it in preparation for installing the camshaft next weekend. Then I wiped down the cylinder bores and test fit the top and second ring (separately) for each cylinder. It looks like each of these rings will need to be file fit. I am going with .018 gap on the second ring and .024 gap on the top ring. I moved the piston rings and tools into the barn yesterday so everything would be measured at the same working temperature today. I am going to wait and double check my gap measurements when it warms up over the next few days before file fitting any of the rings. Measure twice, cut once!!!!
First I placed the ring vertical into the bore and carefully pressed it down in while lightly compressing the sides.
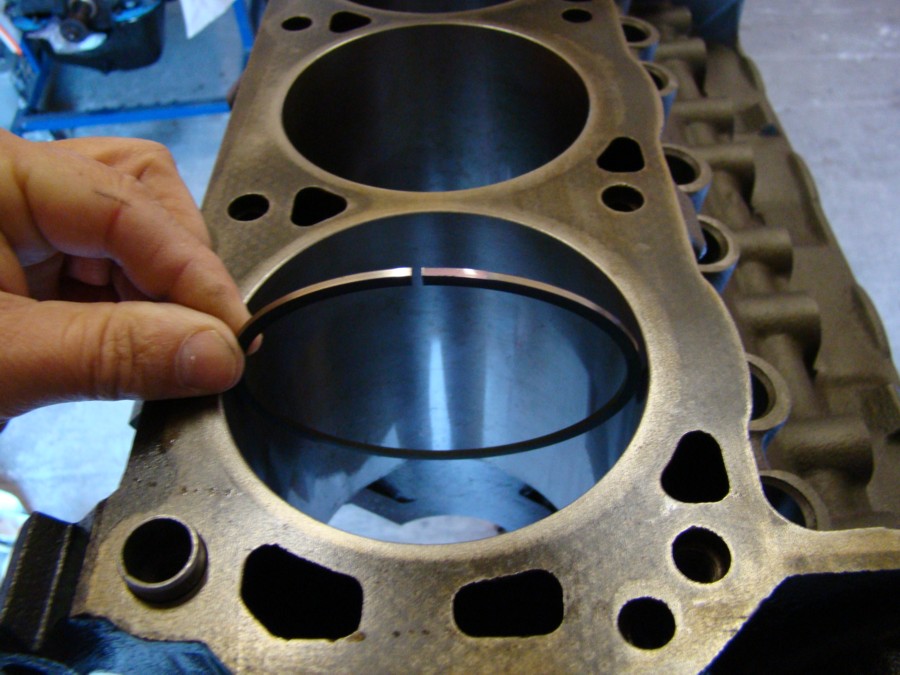
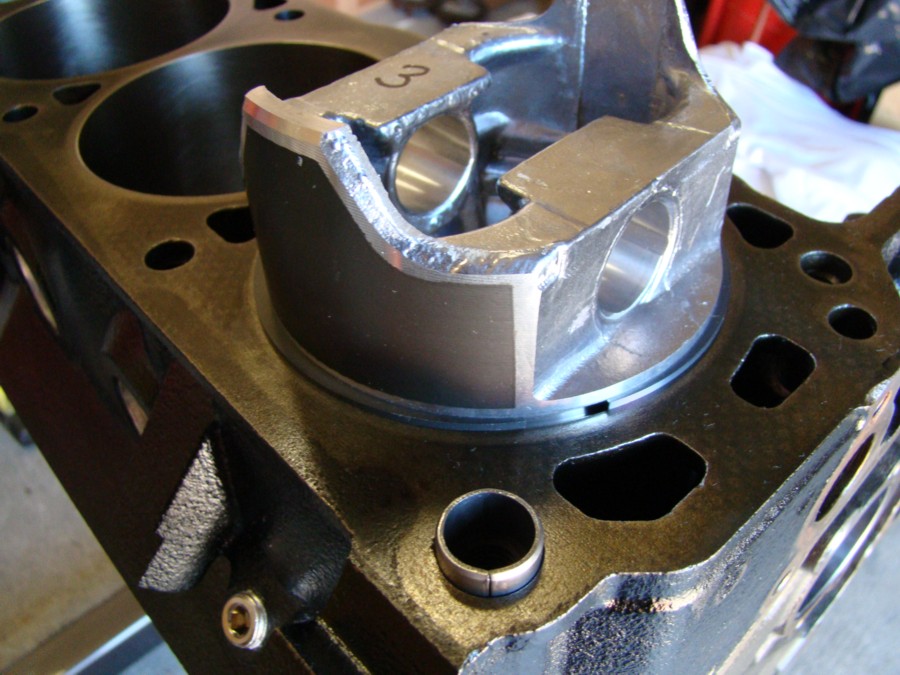
Then I pivoted the ring so it sat horizontal in the bore.
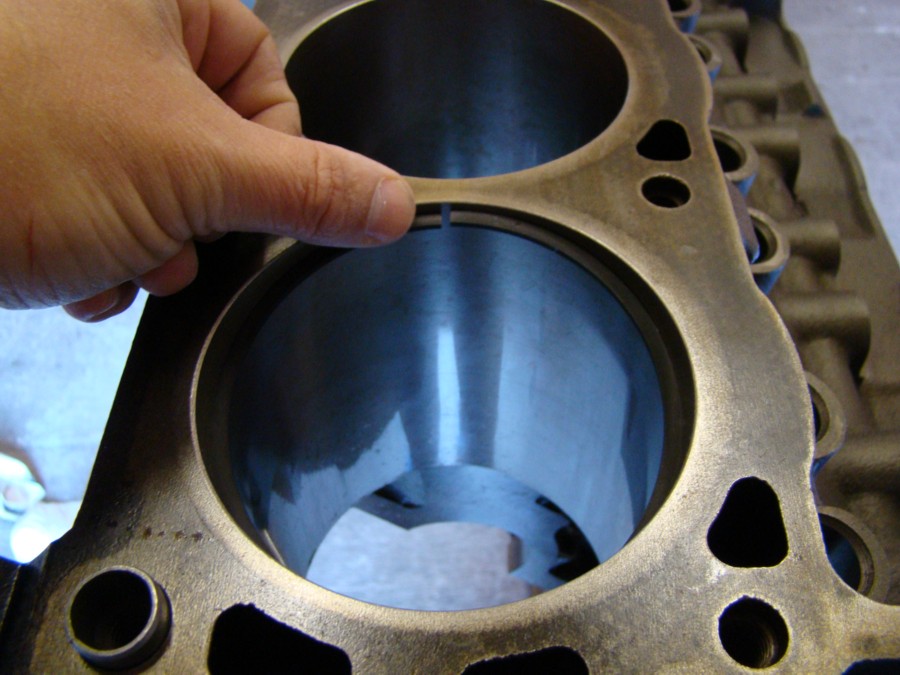
Then carefully squared it in the bore by using a piston and ring as a squaring tool.
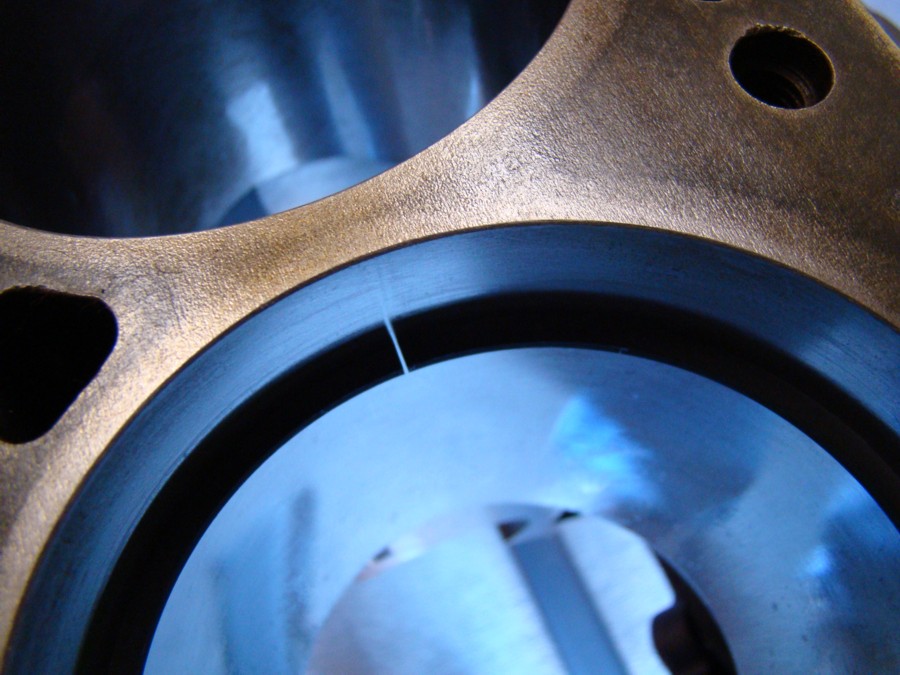
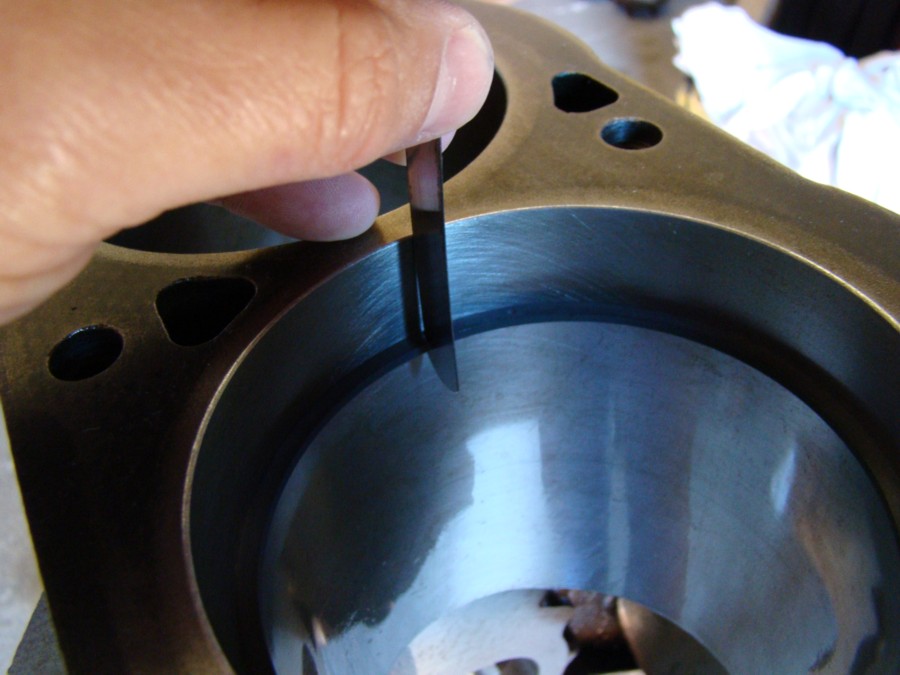
Then I measured the ring gap with a feeler gauge on each of the top and second rings. The average gap was between .016 and .018 on the majority of the piston rings.
First I placed the ring vertical into the bore and carefully pressed it down in while lightly compressing the sides.
Then I pivoted the ring so it sat horizontal in the bore.
Then carefully squared it in the bore by using a piston and ring as a squaring tool.
Then I measured the ring gap with a feeler gauge on each of the top and second rings. The average gap was between .016 and .018 on the majority of the piston rings.
#43
02-01-2017, 03:29 PM
Join Date: Jan 2017
Posts: 157
Likes: 0
Received 0 Likes
on
0 Posts
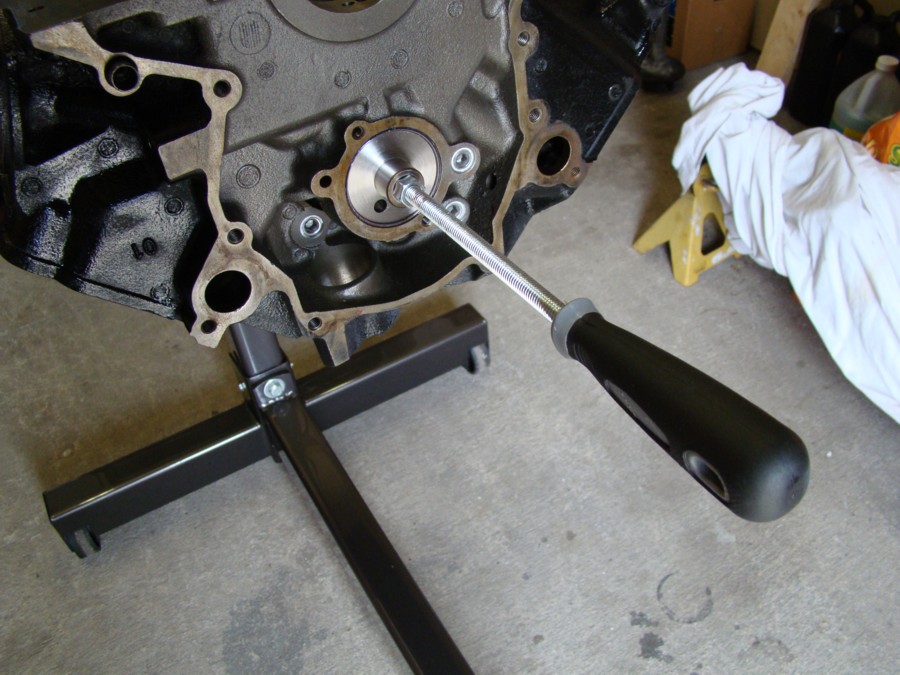
Even with a busy work schedule this weekend I did get the camshaft installed. I cut a piece of threaded rod, drilled out a plastic file handle, and then screwed the two together. The new tool made it easy to slip the cam into place without any damage to the bearings. Installing the cam before the rotating assembly made it easy to get an extra pair of hands in the mix to guide the cam through each of the bores.
#44
02-01-2017, 03:30 PM
Join Date: Jan 2017
Posts: 157
Likes: 0
Received 0 Likes
on
0 Posts
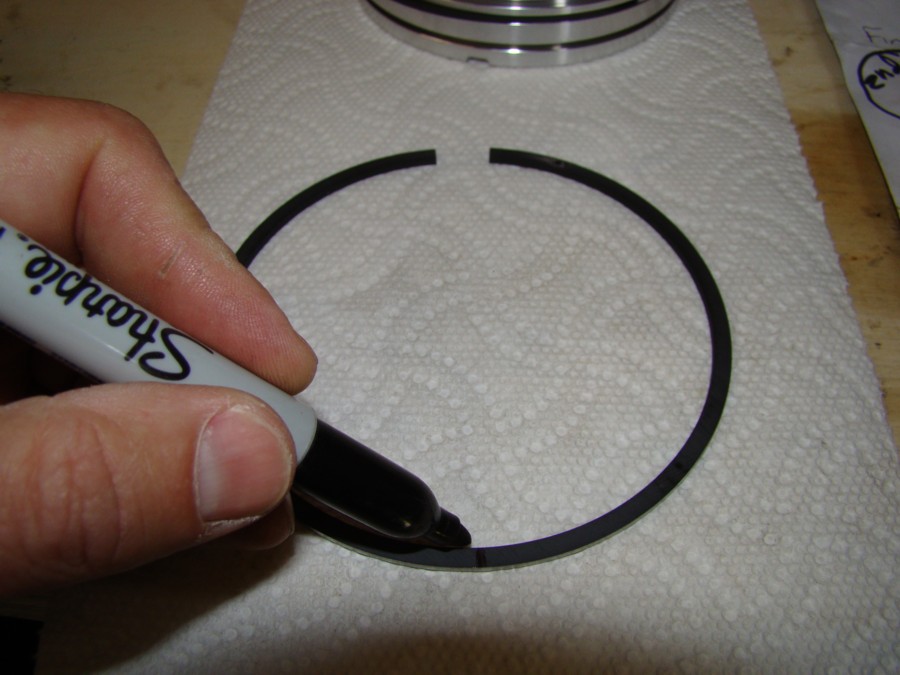
A week or so ago I determined that the piston ring gap on each of the top and second rings would need to be file fit to spec. Today I had a few hours to tackle this project so I started by clearly marking the top side of each ring to avoid confusion during the process.
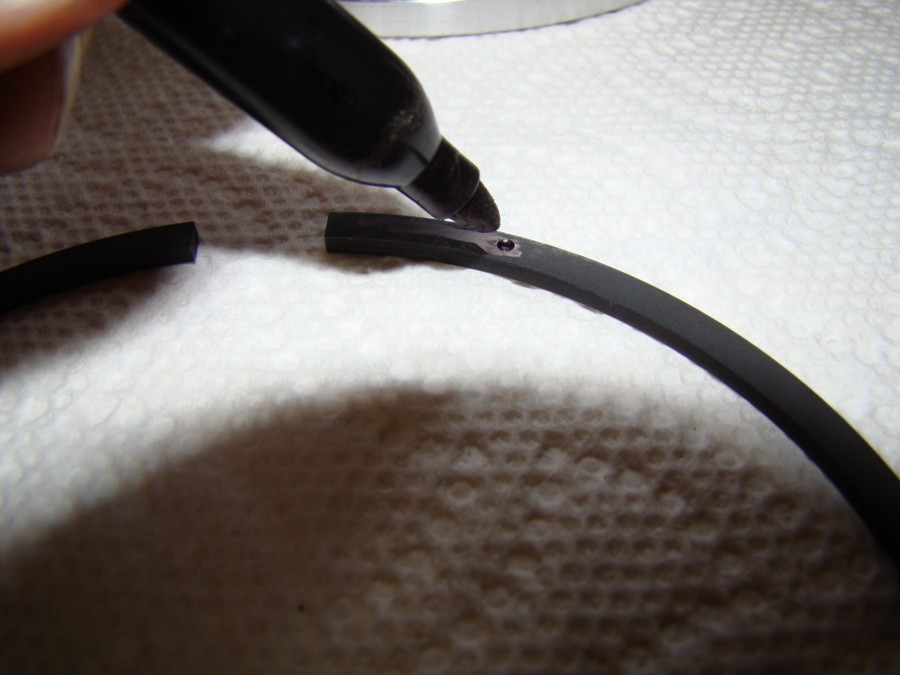
I also marked the six o’clock position to use as a reference point to help keep the ring square as the gap is being cut.
I set up two pieces of aluminum angle in a vise with a file placed in the center of the two. The aluminum pieces act as a guide to helped keep the ring squared horizontally as the gap is being cut. I then added some painters tape to the aluminum so the bottom side of the ring would not be scratched. Then I measured the inside diameter of the ring and marked the file so I didn’t go too far on each pass and bang the back side of the ring. Because of the Moly coating each pass should be from the outside of the ring towards the inside. By using this method the Moly coating shouldn’t chip as the ring is pushed along the edge of the file. I was very careful to only file one side of the gap, to keep the ring squared on each pass, and double check the gap alignment by holding it up to the light and compressing the ring so the gap closed on itself. By doing so the file side could be compared to the stock side to make sure the gap was consistent from the inside to the outside. If any light can be seen either on the inside or the outside of the gap the next few passes can be adjusted by moving the mark at the six o’clock position right or left as needed.
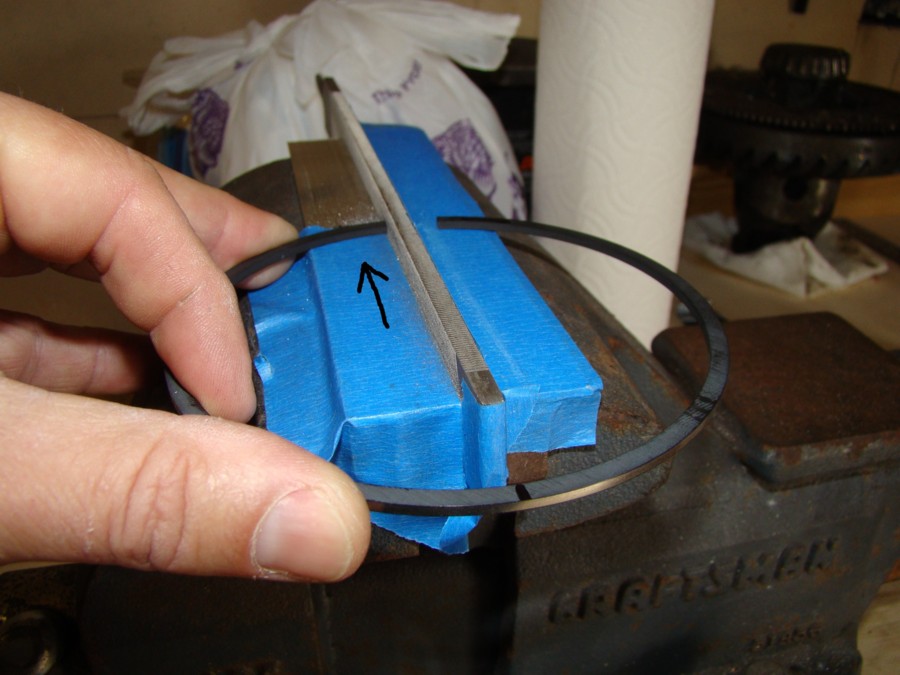
Each gap was carefully checked and rechecked as it was brought into spec until the final number was perfect. Then all four sides of the corrected end on each ring were lightly dressed with 400 grit paper to clean any burrs.
I also marked the six o’clock position to use as a reference point to help keep the ring square as the gap is being cut.
I set up two pieces of aluminum angle in a vise with a file placed in the center of the two. The aluminum pieces act as a guide to helped keep the ring squared horizontally as the gap is being cut. I then added some painters tape to the aluminum so the bottom side of the ring would not be scratched. Then I measured the inside diameter of the ring and marked the file so I didn’t go too far on each pass and bang the back side of the ring. Because of the Moly coating each pass should be from the outside of the ring towards the inside. By using this method the Moly coating shouldn’t chip as the ring is pushed along the edge of the file. I was very careful to only file one side of the gap, to keep the ring squared on each pass, and double check the gap alignment by holding it up to the light and compressing the ring so the gap closed on itself. By doing so the file side could be compared to the stock side to make sure the gap was consistent from the inside to the outside. If any light can be seen either on the inside or the outside of the gap the next few passes can be adjusted by moving the mark at the six o’clock position right or left as needed.
Each gap was carefully checked and rechecked as it was brought into spec until the final number was perfect. Then all four sides of the corrected end on each ring were lightly dressed with 400 grit paper to clean any burrs.
#45
02-02-2017, 03:43 PM
Join Date: Jan 2017
Posts: 157
Likes: 0
Received 0 Likes
on
0 Posts
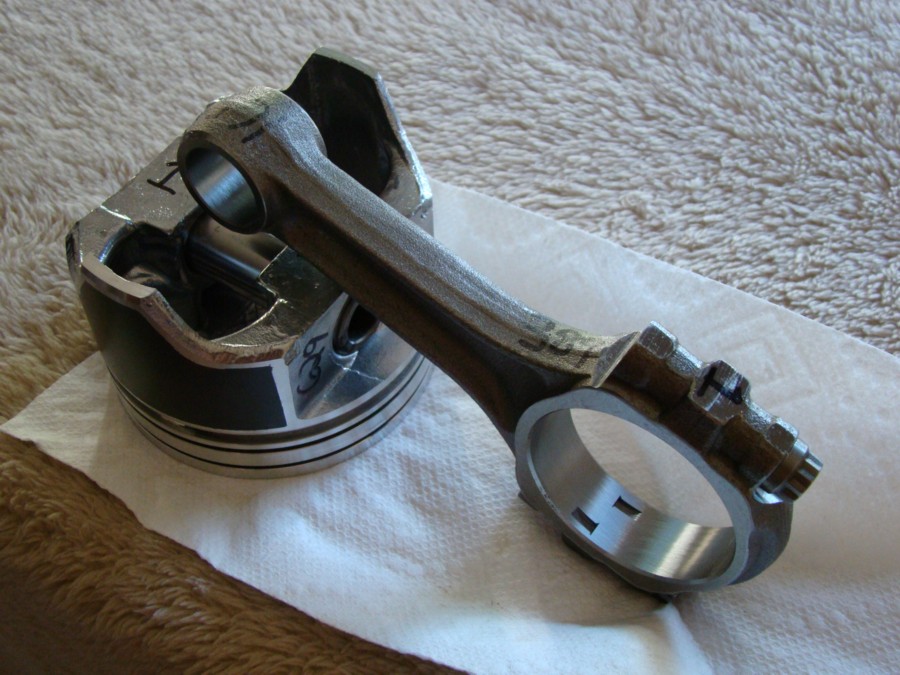
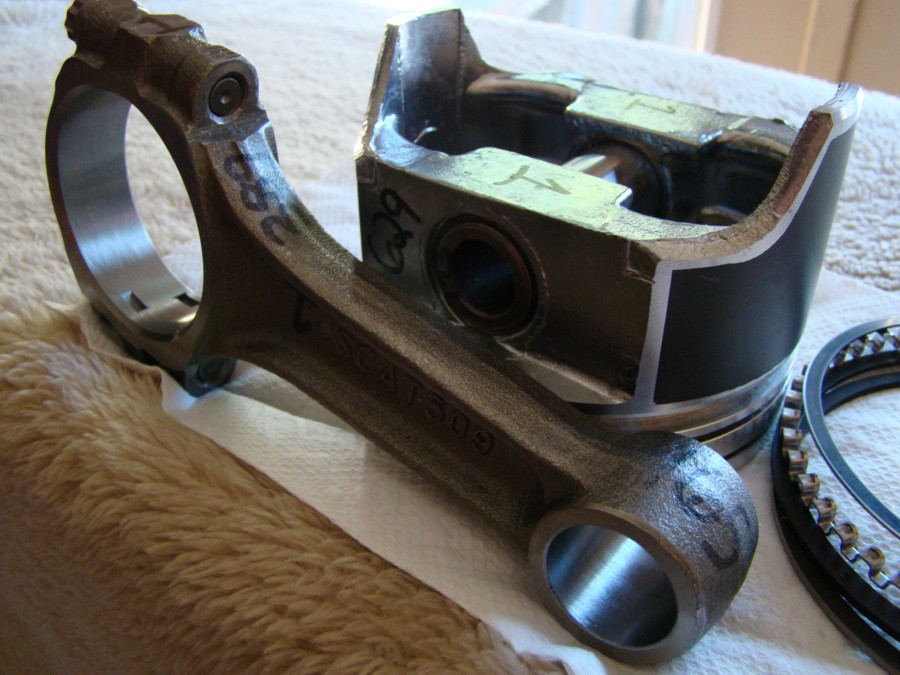
The rotating assembly is back from being balanced. Not much new there except I did decide to upgrade to a set of Scat Forged I beam connecting rods in place of the stock Ford connecting rods I originally planned on using.
The pistons were matched to 629.5 grams, +/- .5 grams.
The wrist pins matched out at 143 grams a piece.
The connecting rods were matched to 389.5 grams (rotating end) and 164.5 grams (reciprocating end), +/- .5 grams.
The piston rings came in at 56 grams per set.
The bearing shells came in at 37 grams per rod.
With oil the Bobweight total came out to 1851 grams.
Today I double checked the condition of all parts and took another set of measurements before packaging the pistons, pins and rods up to go back to the machine shop on Monday. The connecting rods will be heated and the wrist pins pushed through the piston and rod completing the assembly process.

