
1979 F250 4x4 Build
#1
 01-04-2017, 03:37 PM


1979 F250 4x4 Build
Finally getting around to making my newest build thread.
My older build thread was a 1978 F150 2WD longbed regular cab - started the build in 2010. The first truck had a lot of things wrong with it, but it was a really good learning experience the entire time I owned it. In the end, it wasn't I wanted. I wanted a 4x4 truck, so that's what I bought in 2016.
Here's the 2WD F150 build that I started: https://www.ford-trucks.com/forums/1...ld-thread.html
It's not necessary to go through the first build thread, but it's where I collected a lot of my parts and where my inspiration to have a nice dentside started.
So this is my new build thread. The truck I want to put the most effort/time into because it's almost exactly what I want. A 1979 F250 4x4 regular cab longbed.
Here's the specs on the truck:
1979 F250
4x4
400 motor
C6 transmission
NP205 transfer case
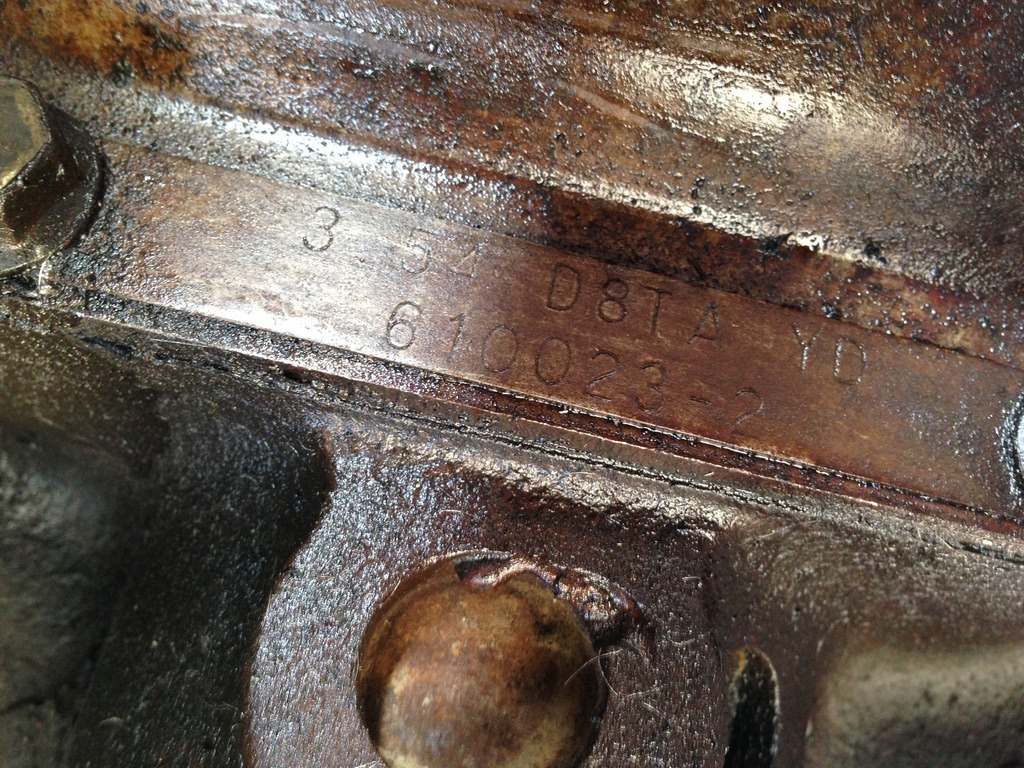
Dana 60 rear differential - 3.54 D8TA-YD BOM: 610023-2
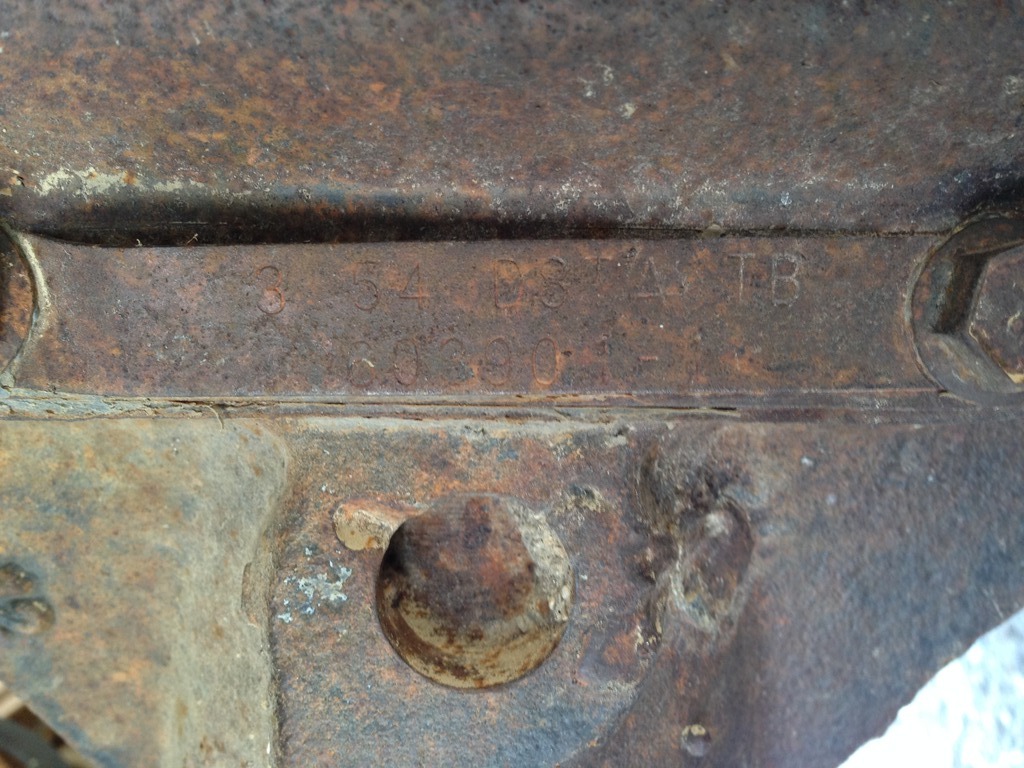
Dana 60 Sno-Fighter front differential - 3.54 D8TA-TB BOM: 603901-1
Unfortunately, it's not a sno-fighter truck. But it does have a very nice sno-fighter Dana 60 High Pinion front differential
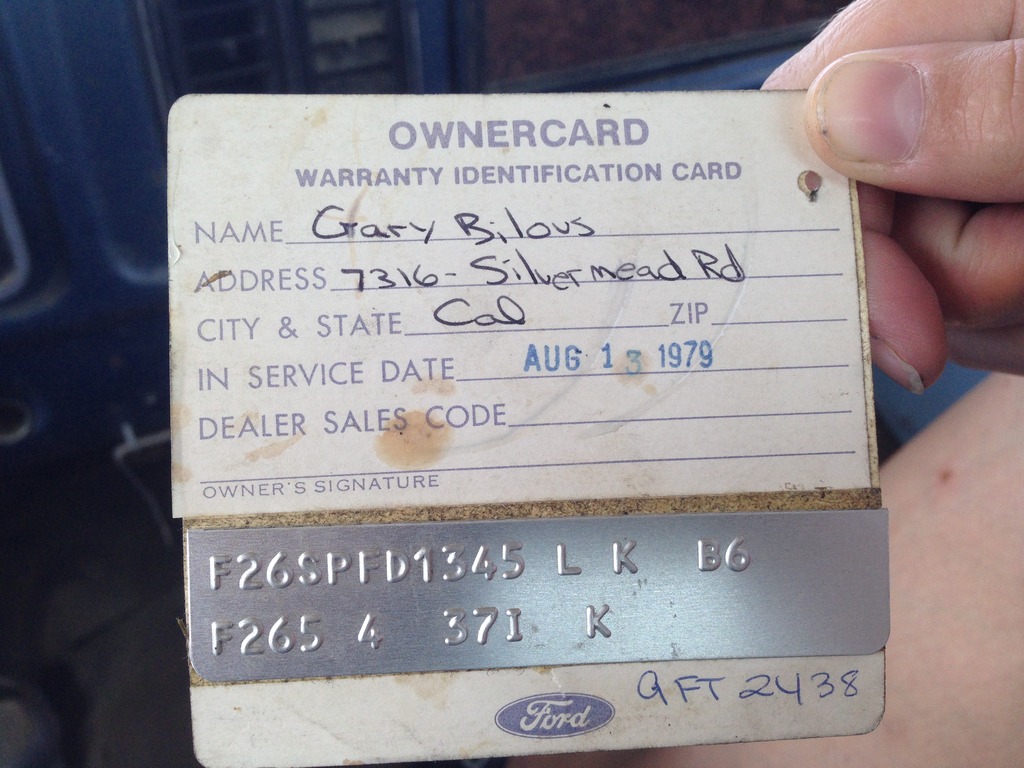
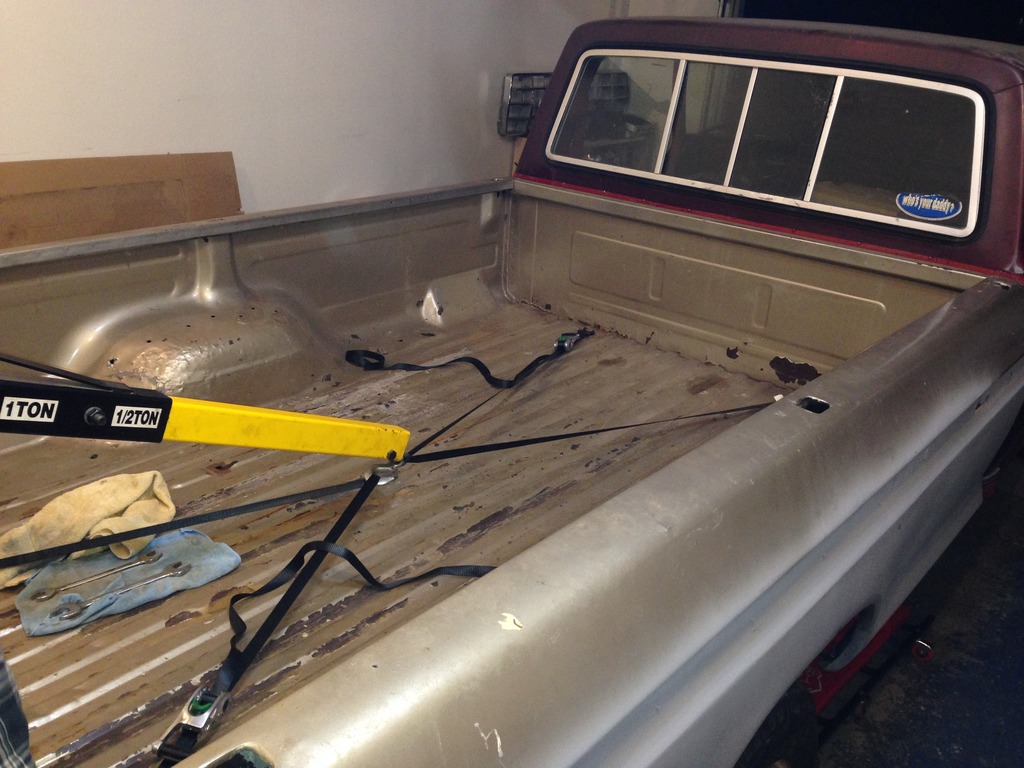
I know that the truck was originally an Alberta truck. It's owners tag was listed as Calgary under the name: Gary Bilous. You could also tell the truck was from Alberta by wood bed liner that was installed in it - this is very common for Alberta vehicles.
Here's the original Warranty Tag:
Vin: F26SPFD1345 L K B6
F265 4 37I K
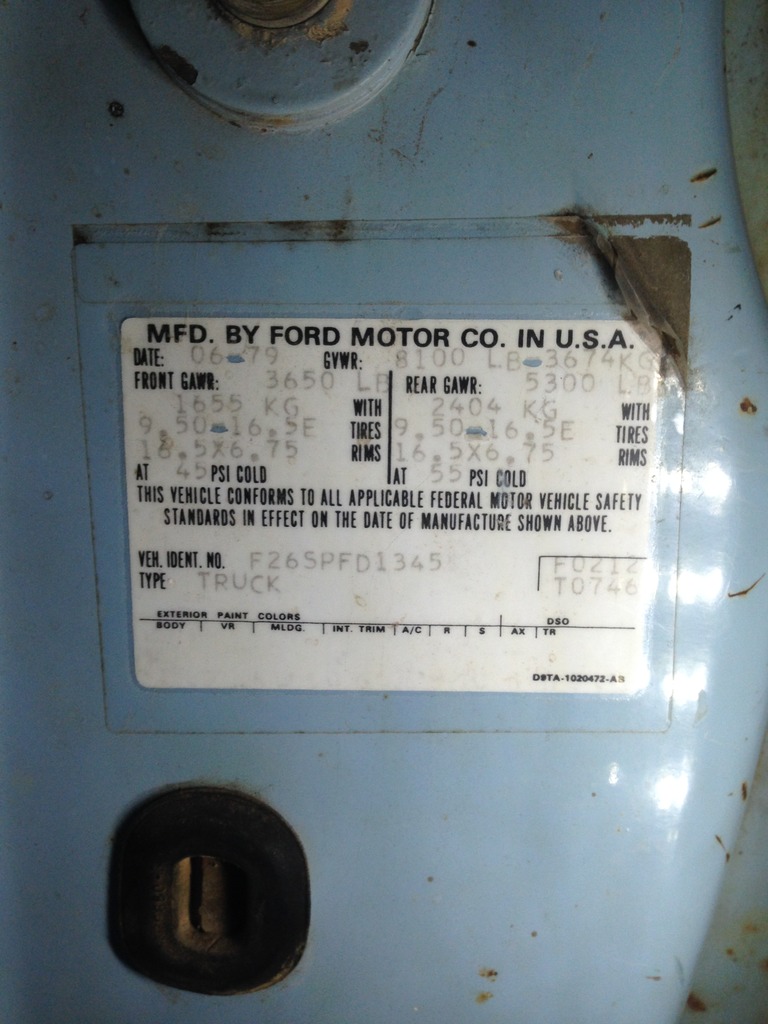
Cab Sticker:
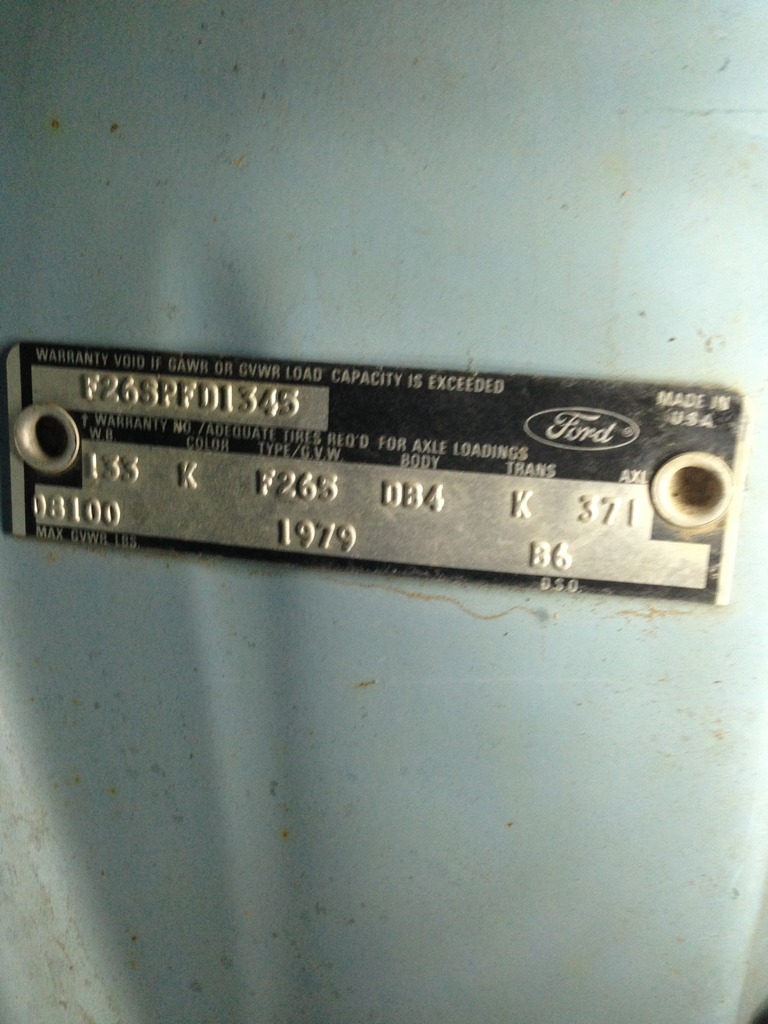
Vin Plate:
I bought the truck off my Ford parts guy. He had just acquired it from someone in Kipling, a small town in Saskatchewan. I learnt about it one day, drove out to his place to take it for a drive, and fell in love. I had to have it.
I worked out a deal with him:
1) Delivery of the F250 4x4 to my doorstep (the truck had no working brakes and all of the lines were cut)
2) $1500 cash for the F250 4x4
3) Time to do a lot of work on the F250, including a body swap
4) Pick-up and haul-away of my original build (for him to keep, including lots of extra parts I don't need)
This deal worked out extremely well for both of us. He tears apart old Fords, mostly dentsides, as a side business. He's got around 50 trucks, and is a very nice person to deal with. Can't say enough good things about him.
In return, I got myself a F250 4x4 that runs, drives, doesn't stop, but works overall. I'm very happy with how it all turned out.
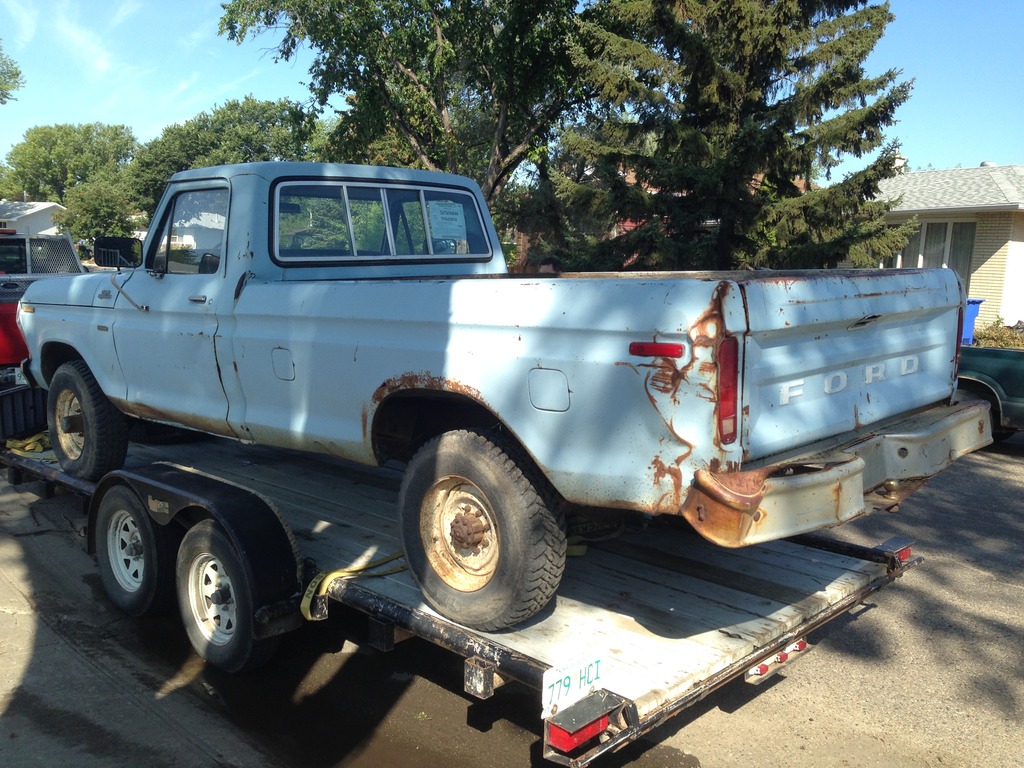
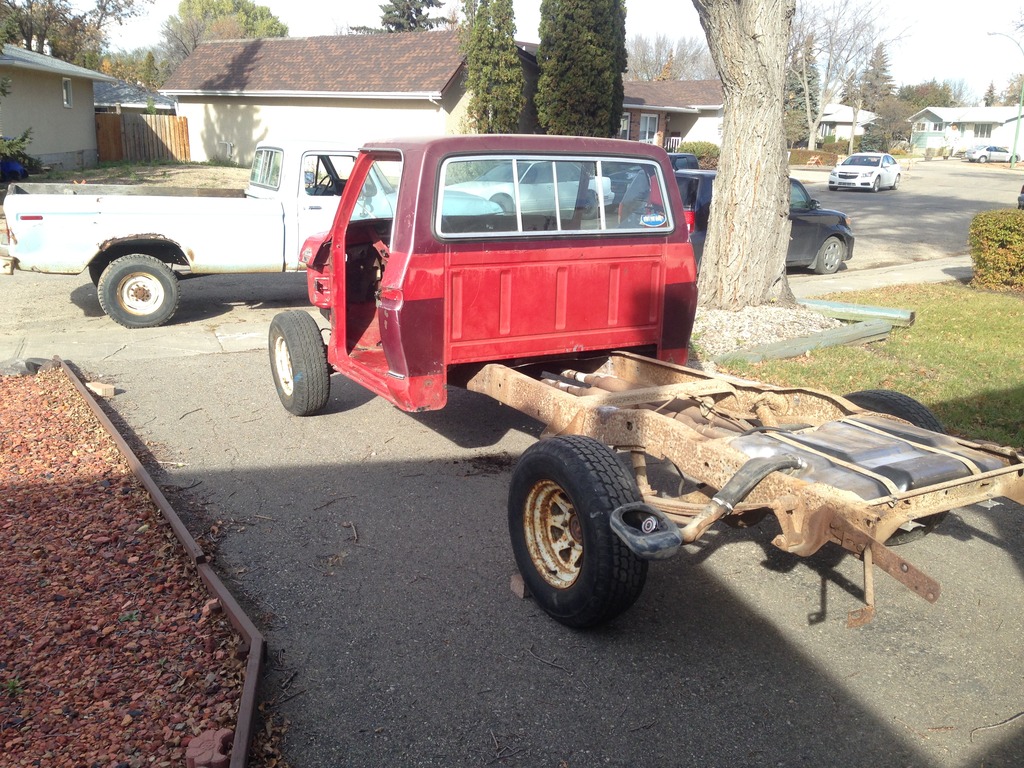
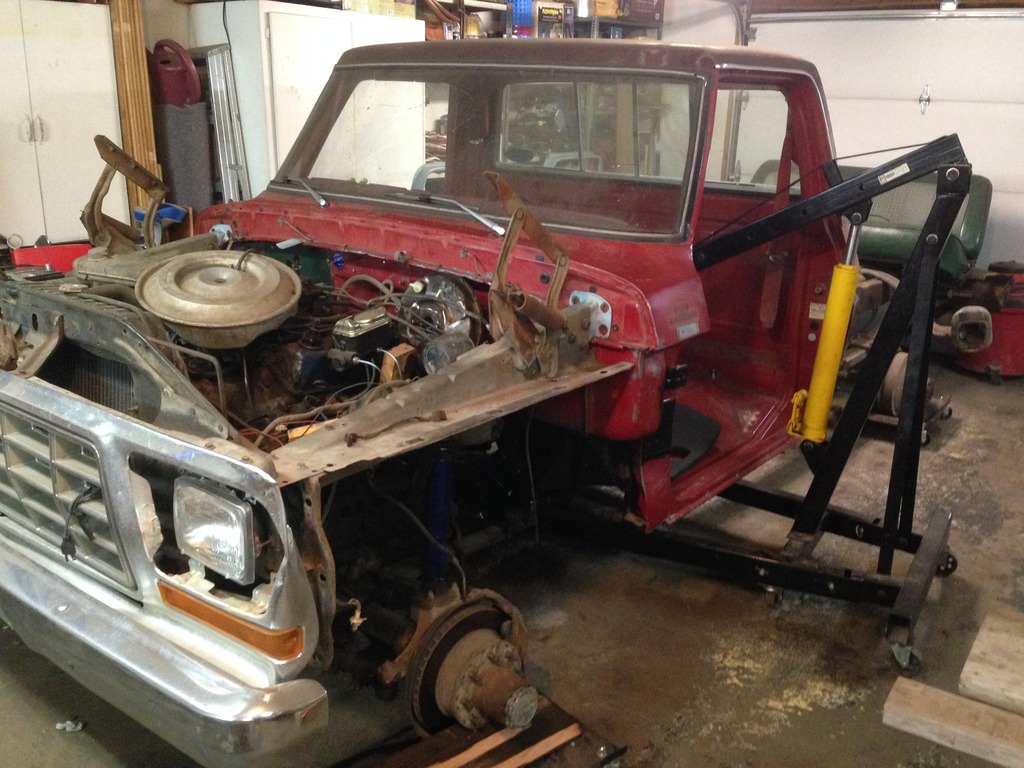
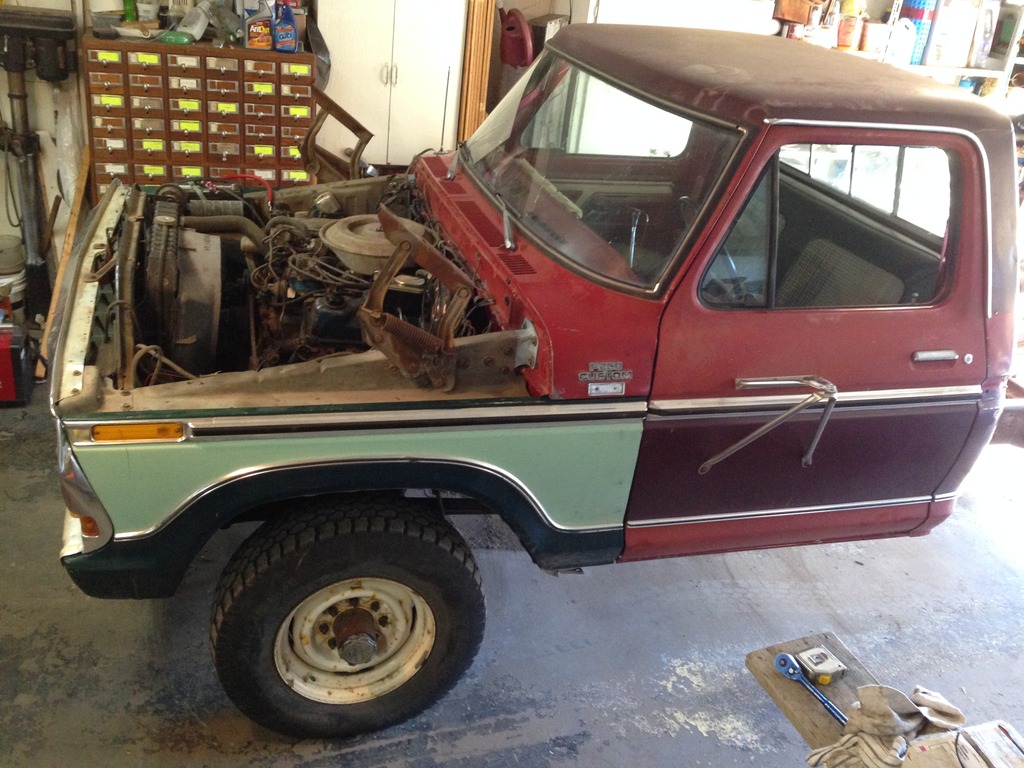
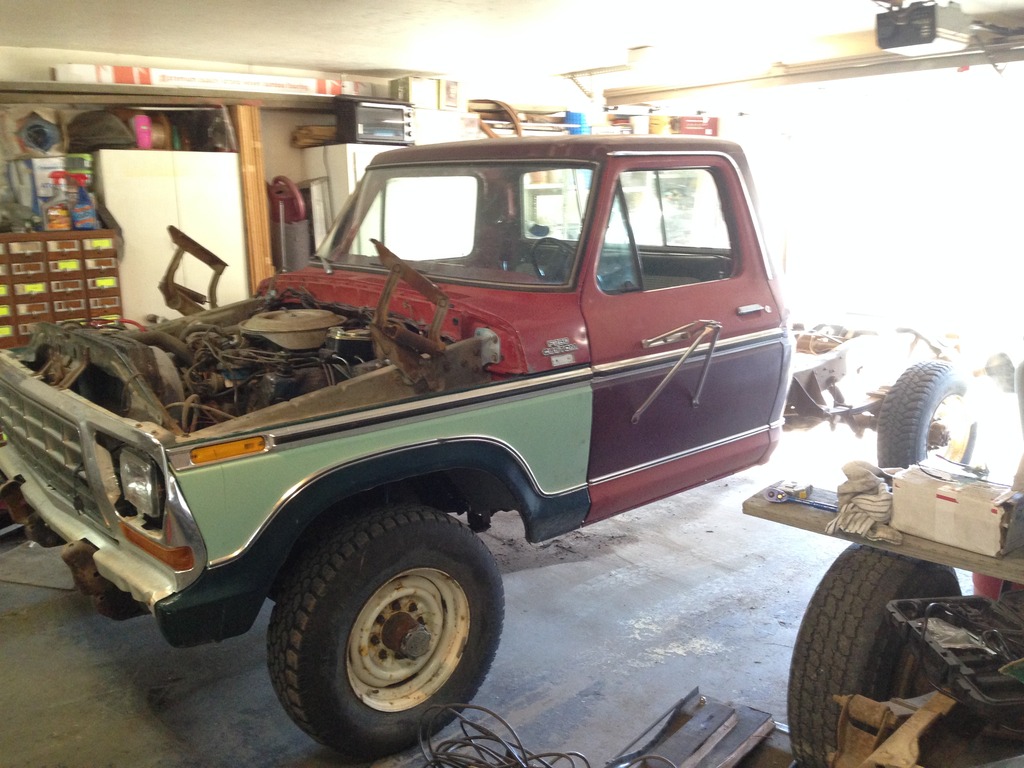
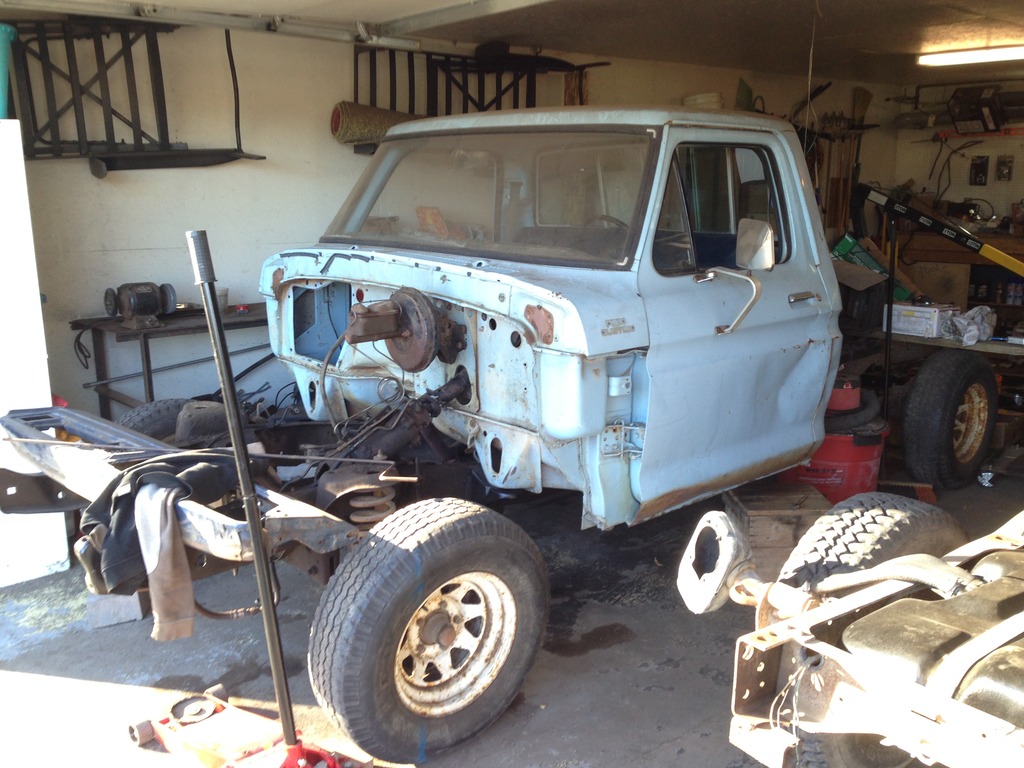
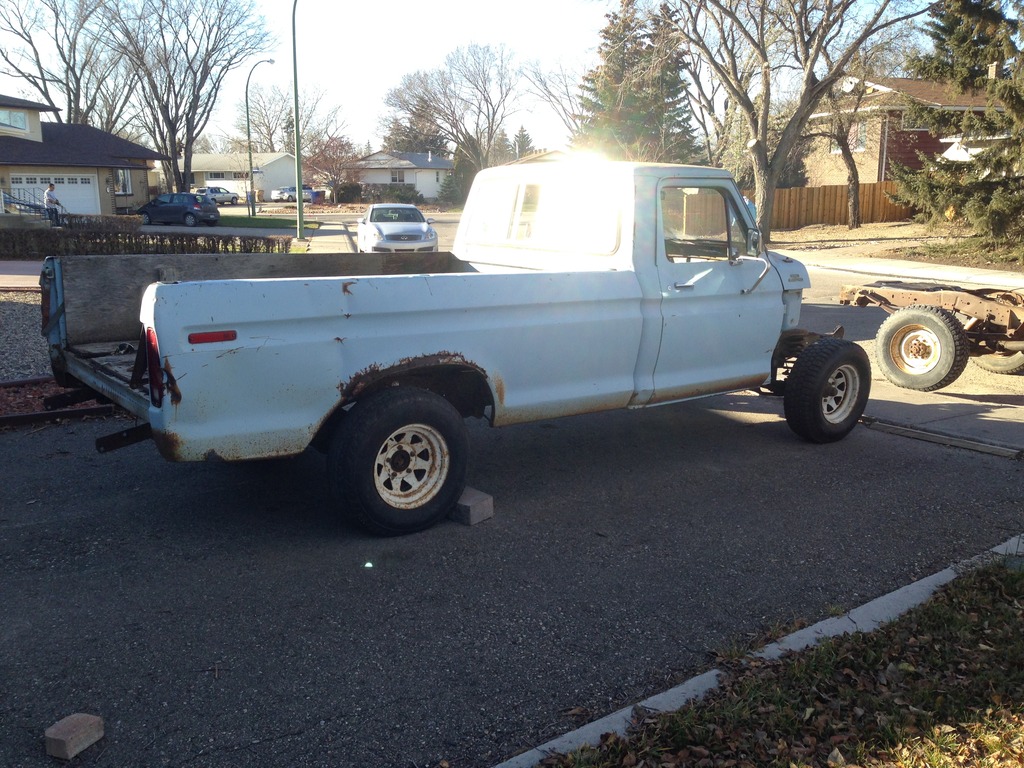
Delivery of the truck:
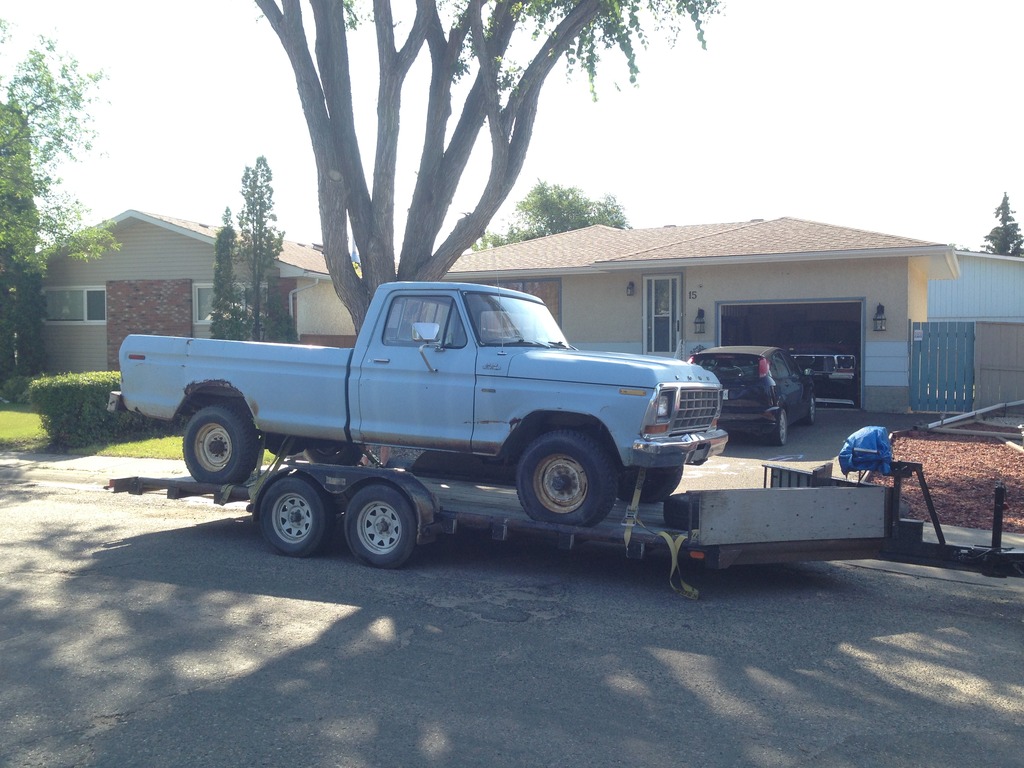
The dent on the mid portion of the box was from being hit by an ATV.
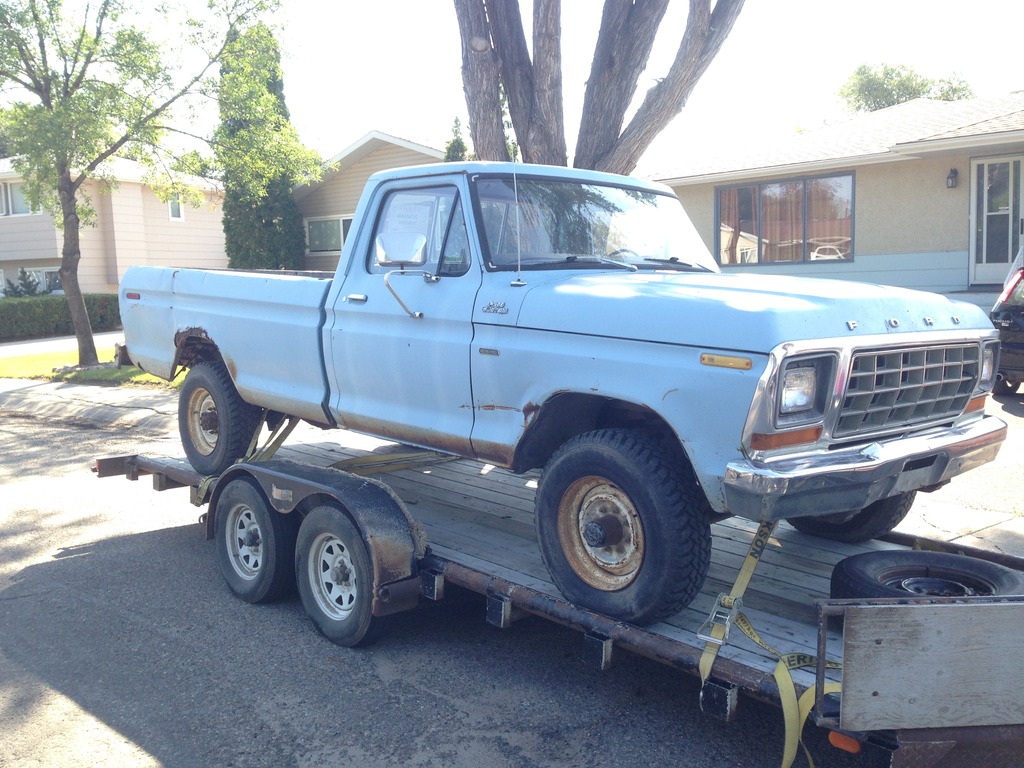
Apparently a combine tried to eat the rear corner of the F250. A farmer previously owned the truck and took fairly good care of it until he bought a new vehicle. After that, the truck went steadily downhill and his kids often when mudding/joy-riding in it.
As you can see, it's not in terrible shape... but it aint pretty in certain spots.
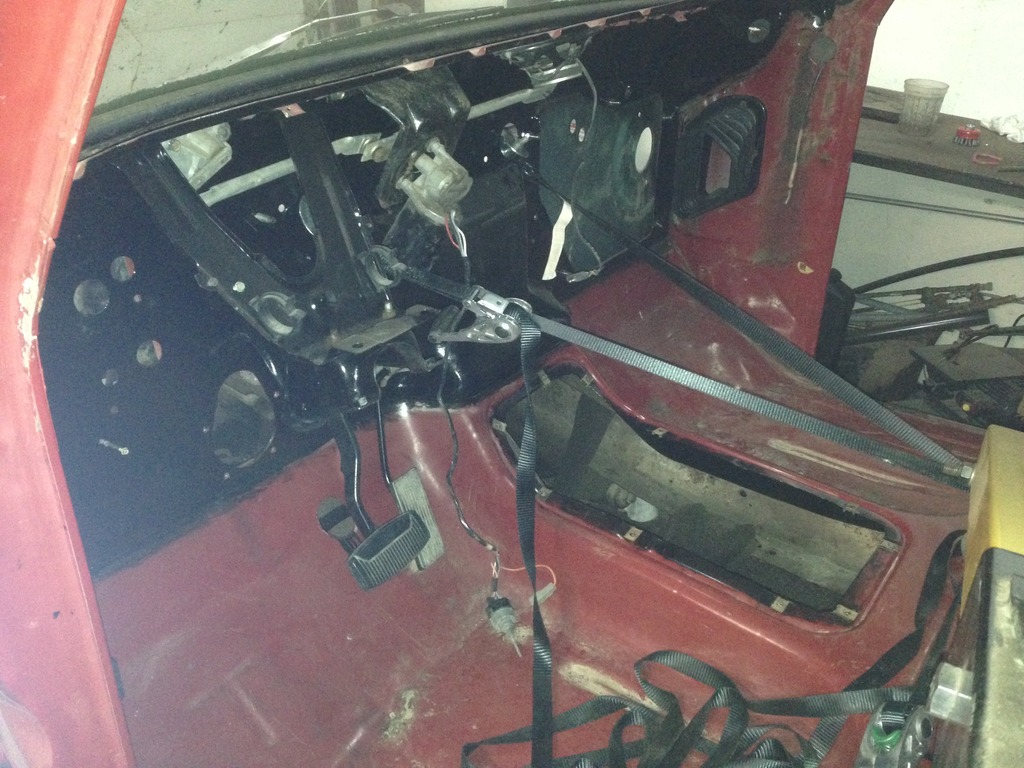
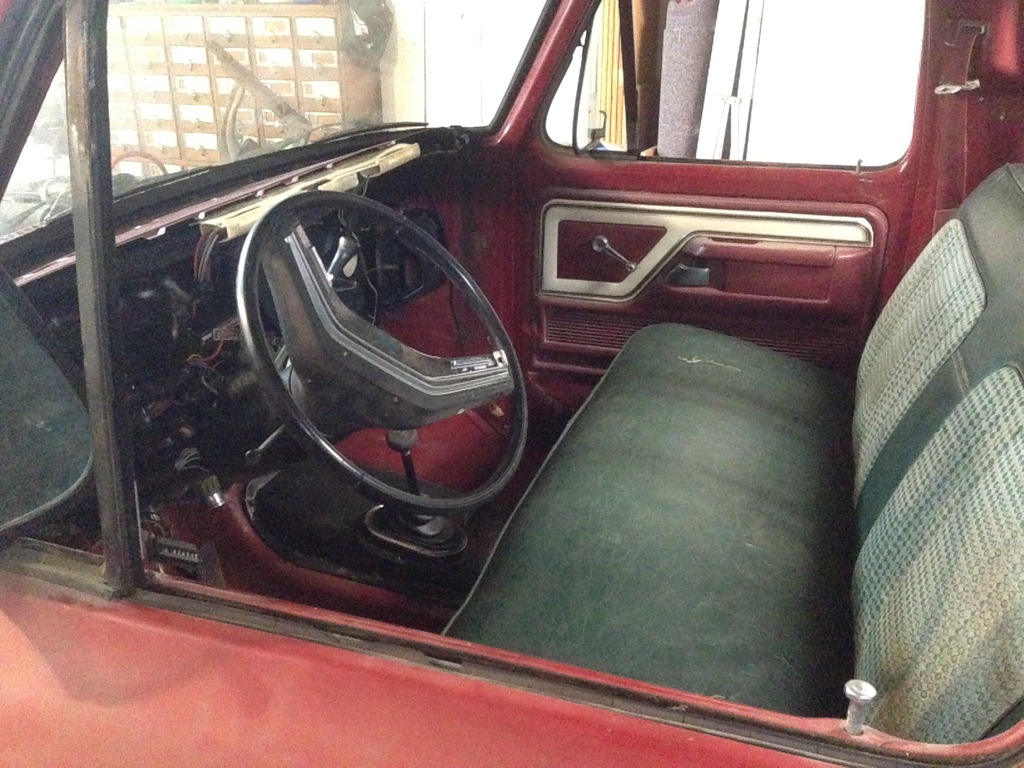
When my parts guy delivered the truck, the shift collar broke in the steering column. Not a huge deal, but he felt very bad. I wanted to take it for a ride, but never got to when it was delivered. Probably a good thing though because the shift collar was bound to break sometime very soon.
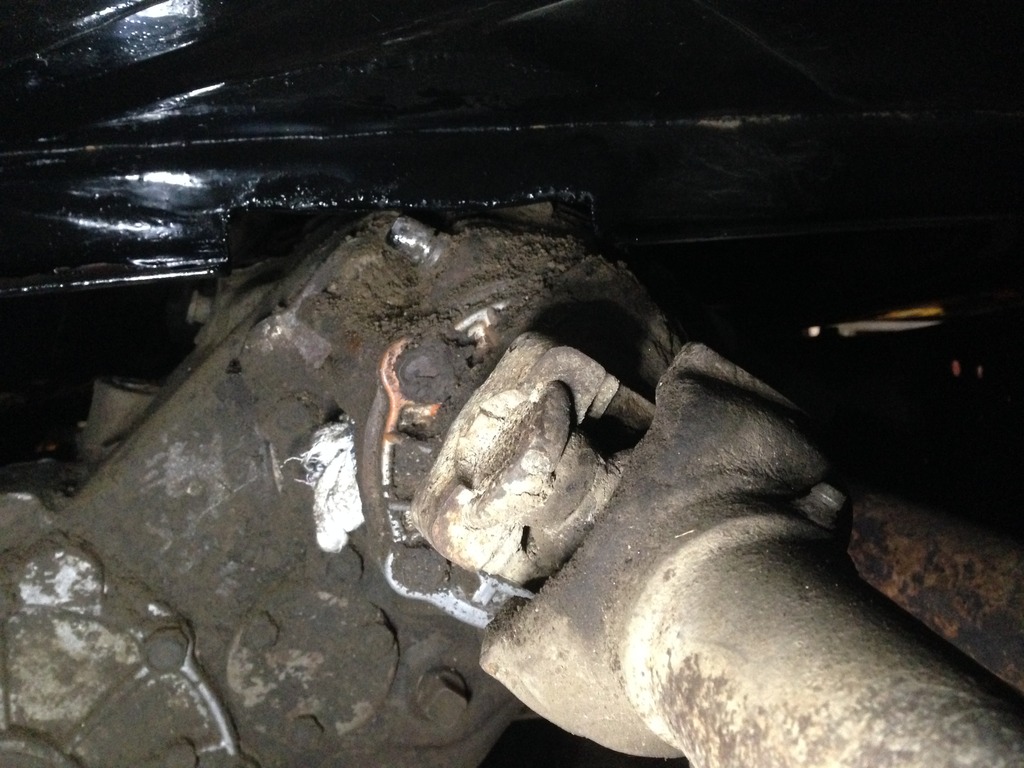
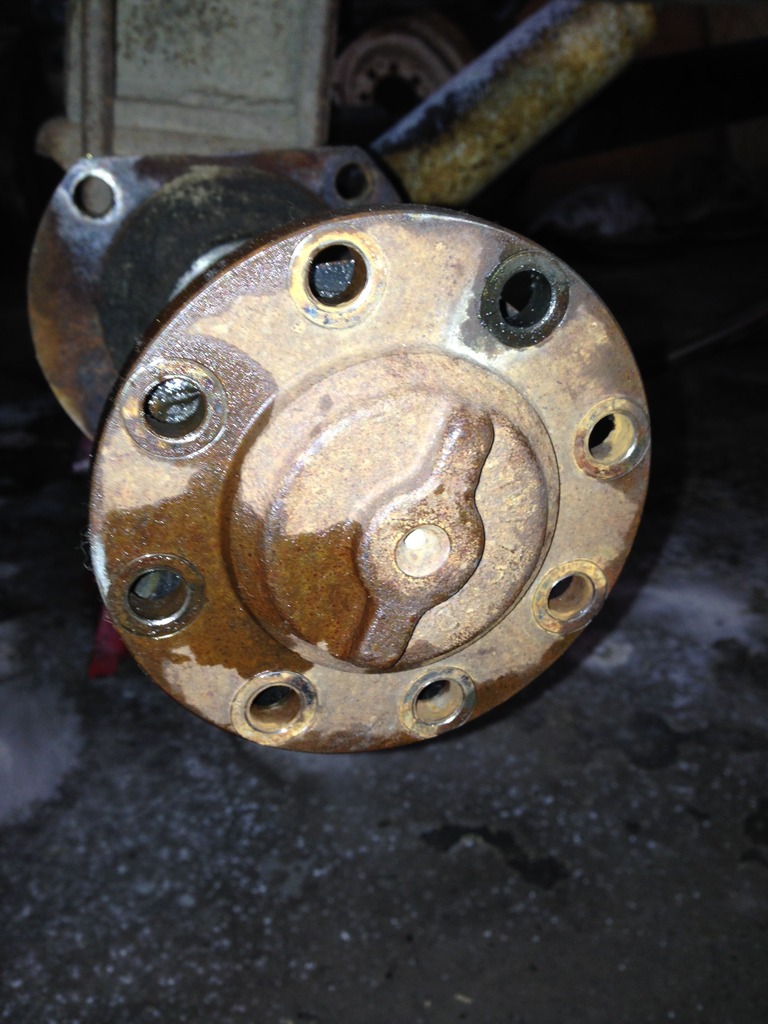
Front differential: 3.54 D8TA-TB BOM: 603901-1 (1979 Sno-Fighter Dana 60)
The fluid on the differential is all brake fluid. The whole brake system needs a massive overhaul.
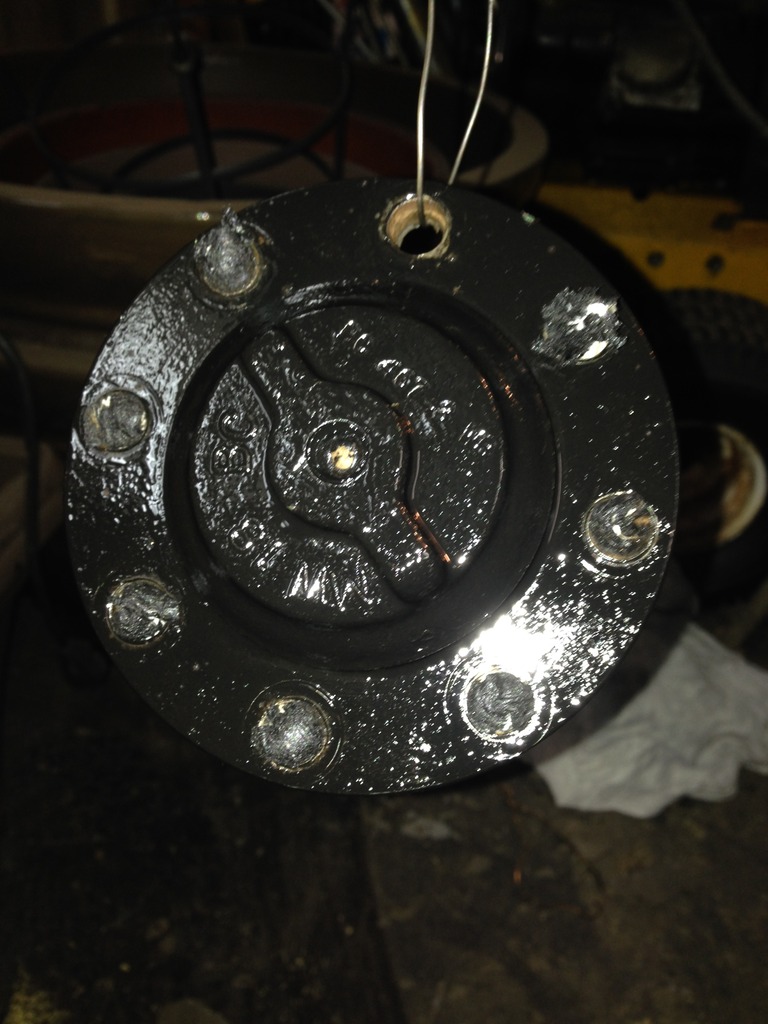
Rear differential: 3.54 D8TA-YD BOM: 610023-2
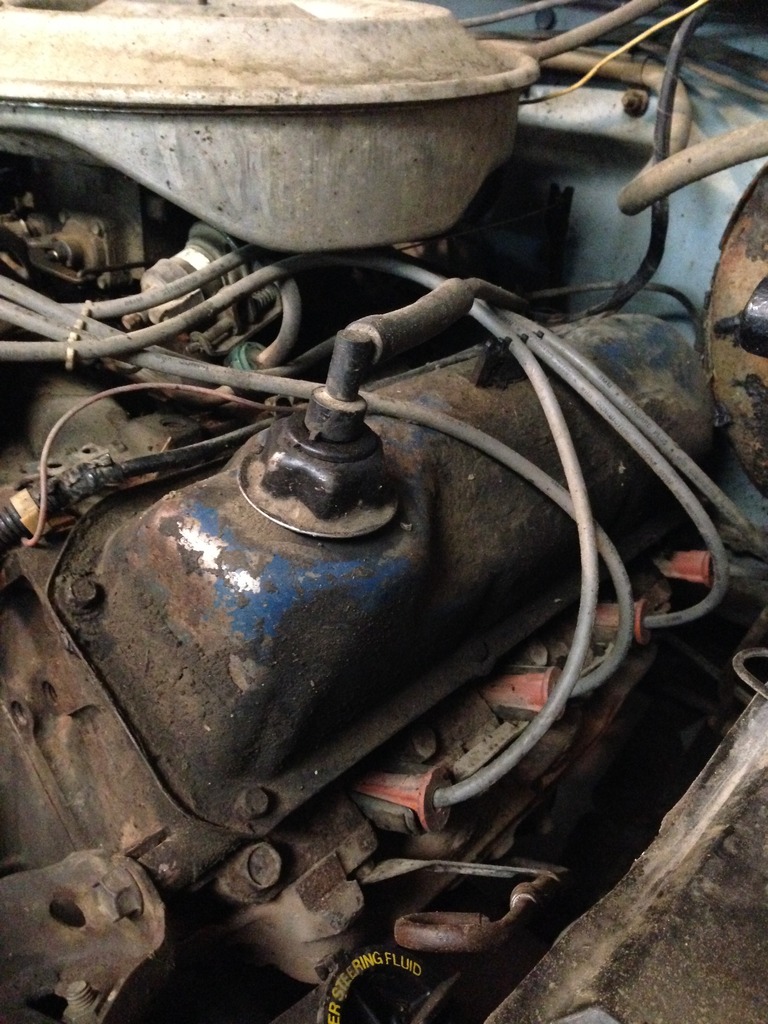
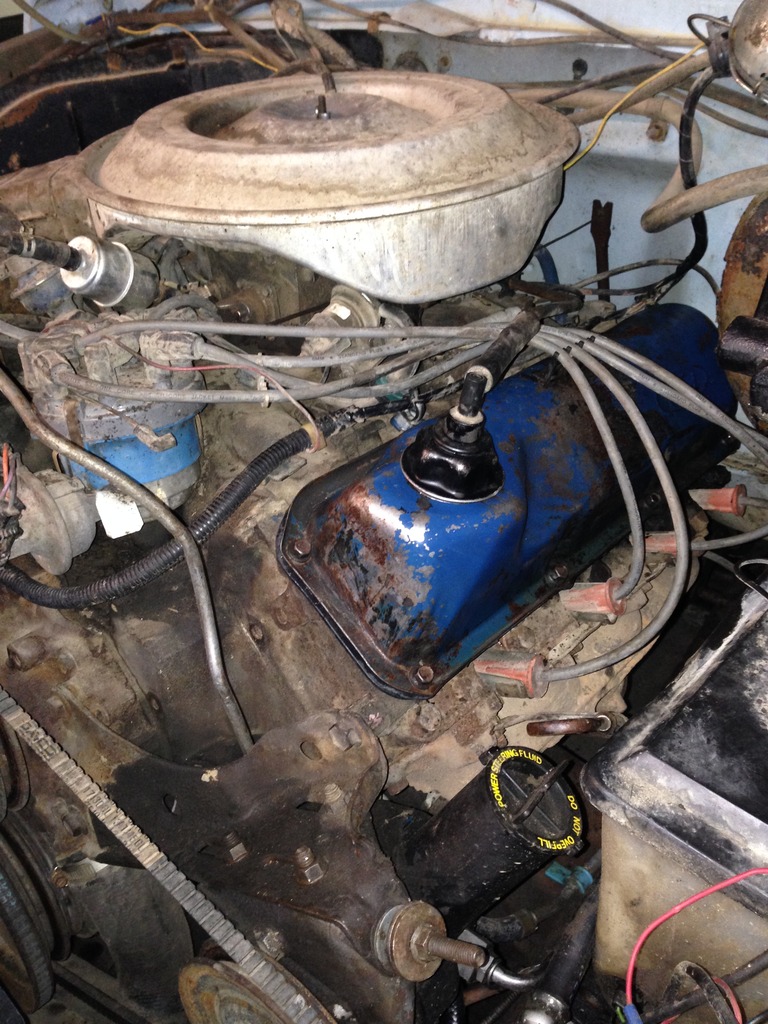
The engine is leaky around the dipstick (or so it looks):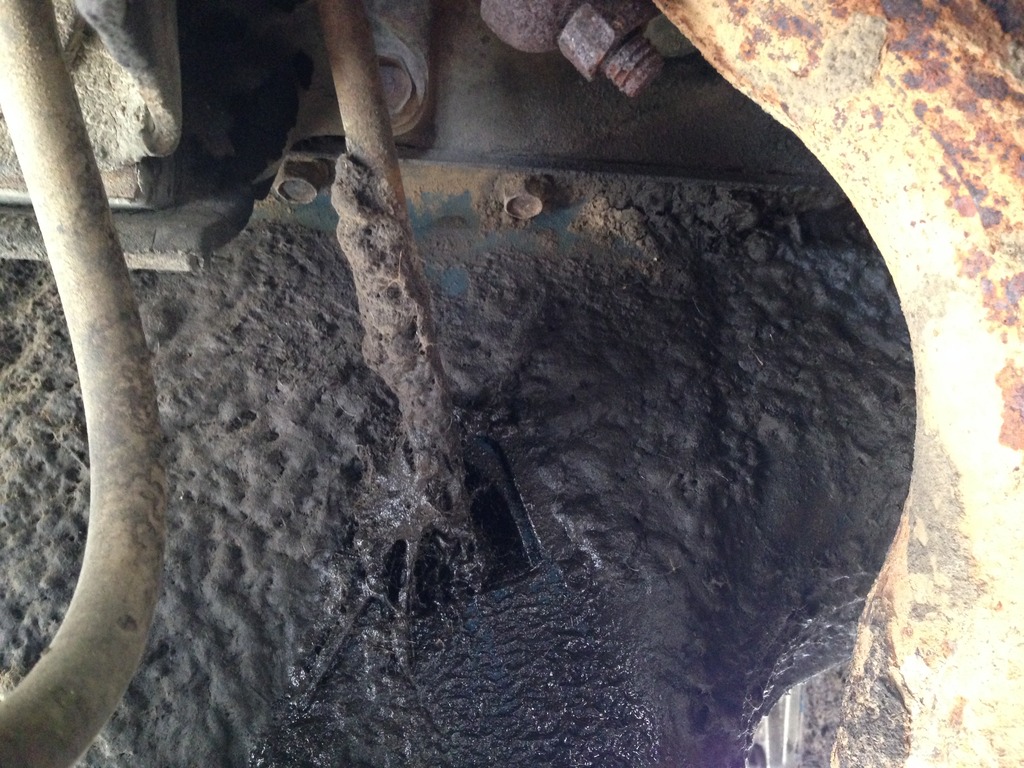
The fuel pump seriously needs a proper gasket:
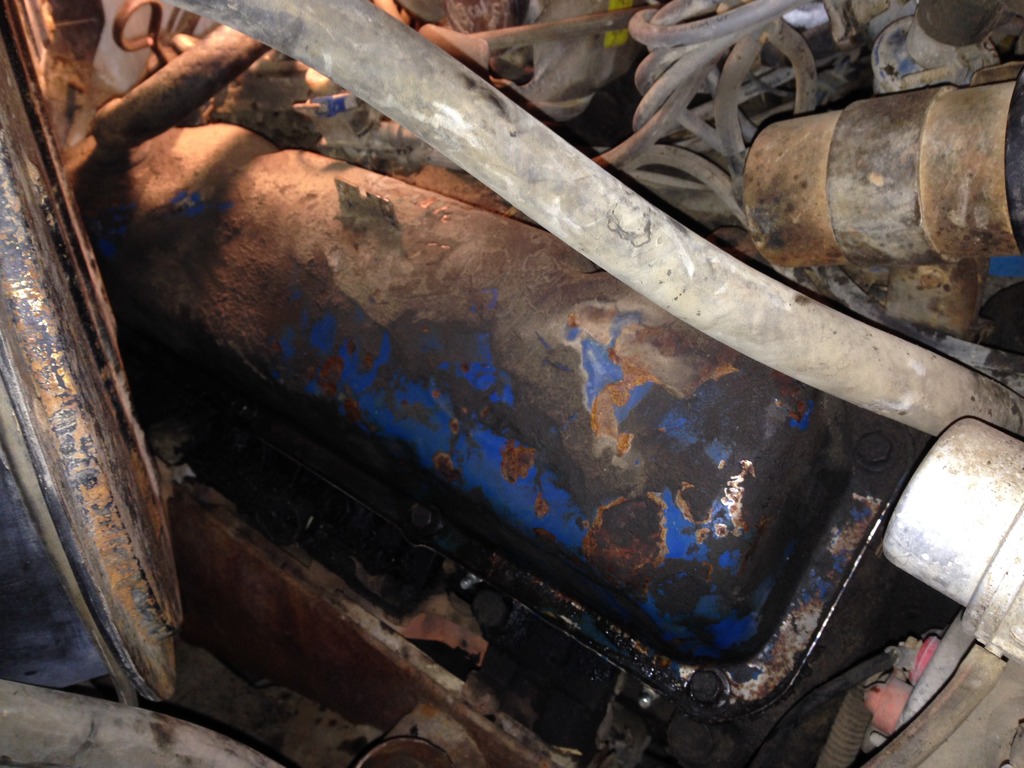
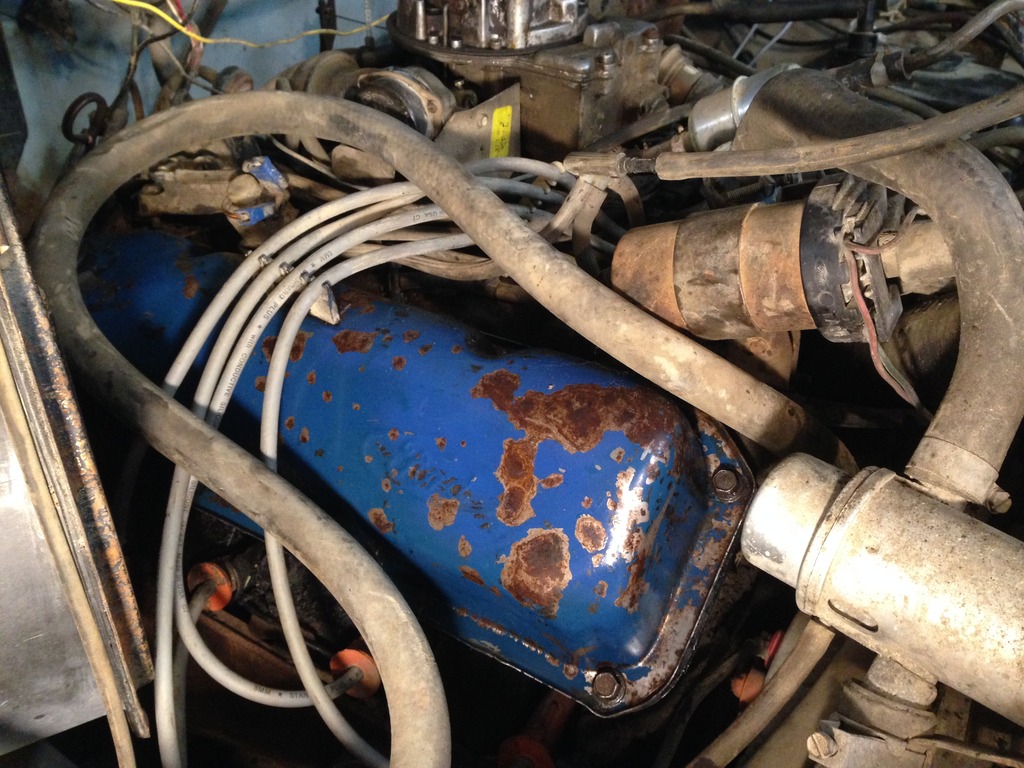
The valve covers leak and burn antifreeze like crazy:
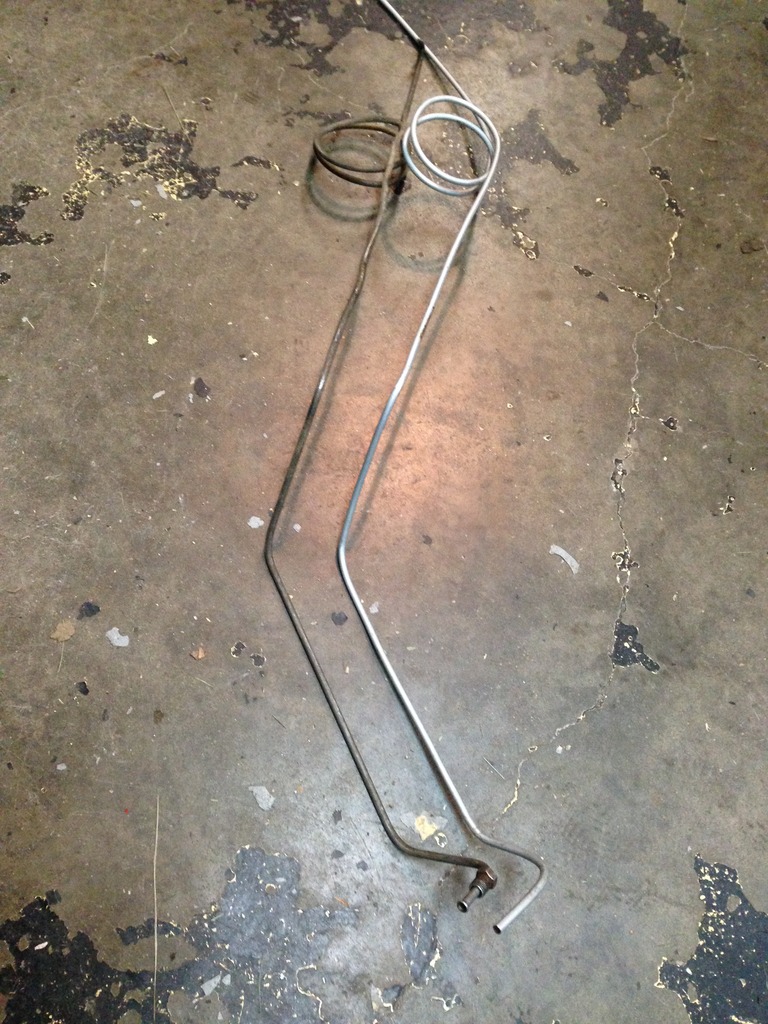
Since the truck needed brake lines very badly, I started working on them first.
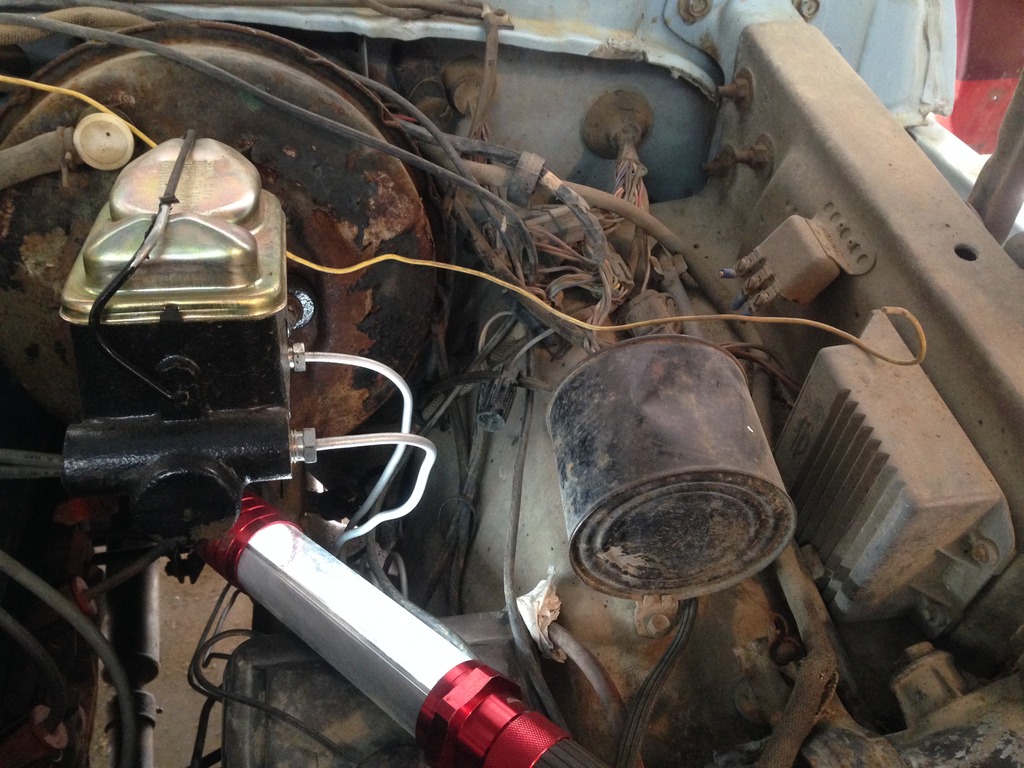
Bought a new master cylinder, brake line flaring kit, 50 feet of brake line, and new fittings.
Started working on the brake lines:
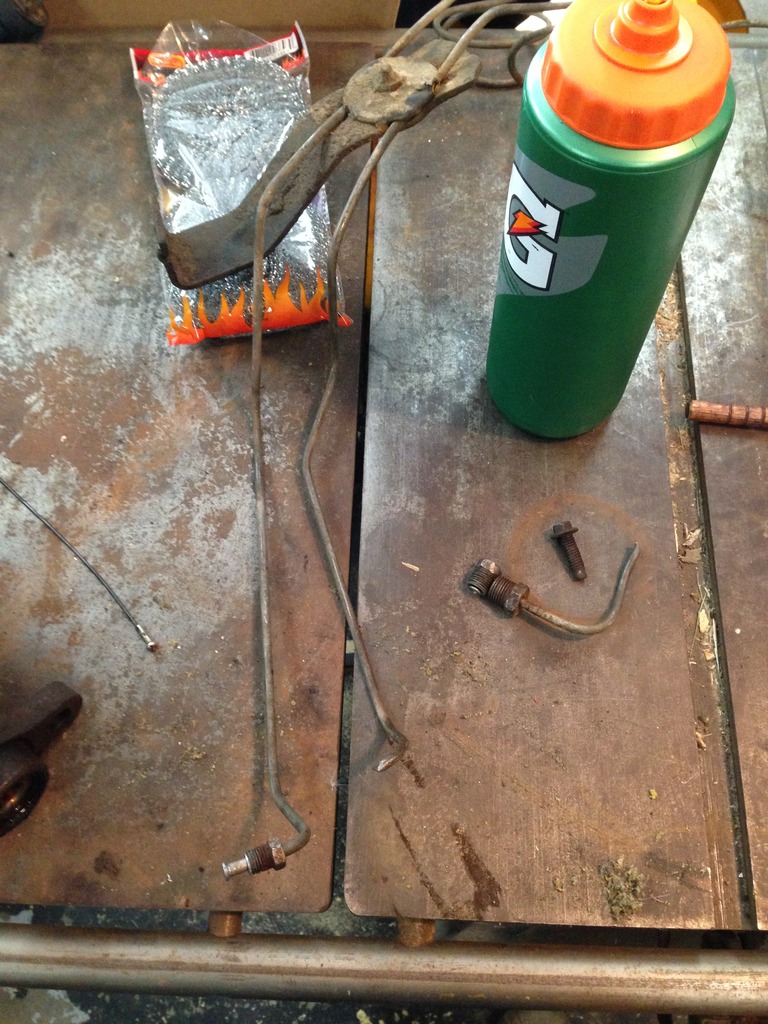
First attempt ever at a brake line. OEM (left), and new line I made myself (right).
After fixing a few small brake lines from the master cylinder to the proportioning valve, I set my sights on the steering column. Luckily, I had a second steering column in my parts stash.
I swapped out the shift linkage to a 4x4 linkage, and installed the "new" column in the truck. Unfortunately, I ended up stretching something inside the column and now it tilts/moves up and down ever so slightly like something is loose. Not good, so I'll be rebuilding one of my tilt columns in the future. For now, it works.
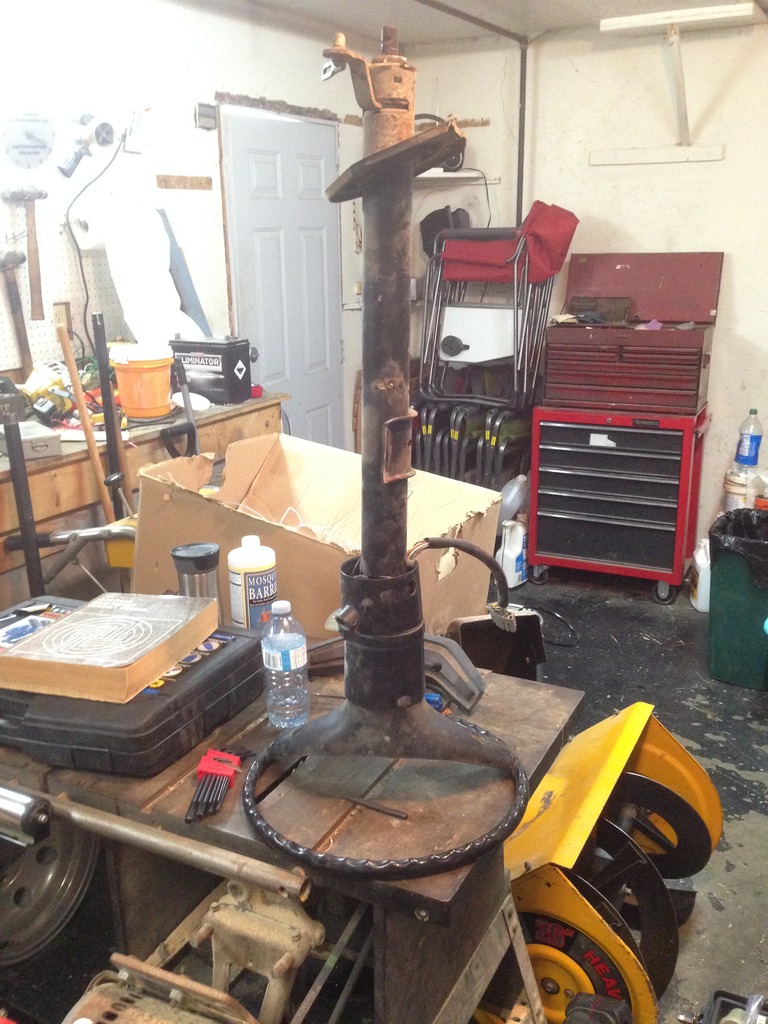
Took out and tore down the original tilt column.
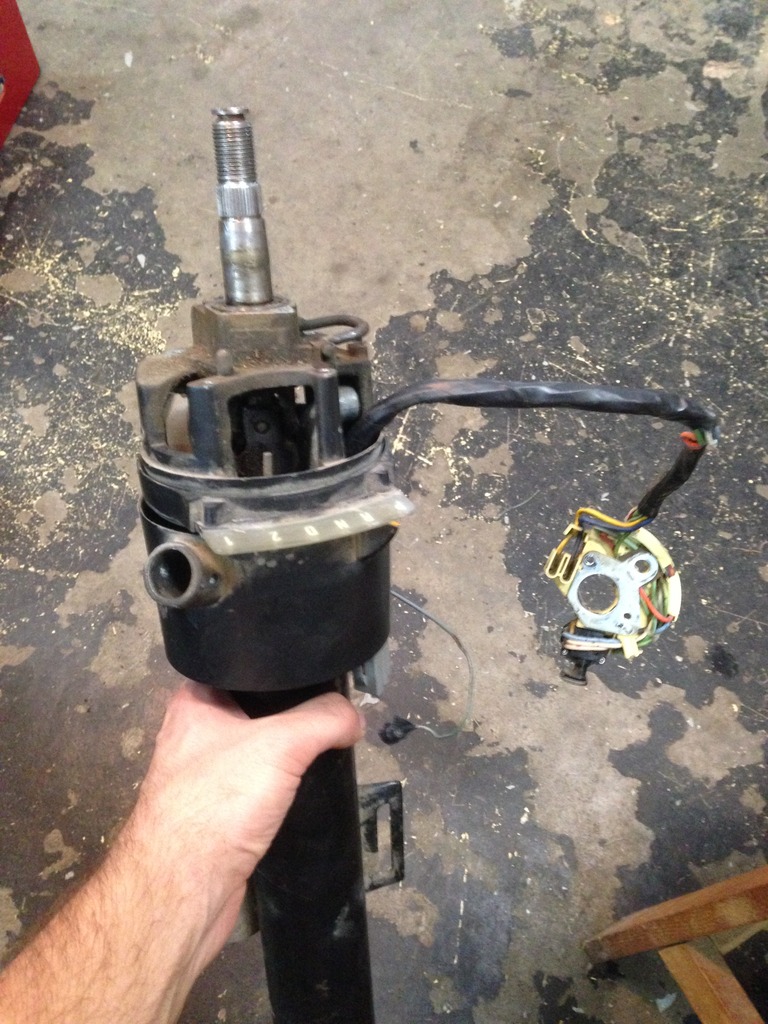
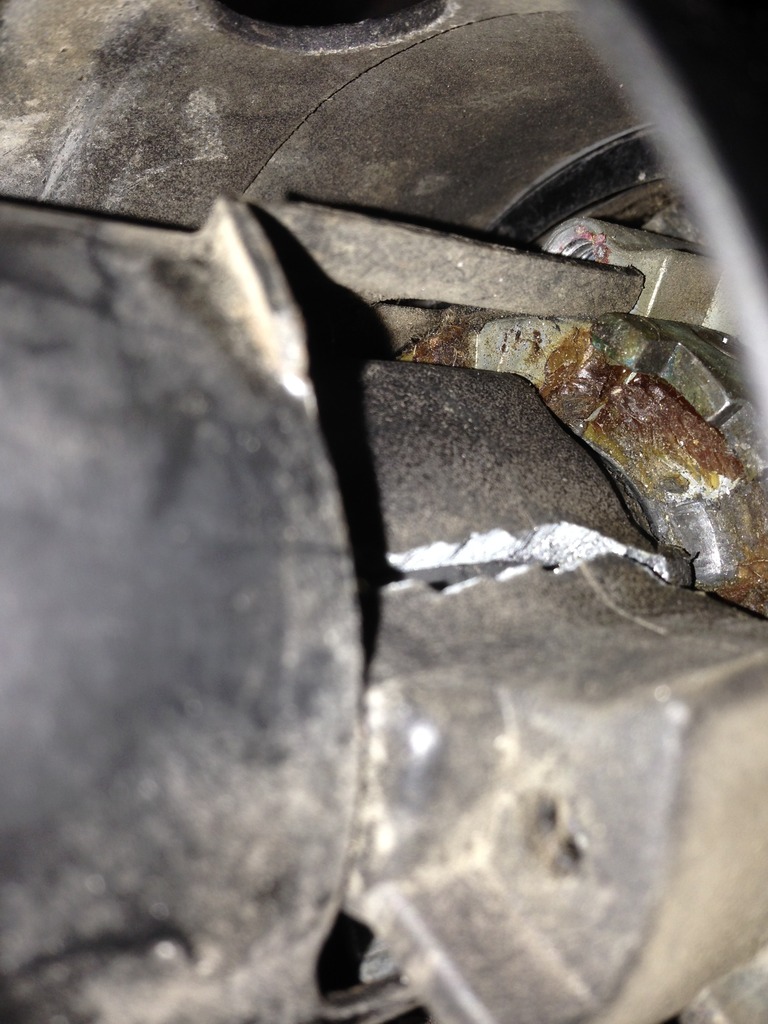
Picture of the broken pot metal shift collar inside the original column.
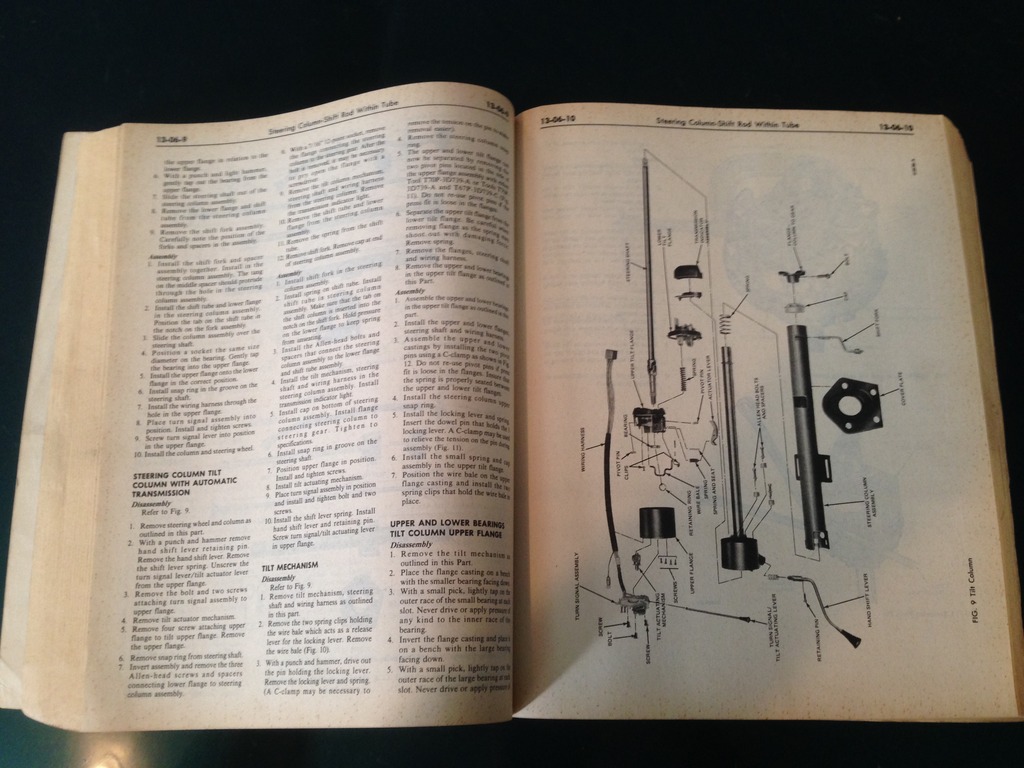
Tore it down as far as I could using the reference I had
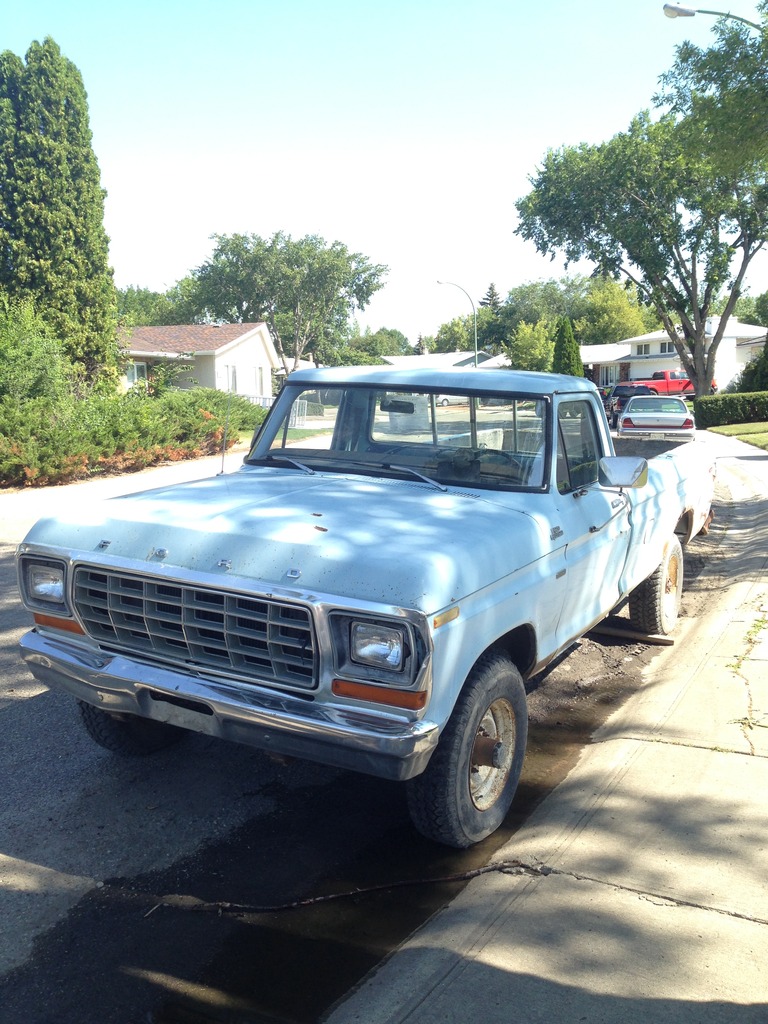
Got the new tilt column ready, and threw it in the truck. Finally, I could move the truck from being parked illegally (in the wrong direction) on the street.
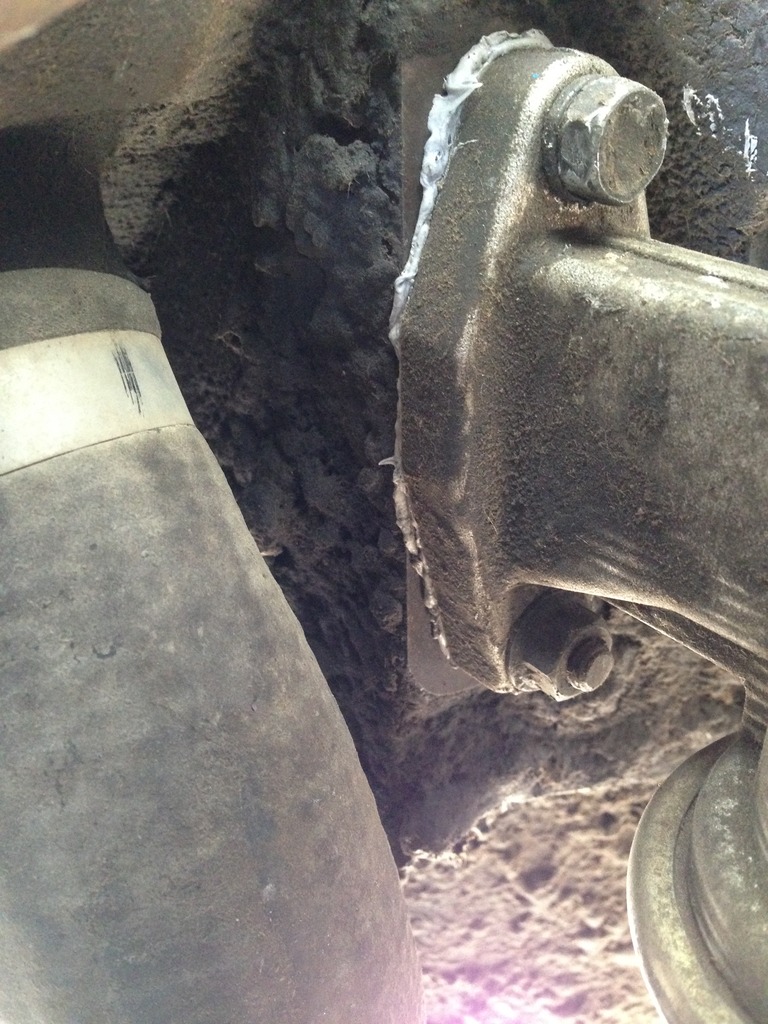
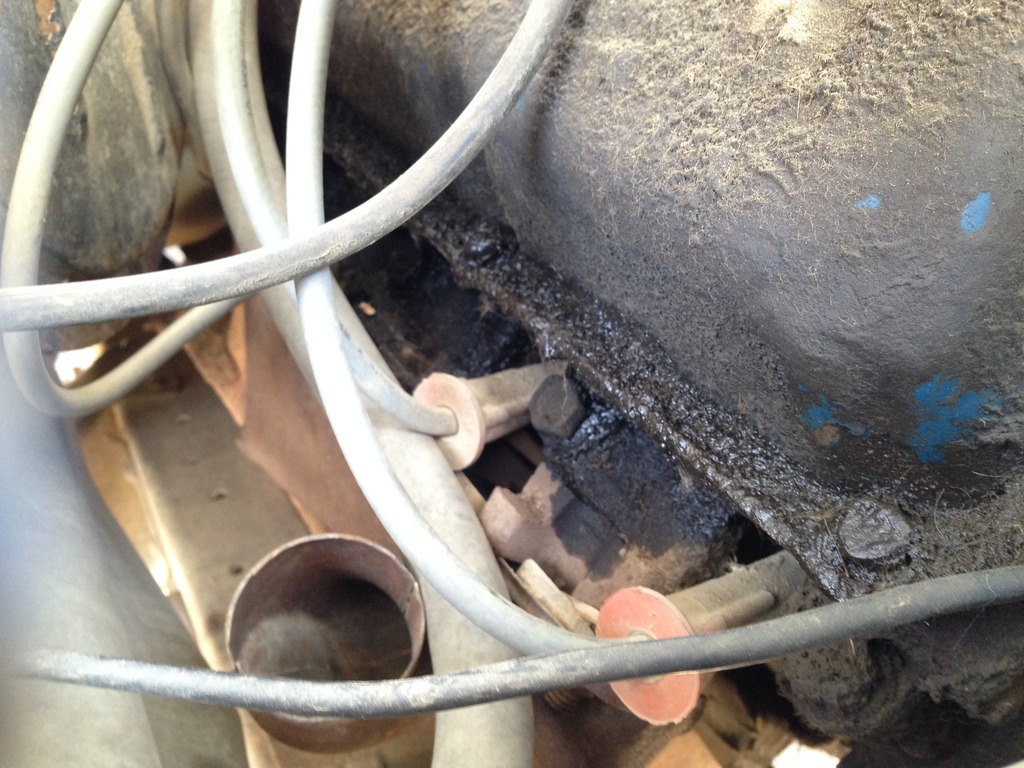
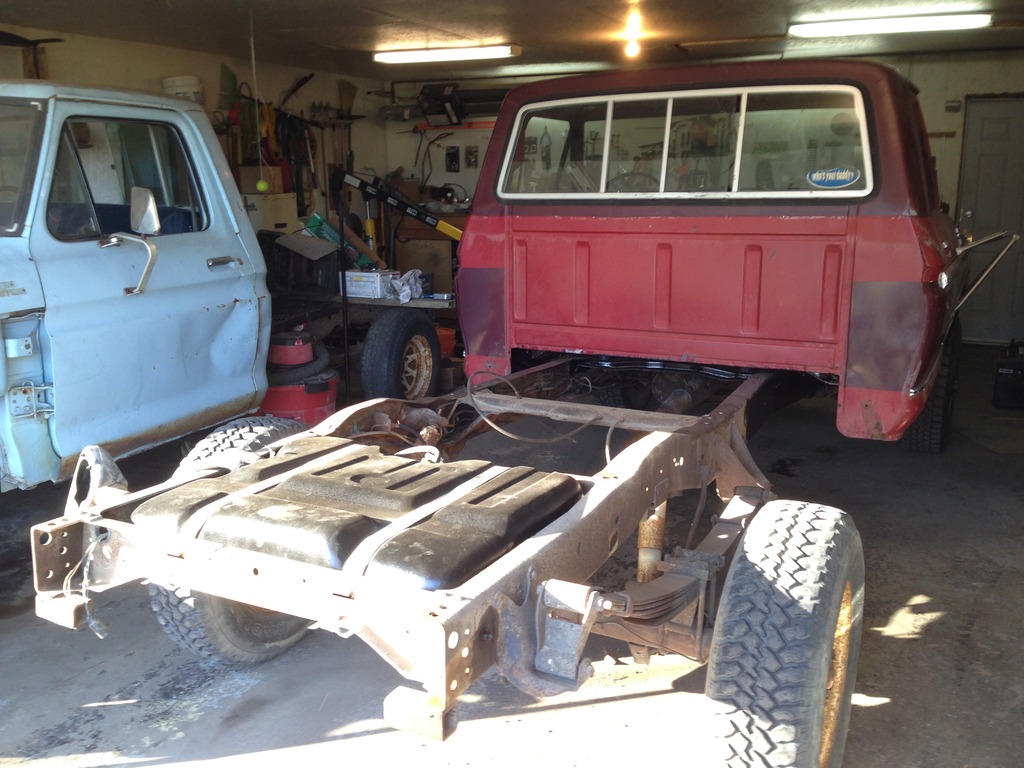
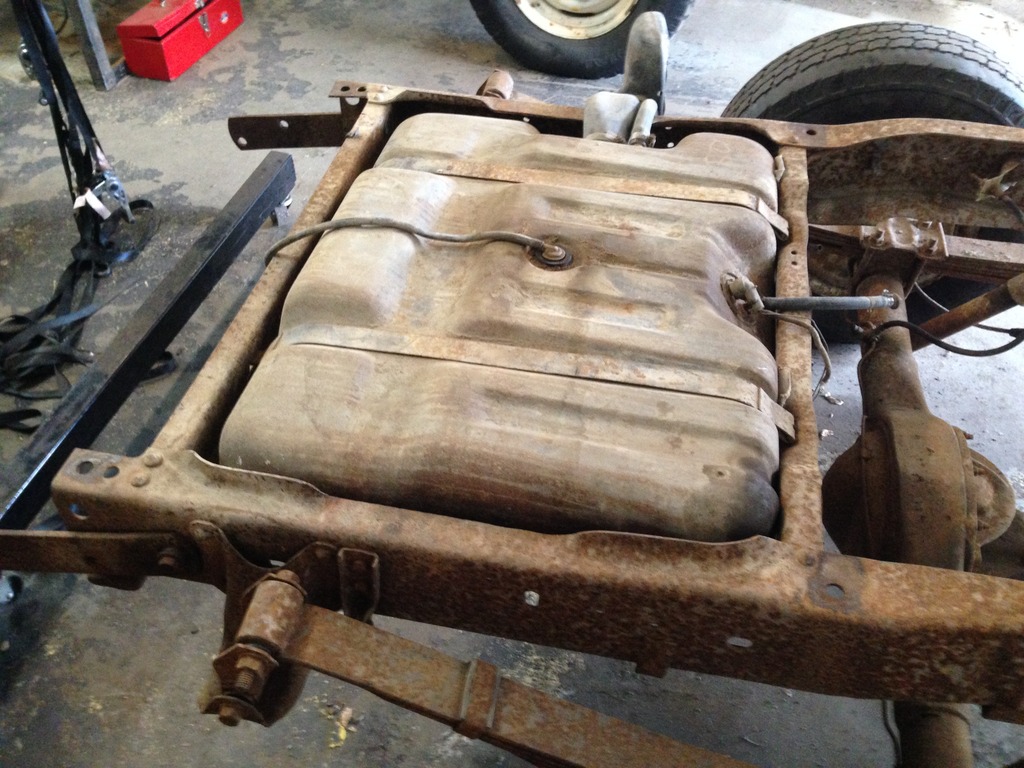
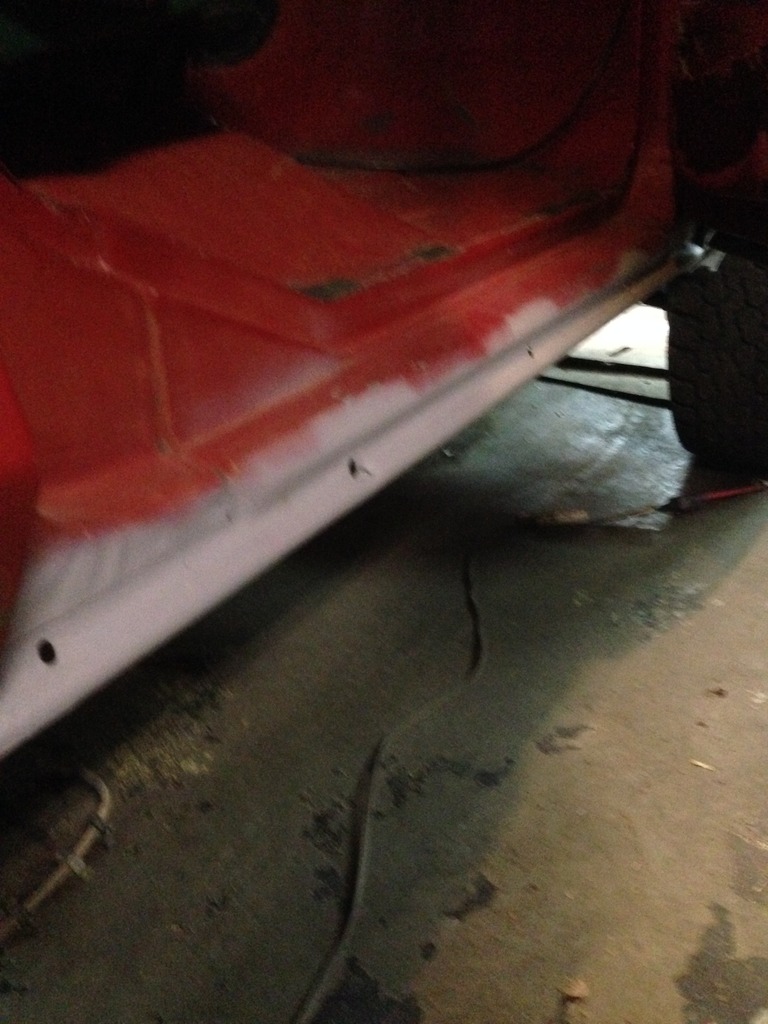
The last thing I did before tackling other issues was bleed the brakes which is where I found out that the rear mid-ship brake line had been rusted out and was leaking fluid like crazy.
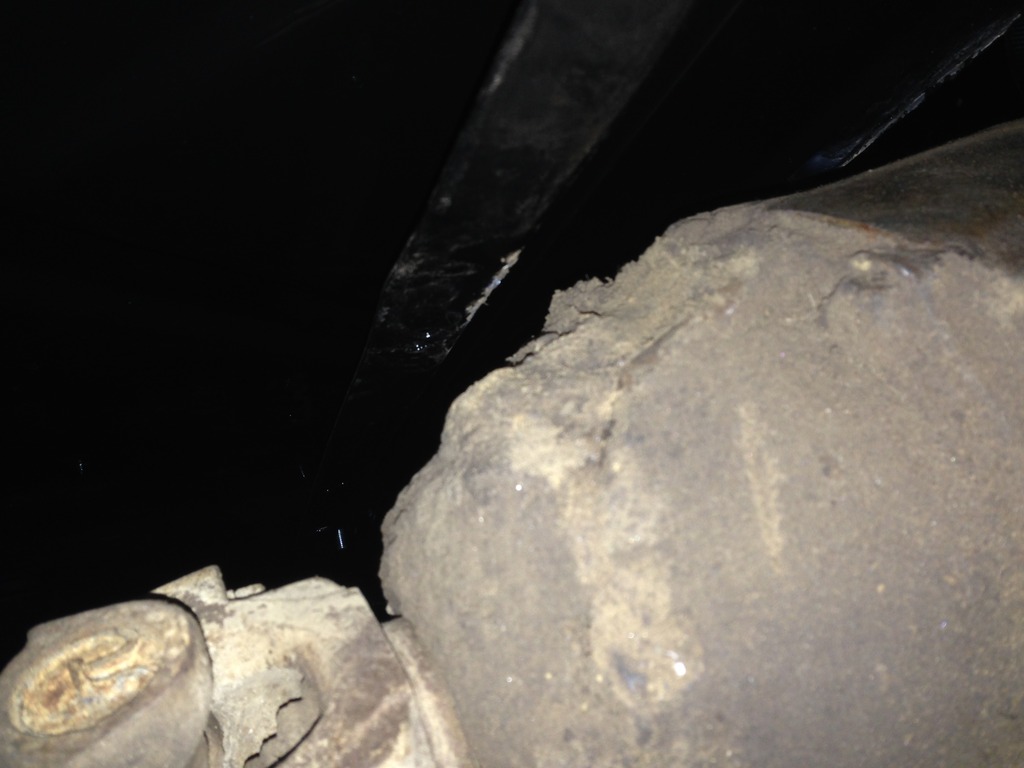
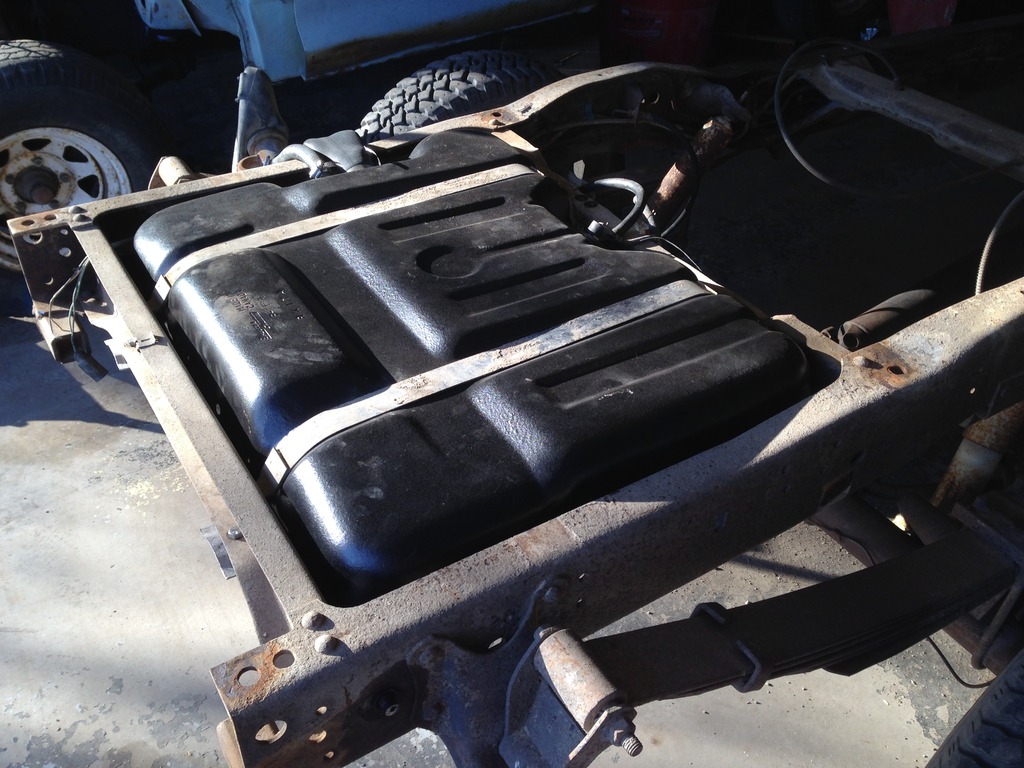
I dropped the secondary fuel tank, and saw that there was about 2 feet of brake line turned to dust on the side that touches the frame. The rust was hidden between the frame rail and the secondary tank. The accumulation of dirt/water over time had rusted the line very badly.
Here's a picture of the rusted line location:
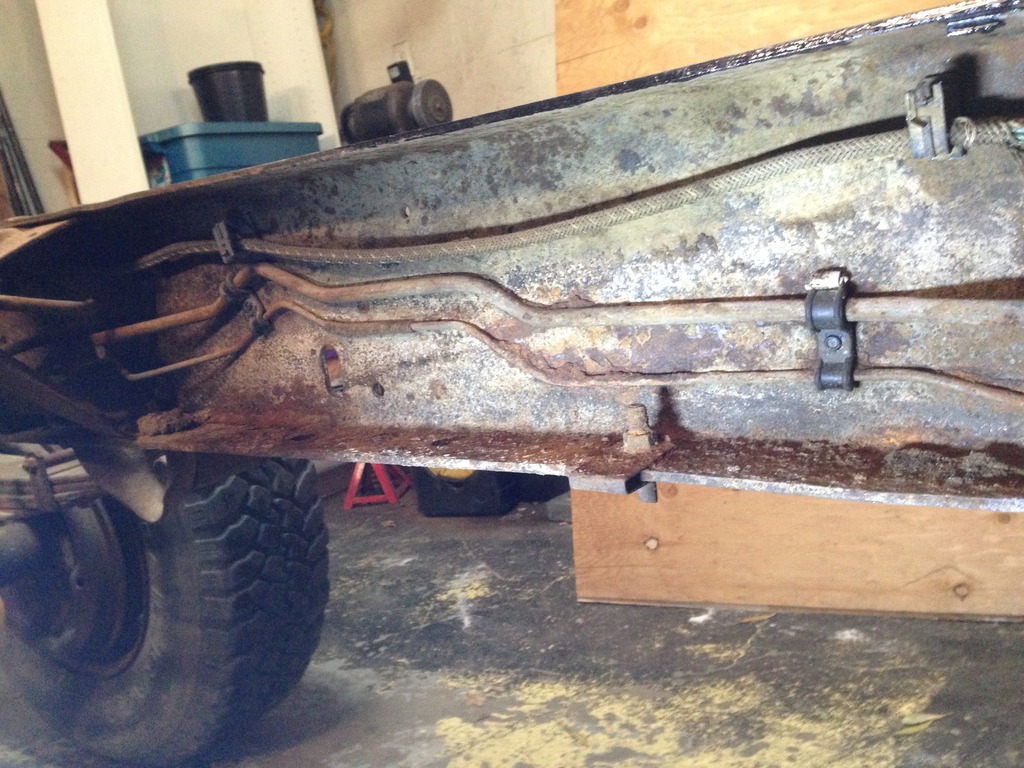
The front calipers needed new bleeders, so I changed them out and bled the front brakes so I at least had something to stop the truck. One of the bleeders was broken off flush with the caliper, but I got it out with some drilling, heat and an easy-out. No pics of that work, sorry fellas.
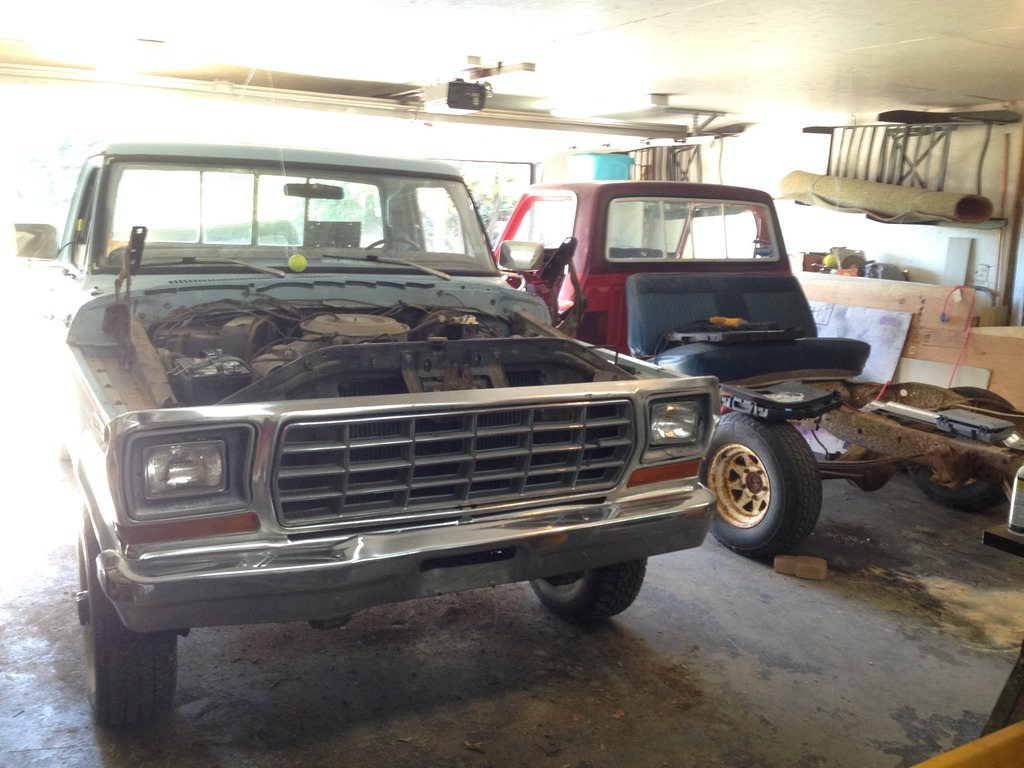
Once I got the brakes working (about 10% stopping power), I moved into the garage where I could get some real work done.
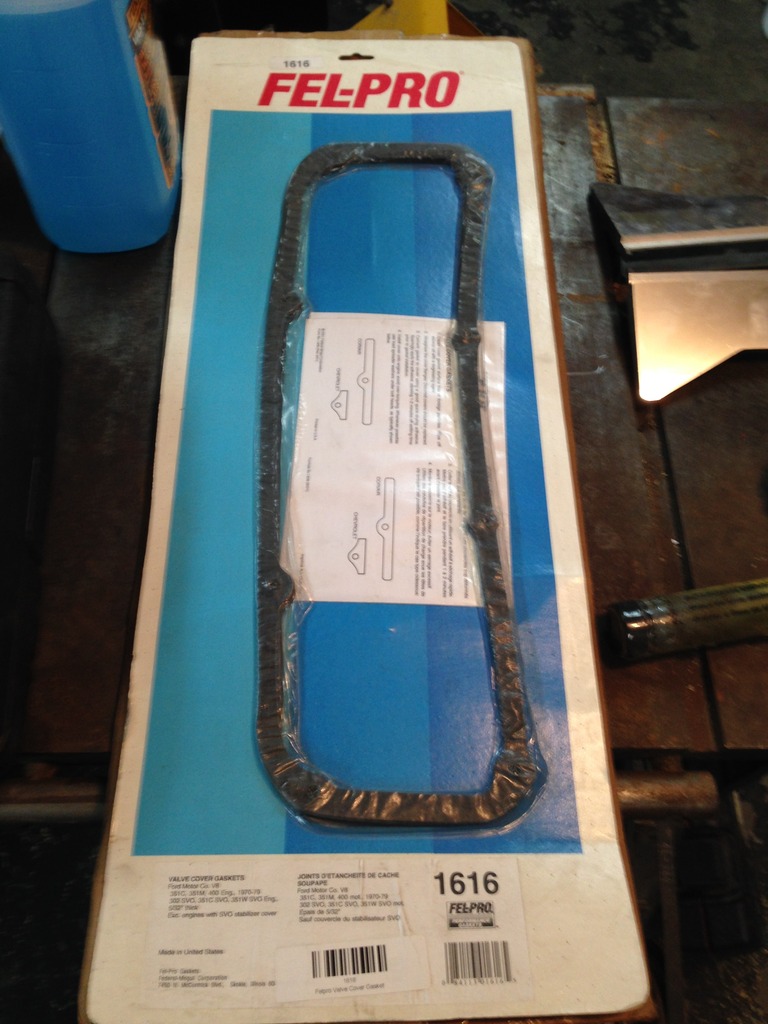
Fel-pro valve cover gasket set came in. Installed it in the truck and cleaned up the valve covers real good.
Driver side before:
Driver side after:
Passenger side before:
Passenger side after:
The leaking through the valve covers stopped, the brakes worked, and things were looking good.
Next comes a very large amount of work, and me fulfilling my end of the bargain with my parts guy. I set out to have a body swap completed on the truck by the end of November.
This first post covers from June 2016 to September 2016. Not much happened until the start of October 2016 after this little bit of work.
Lots, lots more to come.
My older build thread was a 1978 F150 2WD longbed regular cab - started the build in 2010. The first truck had a lot of things wrong with it, but it was a really good learning experience the entire time I owned it. In the end, it wasn't I wanted. I wanted a 4x4 truck, so that's what I bought in 2016.
Here's the 2WD F150 build that I started: https://www.ford-trucks.com/forums/1...ld-thread.html
It's not necessary to go through the first build thread, but it's where I collected a lot of my parts and where my inspiration to have a nice dentside started.
So this is my new build thread. The truck I want to put the most effort/time into because it's almost exactly what I want. A 1979 F250 4x4 regular cab longbed.
Here's the specs on the truck:
1979 F250
4x4
400 motor
C6 transmission
NP205 transfer case
Dana 60 rear differential - 3.54 D8TA-YD BOM: 610023-2
Dana 60 Sno-Fighter front differential - 3.54 D8TA-TB BOM: 603901-1
Unfortunately, it's not a sno-fighter truck. But it does have a very nice sno-fighter Dana 60 High Pinion front differential
I know that the truck was originally an Alberta truck. It's owners tag was listed as Calgary under the name: Gary Bilous. You could also tell the truck was from Alberta by wood bed liner that was installed in it - this is very common for Alberta vehicles.
Here's the original Warranty Tag:
Vin: F26SPFD1345 L K B6
F265 4 37I K
Cab Sticker:
Vin Plate:
I bought the truck off my Ford parts guy. He had just acquired it from someone in Kipling, a small town in Saskatchewan. I learnt about it one day, drove out to his place to take it for a drive, and fell in love. I had to have it.
I worked out a deal with him:
1) Delivery of the F250 4x4 to my doorstep (the truck had no working brakes and all of the lines were cut)
2) $1500 cash for the F250 4x4
3) Time to do a lot of work on the F250, including a body swap
4) Pick-up and haul-away of my original build (for him to keep, including lots of extra parts I don't need)
This deal worked out extremely well for both of us. He tears apart old Fords, mostly dentsides, as a side business. He's got around 50 trucks, and is a very nice person to deal with. Can't say enough good things about him.
In return, I got myself a F250 4x4 that runs, drives, doesn't stop, but works overall. I'm very happy with how it all turned out.
Delivery of the truck:
The dent on the mid portion of the box was from being hit by an ATV.
Apparently a combine tried to eat the rear corner of the F250. A farmer previously owned the truck and took fairly good care of it until he bought a new vehicle. After that, the truck went steadily downhill and his kids often when mudding/joy-riding in it.
As you can see, it's not in terrible shape... but it aint pretty in certain spots.
When my parts guy delivered the truck, the shift collar broke in the steering column. Not a huge deal, but he felt very bad. I wanted to take it for a ride, but never got to when it was delivered. Probably a good thing though because the shift collar was bound to break sometime very soon.
Front differential: 3.54 D8TA-TB BOM: 603901-1 (1979 Sno-Fighter Dana 60)
The fluid on the differential is all brake fluid. The whole brake system needs a massive overhaul.
Rear differential: 3.54 D8TA-YD BOM: 610023-2
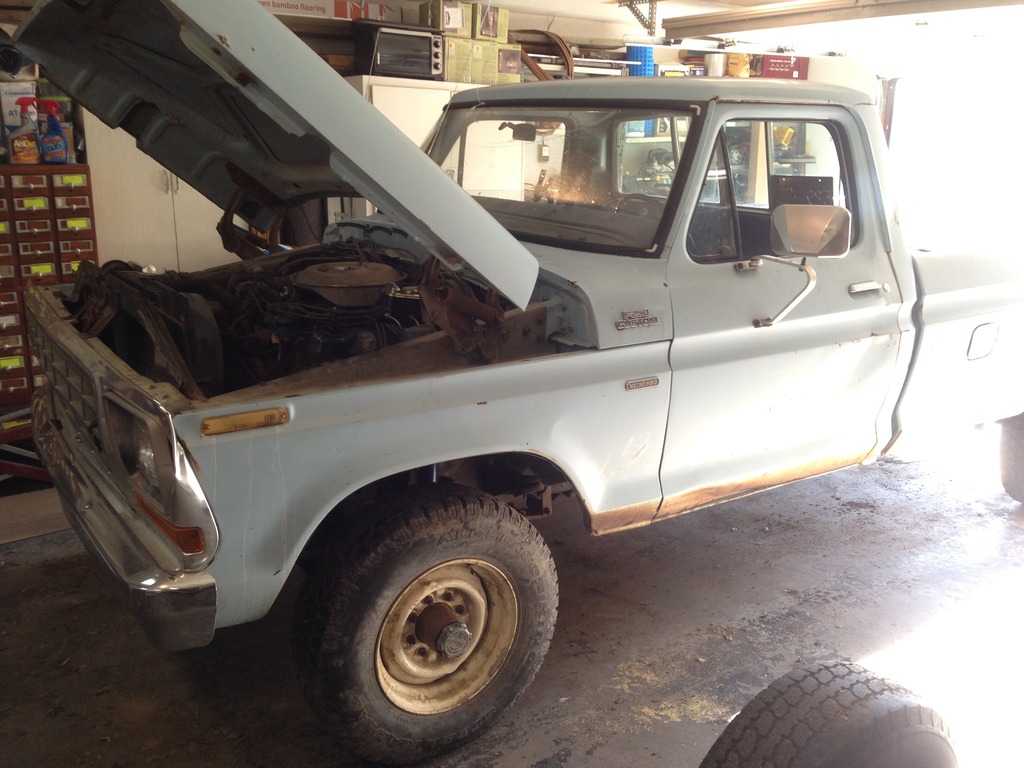
The engine is leaky around the dipstick (or so it looks):
The fuel pump seriously needs a proper gasket:
The valve covers leak and burn antifreeze like crazy:
Since the truck needed brake lines very badly, I started working on them first.
Bought a new master cylinder, brake line flaring kit, 50 feet of brake line, and new fittings.
Started working on the brake lines:
First attempt ever at a brake line. OEM (left), and new line I made myself (right).
After fixing a few small brake lines from the master cylinder to the proportioning valve, I set my sights on the steering column. Luckily, I had a second steering column in my parts stash.
I swapped out the shift linkage to a 4x4 linkage, and installed the "new" column in the truck. Unfortunately, I ended up stretching something inside the column and now it tilts/moves up and down ever so slightly like something is loose. Not good, so I'll be rebuilding one of my tilt columns in the future. For now, it works.
Took out and tore down the original tilt column.
Picture of the broken pot metal shift collar inside the original column.
Tore it down as far as I could using the reference I had
Got the new tilt column ready, and threw it in the truck. Finally, I could move the truck from being parked illegally (in the wrong direction) on the street.
The last thing I did before tackling other issues was bleed the brakes which is where I found out that the rear mid-ship brake line had been rusted out and was leaking fluid like crazy.
I dropped the secondary fuel tank, and saw that there was about 2 feet of brake line turned to dust on the side that touches the frame. The rust was hidden between the frame rail and the secondary tank. The accumulation of dirt/water over time had rusted the line very badly.
Here's a picture of the rusted line location:
The front calipers needed new bleeders, so I changed them out and bled the front brakes so I at least had something to stop the truck. One of the bleeders was broken off flush with the caliper, but I got it out with some drilling, heat and an easy-out. No pics of that work, sorry fellas.
Once I got the brakes working (about 10% stopping power), I moved into the garage where I could get some real work done.
Fel-pro valve cover gasket set came in. Installed it in the truck and cleaned up the valve covers real good.
Driver side before:
Driver side after:
Passenger side before:
Passenger side after:
The leaking through the valve covers stopped, the brakes worked, and things were looking good.
Next comes a very large amount of work, and me fulfilling my end of the bargain with my parts guy. I set out to have a body swap completed on the truck by the end of November.
This first post covers from June 2016 to September 2016. Not much happened until the start of October 2016 after this little bit of work.
Lots, lots more to come.
#3
01-04-2017, 05:28 PM
Before I move on, I found a pic of the brake line work and the new master cylinder. I know how you fellas love pictures so much.
Painted the MC with POR-15. Some of it didn't stick around long when I spilled some brake fluid. Oh well, at least it looks half decent.
Moving on...
So in order to complete my body swap, I had to be very strategic about it.
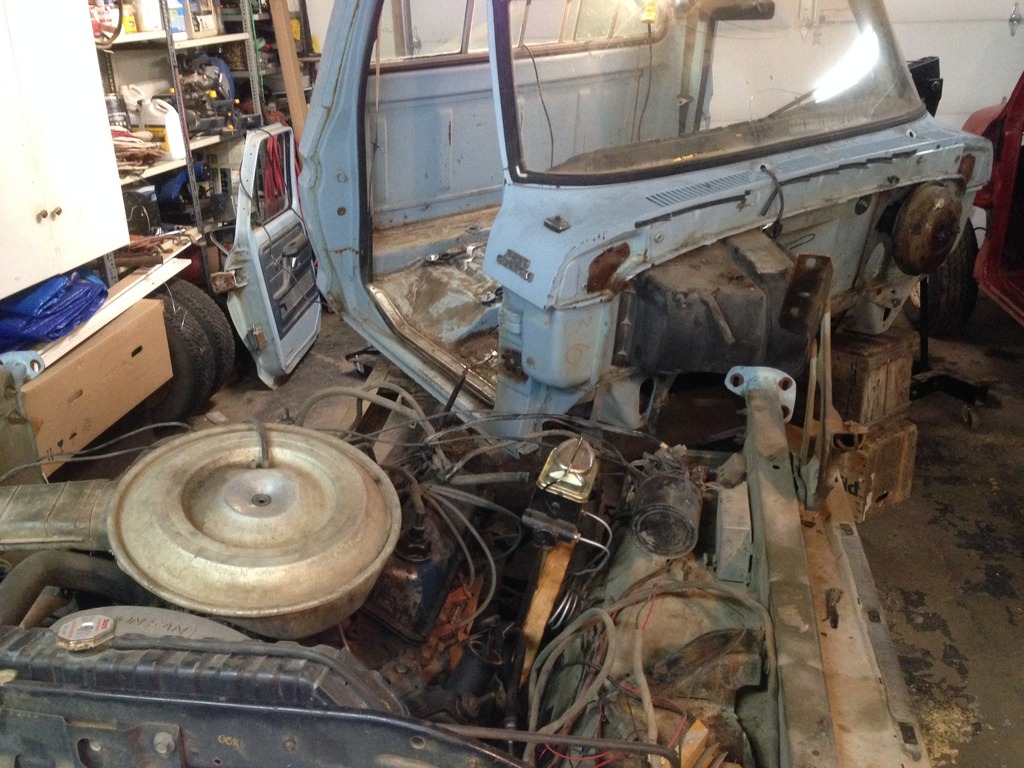
First step: get the F150 2WD out of the front garage, but leave the box behind.
Motor and trans were gone from the truck. I sold them for some cash because they were useless to me with a running Ford 400 under the hood of the F250.
An organized mess in the garage. This mess used to be in the box, but since it's standing on wooden sawhorses, I wanted to make sure the box wouldn't tip or the sawhorses wouldn't collapse.
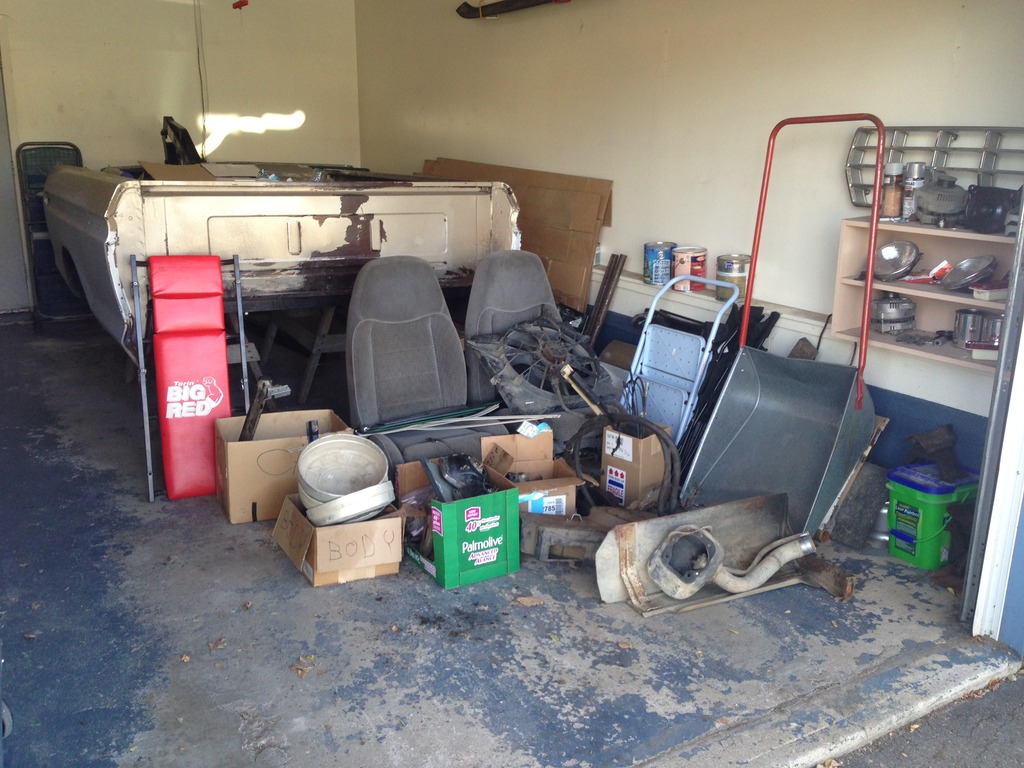
Move day. My dad in the F150, me driving the F250. Pulled the F150 around to the back alley and pushed it up the rear driveway with the F250.
Gotta love how strong these old bumpers are
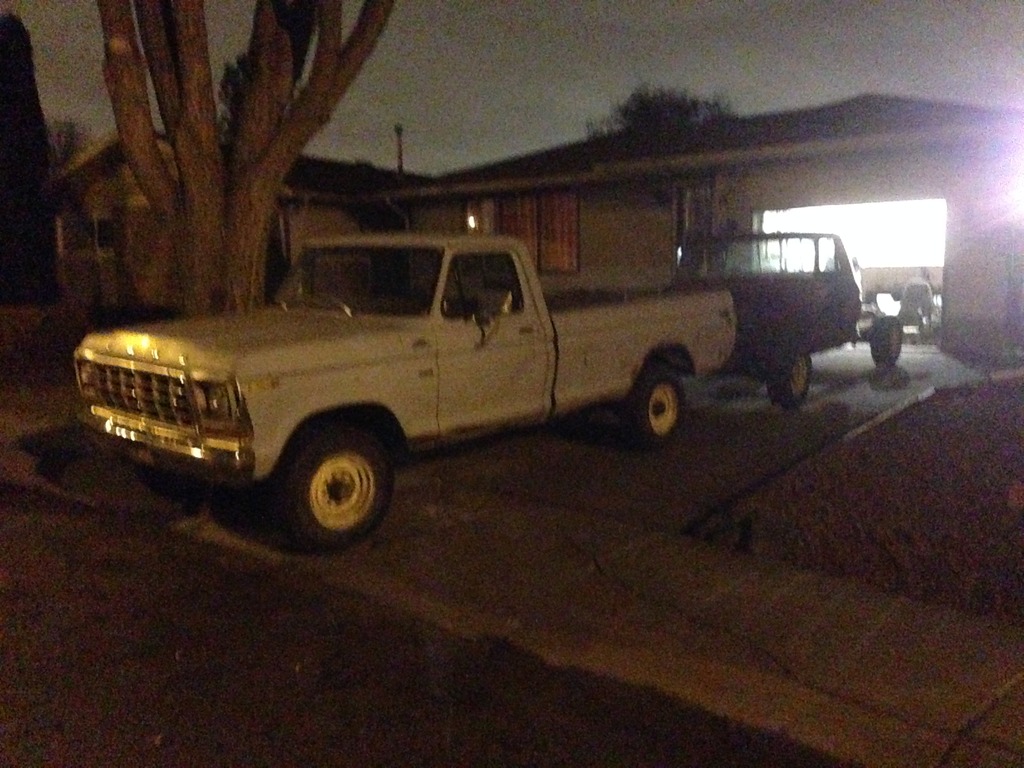
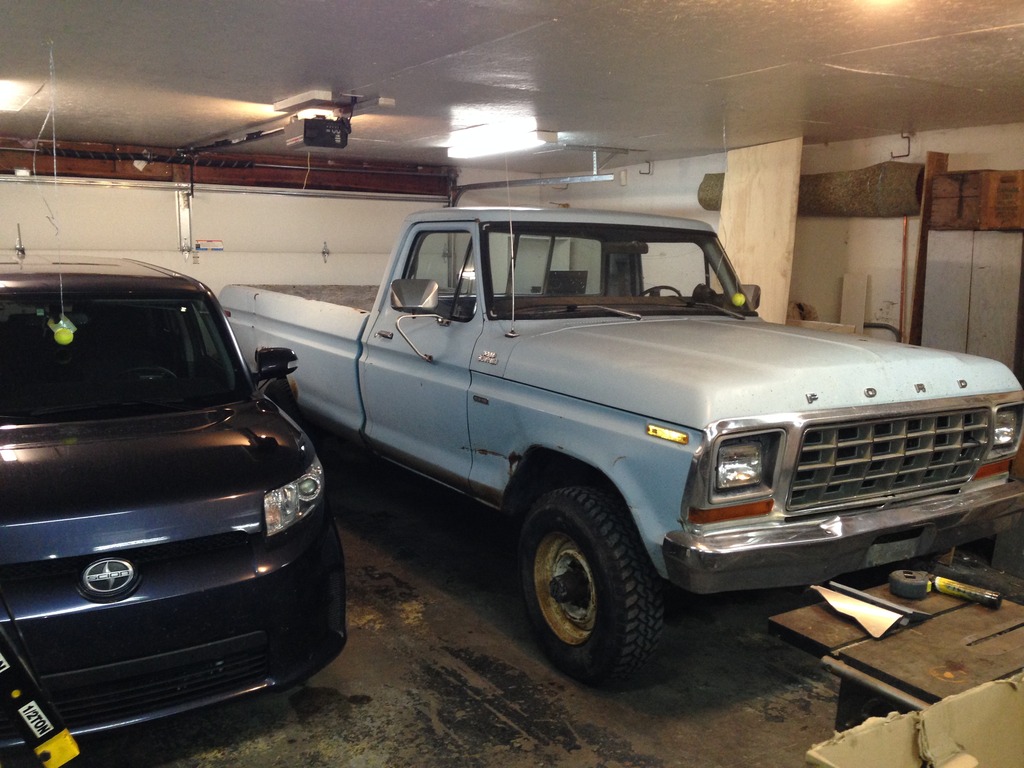
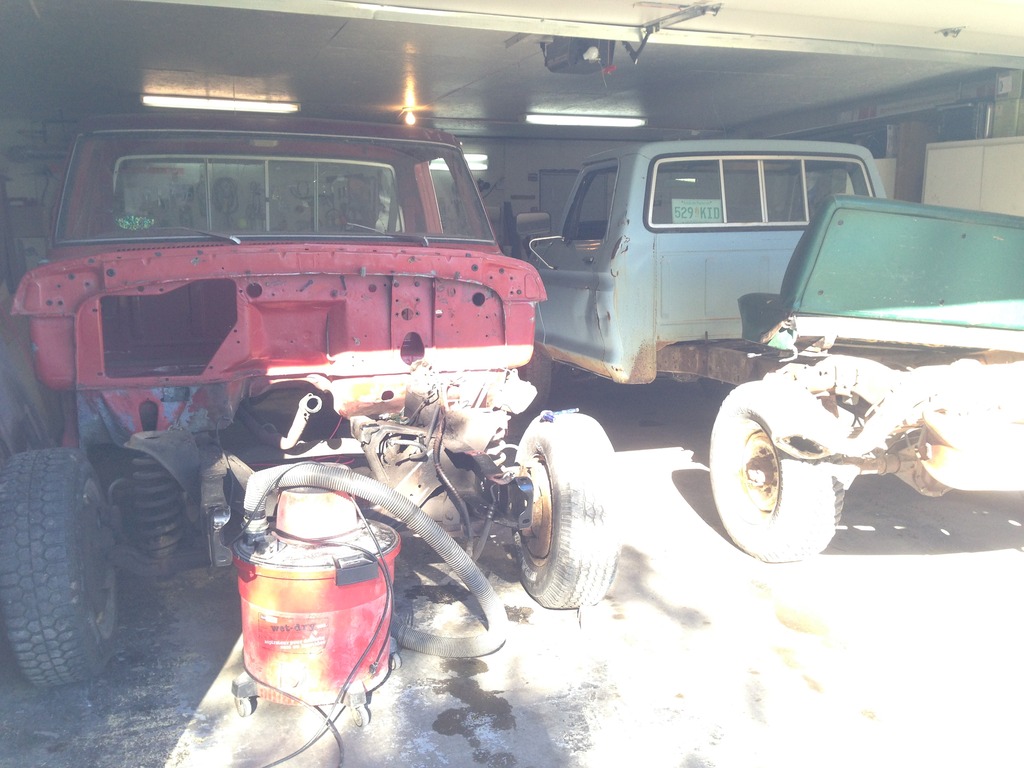
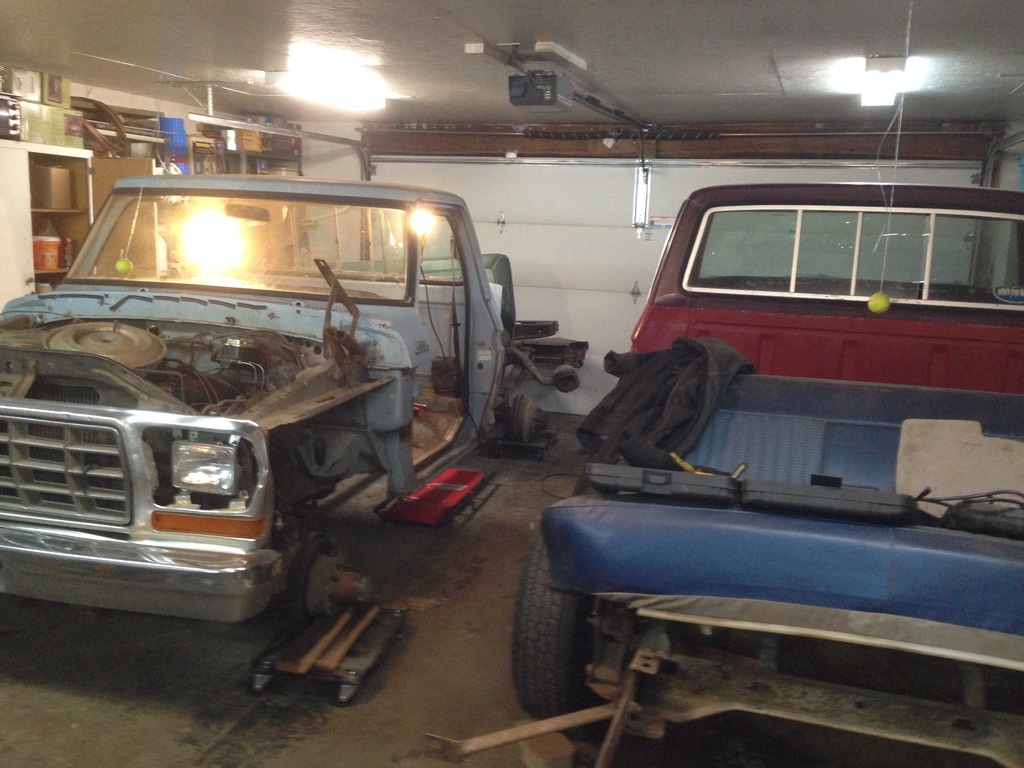
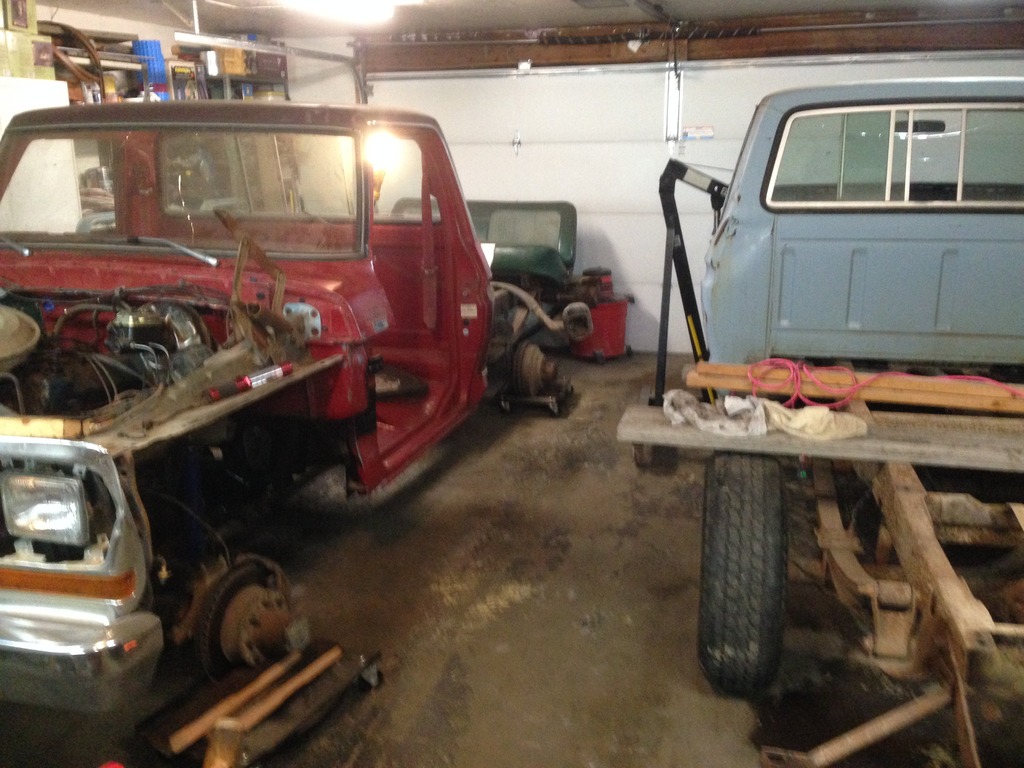
Both trucks in the garage. Let the fun begin.
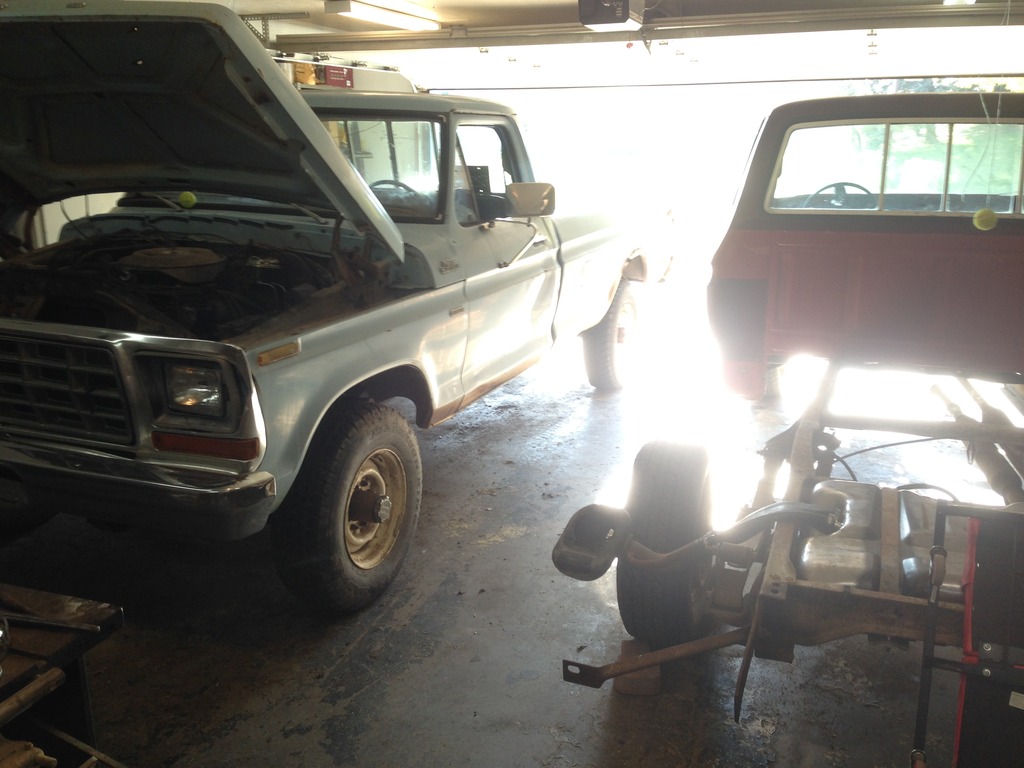
The Plan:
Swap the body parts (cab, front clip and box) from the F150 onto the F250. Then move all of the F250 body parts onto the F150 and prep it for my parts guy to come pick it up.
I started the body swap on October 1, 2016.
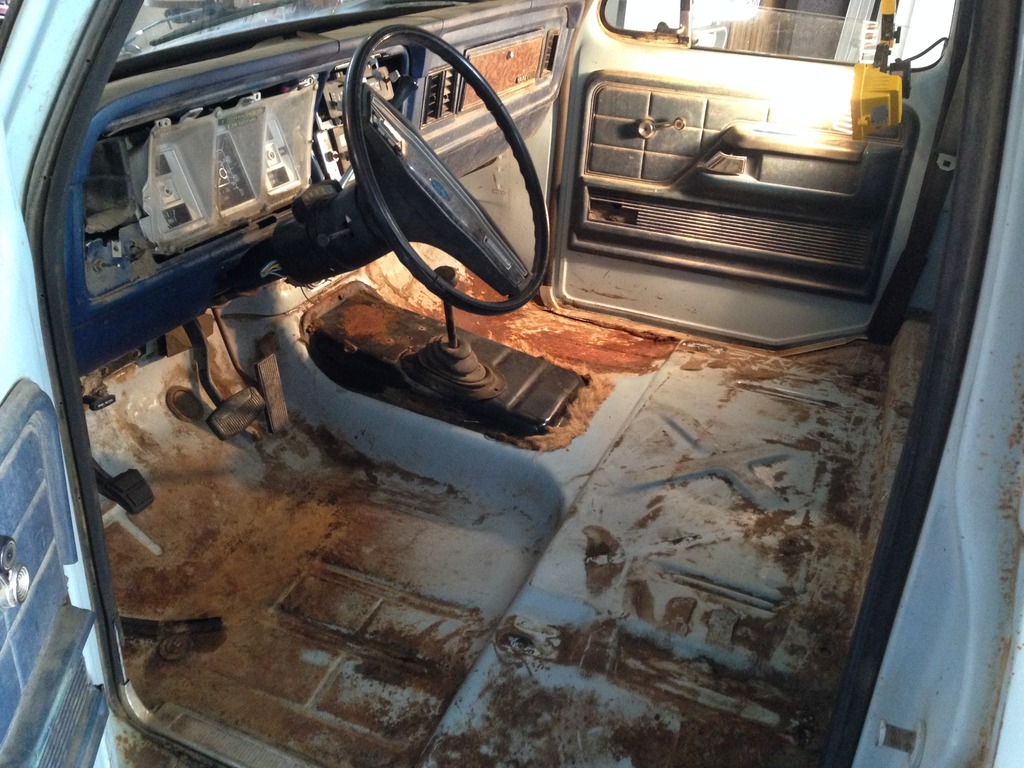
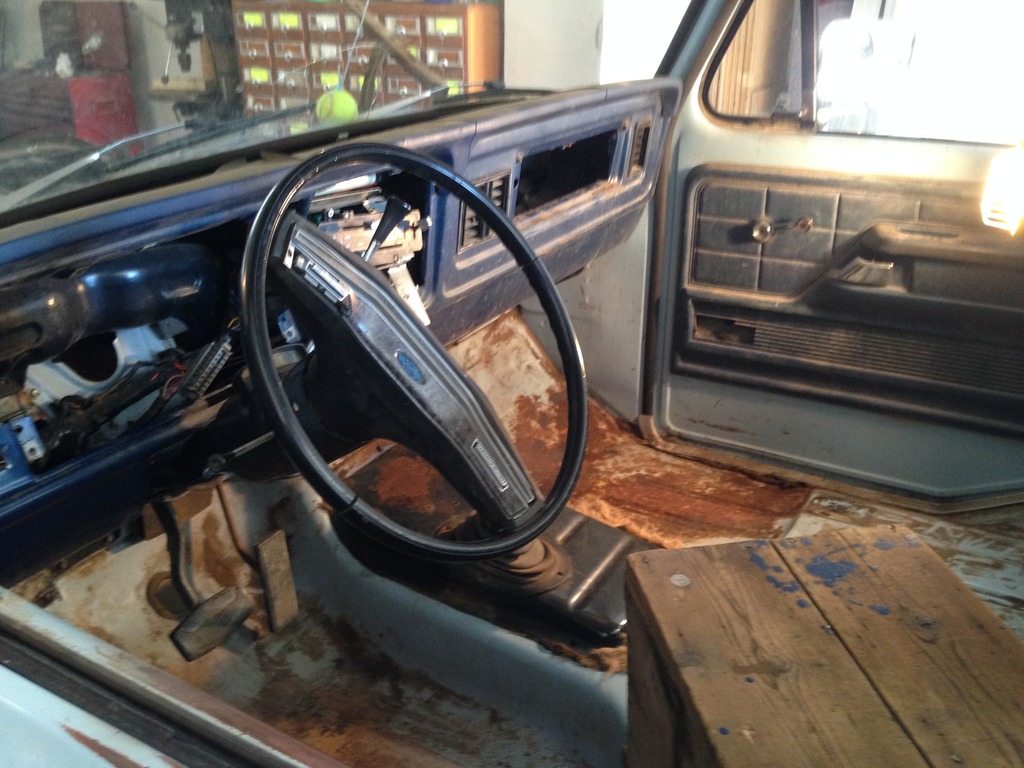
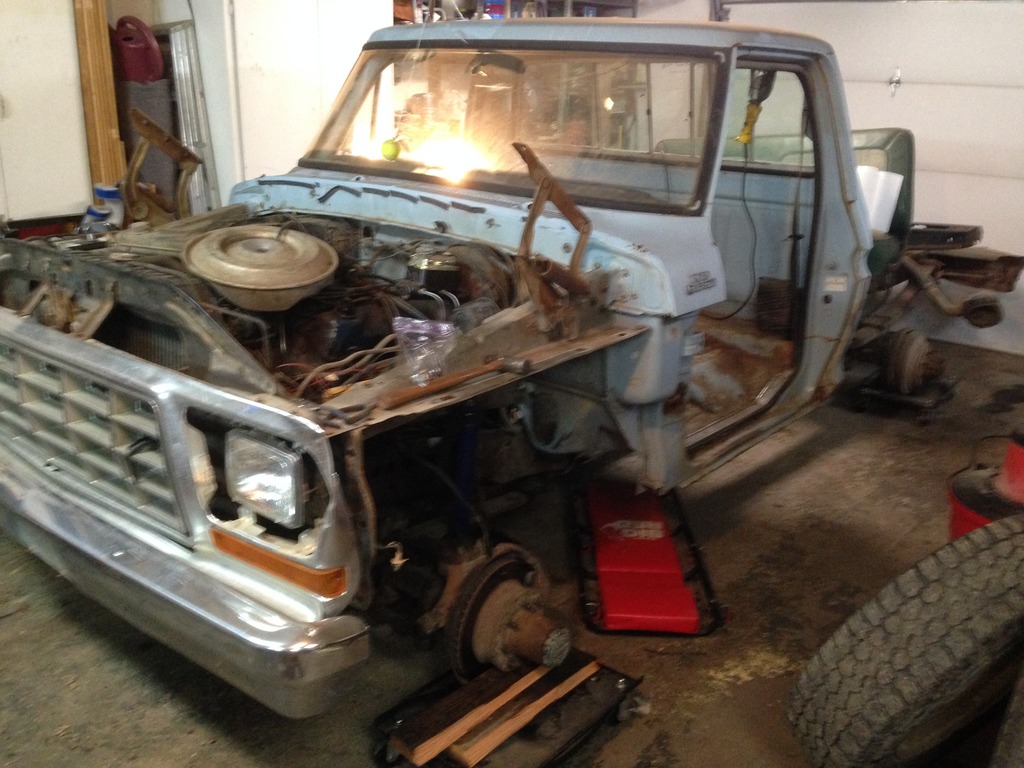
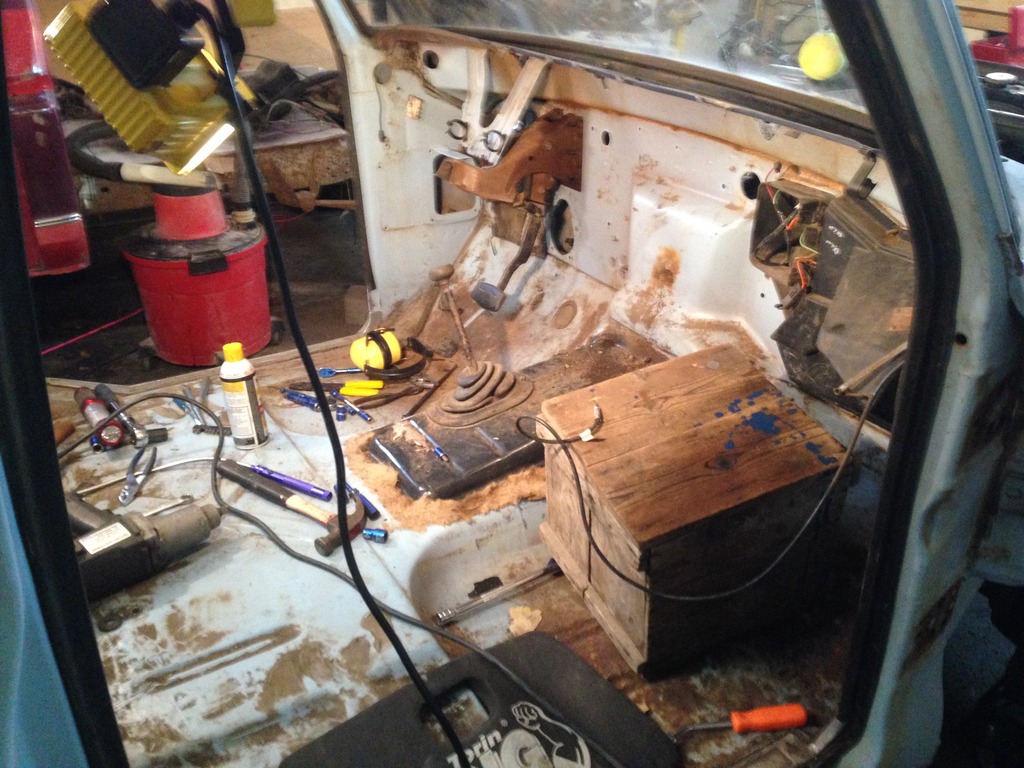
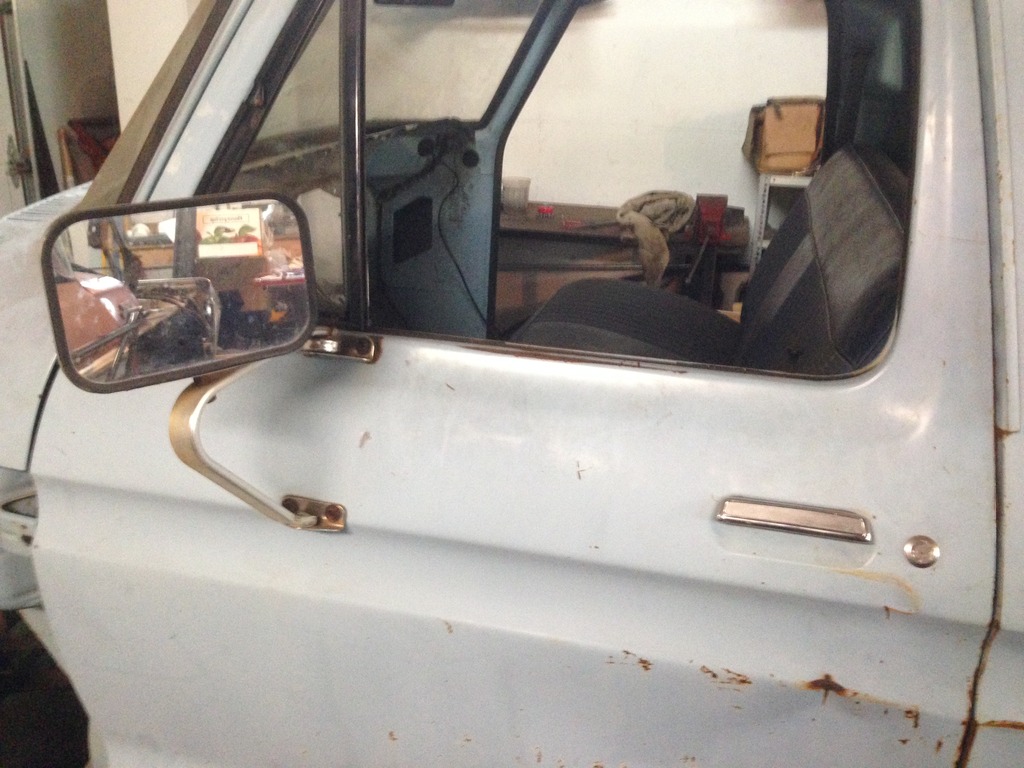
As usual, the blue truck was full of mouse crap, dirt and dust. It was a farm truck, so it's expected.
Seat was first thing to go. Rubber & Underlay removal.
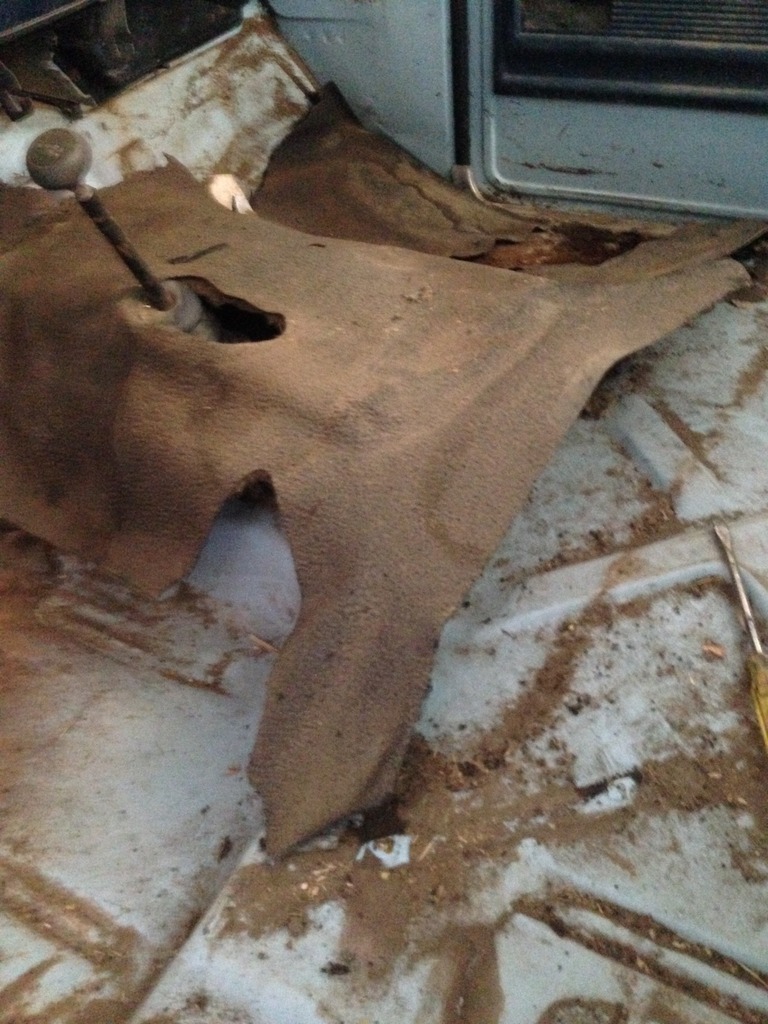
Yeah... dirty...
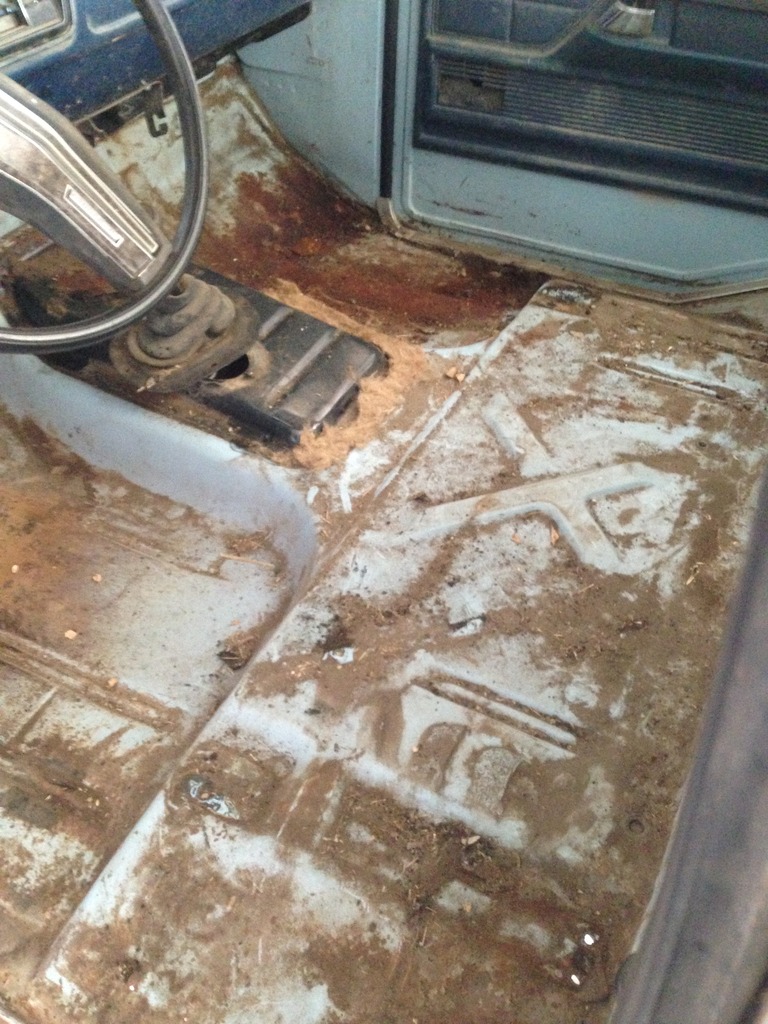
So this is basically where the true tear-down started. I had only 1 issue with the entire tear-down... one of the gauge cluster screws was stripped and wouldn't come out. Used a dremel tool to cut the head off and remove the rest with pliers.
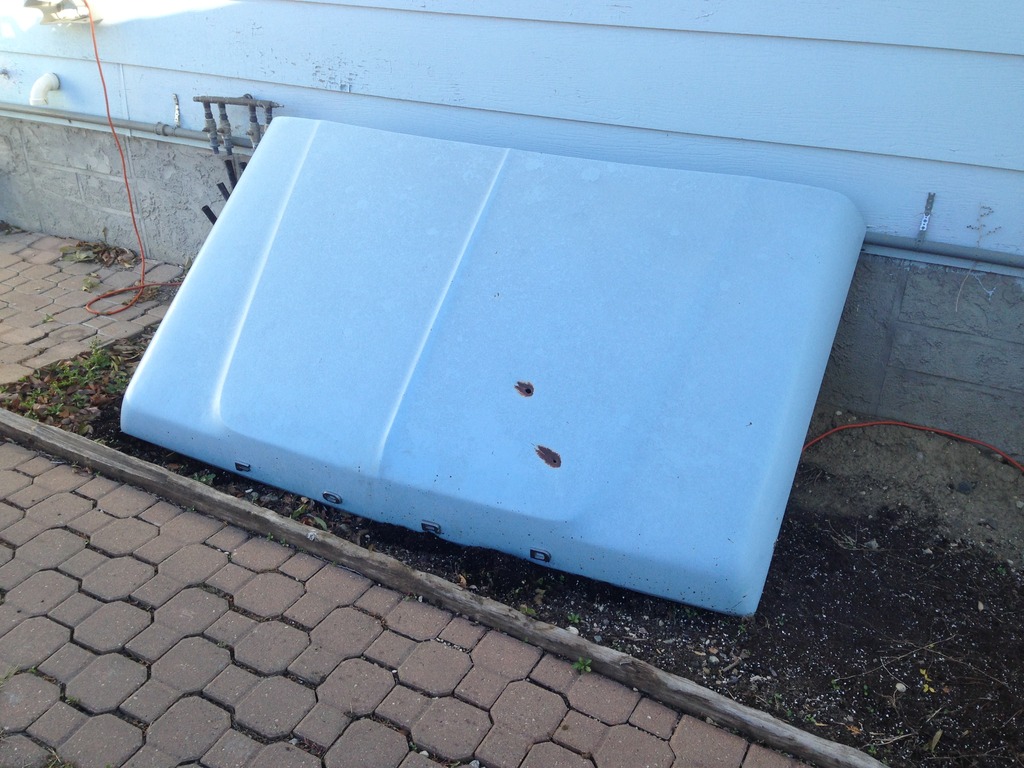
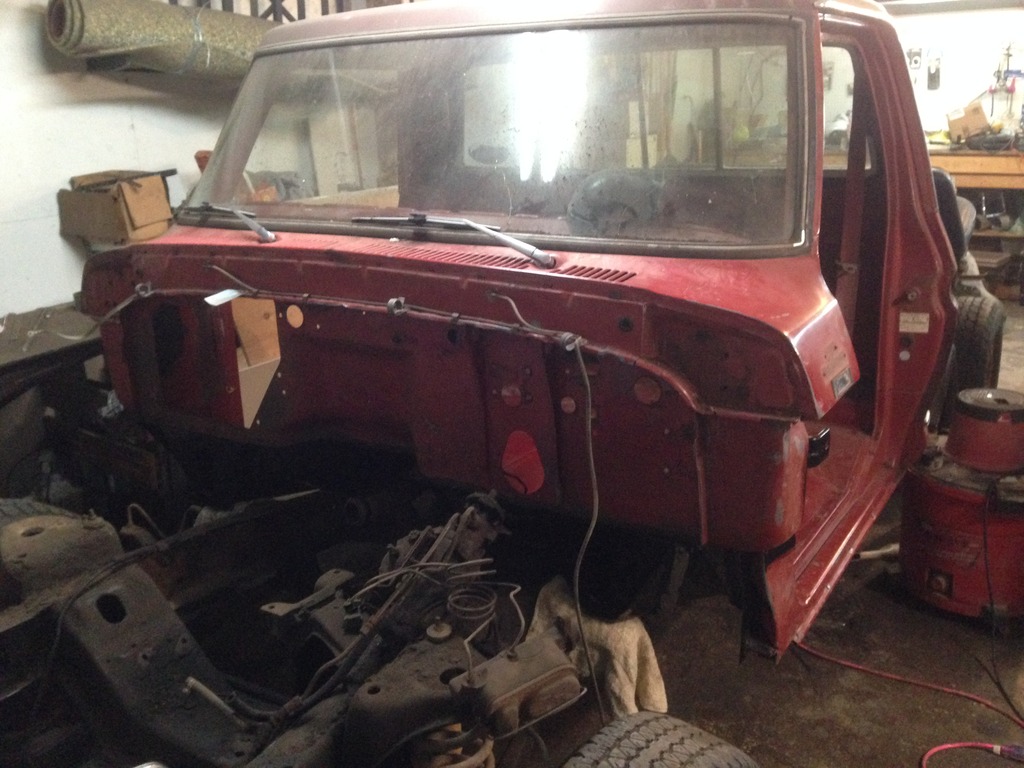
Removed the hood. Notice the 2 buck-shot holes (rusty spots) in the hood? From what I can tell, the shot missed anything important under the hood. The front windshield has some nice buck-shot bruises in it too.
The kids who took this thing joy riding really had a good time with it.
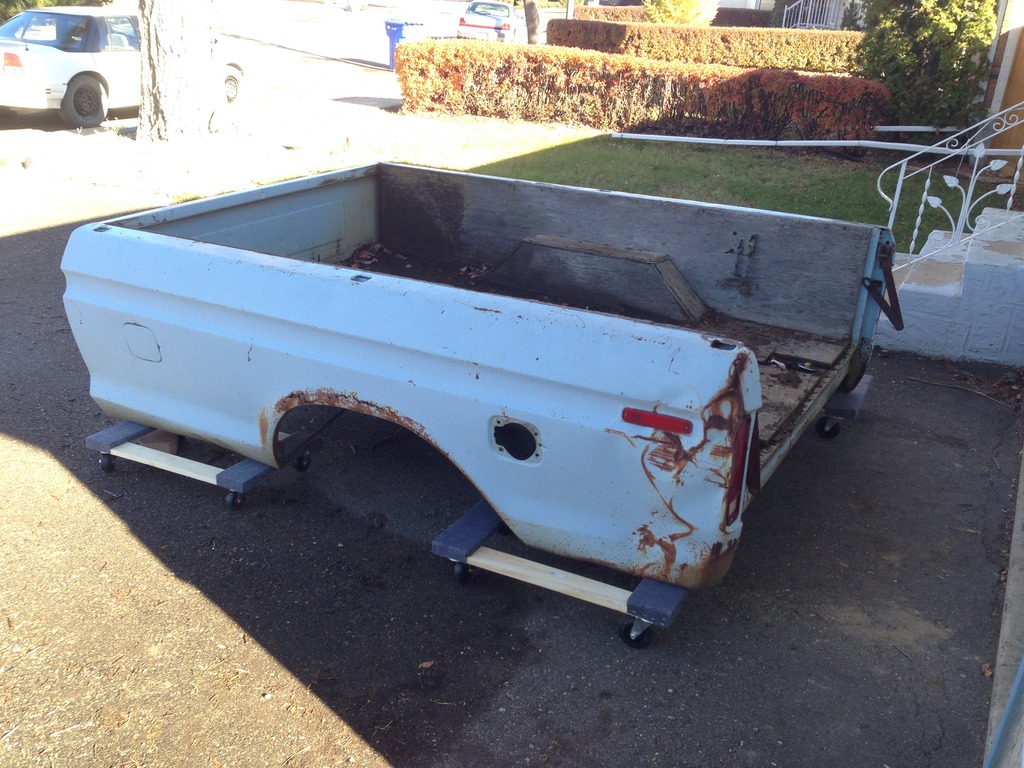
Blue truck driven back around front and had the box removed. Set on dolleys for temporary purposes and so it could be wheeled around if needed.
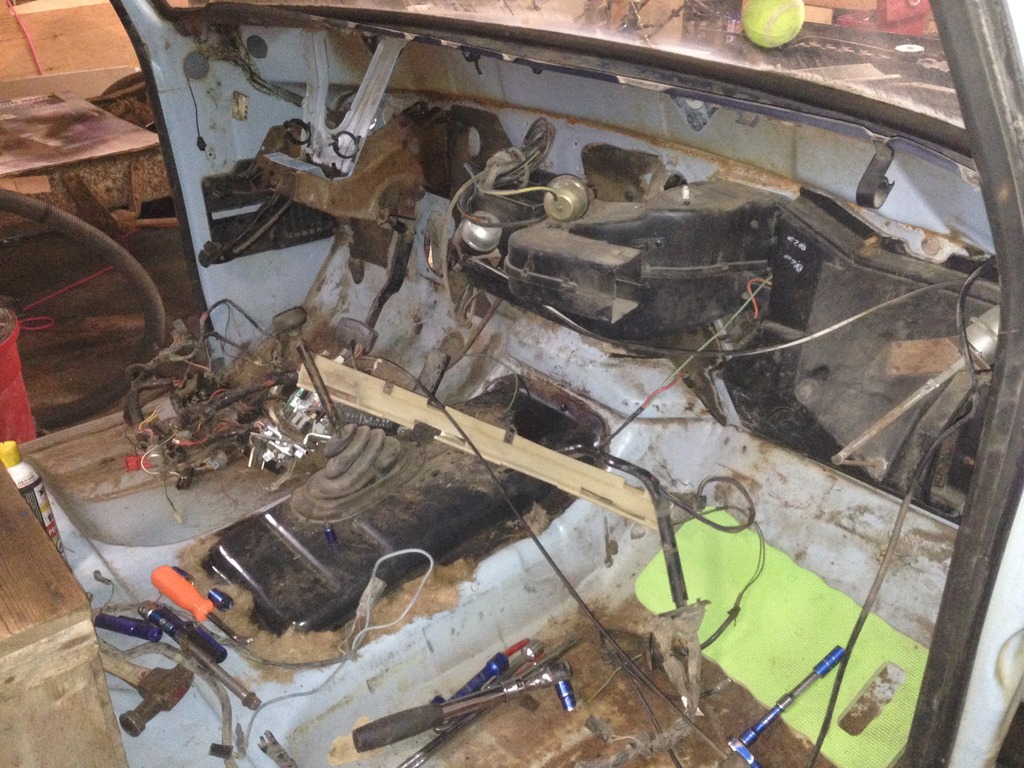
Back to the rear garage we go. Tear-down continues.
Lots of vacuuming mouse poop, and parts removal. I need a three car garage lol.
Wooden antique egg crate used as my driver seat for moving the truck around
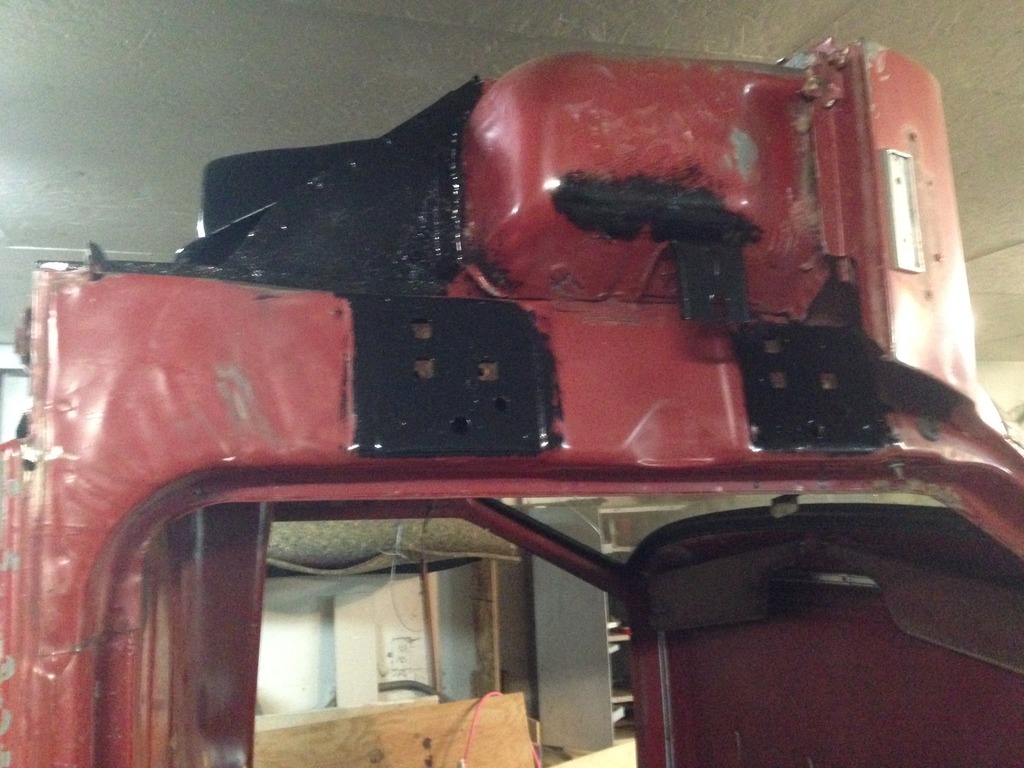
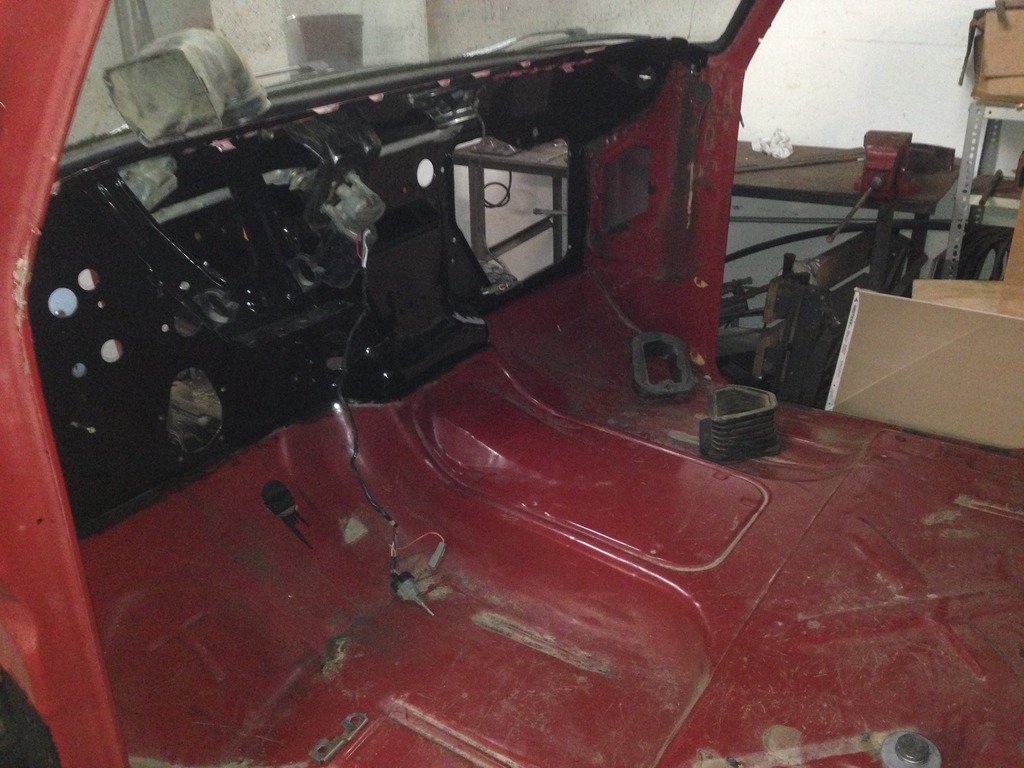
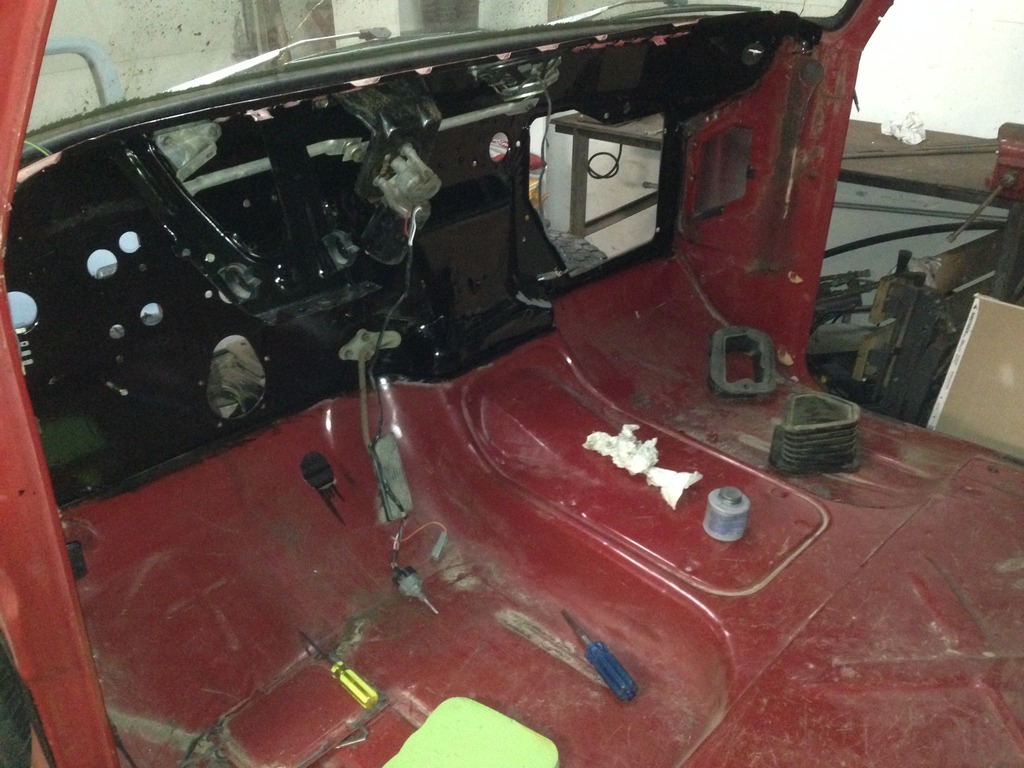
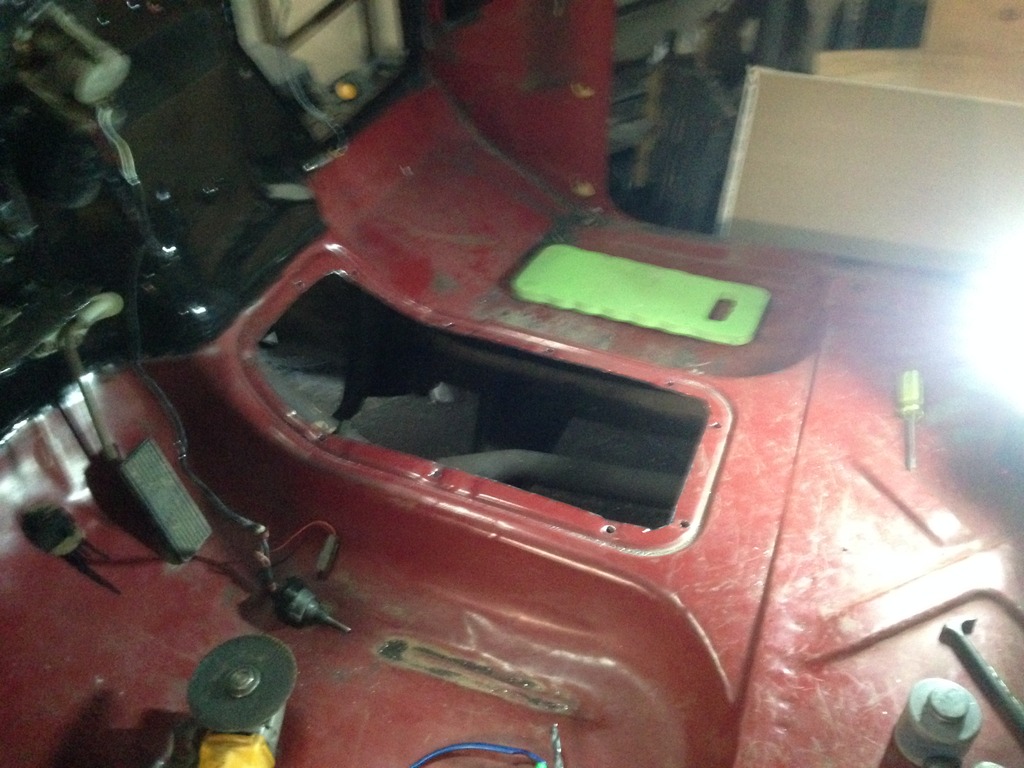
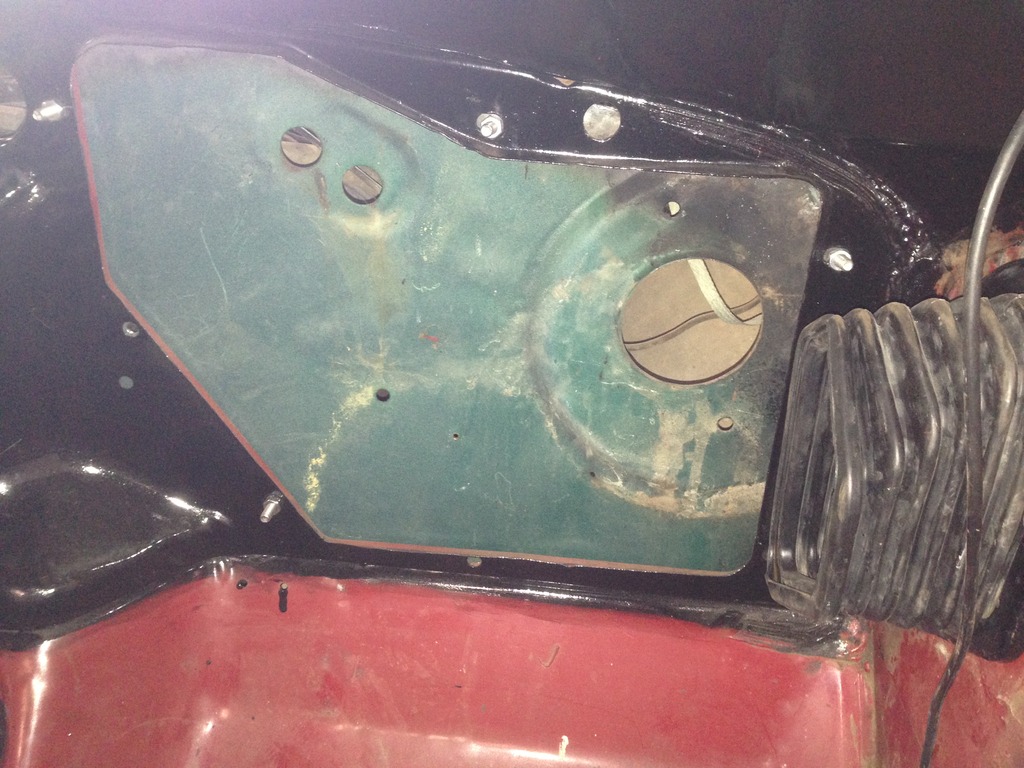
Decided that before the red cab (good cab) gets put on the blue frame, it needs to have its rust fixed on the interior. Forgot to snap a picture before I started, but I used an angle grinder on the firewall and dash area, then POR-15'ed everything.
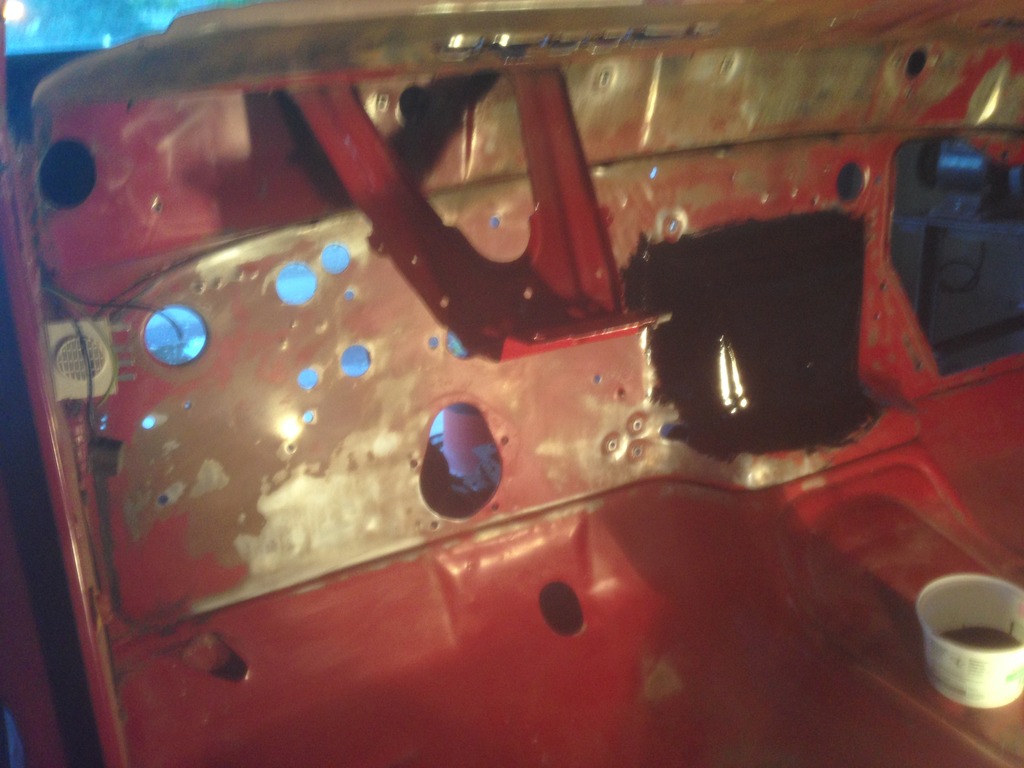
Much better. Now I know I won't have rust behind the dash.
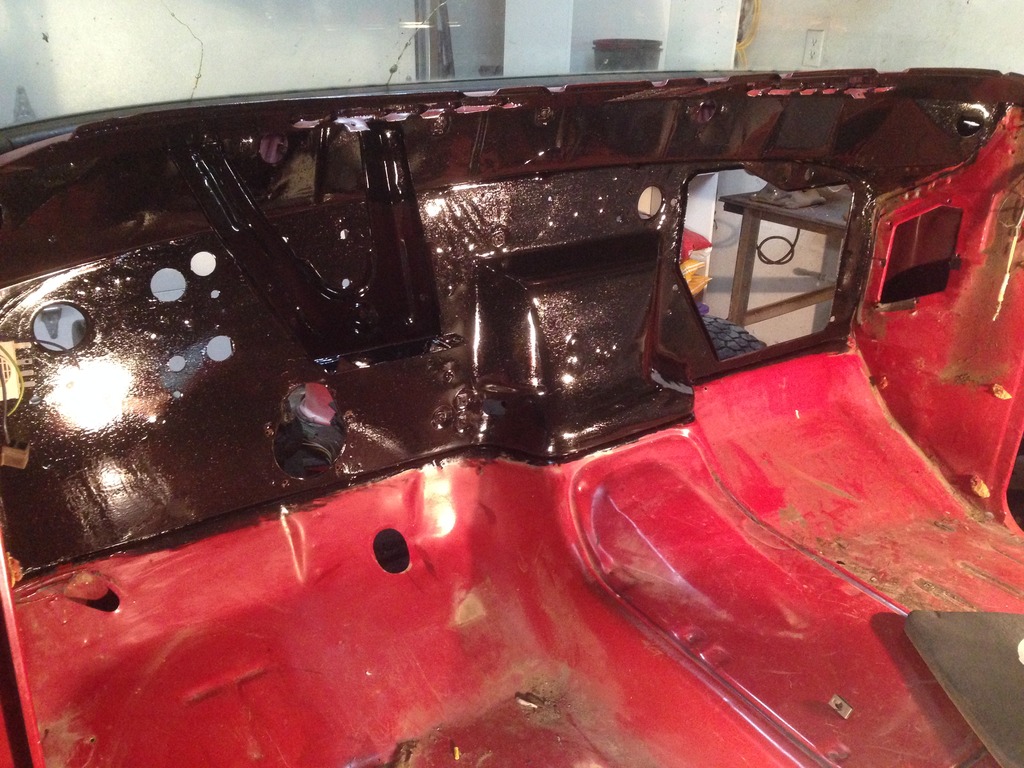
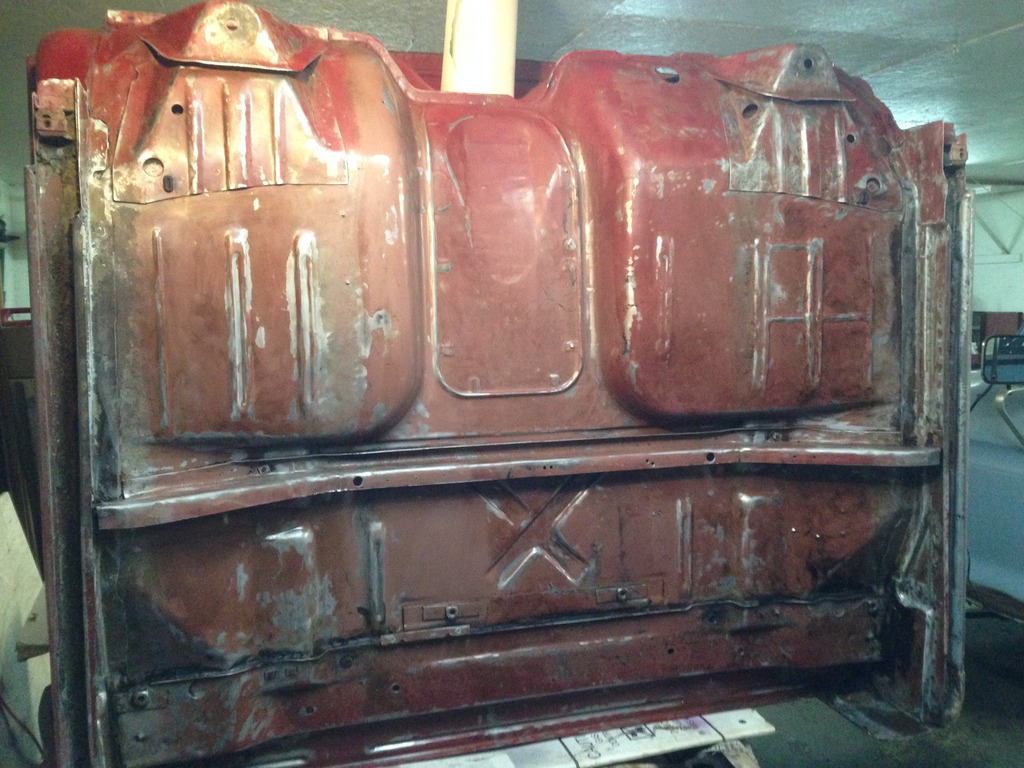
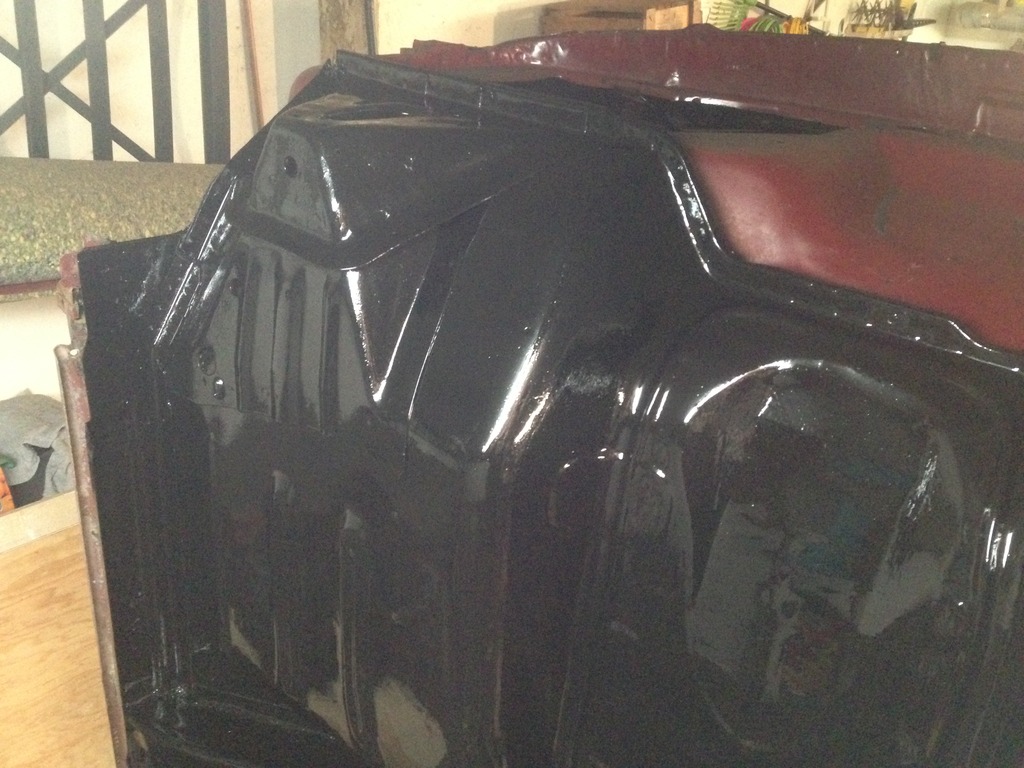
Figured I'd go one big step further too. Cab on its back to get the same treatment. This cab was in great shape on the underside because it had some sort of sound/bed liner sprayed on it at some point in its life. It basically saved the metal from rusting
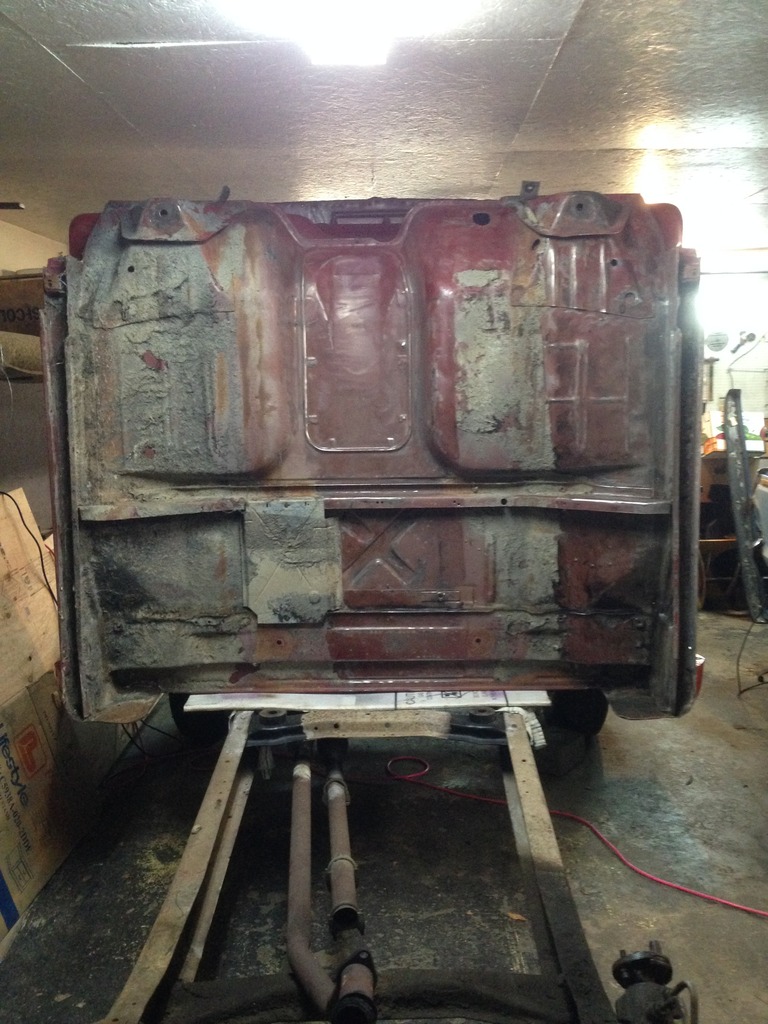
100% stripped. I would have sand-blasted it, but I use wire wheels instead because it's what I had. Still worked out great, just took 10 hours to strip the underside...
POR-15 complete. Minus the lip just inside the door sill... that will come later though because I can't reach in that small space with a wire wheel.
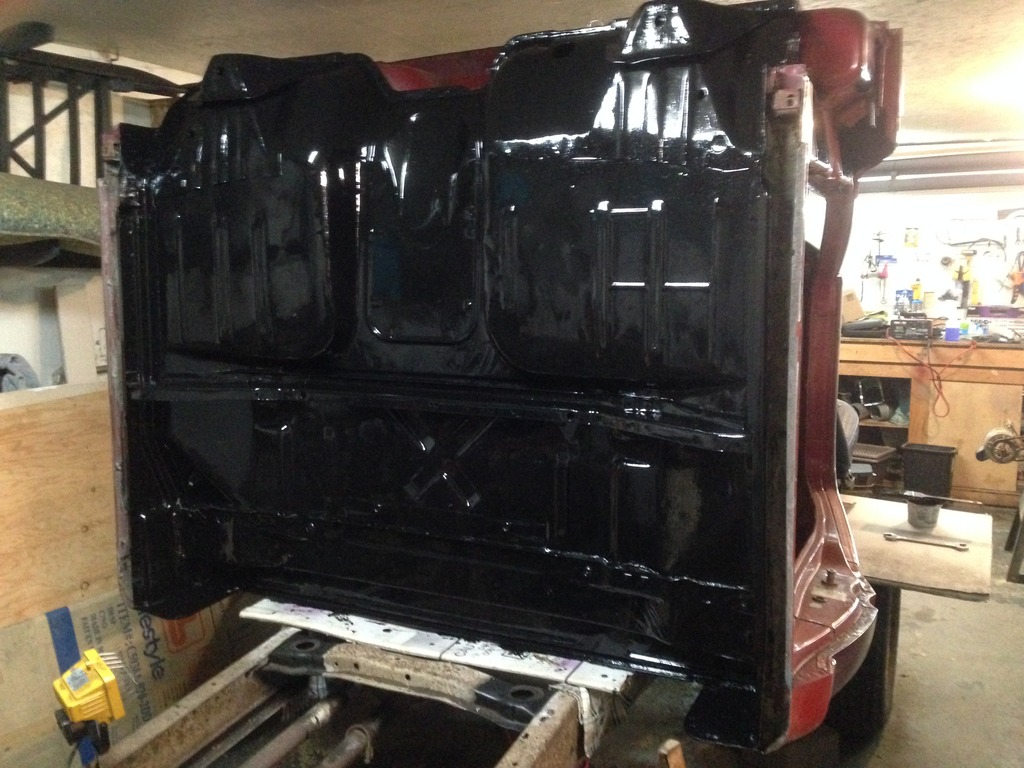
Neat defined line where the POR-15 stops. I didn't want the firewall to be jet black.
Door jambs/mounts got a good treatment too because they were seriously rusty.
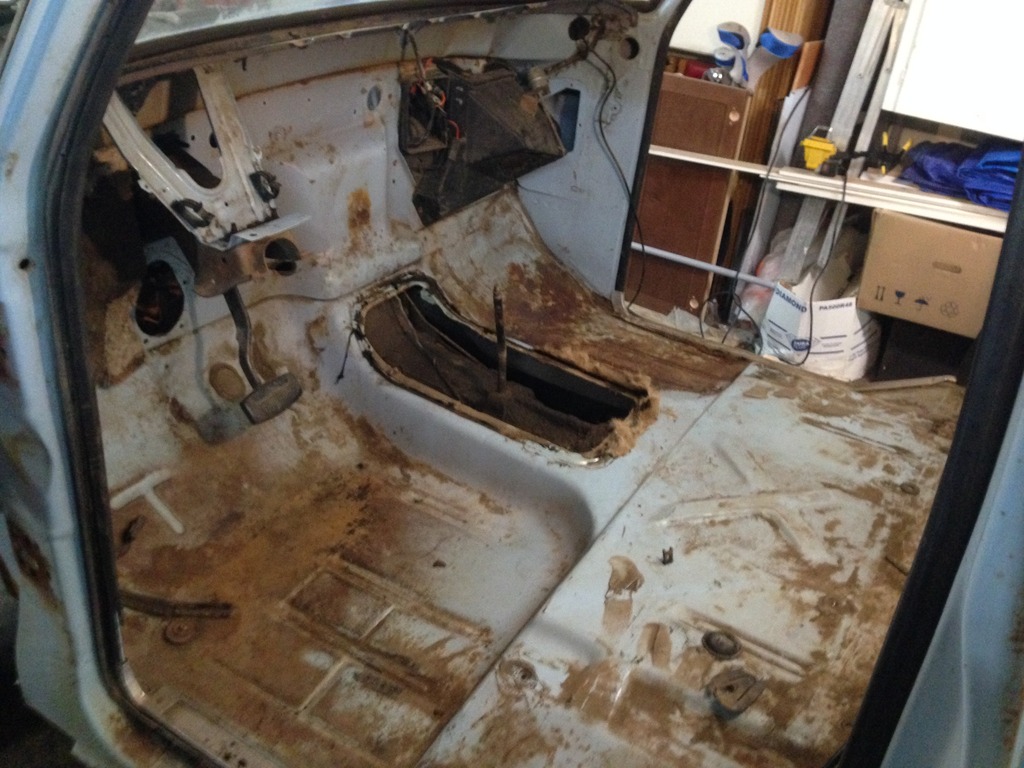
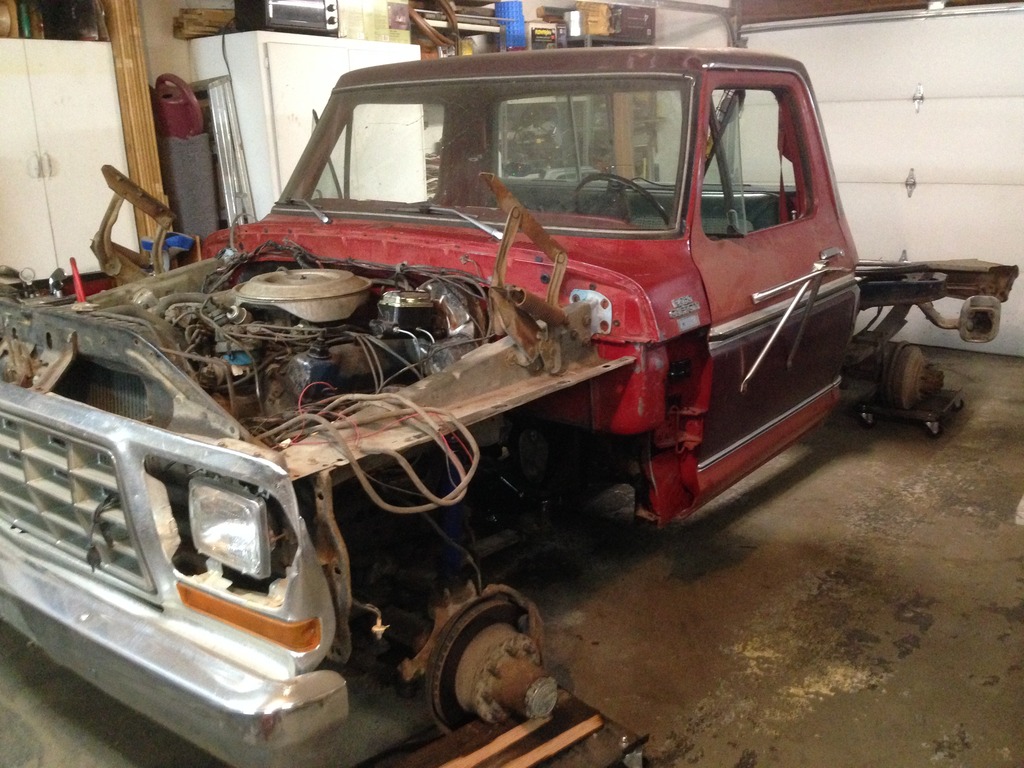
Doors off, rims/tires off, and F250 put onto wheel dolleys with blocking under the disc brakes. I don't have high ceilings, so this had to be done. Made the engine bay easier to access too
Cab nearly stripped. A/C stuff was difficult to remove.
Almost ready to go. New wiper motor installed from F250, along with new wiper arms.
Getting close!
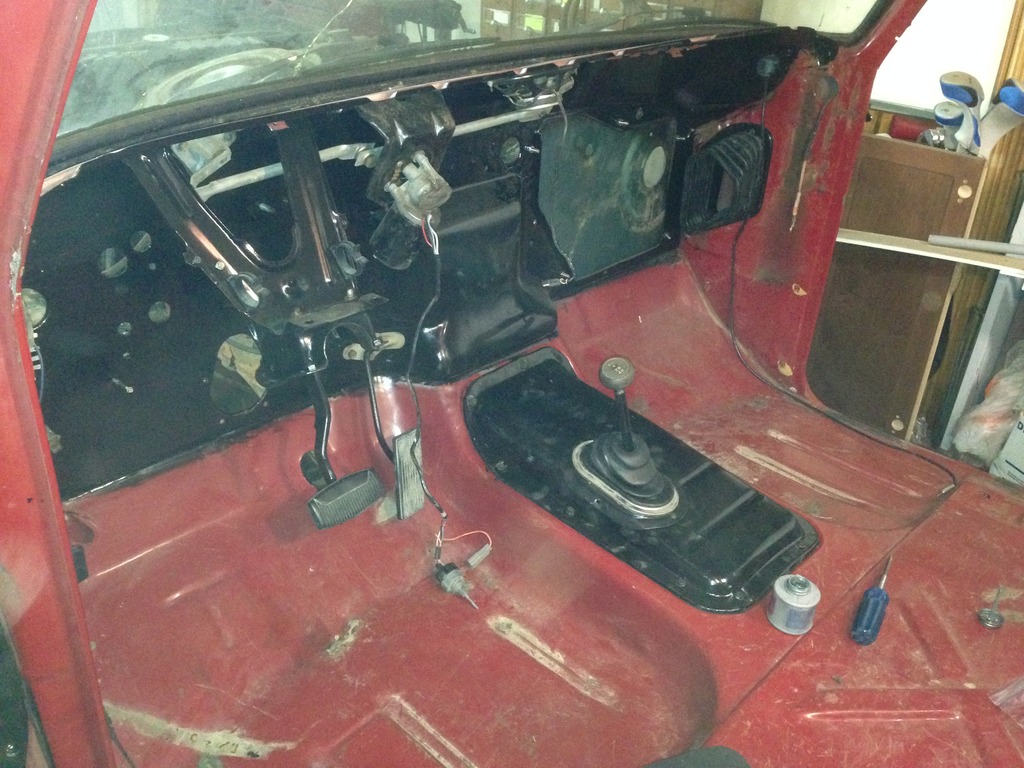
Almost forgot to cut out the new hole for the transfer case. Had to do that before the swap.
Traced the transfer case cover + holes, and cut/drilled.
Now we're ready to rock and roll.
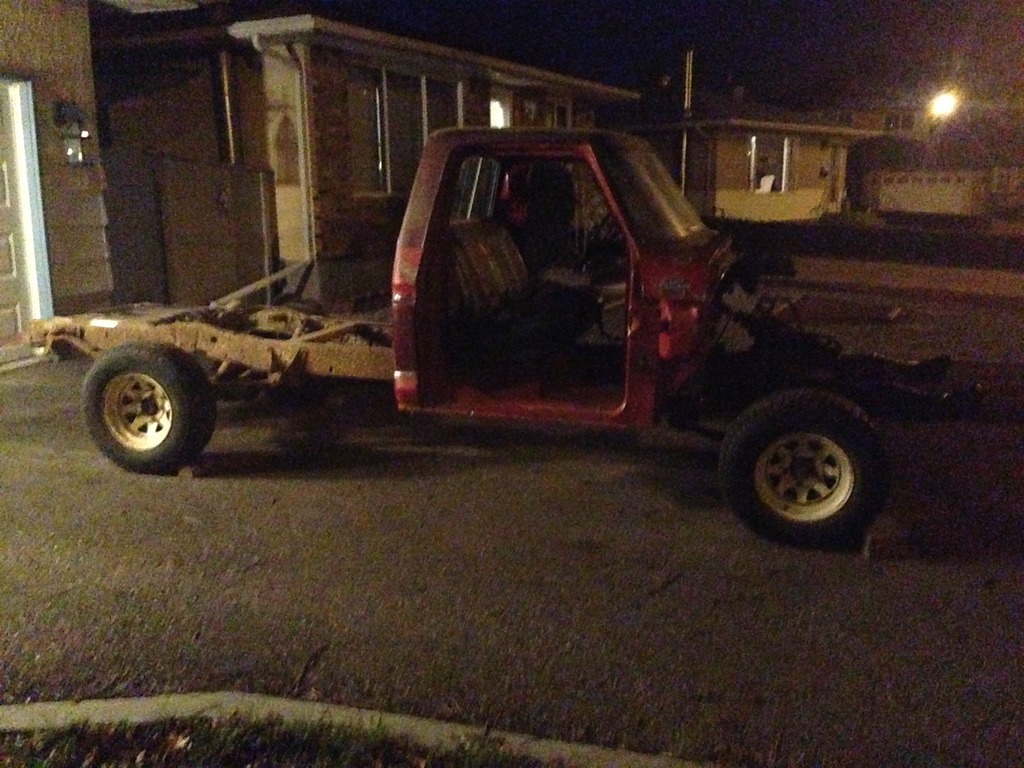
This is how I lifted the cab. Lots of straps and 2 grown men to keep the cab from tilting forward. She's very front-heavy.
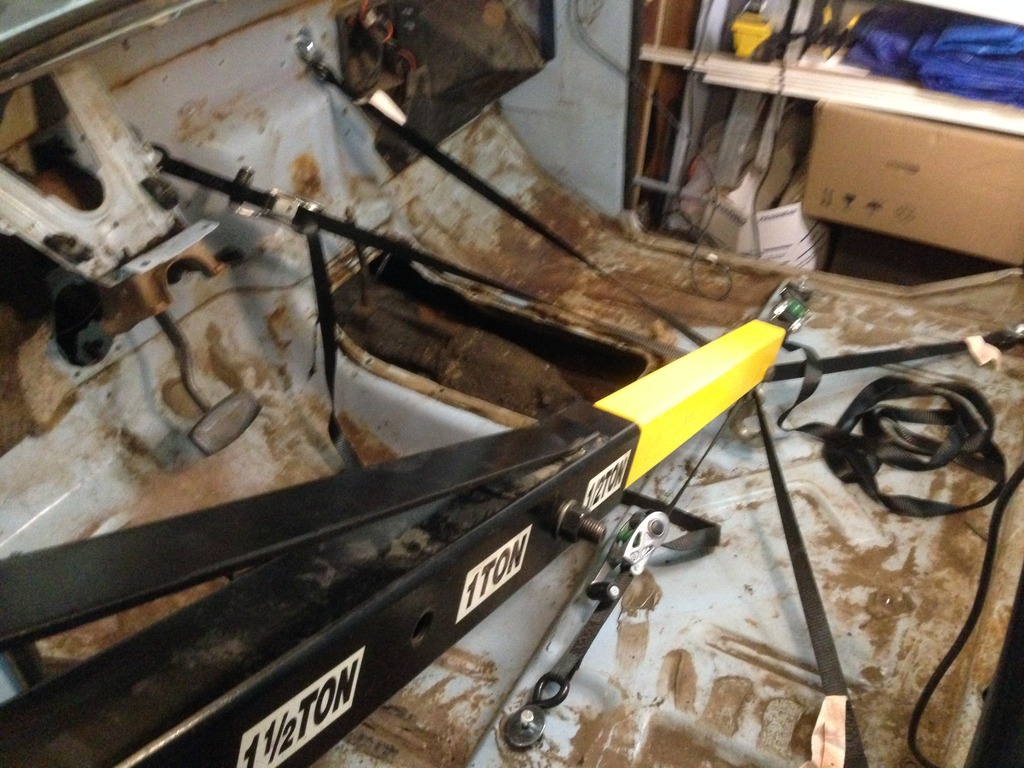
Off she comes. Temporary stopping point to take a picture and take a break. Dang these suckers are heavy!
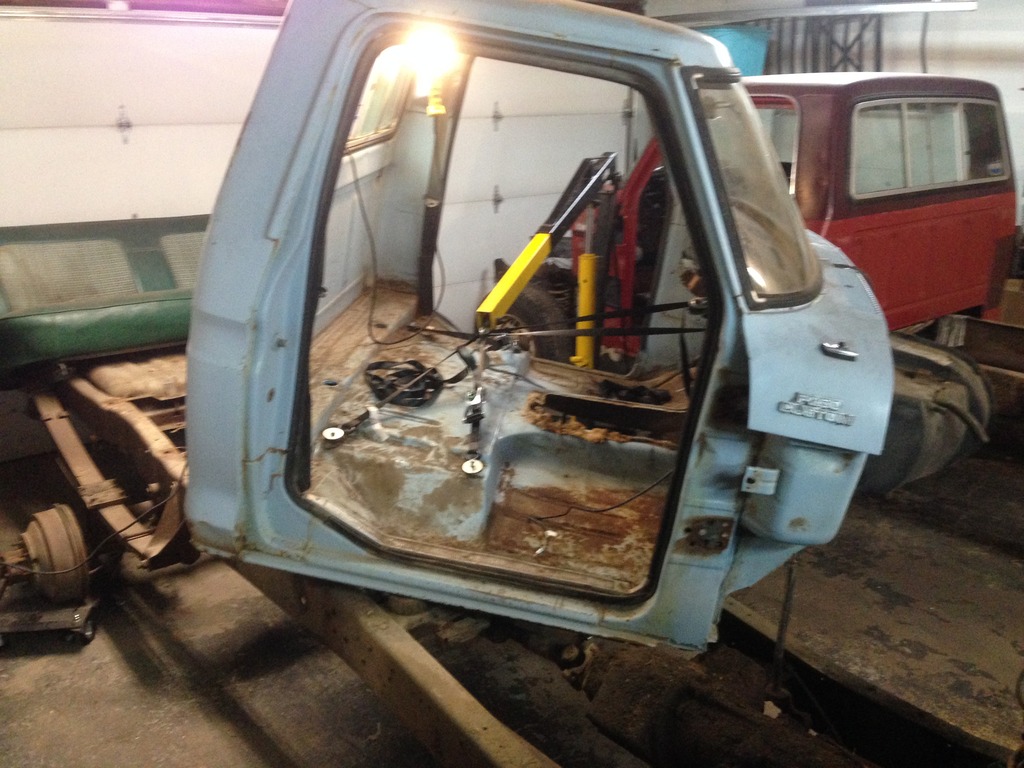
Looking pretty bare!

This is my red-neck crew cab lol.

Everything up to this point took me 5 full days. Had a 5-day weekend, worked hard for 14 to 16 hours each day.
Painted the MC with POR-15. Some of it didn't stick around long when I spilled some brake fluid. Oh well, at least it looks half decent.
Moving on...
So in order to complete my body swap, I had to be very strategic about it.
First step: get the F150 2WD out of the front garage, but leave the box behind.
Motor and trans were gone from the truck. I sold them for some cash because they were useless to me with a running Ford 400 under the hood of the F250.
An organized mess in the garage. This mess used to be in the box, but since it's standing on wooden sawhorses, I wanted to make sure the box wouldn't tip or the sawhorses wouldn't collapse.
Move day. My dad in the F150, me driving the F250. Pulled the F150 around to the back alley and pushed it up the rear driveway with the F250.
Gotta love how strong these old bumpers are
Both trucks in the garage. Let the fun begin.
The Plan:
Swap the body parts (cab, front clip and box) from the F150 onto the F250. Then move all of the F250 body parts onto the F150 and prep it for my parts guy to come pick it up.
I started the body swap on October 1, 2016.
As usual, the blue truck was full of mouse crap, dirt and dust. It was a farm truck, so it's expected.
Seat was first thing to go. Rubber & Underlay removal.
Yeah... dirty...
So this is basically where the true tear-down started. I had only 1 issue with the entire tear-down... one of the gauge cluster screws was stripped and wouldn't come out. Used a dremel tool to cut the head off and remove the rest with pliers.
Removed the hood. Notice the 2 buck-shot holes (rusty spots) in the hood? From what I can tell, the shot missed anything important under the hood. The front windshield has some nice buck-shot bruises in it too.
The kids who took this thing joy riding really had a good time with it.
Blue truck driven back around front and had the box removed. Set on dolleys for temporary purposes and so it could be wheeled around if needed.
Back to the rear garage we go. Tear-down continues.
Lots of vacuuming mouse poop, and parts removal. I need a three car garage lol.
Wooden antique egg crate used as my driver seat for moving the truck around
Decided that before the red cab (good cab) gets put on the blue frame, it needs to have its rust fixed on the interior. Forgot to snap a picture before I started, but I used an angle grinder on the firewall and dash area, then POR-15'ed everything.
Much better. Now I know I won't have rust behind the dash.
Figured I'd go one big step further too. Cab on its back to get the same treatment. This cab was in great shape on the underside because it had some sort of sound/bed liner sprayed on it at some point in its life. It basically saved the metal from rusting
100% stripped. I would have sand-blasted it, but I use wire wheels instead because it's what I had. Still worked out great, just took 10 hours to strip the underside...
POR-15 complete. Minus the lip just inside the door sill... that will come later though because I can't reach in that small space with a wire wheel.
Neat defined line where the POR-15 stops. I didn't want the firewall to be jet black.
Door jambs/mounts got a good treatment too because they were seriously rusty.
Doors off, rims/tires off, and F250 put onto wheel dolleys with blocking under the disc brakes. I don't have high ceilings, so this had to be done. Made the engine bay easier to access too
Cab nearly stripped. A/C stuff was difficult to remove.
Almost ready to go. New wiper motor installed from F250, along with new wiper arms.
Getting close!
Almost forgot to cut out the new hole for the transfer case. Had to do that before the swap.
Traced the transfer case cover + holes, and cut/drilled.
Now we're ready to rock and roll.
This is how I lifted the cab. Lots of straps and 2 grown men to keep the cab from tilting forward. She's very front-heavy.
Off she comes. Temporary stopping point to take a picture and take a break. Dang these suckers are heavy!
Looking pretty bare!
This is my red-neck crew cab lol.
Everything up to this point took me 5 full days. Had a 5-day weekend, worked hard for 14 to 16 hours each day.
#4
01-04-2017, 06:23 PM
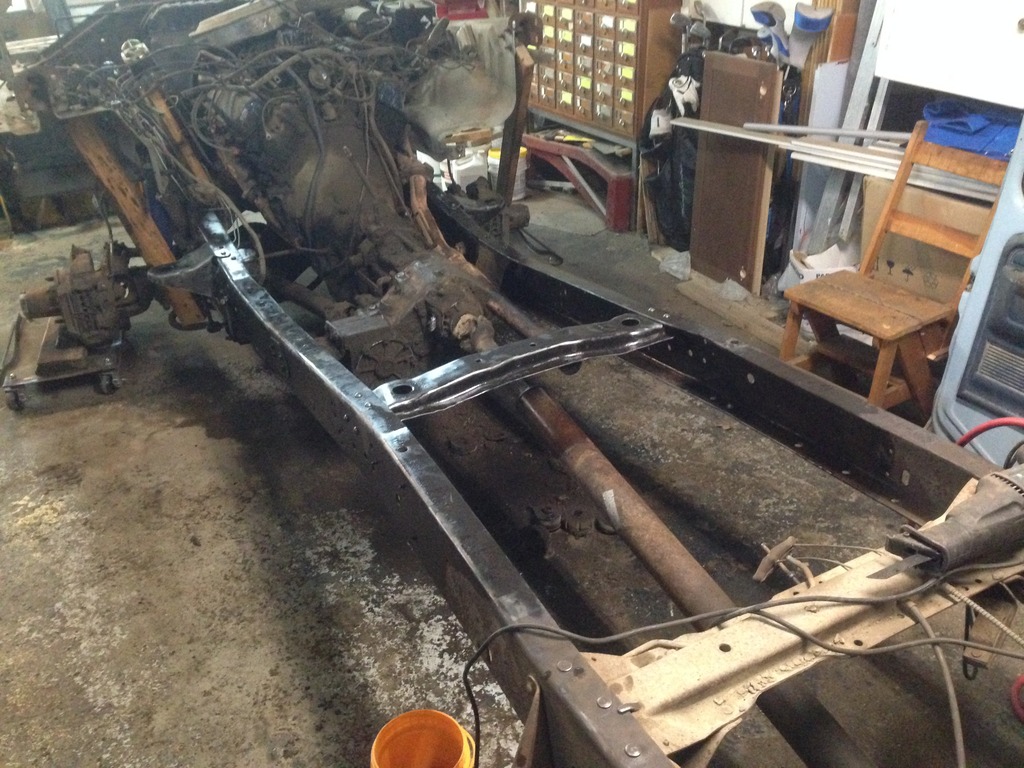
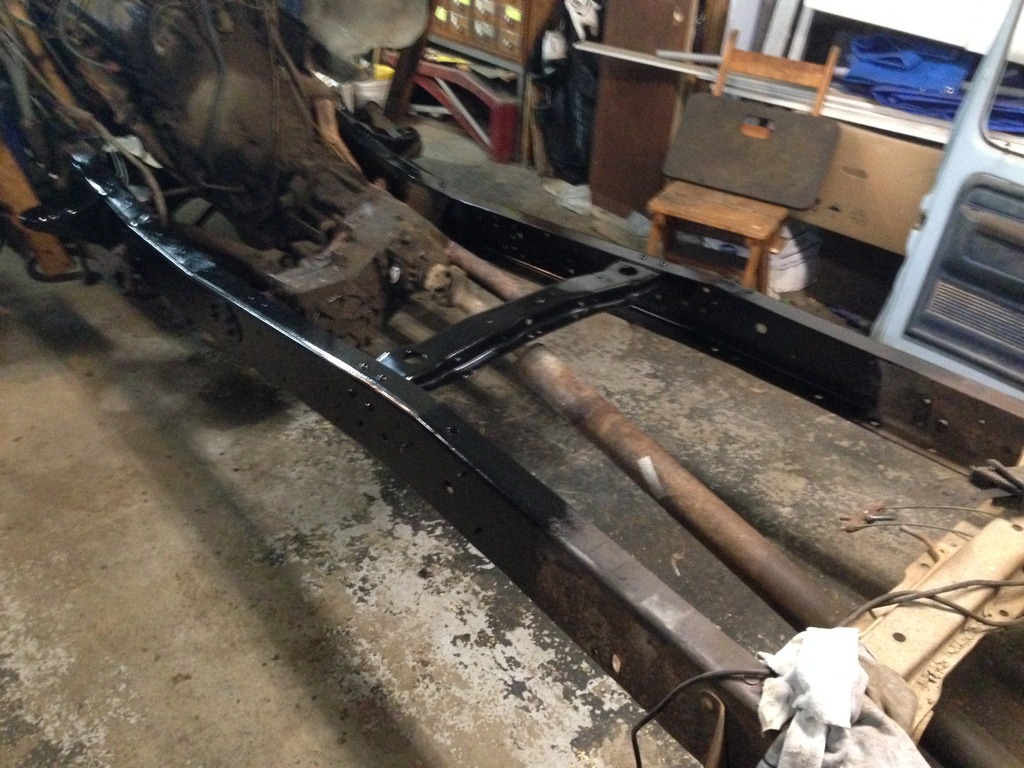
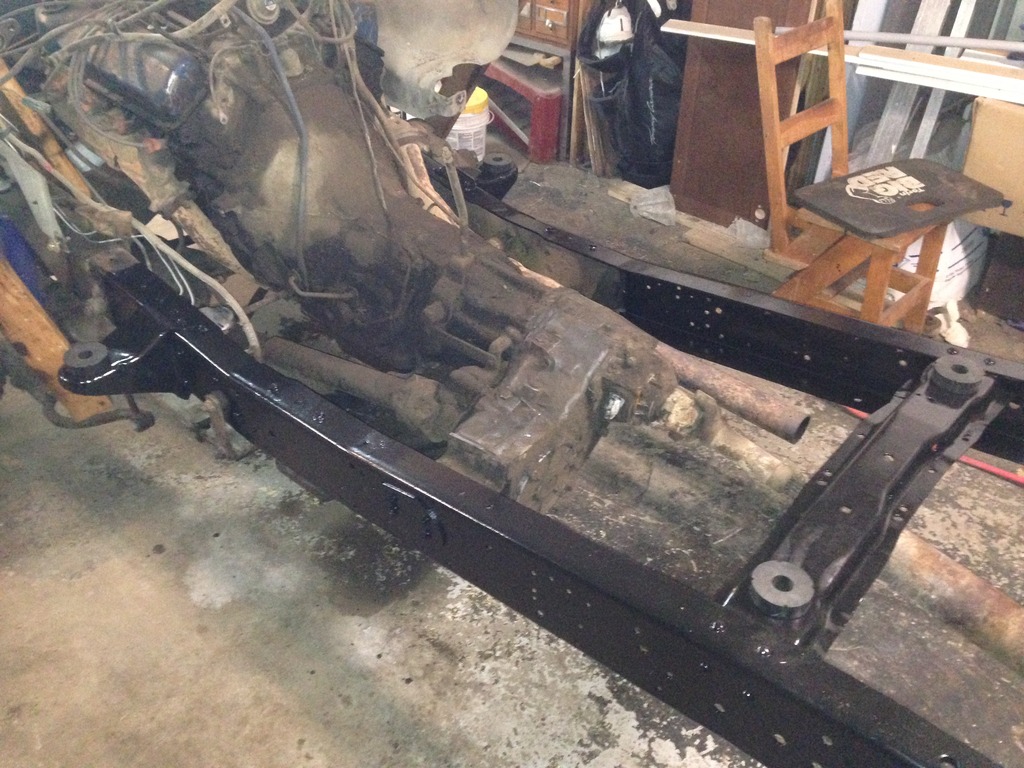
Well... If I'm going this far, why not go a little further right? I mean, I do have a lot of the frame exposed, so why not?
Wire wheeled the frame where the cab will sit. Inside and out unless there was something like brake/fuel lines in the way.
The mounts are in fantastic shape. Finally, a truck without a rusted out frame. Cutting off the old mounts had me worried, I have to admit.
Sprayed down with Metal Ready. Prepped for POR-15.
Very clean.
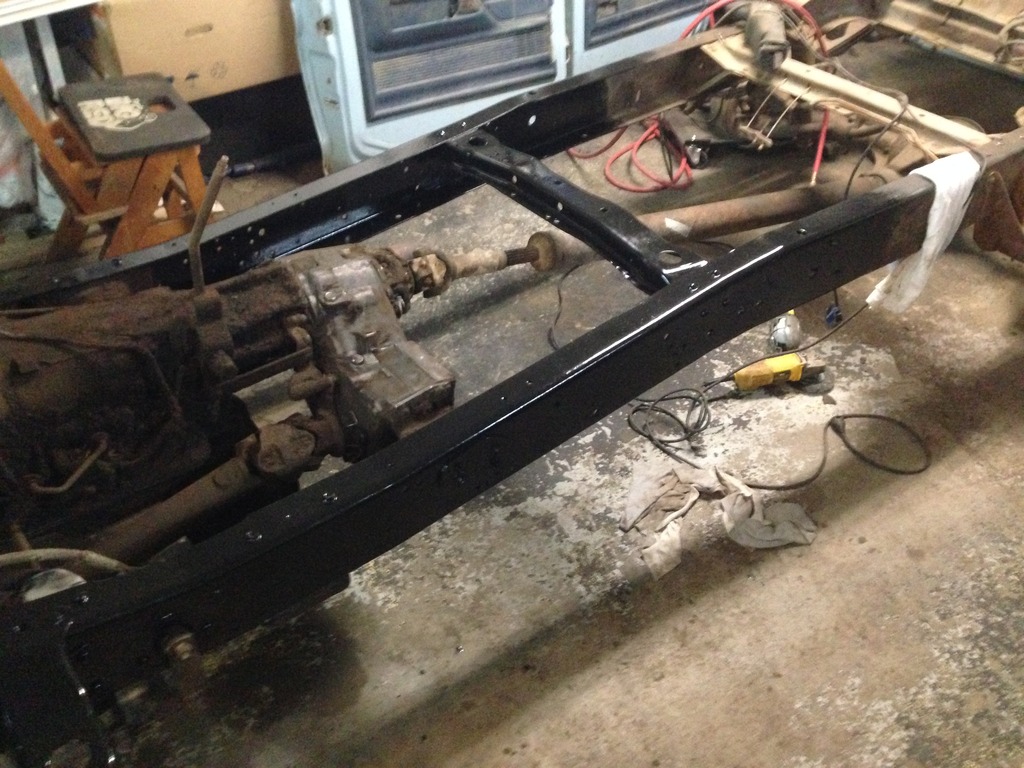
Frame painted with POR-15. I know the cab won't come back off anytime soon, so this step felt really good. A huge goal of mine is to POR-15 the entire frame.
Mainly for the sake of not having crap fall onto my face when I'm under the truck
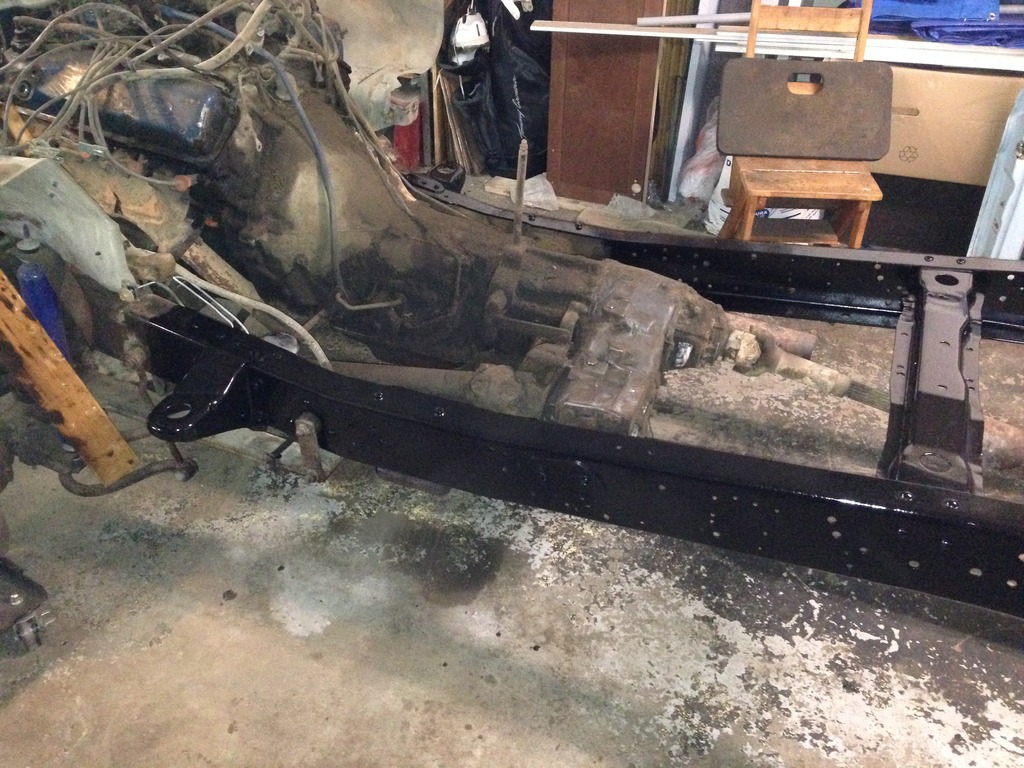
Cleaned up the top of the transfer case as well. Cause why not?
Energy Suspension Frame Mounts... stolen from my F150 build
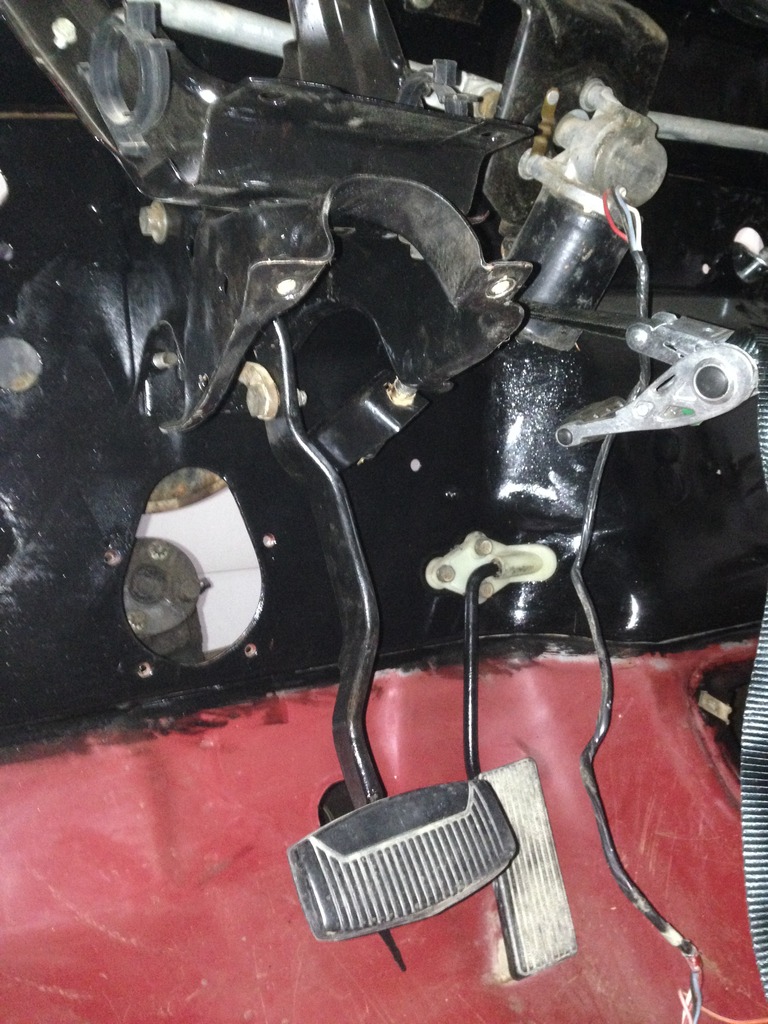
Brake Pedal & Assembly all POR-15'ed. Cause why not? They were rusty, and I'm there.
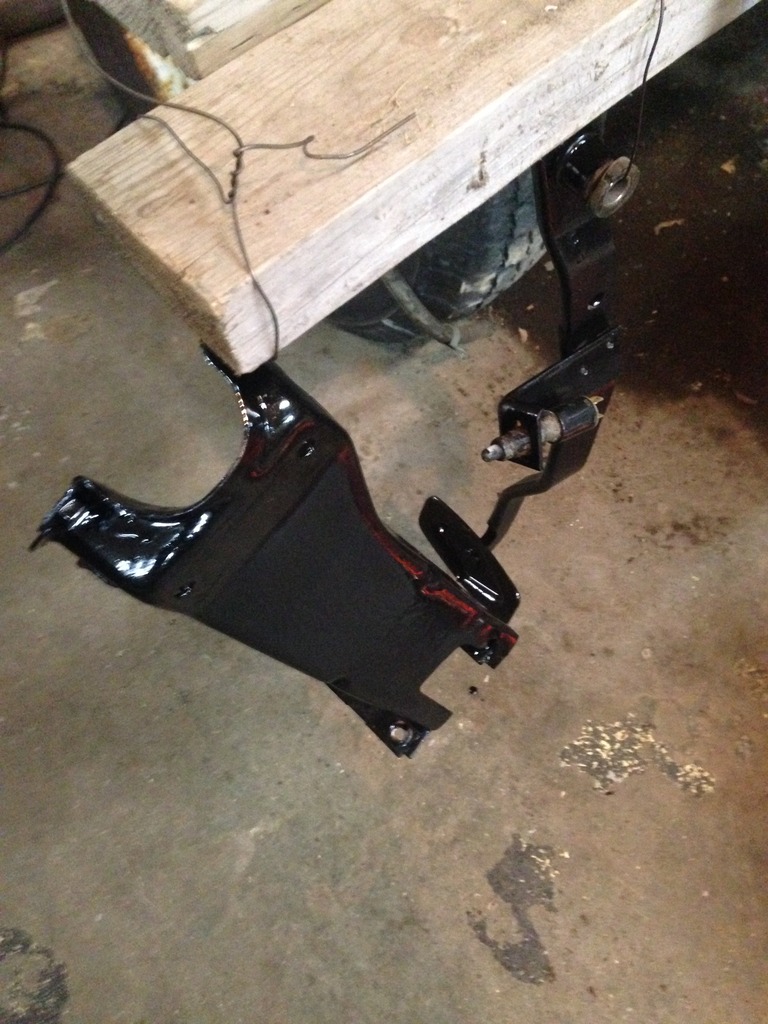
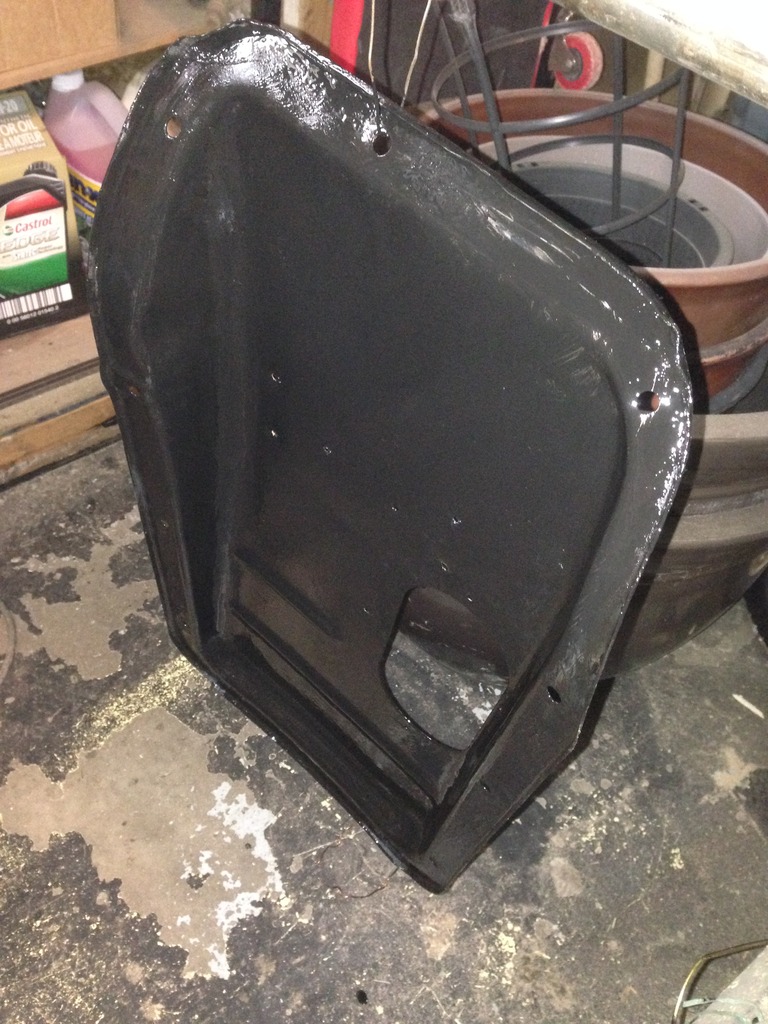
Transfer Case Cover POR-15'ed. You guessed it. Why not?
Pedals assembled. Red cab ready to be transferred onto the F250 frame. Big progress.
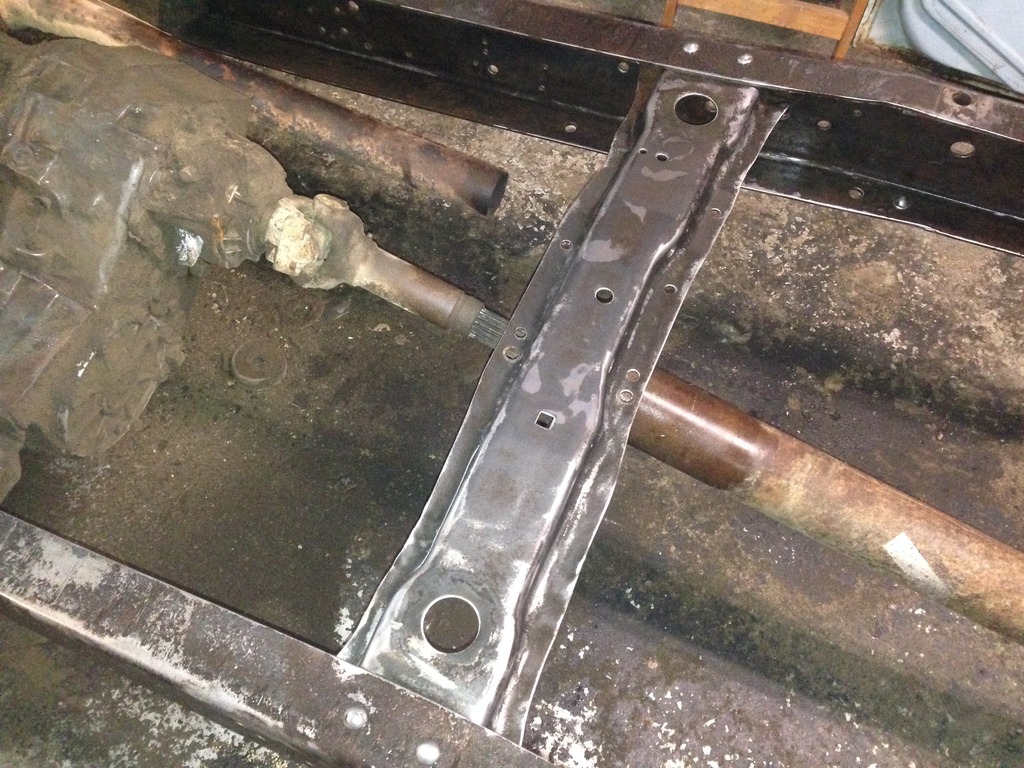
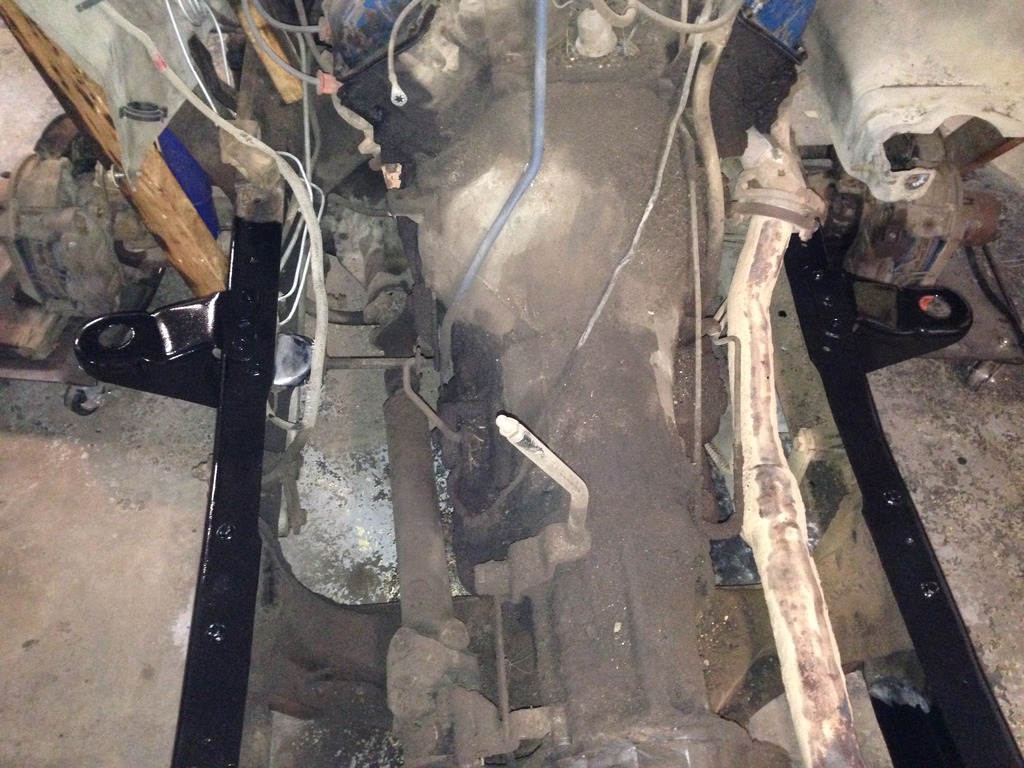
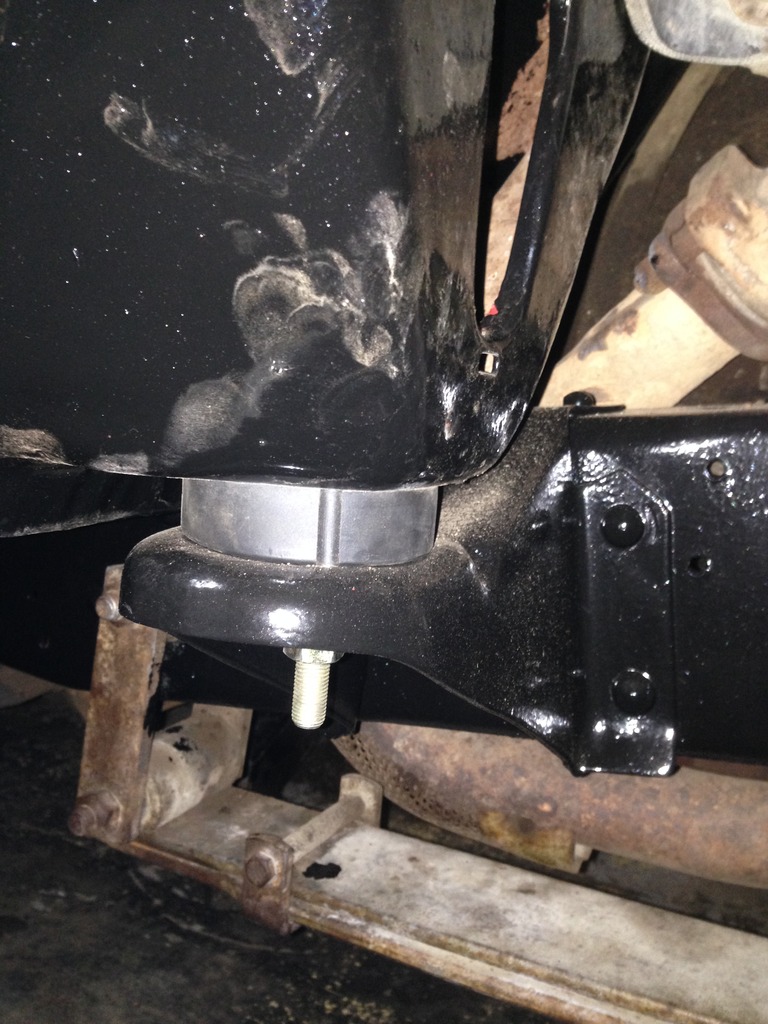
Interesting note... 4x4 cabs are different then 2x4 cabs. I haven't seen many note this before, but it's true. The 4x4 blue cab had a rather large dimple in the cab cross-member that's in the same location as where the transfer case would be. This dimple is made so the rear-top of the transfer case doesn't get smashed by the cab.
It's difficult to see, but the cab smashed into the top of the transfer case when attempted to be mounted. So, back off comes the cab and a notch is cut to accommodate this issue. The jiggle pin moves freely, so I'm satisfied with the result.
Picture of the notch.
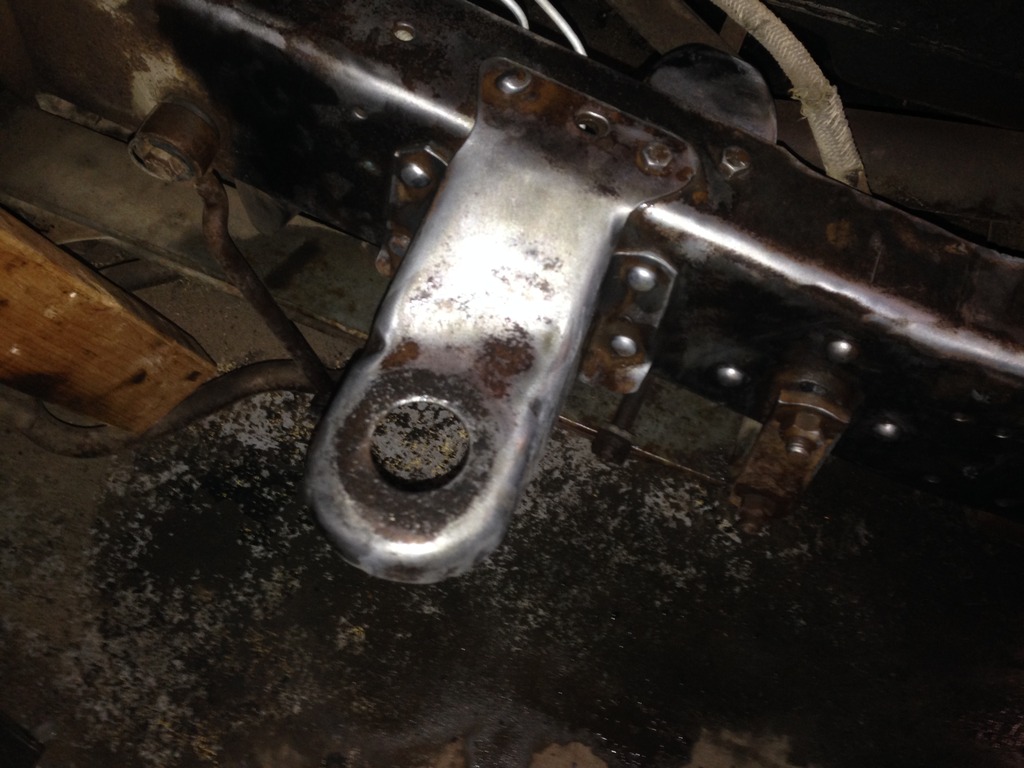
And... it's mounted
Grade 8 hardware used. Quality parts are necessary.
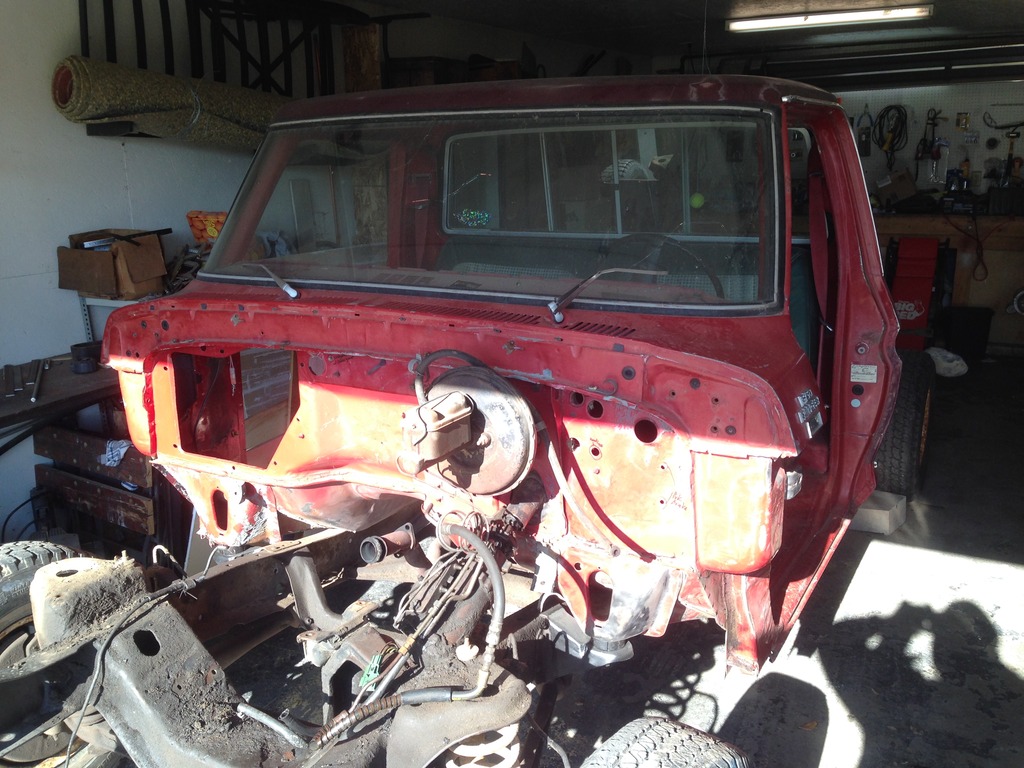
A/C hole patched over with the very first cab I had. Cut out the firewall hole with a torch. Didn't come out perfect, but it works for now.
Now I'm ready to reassemble.
Now, for a little TV magic.
Before.
 [/URL]
After.
This concludes my progress for all of October. On to November.
Wire wheeled the frame where the cab will sit. Inside and out unless there was something like brake/fuel lines in the way.
The mounts are in fantastic shape. Finally, a truck without a rusted out frame. Cutting off the old mounts had me worried, I have to admit.
Sprayed down with Metal Ready. Prepped for POR-15.
Very clean.
Frame painted with POR-15. I know the cab won't come back off anytime soon, so this step felt really good. A huge goal of mine is to POR-15 the entire frame.
Mainly for the sake of not having crap fall onto my face when I'm under the truck
Cleaned up the top of the transfer case as well. Cause why not?
Energy Suspension Frame Mounts... stolen from my F150 build
Brake Pedal & Assembly all POR-15'ed. Cause why not? They were rusty, and I'm there.
Transfer Case Cover POR-15'ed. You guessed it. Why not?
Pedals assembled. Red cab ready to be transferred onto the F250 frame. Big progress.
Interesting note... 4x4 cabs are different then 2x4 cabs. I haven't seen many note this before, but it's true. The 4x4 blue cab had a rather large dimple in the cab cross-member that's in the same location as where the transfer case would be. This dimple is made so the rear-top of the transfer case doesn't get smashed by the cab.
It's difficult to see, but the cab smashed into the top of the transfer case when attempted to be mounted. So, back off comes the cab and a notch is cut to accommodate this issue. The jiggle pin moves freely, so I'm satisfied with the result.
Picture of the notch.
And... it's mounted
Grade 8 hardware used. Quality parts are necessary.
A/C hole patched over with the very first cab I had. Cut out the firewall hole with a torch. Didn't come out perfect, but it works for now.
Now I'm ready to reassemble.
Now, for a little TV magic.
Before.
After.
This concludes my progress for all of October. On to November.
#6
01-04-2017, 08:25 PM
So starts November. Another big month for the build.
Measuring my light bulbs in the truck to order LEDs.
I used the same ebay source as pauli3wood on his crown victoria F150 build (Yitamotor on Ebay.com) - Post #684 in his thread.
Yitamotor sold me 25 LEDS for my truck at a cost of $65 USD, and shipping was $15 to Canada. Total cost of $80.
He/She was VERY VERY difficult to deal with in terms of getting a combined quote and his/her communication. He/She did not have great english and does not really understand how eBay actually works (how to send a combined quote)... I ended up paying via Paypal directly, and eBay was bypassed all together. Took me about 4 weeks of constant communication each night to get me my LED's.
I paid for the LED's in October, and got them at the end of November. Not the best for shipping, but does have quality products at a decent cost. Spoiler alert lol.
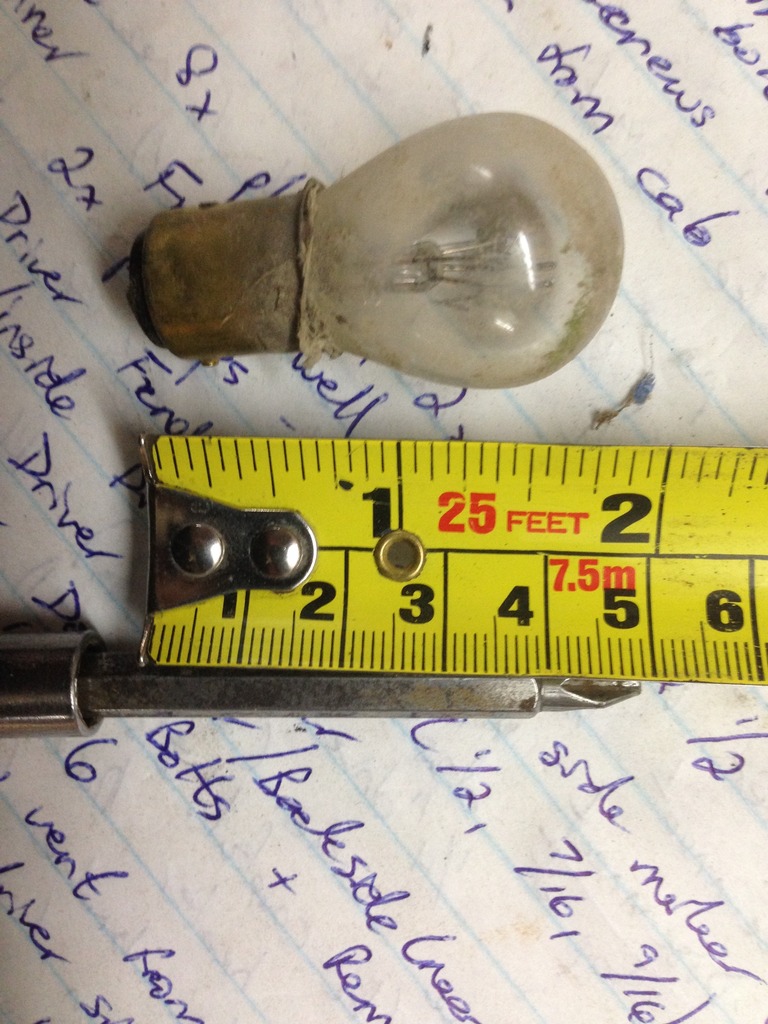
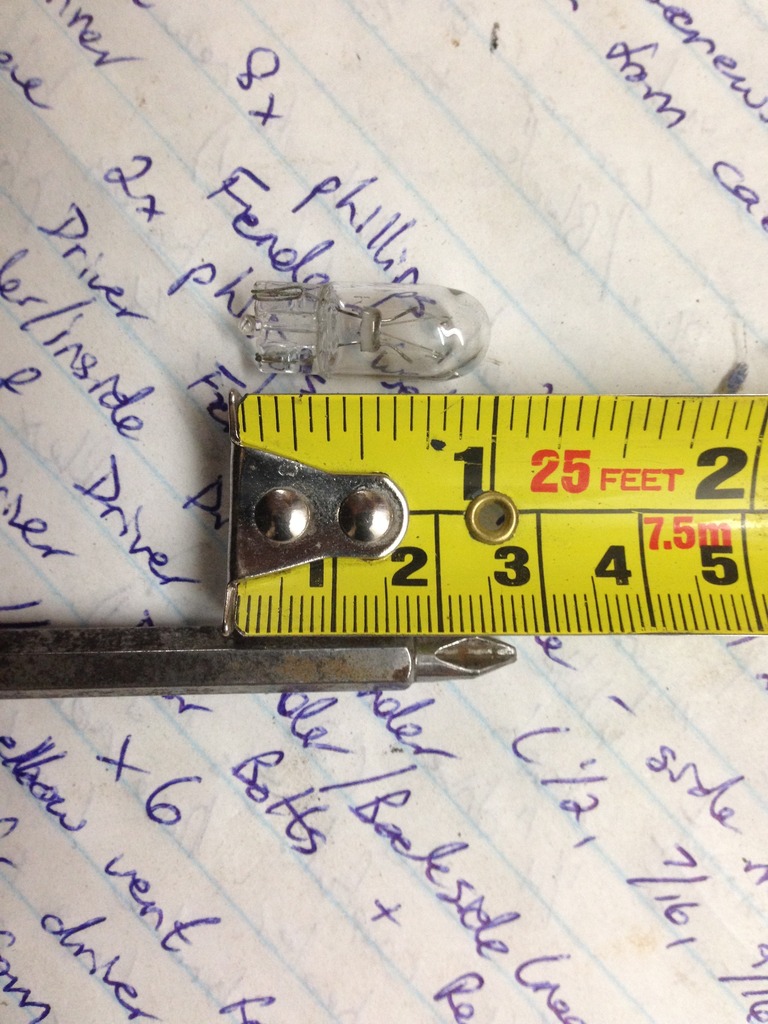
The notepad behind my light bulbs contains every single step involved in doing a cab swap. I wrote roughly 5 pages of steps, identified by a number. Each number contained what I removed (quantity), in that specific order, and how it was removed (size of bolt- 1/4" or 7/16, phillips head, etc).
Doors taken out of the attic and mounted for the first time since 2012.
Green seat from an 1973 F100. Bought it back in 2011 from a nearby farmer for $20.
Doors mounted back on Blue (minus passenger cause the garage is tight).
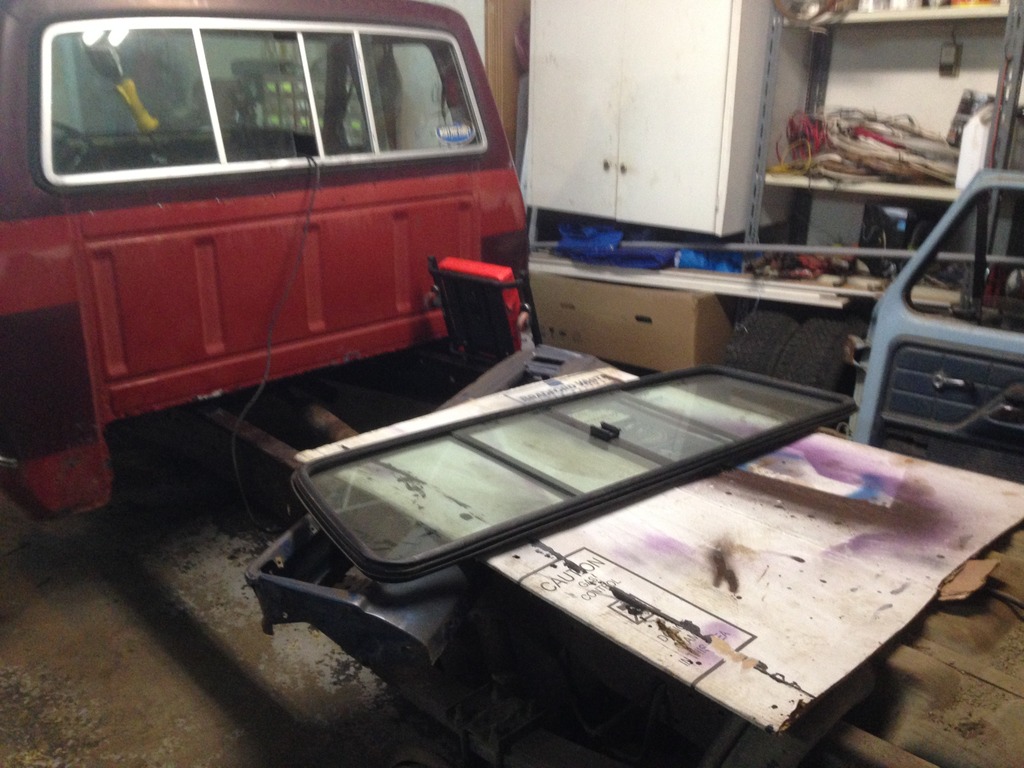
Rear sliding window from a 1995 F150. Should fit directly in the same place as the current OEM sliding window. Current window sucks and doesn't do it's job. It's outdated and needs to be removed, but will be installed later.
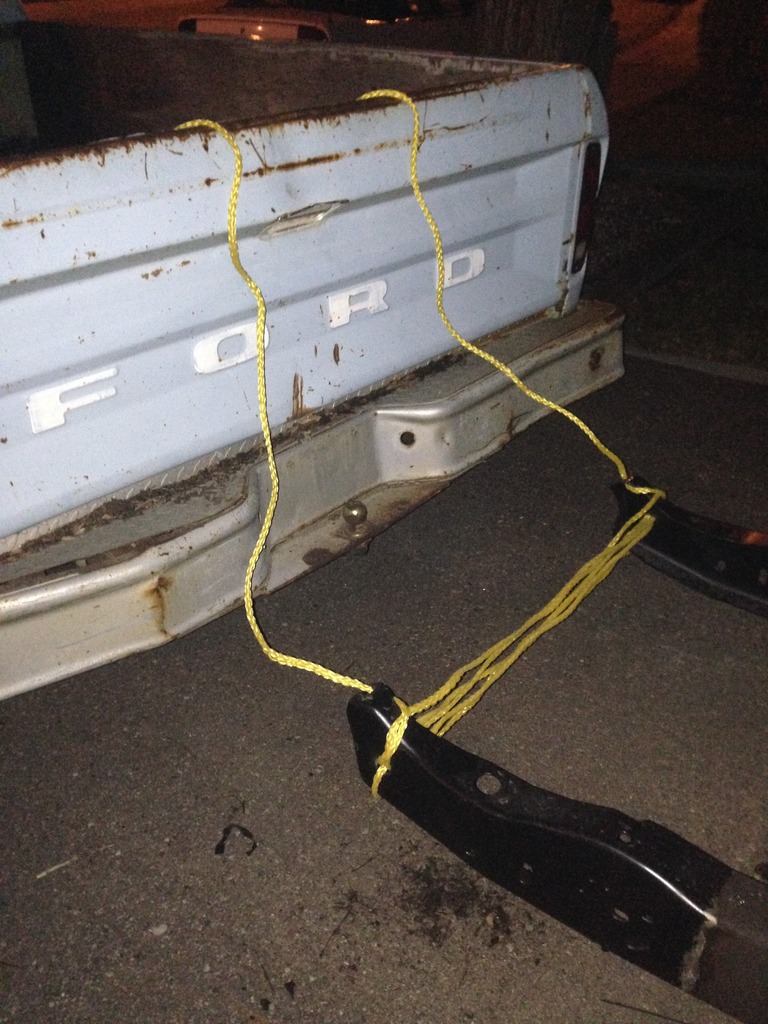
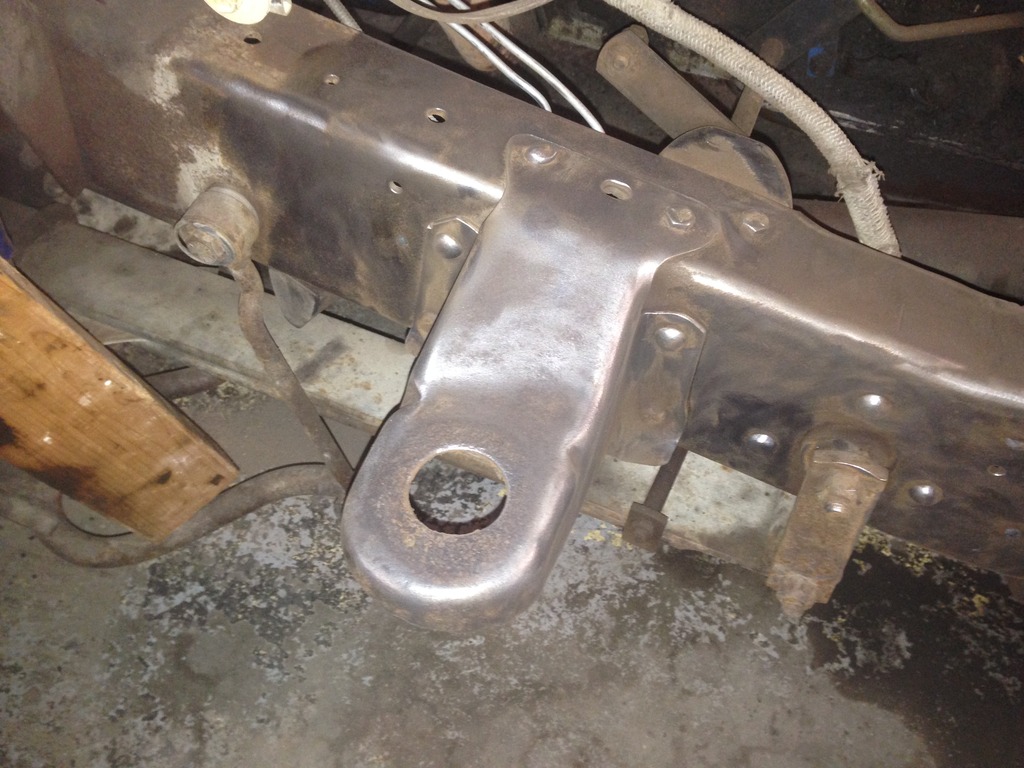
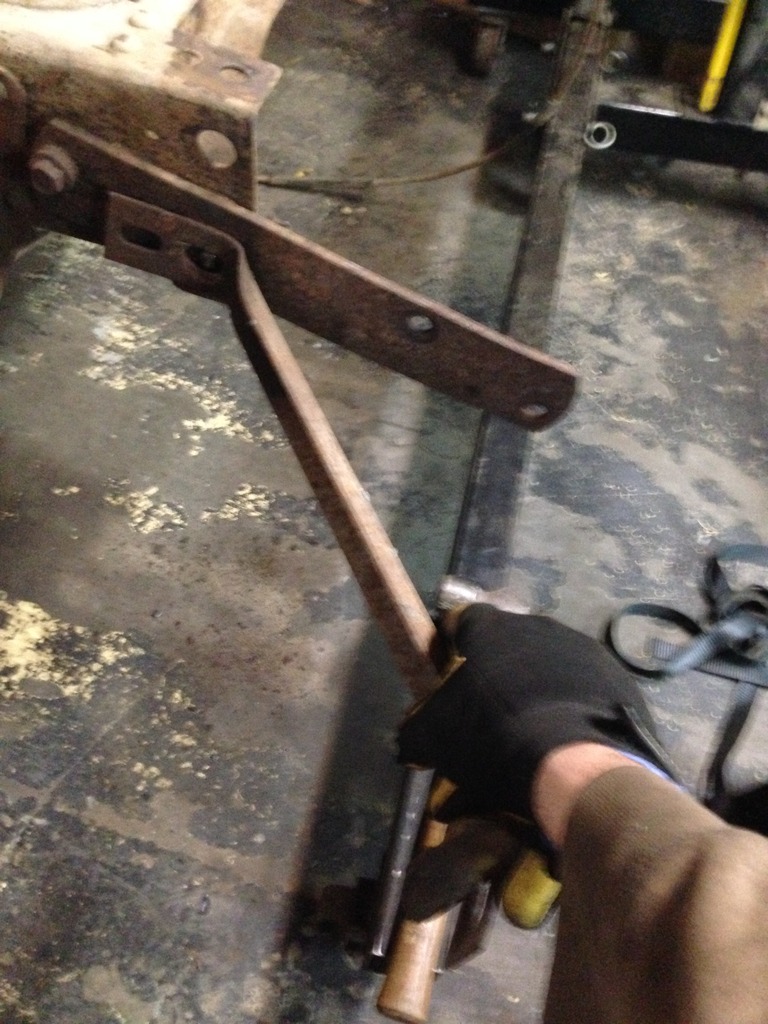
Stole the rear bumper brackets on the F150 frame. Will replace the crushed ones on my F250 frame (from the farmers combine trying to eat the truck).
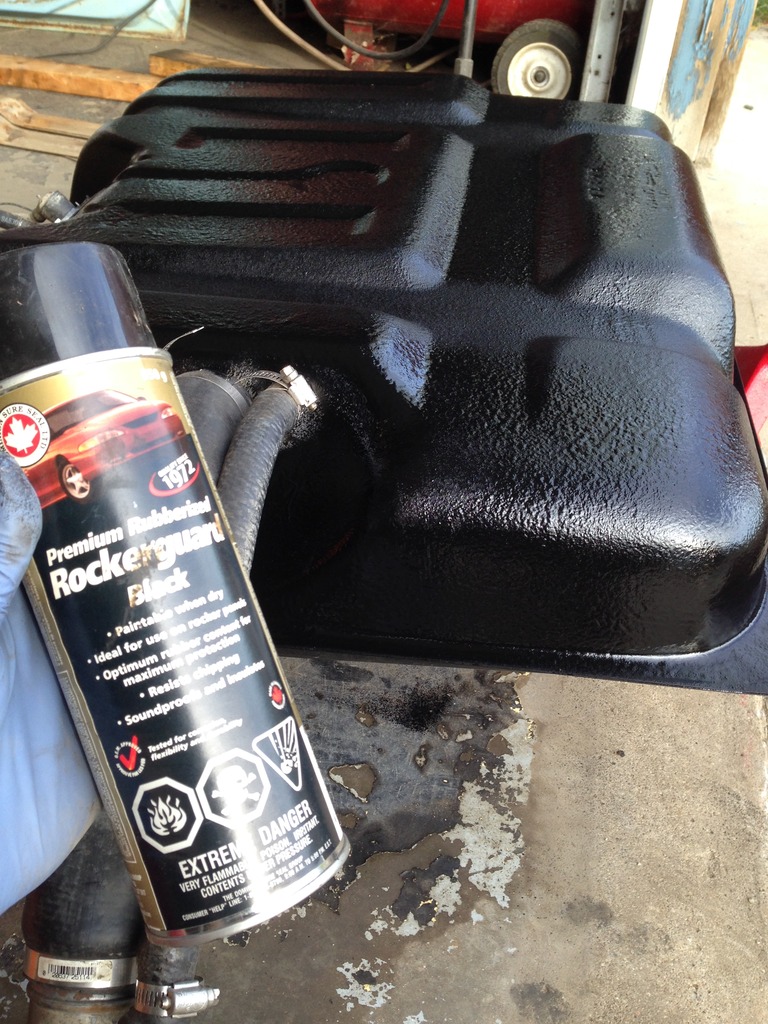
Fuel tank was only partially covered in Rocker Guard since the last build. It needs to be protected like everything else. Finished it off, completely coating it by using 2 full cans of the stuff. Works great and has a nice textured finish to it.
Tank was mounted (temporarily). Spoilers.
Fenders mounted. Progress!
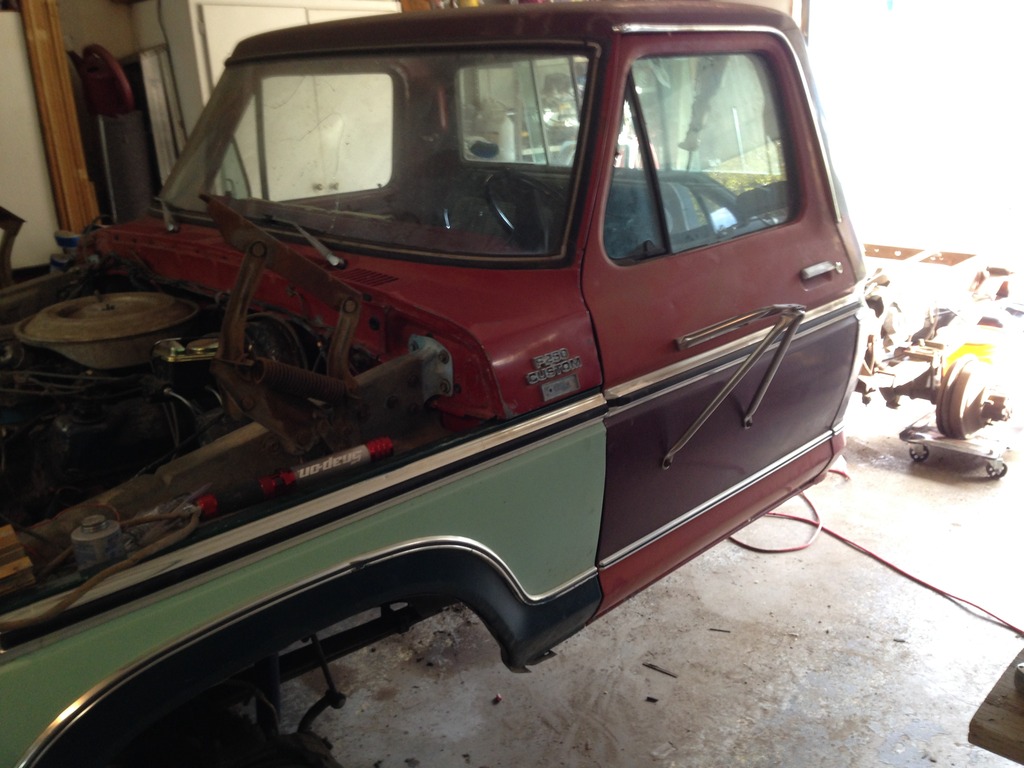
Still no wheels, but they're soon to come.

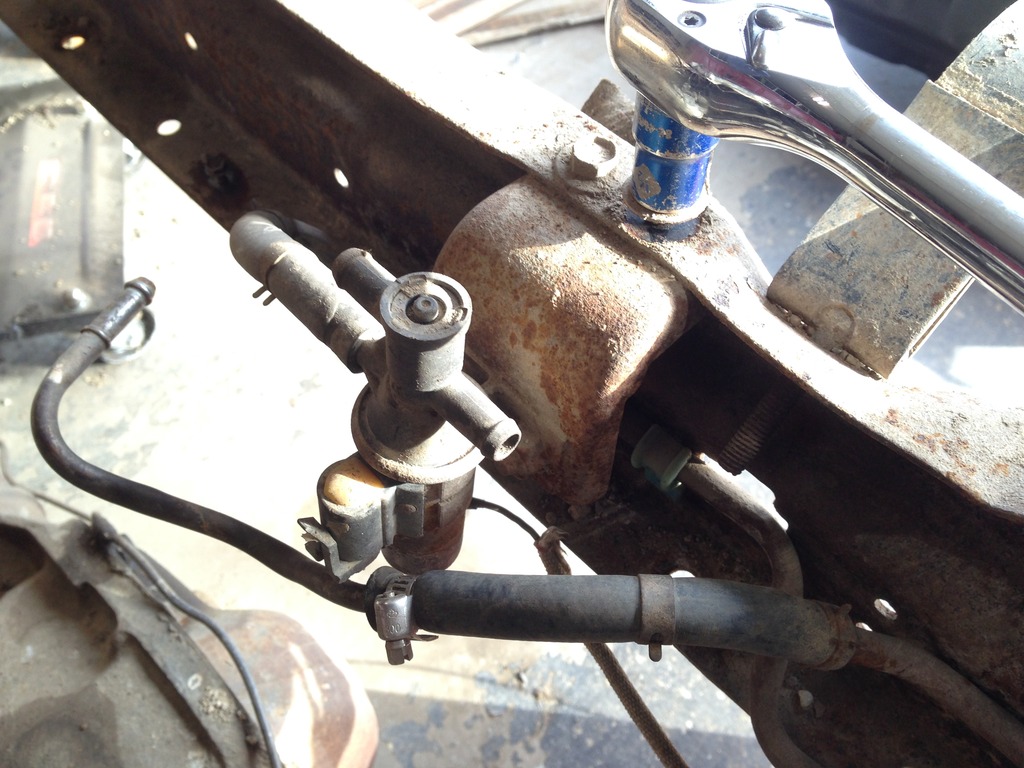
Fuel selector pump removed. It's been hacked up and clearly didn't work for the previous owner as they had removed the lines to the auxiliary tank so it couldn't be used... but the fuel was still plumbed through the selector pump which was unnecessary. Completely removed for simplicity. I plan to run just a single tank for the foreseeable future.
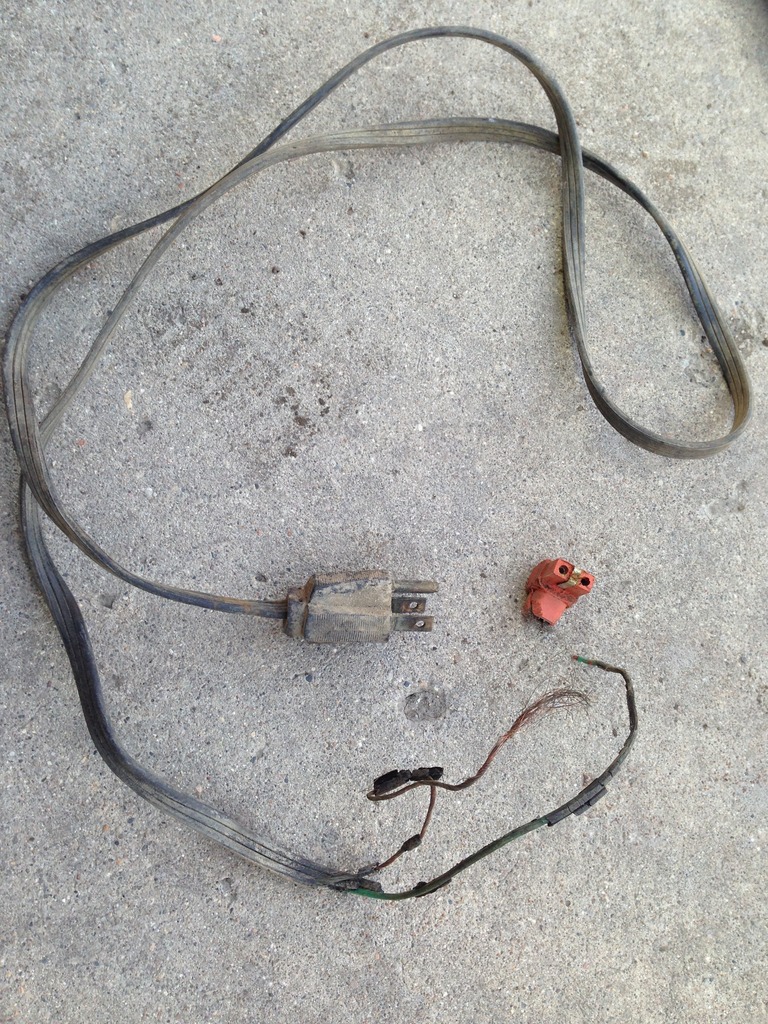
And then something bad happened... but it has a bright side I guess. I got too close to my block heater cord with a power tool. Whoops. Found out that it's not a block heater for a Ford 400... but more to come on that.
Tires mounted. Took it for a victory lap around the neighbourhood. Dang she's loud without an exhaust system.
Pic of the tank mounted. Looks pretty good if you ask me. Rocker Guard should save it from external rust and rocks.
Blue truck has brakes remounted to give it a way to stop when I pull it out of the rear garage and park it back out front of the house for my parts guy.
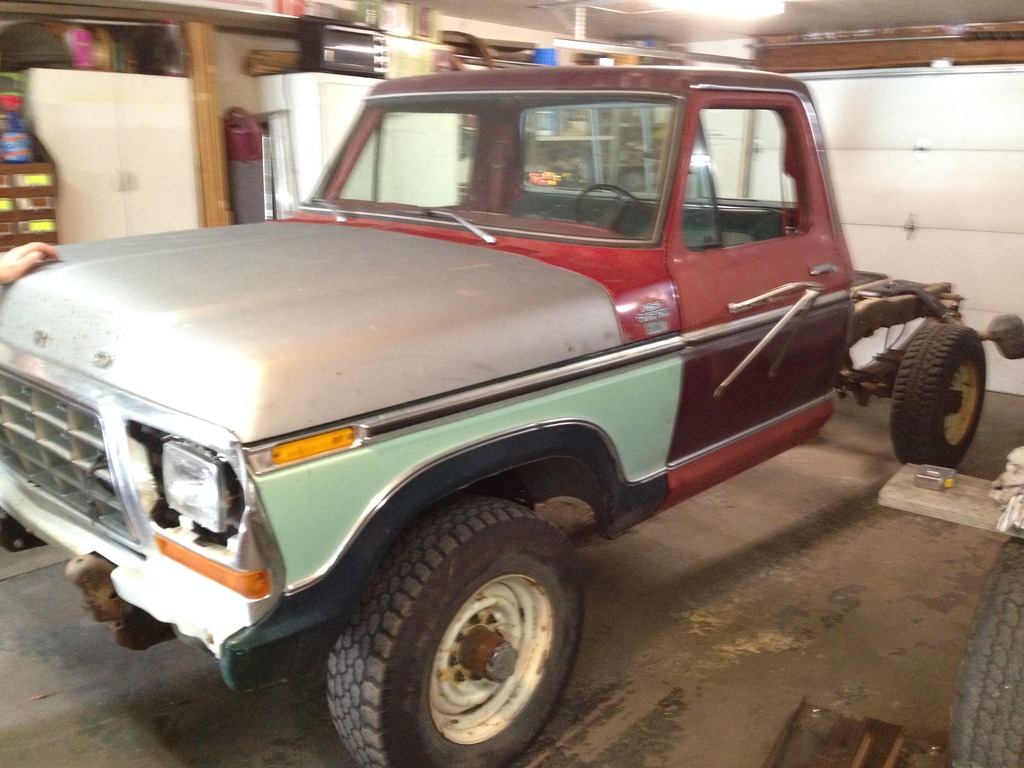
Hood mounted. Silver hood came from my parts guy. It's in great shape.
Evap tank mounted in the F150 frame. It still works great, but I don't need 2 tanks, plus my other one is brand new.
F150 (now the blue truck) moved out front for box mounting.

F250 parked in its way in case some punks decide to kick out the wheel chocks.
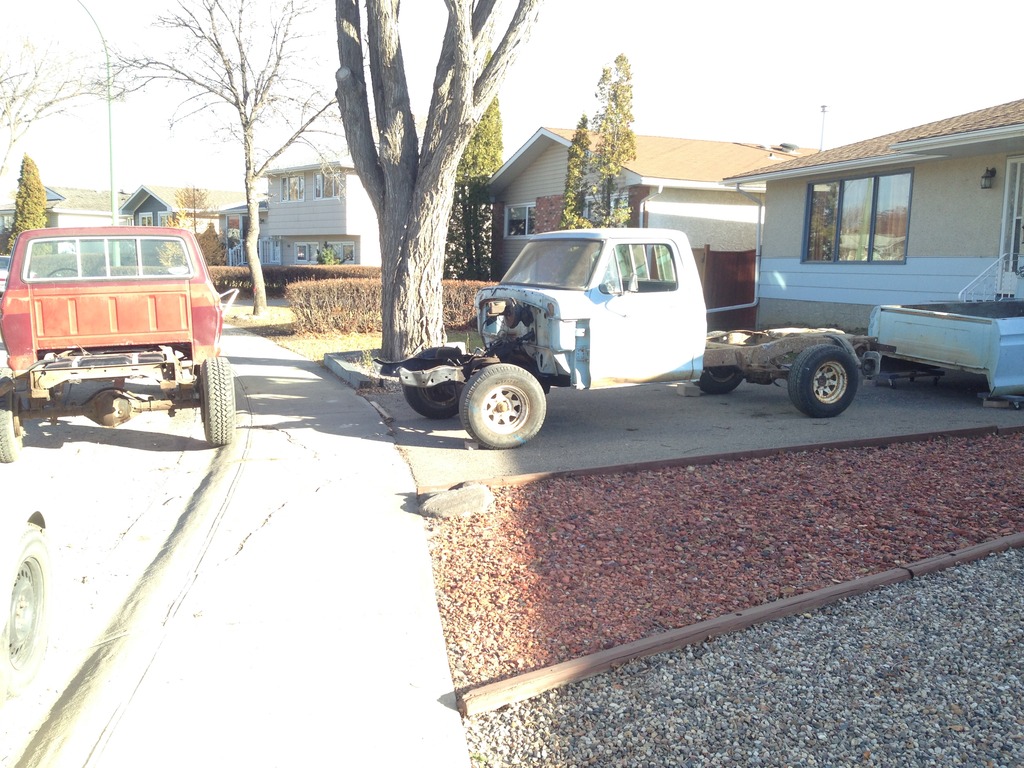
Same method as before. Simple and effective.
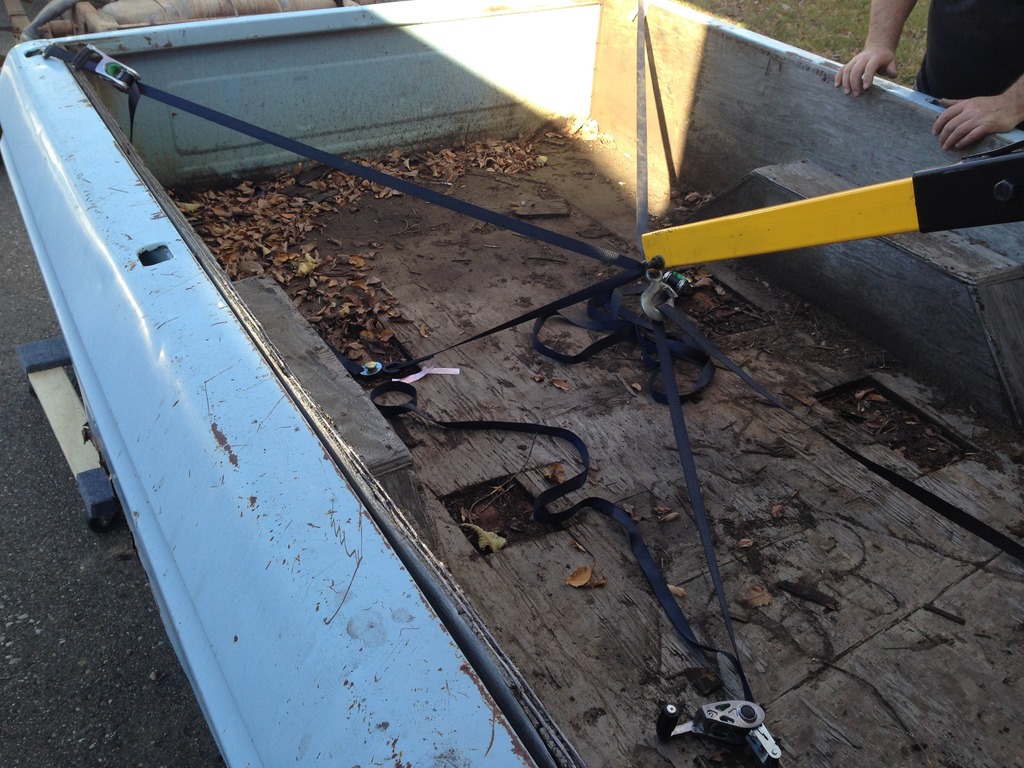
Front-heavy just like a cab.
Looks more like a truck. Almost ready to go to my parts guy. Needs a tailgate and a box full of parts yet.
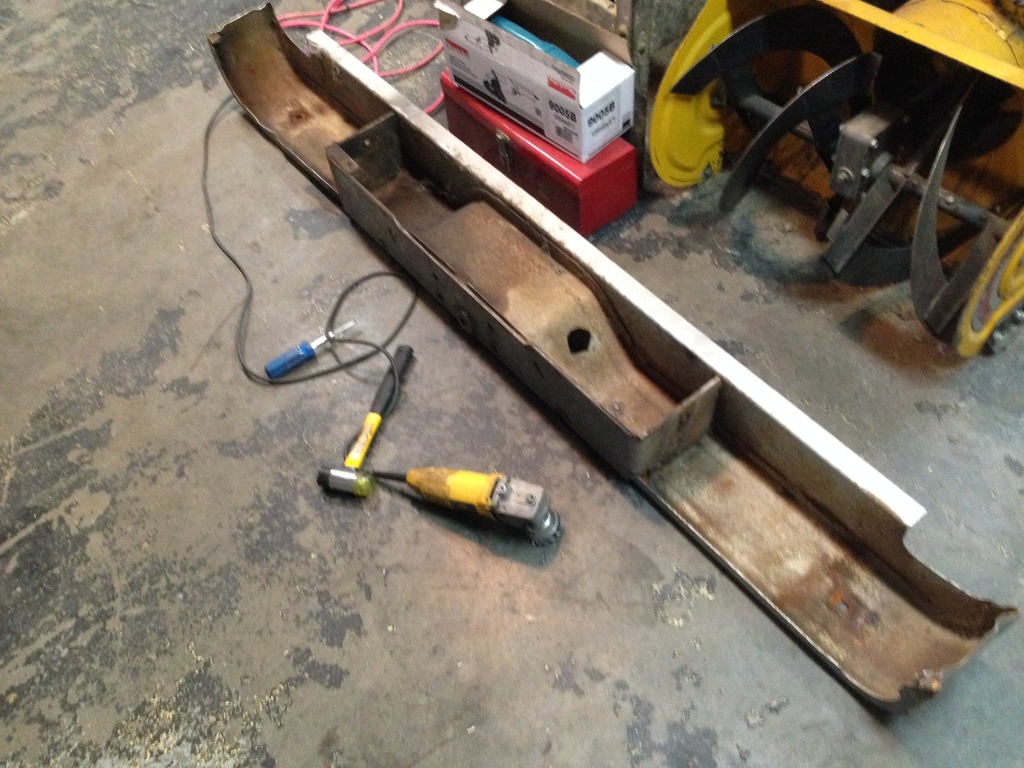
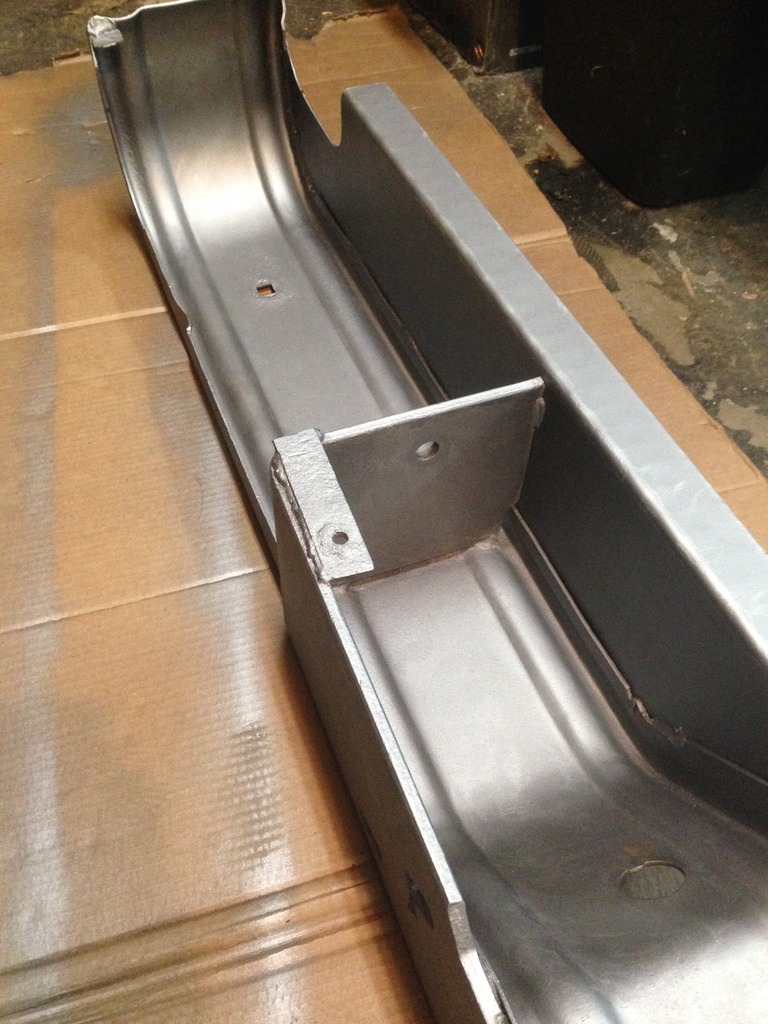
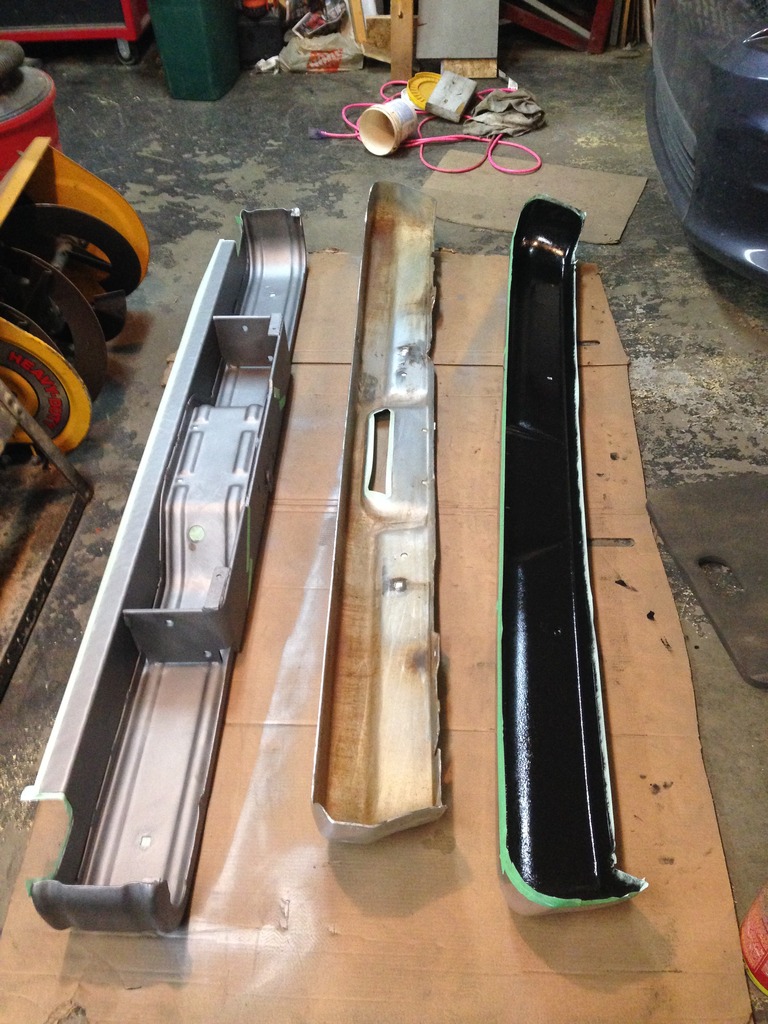
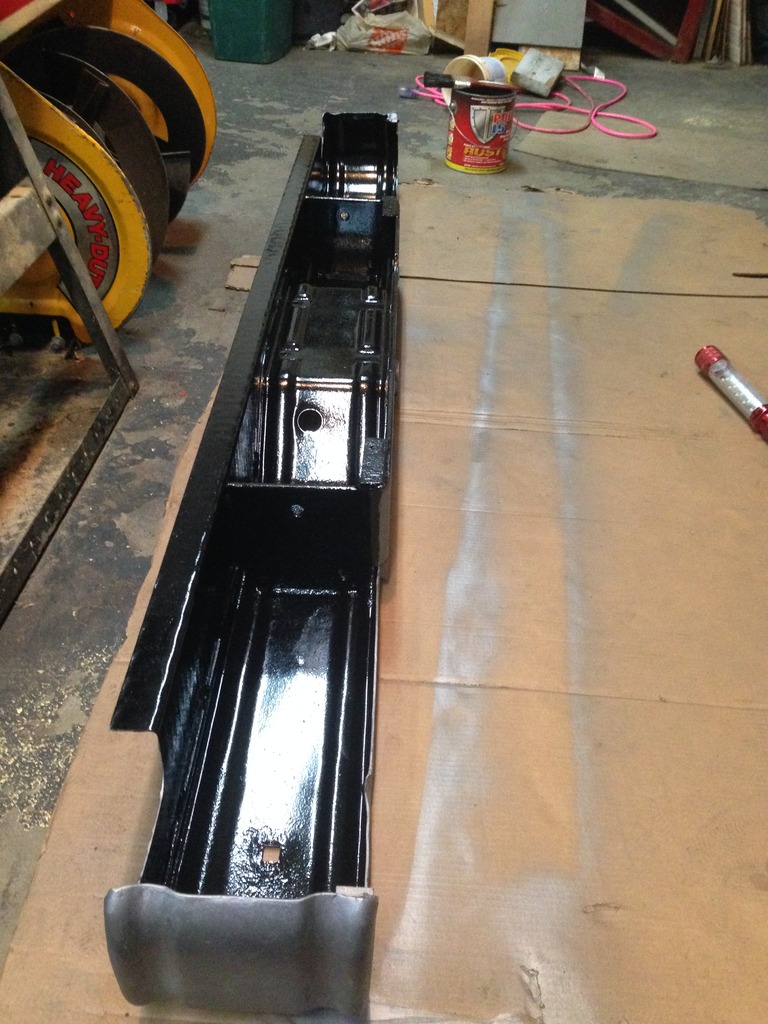
Rear bumper I acquired. Heavy duty solid steel. Pounded out the dents, stripped it, painted the outside, and POR-15'ed the inside.
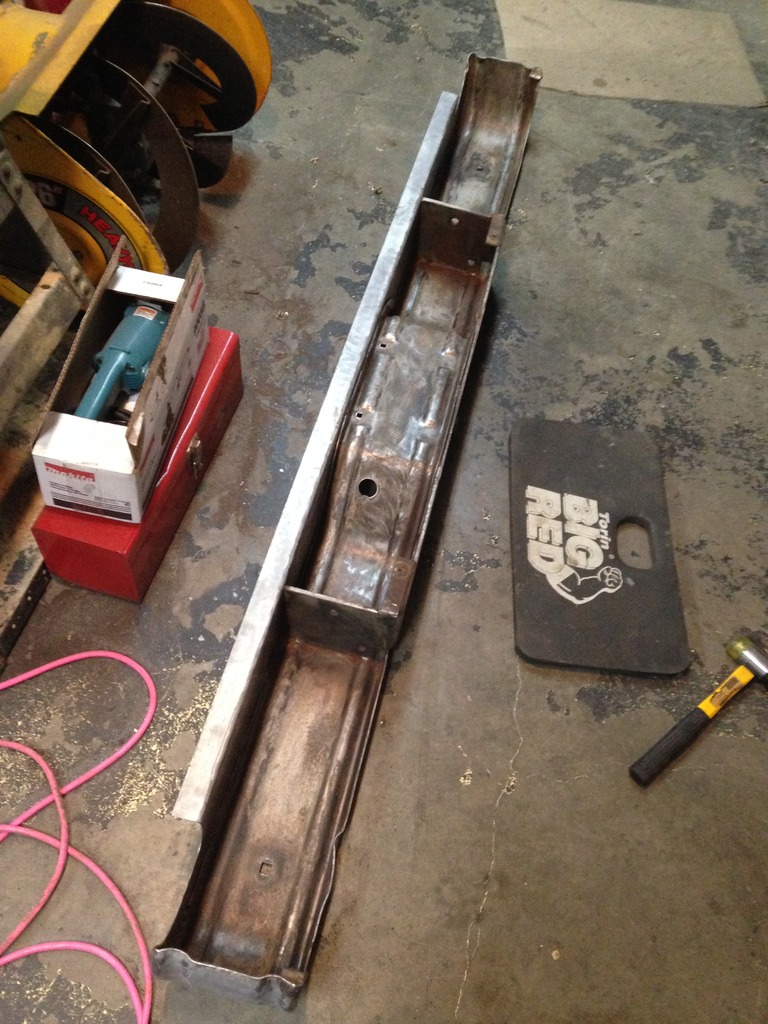
First layer of paint. Called "Bumper Paint".
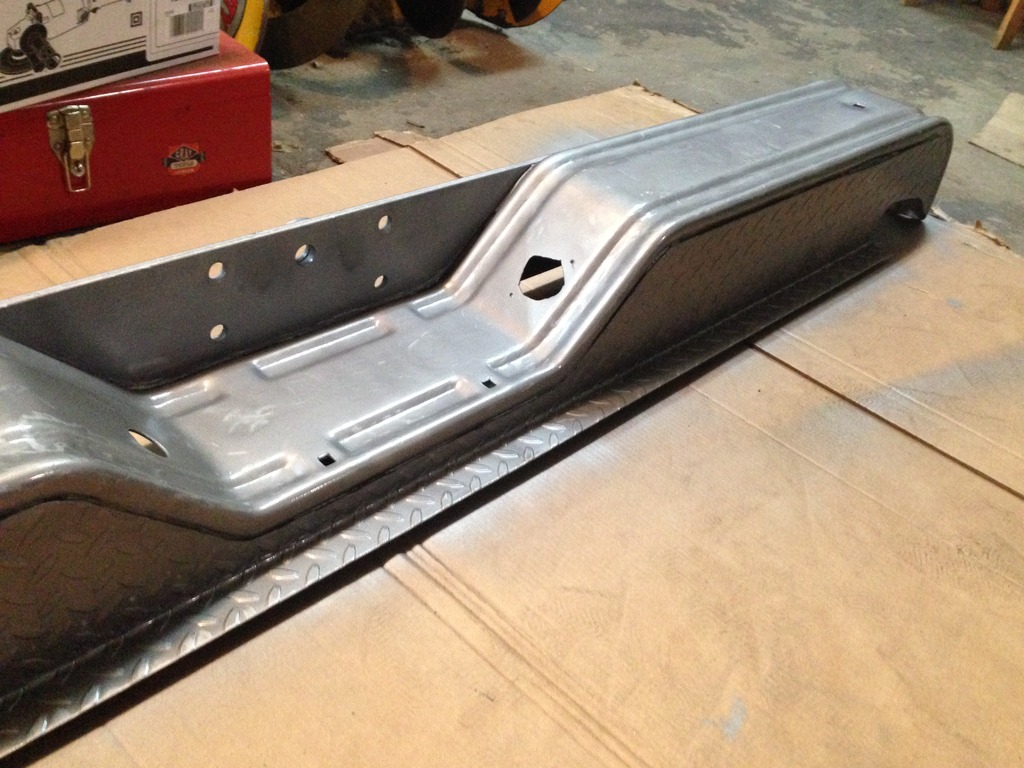
Bumper paint on the inside as a base coat.
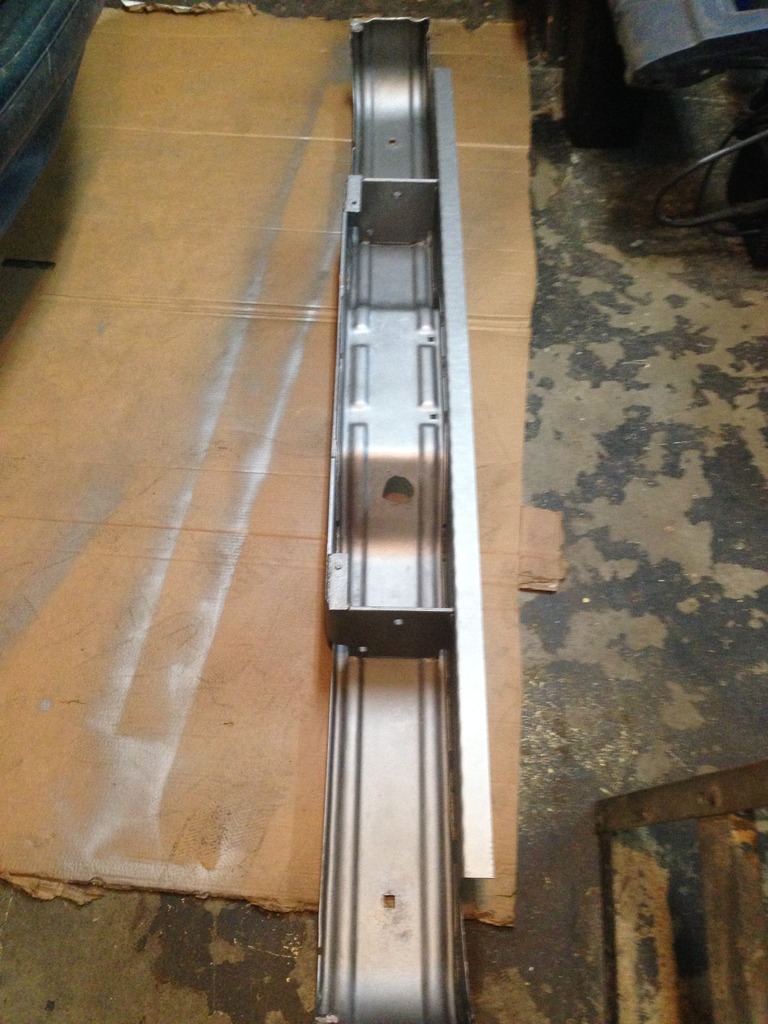
Masked off all my bumpers, prepped them for POR-15. One front bumper is a post-77 style and isn't in the greatest of shape. The other is a pre-77 and is mint.
Before.
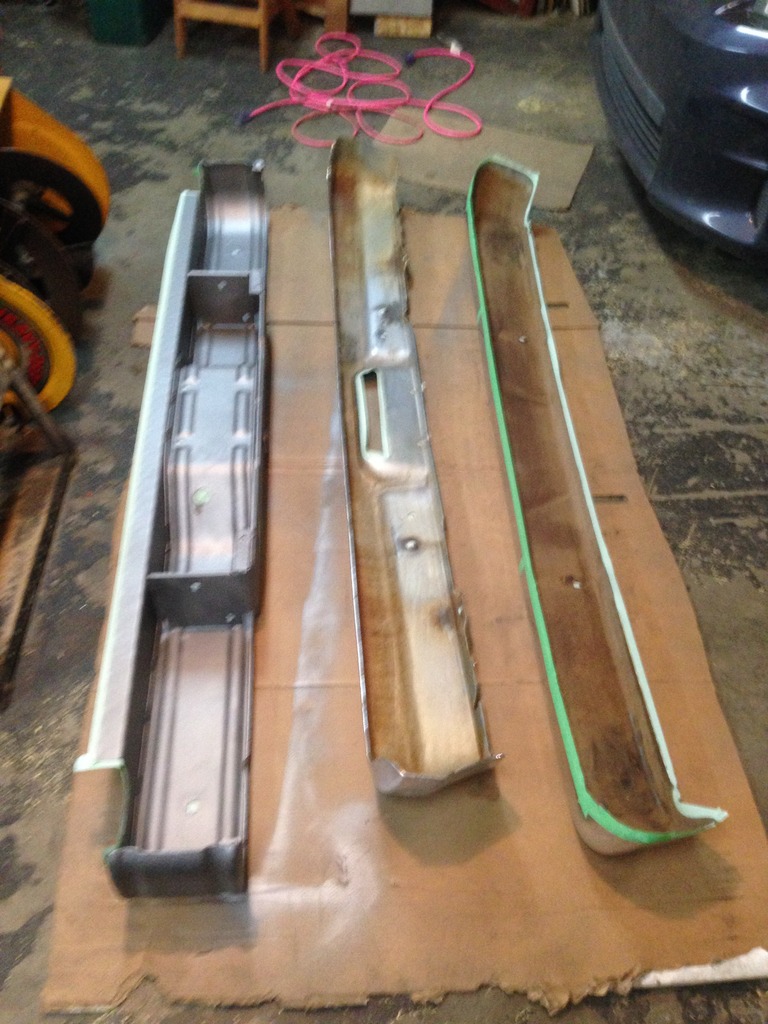
After.
Since the POR-15 was out... I painted my rear bumper brackets. Why not? You see this is becoming a recurring theme
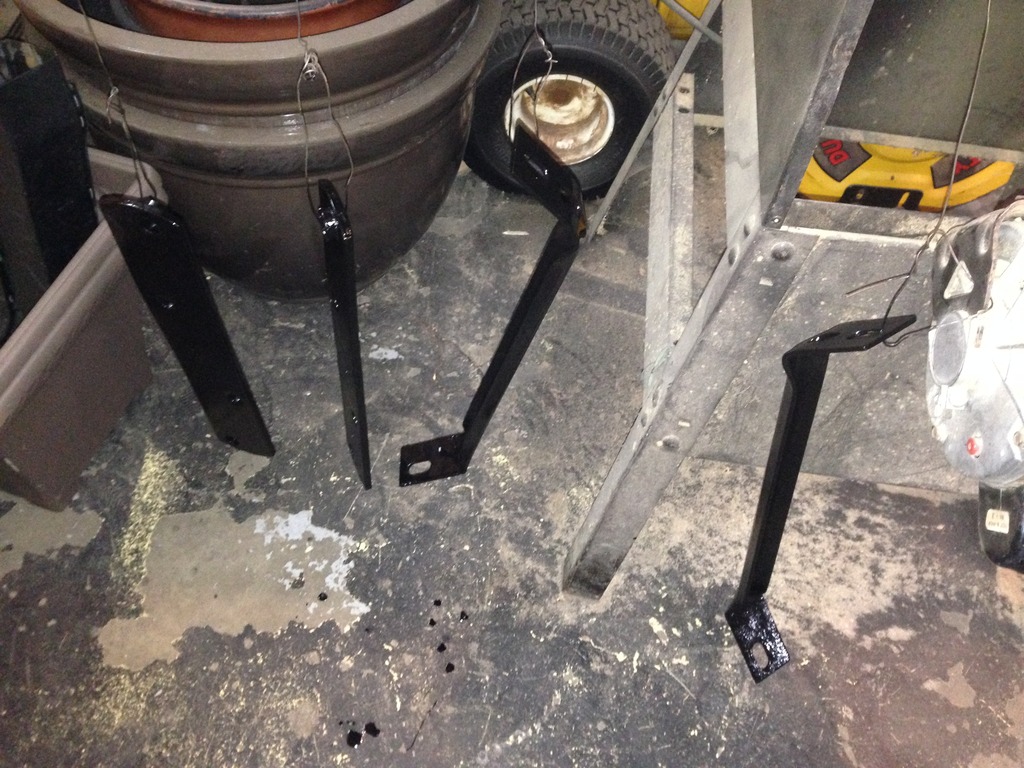
Complete. Protecting my investments. Final Coating on the outside is Duplicolour's "Aluminium".

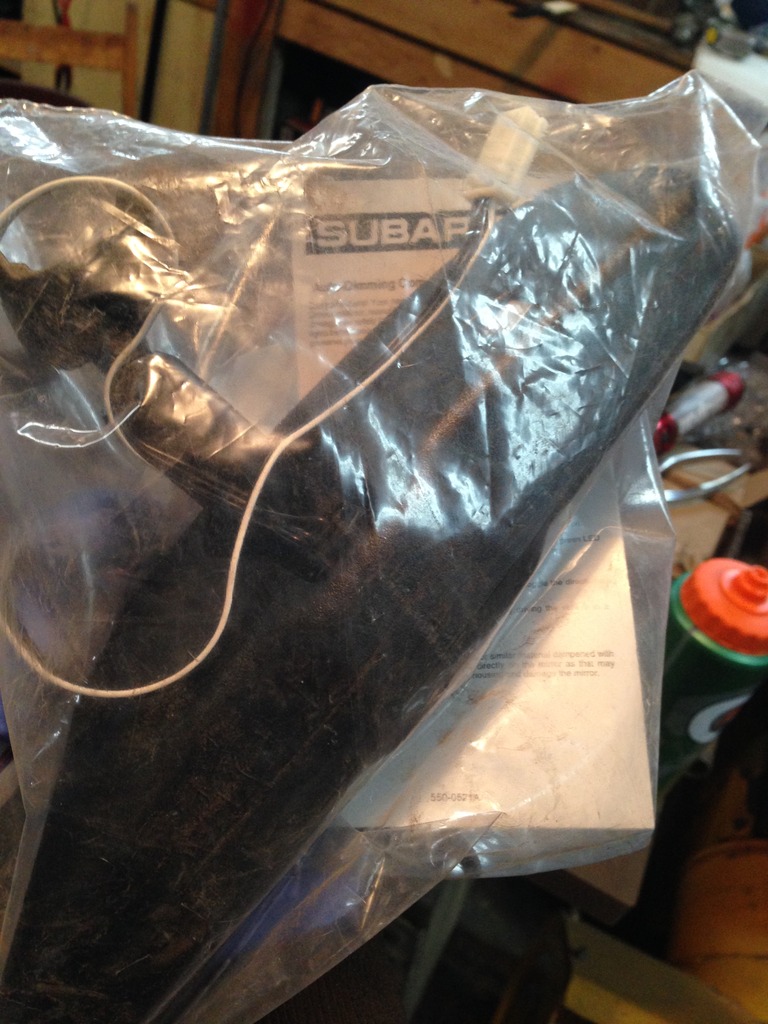
Future upgrade. Acquired in 2013 and stored in a box until I came across it. It's a mid 2000's Subaru Legacy rear view mirror. 2 power wires and 1 ground allow it to have a auto-dimming feature and a compass.
Yes, this is a creature comfort. I'm not against them in our trucks. We all need cup holders, don't we? Well, auto-dimming is one of those things that I believe is "needed". So many a-holes on the road have very bright LED or Xenon bulbs installed in their vehicles improperly. The police do nothing to stop this, and newer vehicles get brighter and brighter headlights every year.
Bright headlights installed on inner city vehicles drives me bat-s**t crazy. You don't need super bright headlights when the streets are illuminated. It's ludicrous to think you do. Rant over, point made.
This mirror will help me to ignore those a-holes on the road and prevent future rants
November isn't over just yet.
Measuring my light bulbs in the truck to order LEDs.
I used the same ebay source as pauli3wood on his crown victoria F150 build (Yitamotor on Ebay.com) - Post #684 in his thread.
Yitamotor sold me 25 LEDS for my truck at a cost of $65 USD, and shipping was $15 to Canada. Total cost of $80.
He/She was VERY VERY difficult to deal with in terms of getting a combined quote and his/her communication. He/She did not have great english and does not really understand how eBay actually works (how to send a combined quote)... I ended up paying via Paypal directly, and eBay was bypassed all together. Took me about 4 weeks of constant communication each night to get me my LED's.
I paid for the LED's in October, and got them at the end of November. Not the best for shipping, but does have quality products at a decent cost. Spoiler alert lol.
The notepad behind my light bulbs contains every single step involved in doing a cab swap. I wrote roughly 5 pages of steps, identified by a number. Each number contained what I removed (quantity), in that specific order, and how it was removed (size of bolt- 1/4" or 7/16, phillips head, etc).
Doors taken out of the attic and mounted for the first time since 2012.
Green seat from an 1973 F100. Bought it back in 2011 from a nearby farmer for $20.
Doors mounted back on Blue (minus passenger cause the garage is tight).
Rear sliding window from a 1995 F150. Should fit directly in the same place as the current OEM sliding window. Current window sucks and doesn't do it's job. It's outdated and needs to be removed, but will be installed later.
Stole the rear bumper brackets on the F150 frame. Will replace the crushed ones on my F250 frame (from the farmers combine trying to eat the truck).
Fuel tank was only partially covered in Rocker Guard since the last build. It needs to be protected like everything else. Finished it off, completely coating it by using 2 full cans of the stuff. Works great and has a nice textured finish to it.
Tank was mounted (temporarily). Spoilers.
Fenders mounted. Progress!
Still no wheels, but they're soon to come.
Fuel selector pump removed. It's been hacked up and clearly didn't work for the previous owner as they had removed the lines to the auxiliary tank so it couldn't be used... but the fuel was still plumbed through the selector pump which was unnecessary. Completely removed for simplicity. I plan to run just a single tank for the foreseeable future.
And then something bad happened... but it has a bright side I guess. I got too close to my block heater cord with a power tool. Whoops. Found out that it's not a block heater for a Ford 400... but more to come on that.
Tires mounted. Took it for a victory lap around the neighbourhood. Dang she's loud without an exhaust system.
Pic of the tank mounted. Looks pretty good if you ask me. Rocker Guard should save it from external rust and rocks.
Blue truck has brakes remounted to give it a way to stop when I pull it out of the rear garage and park it back out front of the house for my parts guy.
Hood mounted. Silver hood came from my parts guy. It's in great shape.
Evap tank mounted in the F150 frame. It still works great, but I don't need 2 tanks, plus my other one is brand new.
F150 (now the blue truck) moved out front for box mounting.
F250 parked in its way in case some punks decide to kick out the wheel chocks.
Same method as before. Simple and effective.
Front-heavy just like a cab.
Looks more like a truck. Almost ready to go to my parts guy. Needs a tailgate and a box full of parts yet.
Rear bumper I acquired. Heavy duty solid steel. Pounded out the dents, stripped it, painted the outside, and POR-15'ed the inside.
First layer of paint. Called "Bumper Paint".
Bumper paint on the inside as a base coat.
Masked off all my bumpers, prepped them for POR-15. One front bumper is a post-77 style and isn't in the greatest of shape. The other is a pre-77 and is mint.
Before.
After.
Since the POR-15 was out... I painted my rear bumper brackets. Why not? You see this is becoming a recurring theme
Complete. Protecting my investments. Final Coating on the outside is Duplicolour's "Aluminium".
Future upgrade. Acquired in 2013 and stored in a box until I came across it. It's a mid 2000's Subaru Legacy rear view mirror. 2 power wires and 1 ground allow it to have a auto-dimming feature and a compass.
Yes, this is a creature comfort. I'm not against them in our trucks. We all need cup holders, don't we? Well, auto-dimming is one of those things that I believe is "needed". So many a-holes on the road have very bright LED or Xenon bulbs installed in their vehicles improperly. The police do nothing to stop this, and newer vehicles get brighter and brighter headlights every year.
Bright headlights installed on inner city vehicles drives me bat-s**t crazy. You don't need super bright headlights when the streets are illuminated. It's ludicrous to think you do. Rant over, point made.
This mirror will help me to ignore those a-holes on the road and prevent future rants
November isn't over just yet.
#7
01-04-2017, 08:27 PM
Trending Topics
#8
01-04-2017, 09:44 PM
Onward and upward.
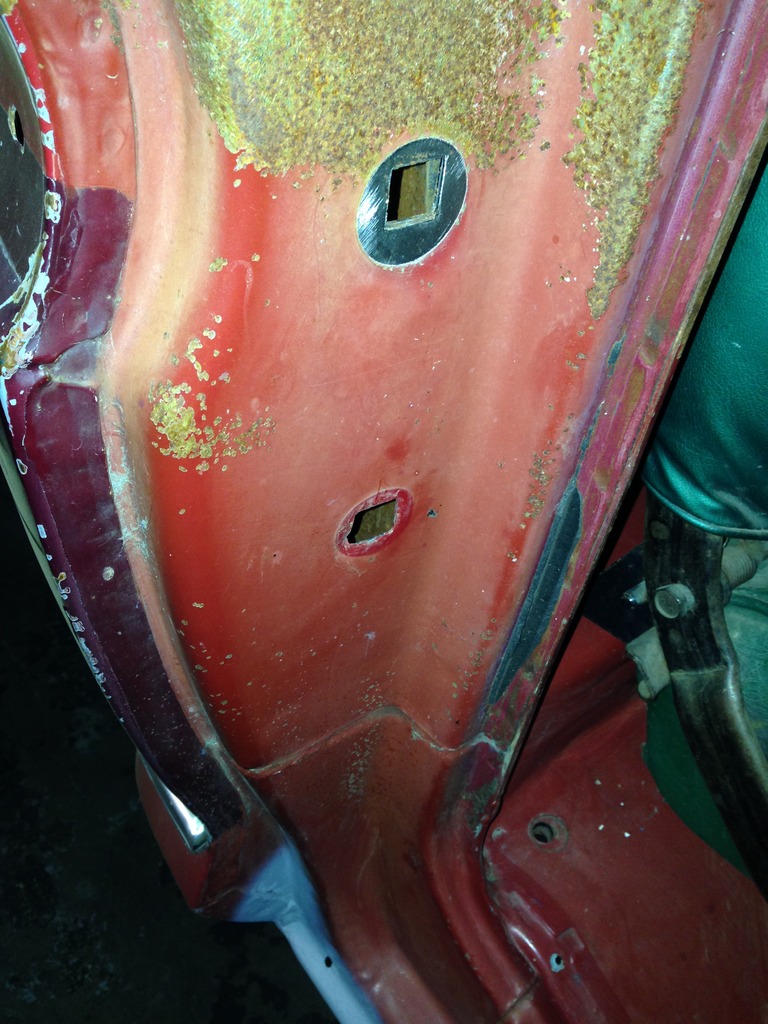
Some scars left behind from removing the previous cab owners side-steps. Removed them the day I got the cab. Sprayed some rattle-can primer on the holes to keep them from rusting. A more permanent solution will come in the future.
Passenger door striker nut removed to measure its thread/pitch. Unlucky me... the nut for the striker fell into the cab corner.
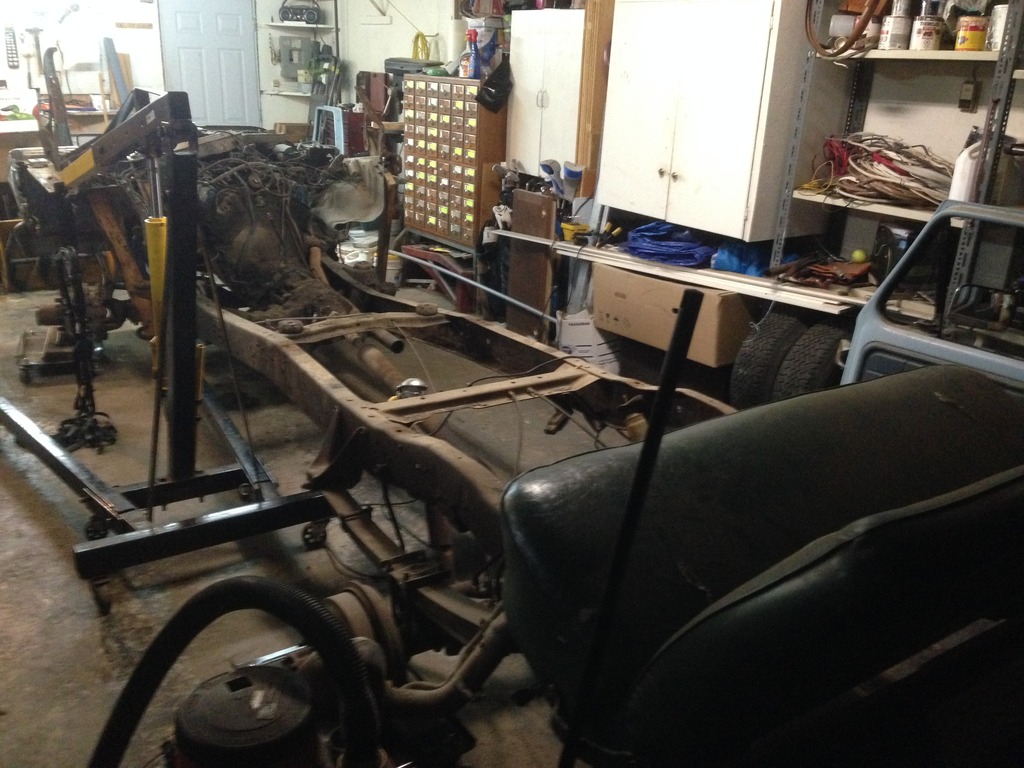
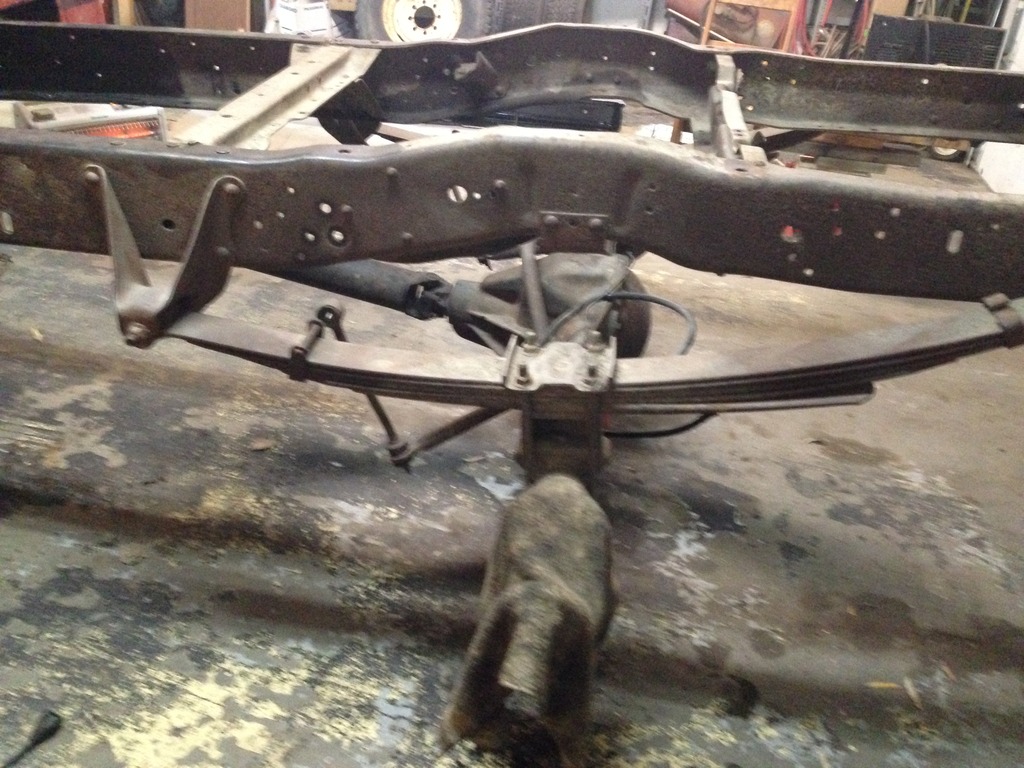
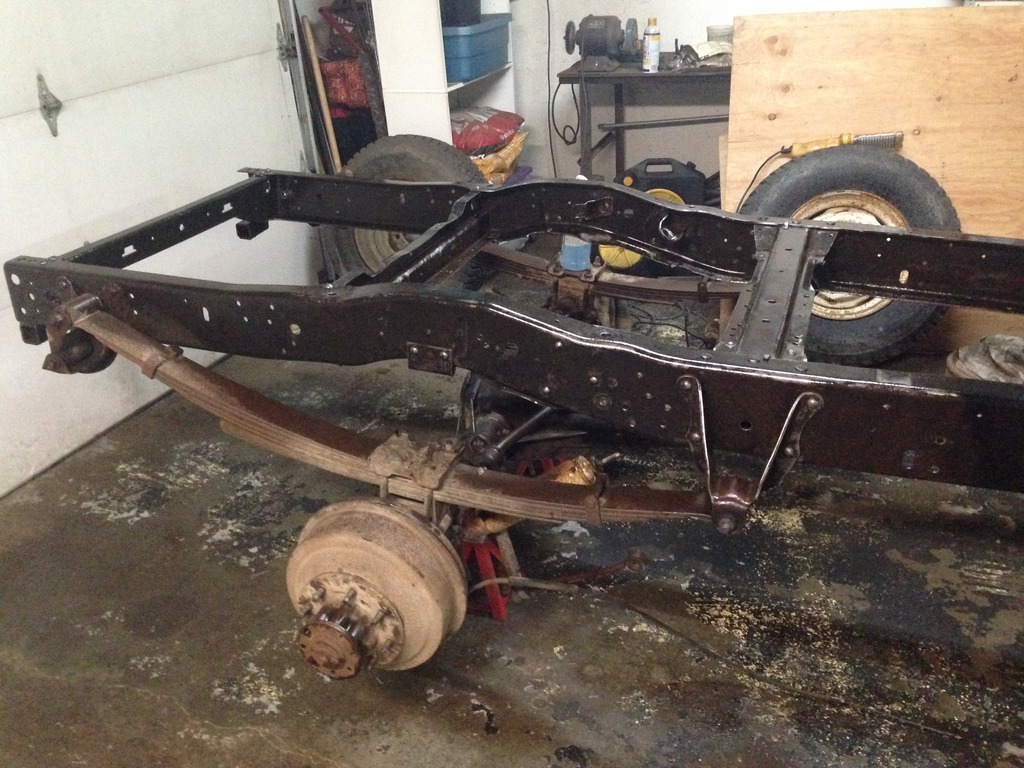
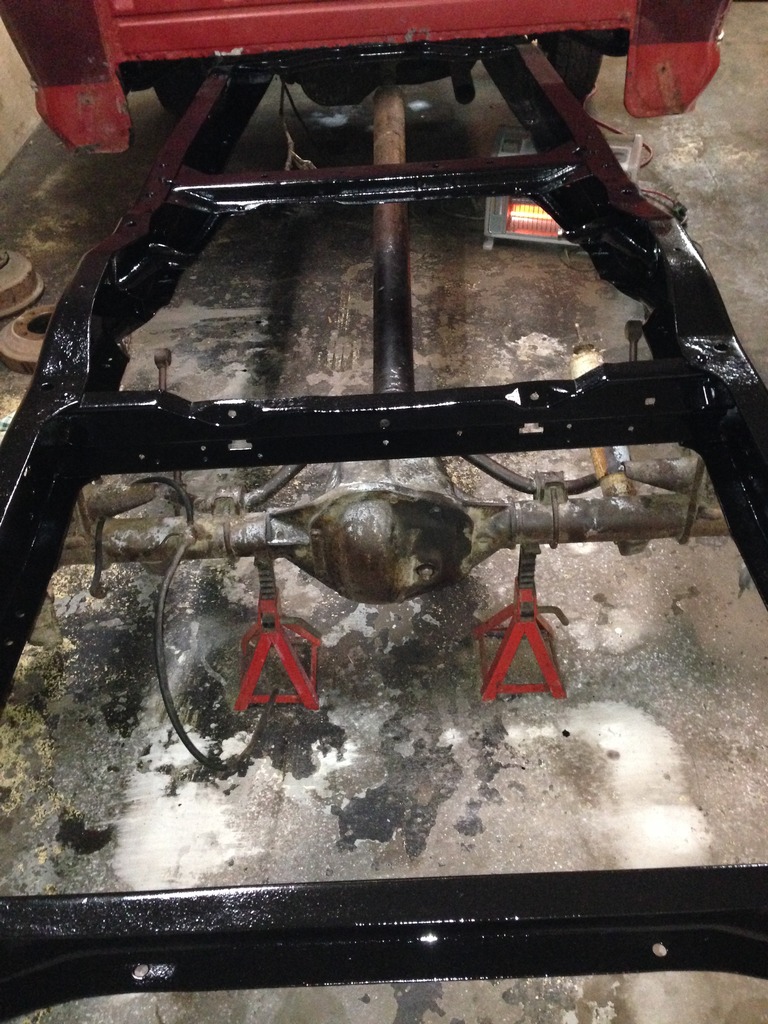
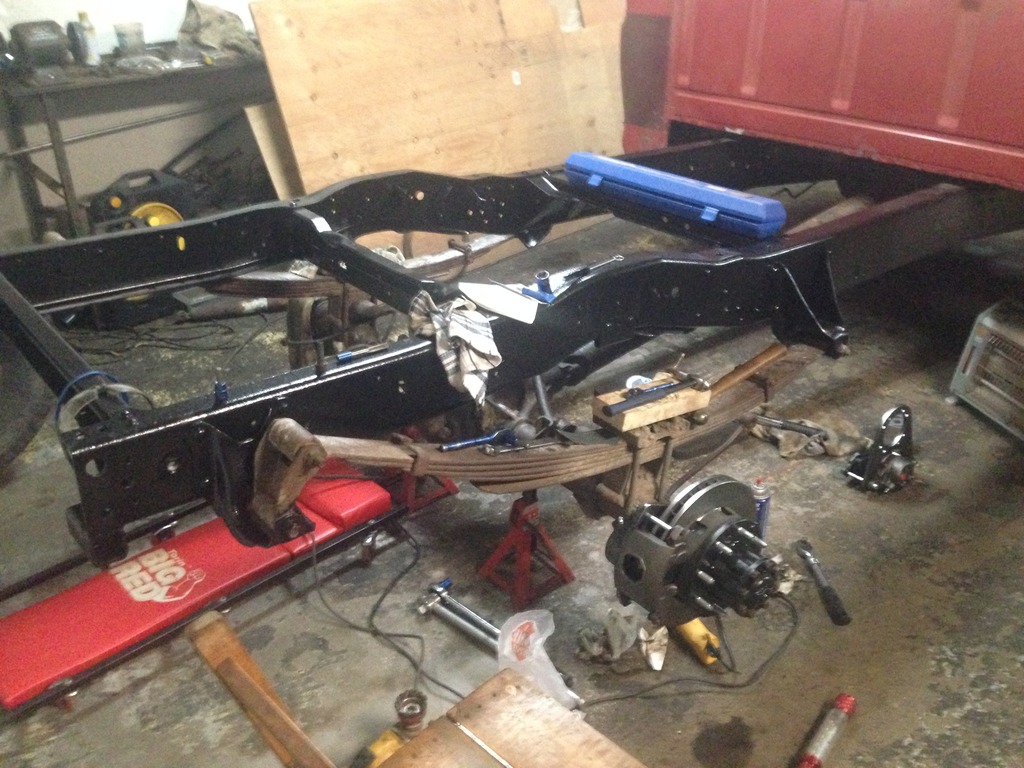
So starts stage 2 of the frame restore. From the cab back.
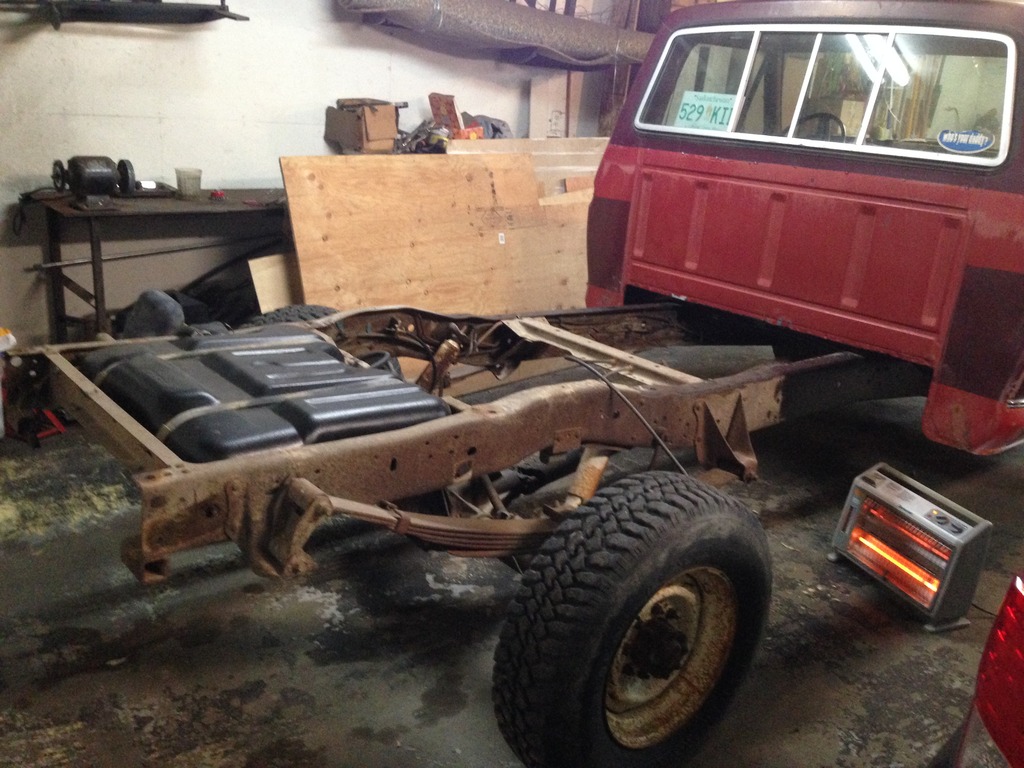
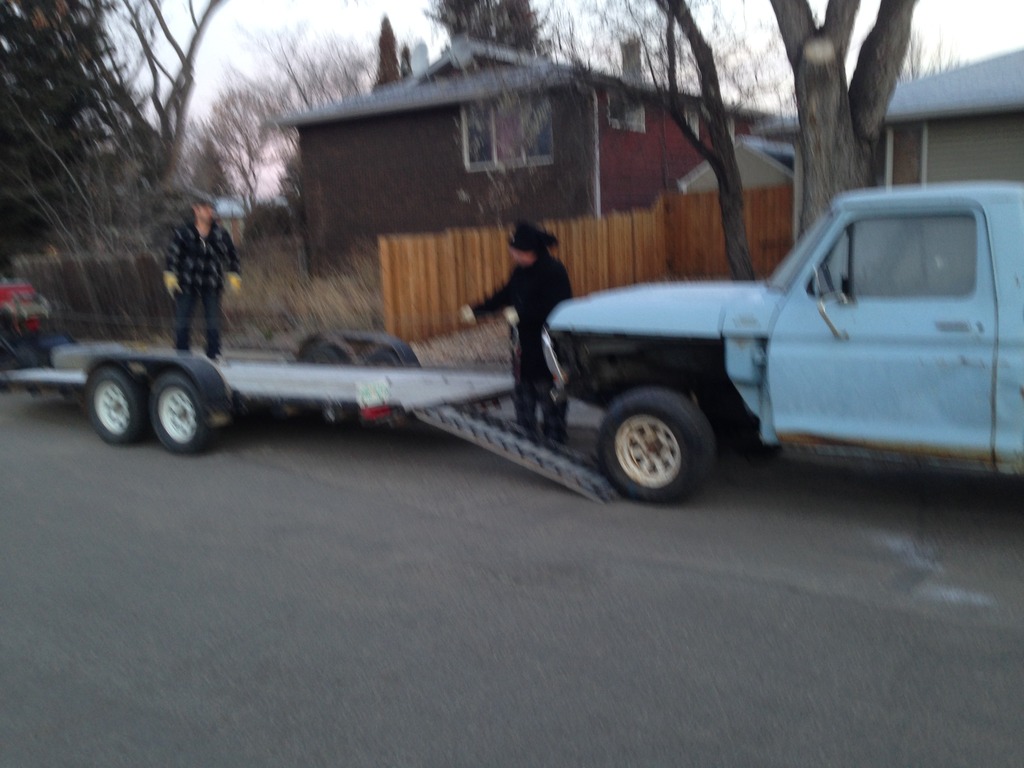
Saying goodbye to the F150 build. My parts guy picked it up in mid November.
Did an axle/hub tear-down. Figured if I was restoring the frame that the bearings and seals could use some attention while I was at it.
Ordered 4 SET38 Timken inner/outter rear bearings. They're the same on my rear differential.
Bought National 2150 Inner seals locally because I purchased the wrong seals from Rock Auto.
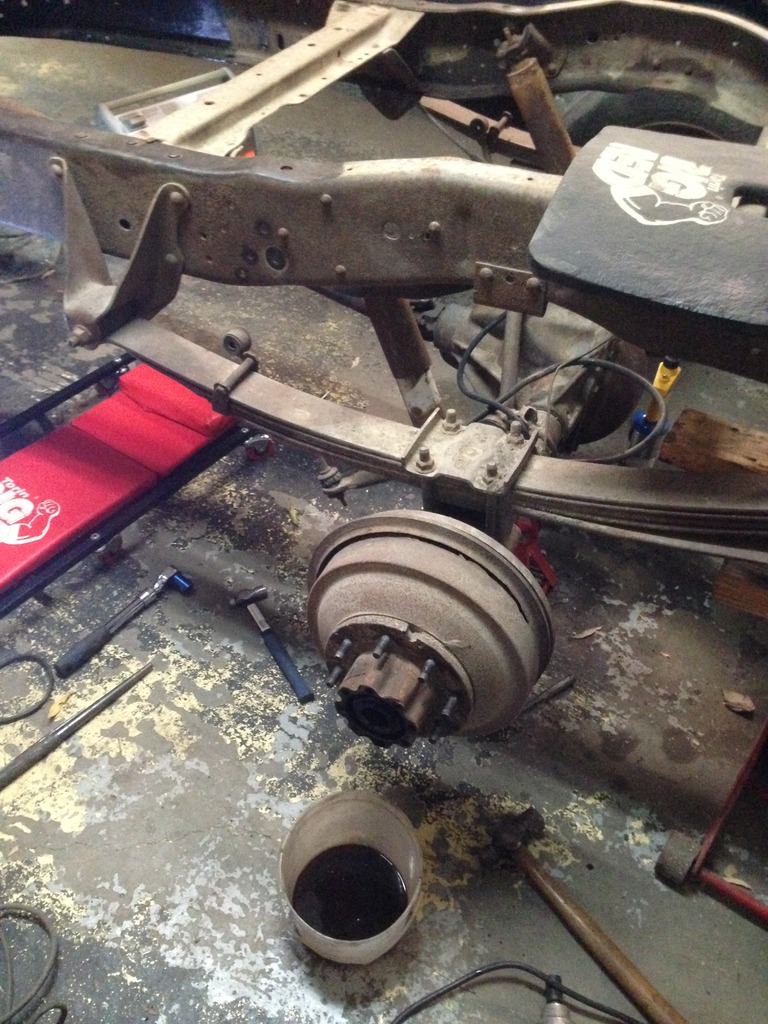
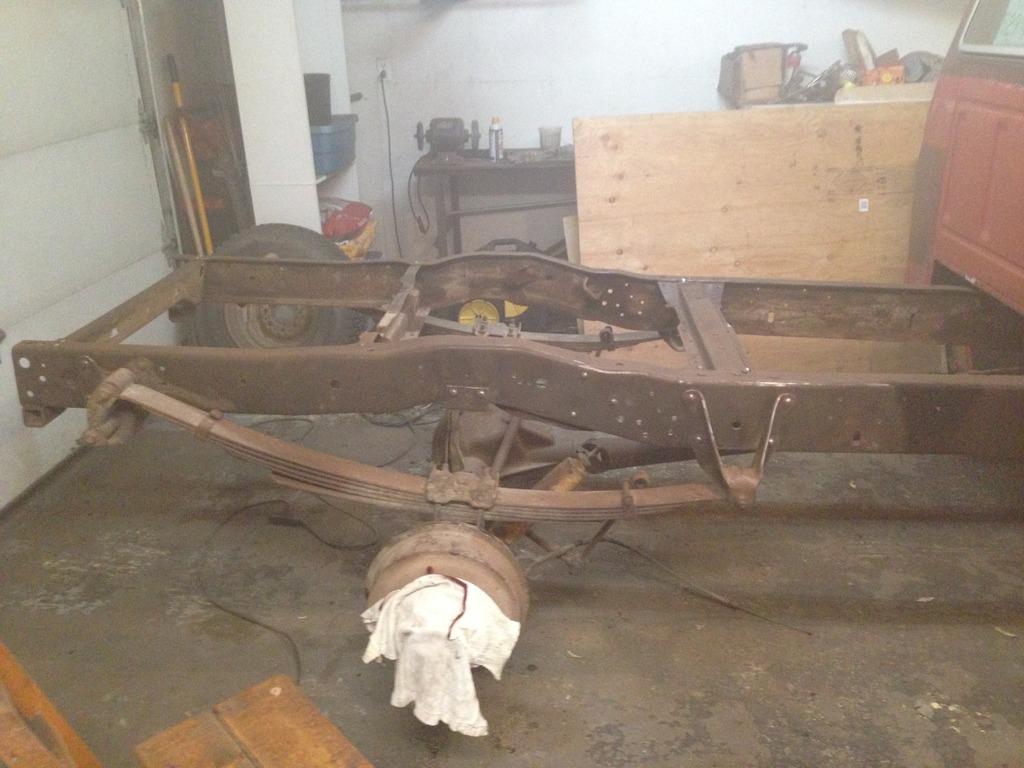
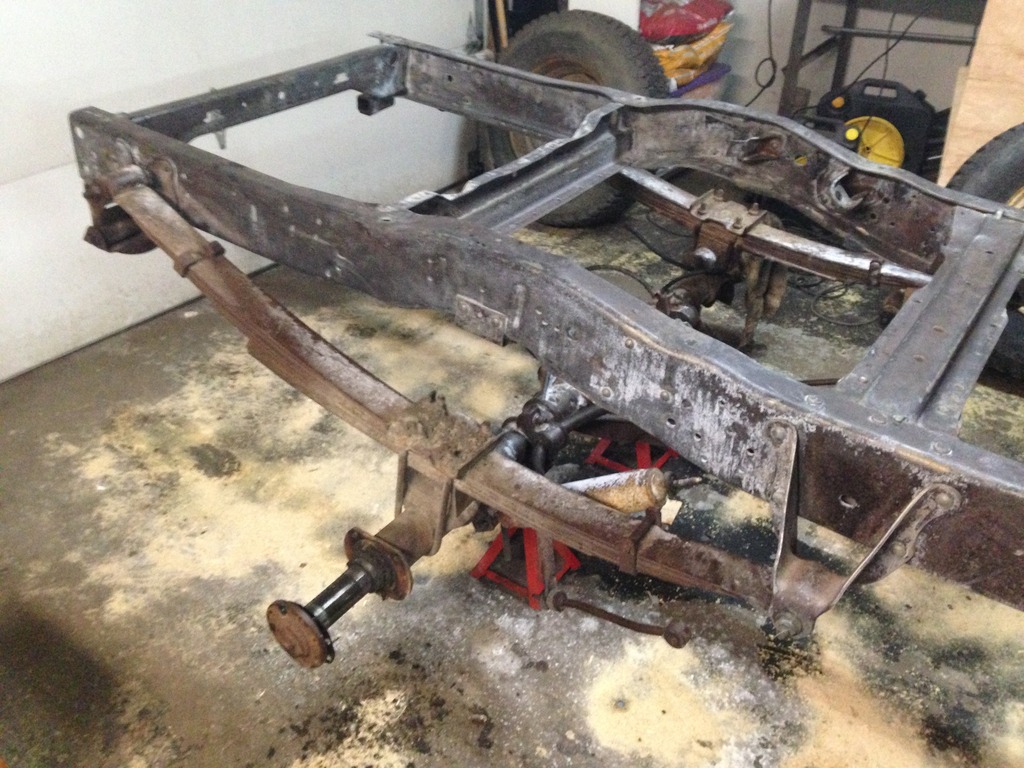
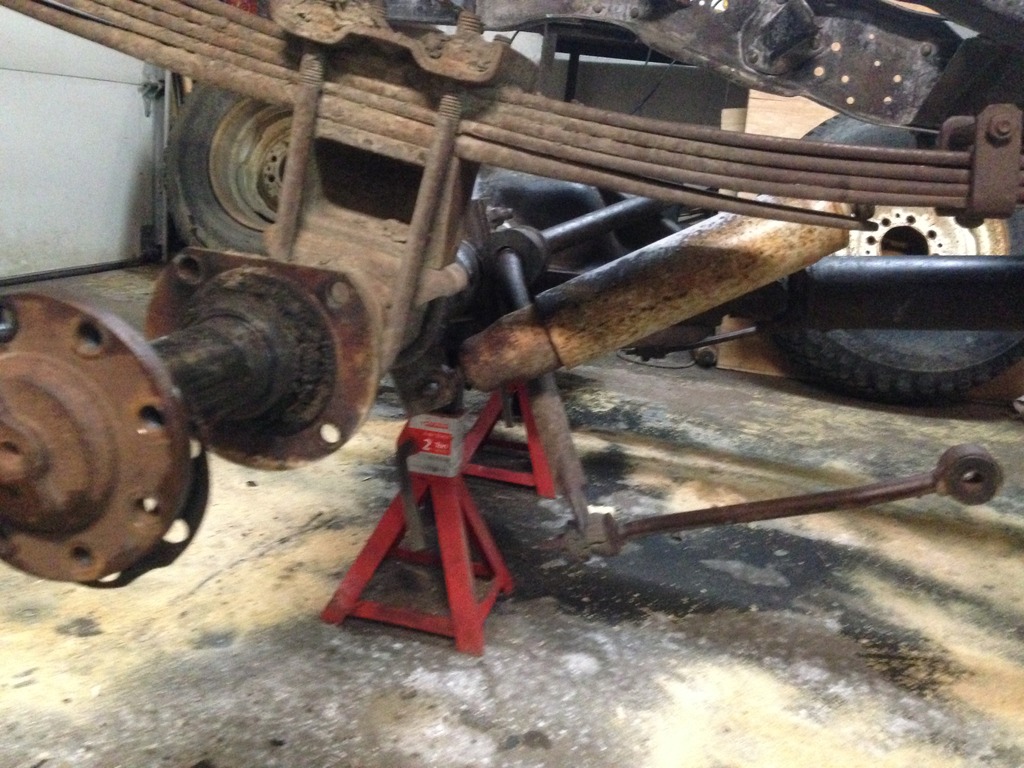
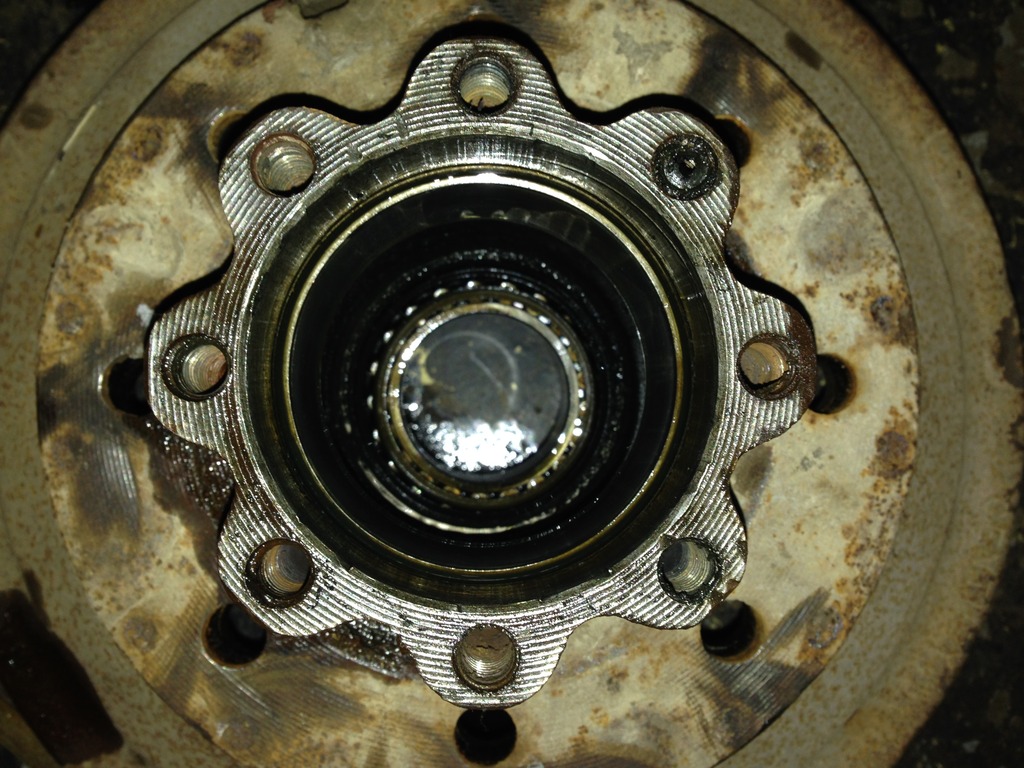
Driver side came off nice and easy. Rear brakes look like hell.
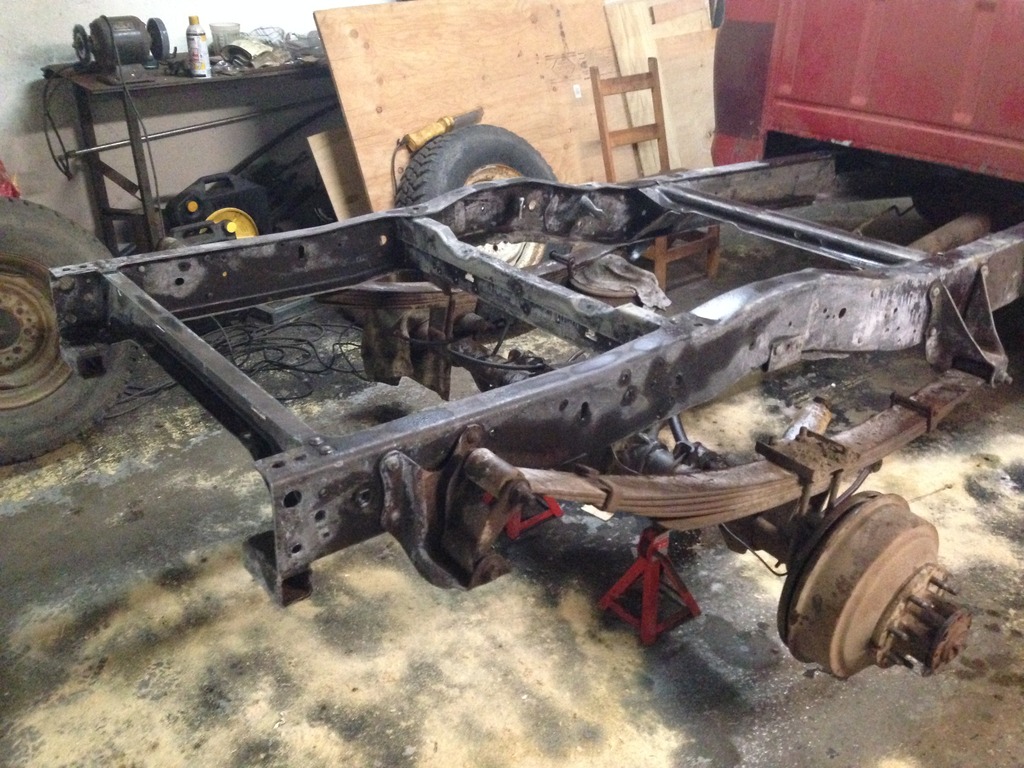
Parts removed. Tank, shocks, clips, lines, electrical. Ready to be wire wheeled.
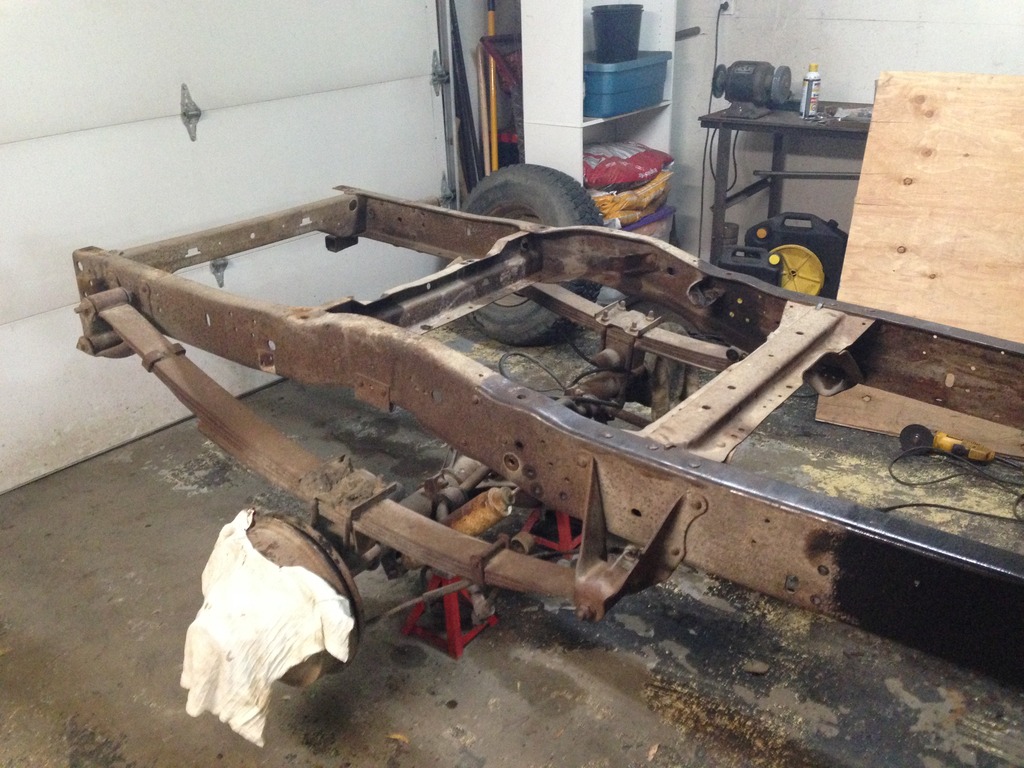
Another angle. Common angle for future pics.

Driver side brakes/hub fully removed and awaiting new parts.
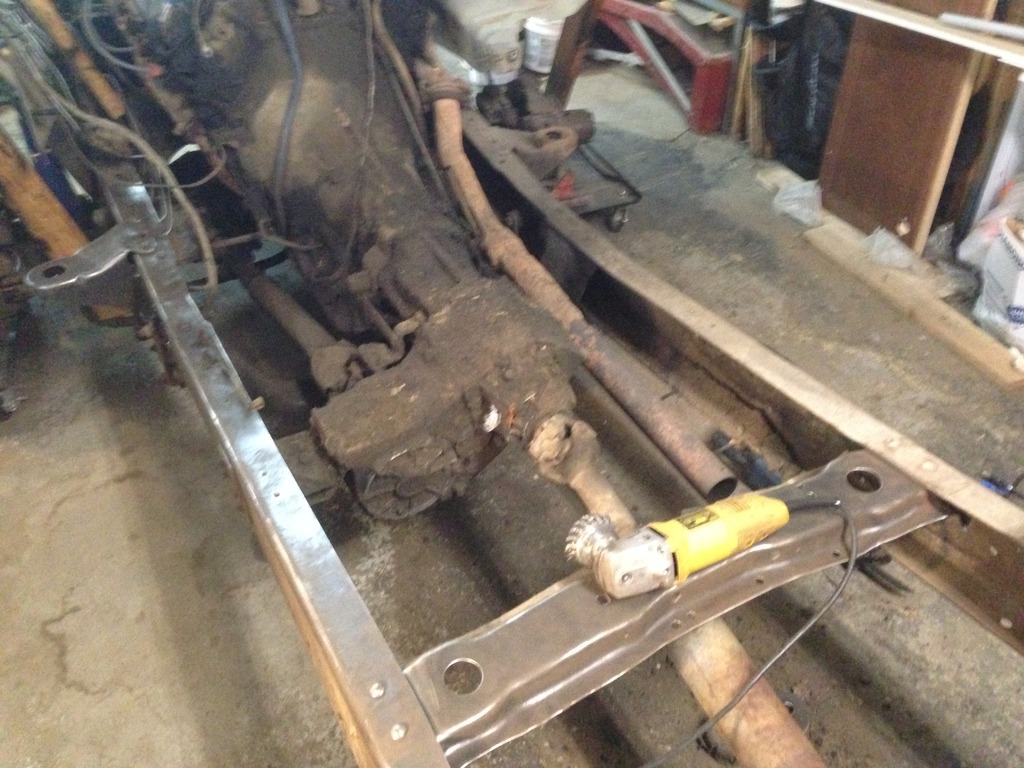
Stripped the frame with a angle grinder and wire wheel. Garage has a nice haze of dusty dirt. 3M particulate/painting face mask required for work like this. Don't want to breathe in 40 year old rust.
Another angle. Every nook and cranny wheeled.
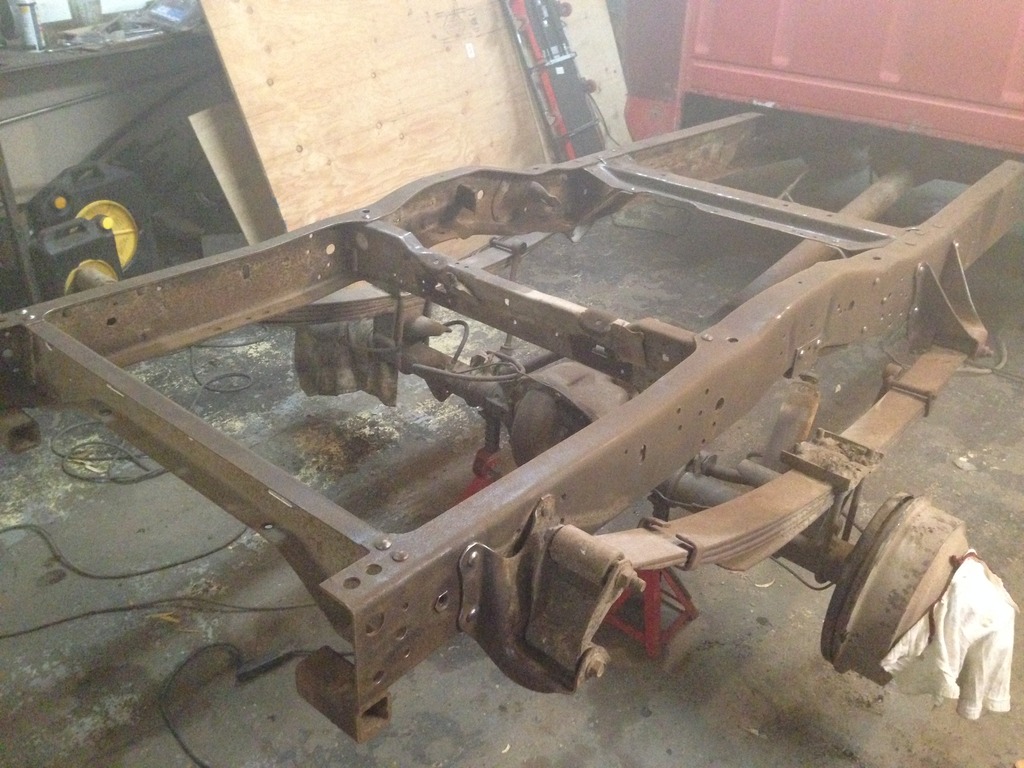
Frame washed down with soapy water and towel/air dried.
Sprayed down with Metal-Ready.
Nice white finish once the metal-ready dries. Shows that some rust was still on the frame even though it was thoroughly wire wheeled.
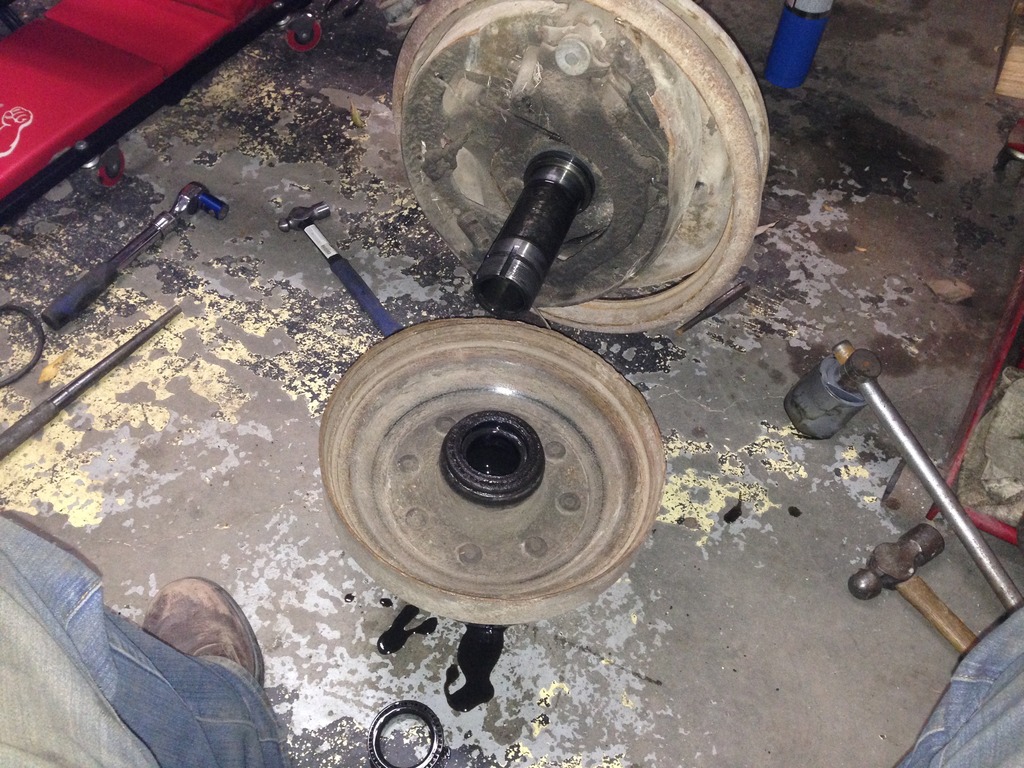
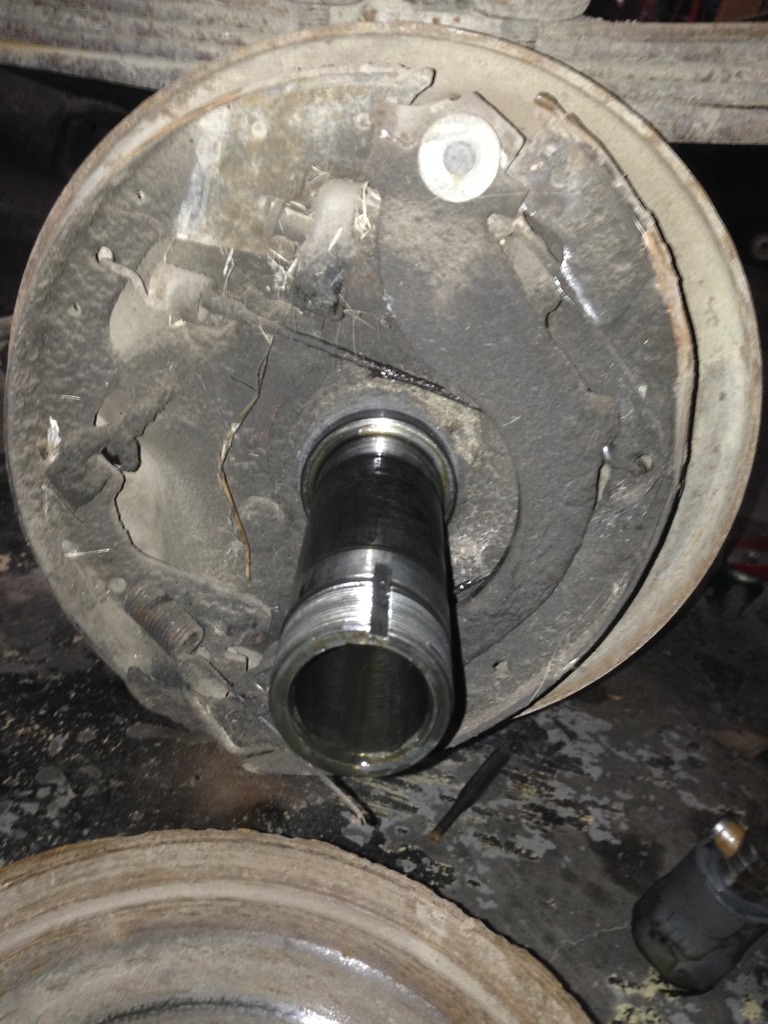
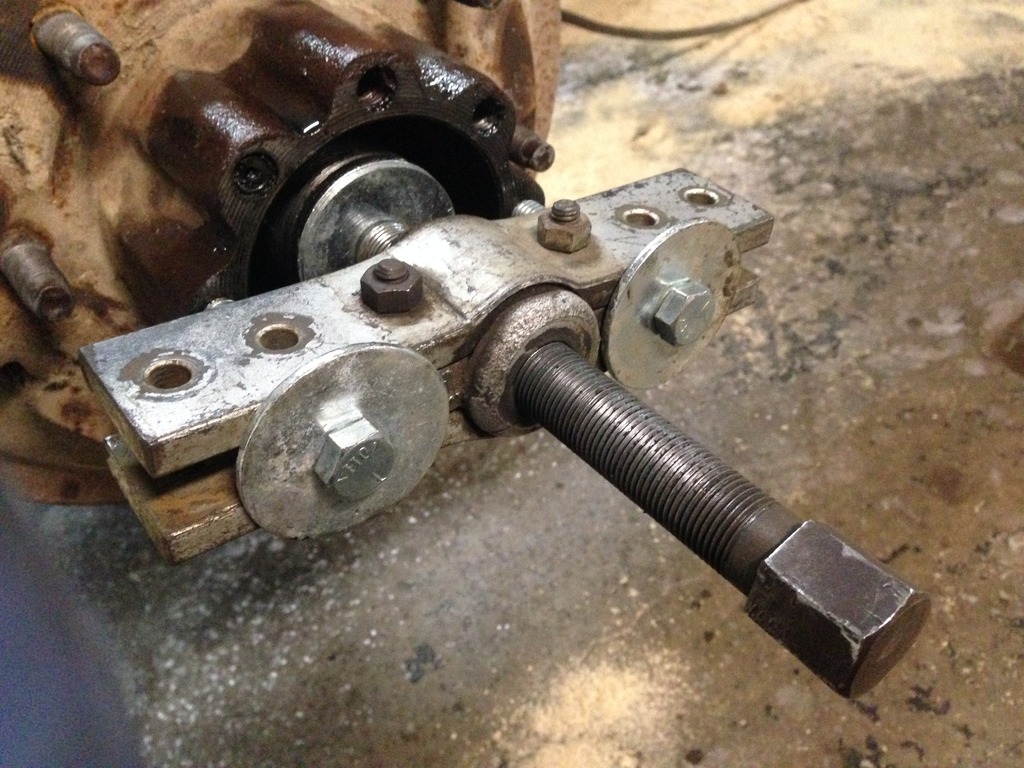
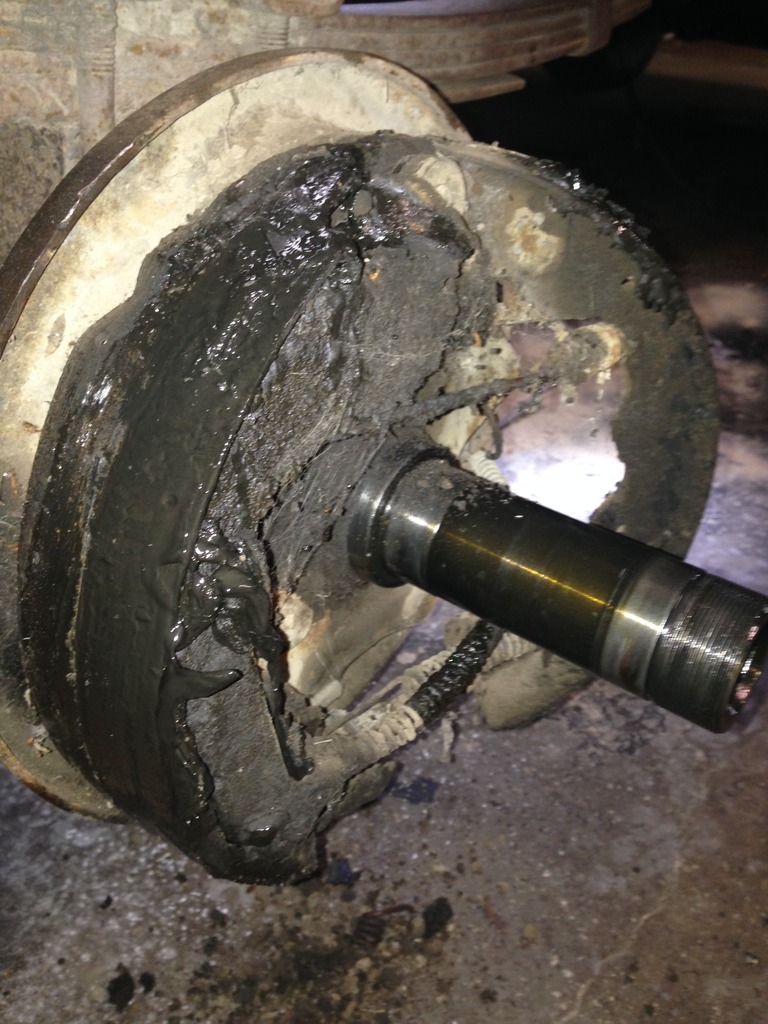
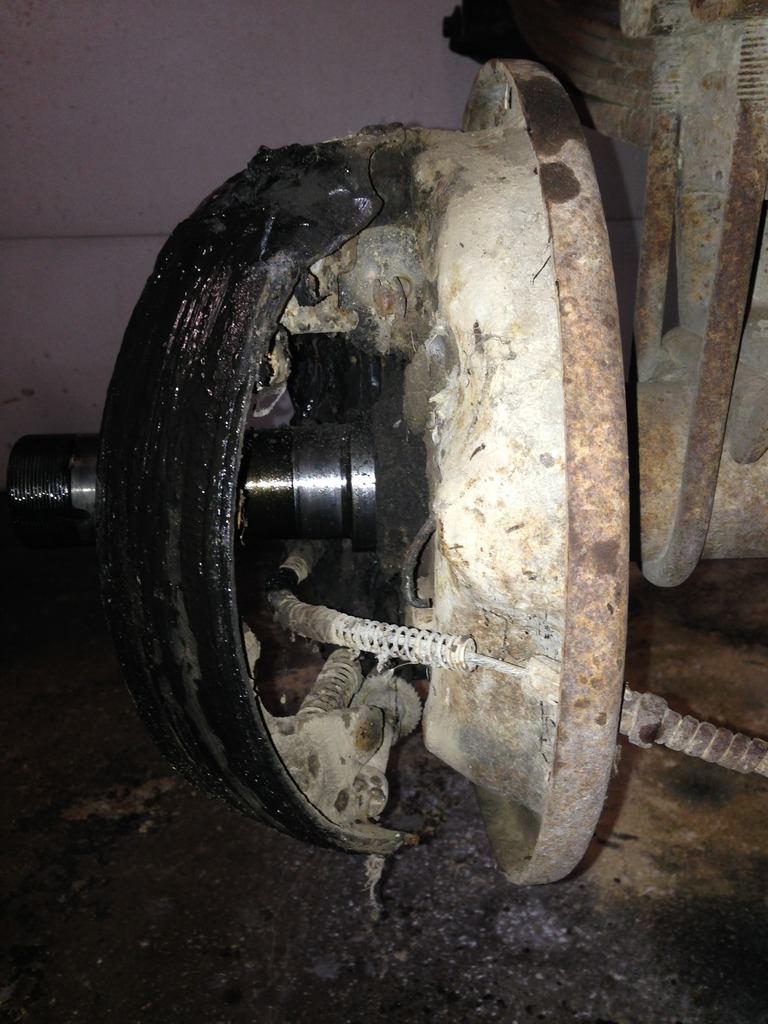
That pesky passenger side drum would NOT come off. I tried everything, even 2 grown men with crow bars.
Eventually I turned to my dads old John Deere Tractor pulley puller. Worked like a charm.
No wonder why it wouldn't come off. The shoes were welded to the inside of the drums from excessive use well beyond what they're capable of doing. The shoes were down to the metal making metal on metal contact which created a 1/4" lip inside the drum.
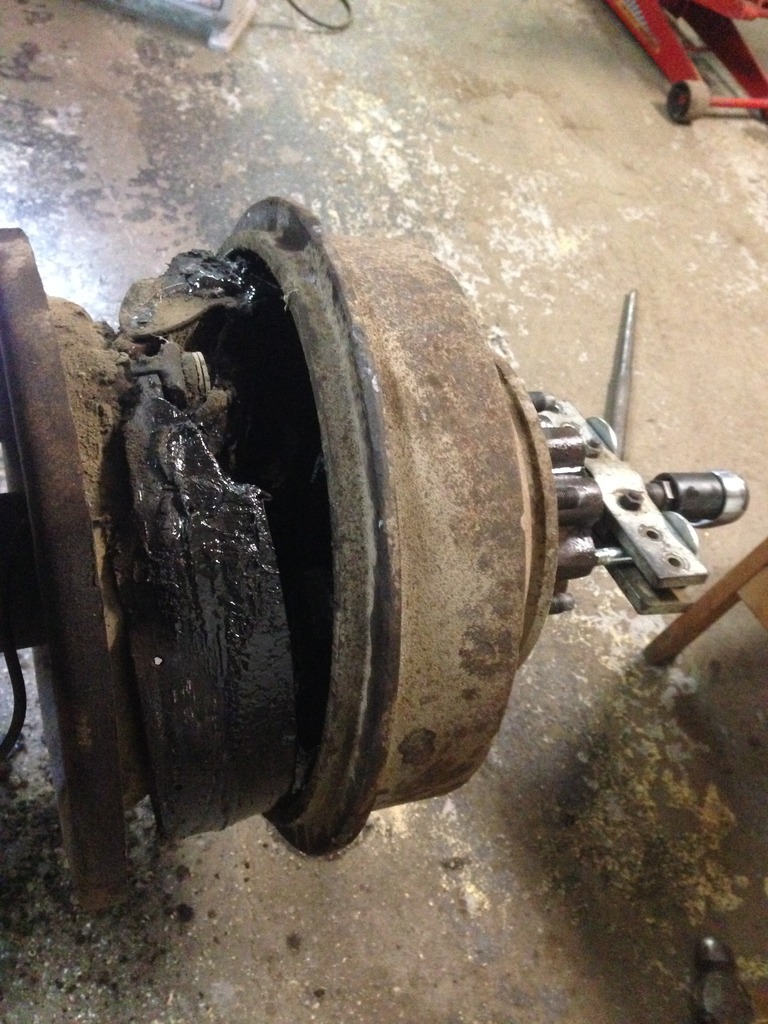
Wow. Joy-riding is right.
Ready for POR-15.
Sway bar removed, replacement bushings ordered.
If the frame is getting a make-over, so is everything else. Before.
After. Holes plugged with paper towel to avoid issues with bolts later on.
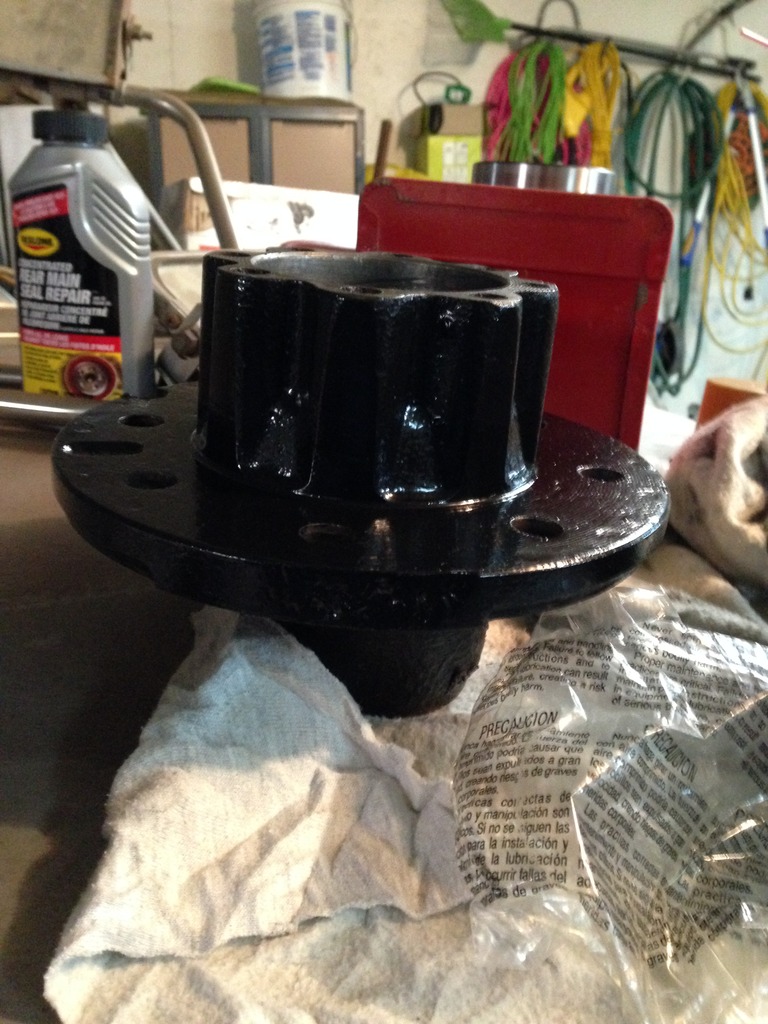
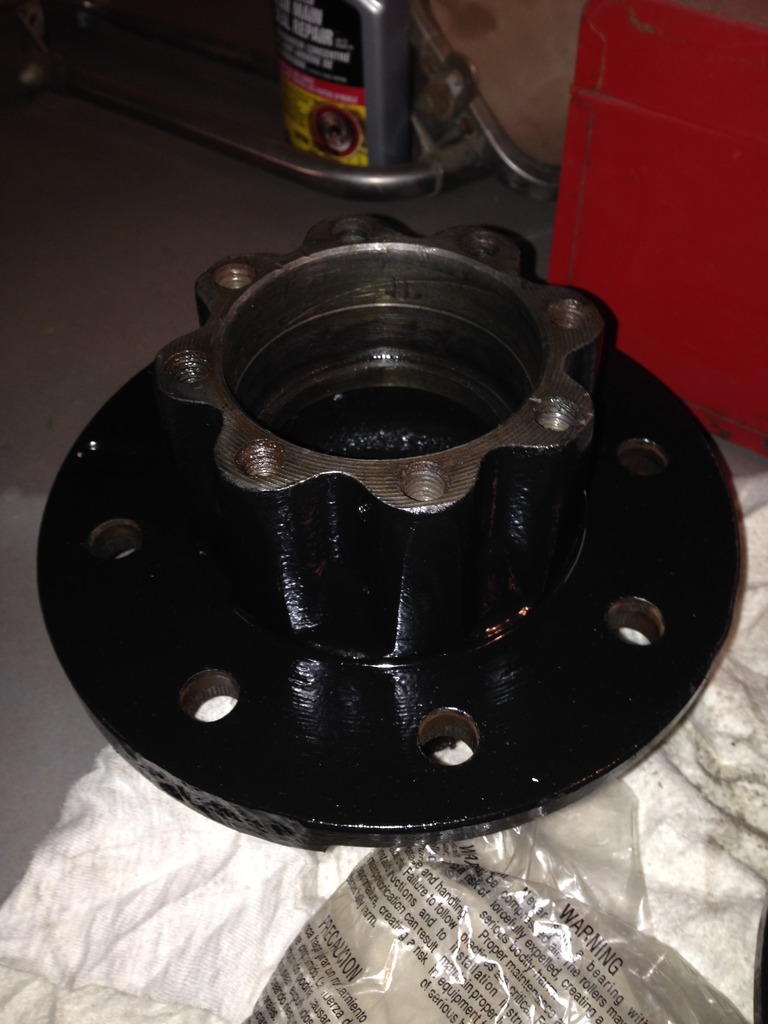
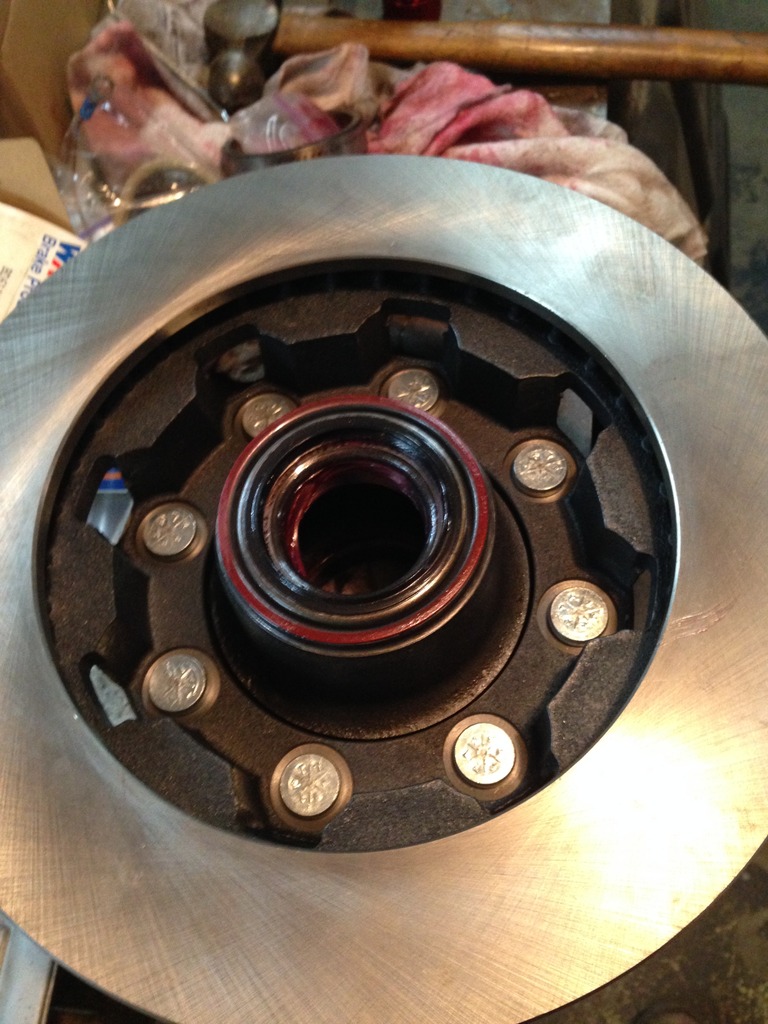
Hubs disassembled. Awaiting POR-15 and new bearings/seals.
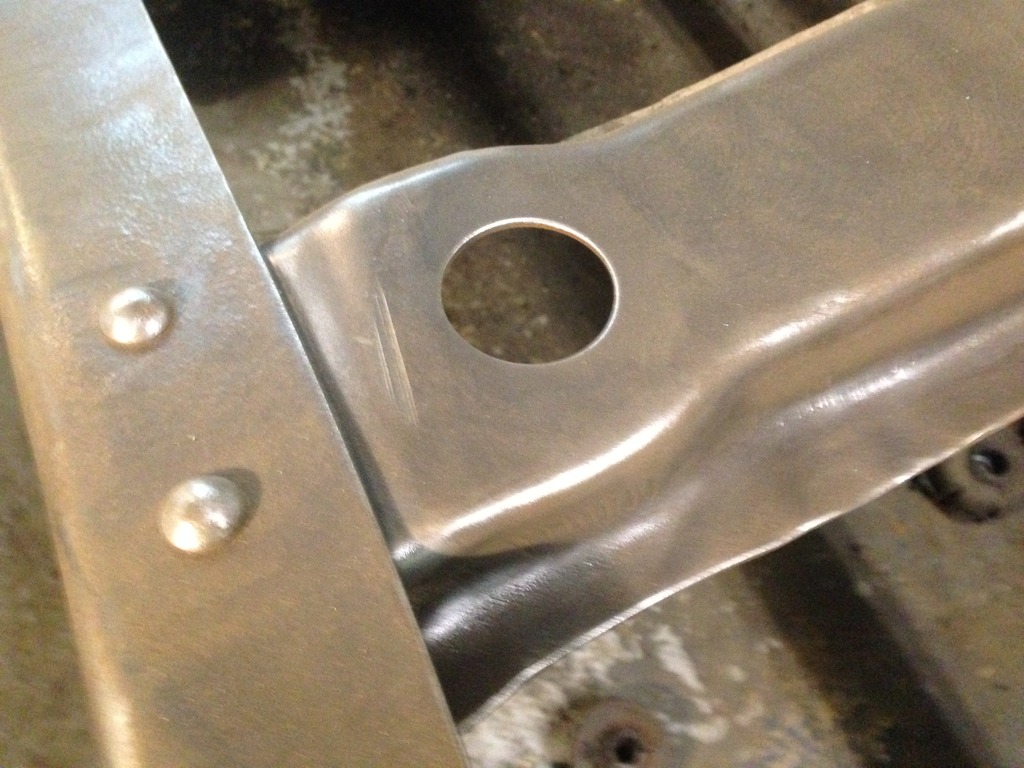
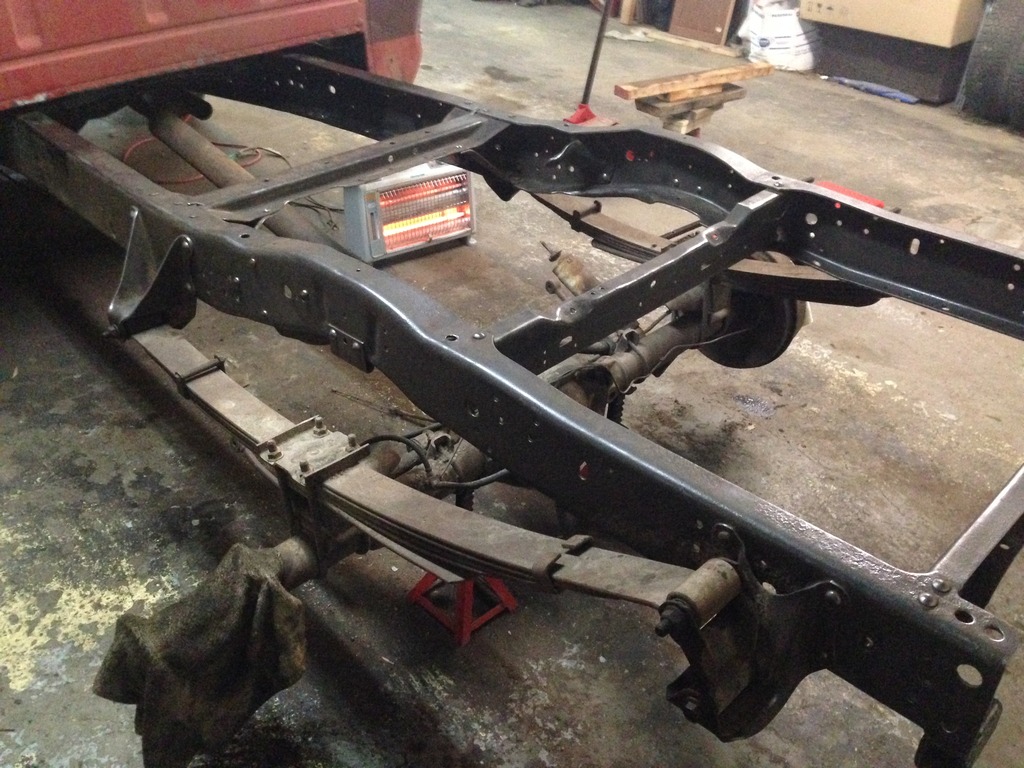
Frame looking pretty.
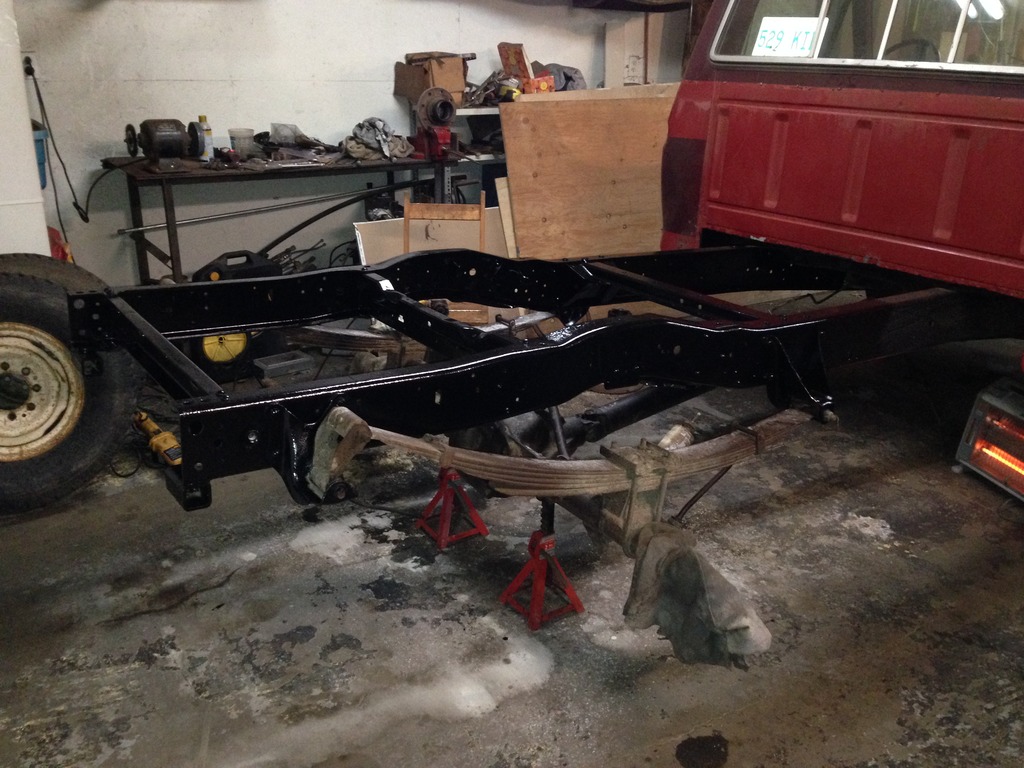
Every inch covered. From the front of the cab backwards. Big milestone for this truck.
Masked and painted with POR-15. Given a second coat of Chassis Coat because the hubs will be exposed to sunlight. POR-15 hates sunlight and breaks down with UV Rays. Chassis coat is not UV sensitive.
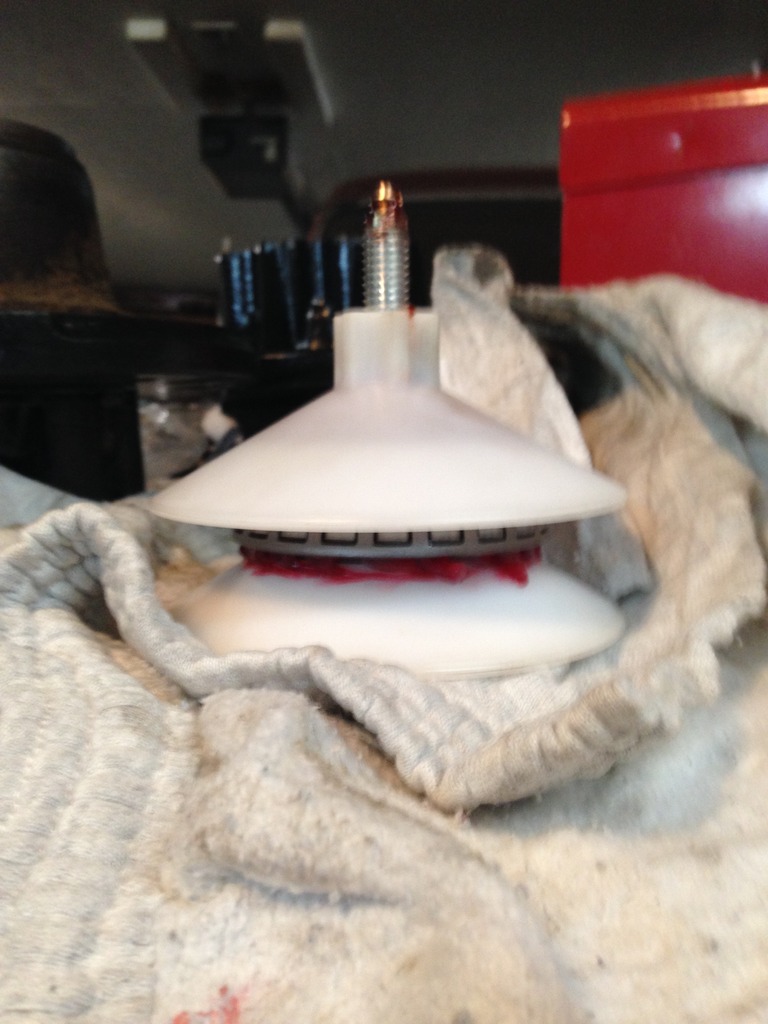
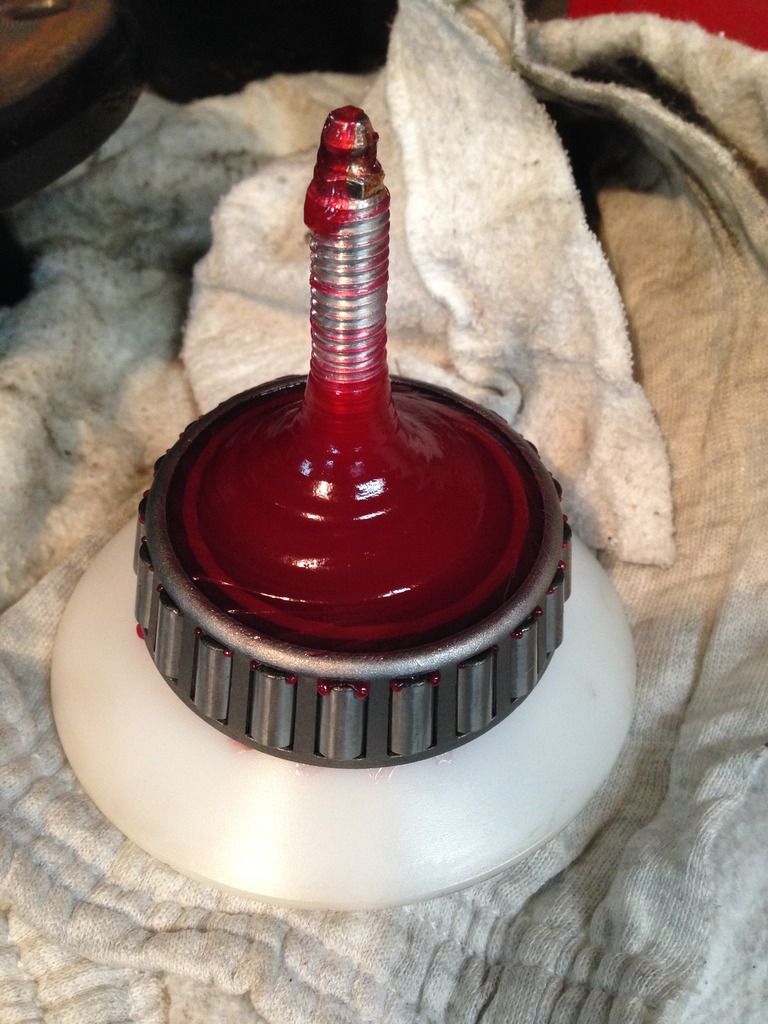
New Lisle bearing packer. Works wonders. Bearing packed with high quality high temp grease.
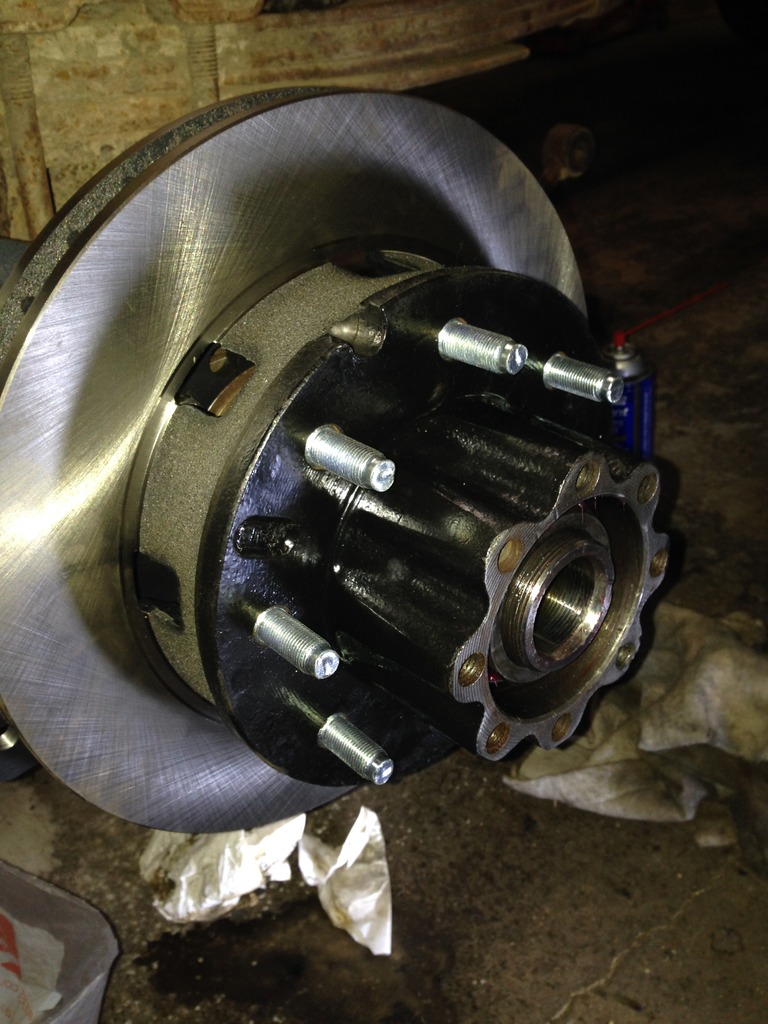
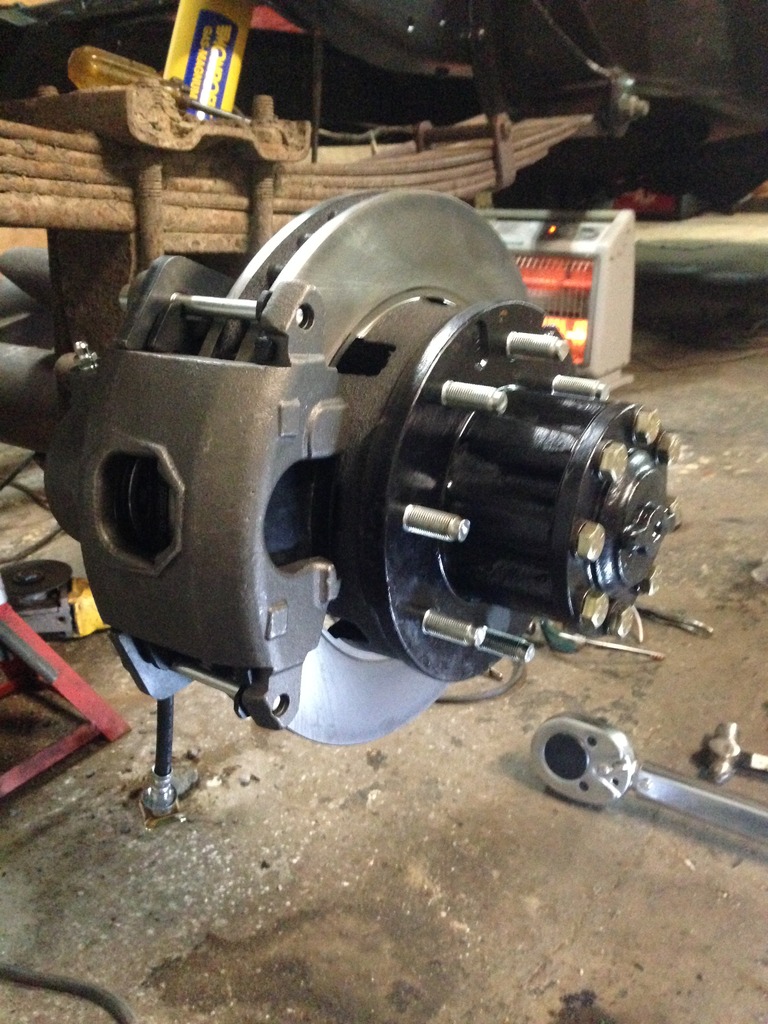
Upgrades! Rear disc brake conversion underway. Discs are from the front of a 1985 K20 Chevy.

Studs are Dorman 610-277. They are shorter than the OEM lug studs and may enable me to have acorn style lug nuts... but I'll have to test it out in the future to make sure.
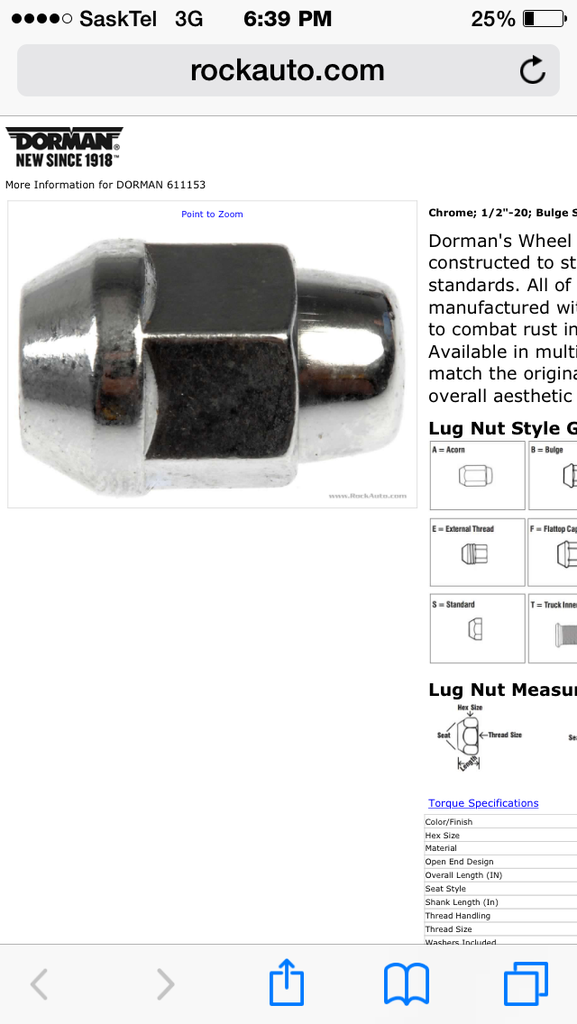
Potential future lug nuts. Dorman 611153.
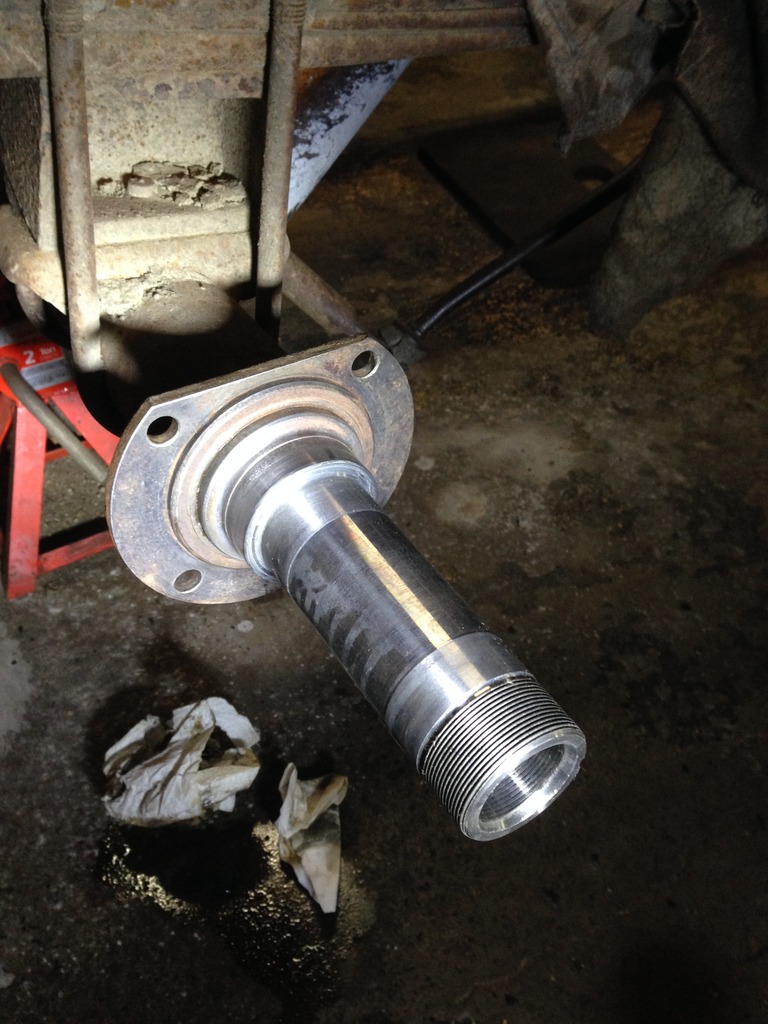
Axle flange cleaned up with wire wheel. Axle tube cleaned up softly with 1000 grit sandpaper.
TMR Custom's Dana 60 Rear Disc Conversion Brackets mounted. Canadian company, makes wonderful stuff. Cost me $120, shipped. Well worth it. High quality. Stainless hardware.
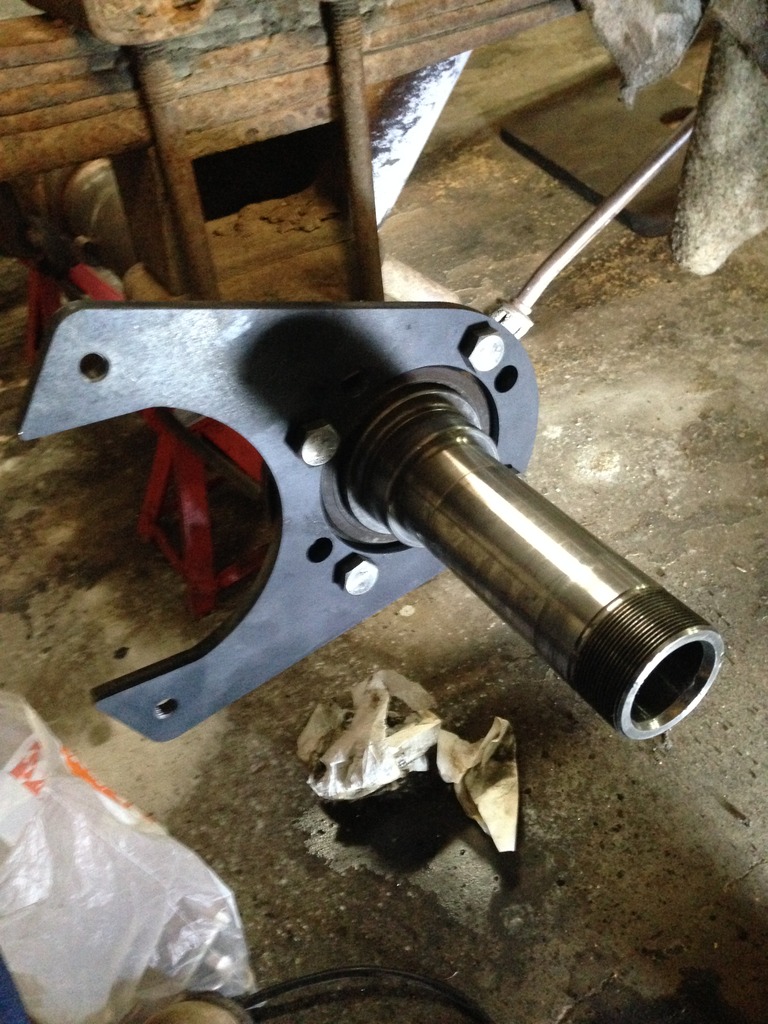
Hubs mounted.
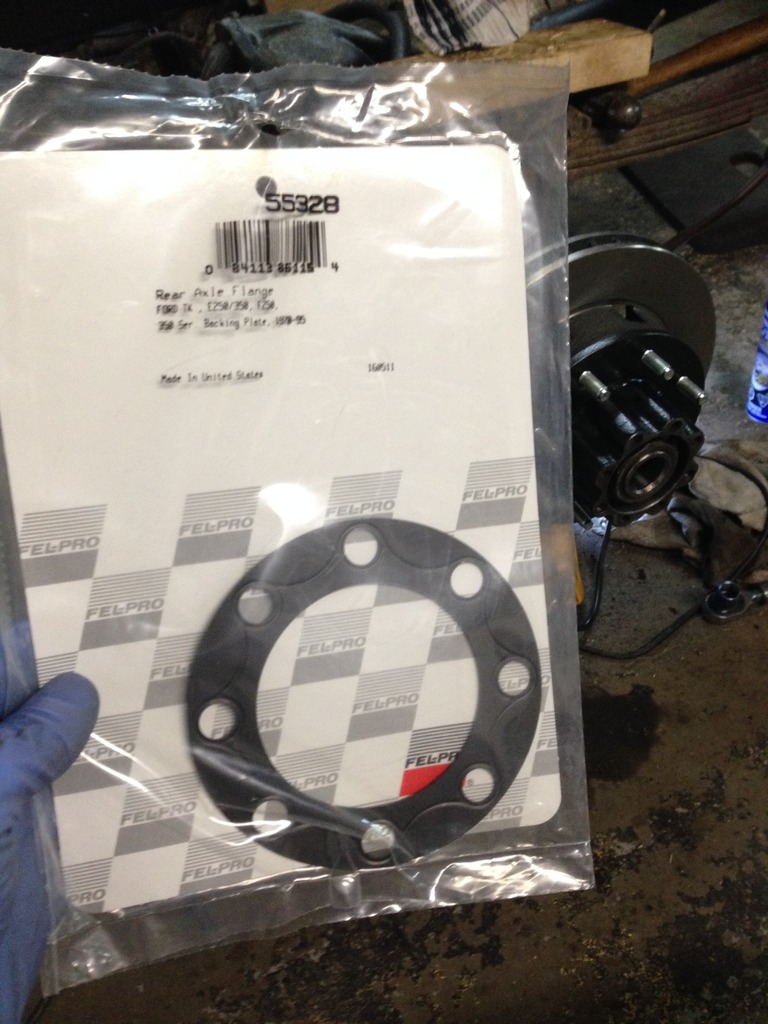
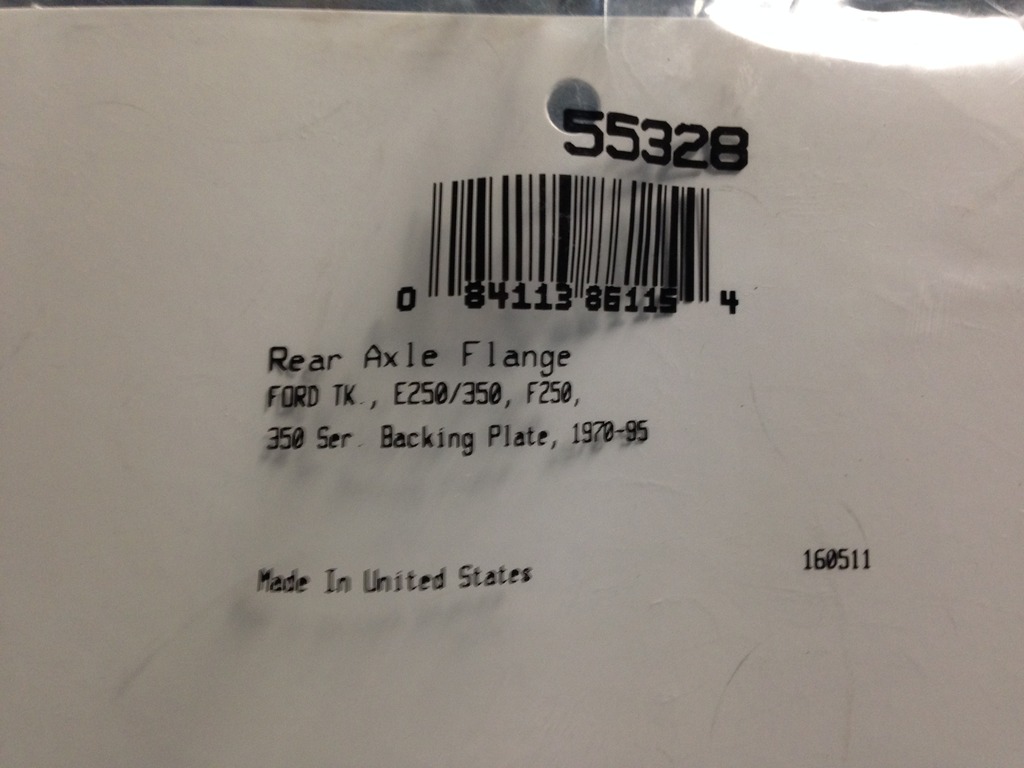
New Fel-Pro axle gaskets installed.
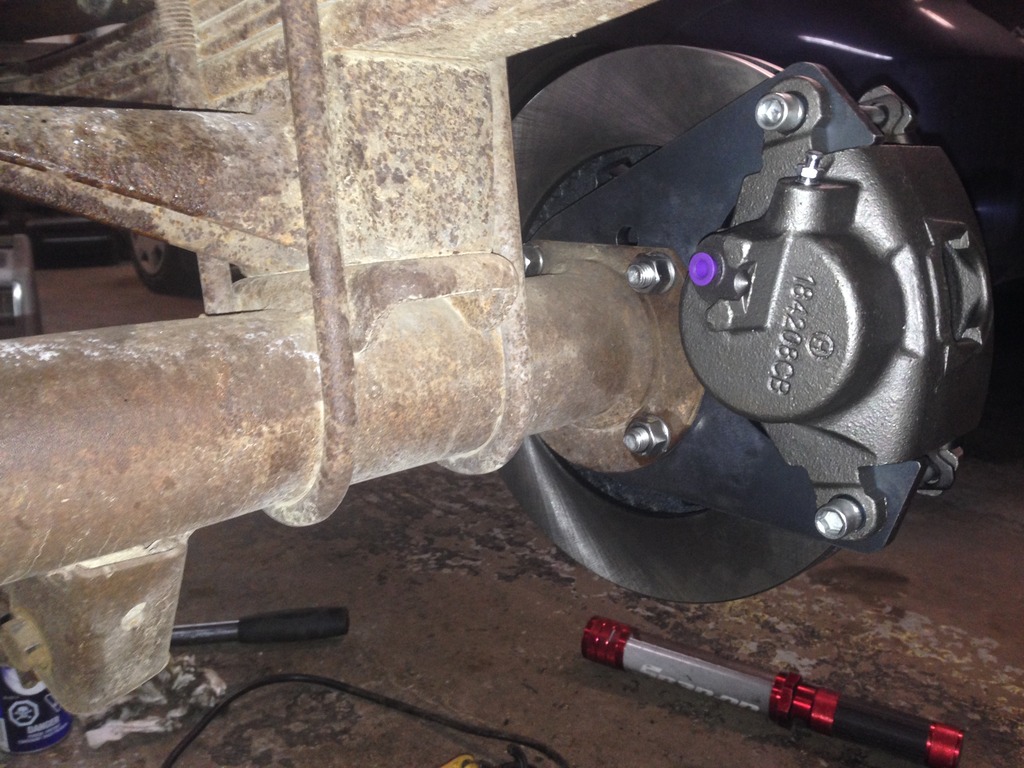
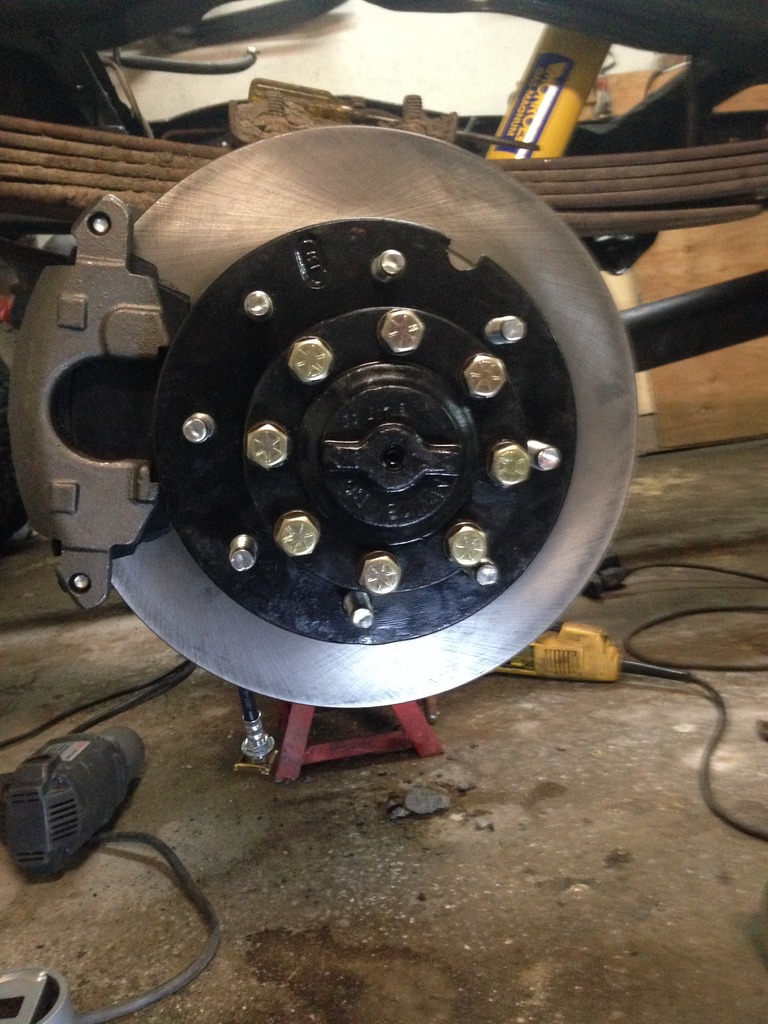
Disc brakes installed temporarily. Old bolts reused.
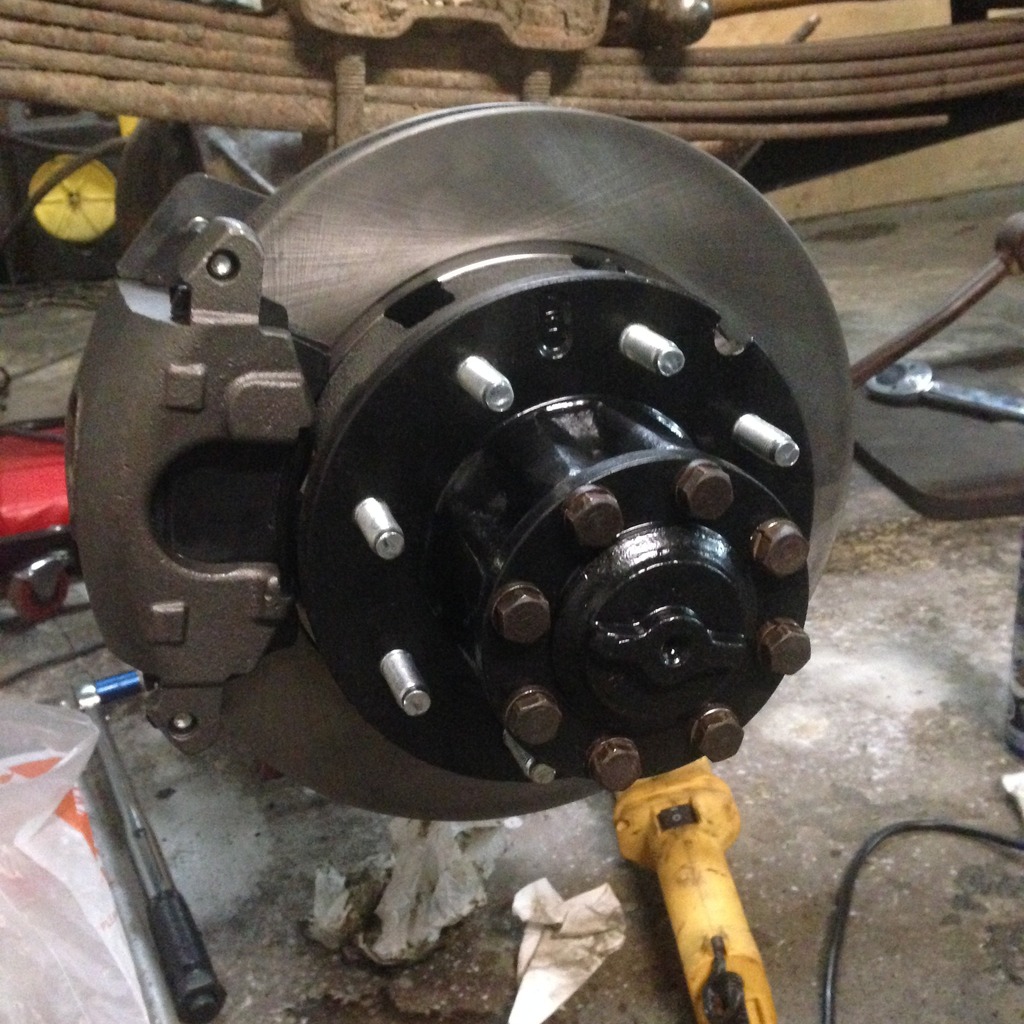
Starting to look good!
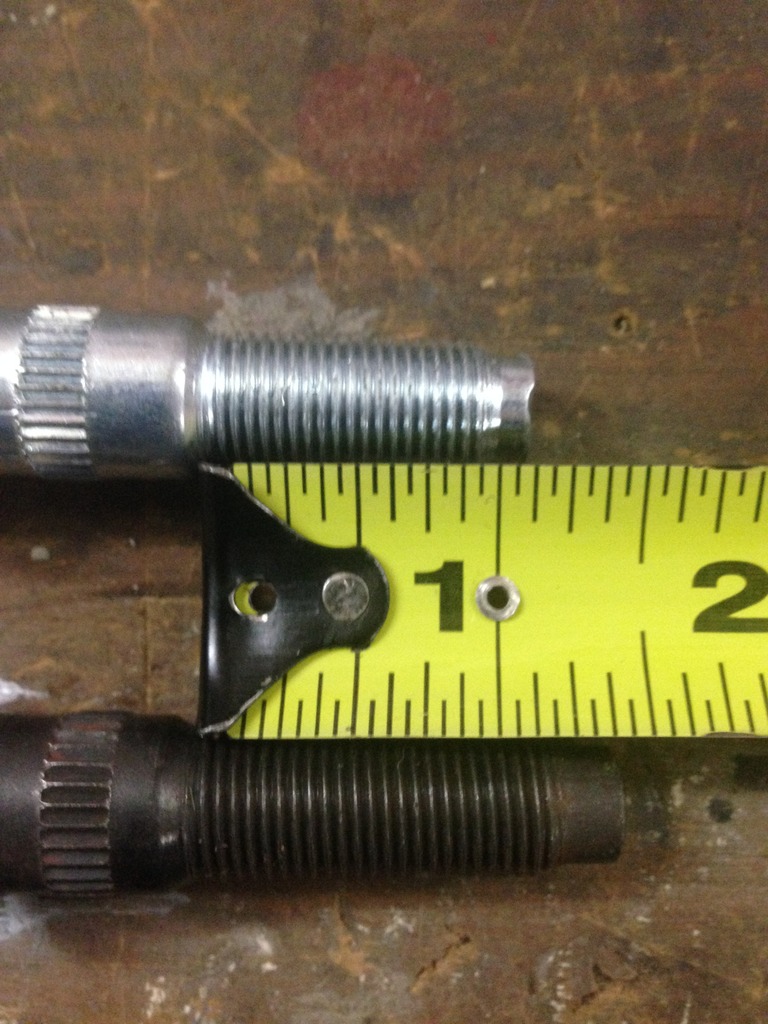
This was disappointing to me. Rock Auto sent me 2 different kinds of lug studs. Dorman (silver) and OEM/Wagner (black). Unfortunately, they're not only different in colour, they're also different in length...
Not happy with this. I like consistency, so eventually I'll switch my black studs to the Dorman studs.
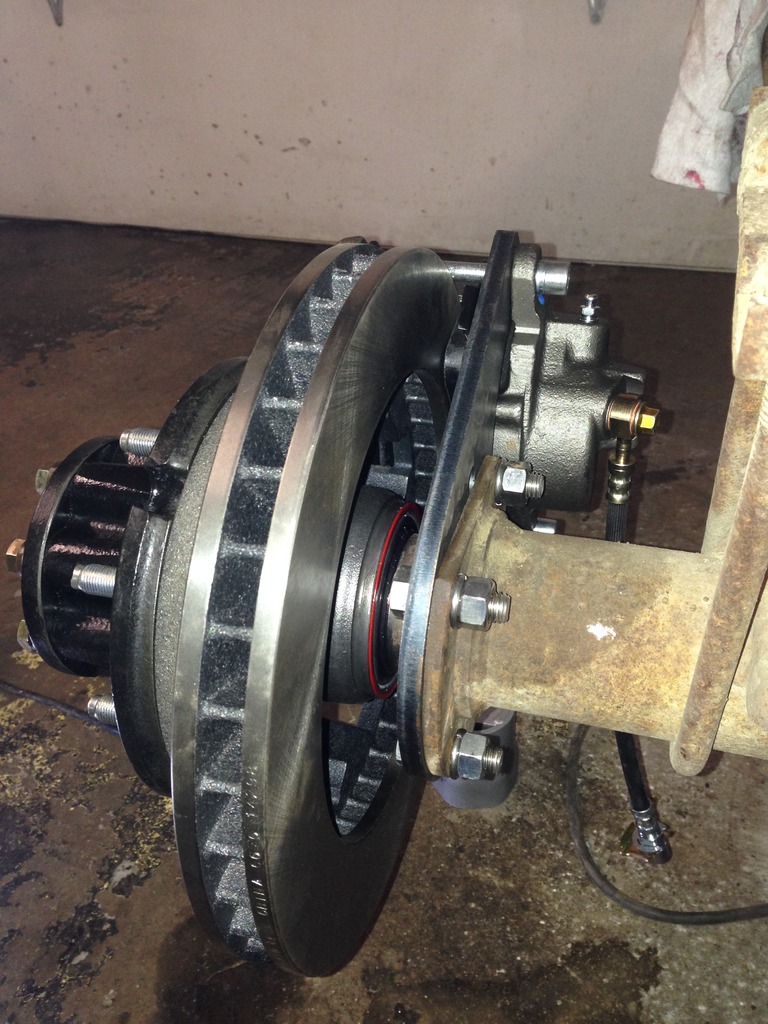
New jewellery installed. Looks much better with Grade 8 hardware. Custom made brake lines from a local company (Air Tech Products). Bit expensive, but really high quality.
So ends the progress for November.
Some scars left behind from removing the previous cab owners side-steps. Removed them the day I got the cab. Sprayed some rattle-can primer on the holes to keep them from rusting. A more permanent solution will come in the future.
Passenger door striker nut removed to measure its thread/pitch. Unlucky me... the nut for the striker fell into the cab corner.
So starts stage 2 of the frame restore. From the cab back.
Saying goodbye to the F150 build. My parts guy picked it up in mid November.
Did an axle/hub tear-down. Figured if I was restoring the frame that the bearings and seals could use some attention while I was at it.
Ordered 4 SET38 Timken inner/outter rear bearings. They're the same on my rear differential.
Bought National 2150 Inner seals locally because I purchased the wrong seals from Rock Auto.
Driver side came off nice and easy. Rear brakes look like hell.
Parts removed. Tank, shocks, clips, lines, electrical. Ready to be wire wheeled.
Another angle. Common angle for future pics.
Driver side brakes/hub fully removed and awaiting new parts.
Stripped the frame with a angle grinder and wire wheel. Garage has a nice haze of dusty dirt. 3M particulate/painting face mask required for work like this. Don't want to breathe in 40 year old rust.
Another angle. Every nook and cranny wheeled.
Frame washed down with soapy water and towel/air dried.
Sprayed down with Metal-Ready.
Nice white finish once the metal-ready dries. Shows that some rust was still on the frame even though it was thoroughly wire wheeled.
That pesky passenger side drum would NOT come off. I tried everything, even 2 grown men with crow bars.
Eventually I turned to my dads old John Deere Tractor pulley puller. Worked like a charm.
No wonder why it wouldn't come off. The shoes were welded to the inside of the drums from excessive use well beyond what they're capable of doing. The shoes were down to the metal making metal on metal contact which created a 1/4" lip inside the drum.
Wow. Joy-riding is right.
Ready for POR-15.
Sway bar removed, replacement bushings ordered.
If the frame is getting a make-over, so is everything else. Before.
After. Holes plugged with paper towel to avoid issues with bolts later on.
Hubs disassembled. Awaiting POR-15 and new bearings/seals.
Frame looking pretty.
Every inch covered. From the front of the cab backwards. Big milestone for this truck.
Masked and painted with POR-15. Given a second coat of Chassis Coat because the hubs will be exposed to sunlight. POR-15 hates sunlight and breaks down with UV Rays. Chassis coat is not UV sensitive.
New Lisle bearing packer. Works wonders. Bearing packed with high quality high temp grease.
Upgrades! Rear disc brake conversion underway. Discs are from the front of a 1985 K20 Chevy.
Studs are Dorman 610-277. They are shorter than the OEM lug studs and may enable me to have acorn style lug nuts... but I'll have to test it out in the future to make sure.
Potential future lug nuts. Dorman 611153.
Axle flange cleaned up with wire wheel. Axle tube cleaned up softly with 1000 grit sandpaper.
TMR Custom's Dana 60 Rear Disc Conversion Brackets mounted. Canadian company, makes wonderful stuff. Cost me $120, shipped. Well worth it. High quality. Stainless hardware.
Hubs mounted.
New Fel-Pro axle gaskets installed.
Disc brakes installed temporarily. Old bolts reused.
Starting to look good!
This was disappointing to me. Rock Auto sent me 2 different kinds of lug studs. Dorman (silver) and OEM/Wagner (black). Unfortunately, they're not only different in colour, they're also different in length...
Not happy with this. I like consistency, so eventually I'll switch my black studs to the Dorman studs.
New jewellery installed. Looks much better with Grade 8 hardware. Custom made brake lines from a local company (Air Tech Products). Bit expensive, but really high quality.
So ends the progress for November.
#11
01-05-2017, 12:56 AM
#14
01-05-2017, 10:07 AM
It is indeed kind of a bitter sweet build. On one hand I'm giving in and saying "I quit" (F150 build), but on the other hand I'm hauling a$$ with this new truck (F250 build).
Either way, I don't plan on quitting outright. Plans had changed just like they do with every build
In the future, I would like to have more research and information on how to properly do an e-brake caliper conversion (unlike how other builds give little to no information like: "it works great" or "it doesn't work at all") but right now resources/time is limited.
As a side note, I haven't included my caliper mishap in this build, but maybe I should. It's an interesting story and it might shed some light on how terrible those eldorado calipers actually are.
If you want more info on why I did not use e-brake calipers, read on. If not, skip the next few paragraphs.
I originally ordered a set of cheaper eldorado calipers (1980-1984 Cadillac Eldorado calipers) instead of the sought-after (1977-1979 Cadillac Eldorado calipers) ones. I thought that they would be roughly the same and would roughly work in the 1985 K20 brake caliper brackets I ordered with little modification. I was wrong.
I spent probably two full weeks of time in the evening doing reading and wrapping my head whether or not to buy 1977 calipers, or to use my 1980's eldorado calipers (smaller and require more modifications, but still have an e-brake), or whether to just give up and send both calipers back and order 1980's K20 front disc calipers.
Turned out that the 1980's version had different dimensions for their mounting points (smaller), and a MUCH smaller piston diameter. In fact, the 1980's e-brake Caddy calipers are so small, that it takes 2 calipers worth of clamping force to be equivalent to create the same clamping force in a single (1) 1985 Chevy K20 front disc caliper. Right then and there, many people would send the calipers back. I didn't. I did more research on these small calipers to make sure sending them back was the right choice.
I read up on all sorts of chevy threads/forums. Many of them were for GM/Chevy trucks and talked about the goods/bads of the 1977-1979 Cadillac Eldorado Calipers. The 1980's calipers have the same design, they're just smaller. The mechanisms inside the caliper are all the same, minus the piston size. Some forums were for campers/vans, some were for newer eldorados trying to get more braking power by converting to older style (1977-1979) calipers and brackets. Some were nova/chevelle forums talking about having e-brakes with rear discs. In the end, all of these forums had similar results by comparison. The 1977-1979 Eldorado calipers and the 1980-85 Eldorado calipers are basically the same, but have different applications due to piston size. The results of doing a Eldorado rear disc conversion were basically the same - both sets of calipers have their problems due to inherent design flaws.
Some of the noted issues I found:
- Leaky piston seals - the seals are extremely easy to tear. Even a brand new caliper out of the box can have its piston seal torn from simply tearing apart the caliper (carefully) to understand how it works. Here's a link I watched. He tears a seal on a brand new caliper.
- Difficulty adjusting the emergency brake cable to have enough clamping force to hold the rotors/vehicle on a hill - this is problematic for a 8000lb truck...
- Constant readjustment of the caliper e-brake arm - as the brake pads wear out, the caliper is supposed to compensate the travel of the e-brake engagement arm (see above youtube video) for the loss of material in the pads. It does do it's job, but the arm has a specific length of travel. That length of travel is too short to allow both: 1) wear of the pads and; 2) left over travel length of the caliper e-brake arm to engage its full clamping force on the rotors. This is very problematic because an owner will have to readjust their calipers every time they intend to use the benefit of the e-brake. Not good.
- Difficulty adjusting the mechanical e-brake caliper arm - I can personally attest to this. I pulled the calipers out of the box when they arrived and started tinkering with them to see what all the fuss was about (i.e. whether or not those chevy guys are complaining for no apparent reason). Turns out, these calipers really do suck. Within 20 minutes of tinkering around with the e-brake arm, I could not get the piston to return to its original position inside the caliper (flush with the seal). I tried everything. I tried turning the piston (it's on a threaded bolt - see youtube video). It would not go in. I tried removing the e-brake arm and repeating what I just did - still would not go back to where it was when I first opened the box. Now it's starting to come out further from the caliper without any reason for doing so (e-brake arm is still removed). By this time, the piston is about 1/4" out of its recess, and I won't be able to install it on the truck. I set it down and watched it carefully. Without even touching it, the piston was slowly creeping out of the caliper. Not good. In one final attempt to return the piston inside the caliper recess, I put the caliper in my vice. I figured since the piston was coming out of the caliper on its own (without the threaded end being moved), it should return with enough force. No dice. Before I damaged anything, I reassembled the caliper and sent it back to where it came from. What a piece of junk.
In theory, ANY manually-engaging e-brake caliper is a wonderful idea. In a real application, they're a bear to get working properly and impossible to keep it that way.
What I found online was that many people had "wonderful results" at first. Many people did not return to that same thread to publish/post their findings after significant use of the calipers except for a few individuals. And of those that did come back to publish results were simply brushed off with "well they work for me [at first install], so you must be wrong".
Overall, not a single thread has posted results from the first concept/planning of the rear disc conversion, to their install of the custom system, and then followed through with a report/results of their first brake pad change. There's a reason nobody has done this. They simply don't stand the test of time.
Find me a credible thread that has posted pictures and their findings on either the 1977-1979 or the 1980-1985 Cadillac Eldorado calipers. I sincerely want to have a good read through a decent thread on this subject if anyone knows where one is. I've been unable to find one and have scrapped the idea of e-brakes on rear calipers.
For those of you who must have e-brakes... stick with drums. It's not worth the headache and hours upon hours of researching to find yourself in the same place as you started.
And yes, call me a hypocrite. I say these things about eldorado calipers but don't have pictures to prove my claims. I didn't think to take any because I sincerely wanted to use them in my build. If you want to see a piston slowly creep out of the caliper, watch the youtube link (above).
Hopefully my rant prevents someone else from buying those ridiculously expensive calipers and a headache or two.
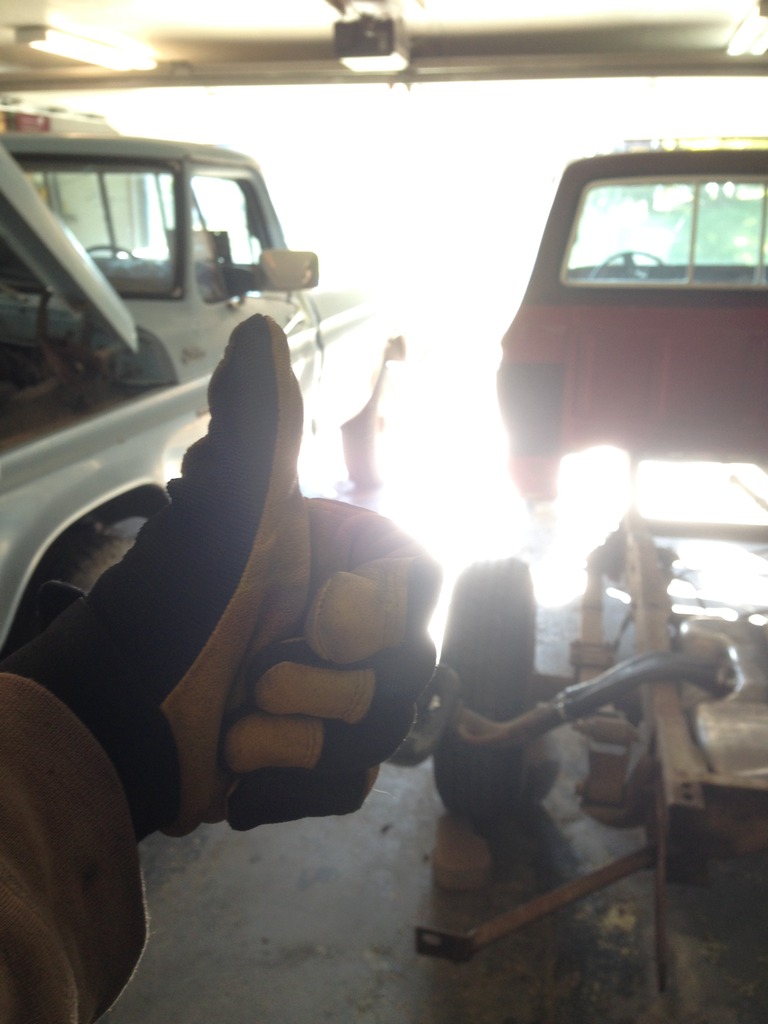
Thanks! Really appreciate everyone's input. Makes me feel good about the work I've put into the build.
More info/pics to come. December hasn't been posted yet
#15
01-05-2017, 06:51 PM
Cargo Master