
1979 F250 4x4 Build
#46
 01-20-2017, 03:49 PM

Senior User
#47
02-01-2017, 11:41 AM

Small update.
Picked up a bunch of pulleys at the pick-n-pull. Attempting to do a serpentine conversion sometime in the future. Will post up progress of that when it happens.
Also picked up a 1994 Astrovan hydroboost. For $20, I figure it was worth the information to have a side-by-side comparison of the 09 Superduty Hydroboost and the 1994 Chevy Hydroboost. Rod length, bolt pattern, all that jazz.
The information has to be good for someone, sometime, right?
Moving on to yesterday's progress. Another small victory.
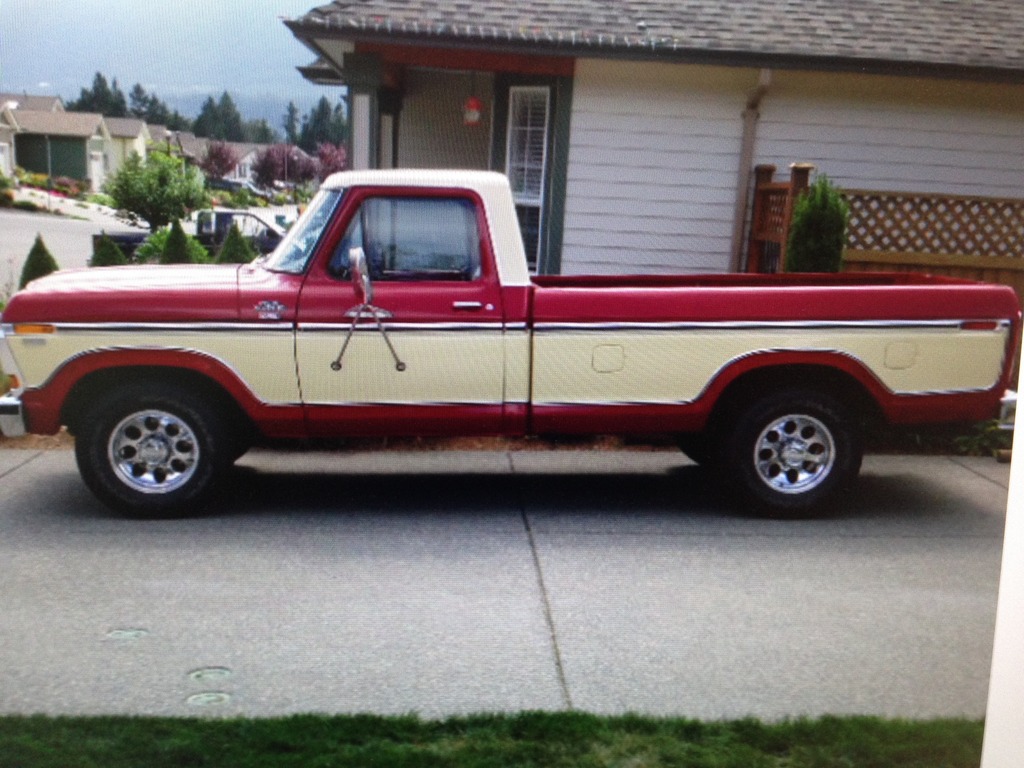
No idea whose truck this is, but I really like the rims they chose.
Ion 171, 16x8's.
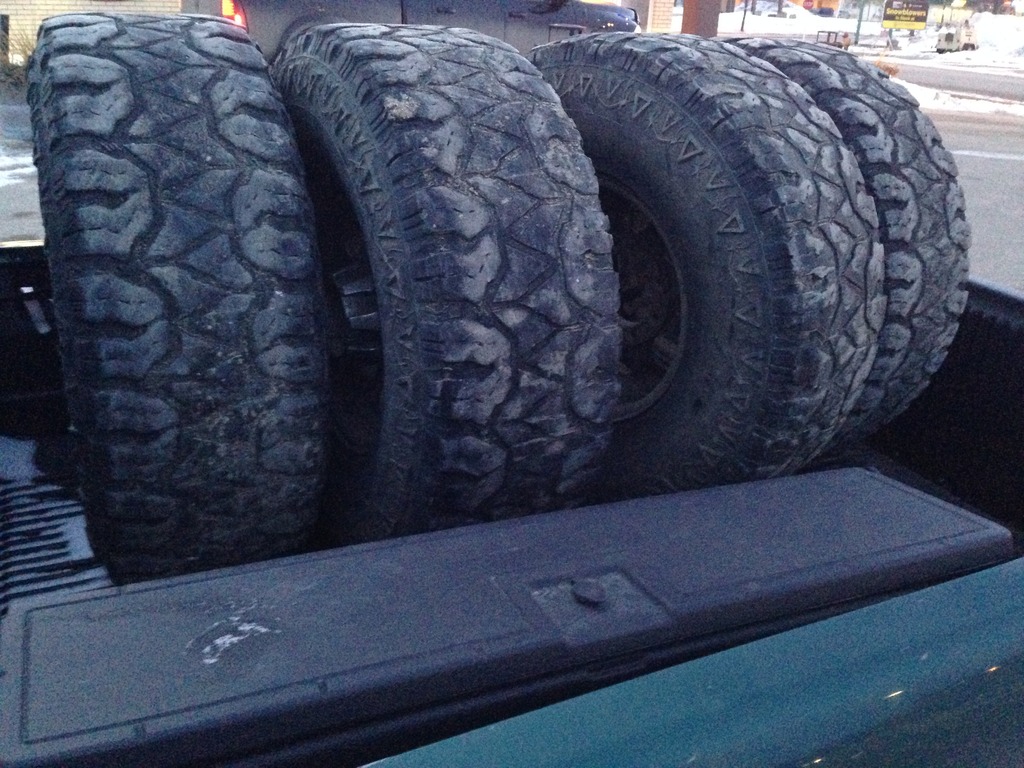
Picked up a set for myself. 35's on them.
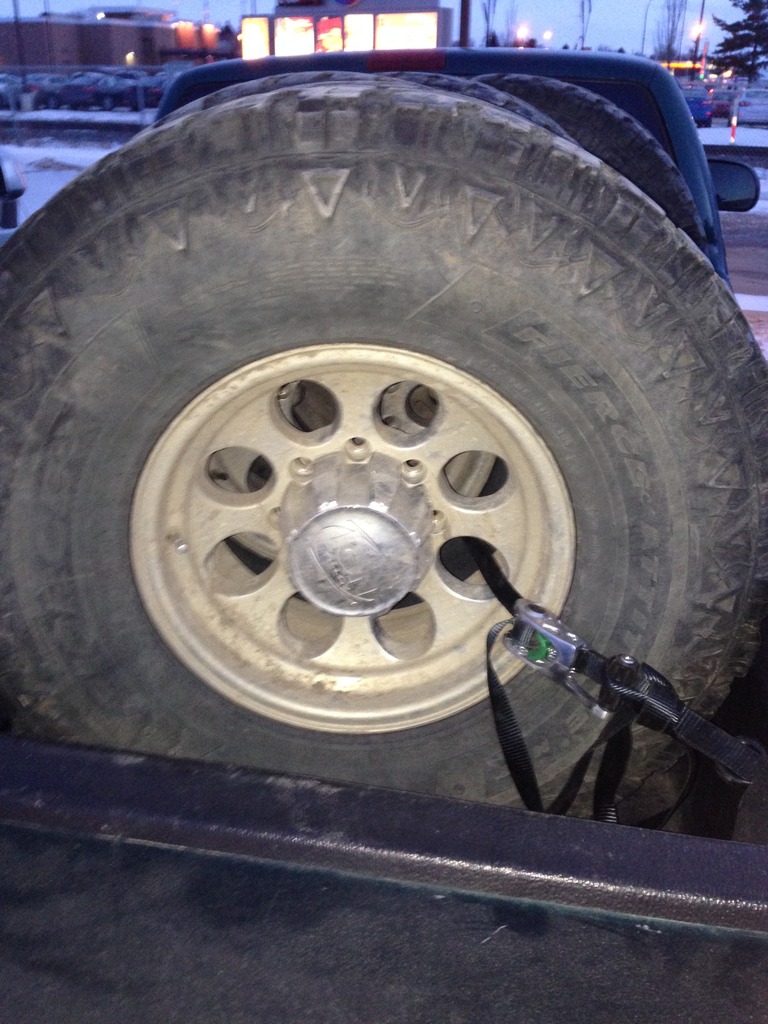
Not in great shape, but they'll do for now.
I need more space
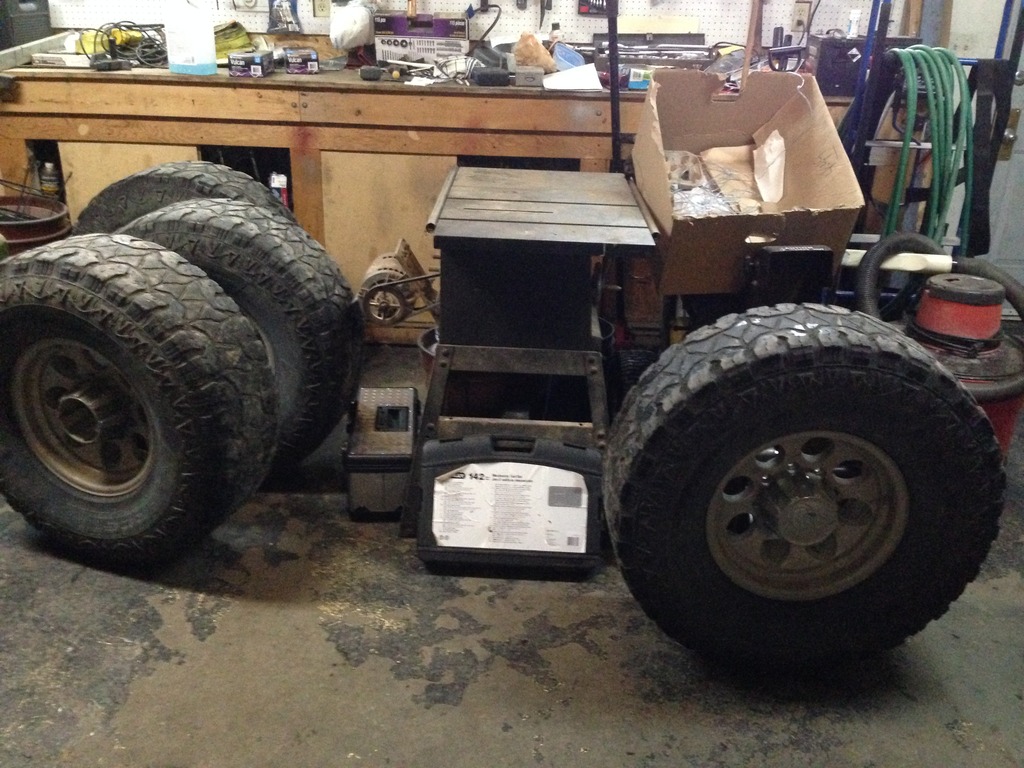
Just for fun
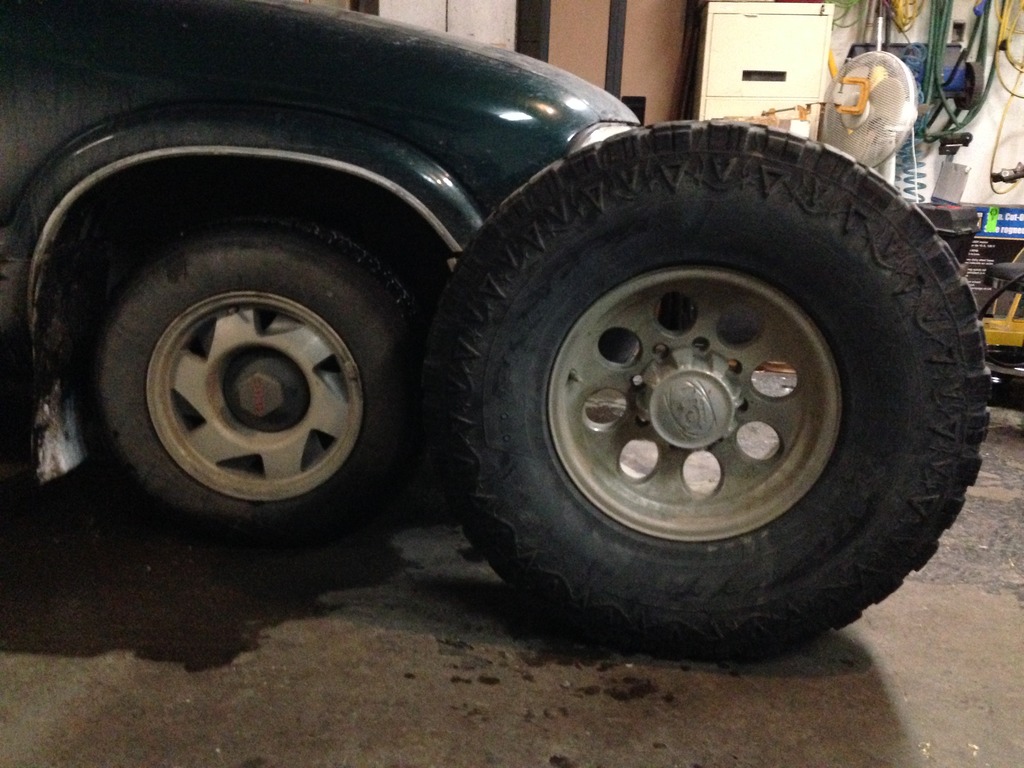
You never really realize how big 35's are until they're next to something. rims need a REALLY good cleaning, but they should work very well. Picked them up for a decent price, and had myself a nice 3 hour road trip
Picked up a bunch of pulleys at the pick-n-pull. Attempting to do a serpentine conversion sometime in the future. Will post up progress of that when it happens.
Also picked up a 1994 Astrovan hydroboost. For $20, I figure it was worth the information to have a side-by-side comparison of the 09 Superduty Hydroboost and the 1994 Chevy Hydroboost. Rod length, bolt pattern, all that jazz.
The information has to be good for someone, sometime, right?
Moving on to yesterday's progress. Another small victory.
No idea whose truck this is, but I really like the rims they chose.
Ion 171, 16x8's.
Picked up a set for myself. 35's on them.
Not in great shape, but they'll do for now.
I need more space
Just for fun
You never really realize how big 35's are until they're next to something. rims need a REALLY good cleaning, but they should work very well. Picked them up for a decent price, and had myself a nice 3 hour road trip
#48
02-01-2017, 01:53 PM
FTE Legend
Join Date: Mar 2009
Location: North Bay Ont Canada
Posts: 161,142
Received 5,139 Likes
on
1,684 Posts
#49
02-01-2017, 07:22 PM
Senior User
Join Date: Jan 2017
Location: Oregon
Posts: 273
Likes: 0
Received 0 Likes
on
0 Posts
#50
02-06-2017, 09:23 AM
Thanks fellas. More progress from over the weekend 
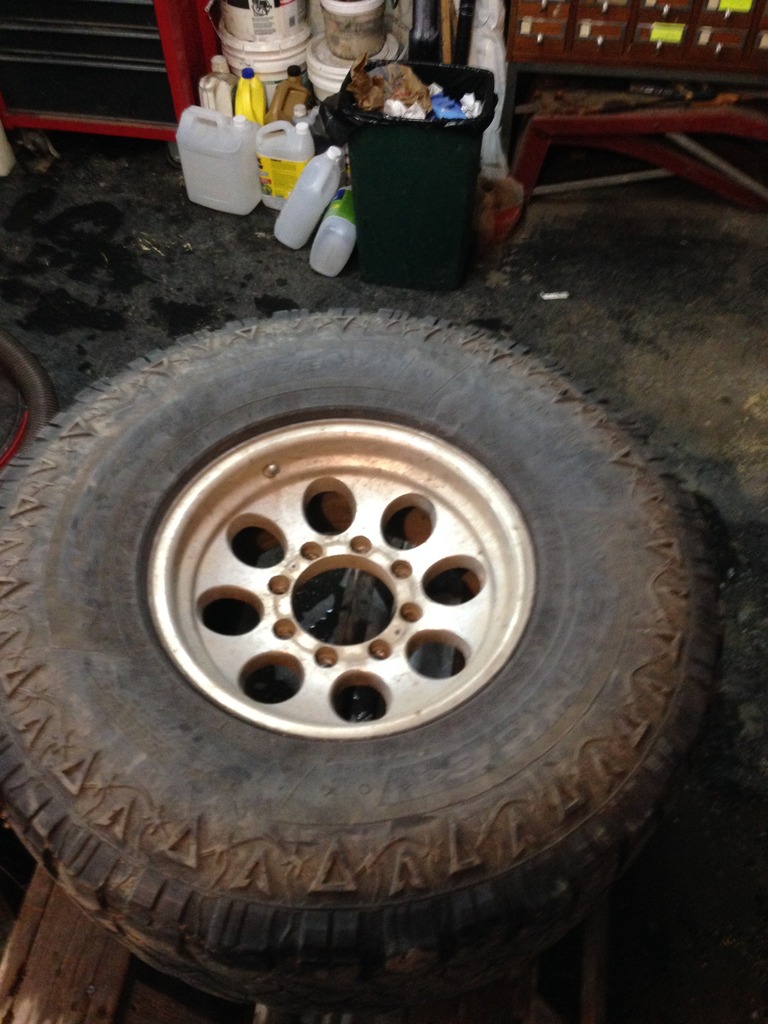
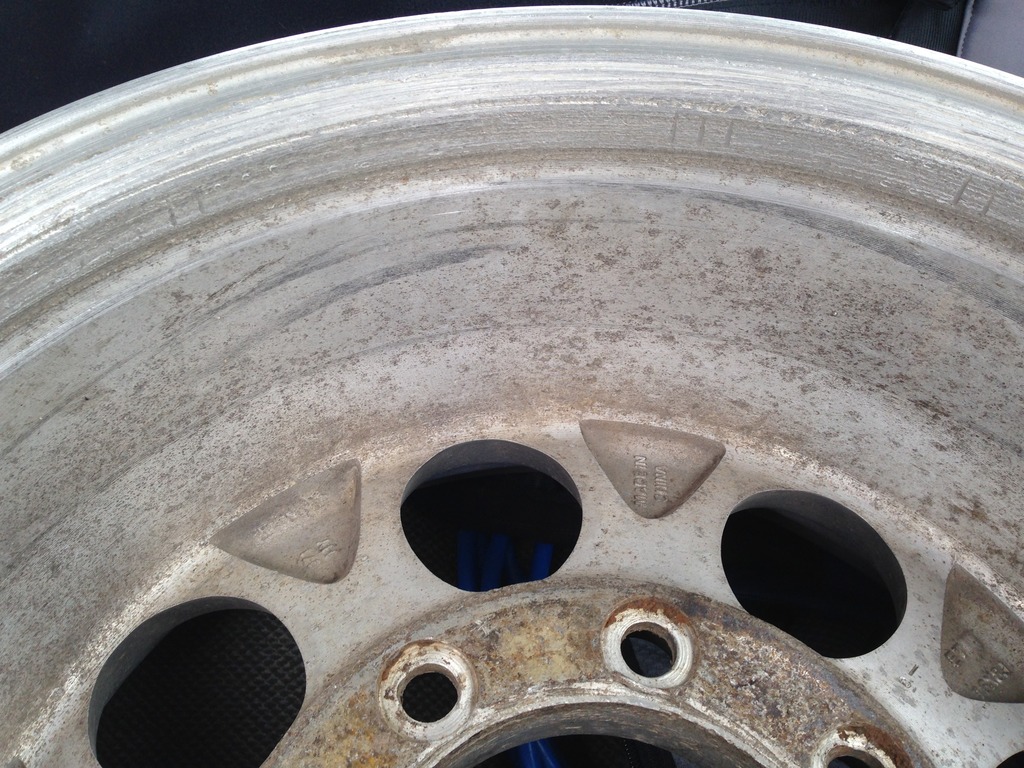
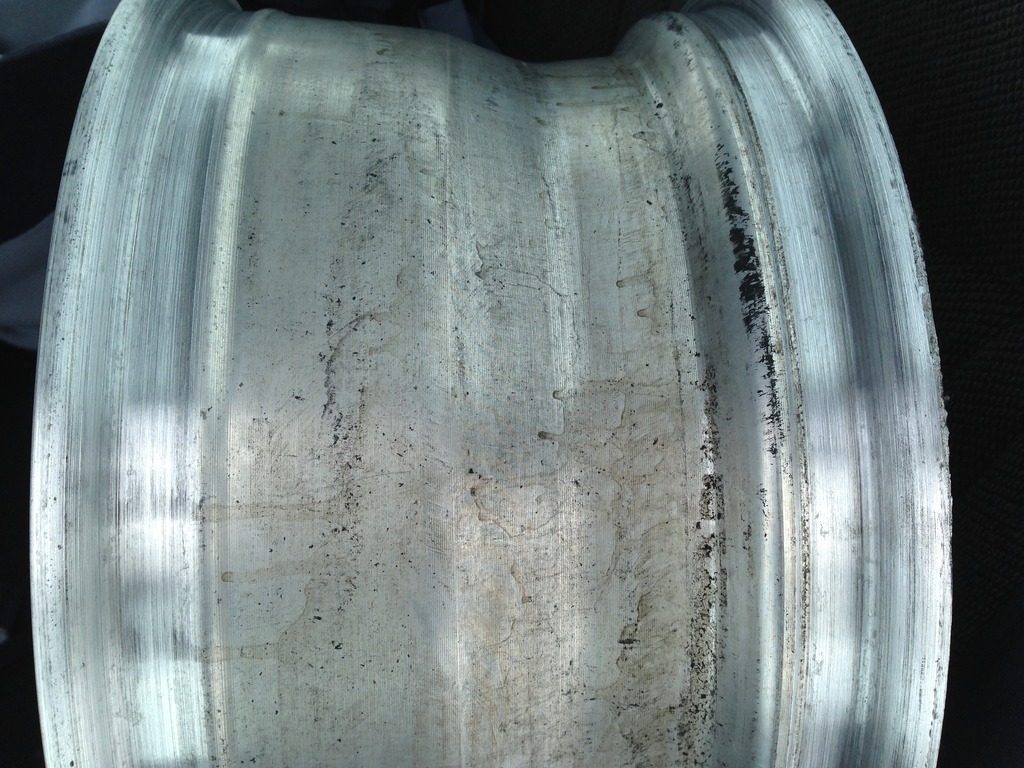
Decided to give these bad boys a bath.
Before.
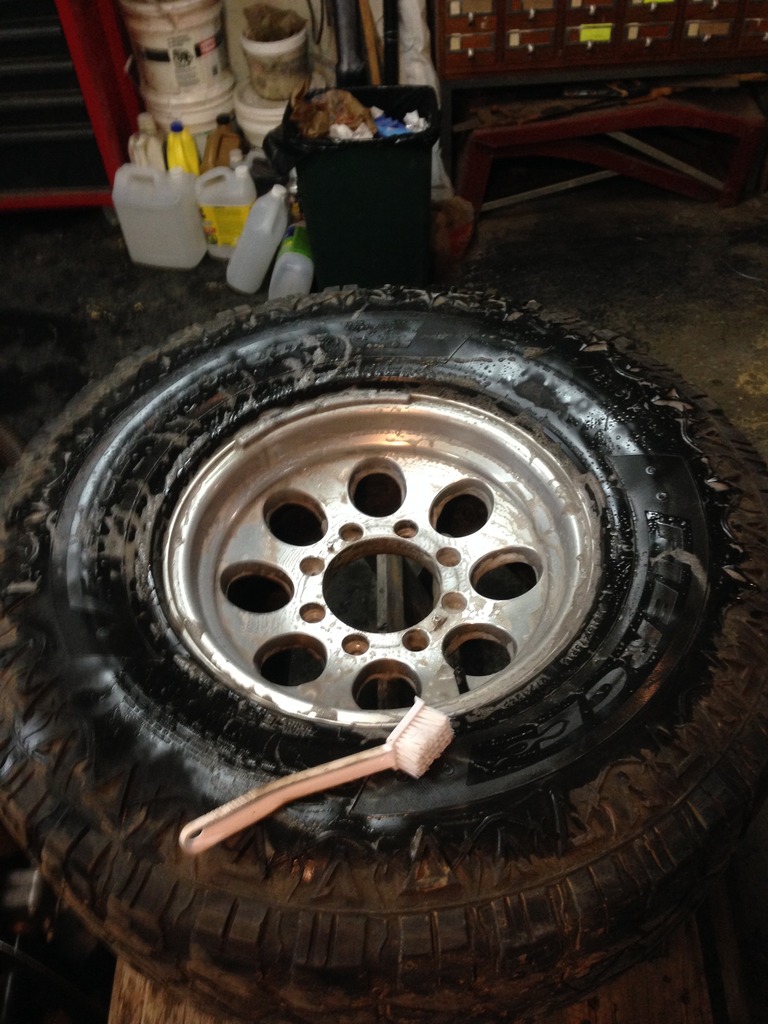
Having a giant toothbrush helped a lot.
During.
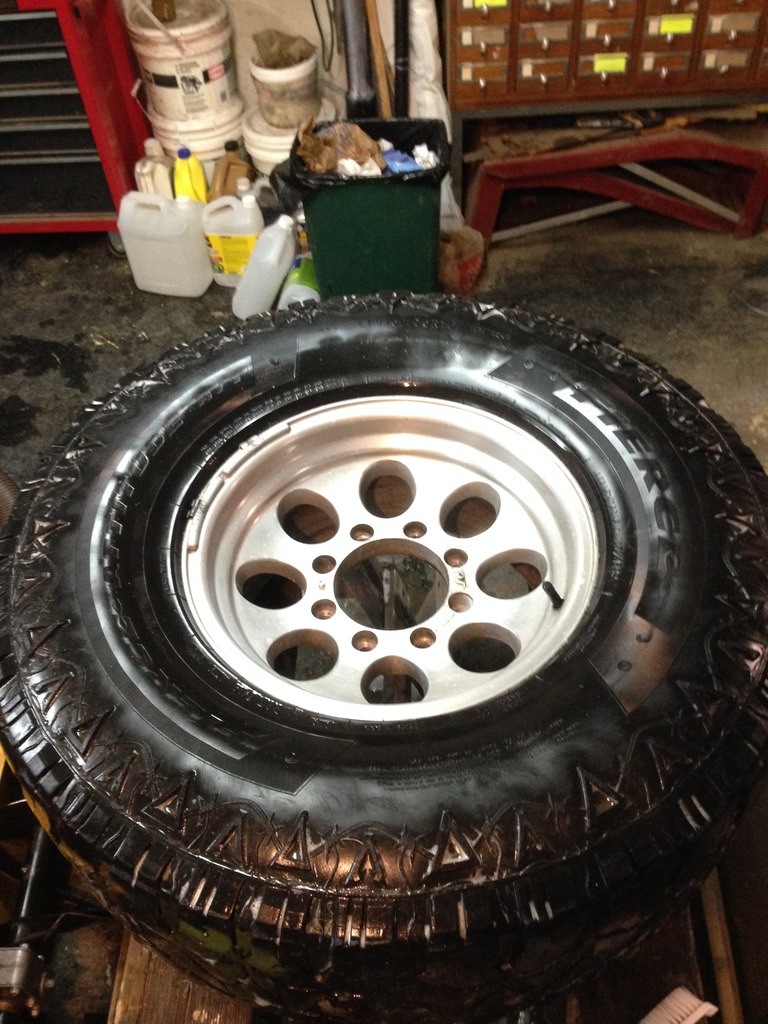
After. Took about 1.5 hours per rim. Found some things I really didn't like after I was done too...
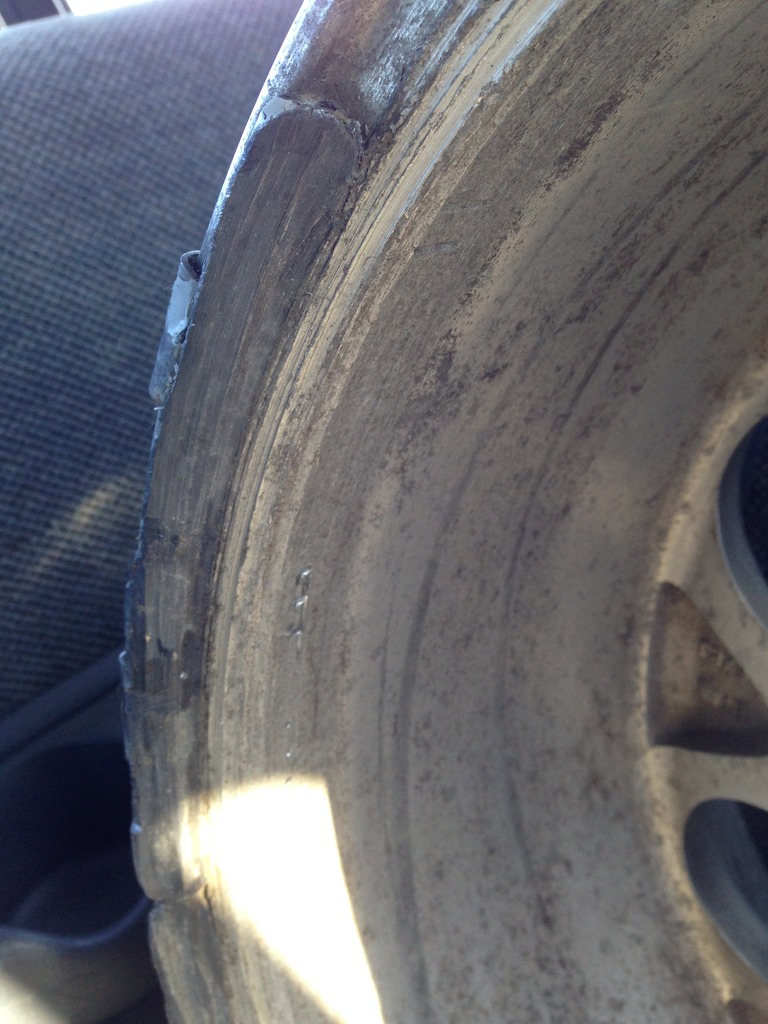
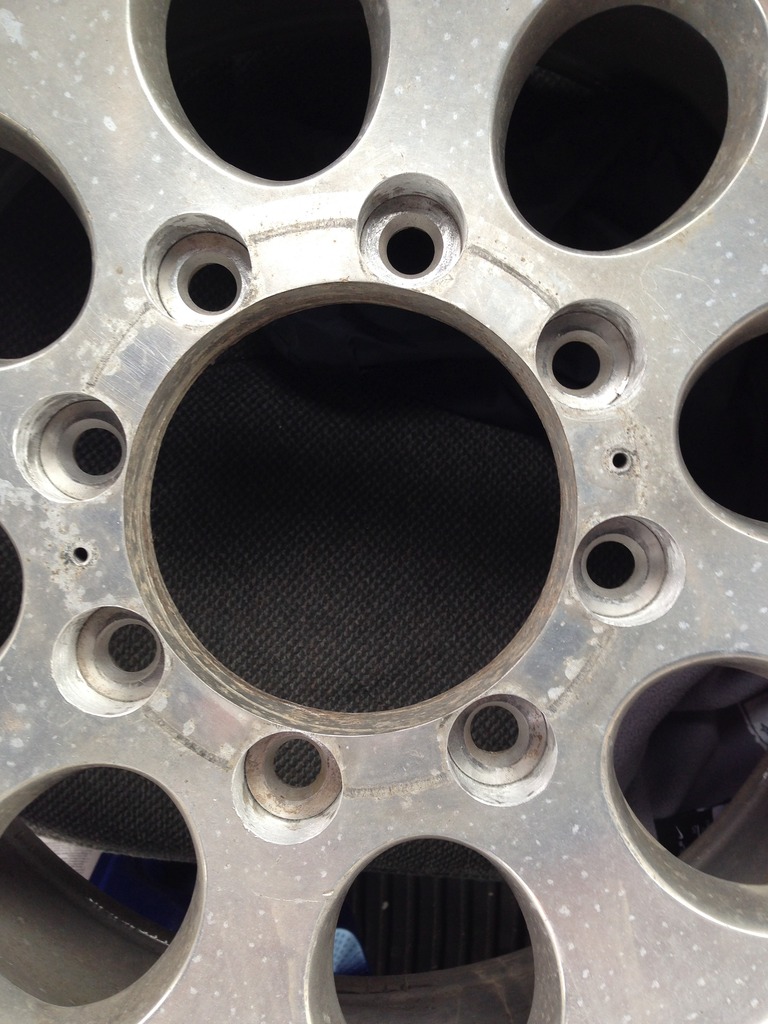
Everything looks fine until I washed the rims... Of course... Word of caution to those who purchase used rims. If the seller leaves them extra dirty, there's a reason (and you should find it before purchasing!).
Looks fine from a distance, but when you look close, you see something has been altered.
From a distance.
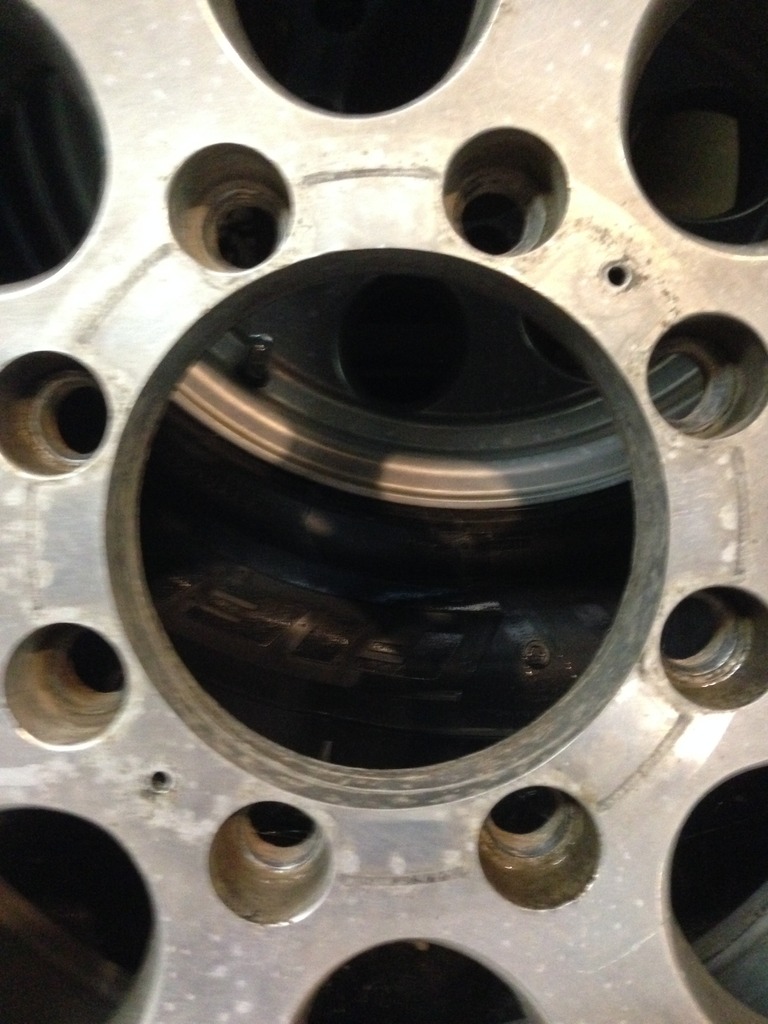
Up close.
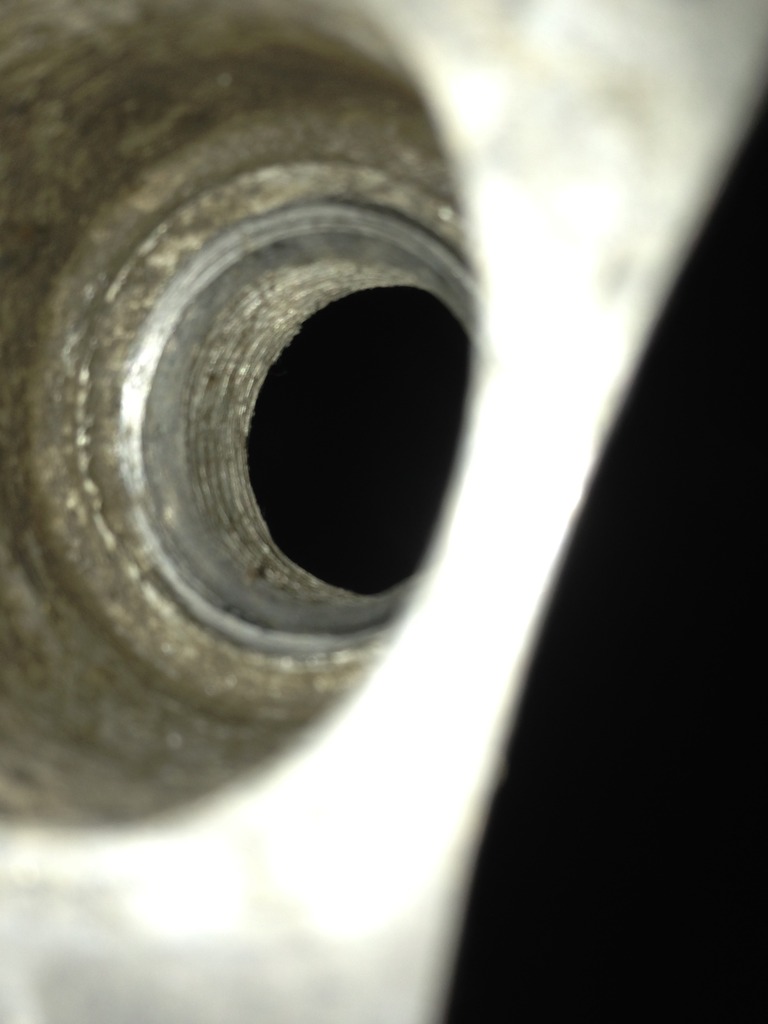
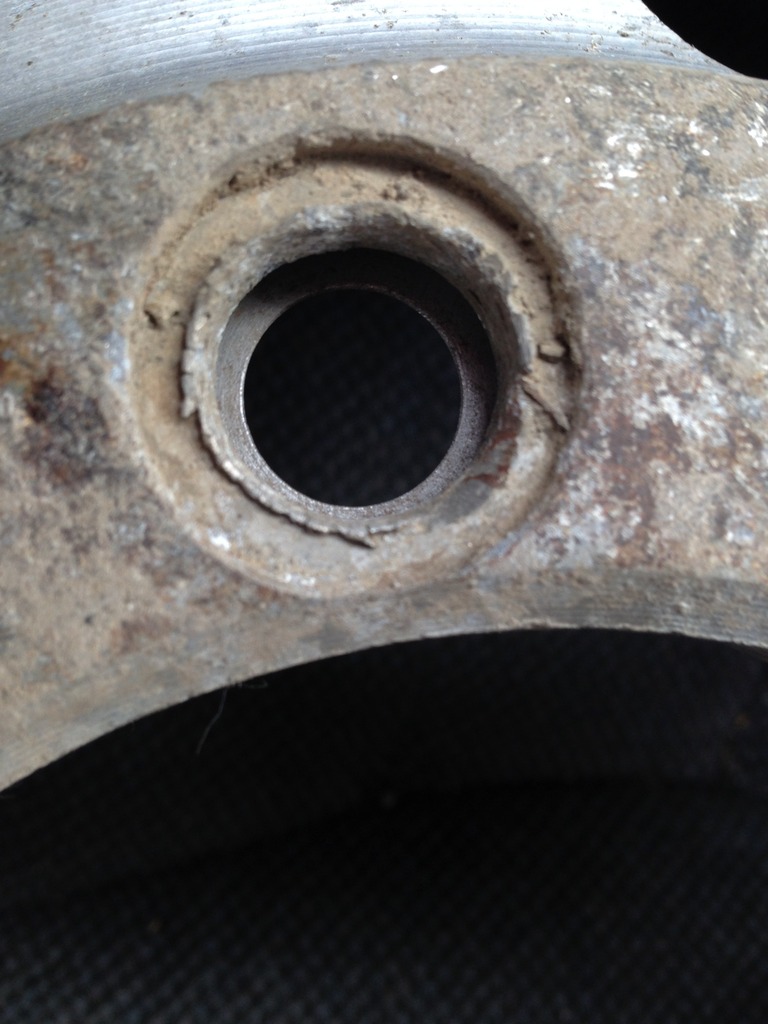
The previous owner tried to hog out the holes on 1 of the 4 rims to force them to fit a 8x170 bolt pattern. Note the thread-like appearance of the lug hole. Luckily, there's still a decent portion of the conical seat left from his drilling.
I should be fine to run with these rims, but this kind of thing really erks me... especially since I didn't catch it.
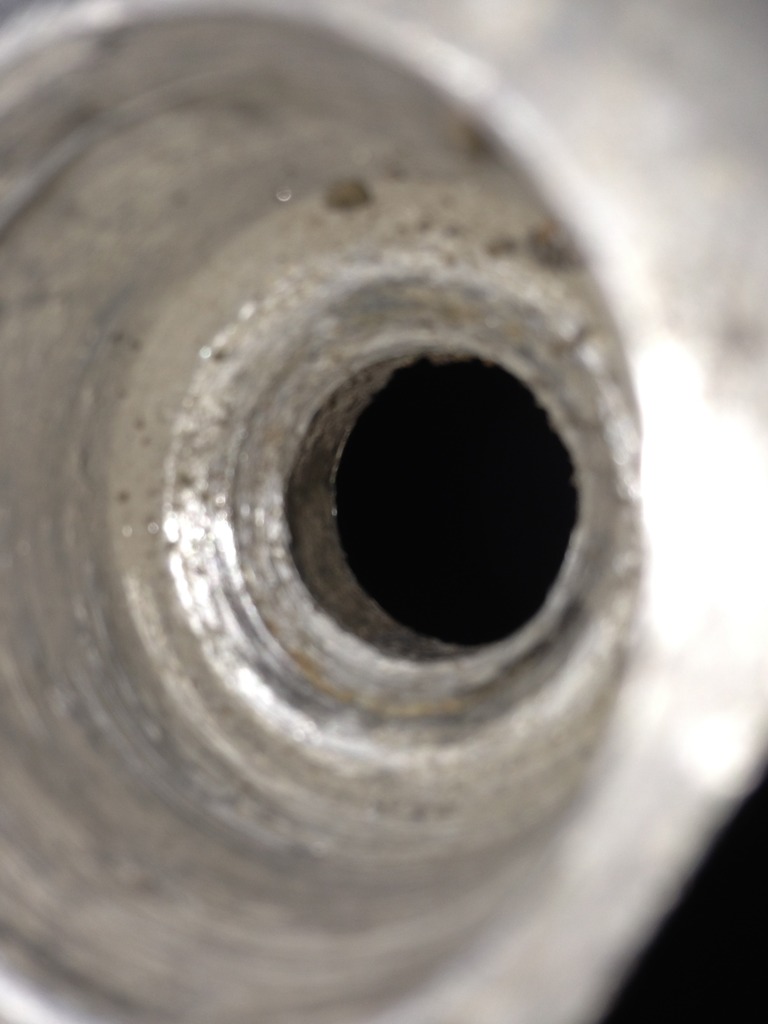
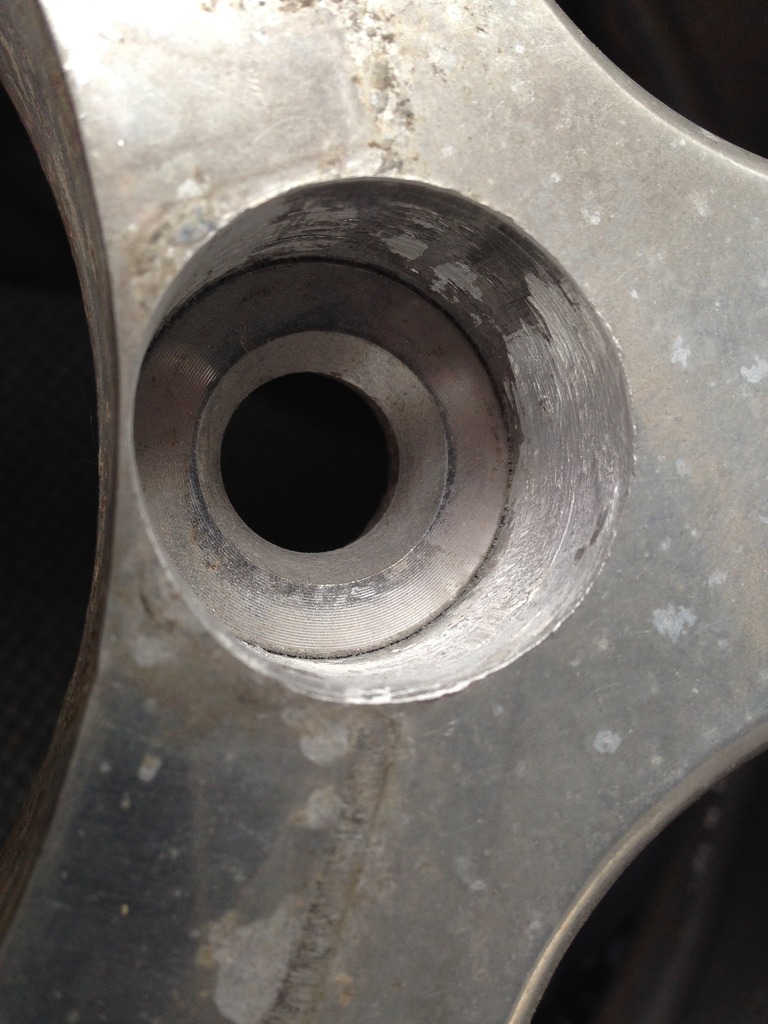
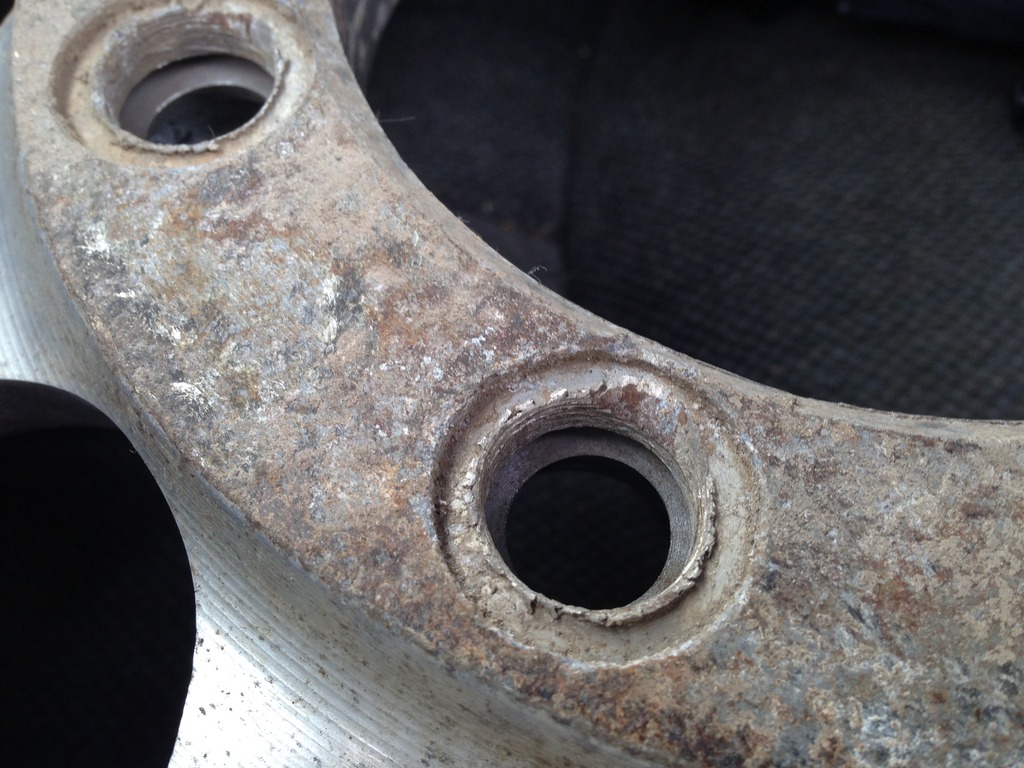
A view of a normal lug hole (without drilling). Note the smoothness of the lug hole for comparison.
There was a bit of a lip/gouge on a second of the four rims (no picture) where it appeared like a rock got stuck between the caliper and the inside flange of the rim. Hopefully a good balance will take care of it.
If not, I may opt to get rid of these rims for another set. Any opinions on running these rims are welcomed.
Next up...
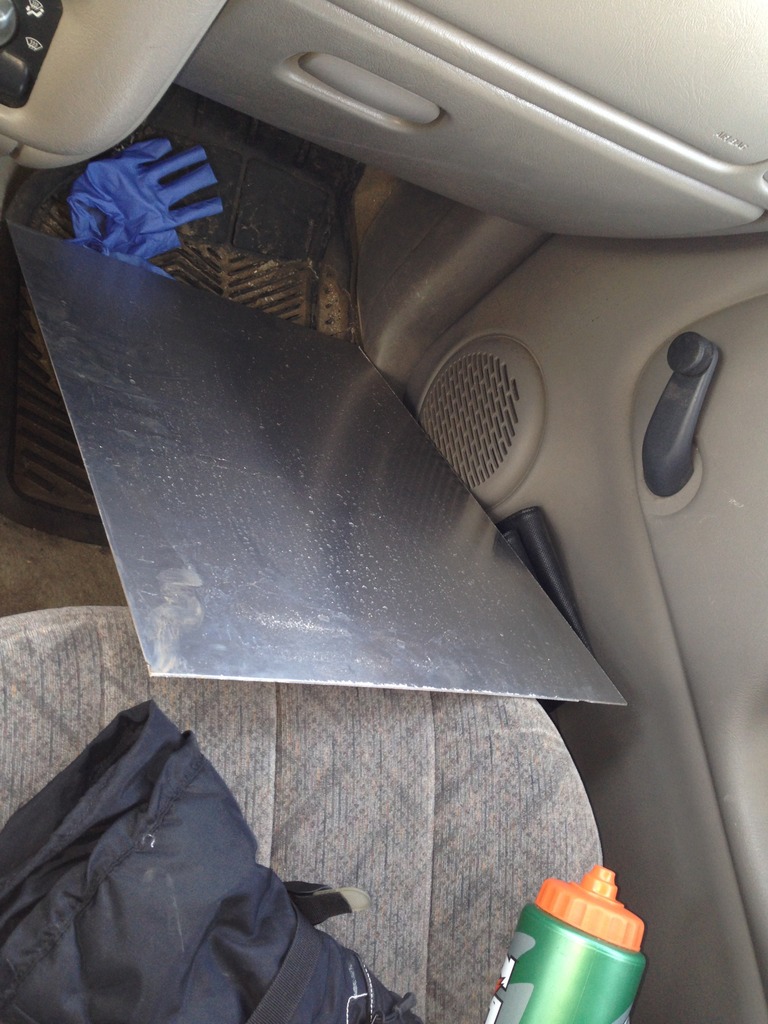
Purchased a 22"x16" sheet of aluminium from Allwyn Welding in White City. They do custom fabrication and were working on a full stainless exhaust for a 1979 Bronco when I pulled up .
.
The 16 gauge aluminium plate will become my new block-off plate for the factory A/C hole. Gotta seal out the noise + exhaust gases.
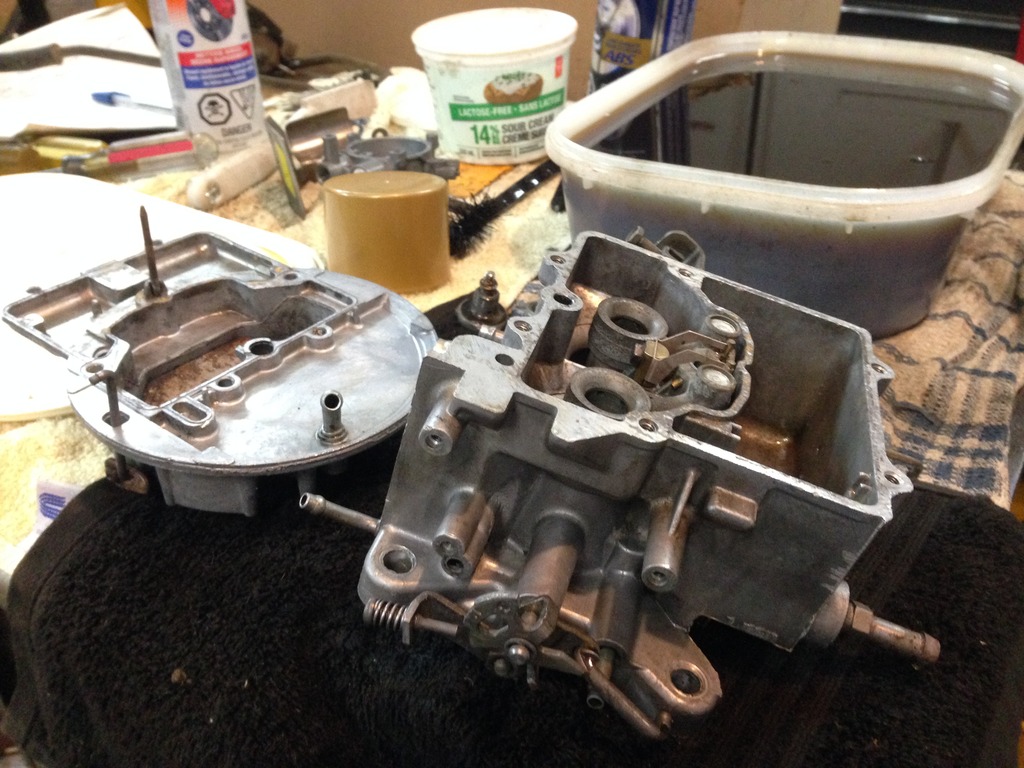
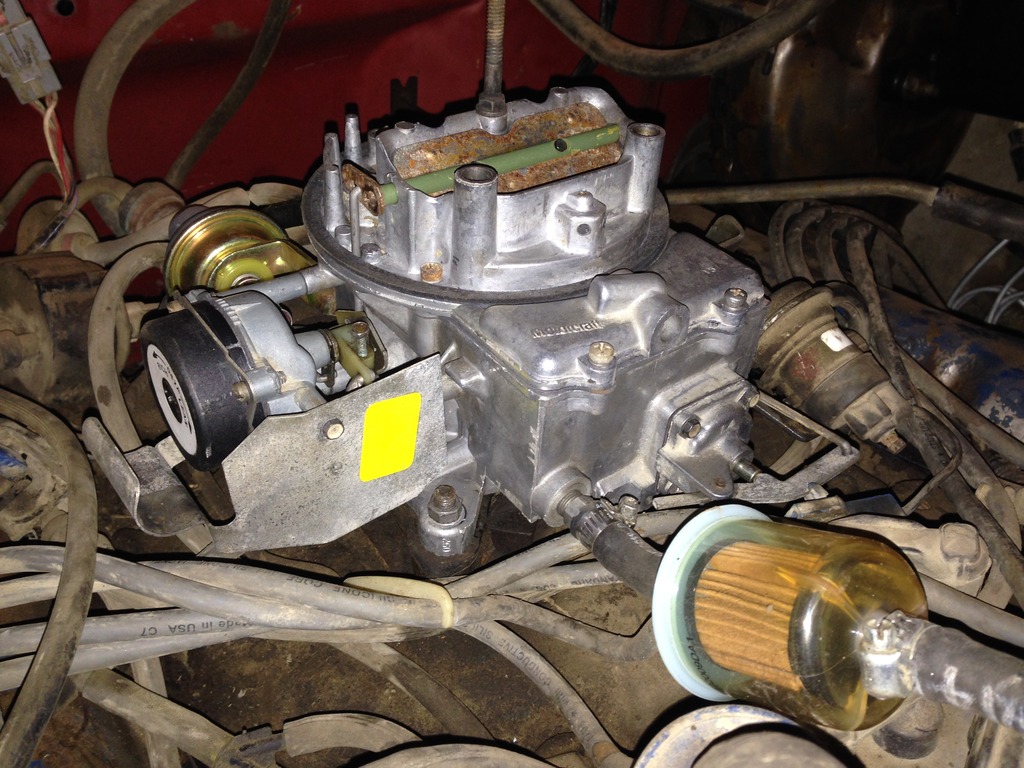
Onto my carb rebuild over the weekend Something that actually went alright for a change.
I think I'm starting to get the hang of this stuff lol.
Before photo.
Note the big container of brown fluid in the background of the photo below. That stuff is called "Hydroseal" from Napa. It works wonders and eats dirt/grime like none other. I strained it with coffee filters so I can rebuild another carb in the future. It'll be the 4th carb thats been rebuild with the same fluid.
I let the carb soak over night in it. Came out VERY clean. Used an old toothbrush and some larger nylon ones to clean everything up. Worked well.
After photo. Rebuild was finished after this photo was taken.
I was contacted over the weekend by a fellow in Indian Head with an Offenhauser intake.
Ran out to have a look and had to have it. I know a lot of guys will tell me to toss it and run an Edlebrock Performer RPM, but I want to give this a try.
Grabbed it for $120. Not a smoking deal, but didn't raid my wallet either.
Since I was in a cleaning mood...
Before:
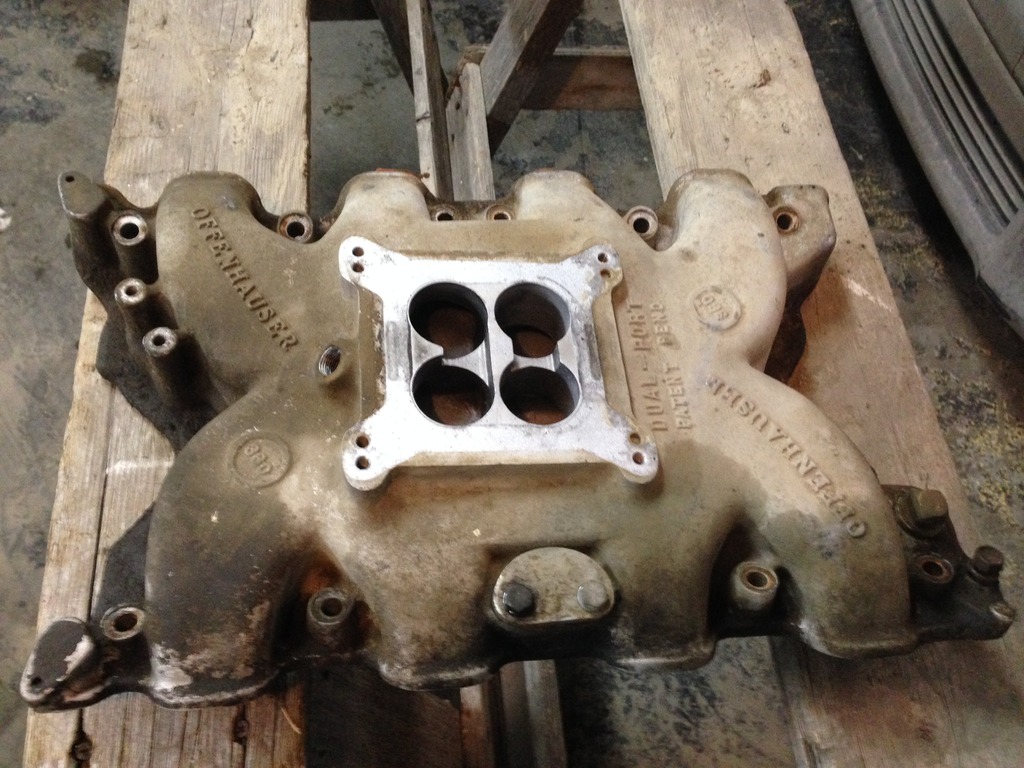
After:
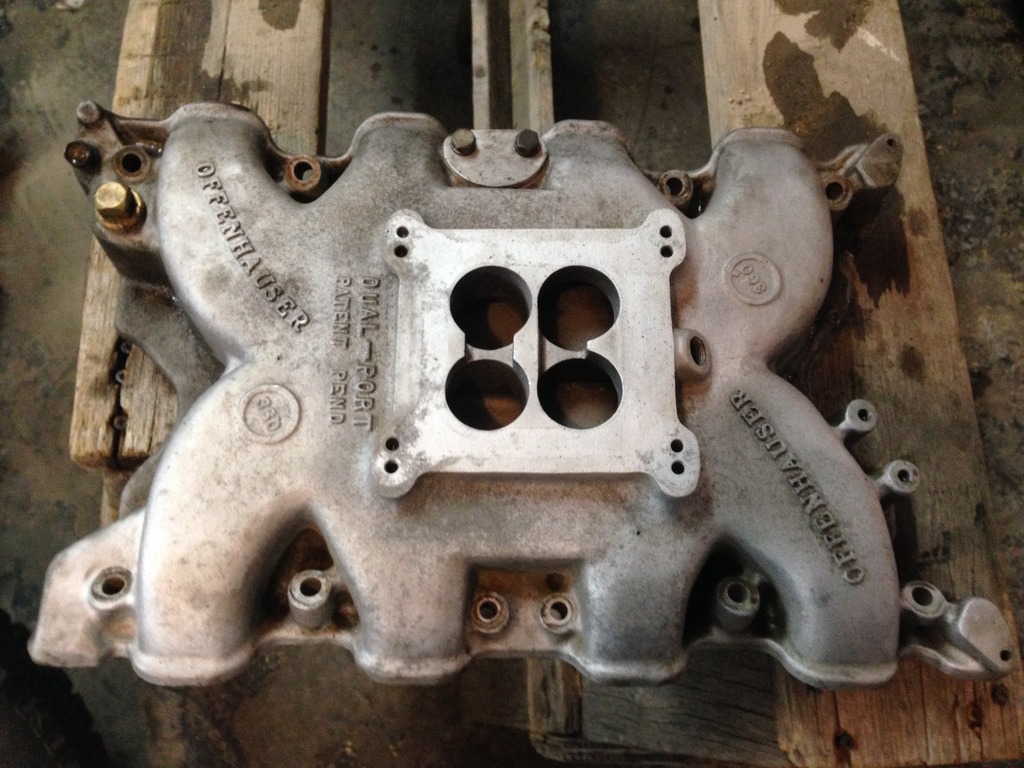
This time I didn't make the mistake of purchasing blindly. I checked over all the surfaces, including the bolt holes before I shook his hand.
Lesson learned with the rims...
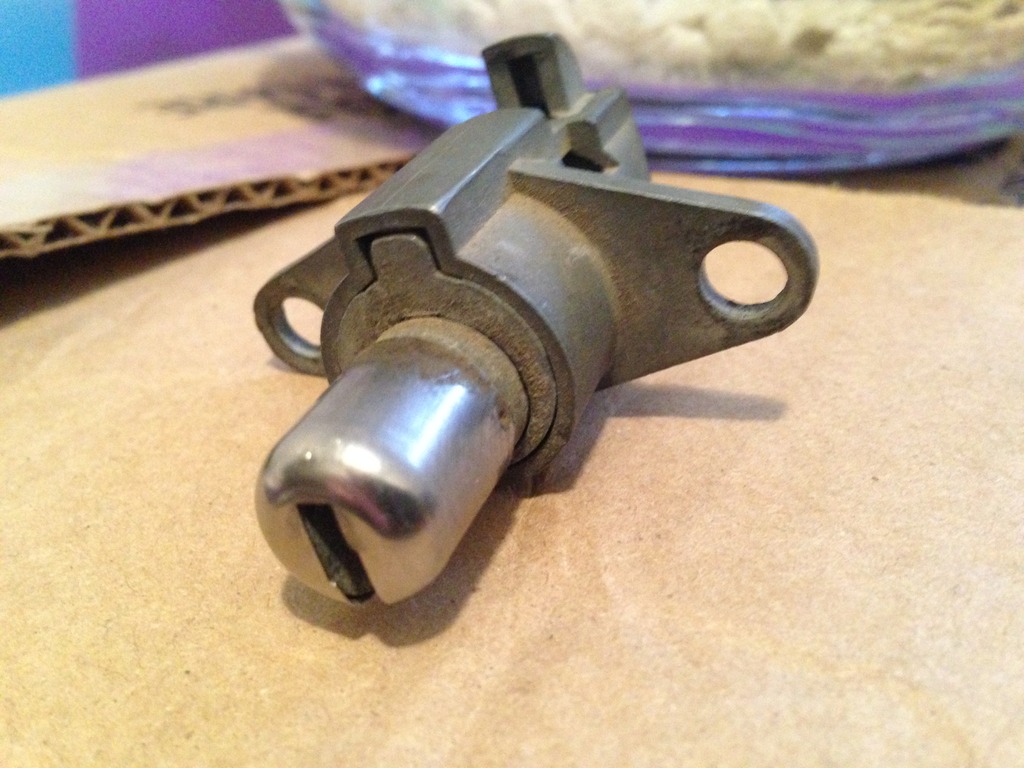
On another note... Something came in the mail!
I am now the proud owner of a locking glove box latch thanks to Bruce King (kingbee here on FTE).
Bruce and his girlfriend Becky are very pleasant to deal with. Typically have quick communication and response times. Recommended for anyone looking for quality OEM parts, shipped to your doorstep.
Thanks Bruce & Becky!
Decided to give these bad boys a bath.
Before.
Having a giant toothbrush helped a lot.
During.
After. Took about 1.5 hours per rim. Found some things I really didn't like after I was done too...
Everything looks fine until I washed the rims... Of course... Word of caution to those who purchase used rims. If the seller leaves them extra dirty, there's a reason (and you should find it before purchasing!).
Looks fine from a distance, but when you look close, you see something has been altered.
From a distance.
Up close.
The previous owner tried to hog out the holes on 1 of the 4 rims to force them to fit a 8x170 bolt pattern. Note the thread-like appearance of the lug hole. Luckily, there's still a decent portion of the conical seat left from his drilling.
I should be fine to run with these rims, but this kind of thing really erks me... especially since I didn't catch it.
A view of a normal lug hole (without drilling). Note the smoothness of the lug hole for comparison.
There was a bit of a lip/gouge on a second of the four rims (no picture) where it appeared like a rock got stuck between the caliper and the inside flange of the rim. Hopefully a good balance will take care of it.
If not, I may opt to get rid of these rims for another set. Any opinions on running these rims are welcomed.
Next up...
Purchased a 22"x16" sheet of aluminium from Allwyn Welding in White City. They do custom fabrication and were working on a full stainless exhaust for a 1979 Bronco when I pulled up
. The 16 gauge aluminium plate will become my new block-off plate for the factory A/C hole. Gotta seal out the noise + exhaust gases.
Onto my carb rebuild over the weekend
Something that actually went alright for a change.I think I'm starting to get the hang of this stuff lol.
Before photo.
Note the big container of brown fluid in the background of the photo below. That stuff is called "Hydroseal" from Napa. It works wonders and eats dirt/grime like none other. I strained it with coffee filters so I can rebuild another carb in the future. It'll be the 4th carb thats been rebuild with the same fluid.
I let the carb soak over night in it. Came out VERY clean. Used an old toothbrush and some larger nylon ones to clean everything up. Worked well.
After photo. Rebuild was finished after this photo was taken.
I was contacted over the weekend by a fellow in Indian Head with an Offenhauser intake.
Ran out to have a look and had to have it. I know a lot of guys will tell me to toss it and run an Edlebrock Performer RPM, but I want to give this a try.
Grabbed it for $120. Not a smoking deal, but didn't raid my wallet either.
Since I was in a cleaning mood...
Before:
After:
This time I didn't make the mistake of purchasing blindly. I checked over all the surfaces, including the bolt holes before I shook his hand.
Lesson learned with the rims...
On another note... Something came in the mail!
I am now the proud owner of a locking glove box latch thanks to Bruce King (kingbee here on FTE).
Bruce and his girlfriend Becky are very pleasant to deal with. Typically have quick communication and response times. Recommended for anyone looking for quality OEM parts, shipped to your doorstep.
Thanks Bruce & Becky!
#52
02-06-2017, 10:25 AM
FTE Legend
Join Date: Mar 2009
Location: North Bay Ont Canada
Posts: 161,142
Received 5,139 Likes
on
1,684 Posts
#53
02-06-2017, 01:08 PM

Cargo Master
I wouldn't even mess with that one wheel. If you mount it just slightly off center of the hub, it will be an off-balance nightmare. Buy a new wheel and mount that tire on it. Hit the other wheels with some jeweler's rouge with a medium cloth wheel on a drill. Make them shine like new. I would probably do the same on that intake too.
#55
02-06-2017, 02:57 PM
Thanks for the input everyone. I really appreciate it.
Just an FYI in case anyone was curious. I rebuilt and intend to run my stock carb for the time being.
When I do upgrades to the 400, it'll consist of the carb, intake and fenderwell exit headers all in one shot.
I don't really want to mess around with the Edelbrock 1406 multiple times just because my truck can't exhale properly. I've got the intake and carb sitting on the shelf. Just now to find a set of headers
Yeah, I was really bummed about the rims. All that anger sure helped me scrub/clean them tho!
Thanks! I'm pumped to finally have a 4-barrel.
It's drilled out enough that I can get the first knuckle on my pinkie passed the lug hole. On all of the other ones, my pinkie knuckle won't fit at all. Dead stop when I try.
So yeah, it's a sizable hole. Certainly not good.
I was tempted just to buy new rims from the get-go, but for half the price I was able to get these... Unfortunately my plan didn't work out the way I intended it to.
Ha! I'll take that as a compliment
The intake and rims are still fairly dirty - they need a really good polish. The carb is spotless as far as I'm concerned lol.
Tell ya what... you stockpile enough rust-free parts to build a truck from the ground up and I'll come be your maid for a month
Just an FYI in case anyone was curious. I rebuilt and intend to run my stock carb for the time being.
When I do upgrades to the 400, it'll consist of the carb, intake and fenderwell exit headers all in one shot.
I don't really want to mess around with the Edelbrock 1406 multiple times just because my truck can't exhale properly. I've got the intake and carb sitting on the shelf. Just now to find a set of headers
Thanks! I'm pumped to finally have a 4-barrel.
So yeah, it's a sizable hole. Certainly not good.
I wouldn't even mess with that one wheel. If you mount it just slightly off center of the hub, it will be an off-balance nightmare. Buy a new wheel and mount that tire on it. Hit the other wheels with some jeweler's rouge with a medium cloth wheel on a drill. Make them shine like new. I would probably do the same on that intake too.
The intake and rims are still fairly dirty - they need a really good polish. The carb is spotless as far as I'm concerned lol.
Tell ya what... you stockpile enough rust-free parts to build a truck from the ground up and I'll come be your maid for a month
#56
02-08-2017, 02:46 PM
Small update.
Dropped off the 2 damaged rims at Wheel Works in White City.
They'll be able to repair the lug holes on the one rim (press in steel sleeves), and they'll smooth out a bit of damage on the other for $100.
Here's a photo of the damage on the other rim (had no photo before). Rock got caught between caliper and the lip, ground down the flange a wee bit so I'm getting them to check for cracks and roundness. Also note the evidence of a spiral/groove inside the flange where another rock got caught.
The chipped-up pieces/dark pieces on the lip of the rim are the weights that were chewed up by rocks. If you look at the top right of the photo and follow the edge of the inside flange, you'll see the damage (it's no longer a rounded corner).
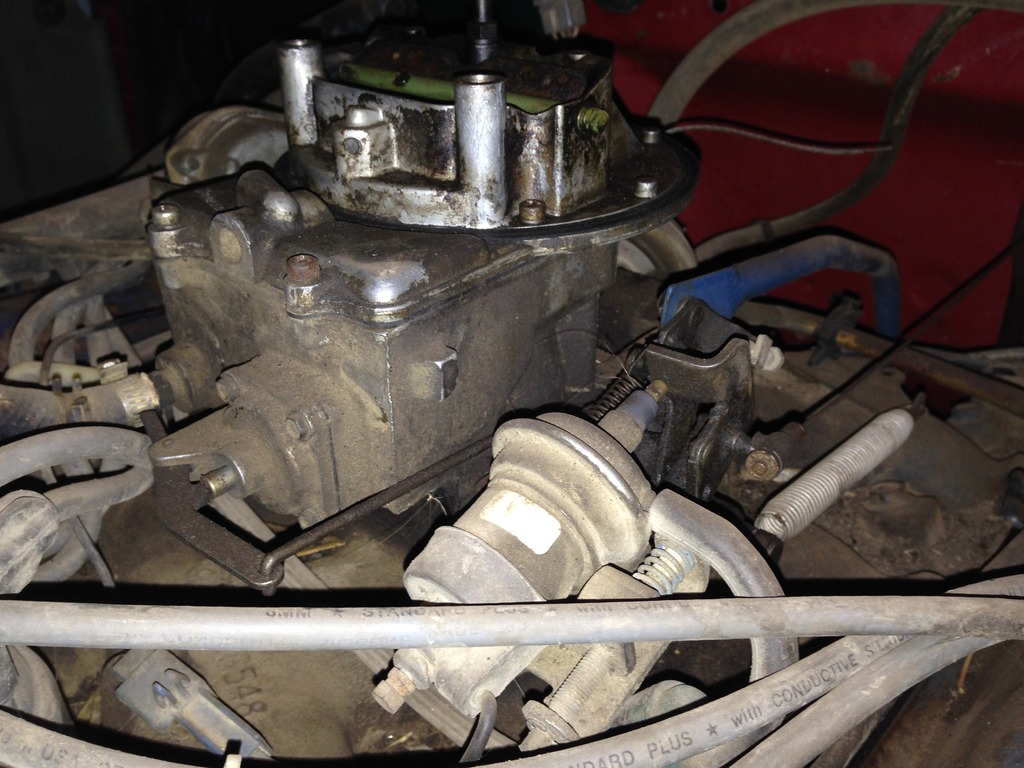
On another note, I got my carb all back together and mounted.
New fuel filter, new fuel hoses, mounted in place and left dry for now. I'll put fuel in the carb and run it when spring comes. For now, it'll be left clean and dry.
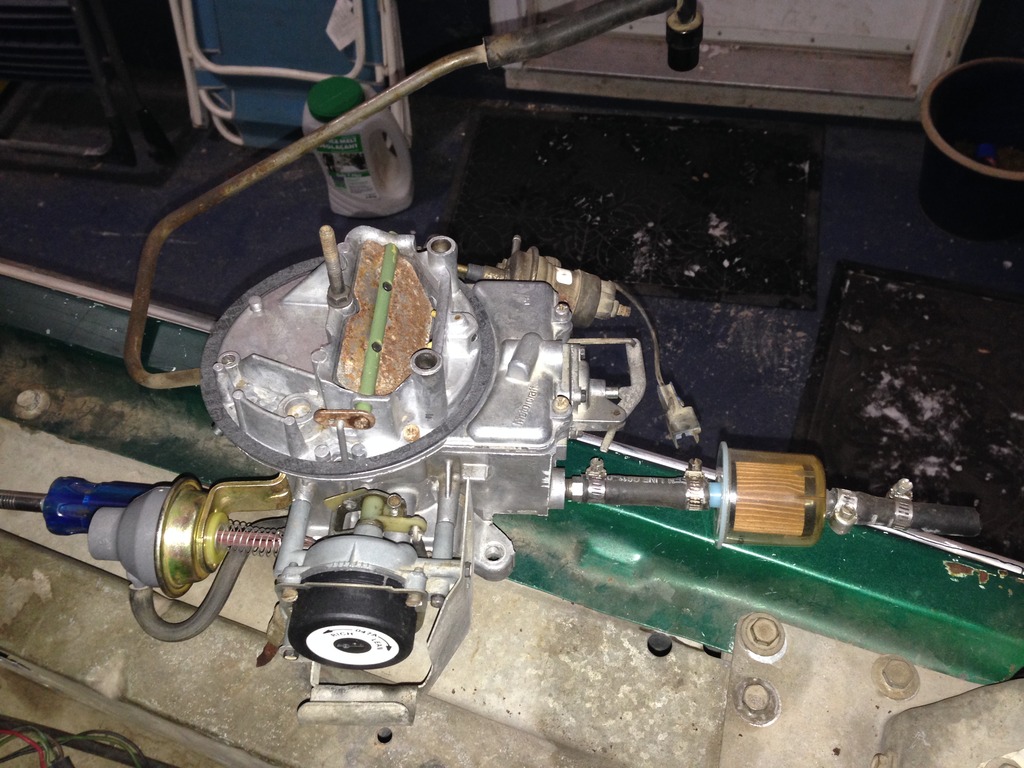
Those choke linkages were fairly finicky. I tried playing around with them but didn't get too far as I didn't want to toss everything out of wack (the carb ran okay before the rebuild, just bogged under acceleration and didn't start great).
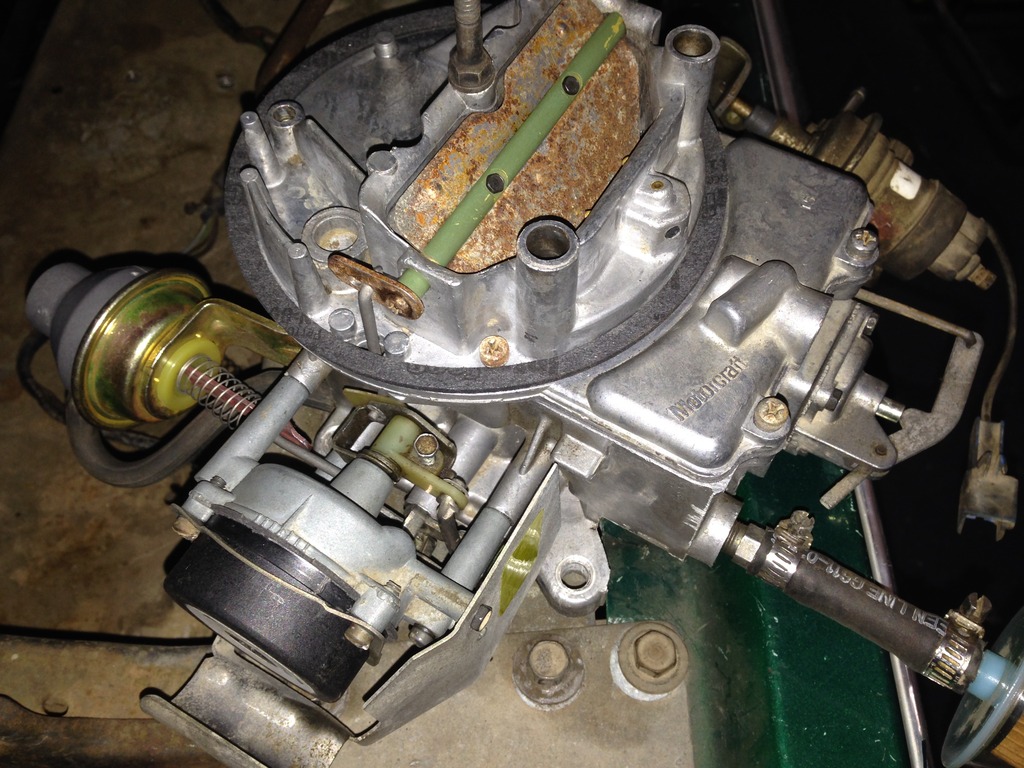
Mounted and ready to go.
Tucked away for now. I plan on copying BKSM's idea of a polished air cleaner. I thought his looked pretty cool and shiny too!
I'll let you guys know how the rims turn out.
Will hopefully have them back by early next week.
Dropped off the 2 damaged rims at Wheel Works in White City.
They'll be able to repair the lug holes on the one rim (press in steel sleeves), and they'll smooth out a bit of damage on the other for $100.
Here's a photo of the damage on the other rim (had no photo before). Rock got caught between caliper and the lip, ground down the flange a wee bit so I'm getting them to check for cracks and roundness. Also note the evidence of a spiral/groove inside the flange where another rock got caught.
The chipped-up pieces/dark pieces on the lip of the rim are the weights that were chewed up by rocks. If you look at the top right of the photo and follow the edge of the inside flange, you'll see the damage (it's no longer a rounded corner).
On another note, I got my carb all back together and mounted.
New fuel filter, new fuel hoses, mounted in place and left dry for now. I'll put fuel in the carb and run it when spring comes. For now, it'll be left clean and dry.
Those choke linkages were fairly finicky. I tried playing around with them but didn't get too far as I didn't want to toss everything out of wack (the carb ran okay before the rebuild, just bogged under acceleration and didn't start great).
Mounted and ready to go.
Tucked away for now. I plan on copying BKSM's idea of a polished air cleaner. I thought his looked pretty cool and shiny too!
I'll let you guys know how the rims turn out.
Will hopefully have them back by early next week.
#57
02-08-2017, 05:56 PM
FTE Legend
Join Date: Mar 2009
Location: North Bay Ont Canada
Posts: 161,142
Received 5,139 Likes
on
1,684 Posts
#58
02-08-2017, 09:53 PM
The guy at the counter sounded pretty confident they could solve my problems with the two rims. Made it seem like he's seen it too many times before.
I'm hopeful I'll get the chance to run with those rims.
More parts keep coming in the mail so more progress to come.
#59
02-09-2017, 04:23 PM
Quick update. Got those Ion alloys back from Wheel Works today.
Rob did a fantastic job on them for me. They're usable again.
All 8 holes with pressed-in steel sleeves.
Close-up.
Back-side. Glad I never ran these in the condition I got them.
The other damaged rim. Rob cleaned it up for me and crack-checked it for free. Even threw it on a balancing machine to make sure it still spun perfect, and it does.
Inside lip (where the damage was done).
Cleaning/checking the other side for cracks.
I'm pretty happy with the result. Can't ask for much more when it only cost $93.
#60
02-09-2017, 06:56 PM
FTE Legend
Join Date: Mar 2009
Location: North Bay Ont Canada
Posts: 161,142
Received 5,139 Likes
on
1,684 Posts