Red 56 F100 Build Thread
#1
 11-17-2016, 11:25 PM


Join Date: Aug 2009
Location: Idaho Falls, Idaho
Posts: 76
Likes: 0
Received 0 Likes
on
0 Posts
Red 56 F100 Build Thread
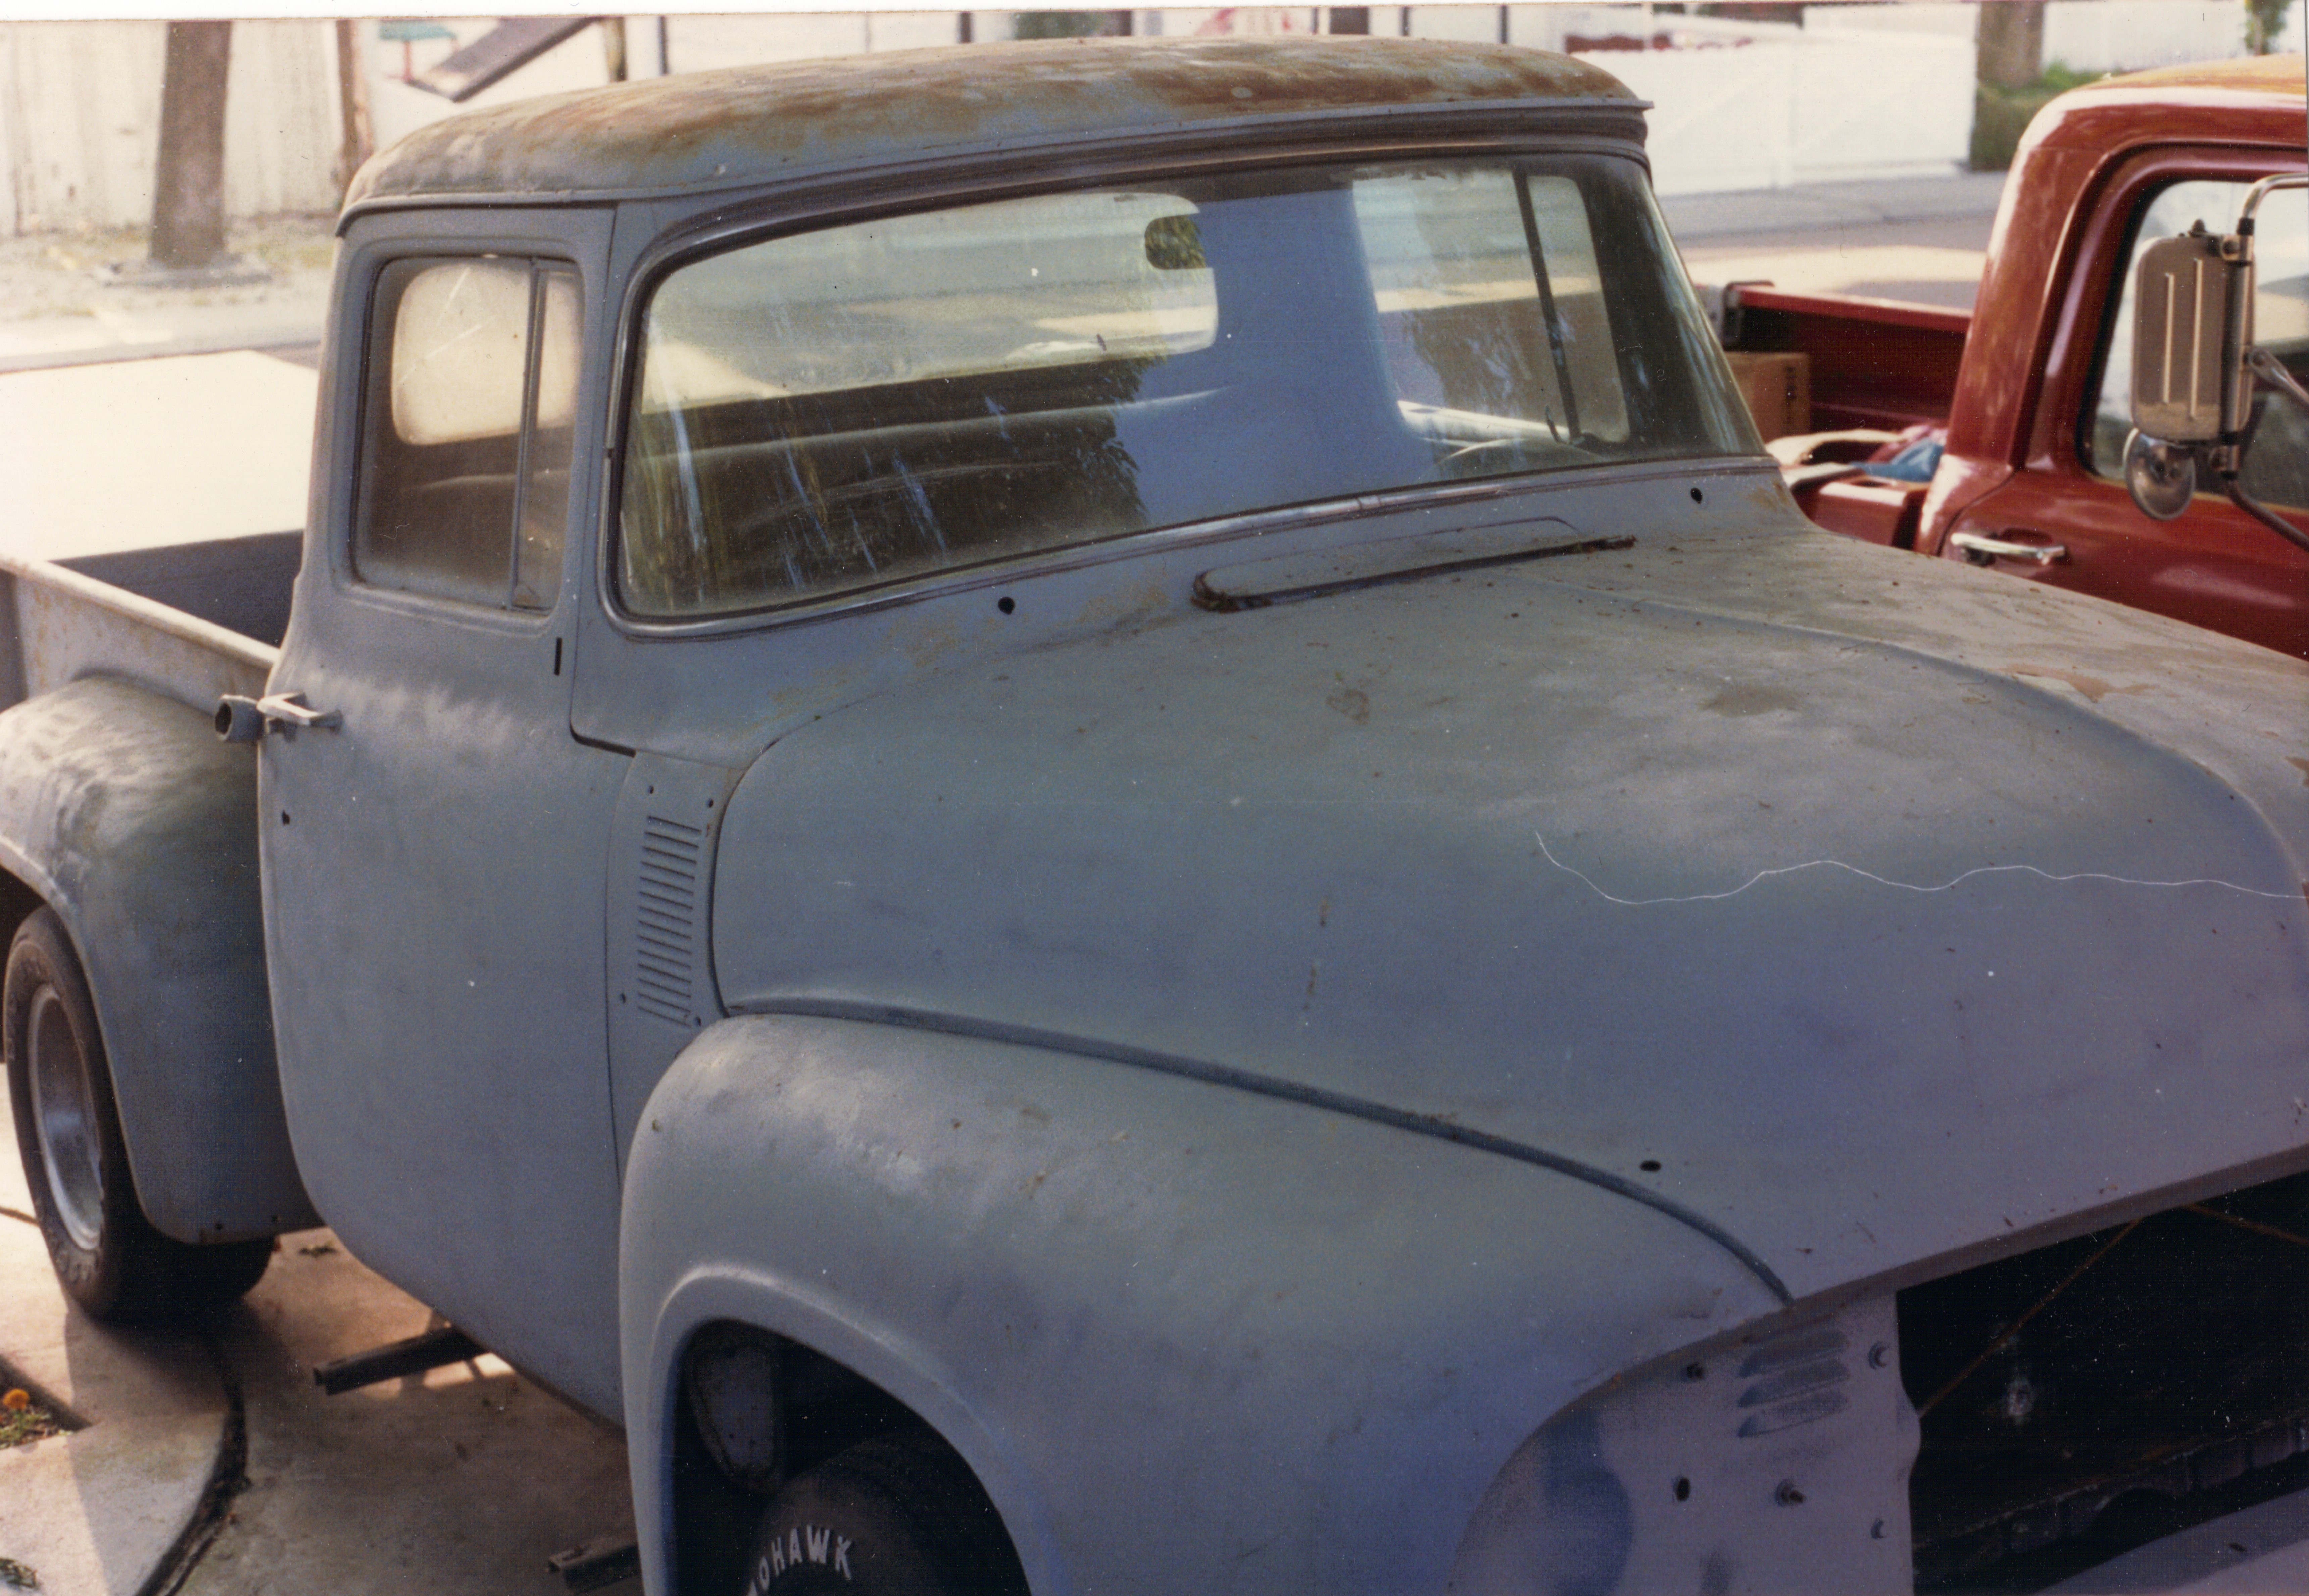
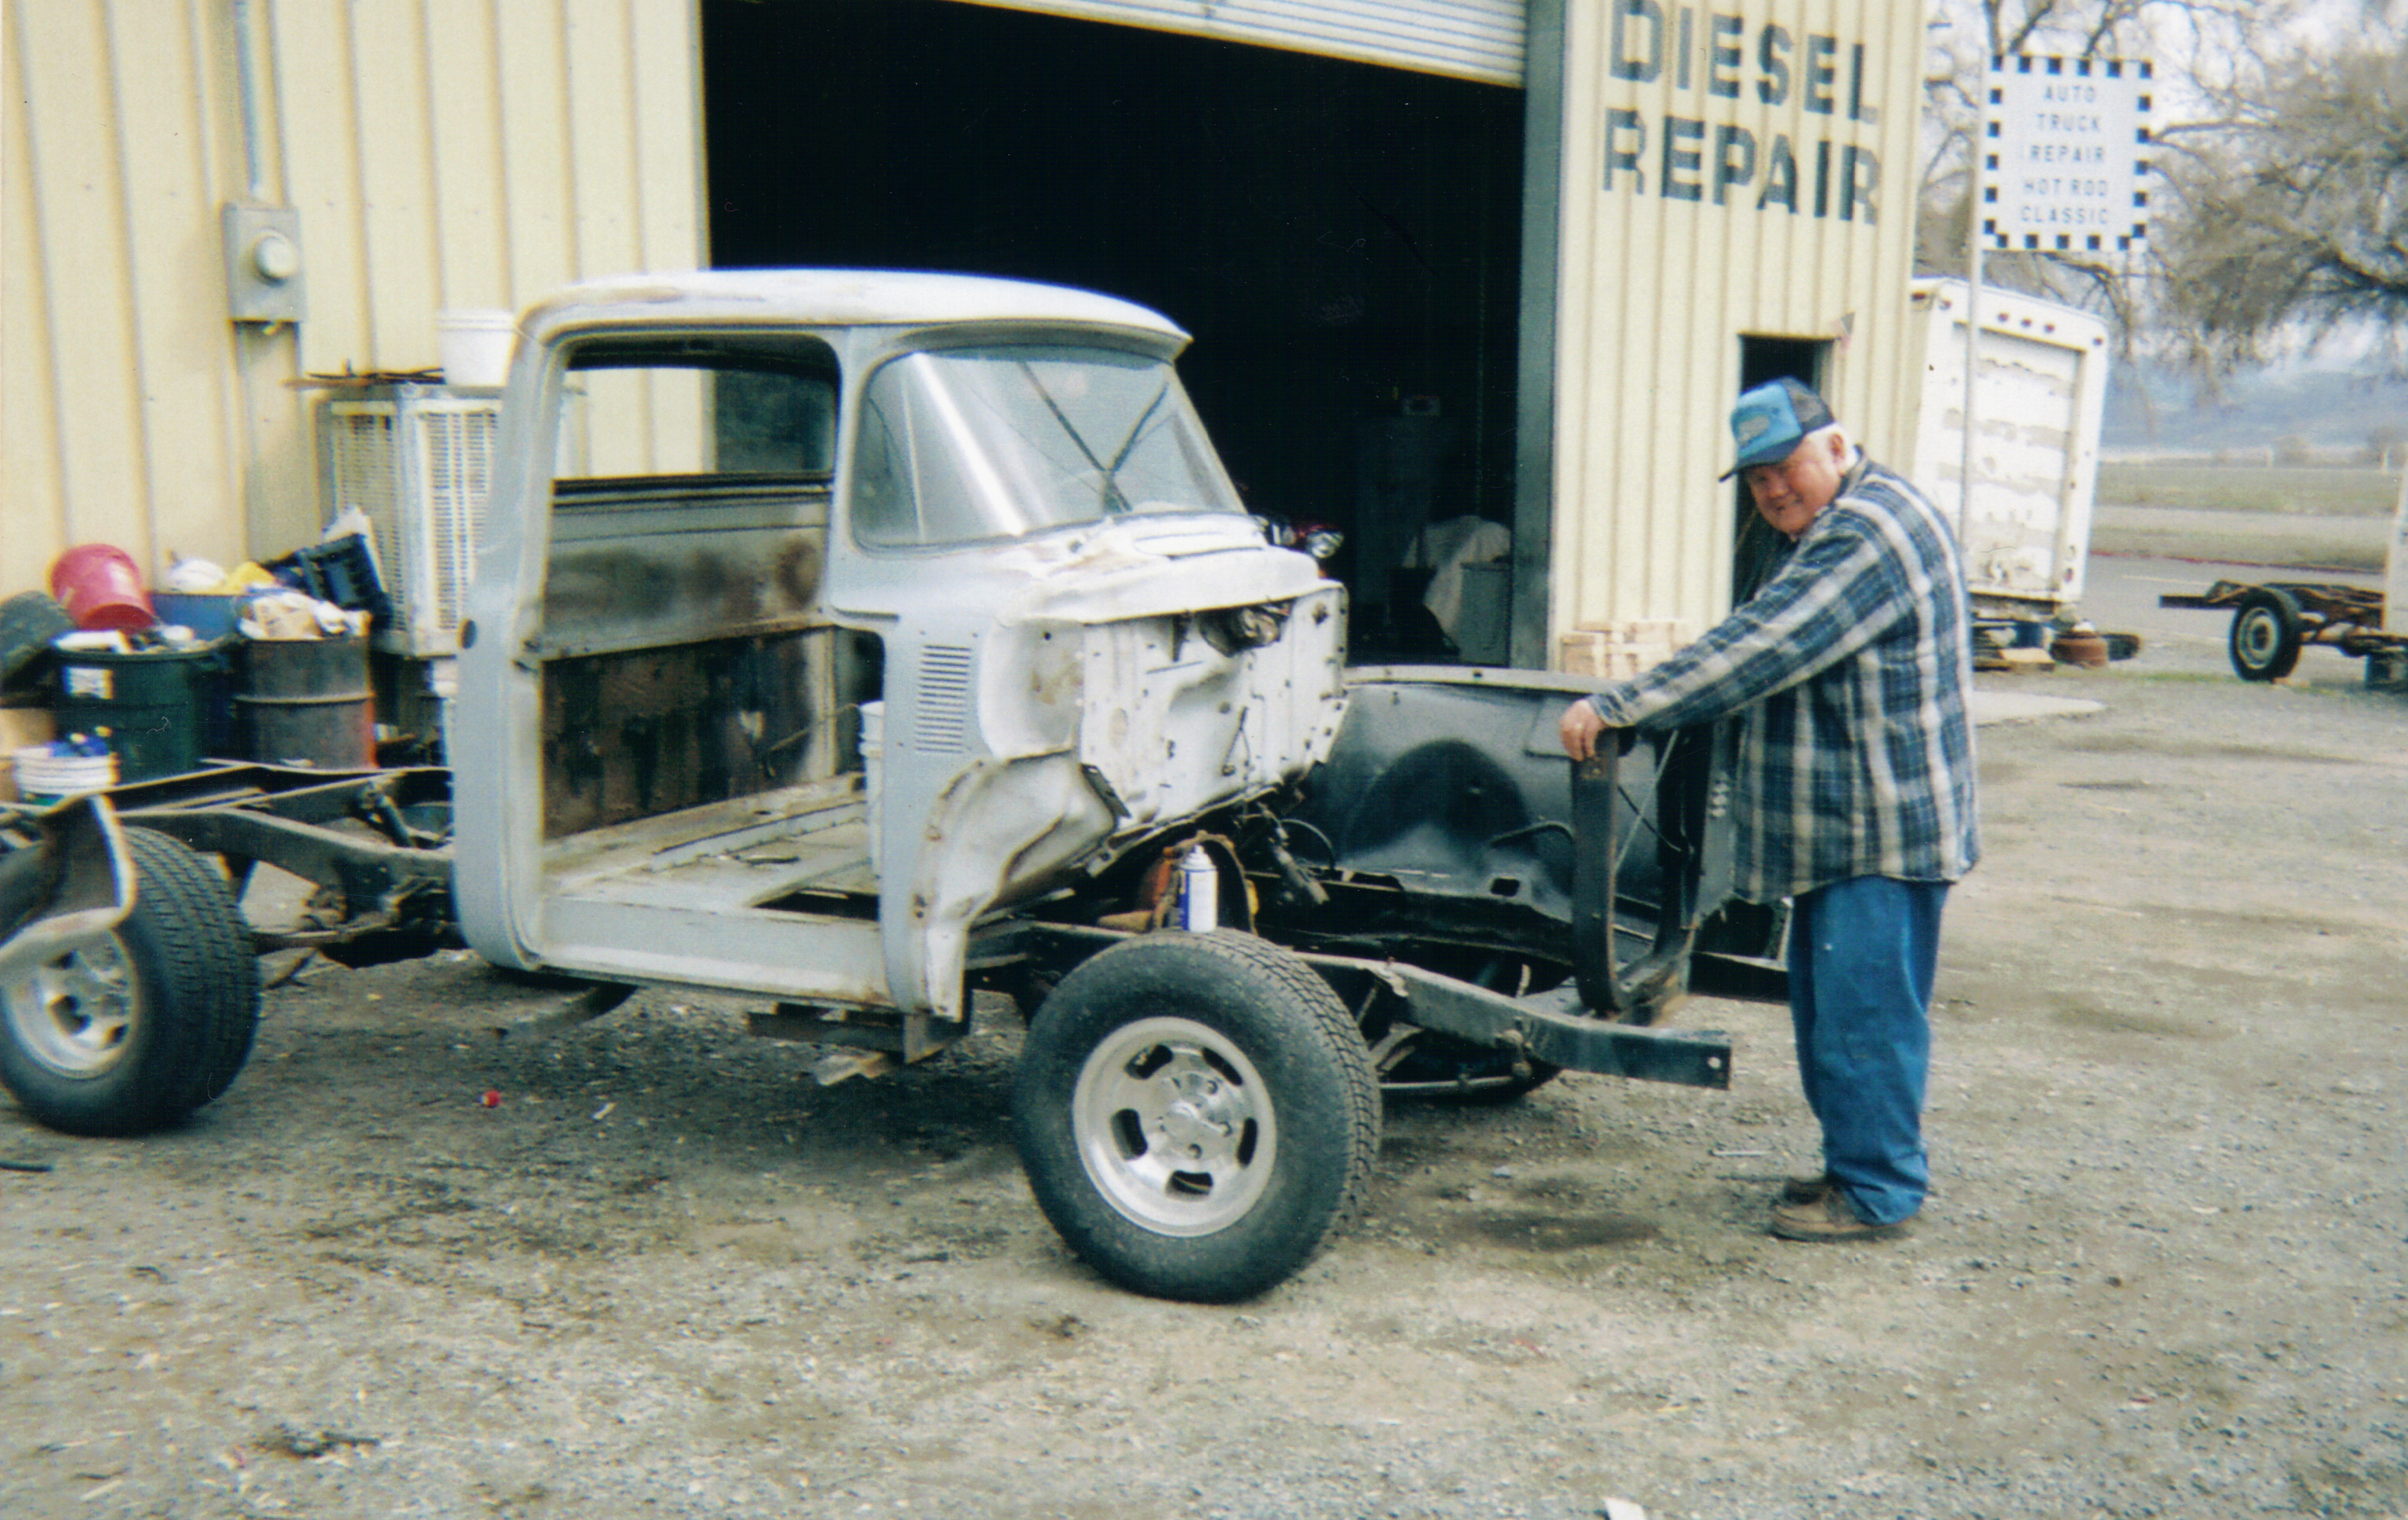
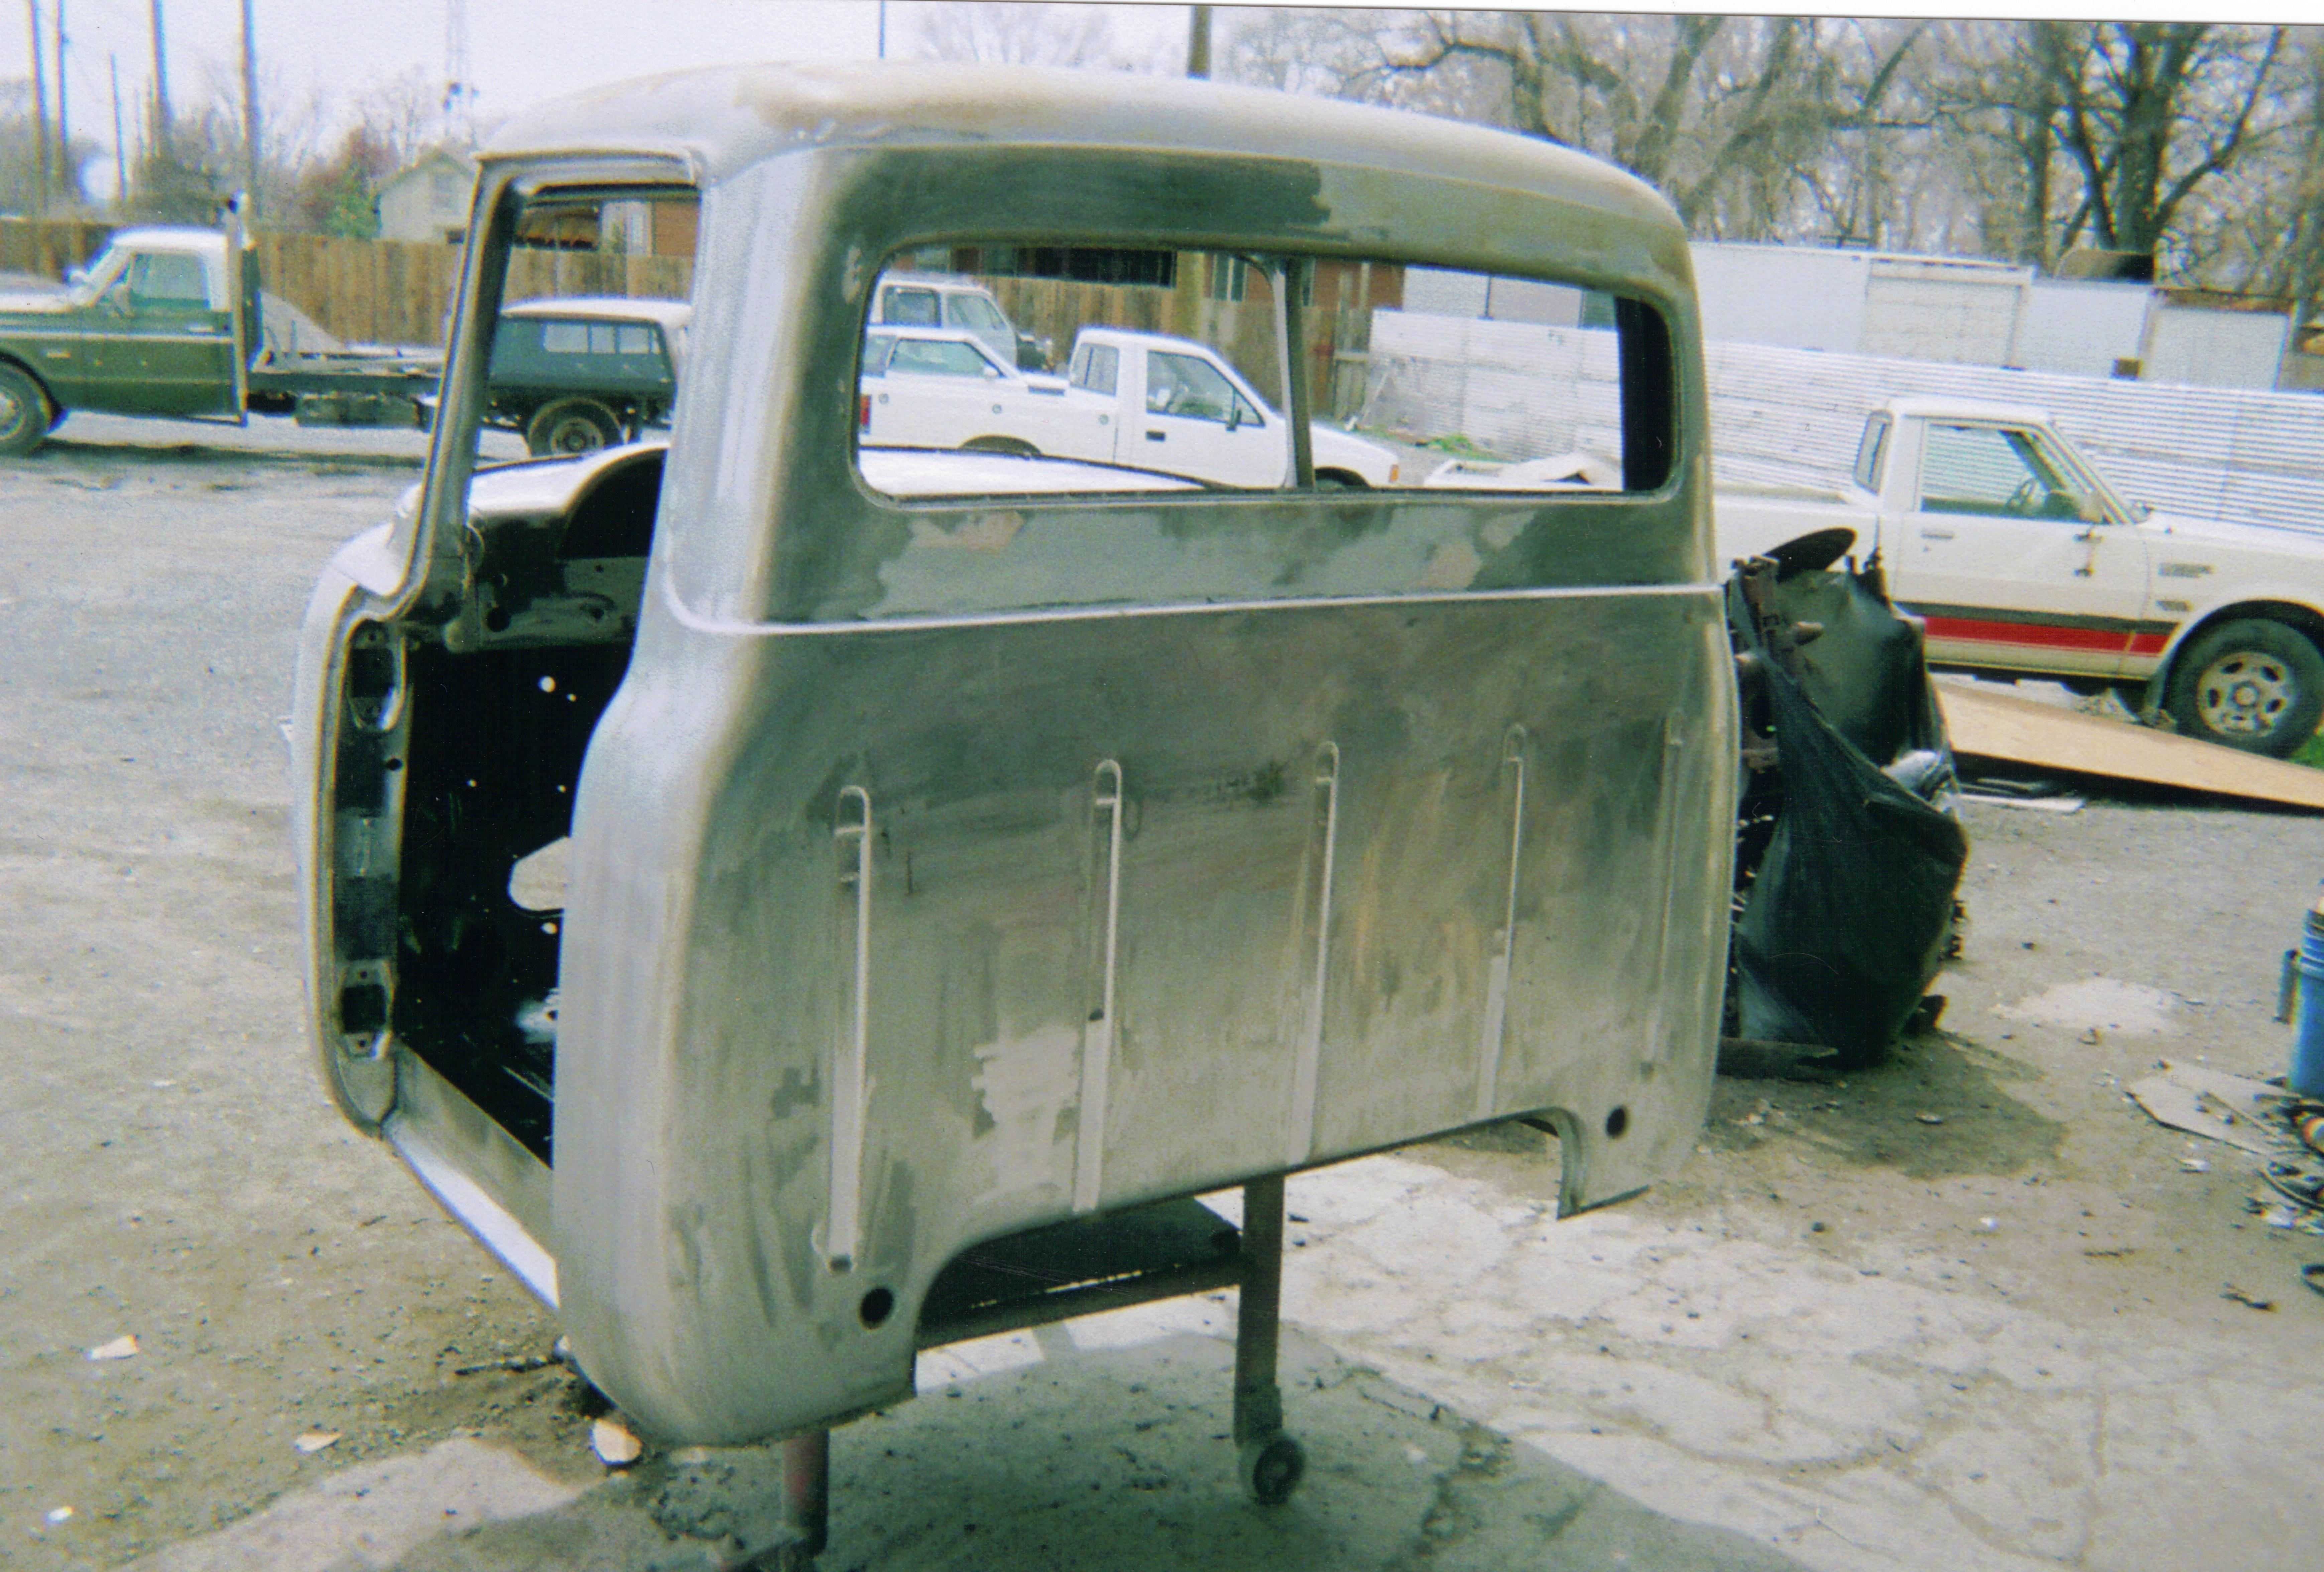
I have been working on my father in laws pickup that he has been trying to get completed for some time. For as long as I have known him he has been wanting to build a 56. He has owned a few 56 pickups over time and really likes the style of the truck.
This is one of the first trucks he bought since I have known him.
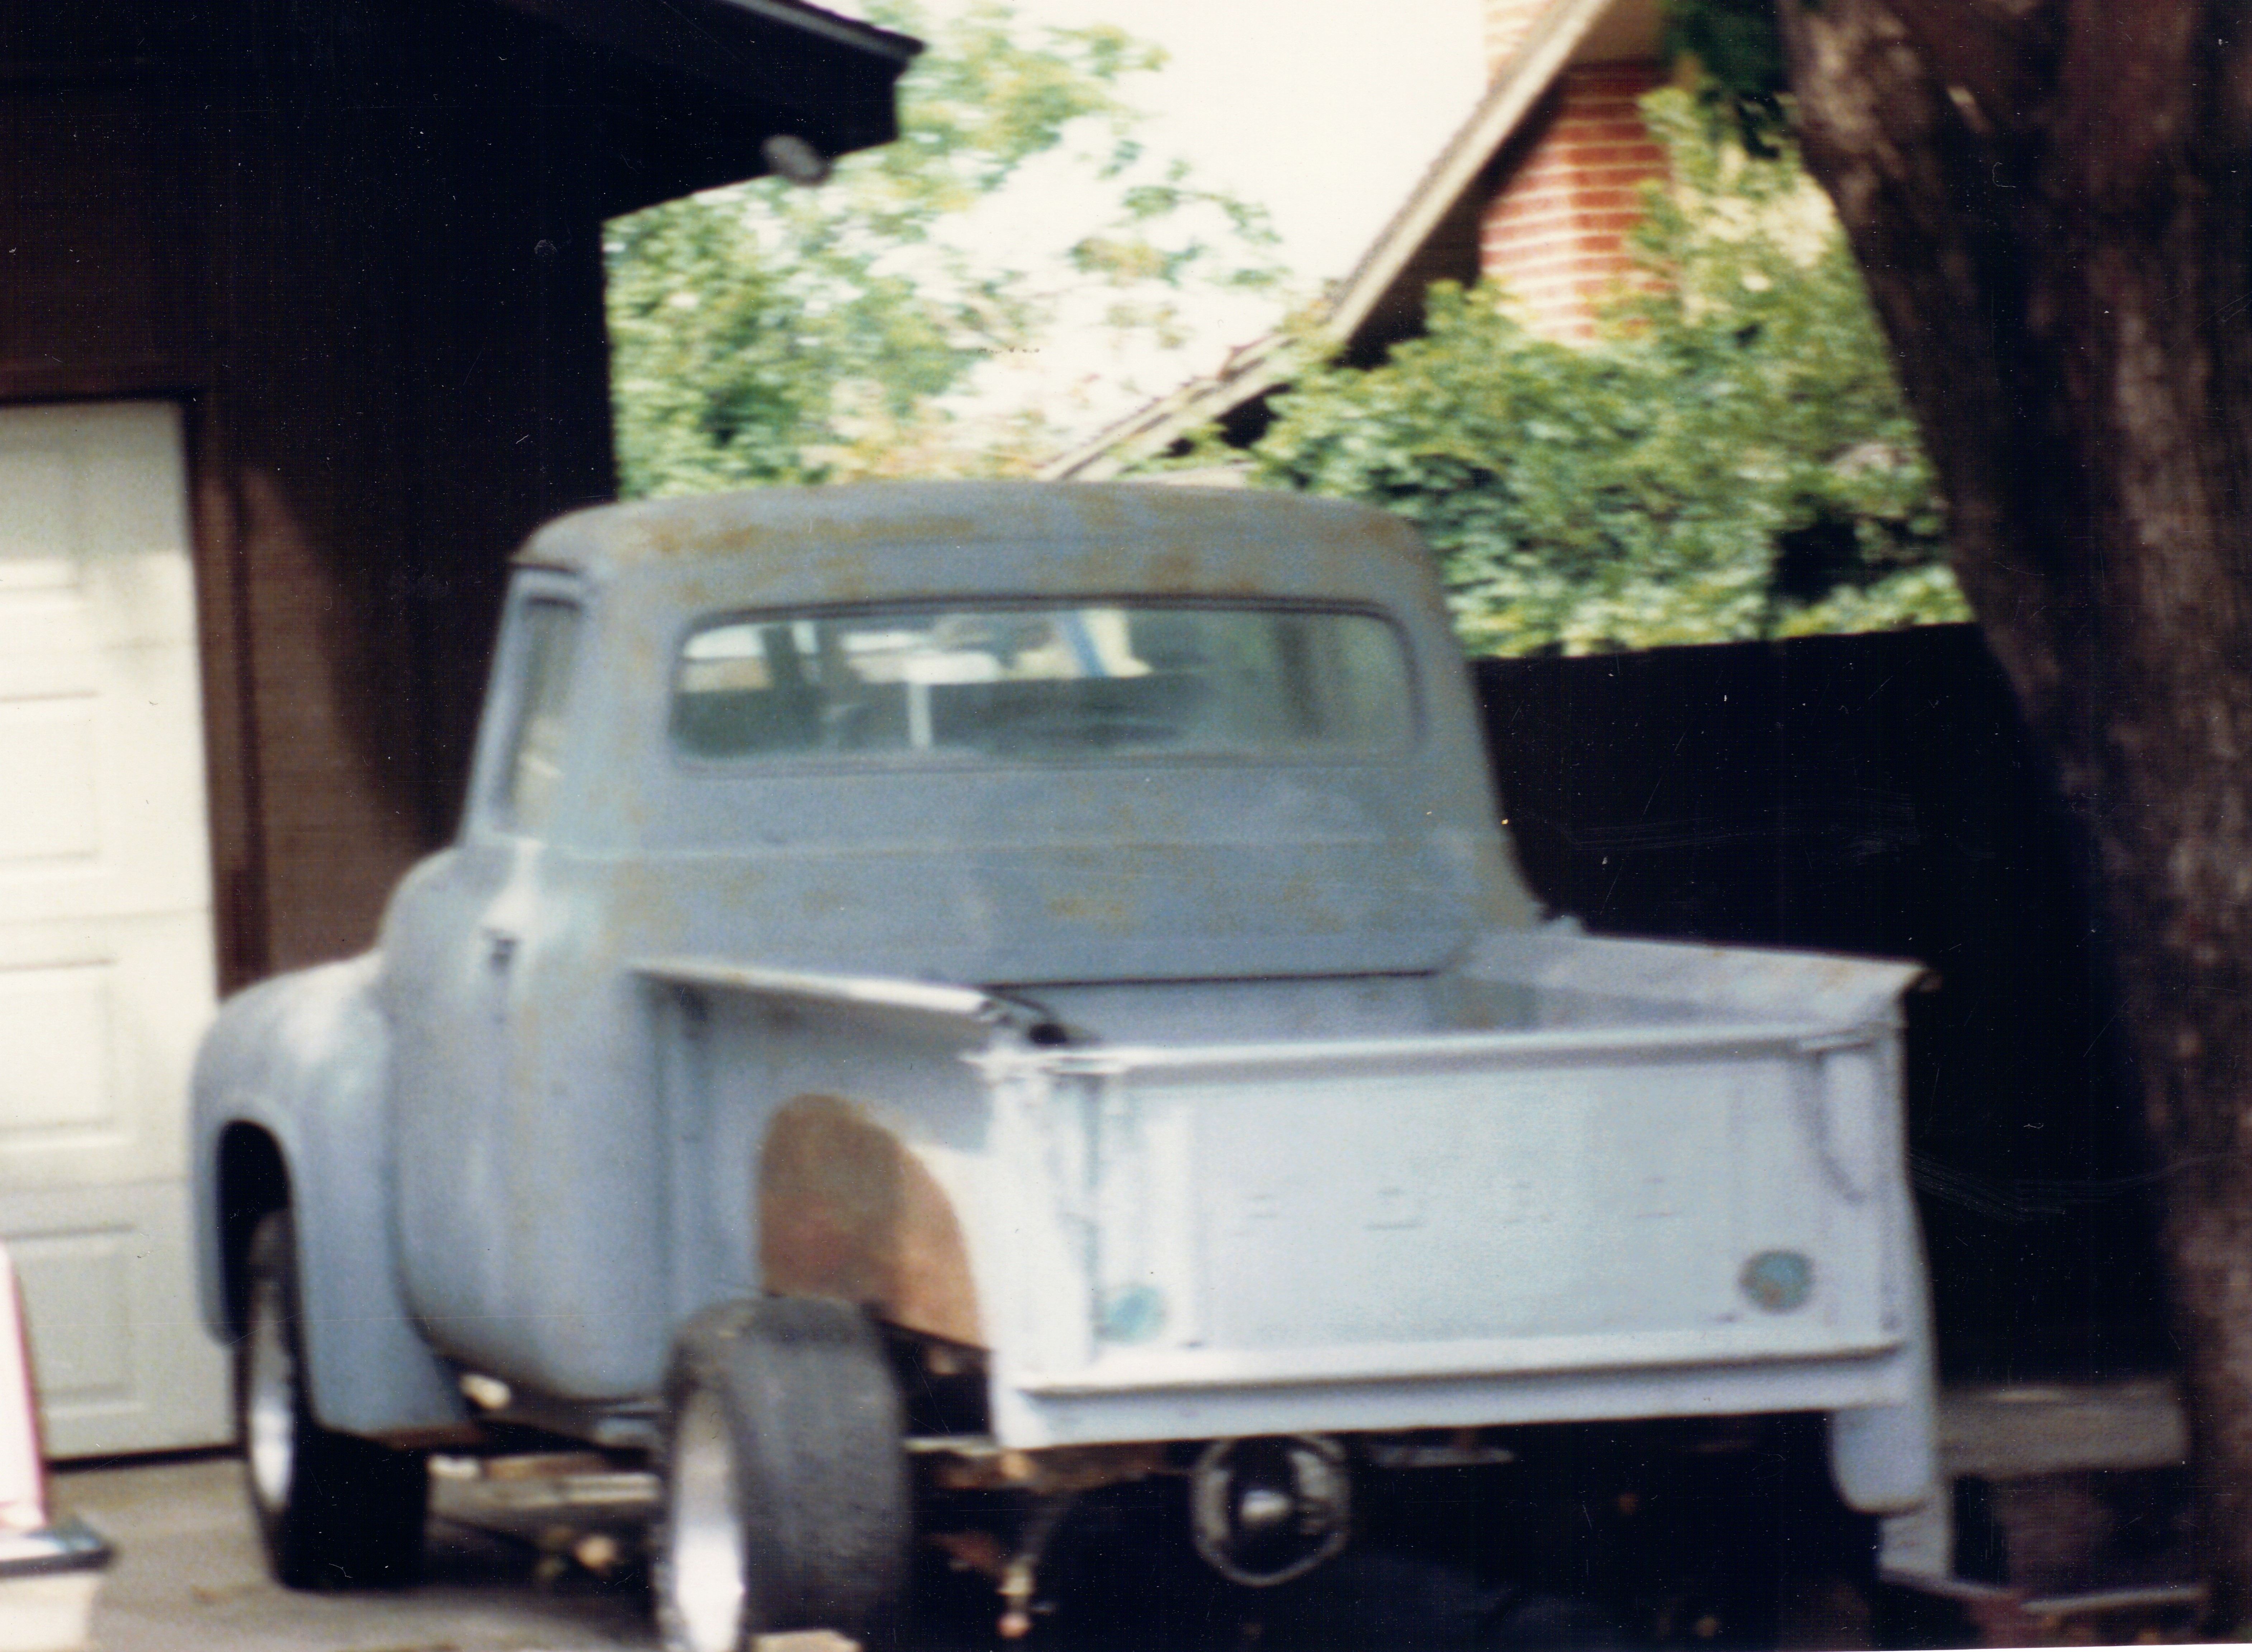
This is a truck that he had when I met my wife. It was behind the fence you can see through the windows on the rear photo of the previous truck.

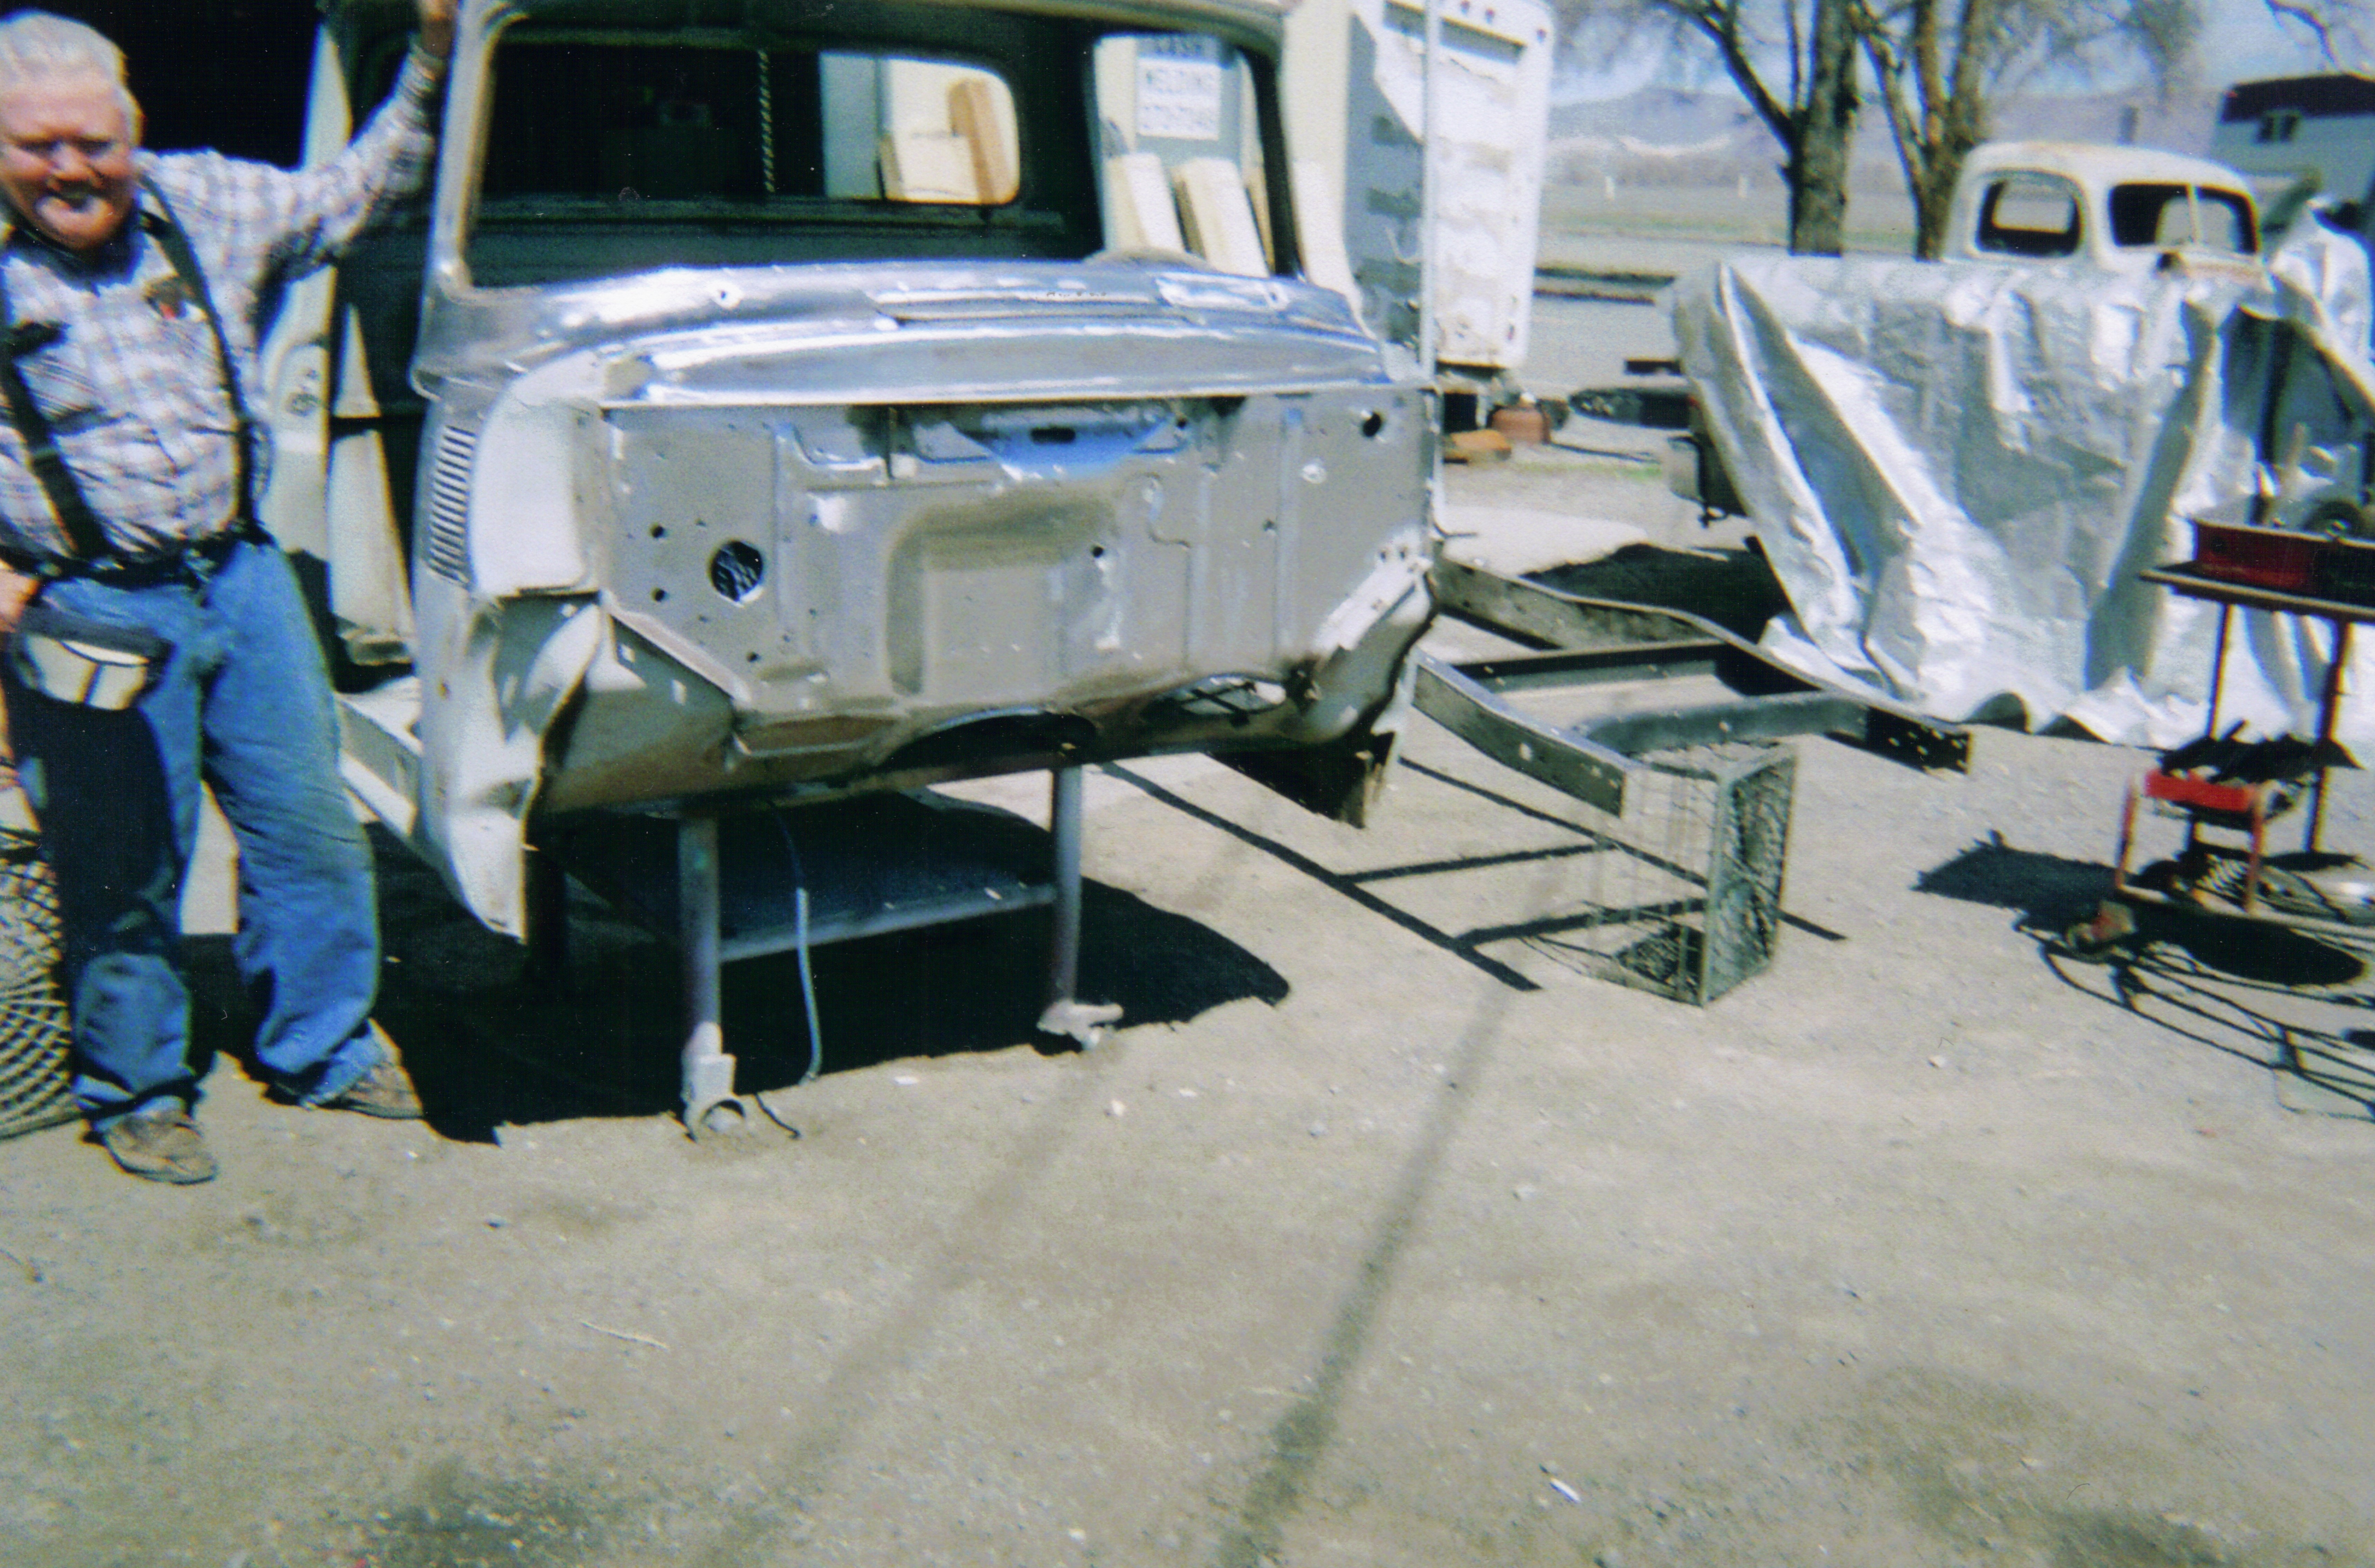
Between the two of these the truck we have is moving along. My in laws have followed us from California. My Father In Law, Don, has moved all of the stuff he has from CA to ID, along with the two trucks. After a few years he finally decided to take the truck to a guy that used to be married to his niece that built vehicles for himself and others.
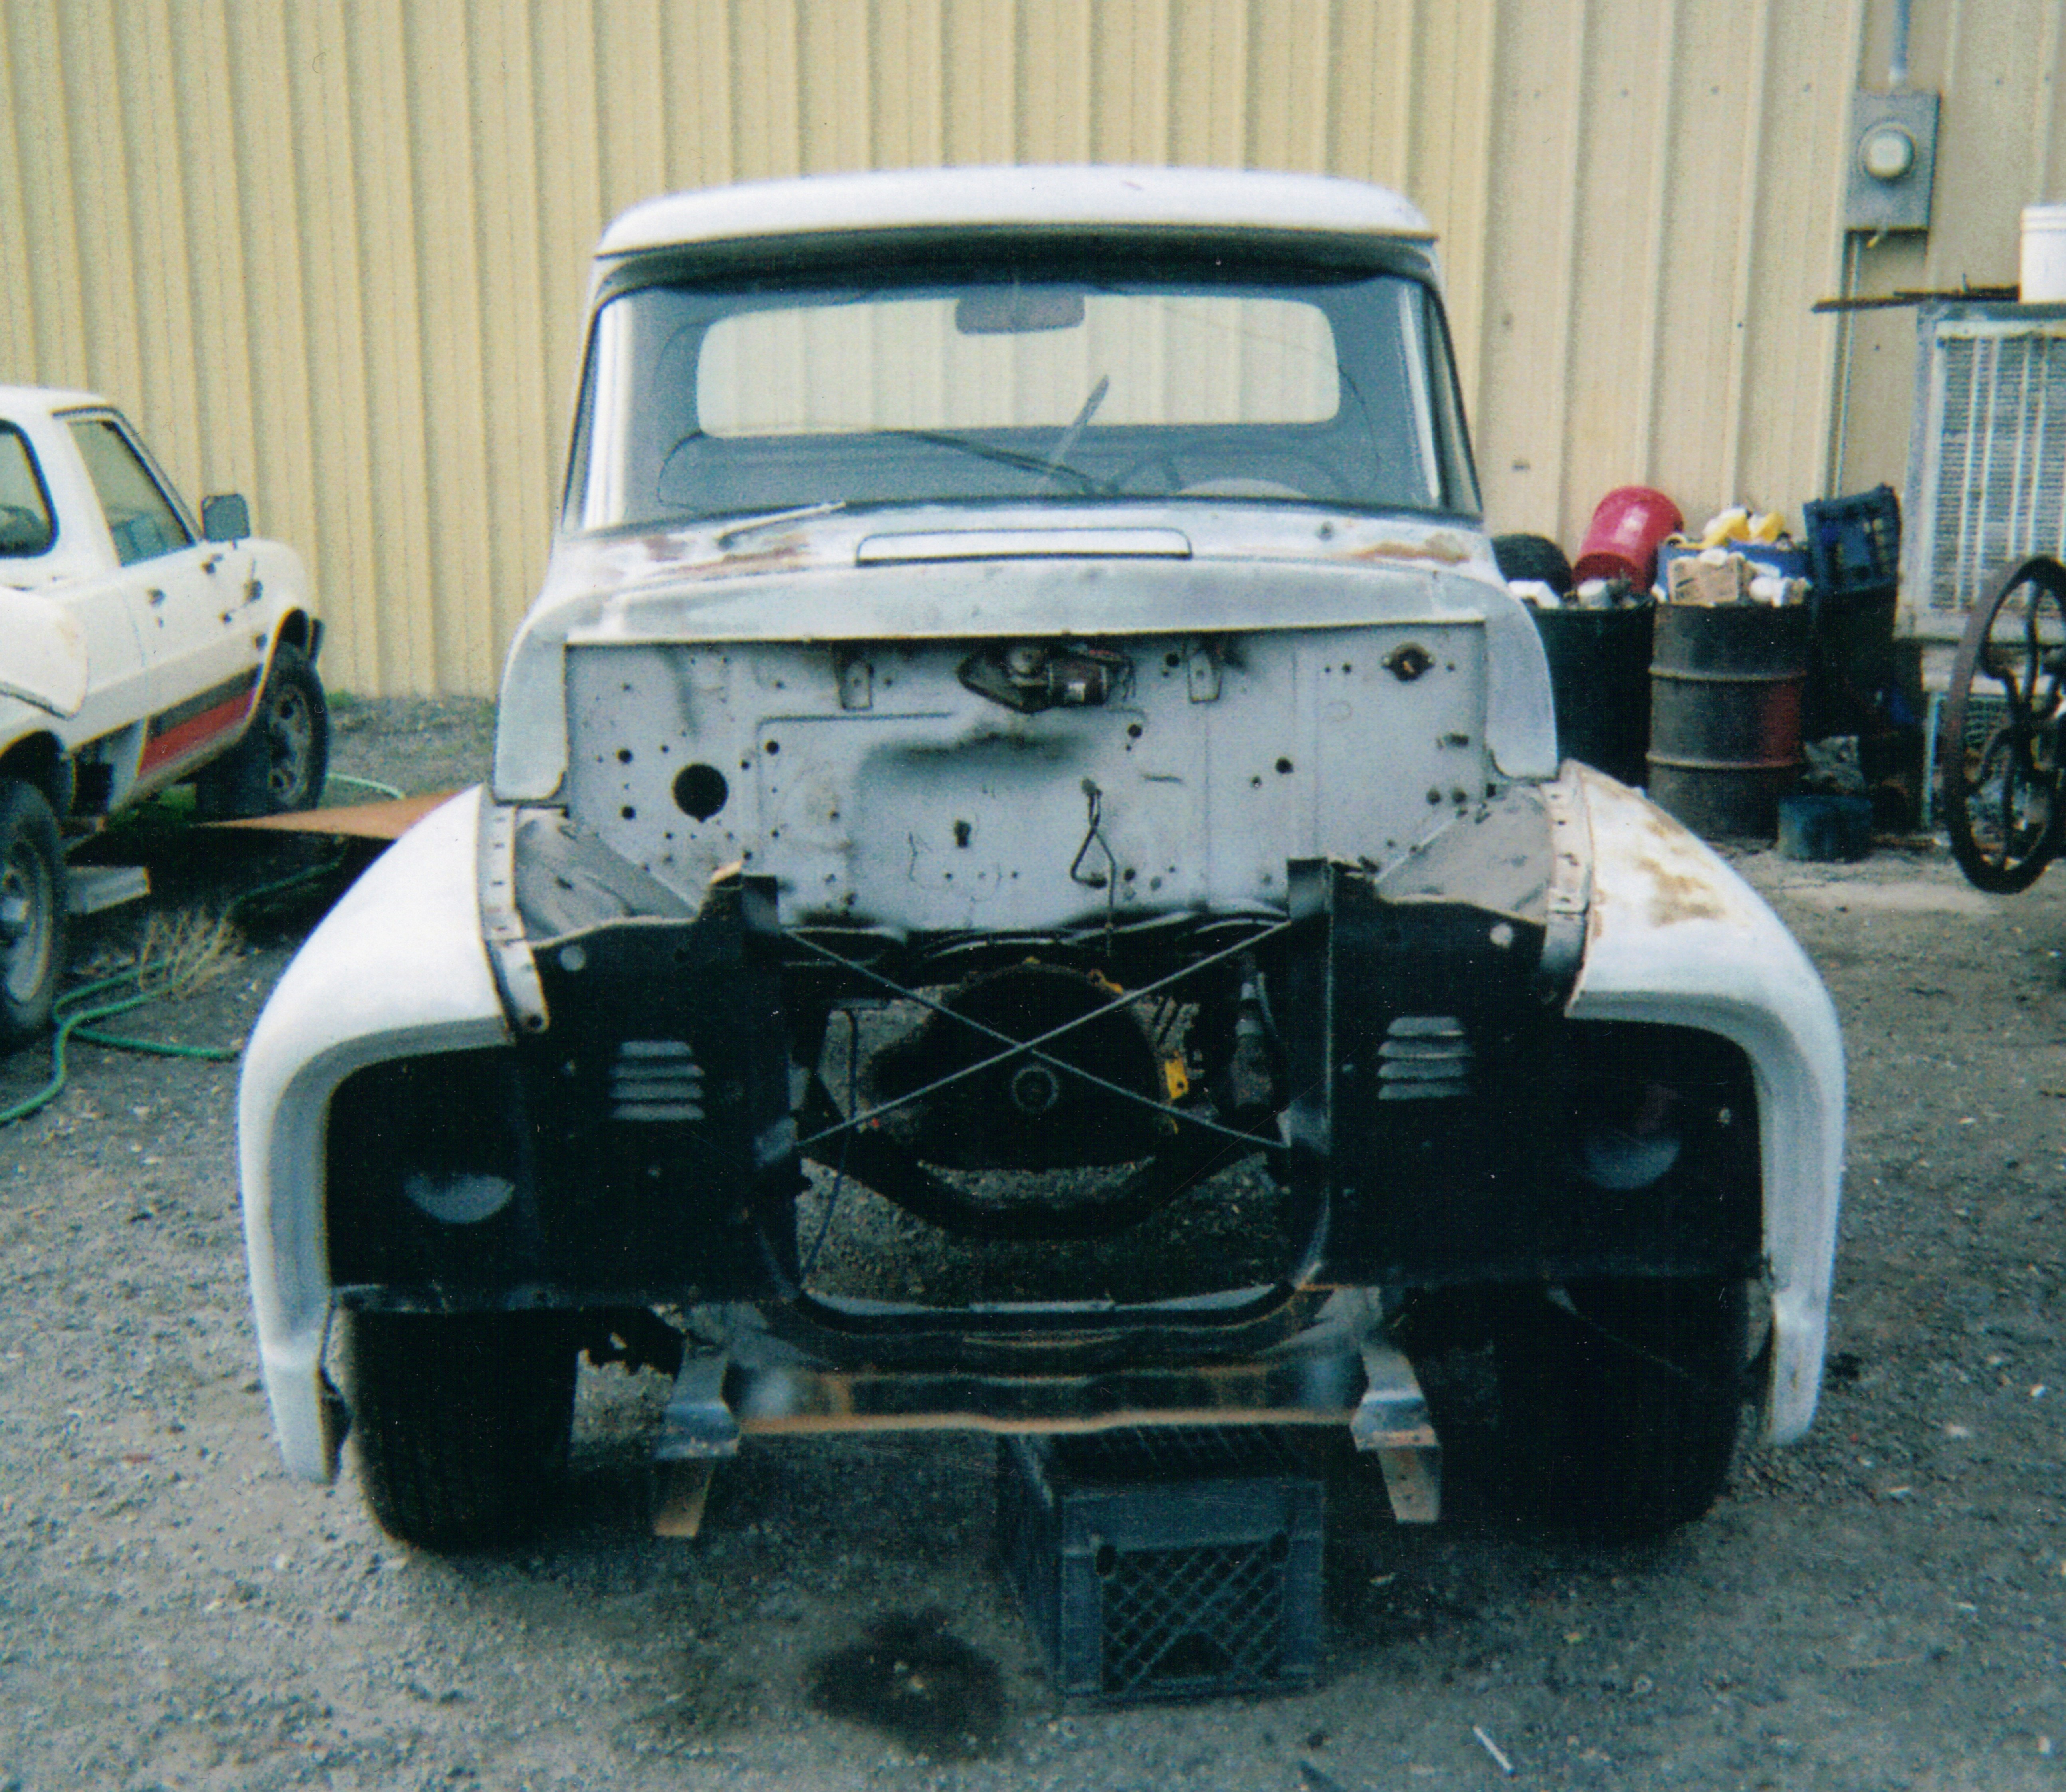
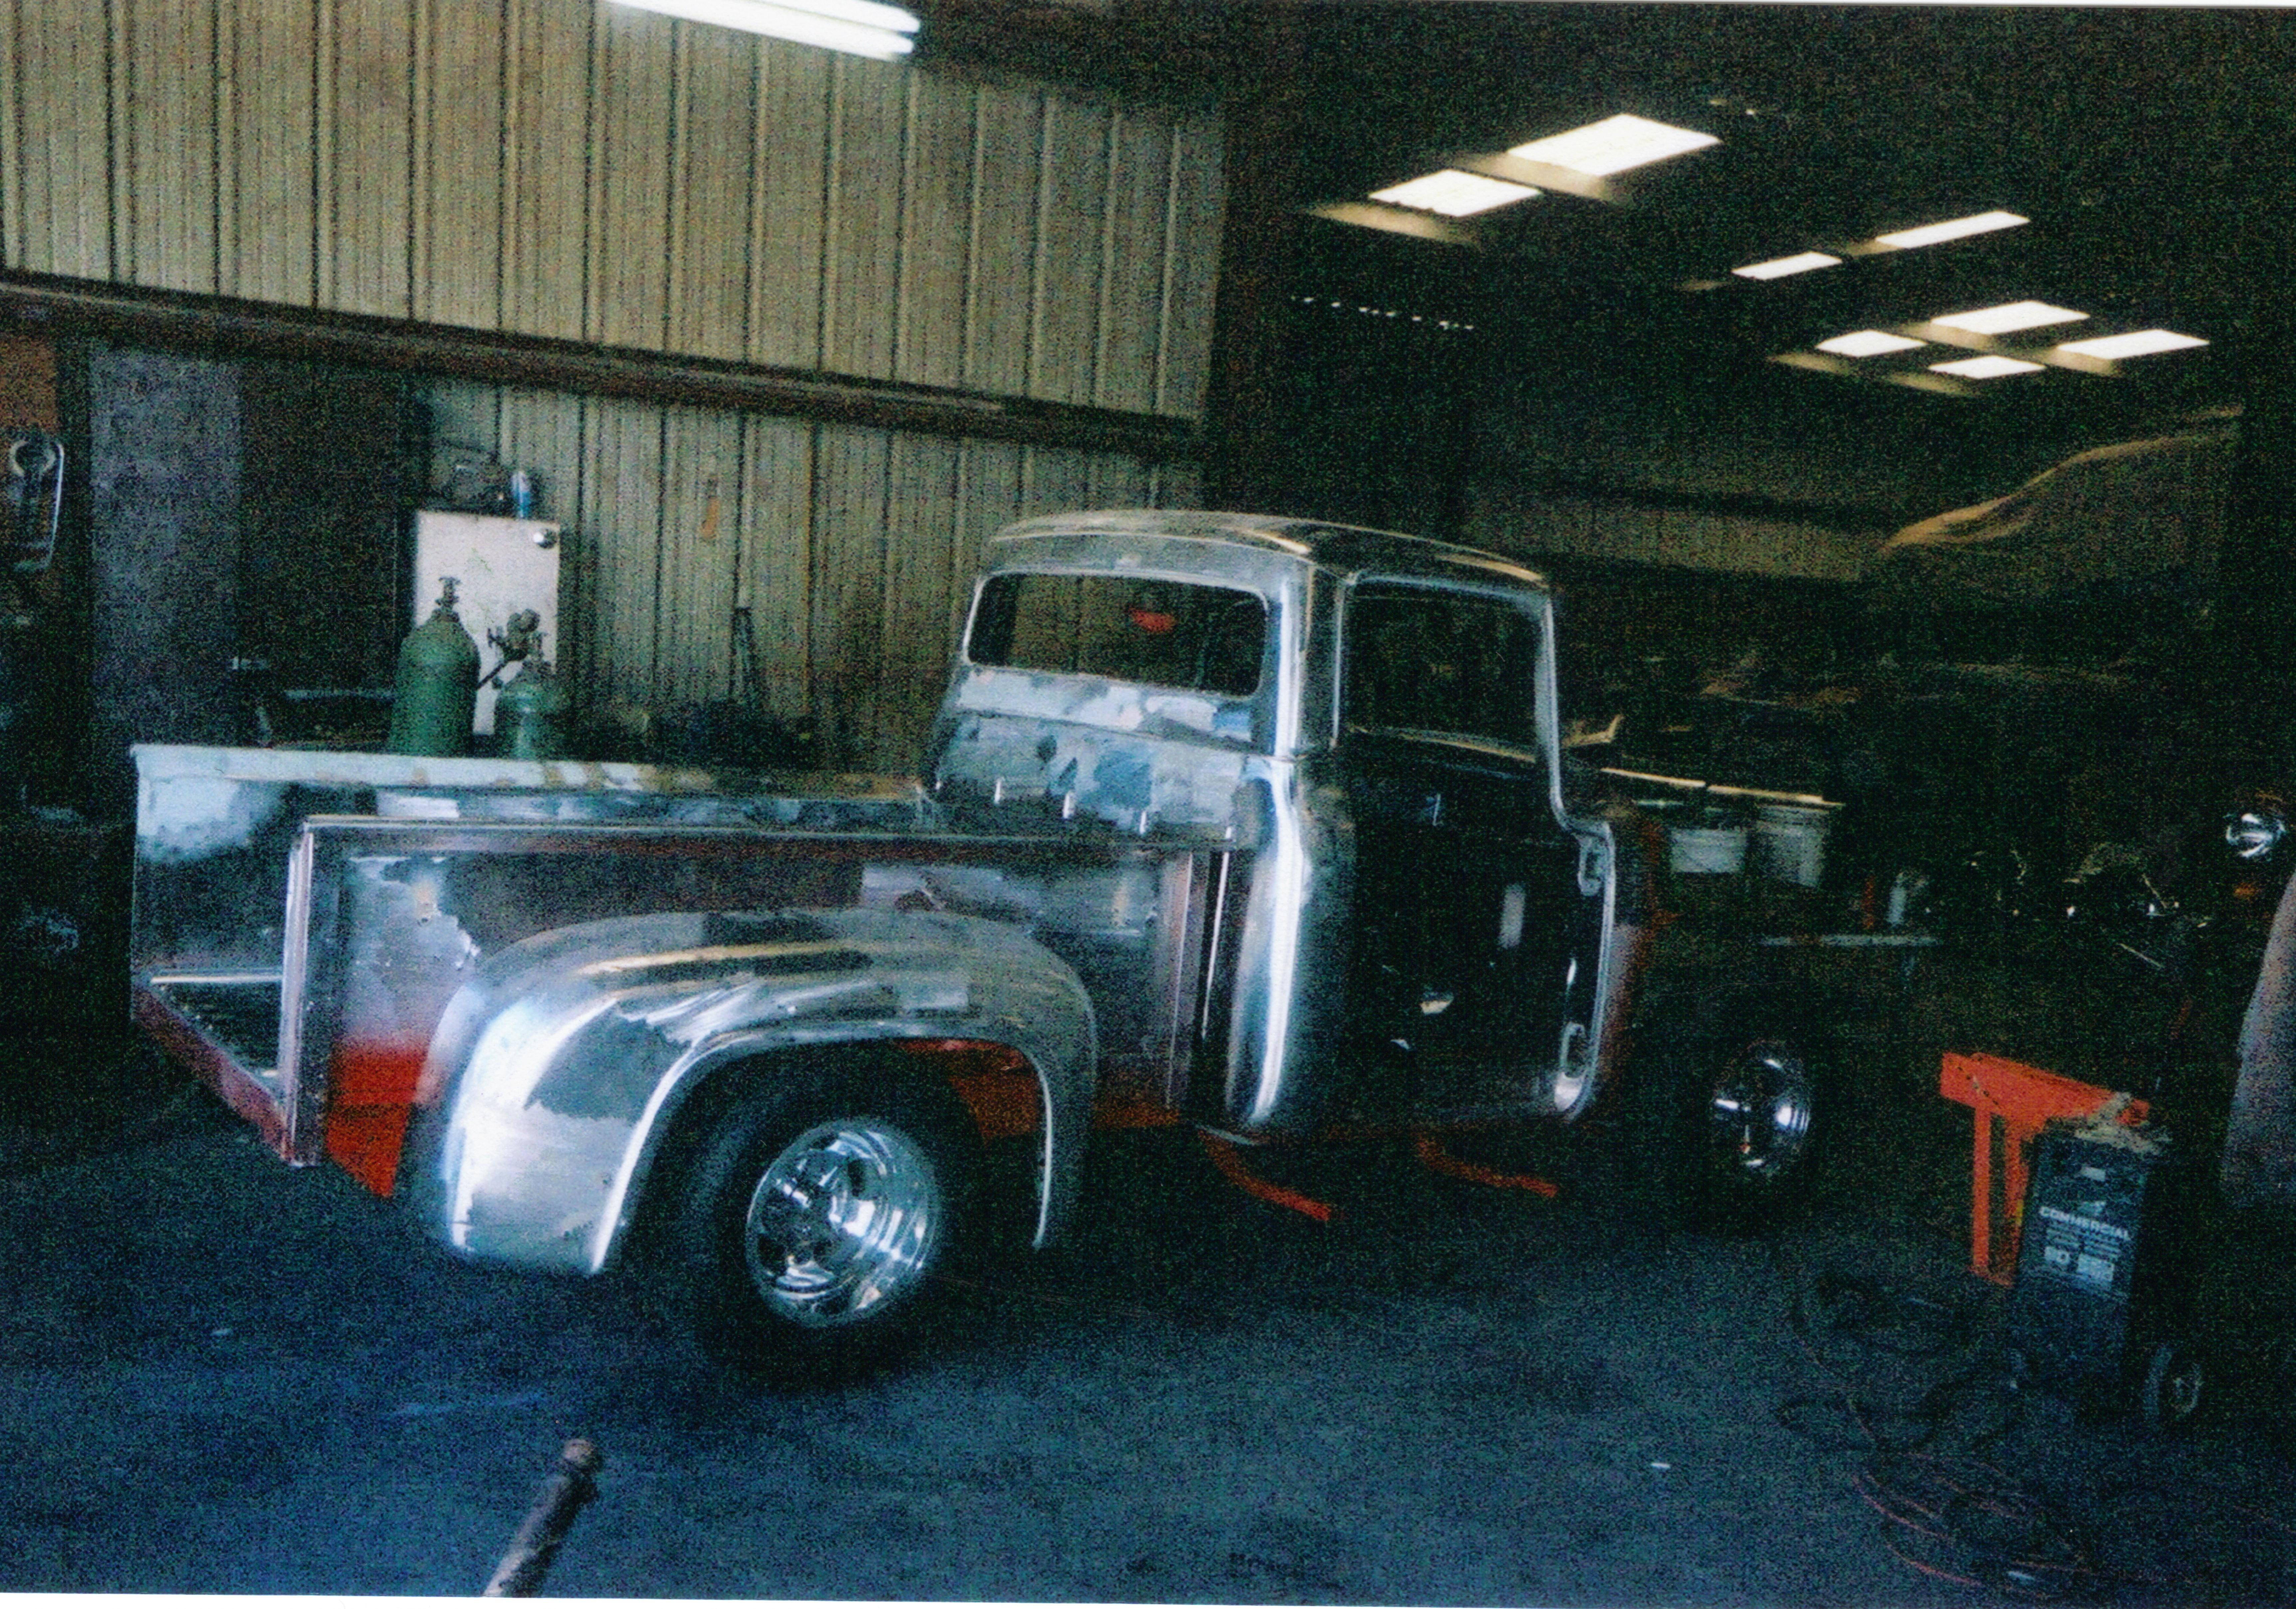
This was a somewhat risky setup because this guy, Russ, was a bit shady. The in laws however felt that this was a good option to get started and hopefully complete the truck. Don took the first truck pictured to Nevada to the shop that Russ worked at. He would spend a few weeks there and then come back home for a week or two and head back to help out with the work. He took most all of the parts that he had accumulated over the years down to NV to work on the truck. There was progress made, and some hurdles were discovered. They started tearing down the truck to get everything cleaned up and repaired.
Over the weeks and months things did move along. I will work to get more info and photos of early progress tomorrow.
Thanks for viewing and more to come.
This is one of the first trucks he bought since I have known him.
This is a truck that he had when I met my wife. It was behind the fence you can see through the windows on the rear photo of the previous truck.
Between the two of these the truck we have is moving along. My in laws have followed us from California. My Father In Law, Don, has moved all of the stuff he has from CA to ID, along with the two trucks. After a few years he finally decided to take the truck to a guy that used to be married to his niece that built vehicles for himself and others.
This was a somewhat risky setup because this guy, Russ, was a bit shady. The in laws however felt that this was a good option to get started and hopefully complete the truck. Don took the first truck pictured to Nevada to the shop that Russ worked at. He would spend a few weeks there and then come back home for a week or two and head back to help out with the work. He took most all of the parts that he had accumulated over the years down to NV to work on the truck. There was progress made, and some hurdles were discovered. They started tearing down the truck to get everything cleaned up and repaired.
Over the weeks and months things did move along. I will work to get more info and photos of early progress tomorrow.
Thanks for viewing and more to come.
Last edited by TrussGod; 11-24-2016 at 01:07 PM. Reason: Removed an inaccurate detail.
#2
11-18-2016, 03:05 PM
Join Date: Aug 2009
Location: Idaho Falls, Idaho
Posts: 76
Likes: 0
Received 0 Likes
on
0 Posts
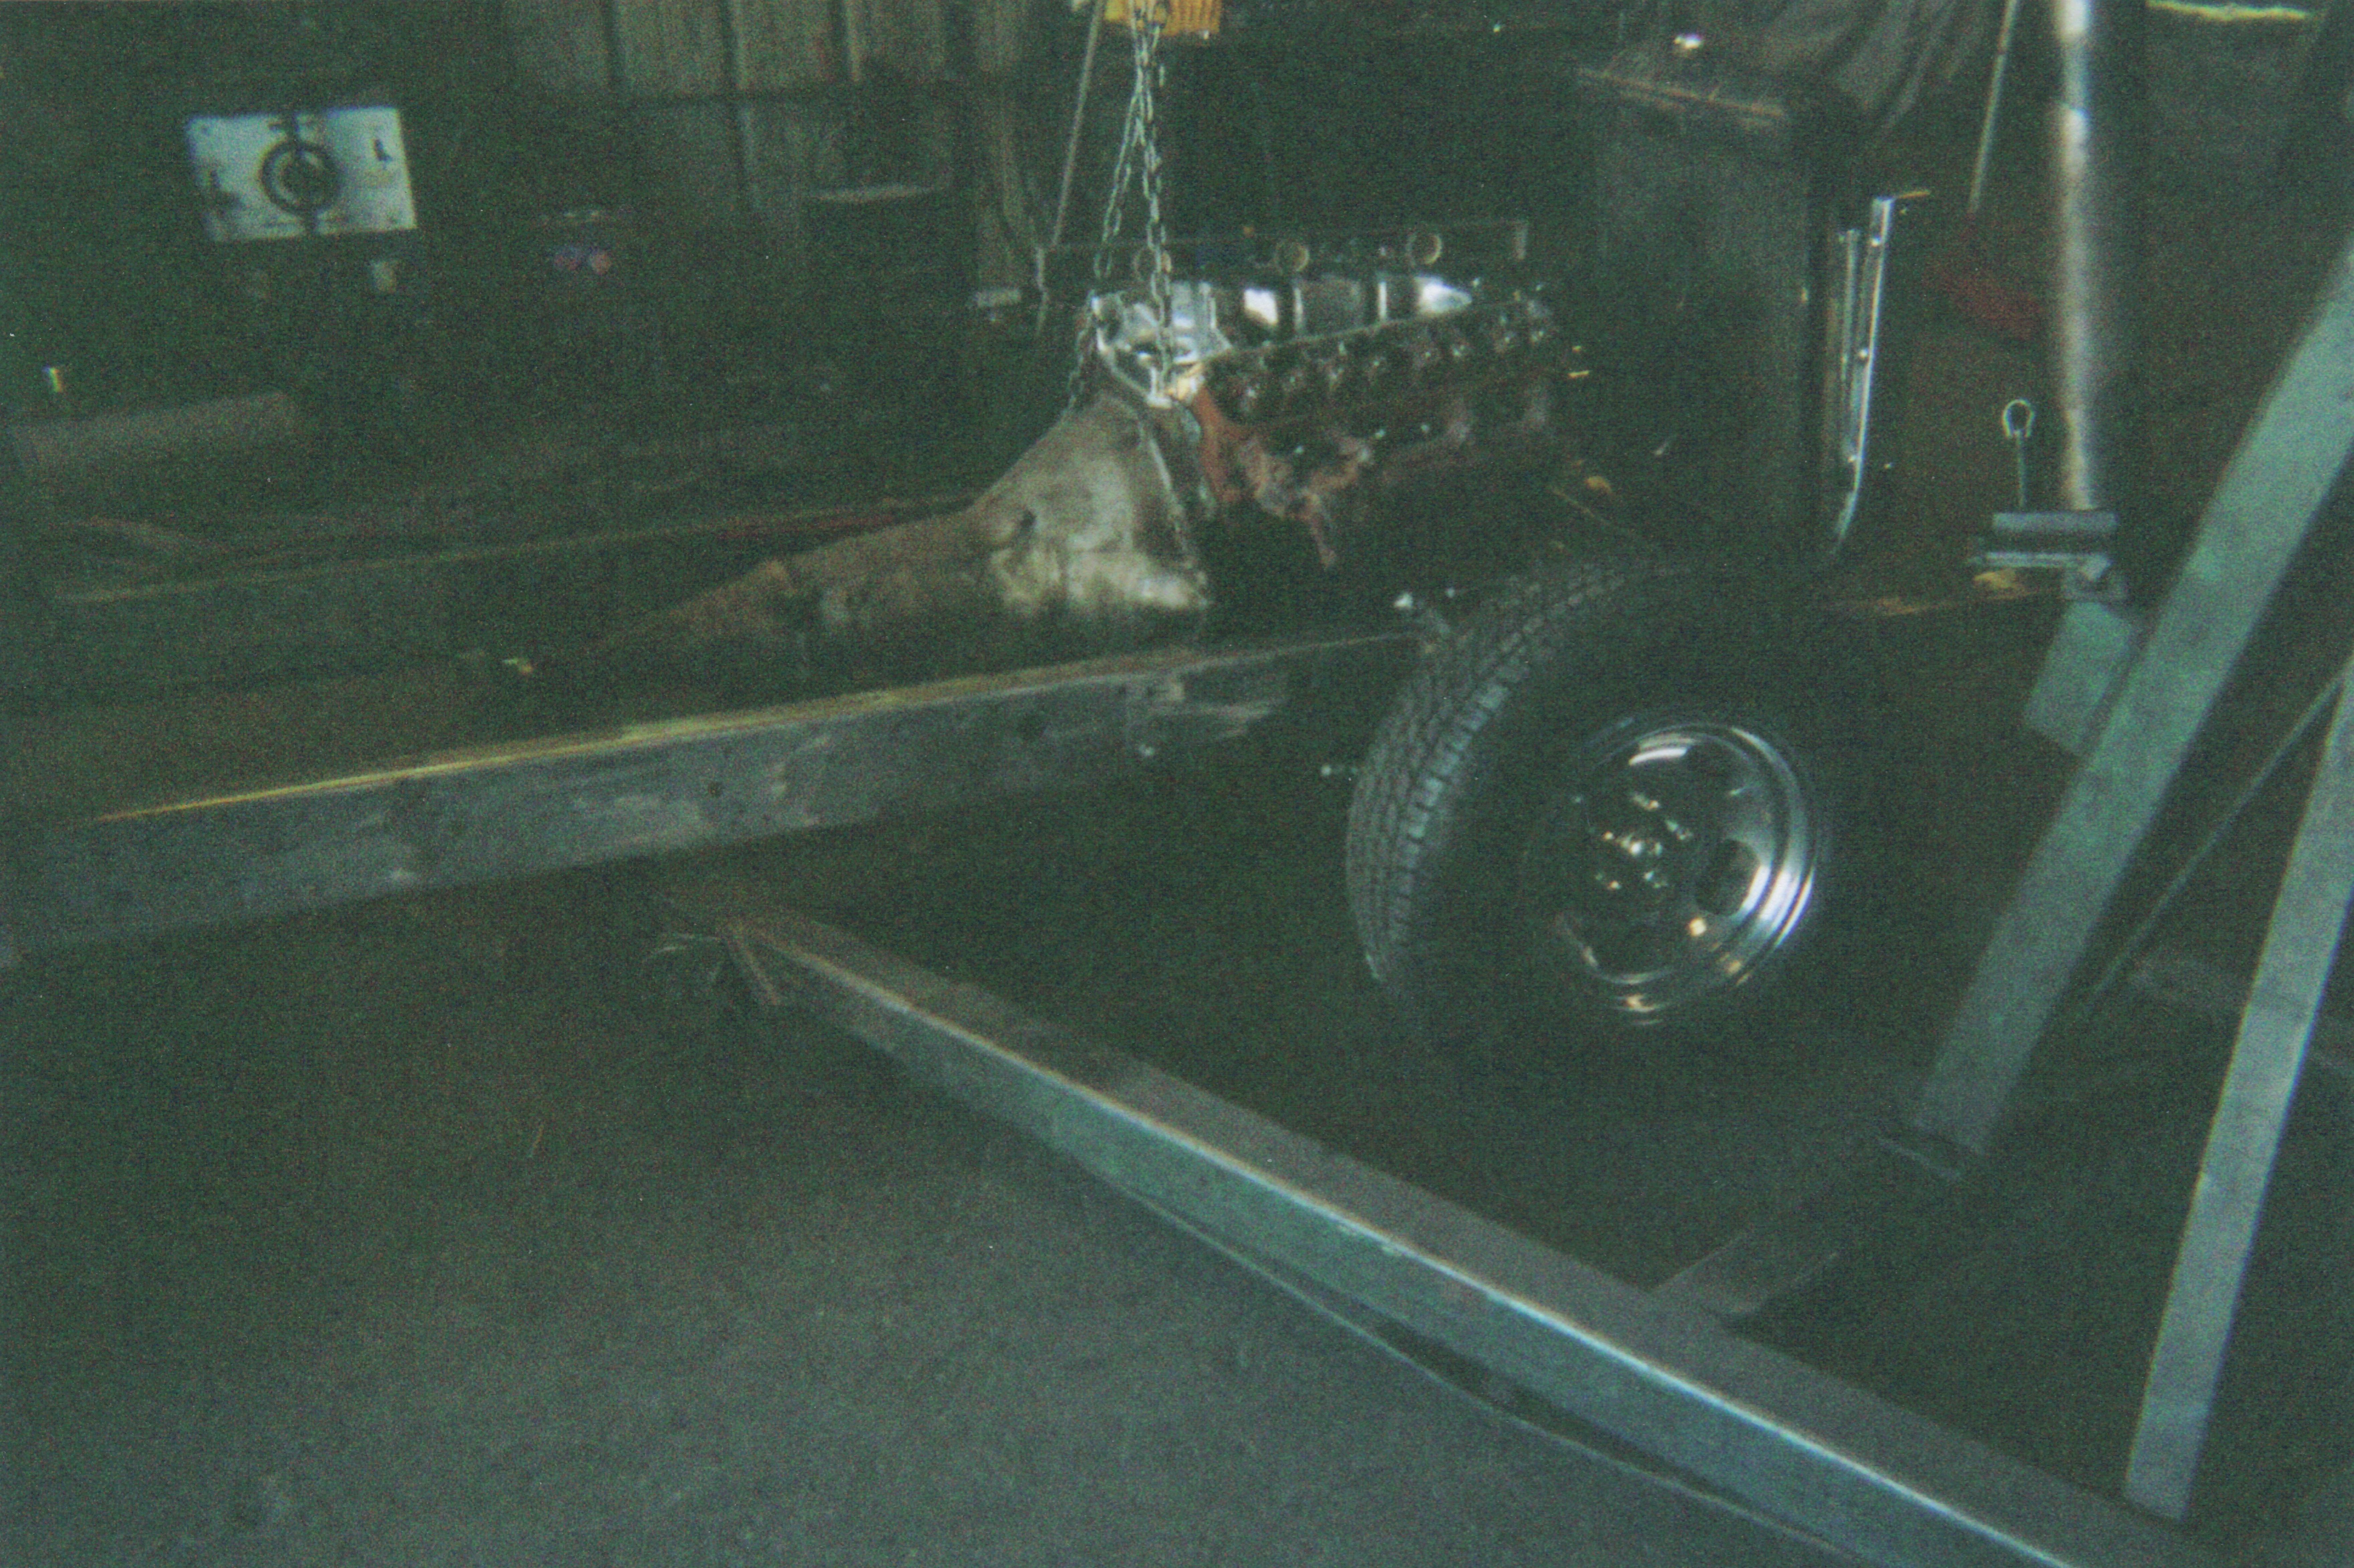
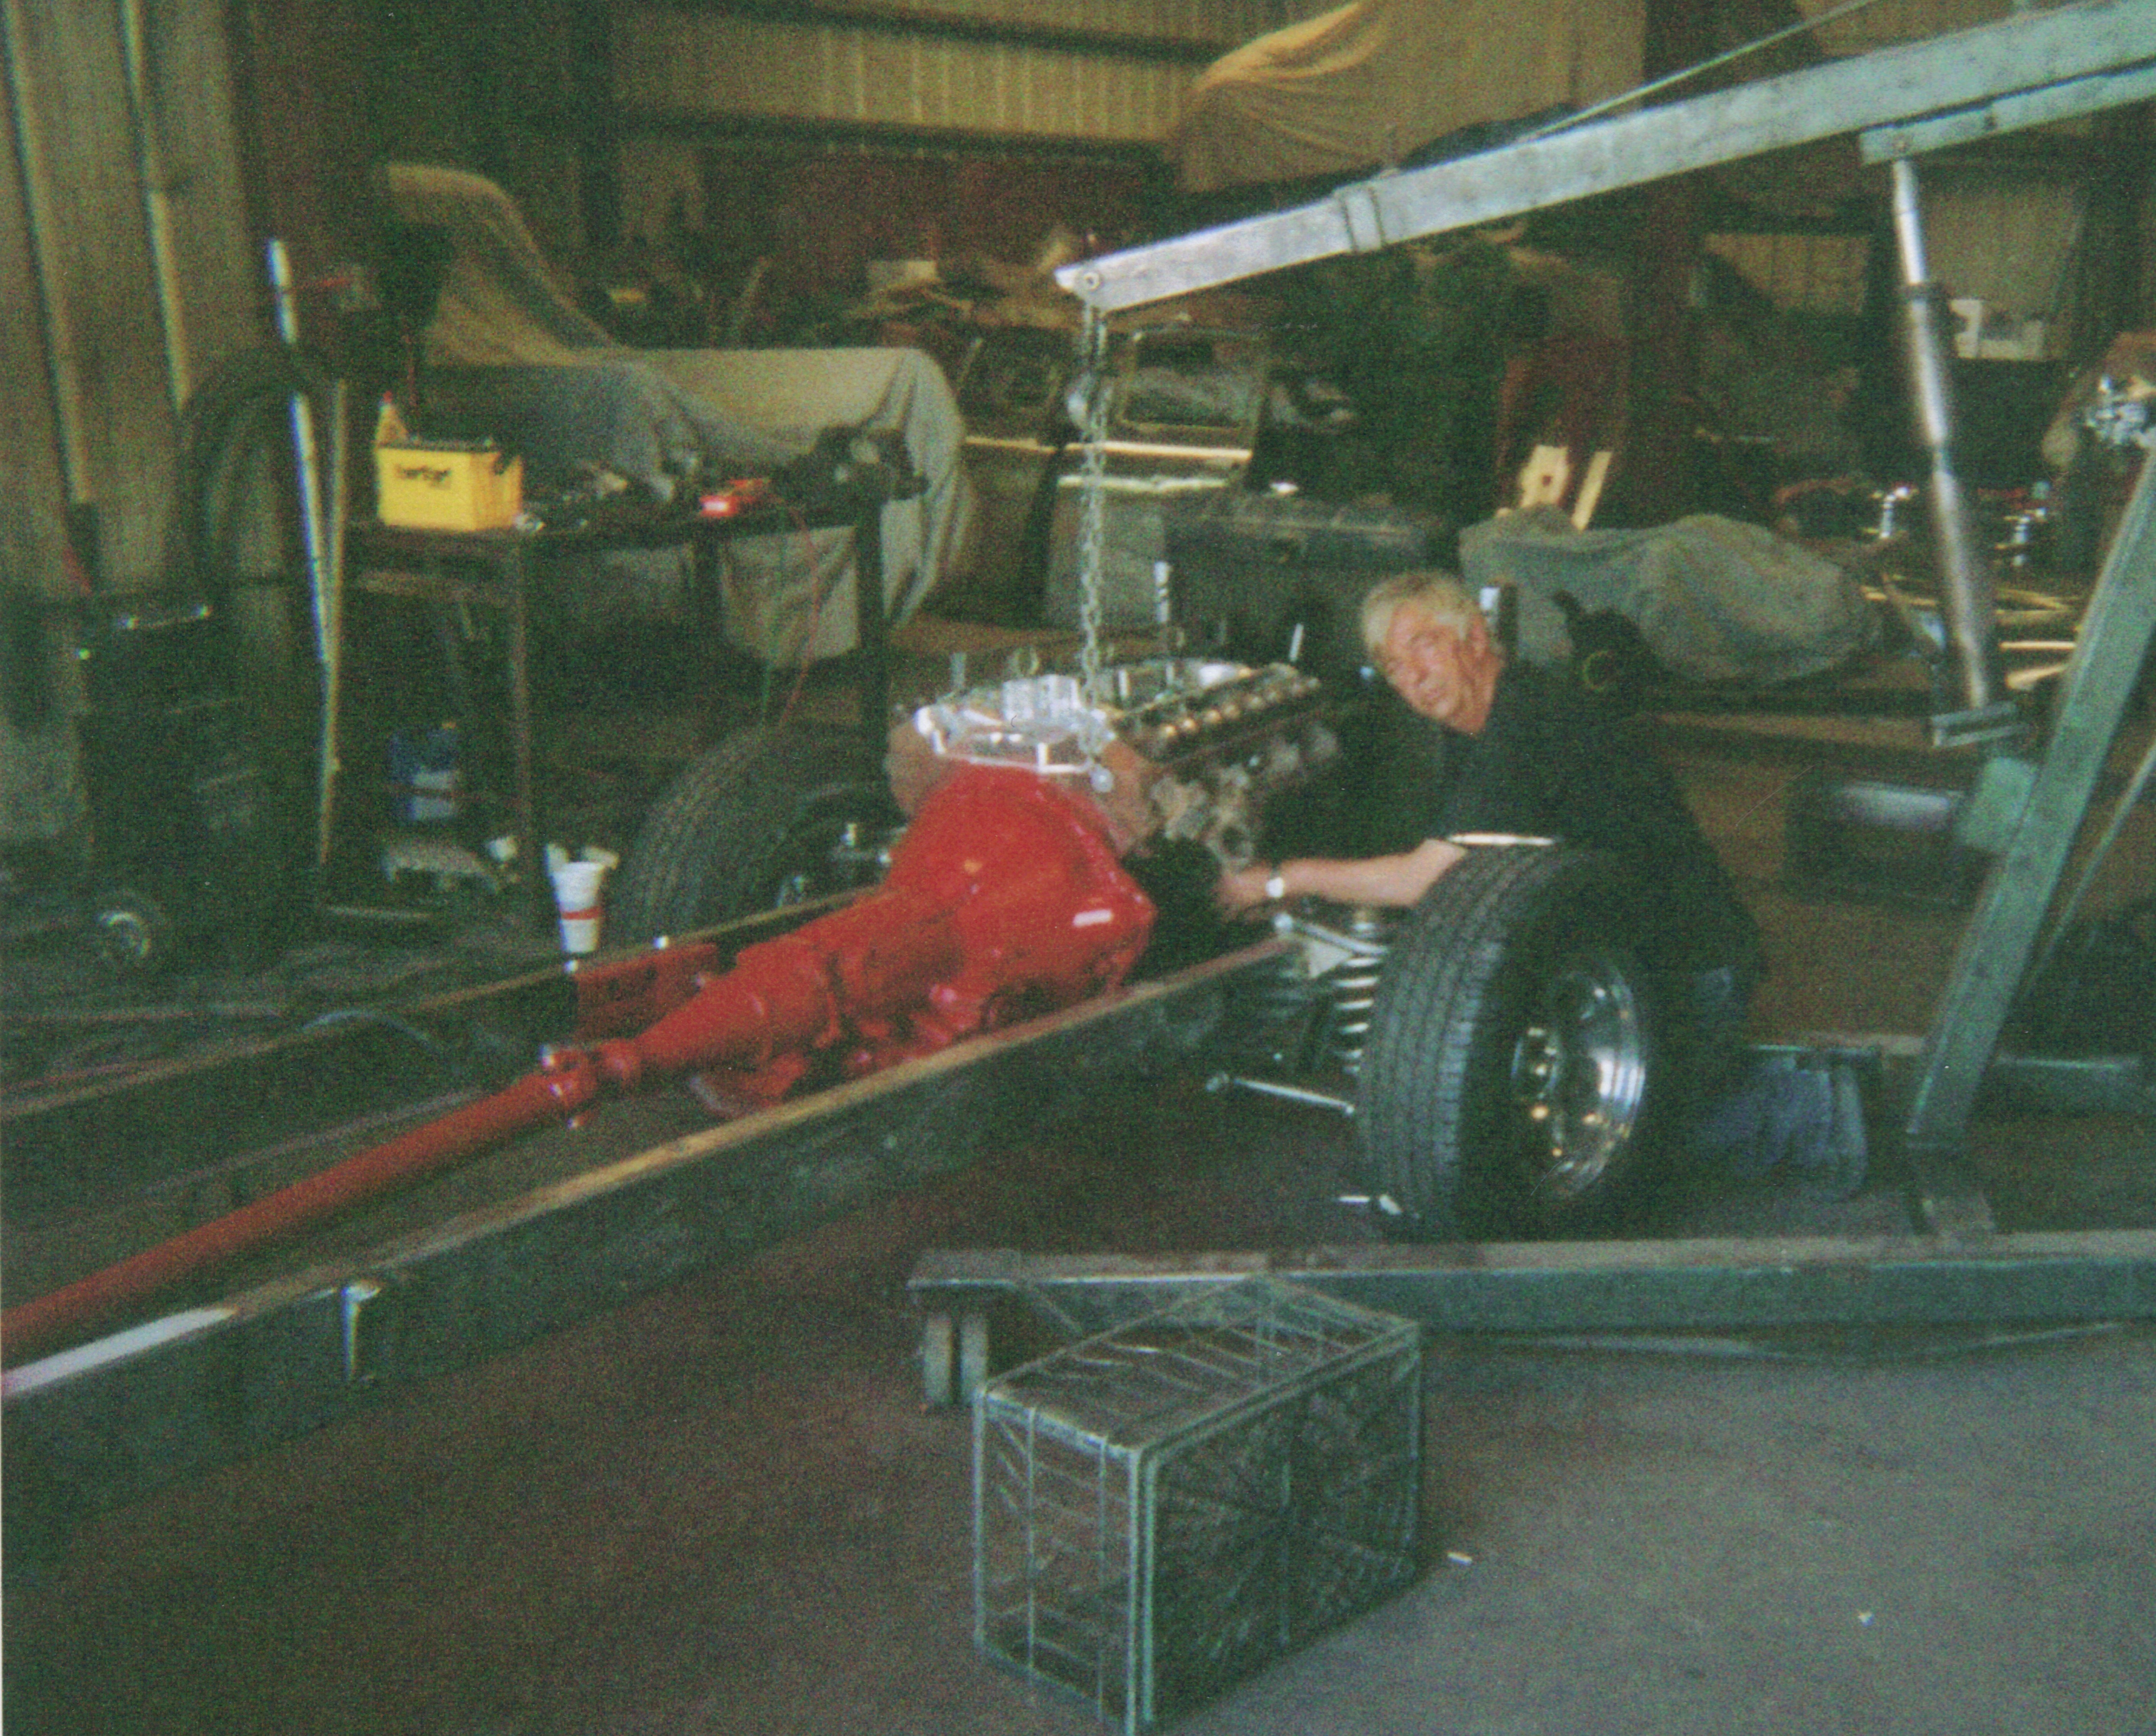
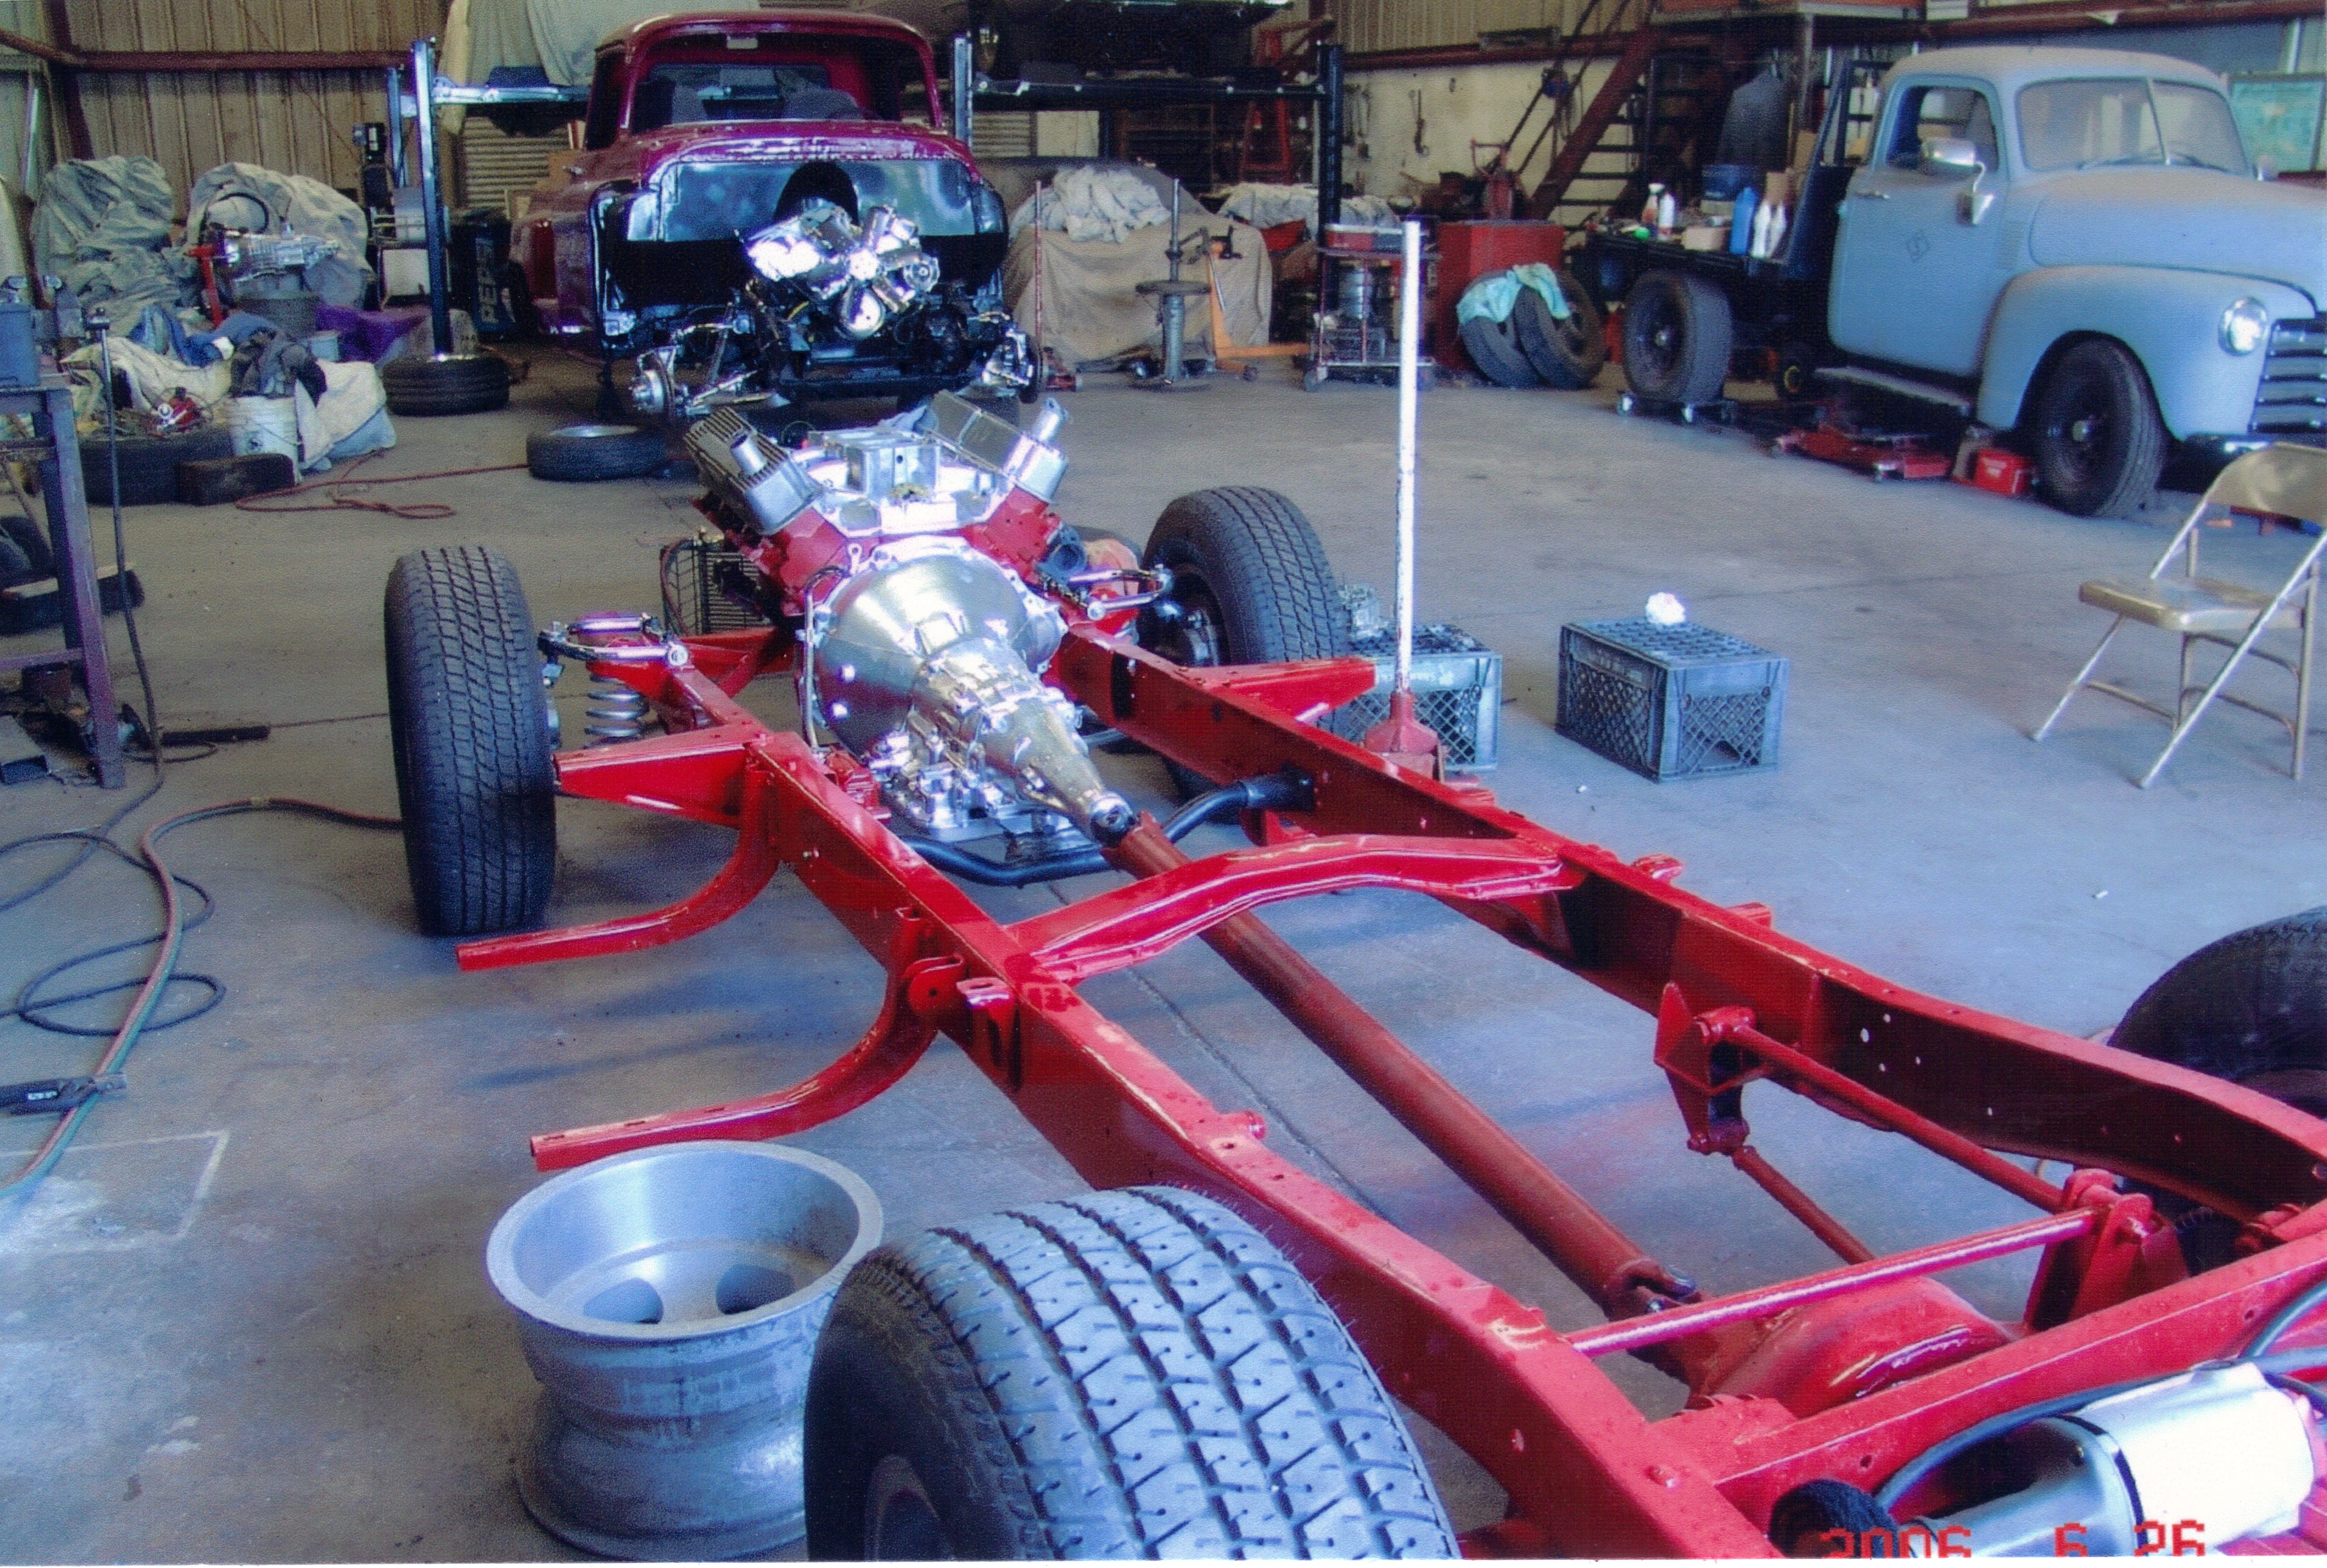
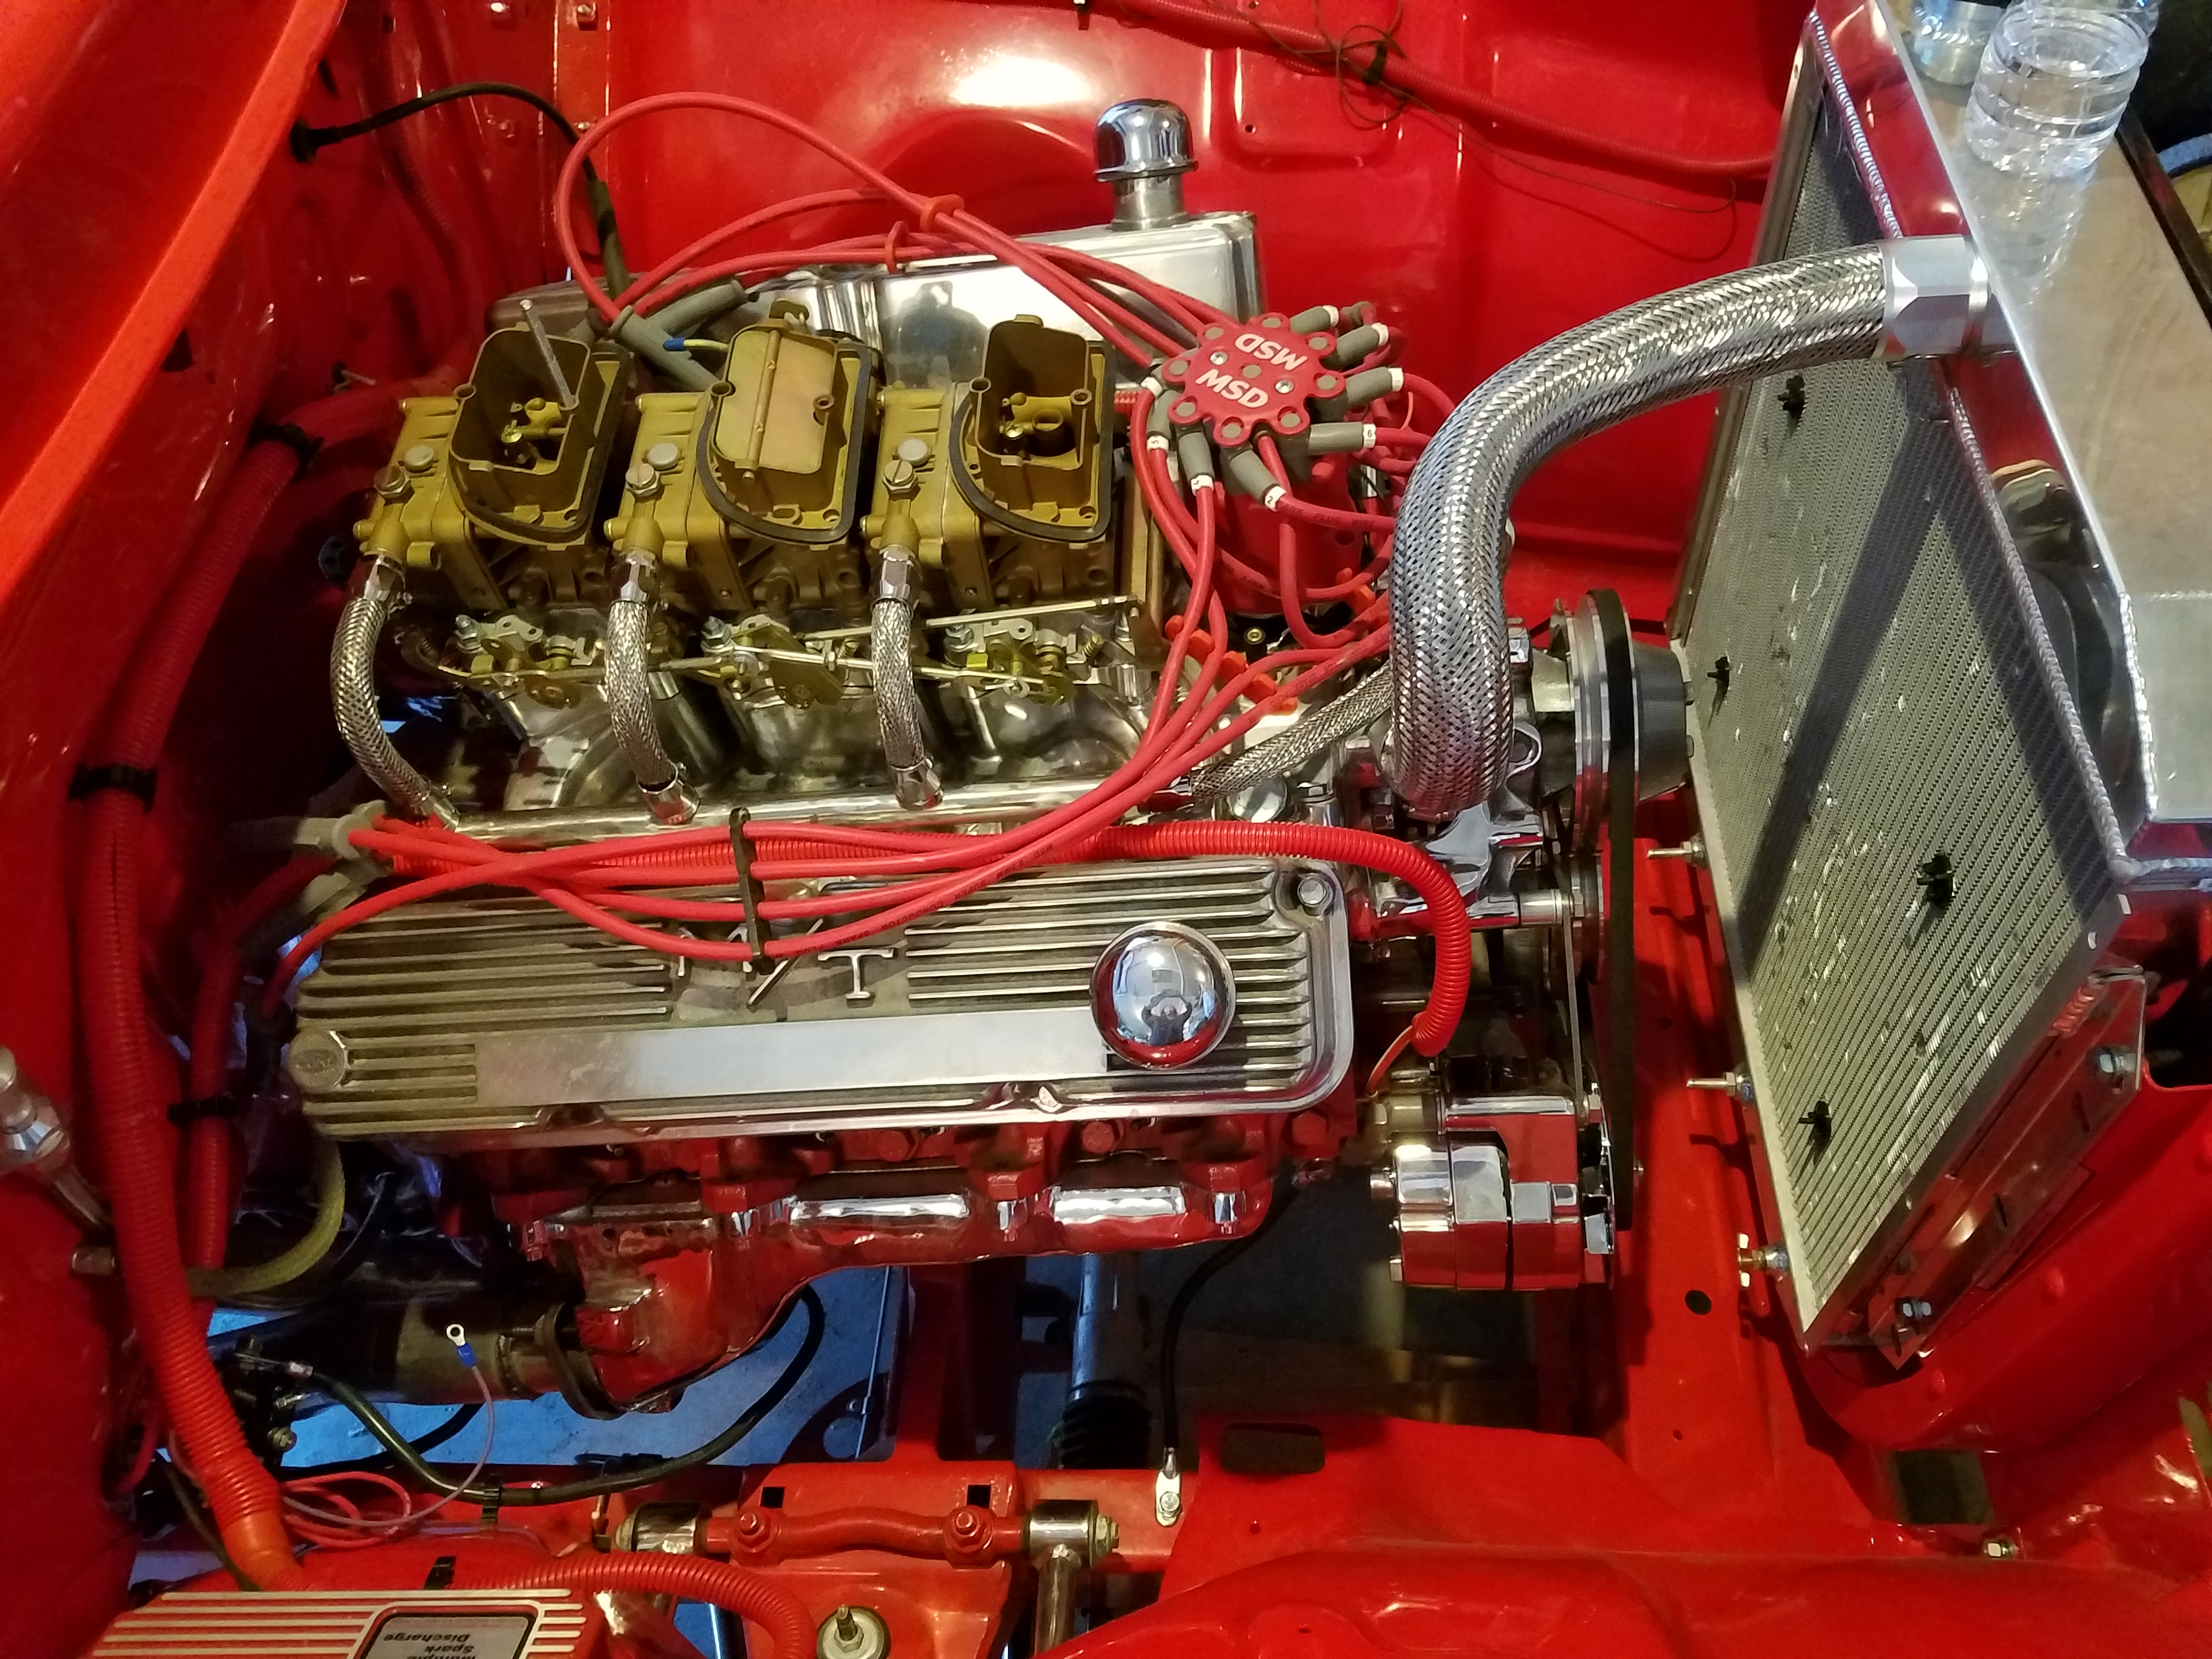
As things moved forward the motor was rebuilt and assembled. It is a 63 406 tri-power motor that is the same size motor that was in a 62 Galaxie 500 that Don had bought new.

He always liked the power that the motor had in the car, and he knew that if he could find one he would put it in the pickup. He ran across a guy that had the motor for sale, not really knowing what he had, and bought it for a really good deal.
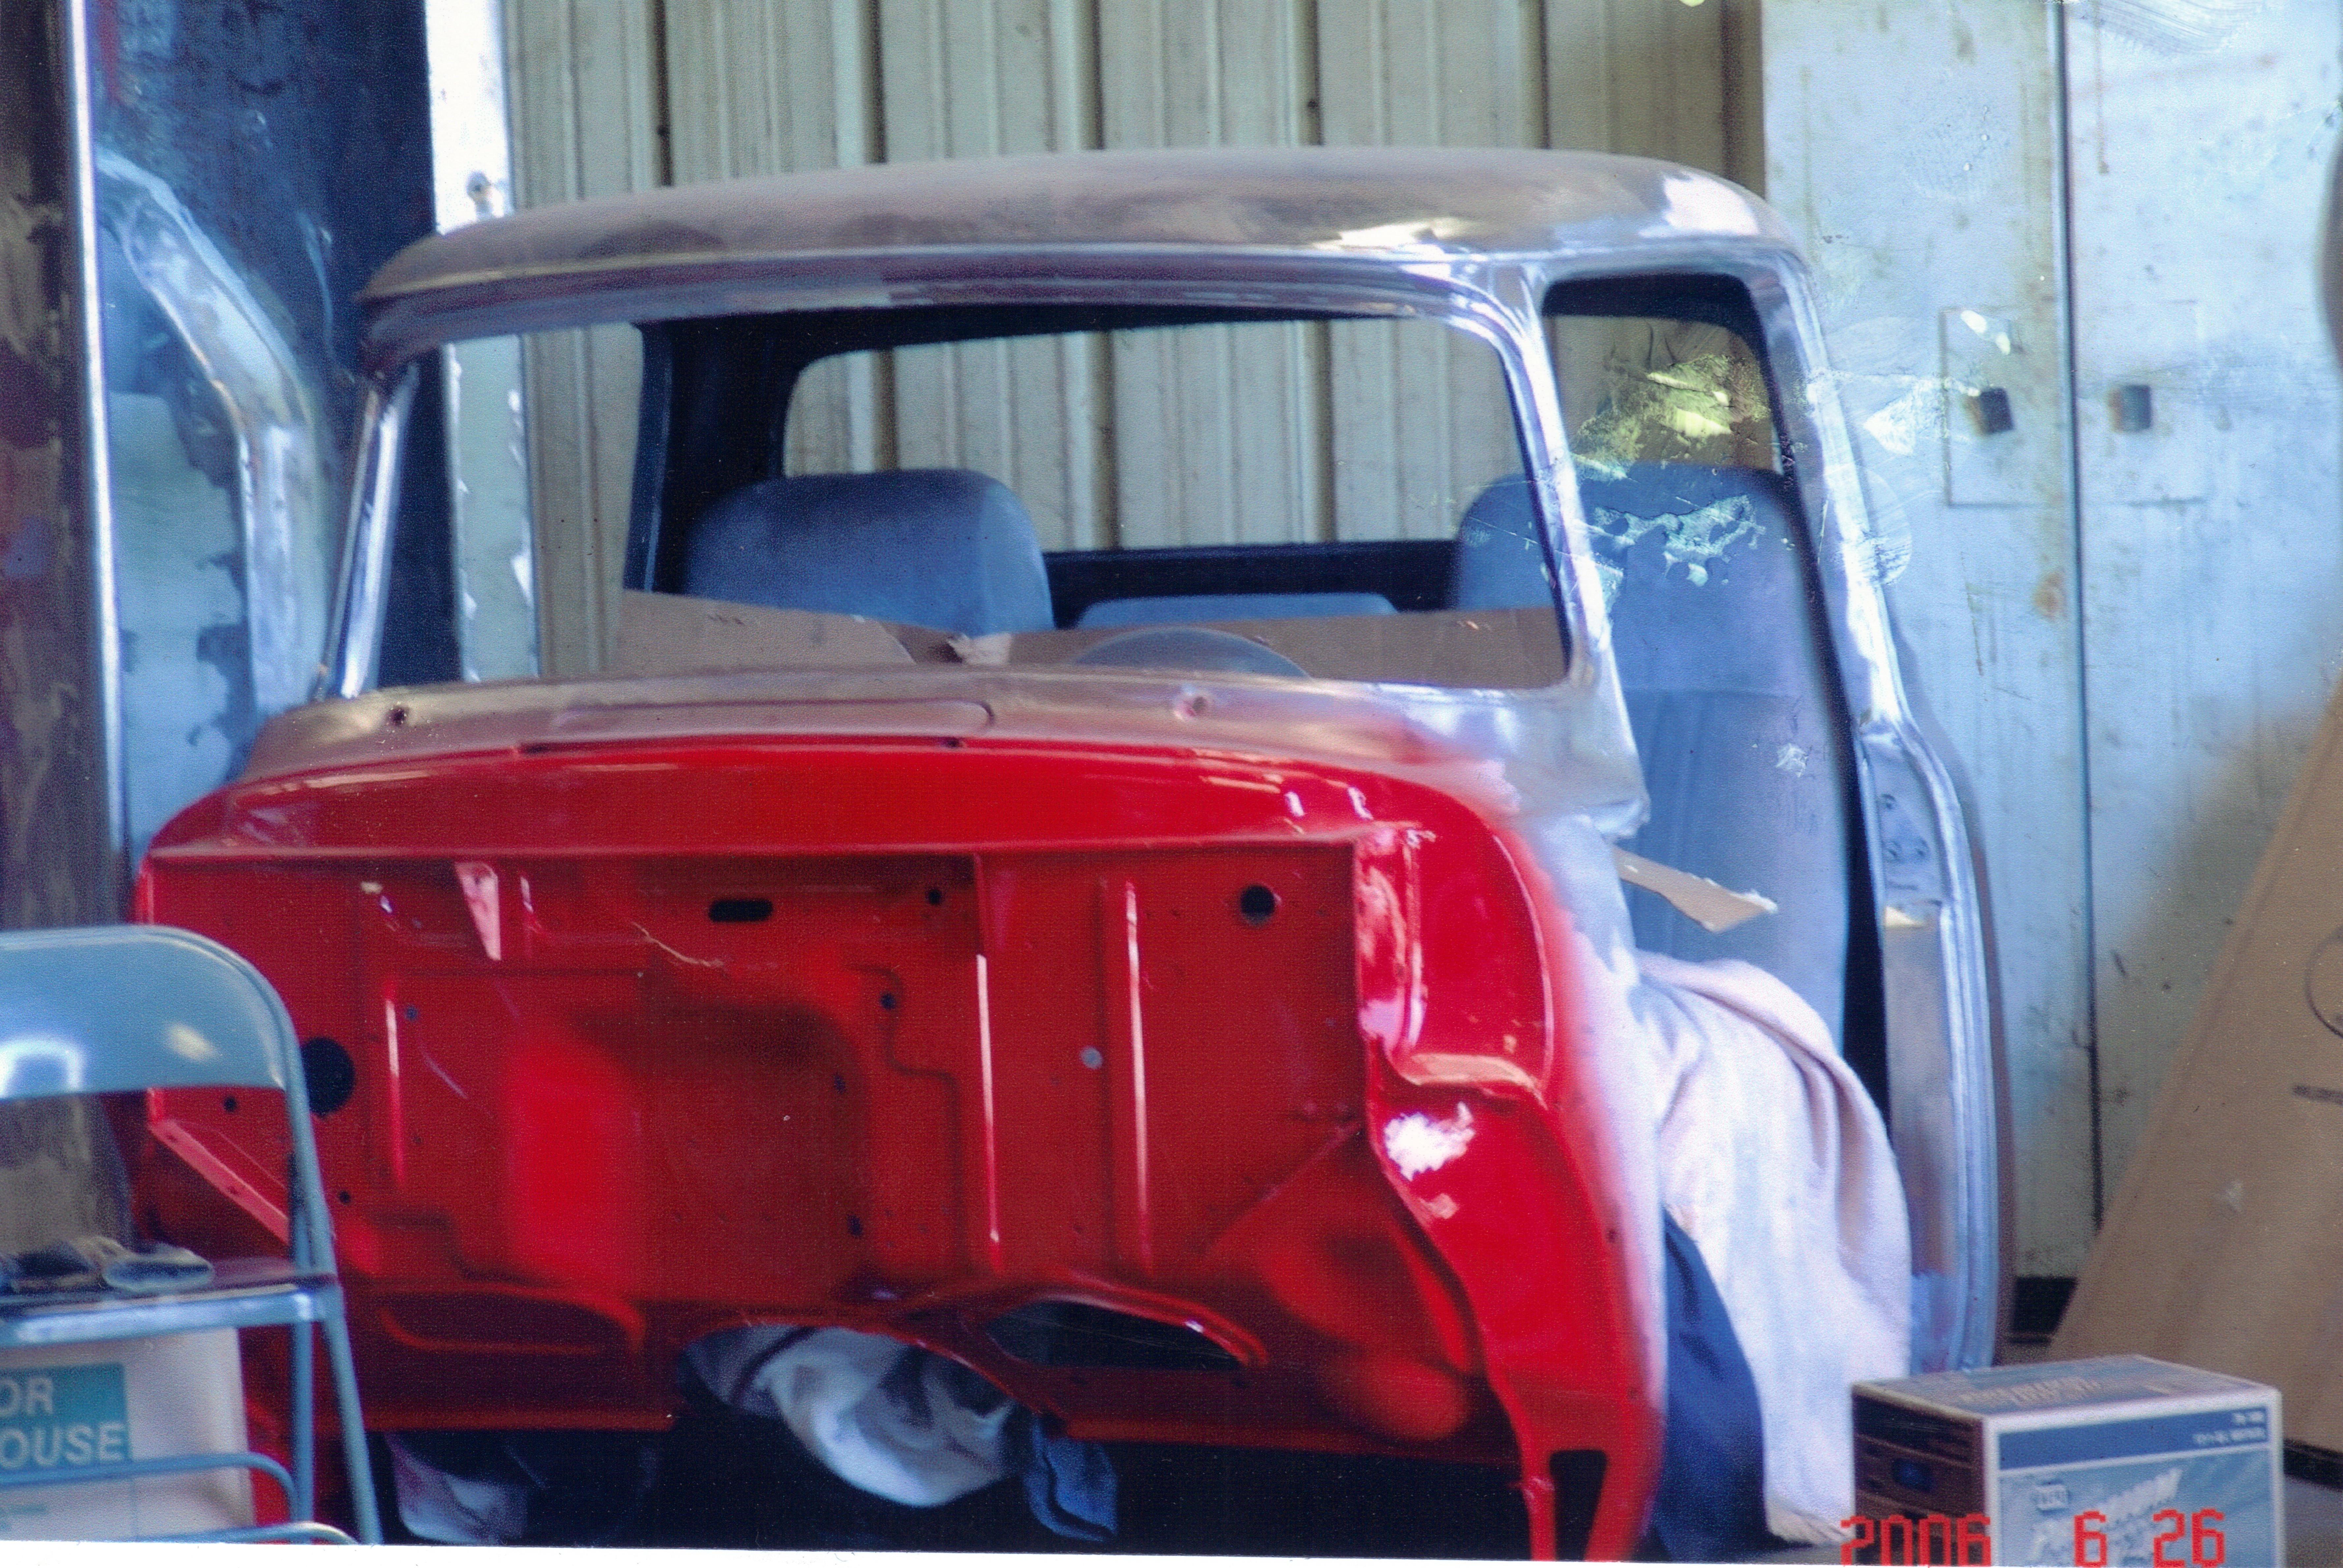
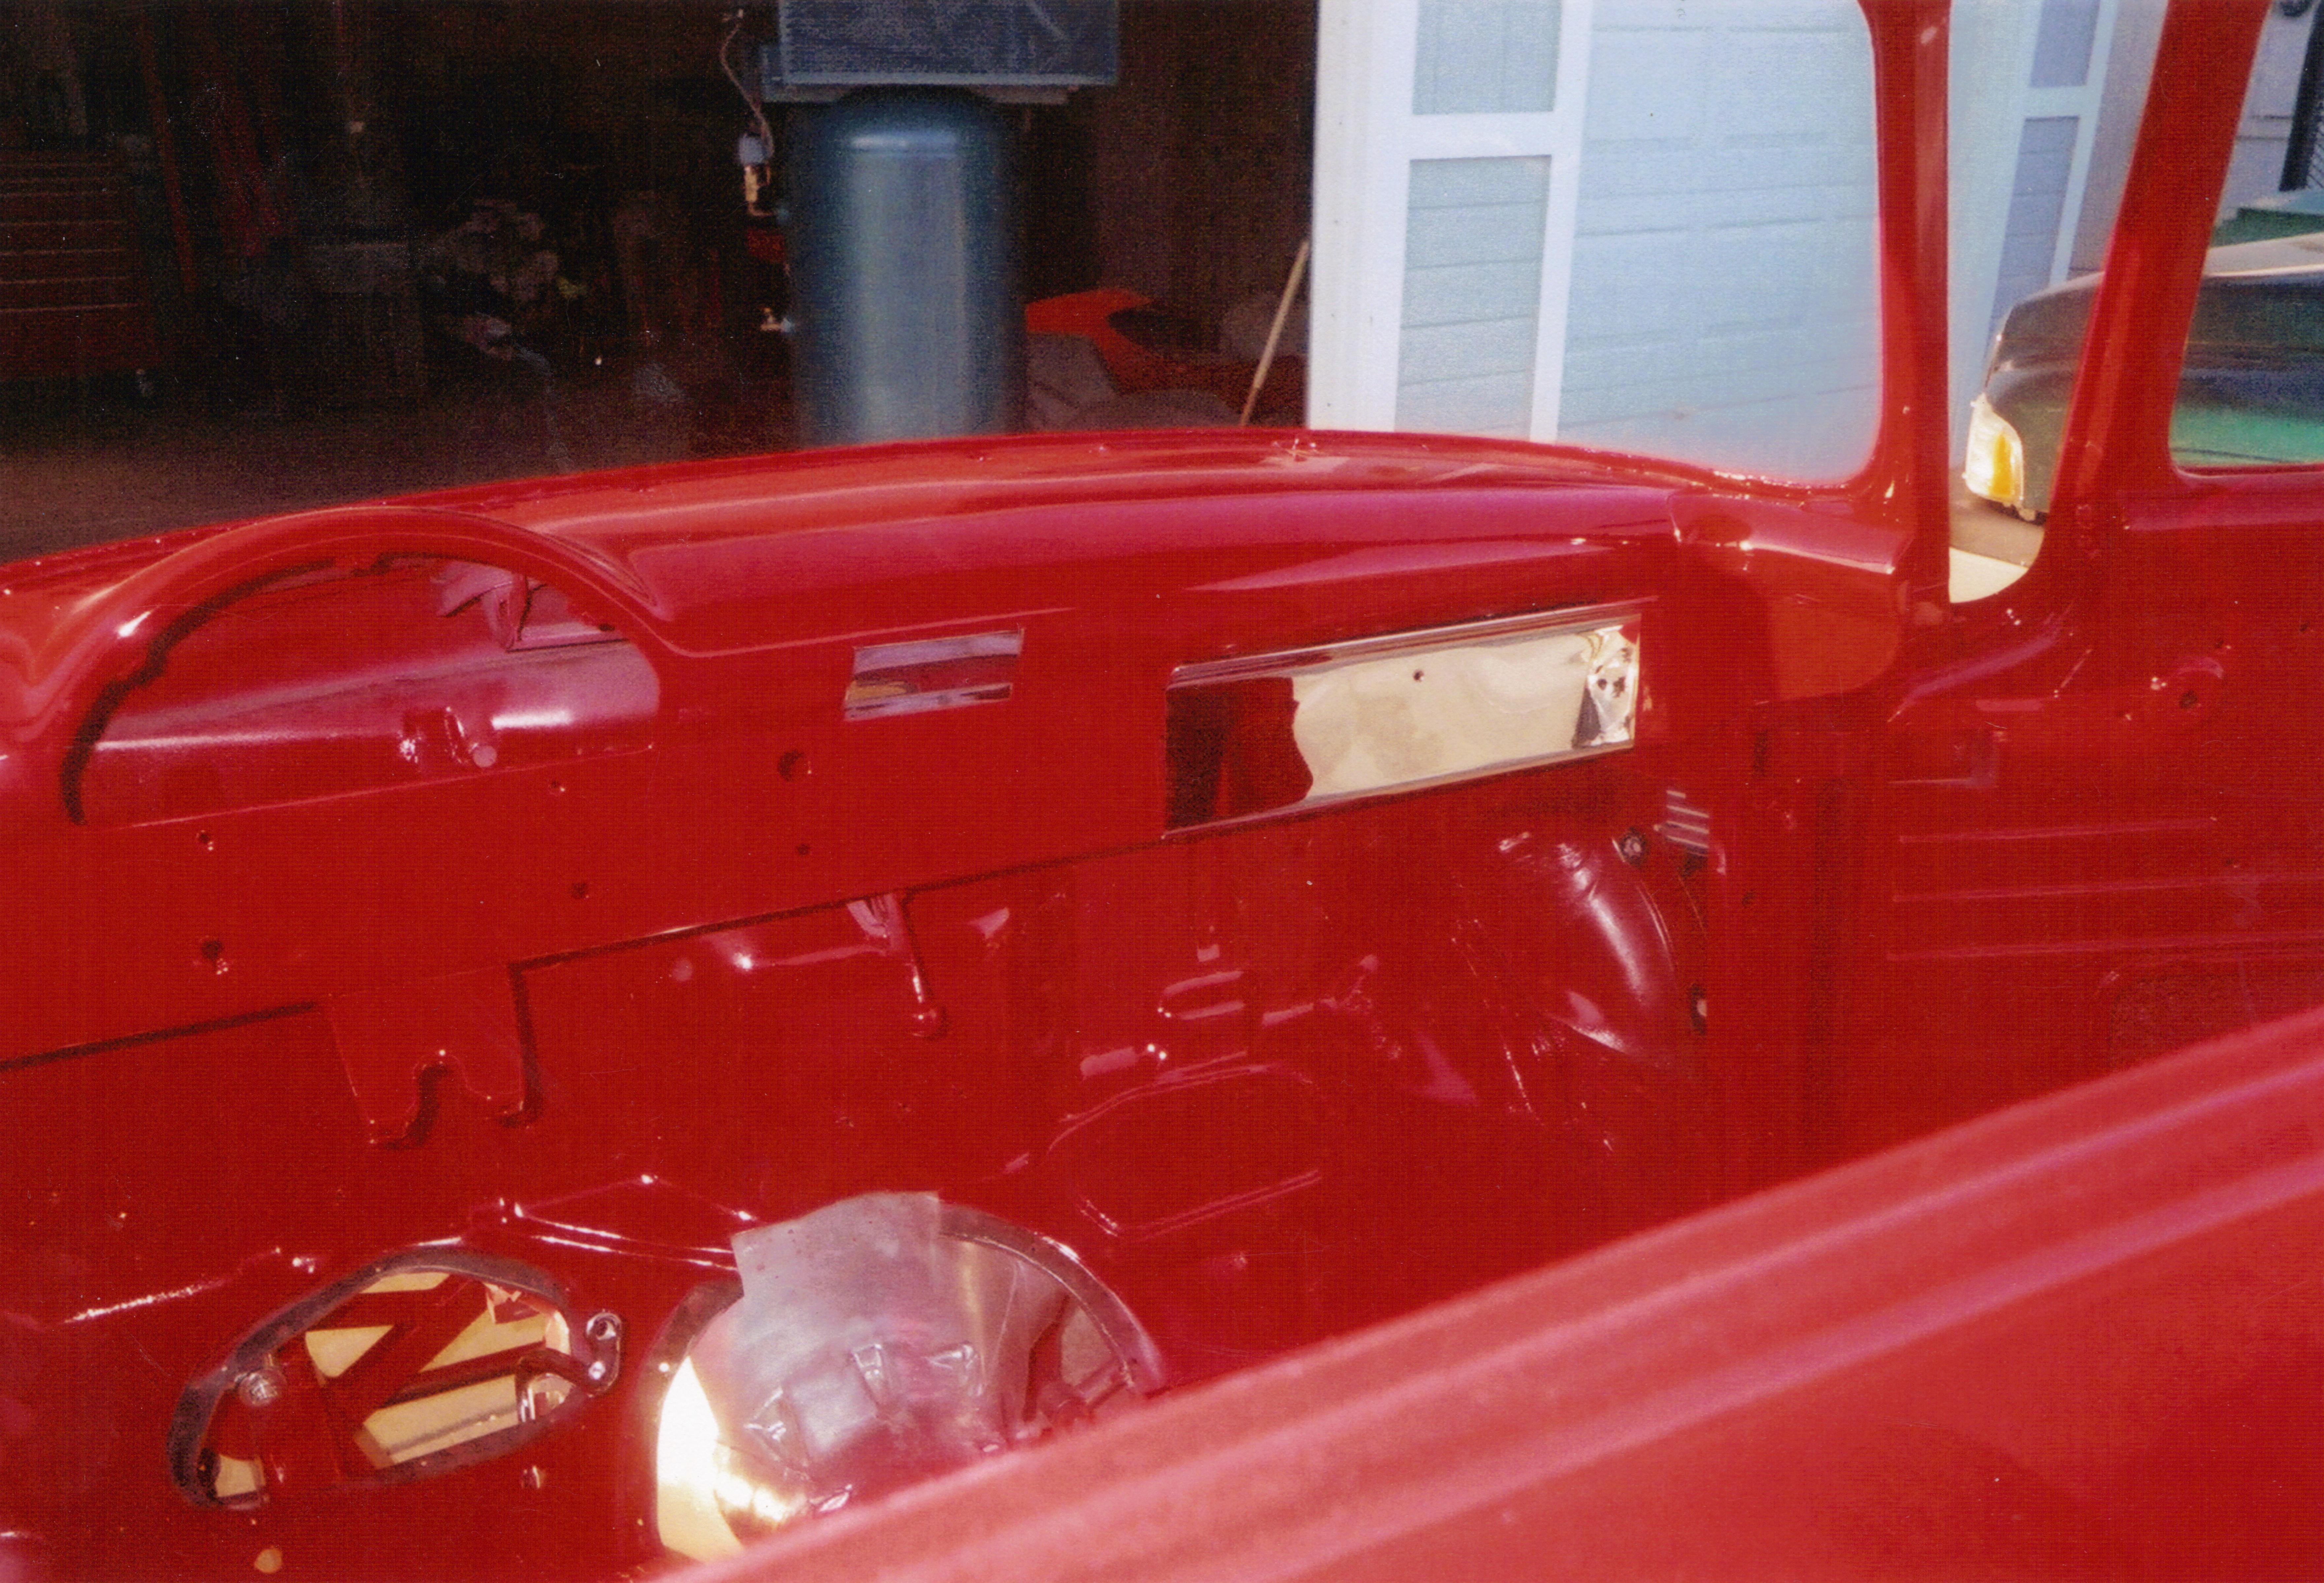
The truck was dismantled and cleaned up, cab, bed, fenders all were sanded and prepped for finish. The bottom of the cab was painted once prepped.
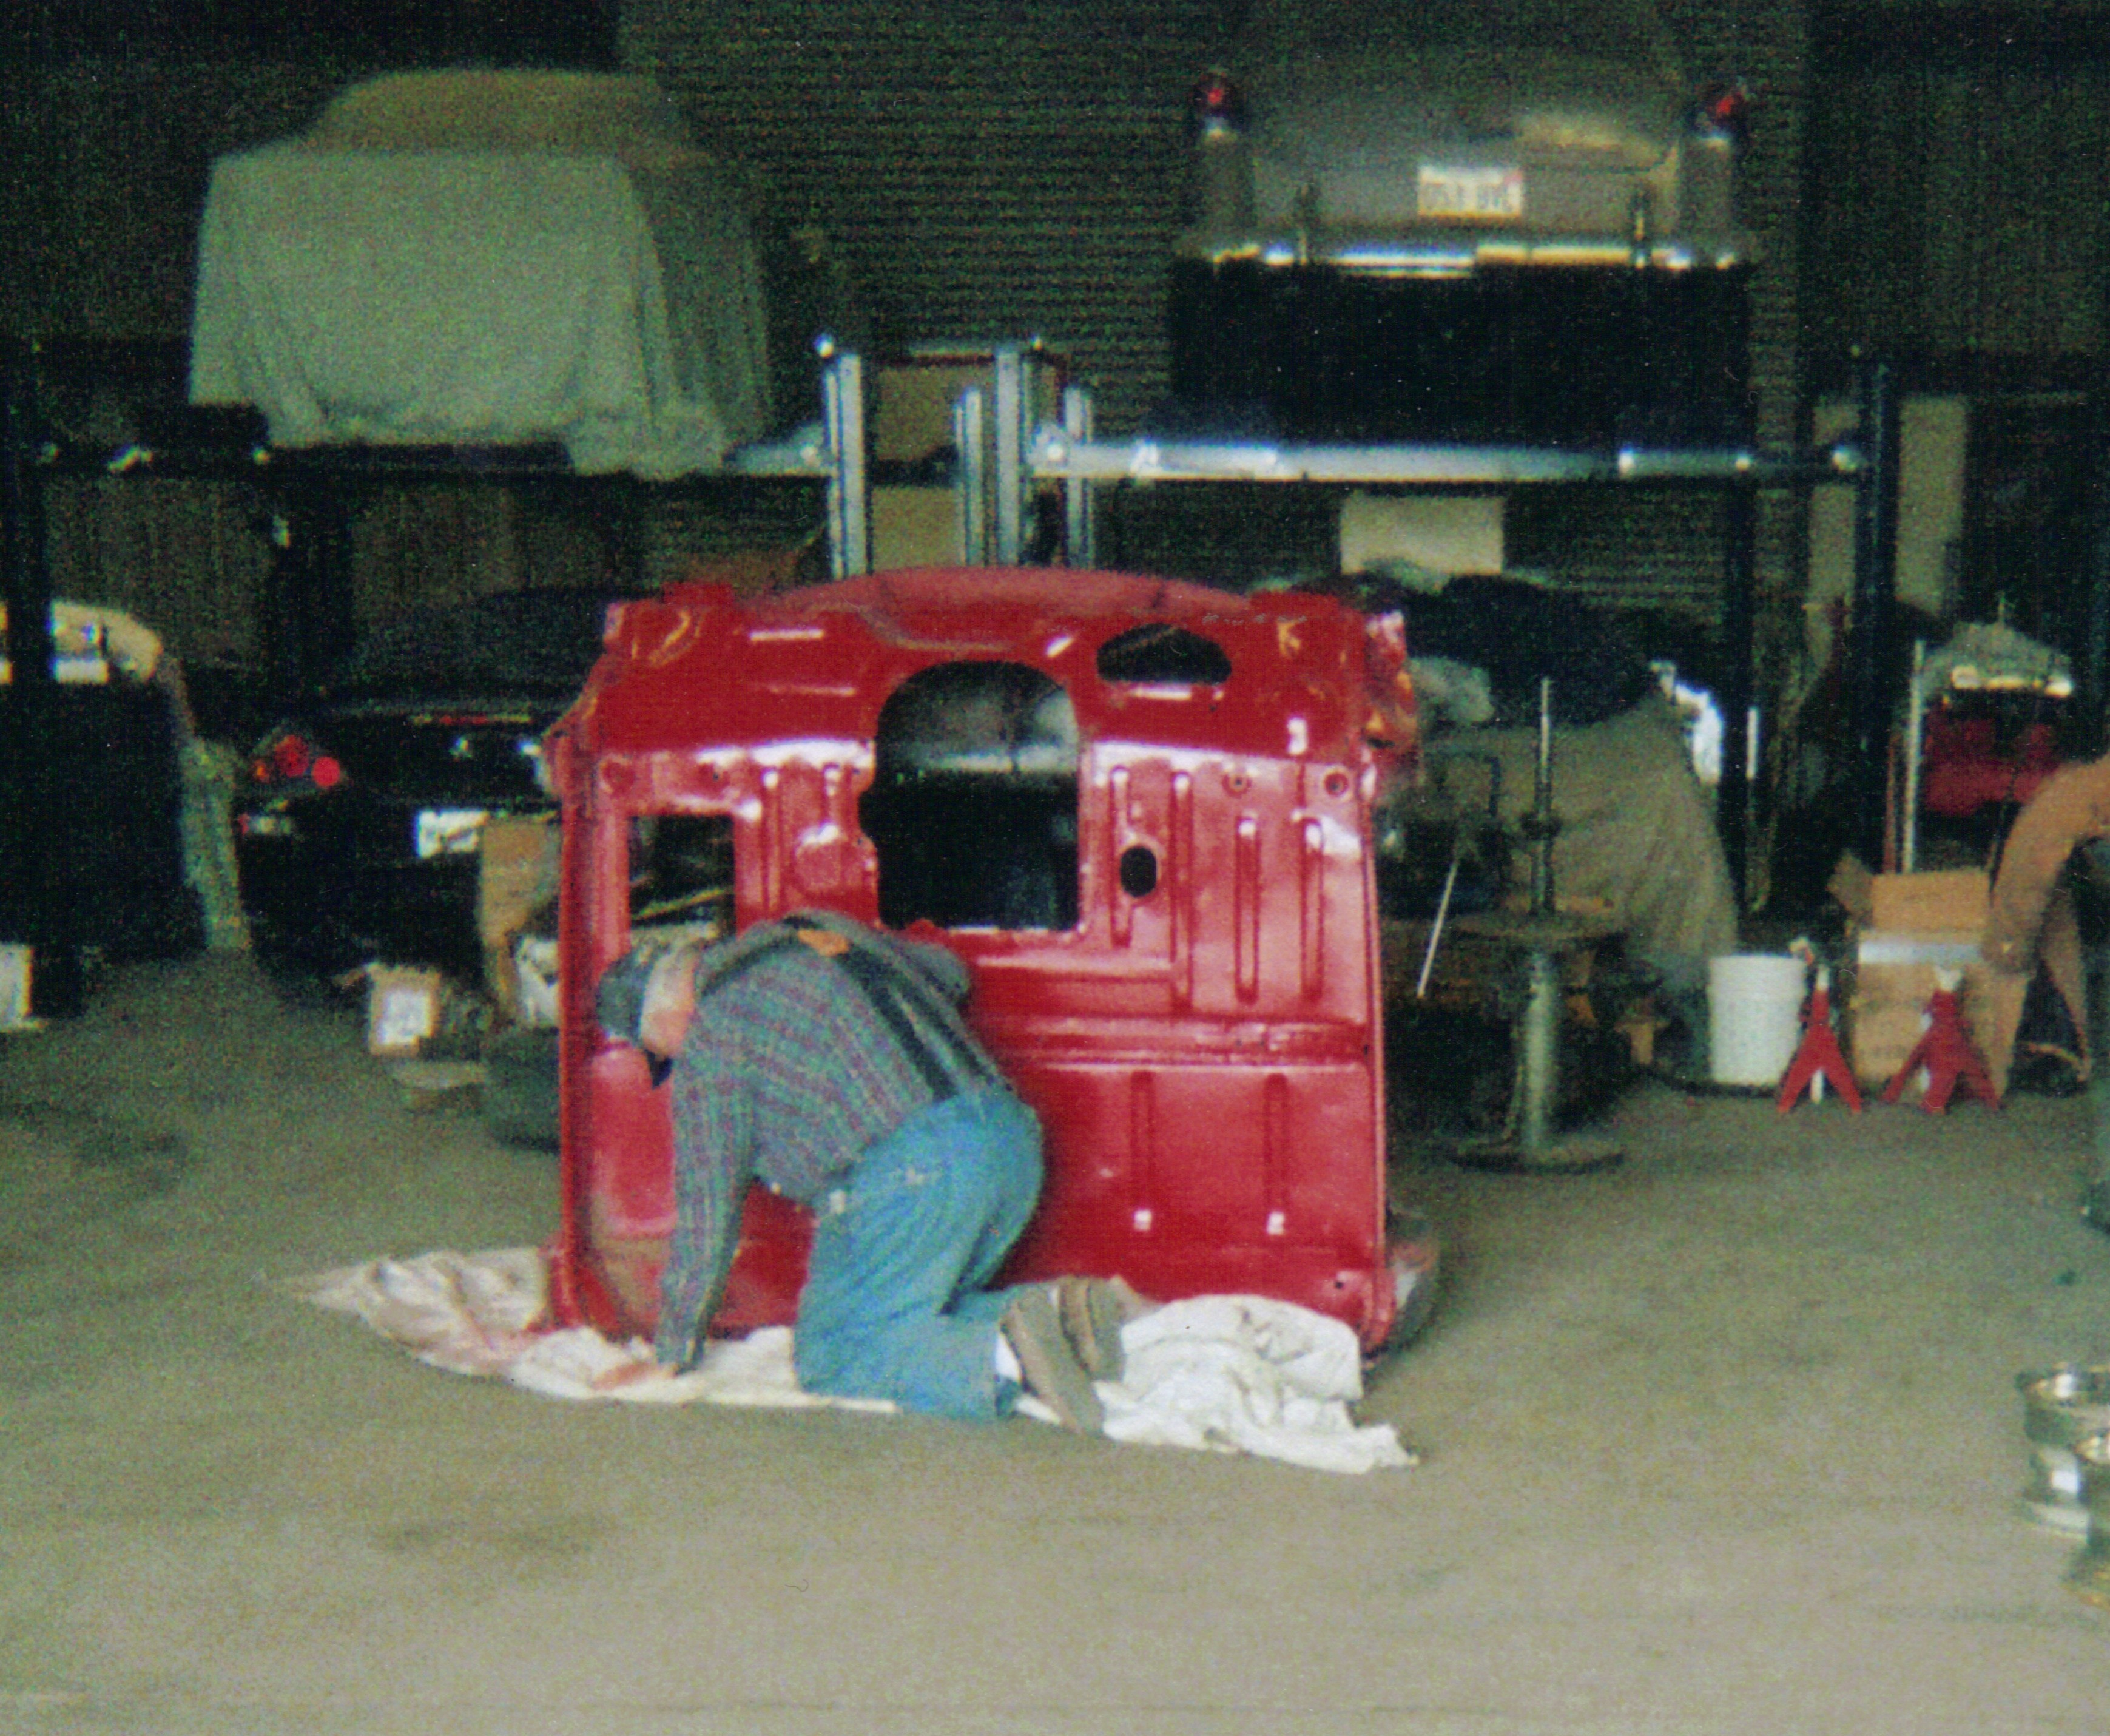
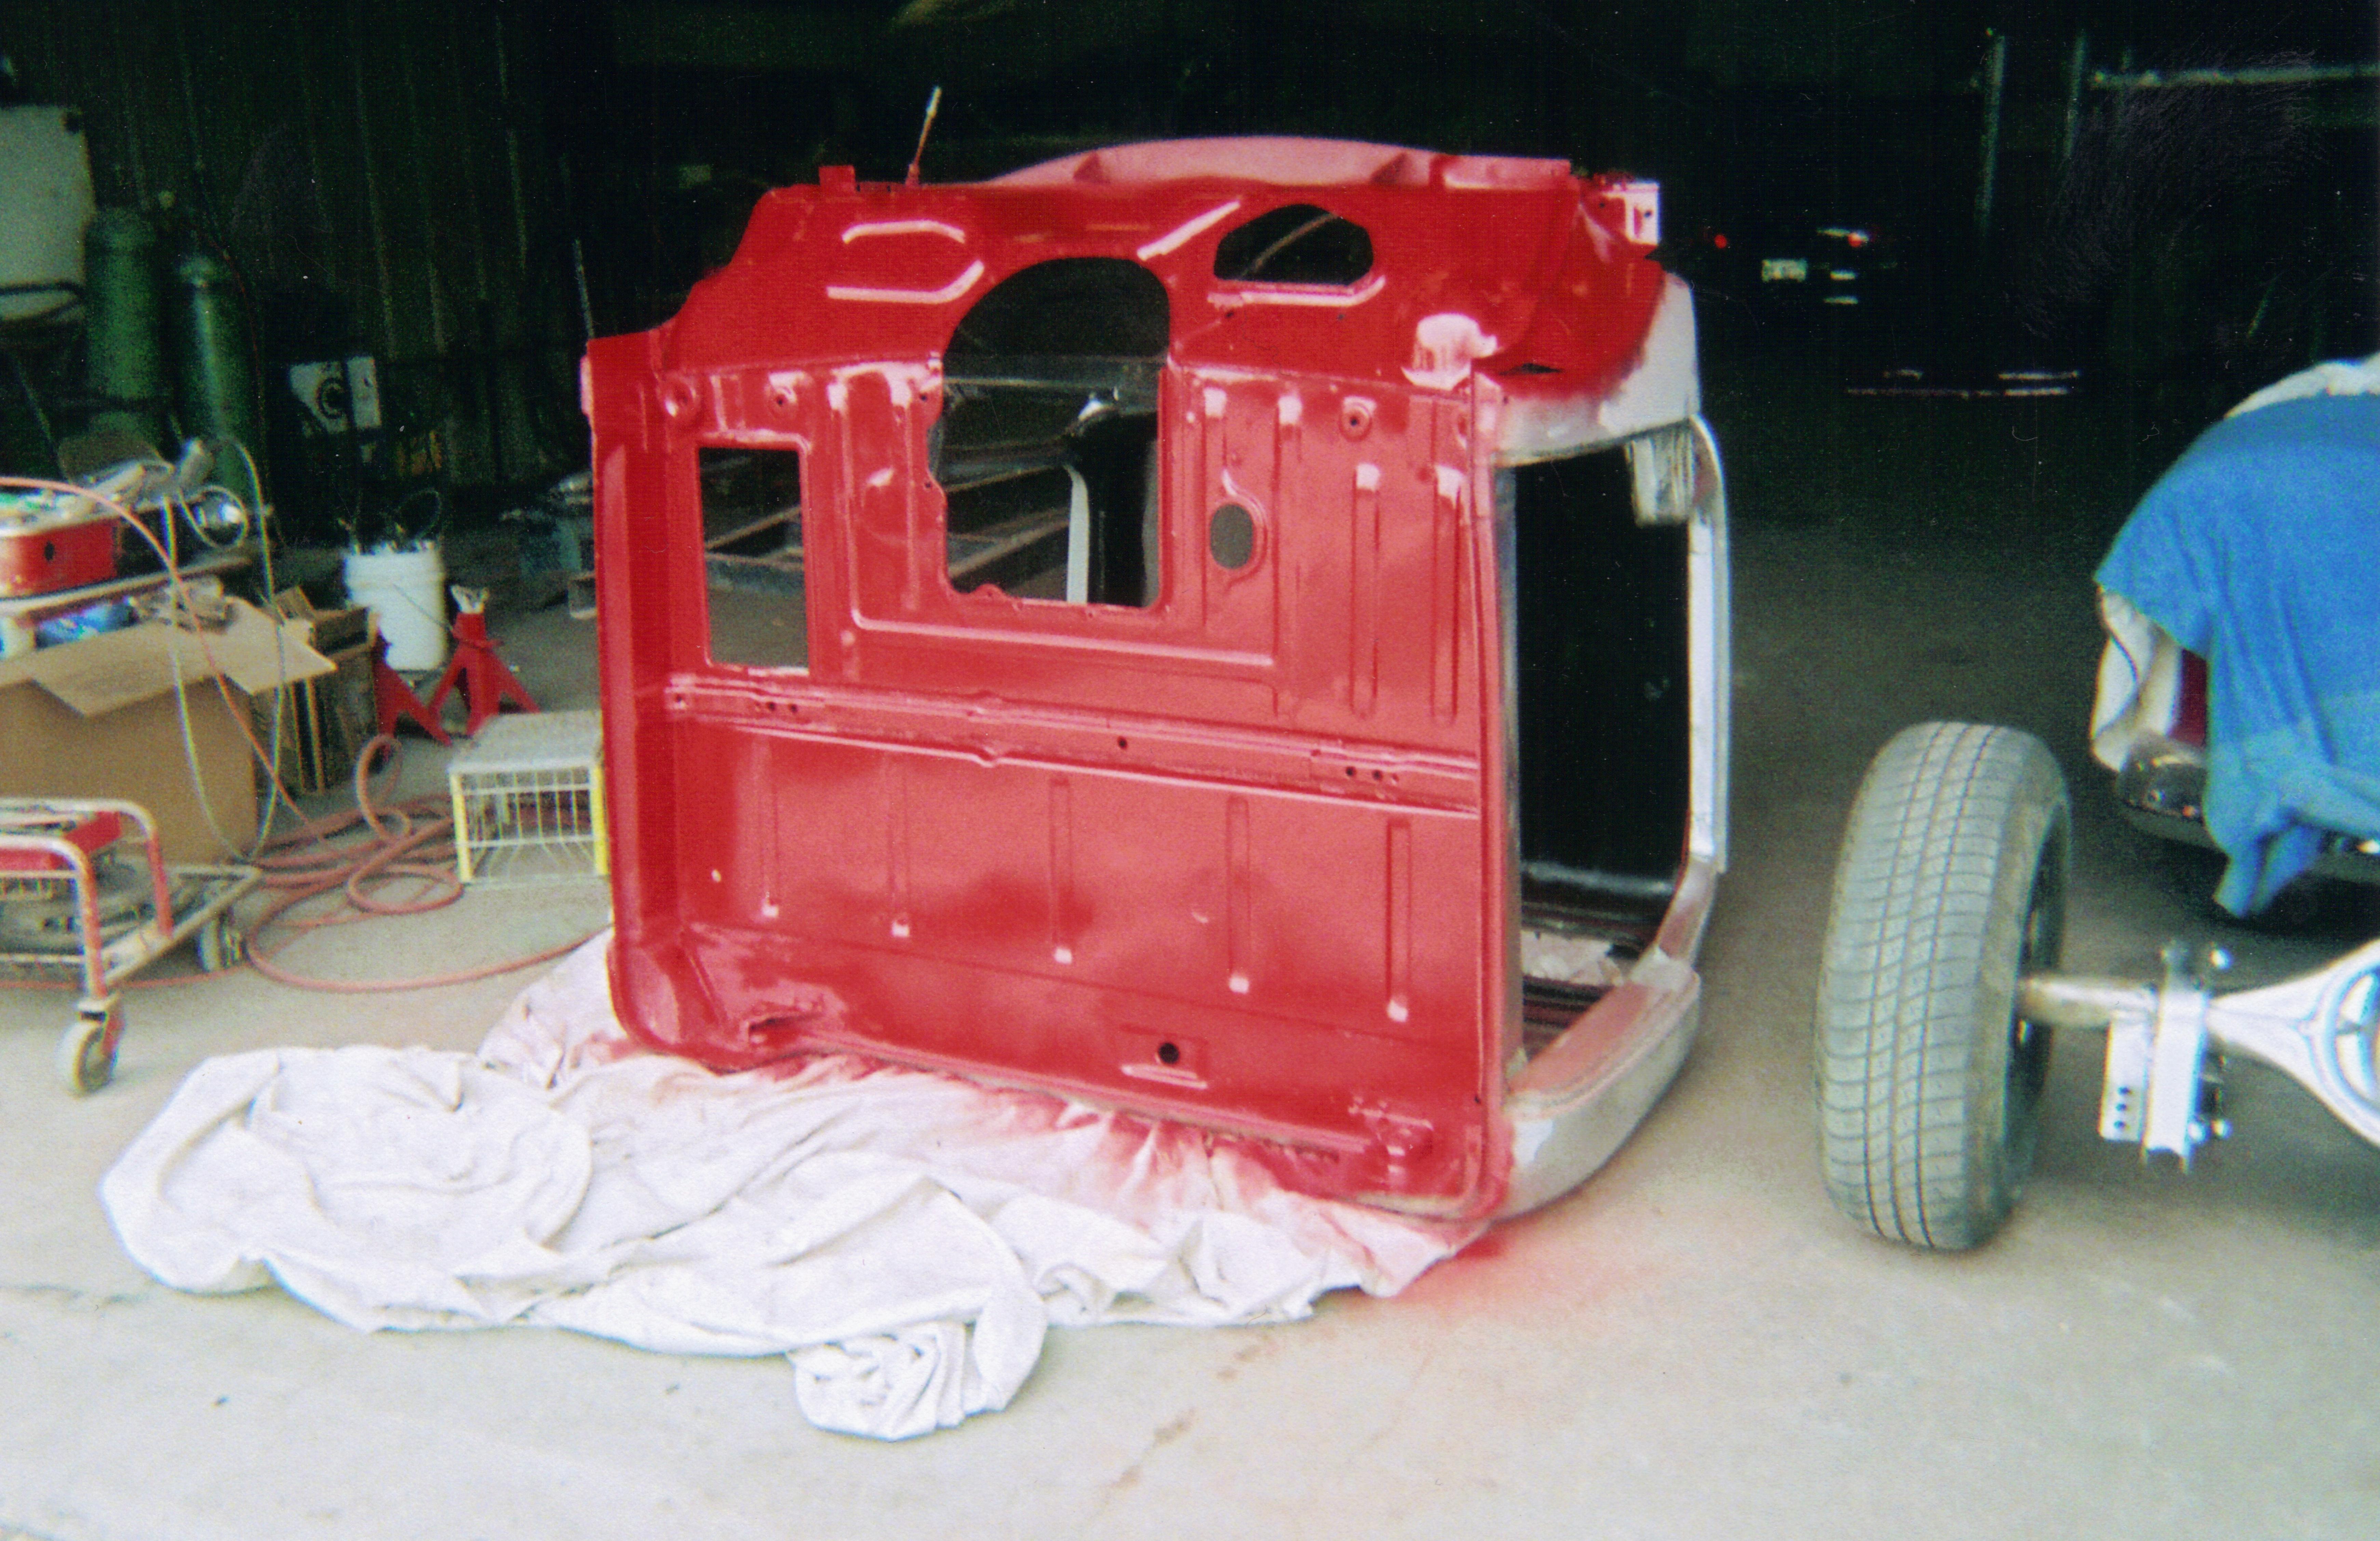
They even painted the floor of the cab once it was cleaned up.
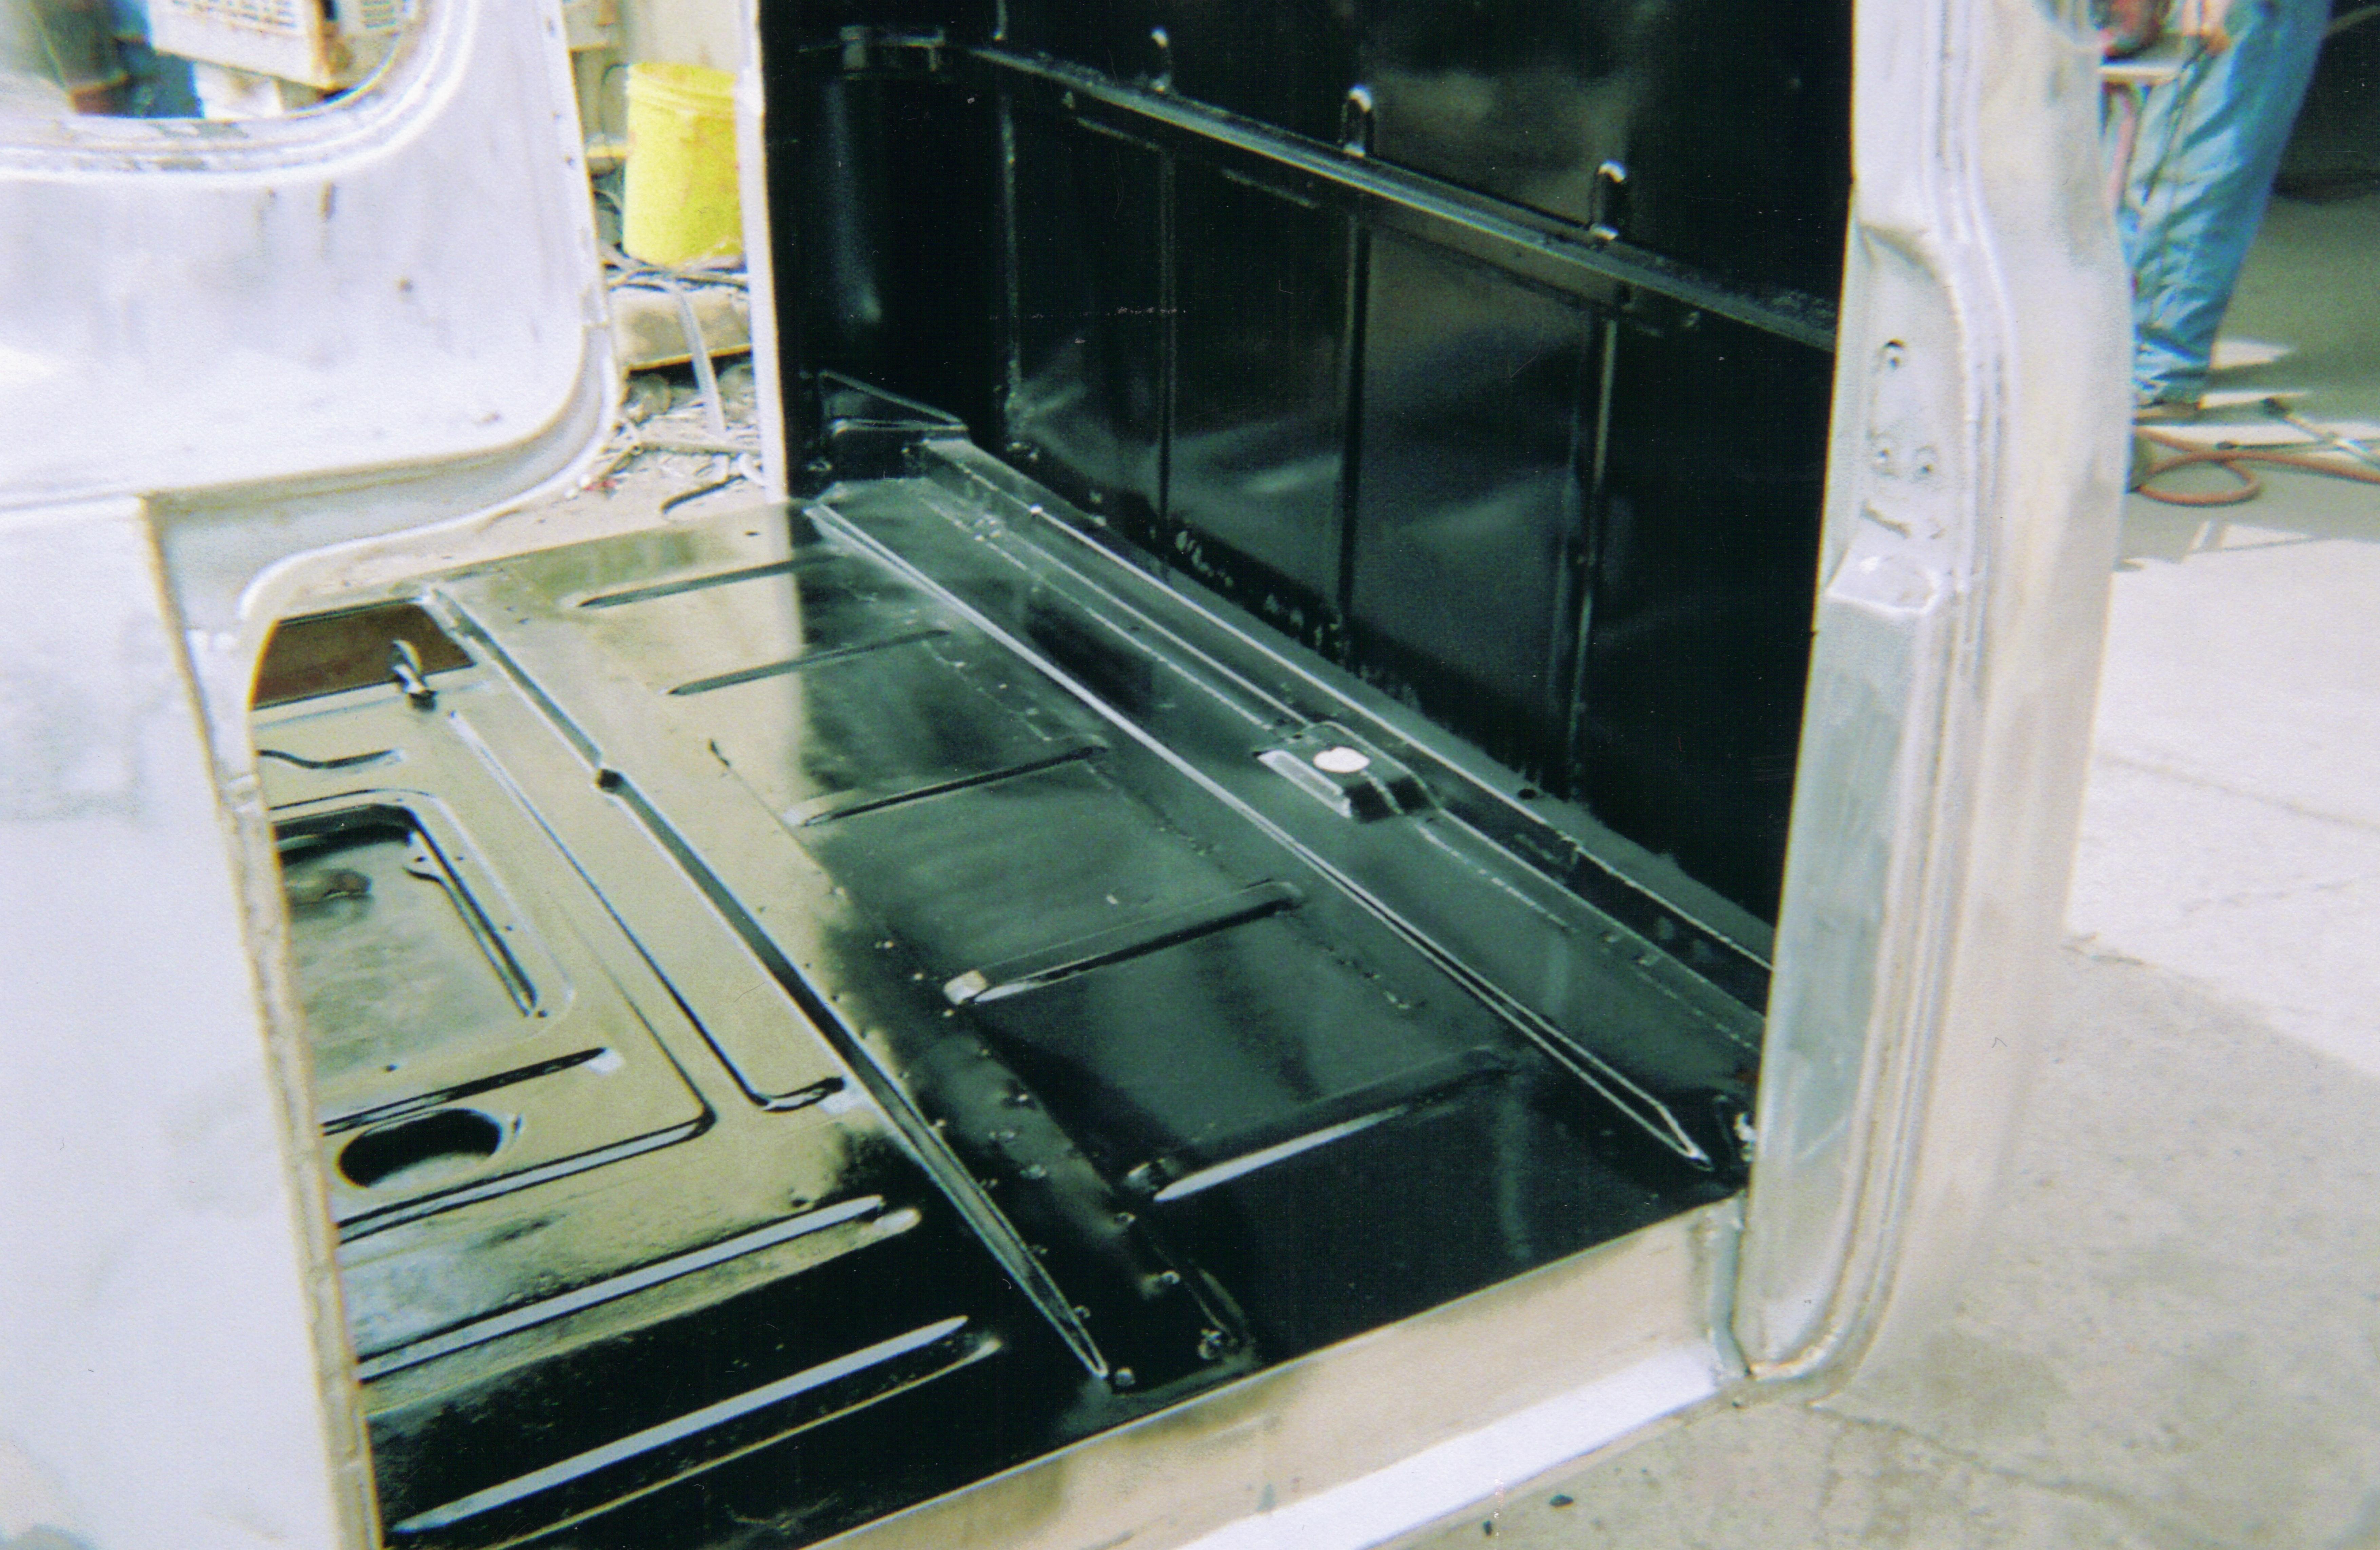
All of the exterior surfaces were readied for paint.
Including the frame.
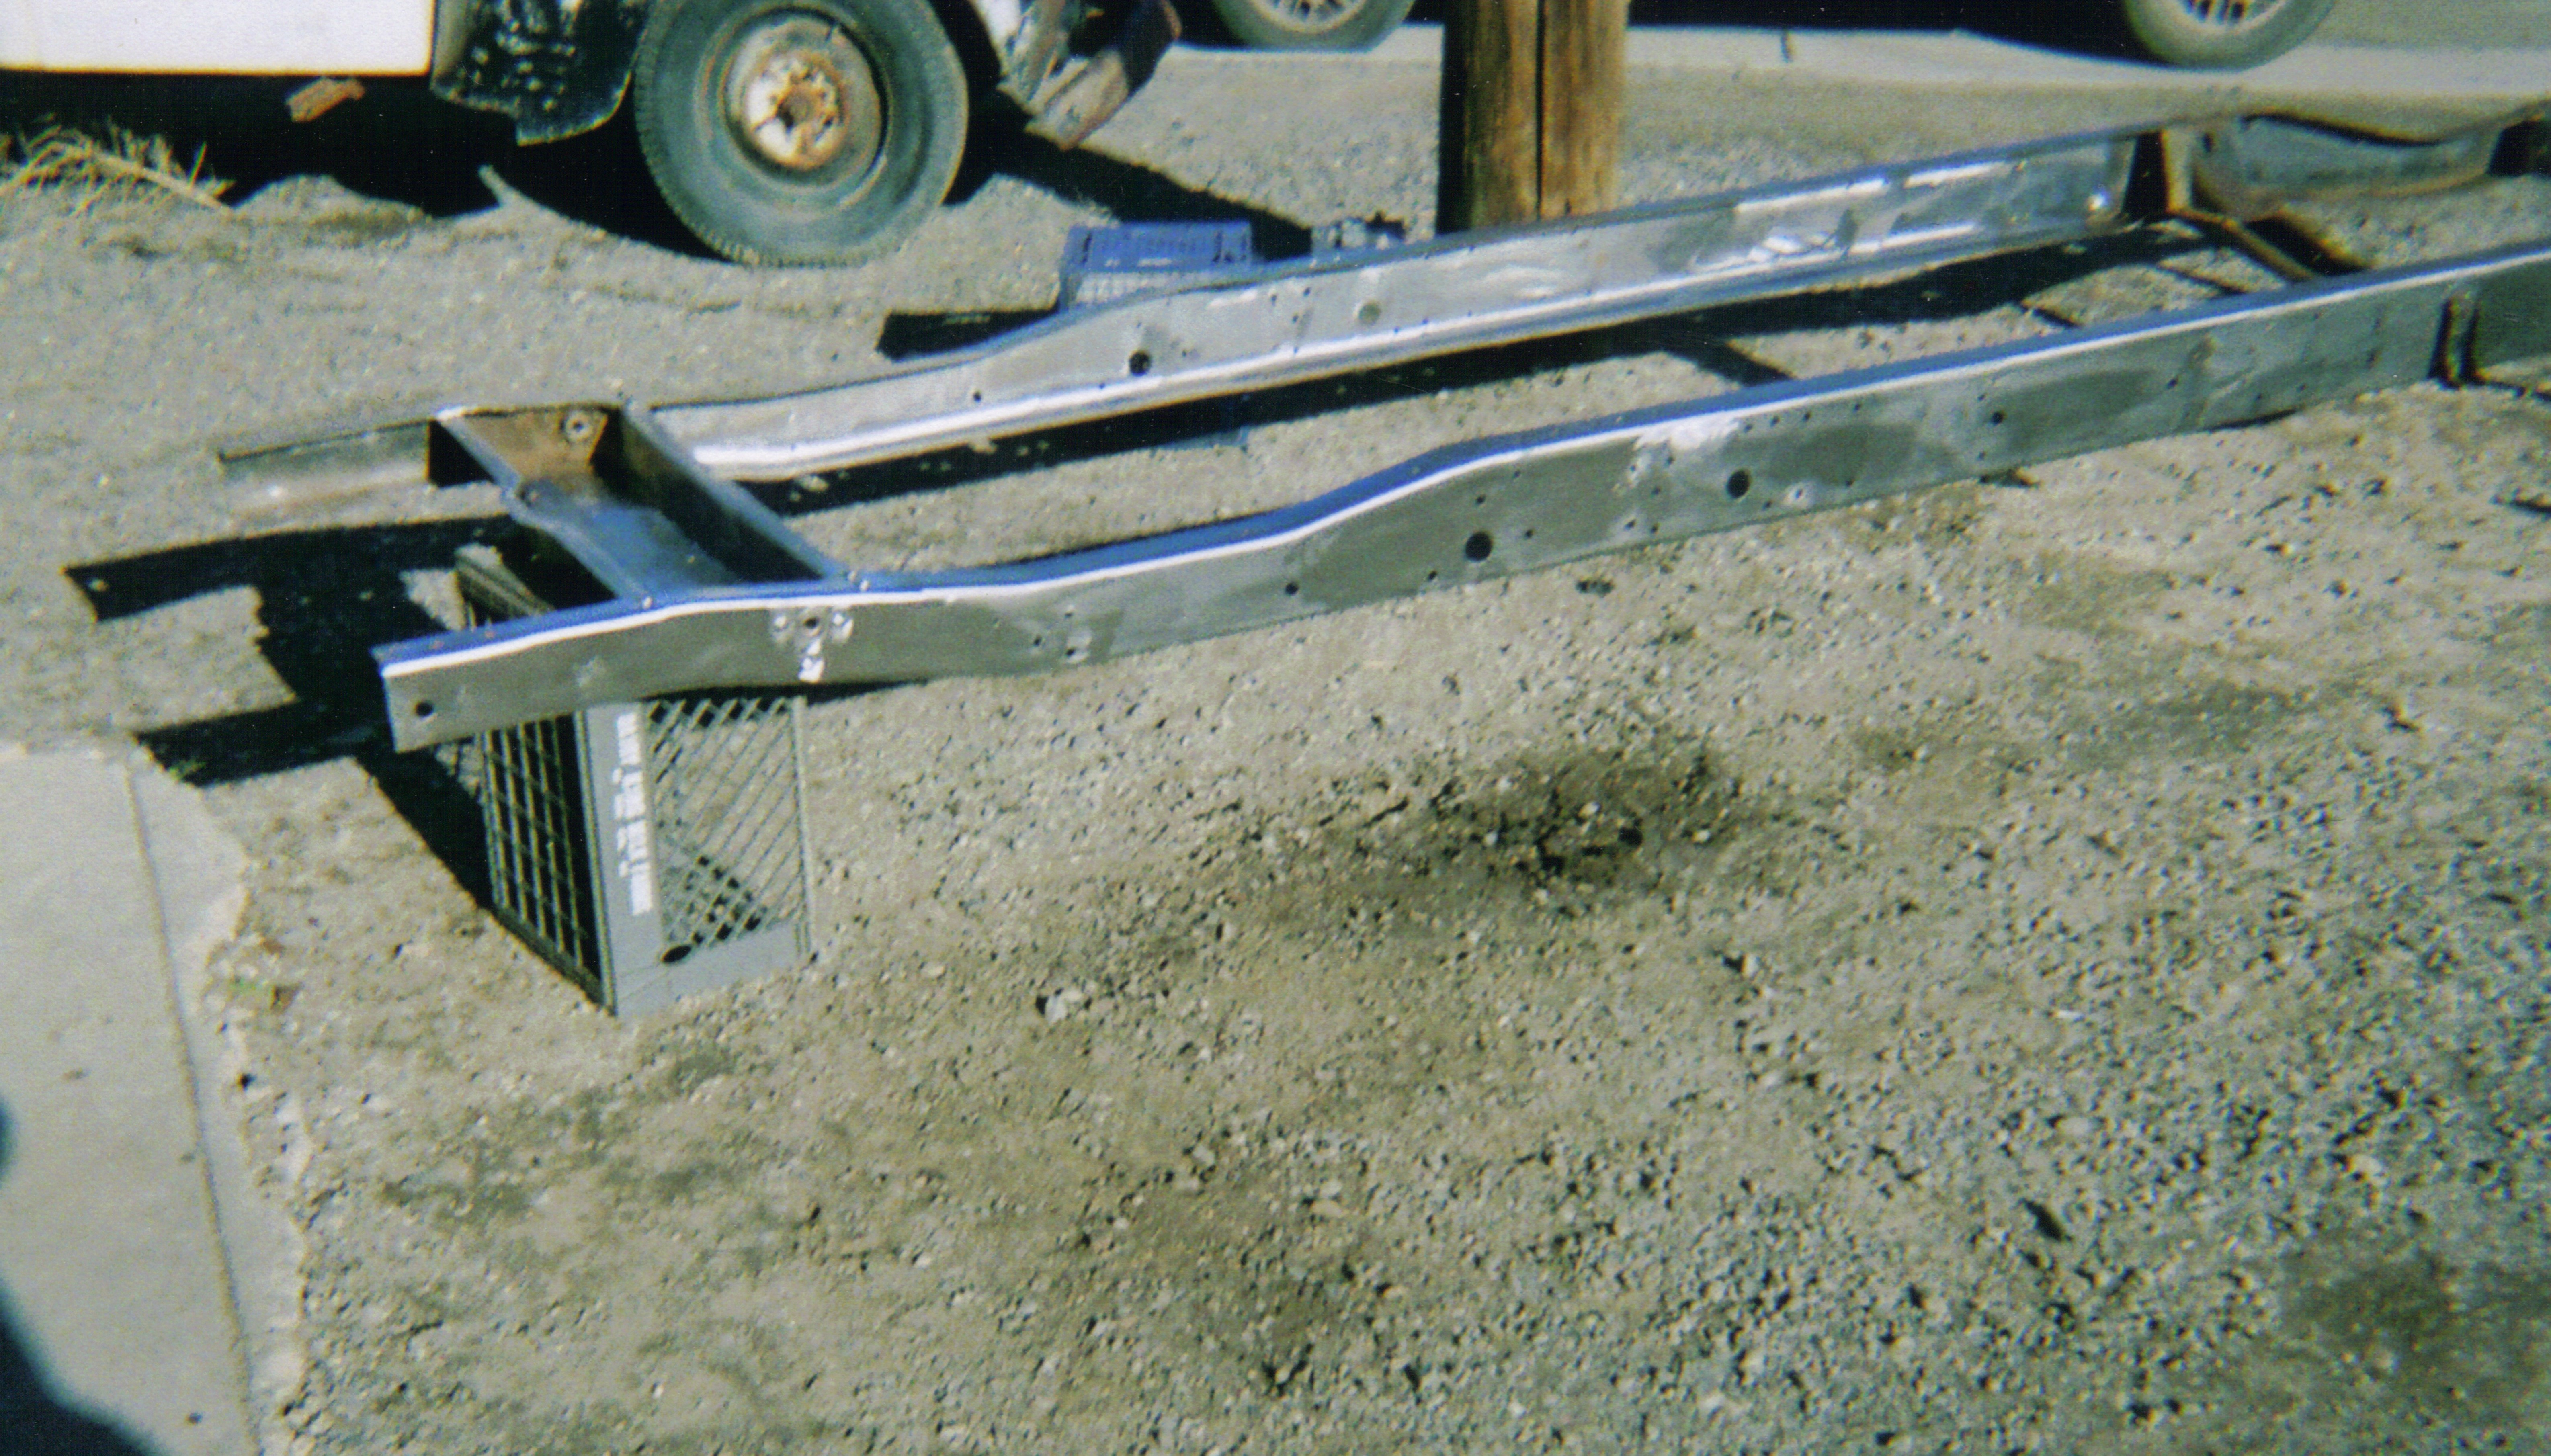
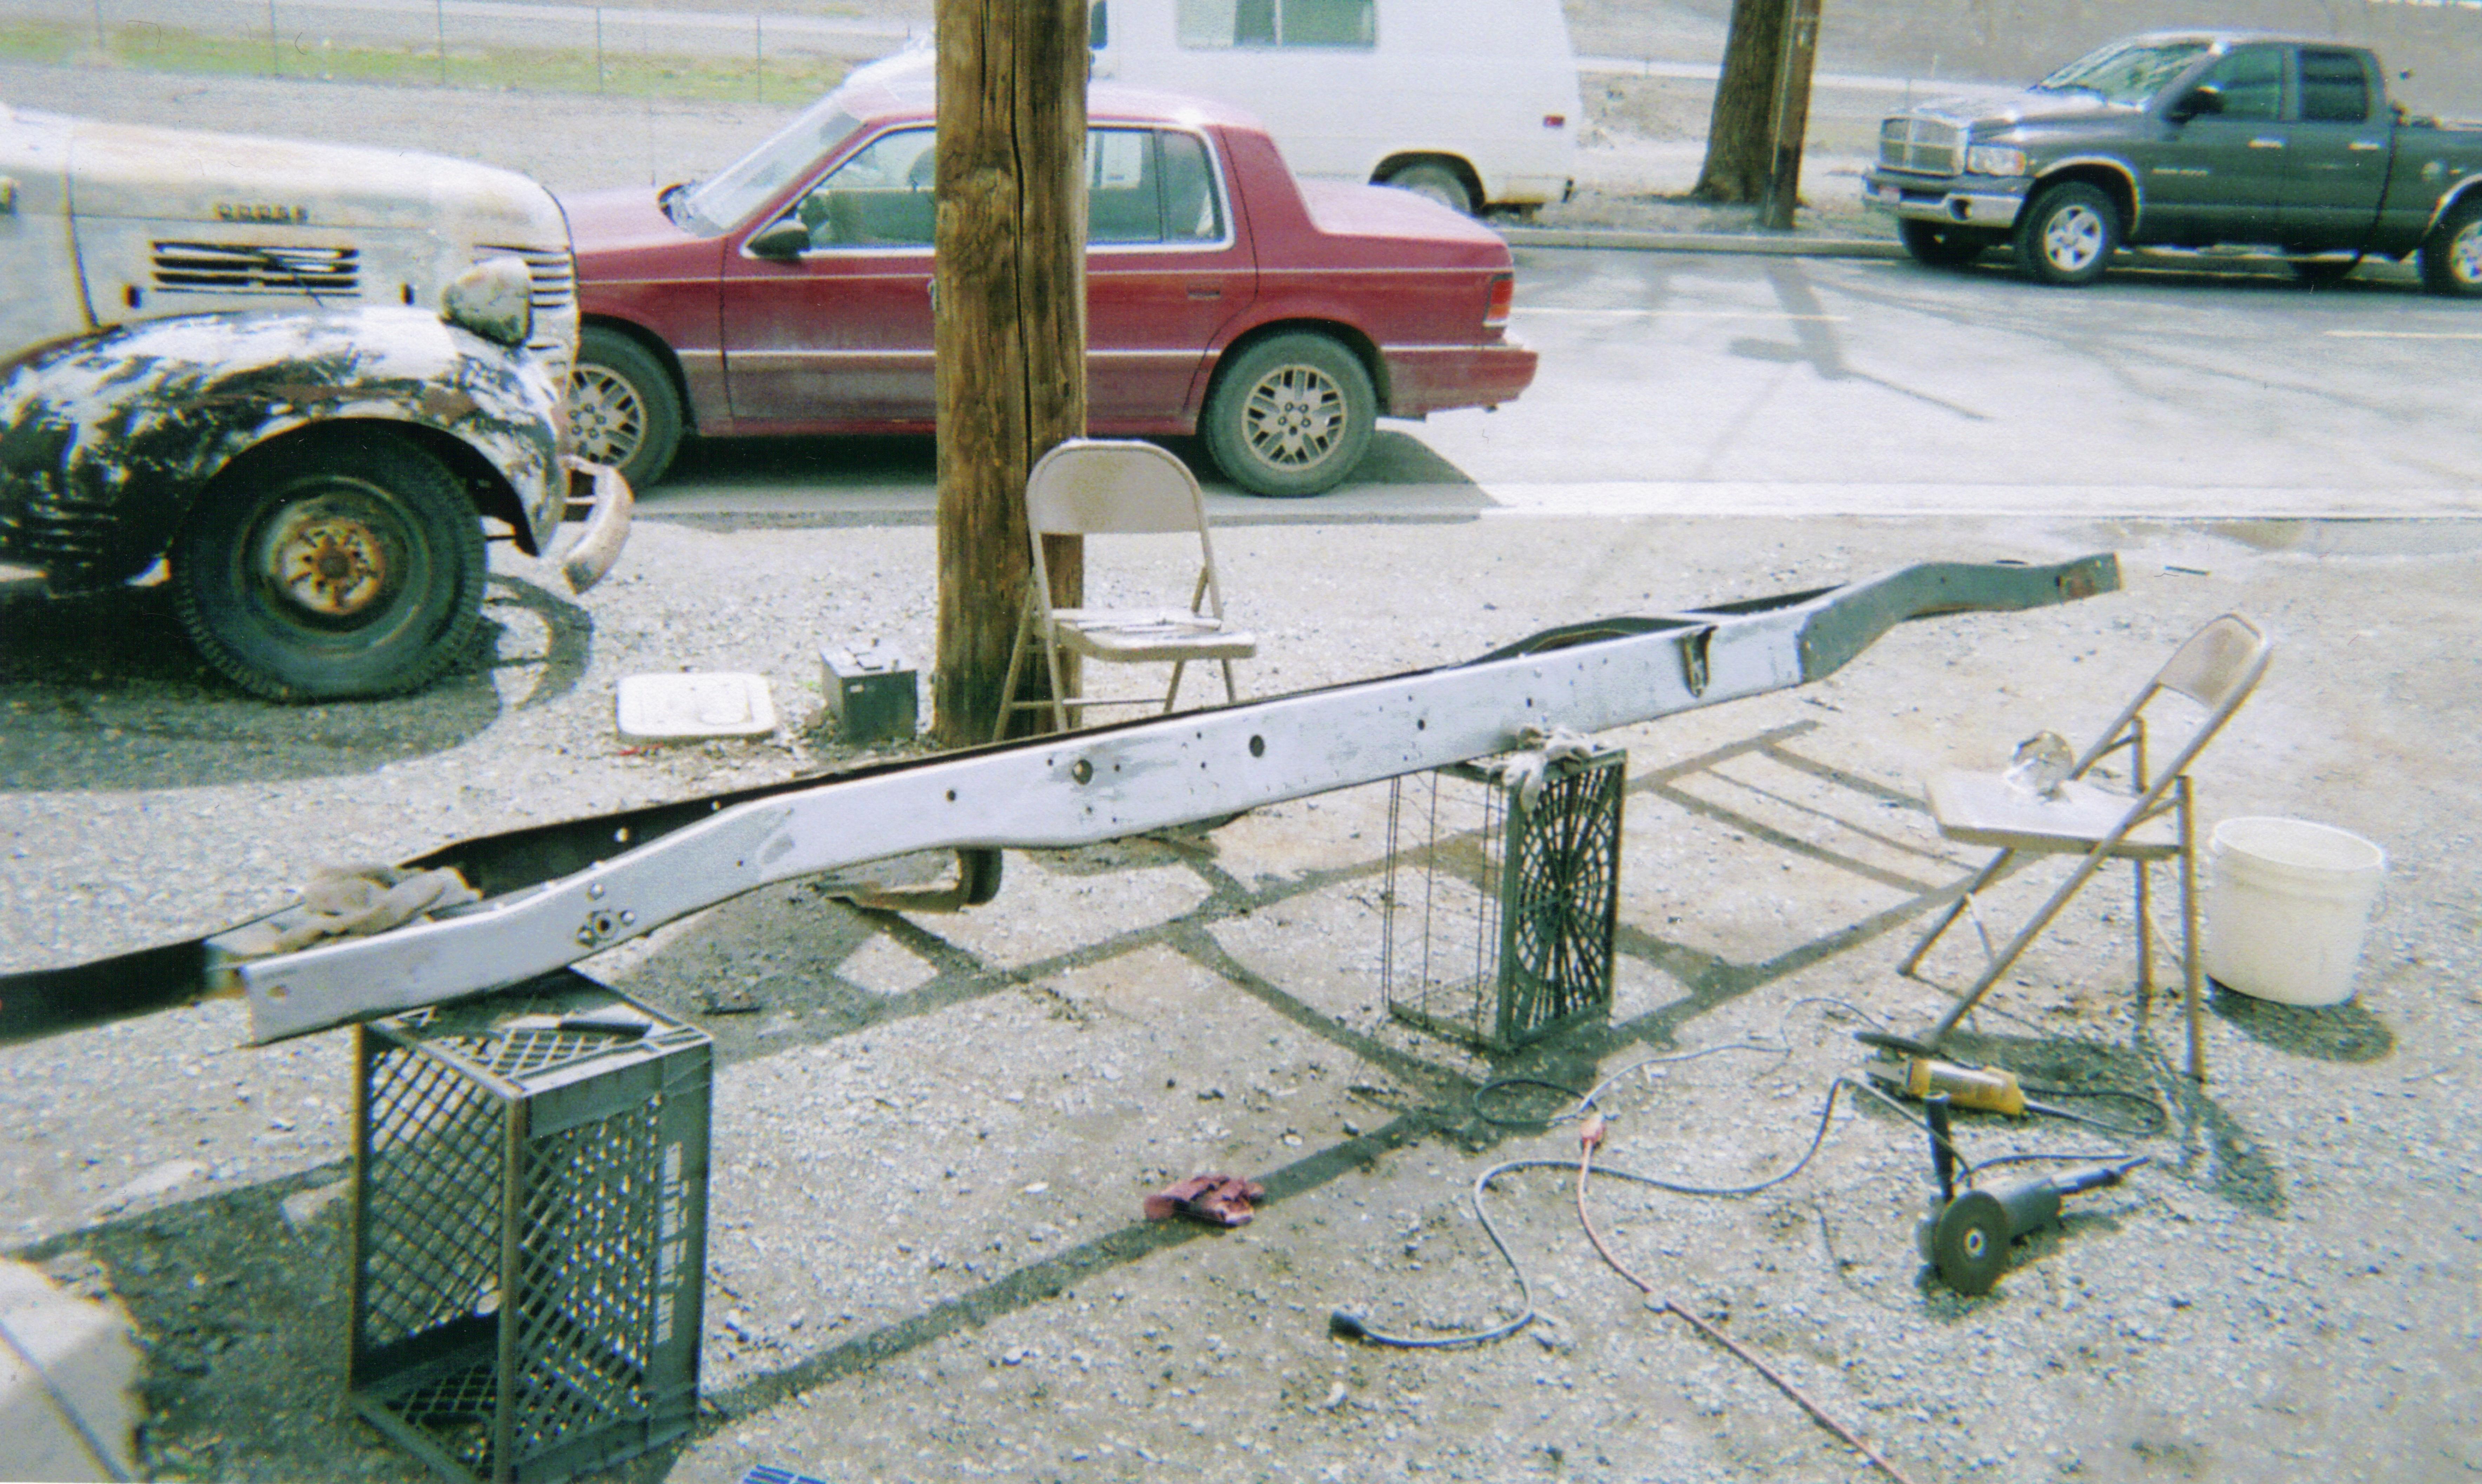
.
He always liked the power that the motor had in the car, and he knew that if he could find one he would put it in the pickup. He ran across a guy that had the motor for sale, not really knowing what he had, and bought it for a really good deal.
The truck was dismantled and cleaned up, cab, bed, fenders all were sanded and prepped for finish. The bottom of the cab was painted once prepped.
They even painted the floor of the cab once it was cleaned up.
All of the exterior surfaces were readied for paint.
Including the frame.
.
#3
11-19-2016, 12:07 AM
Join Date: Aug 2009
Location: Idaho Falls, Idaho
Posts: 76
Likes: 0
Received 0 Likes
on
0 Posts
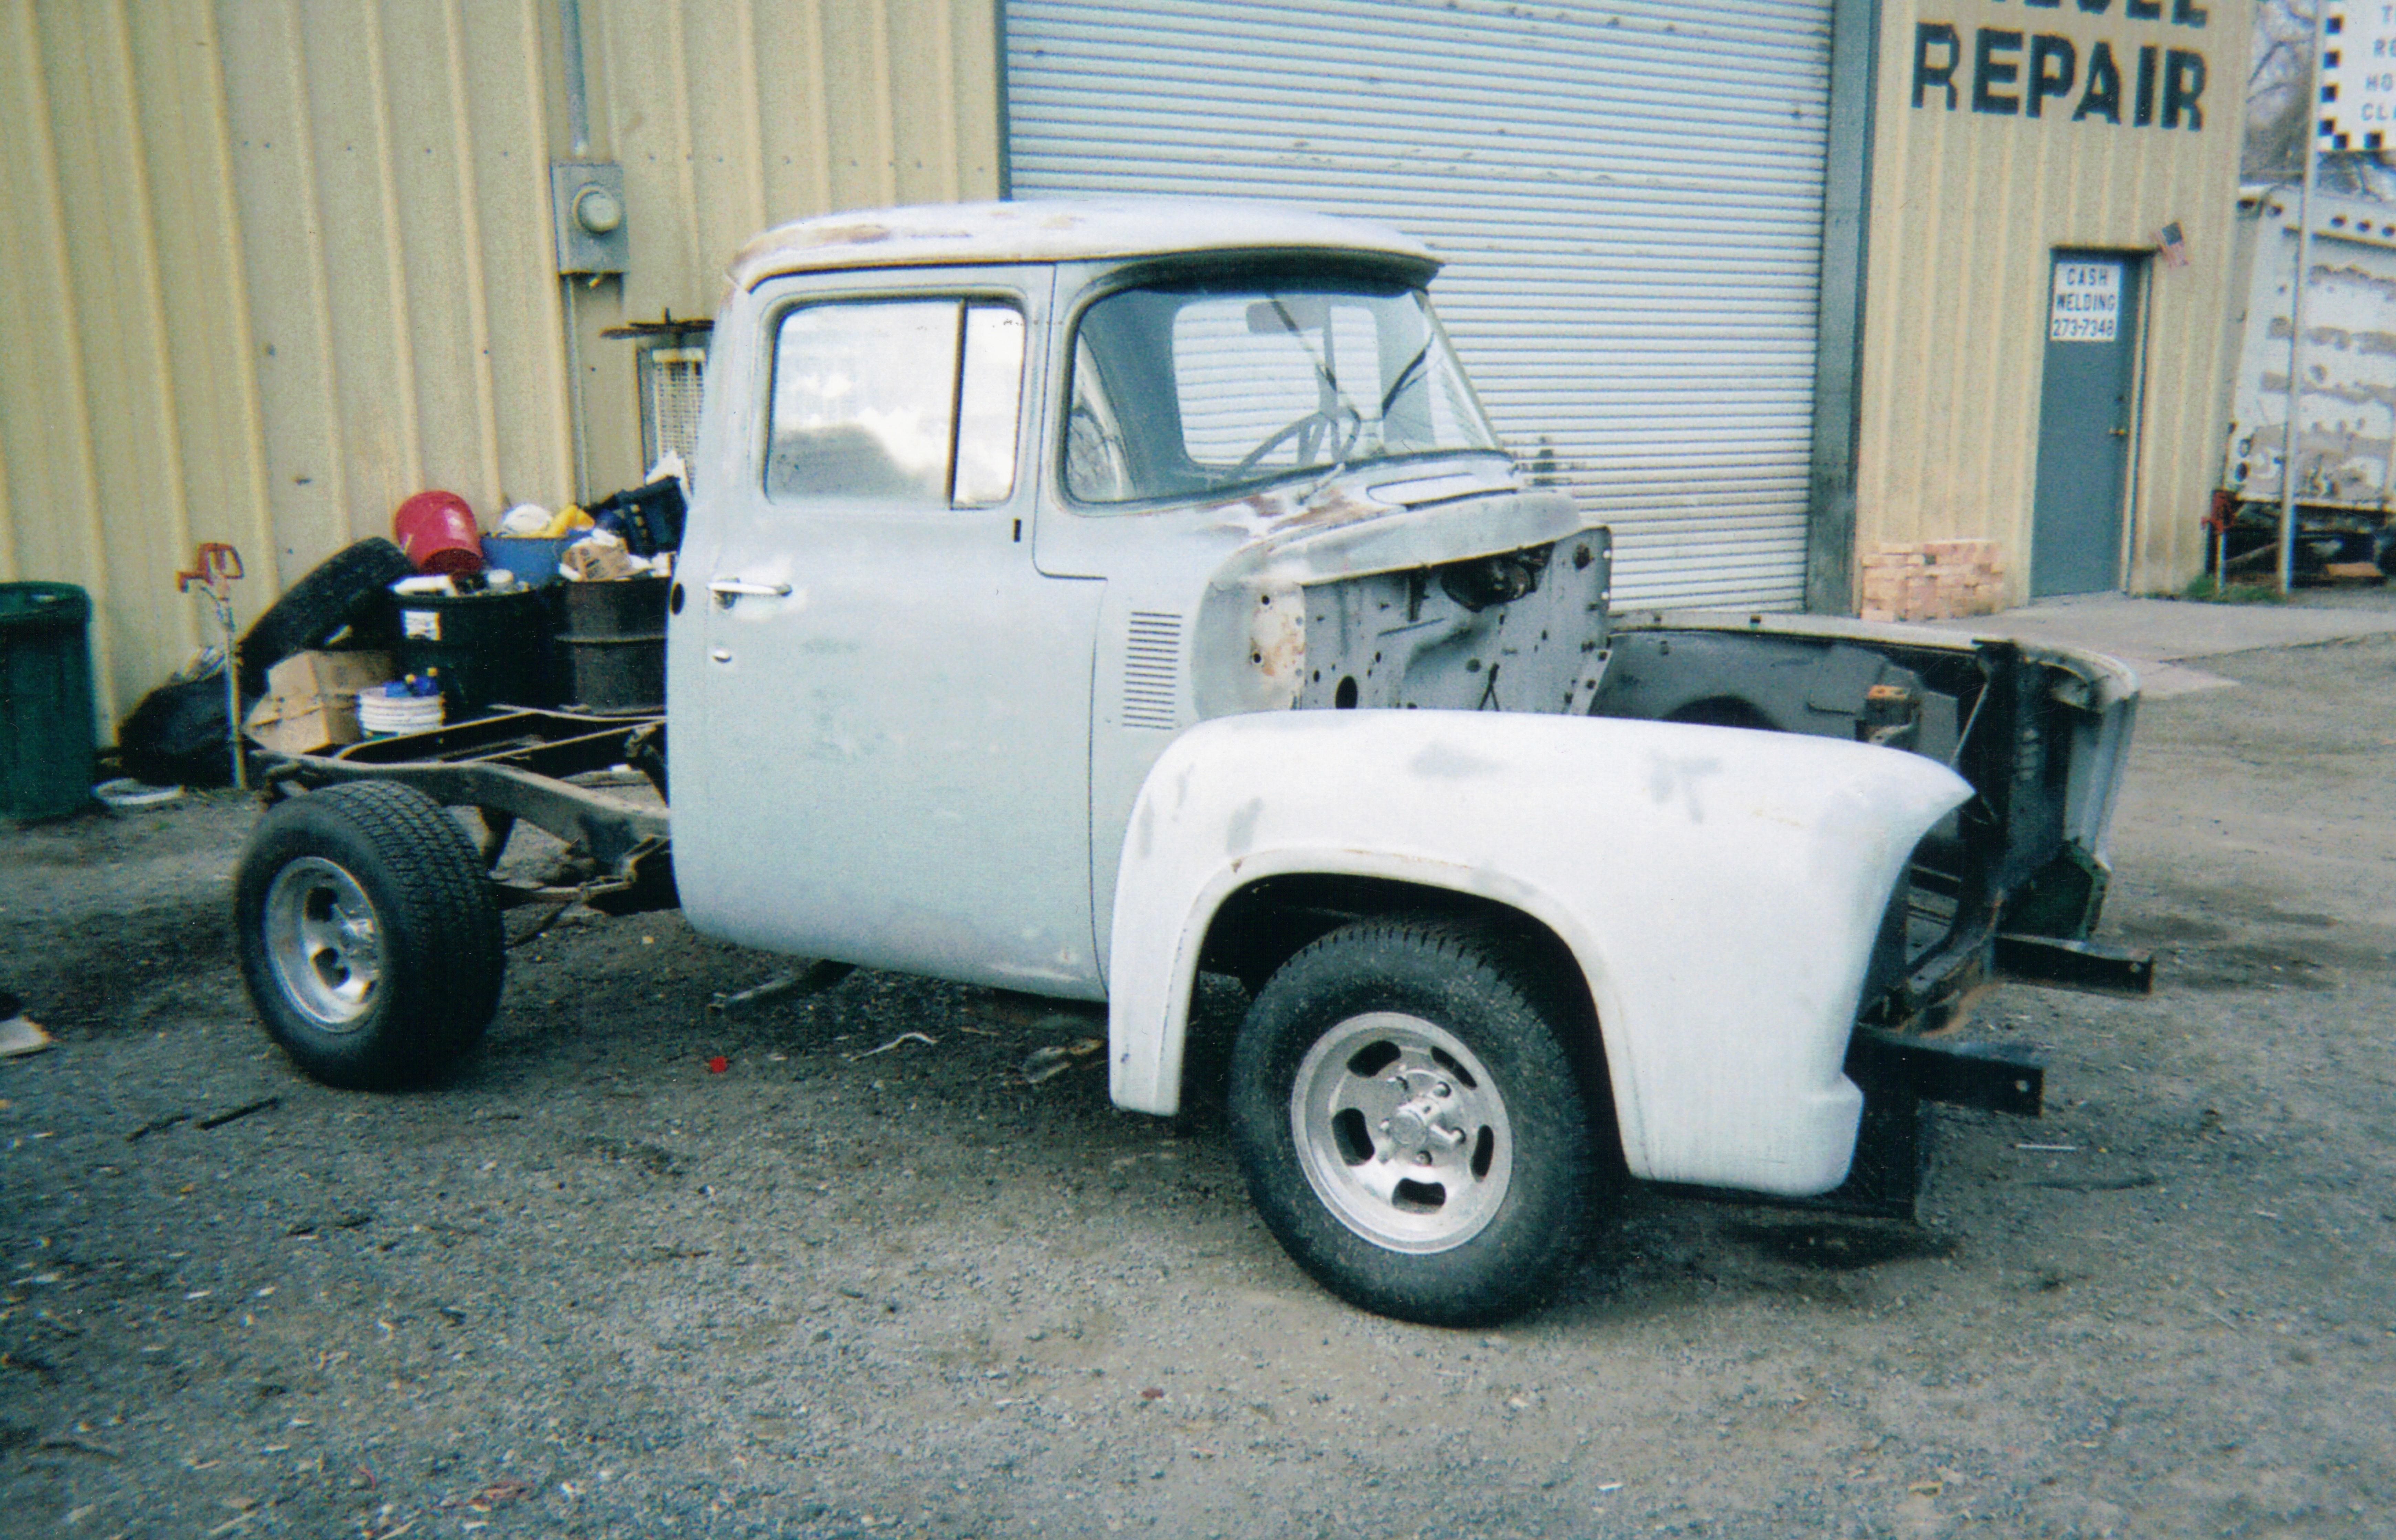
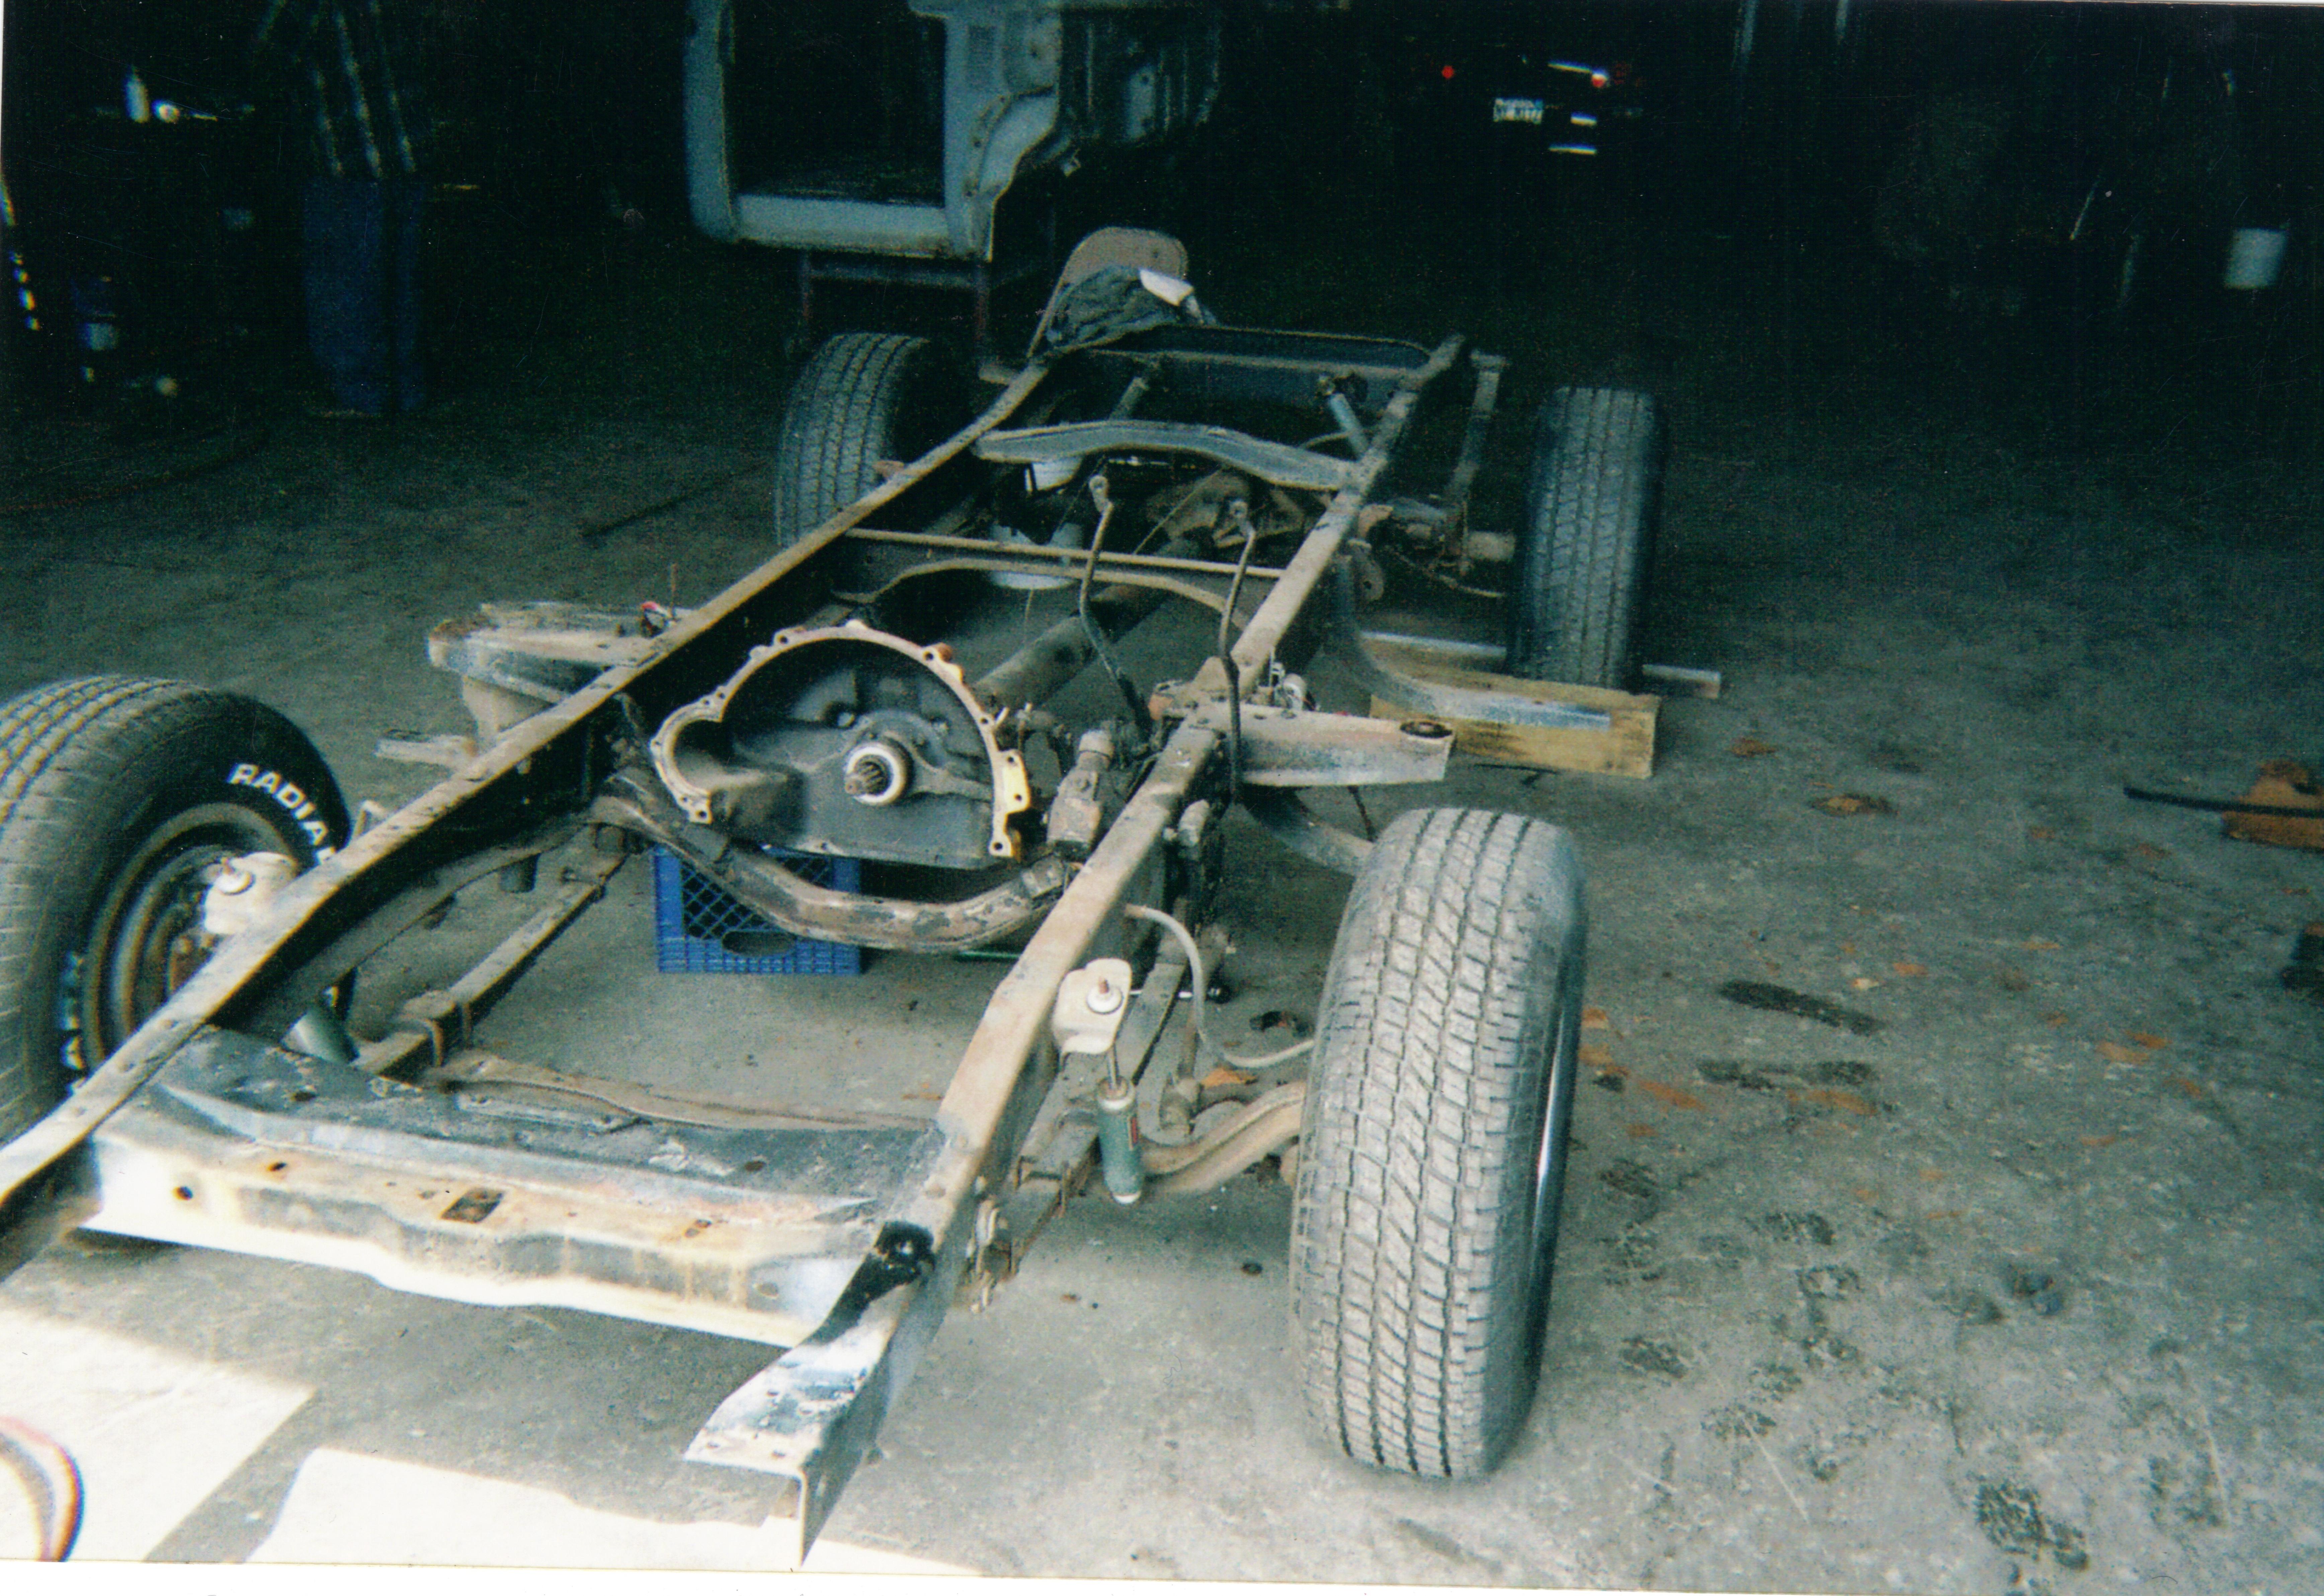
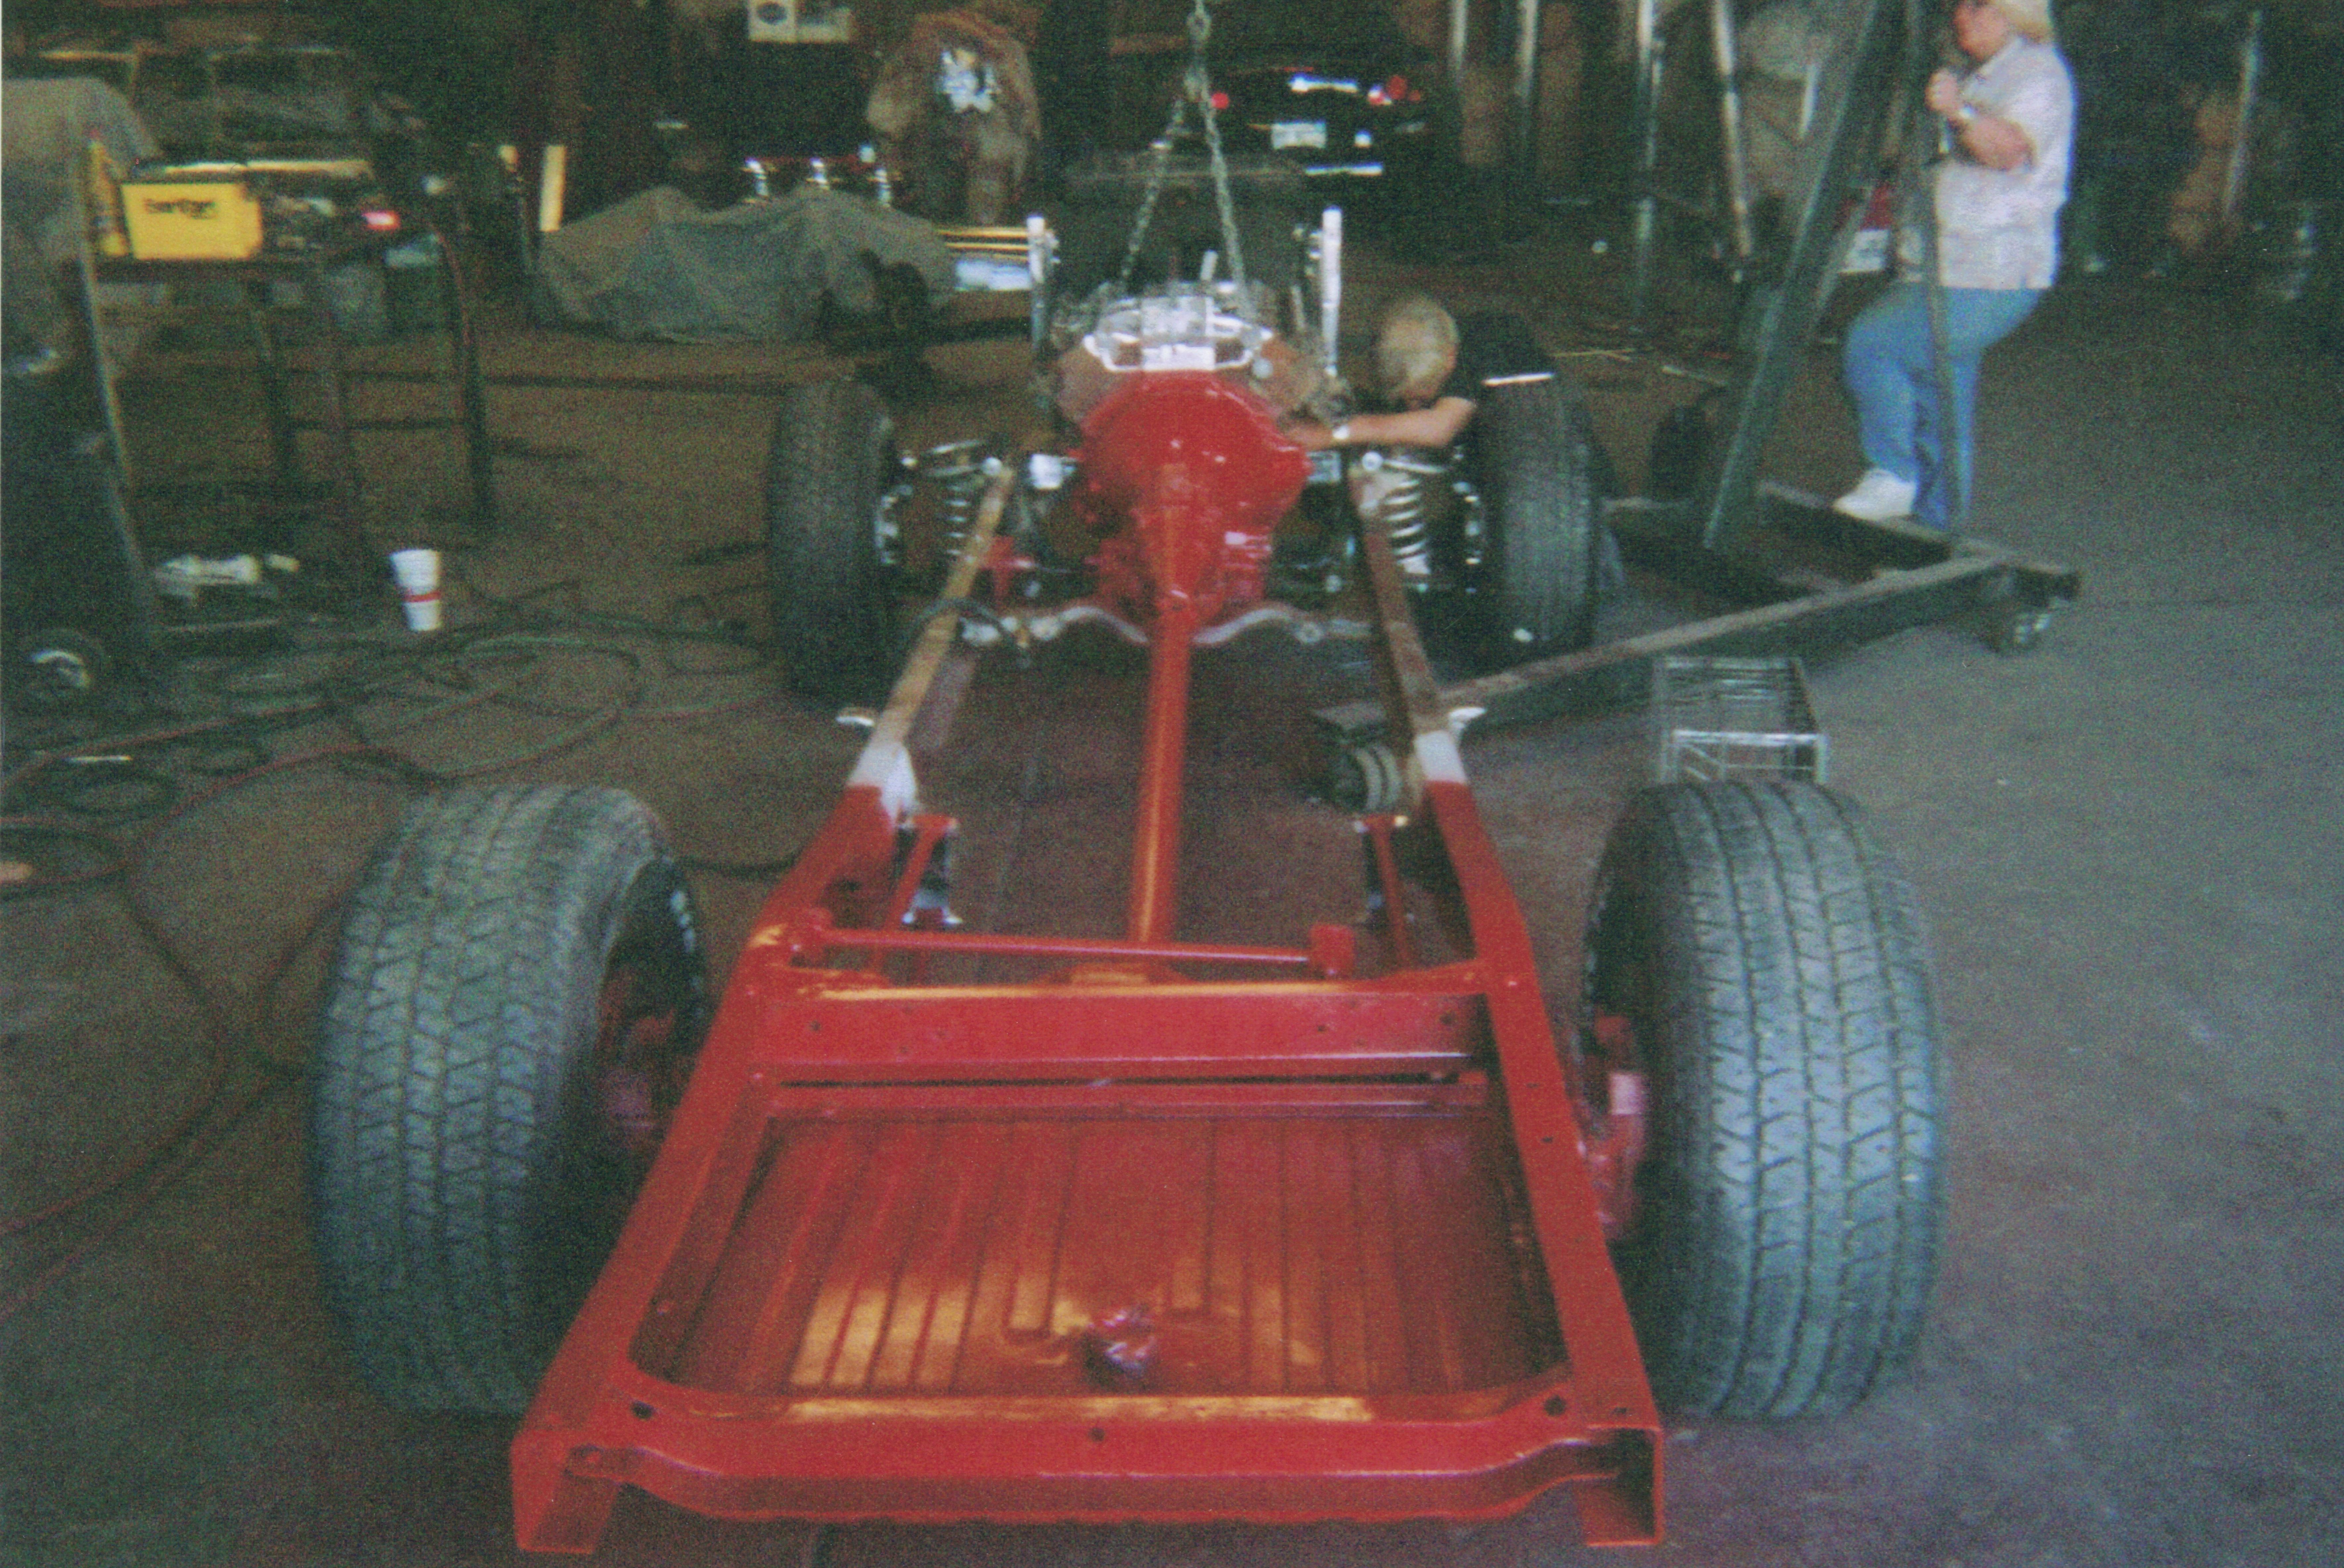
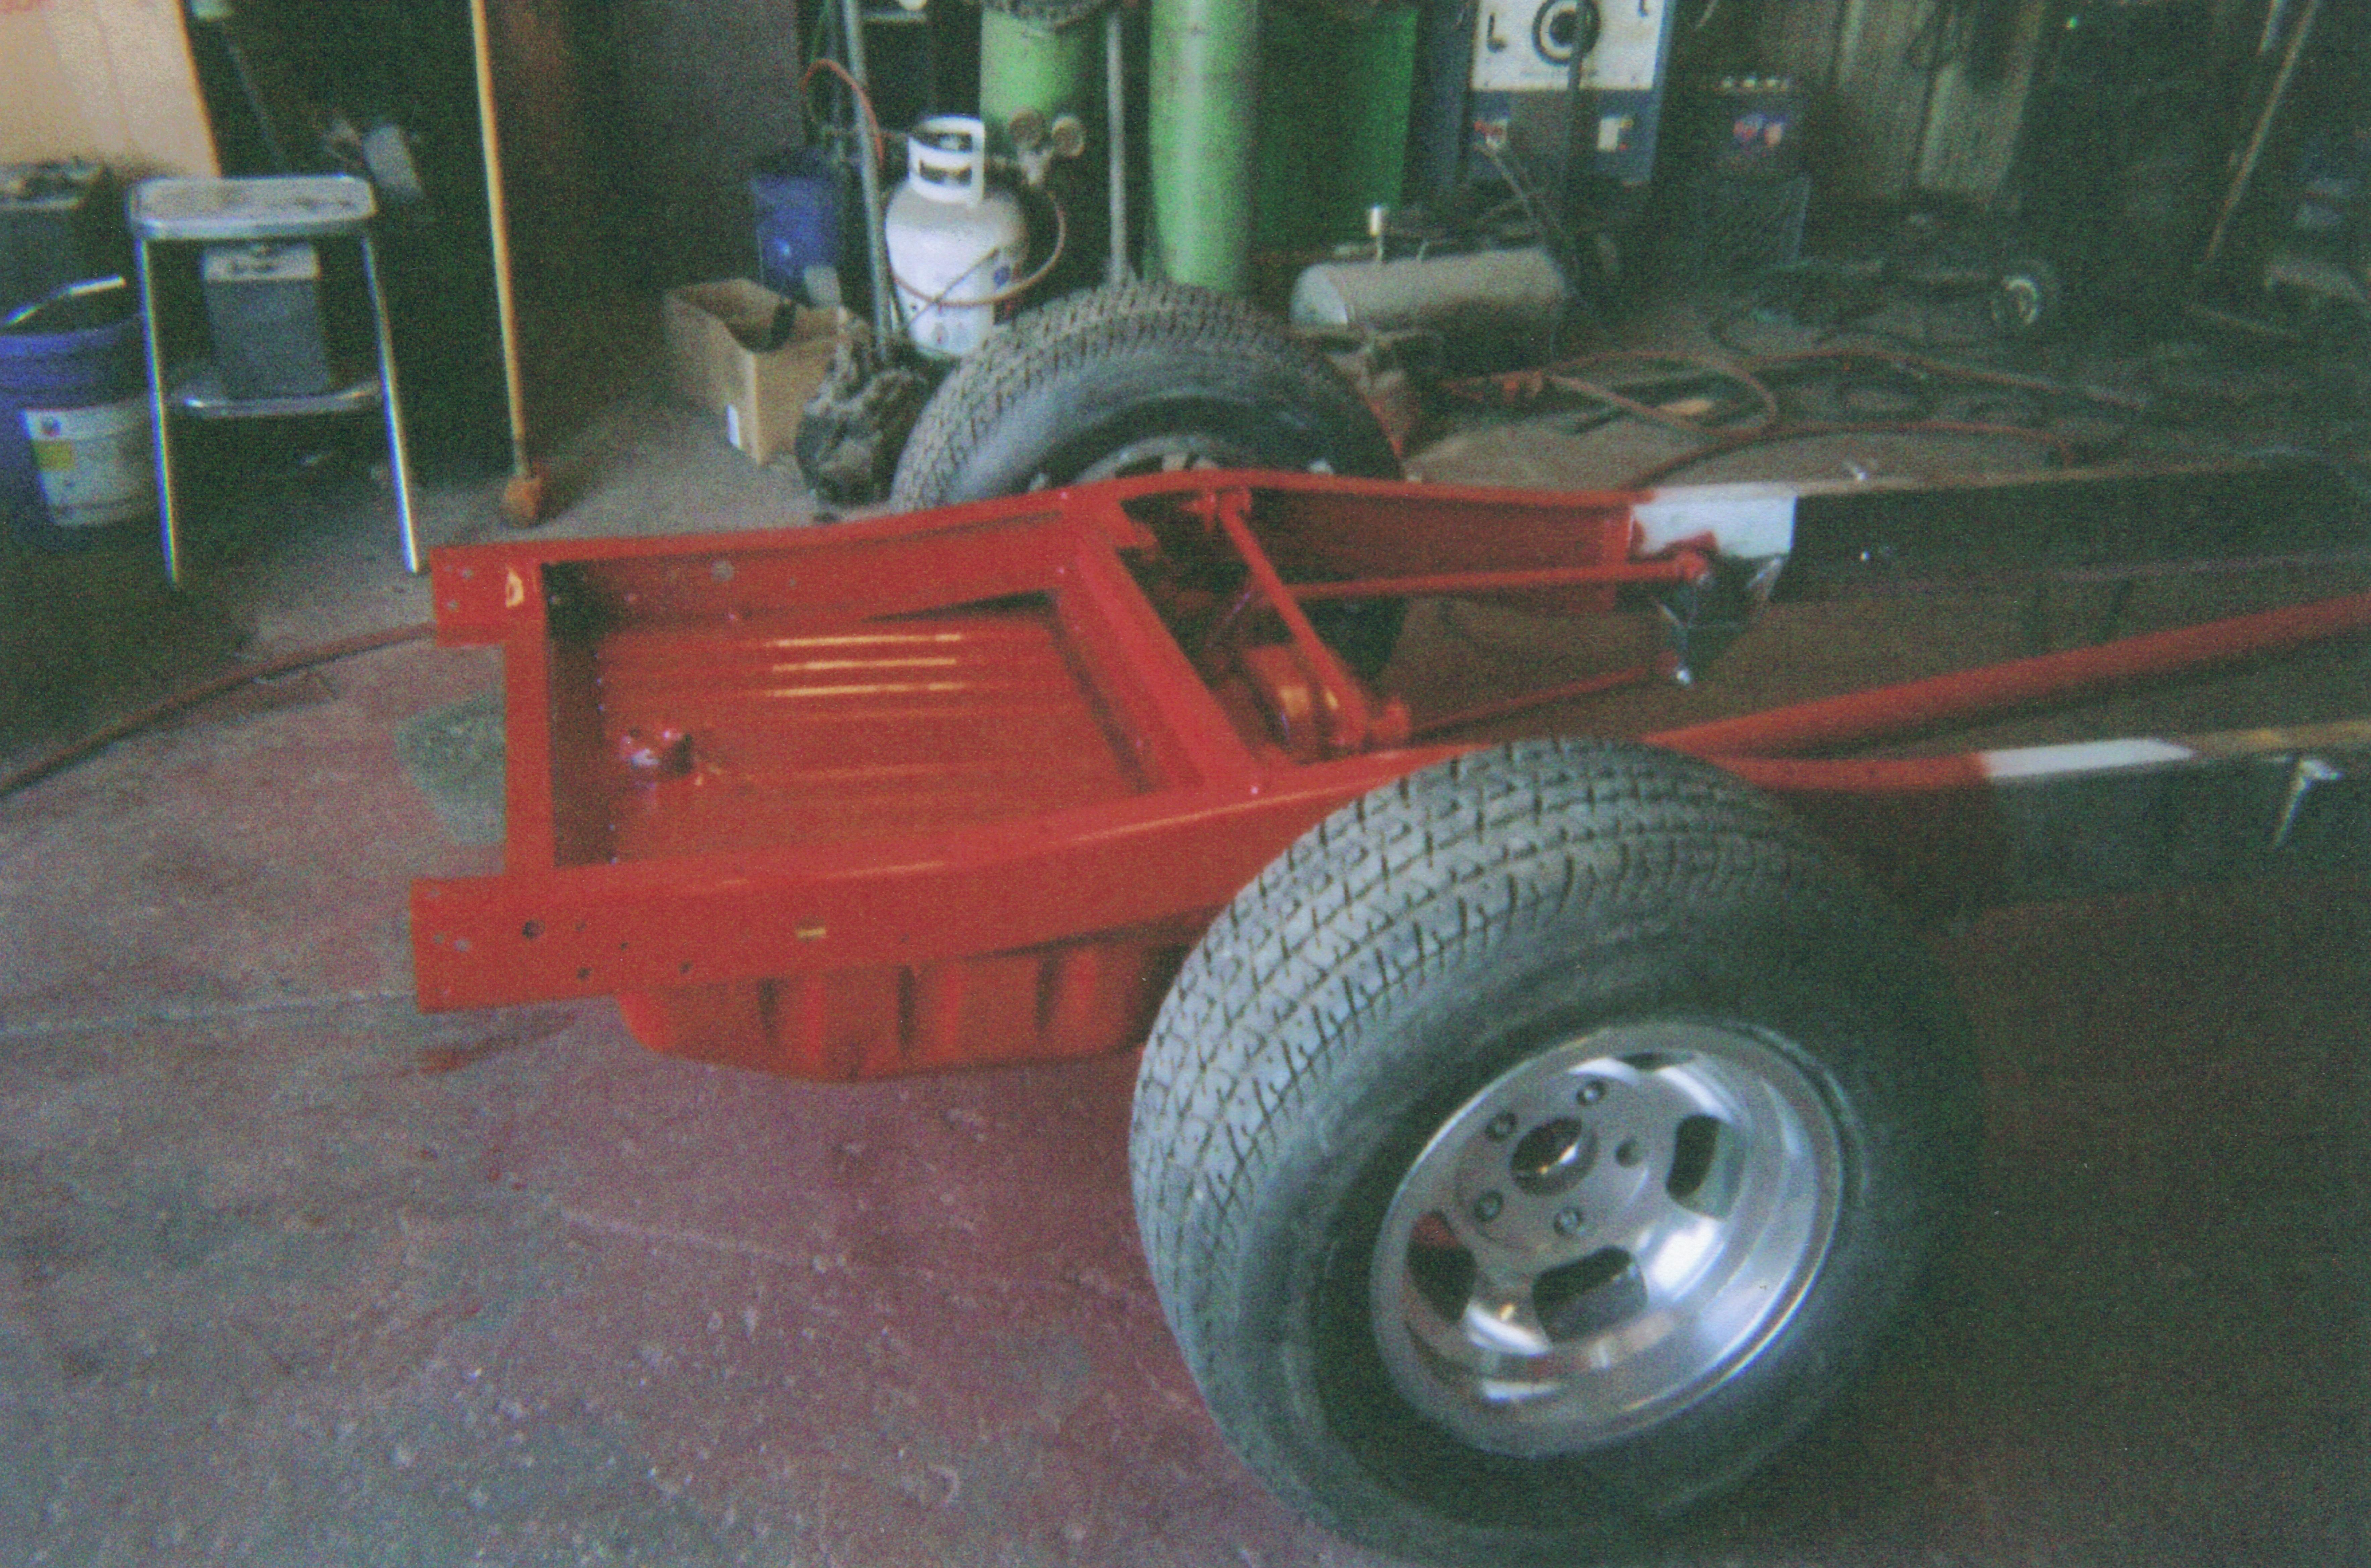
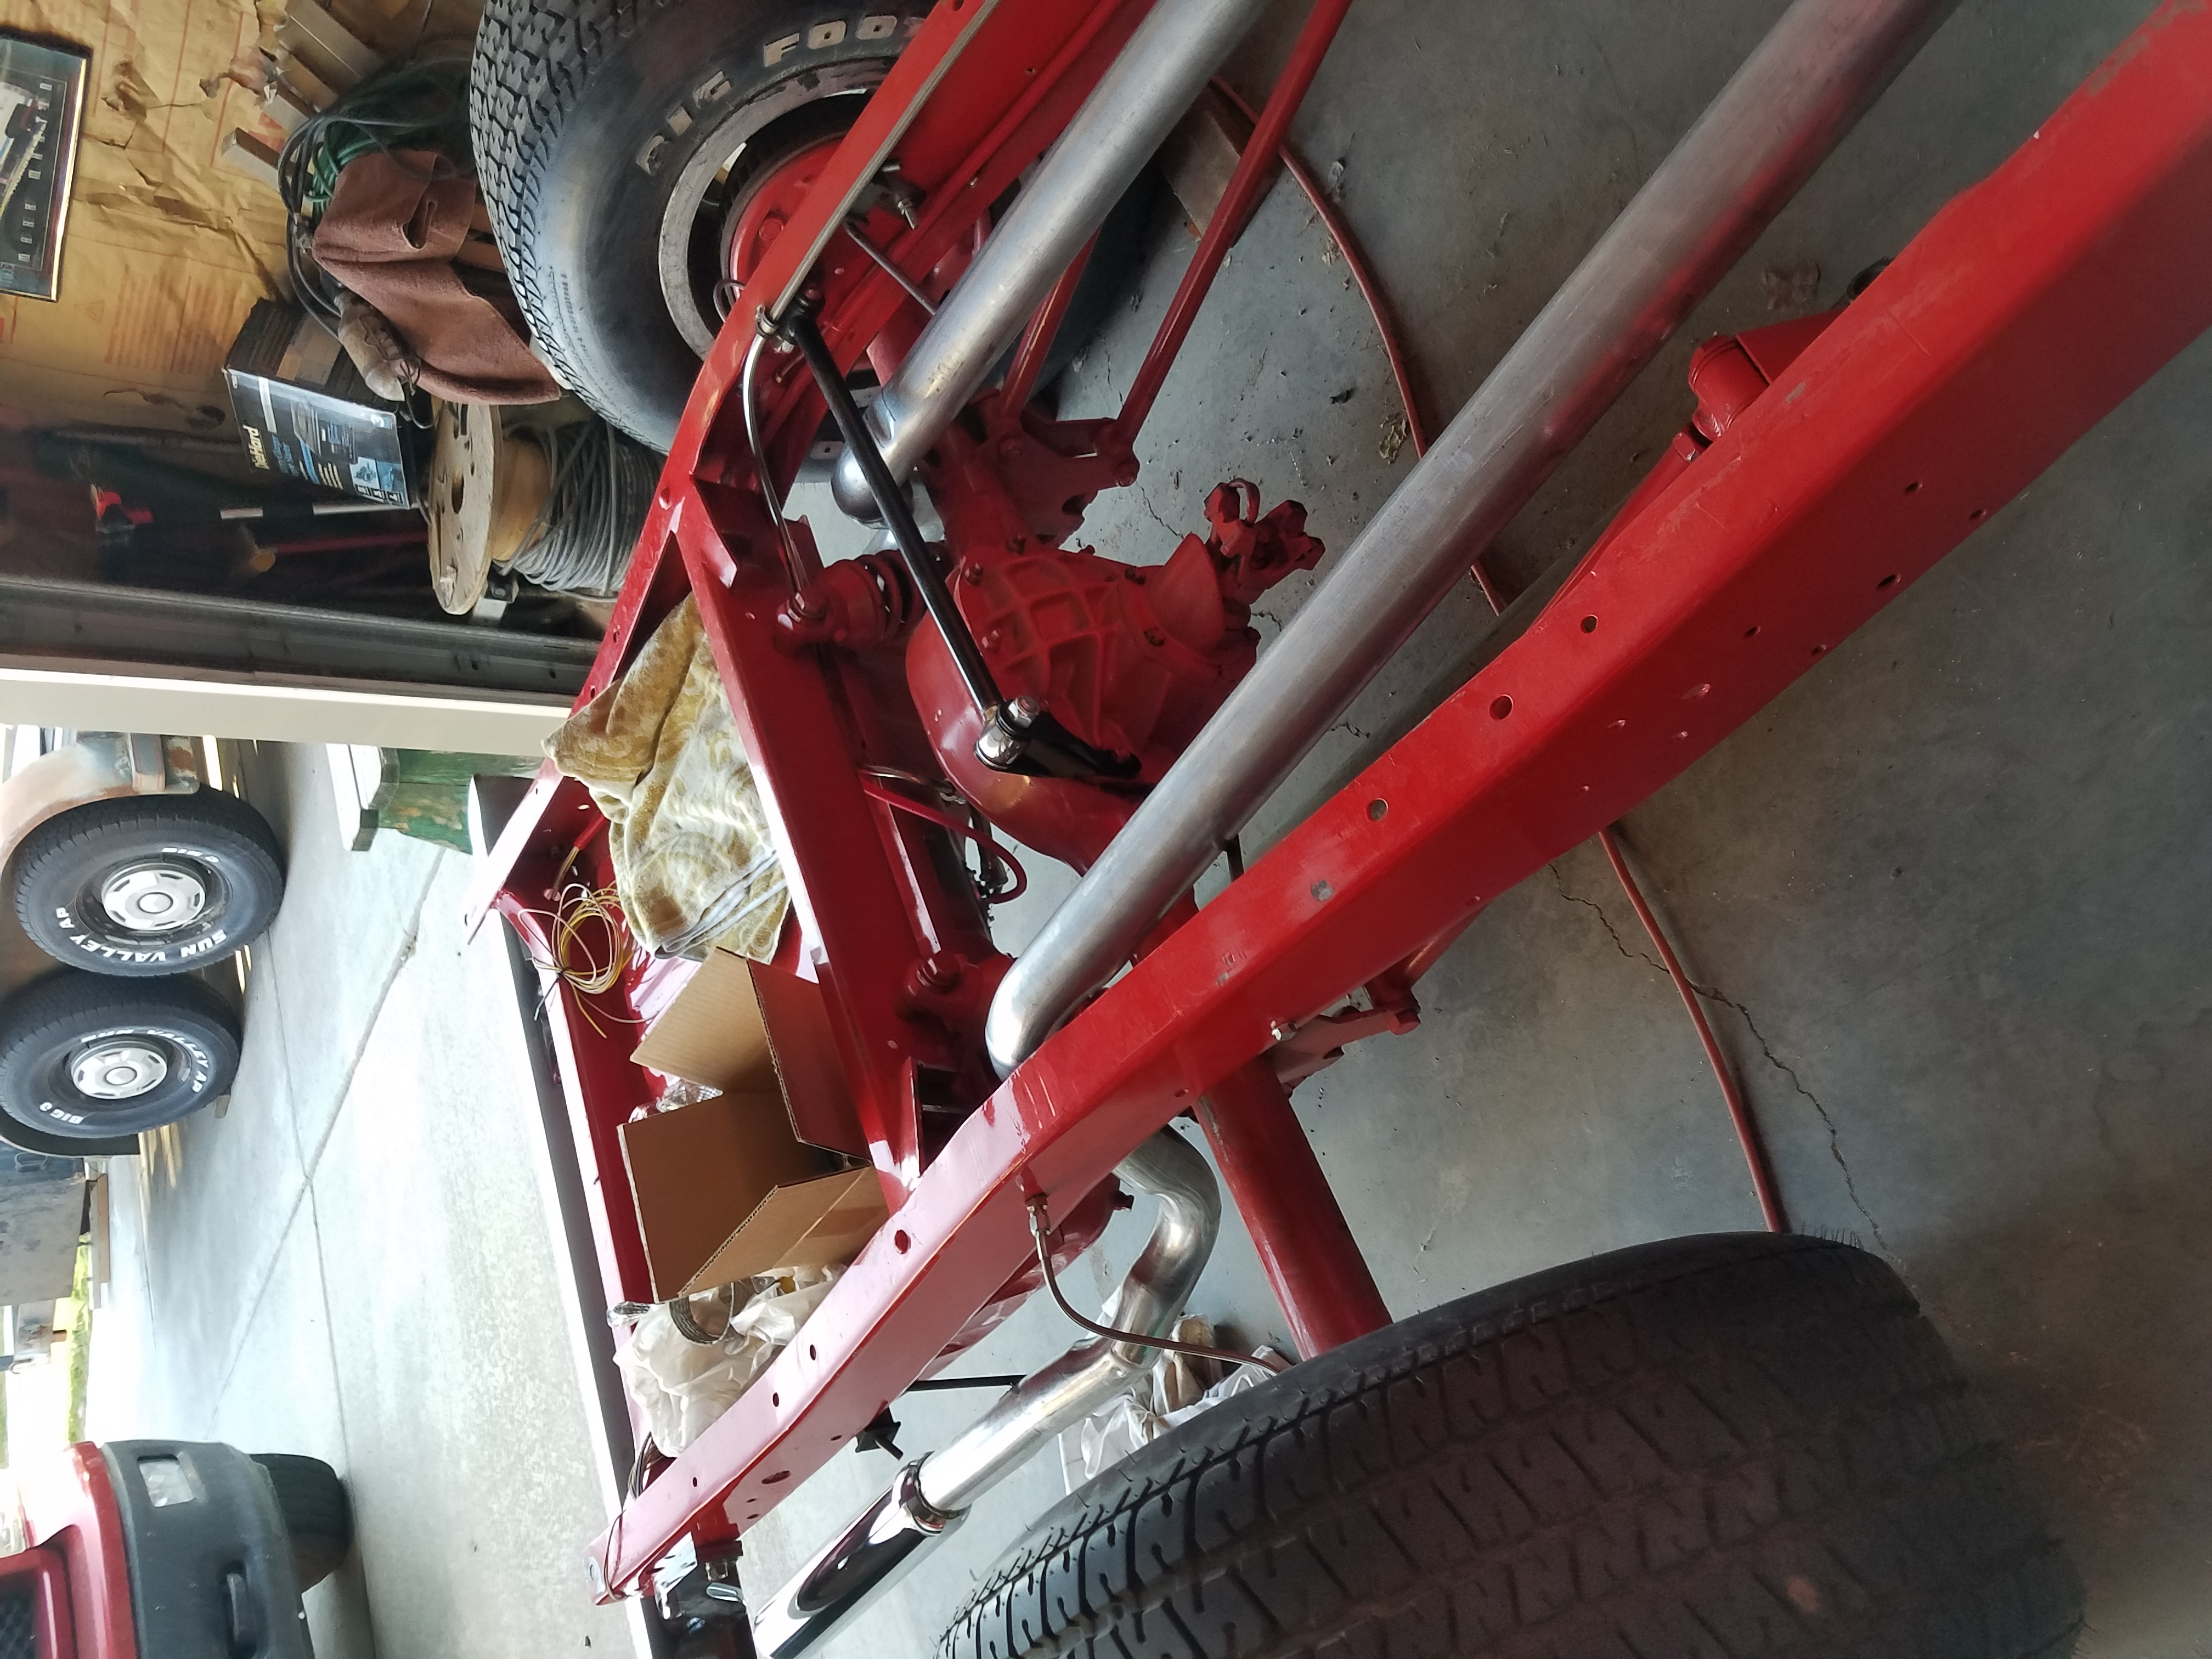
As another month passed and he was there for his next trip and more progress was happening. I am not 100% on what is going on, I think that some of the issues that were concerns were starting to show. There has been progress on the frame, working on mounts for attaching the rear axle.
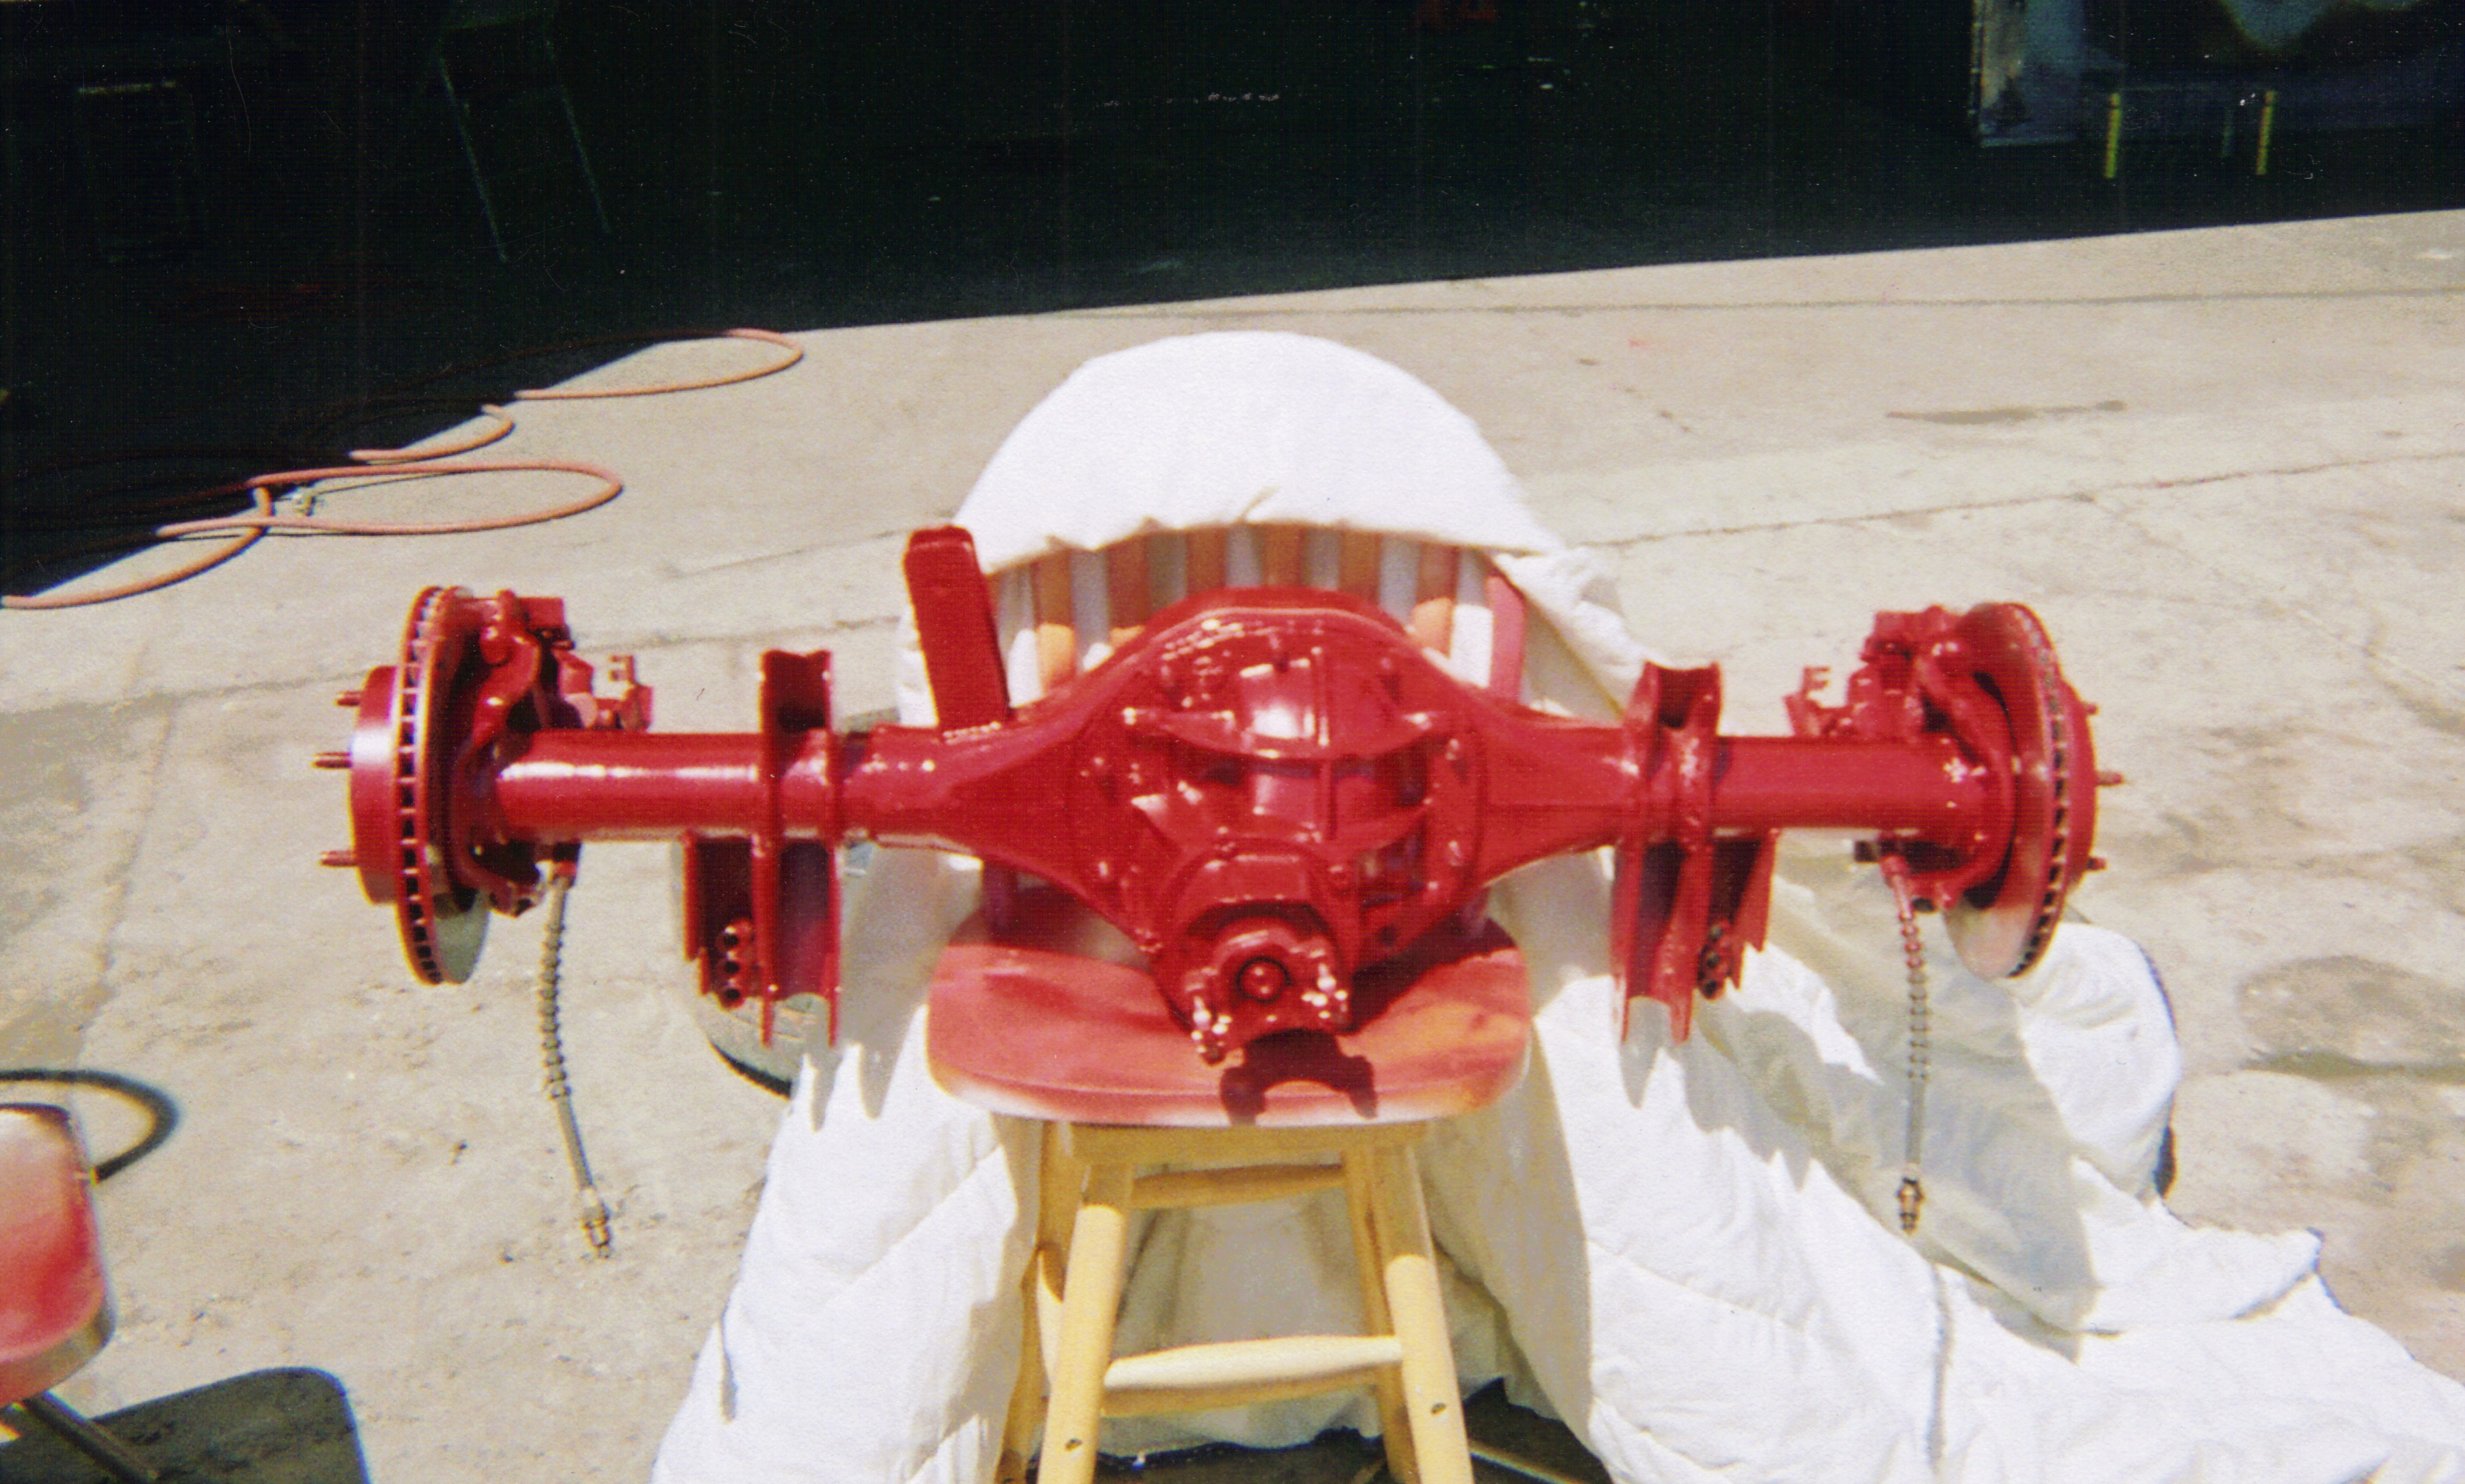
This is the axle that was used for most of the mock ups and assembly. They had decided to go with a 5 link suspension. The fuel tank was mounted. The motor and transmission were mocked up and mounts were placed. The front independent mustang suspension was put in.
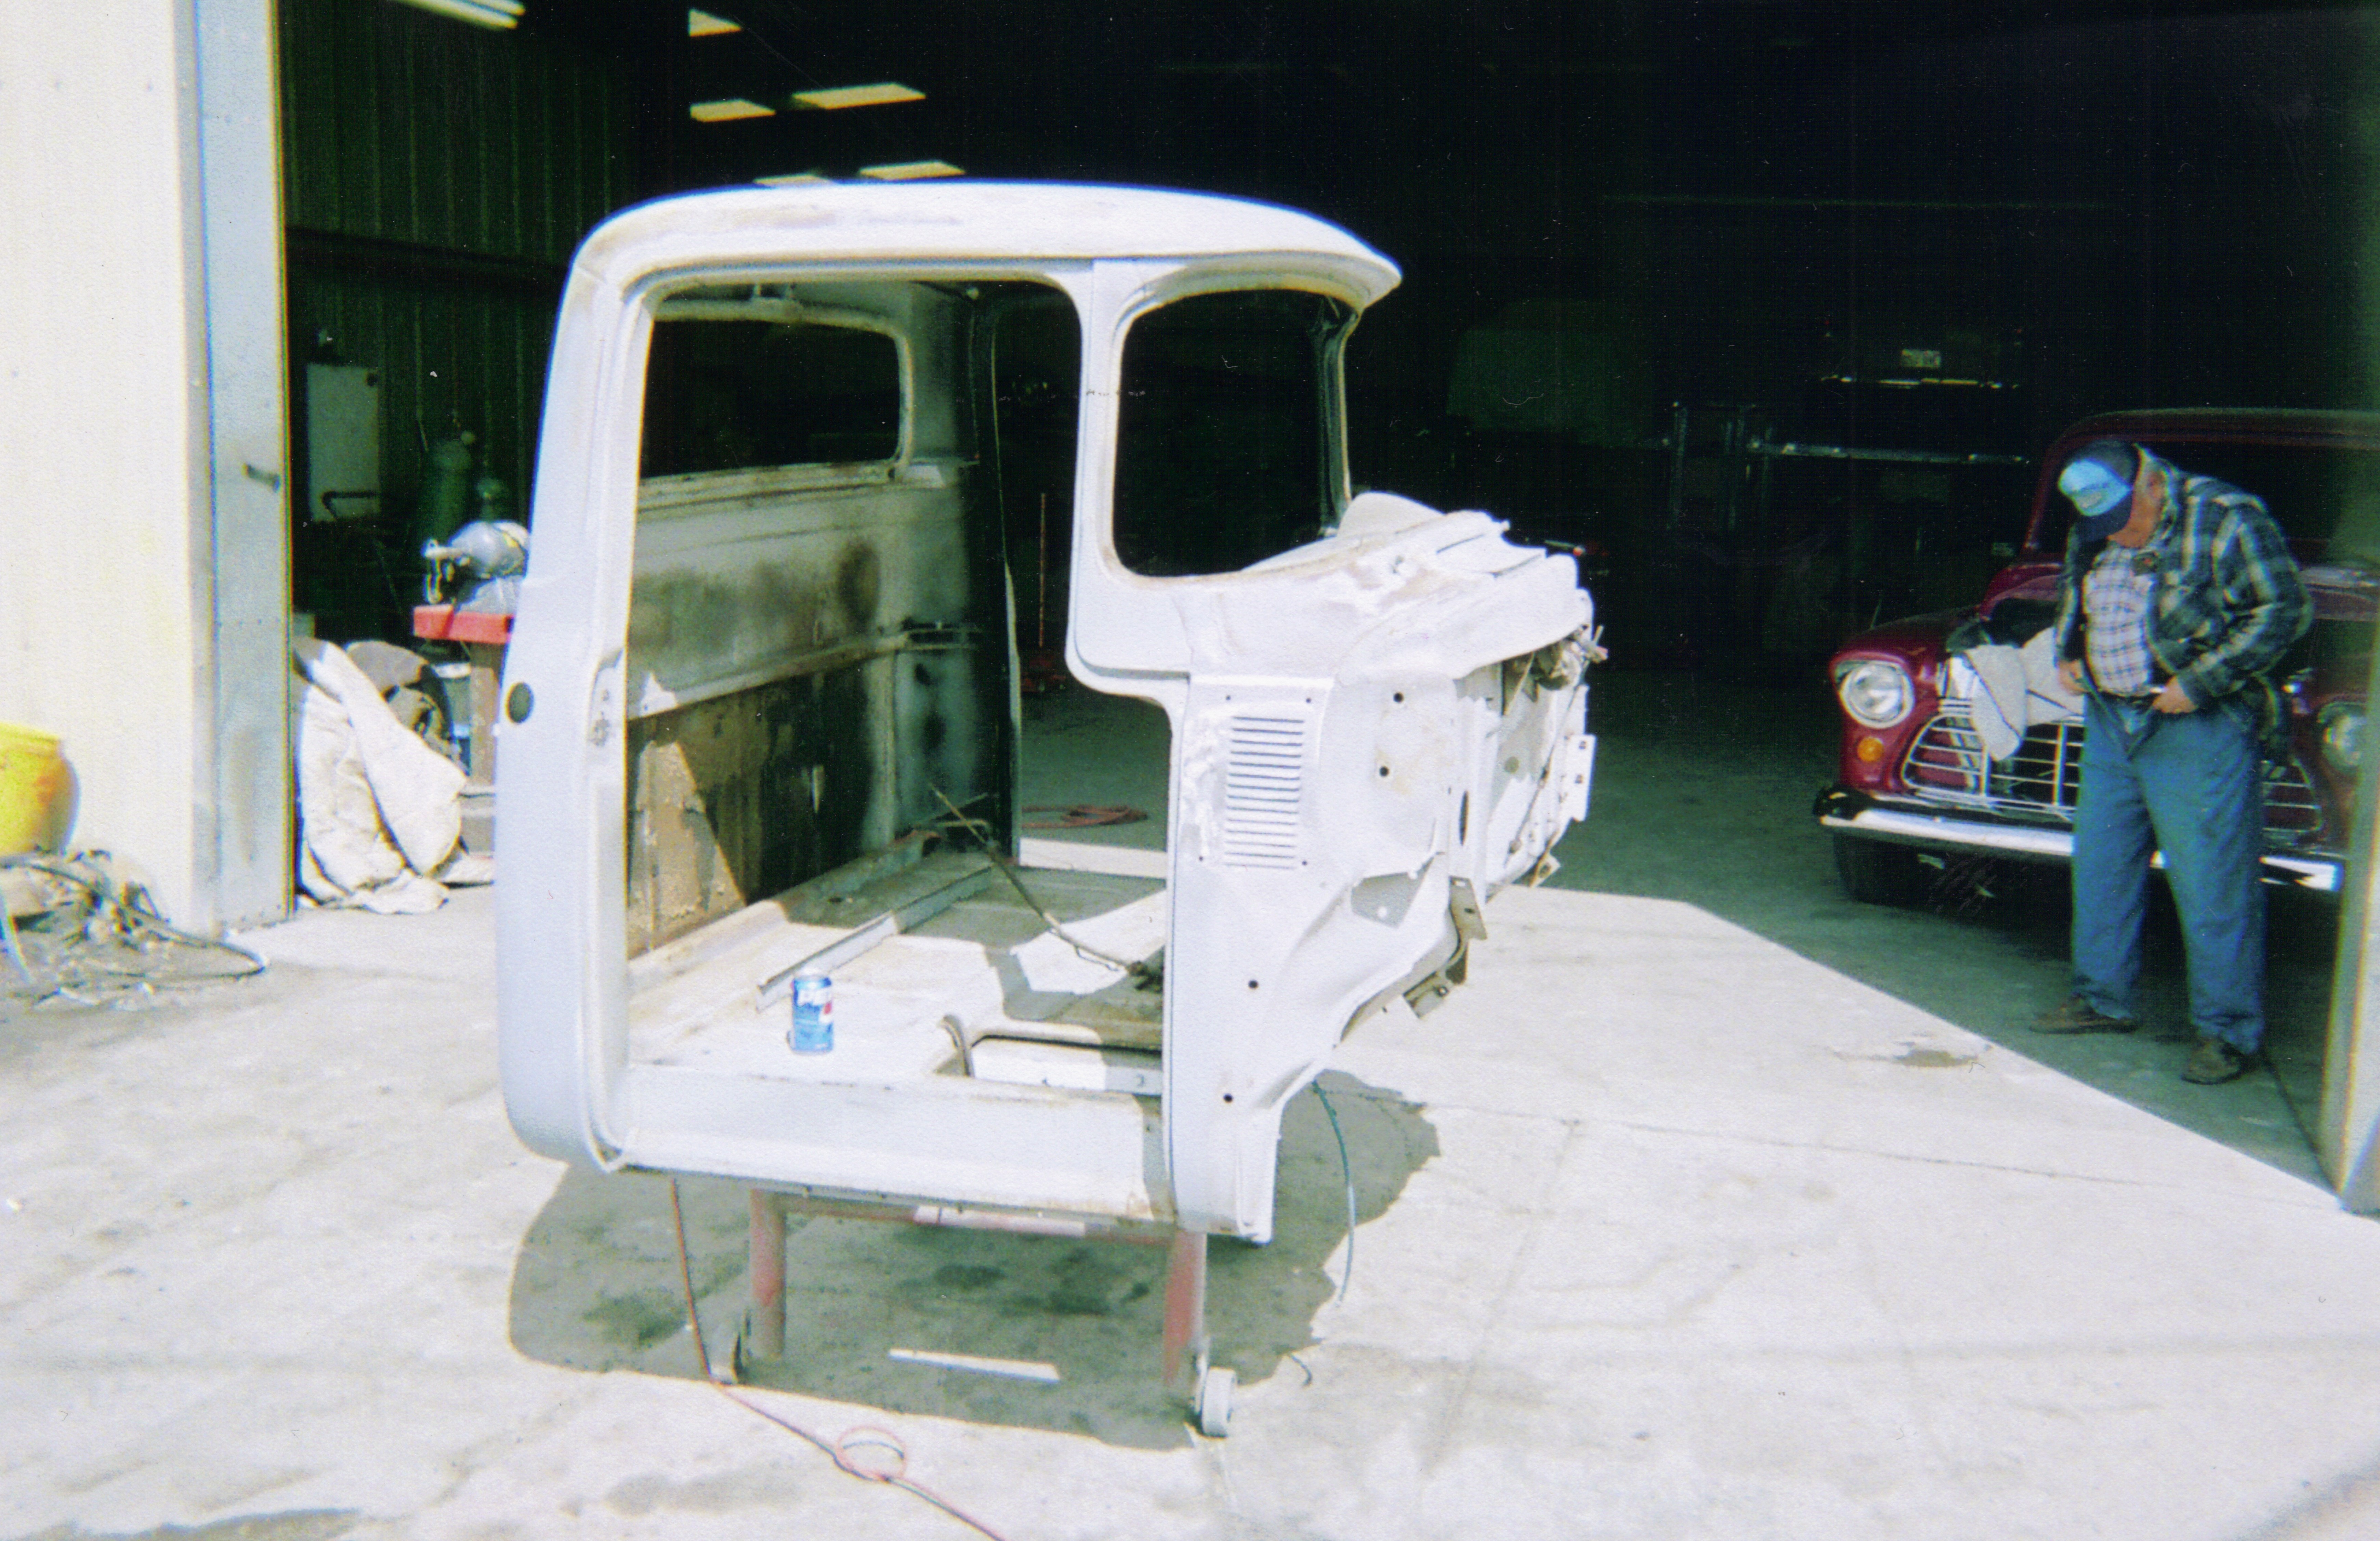
Don had wanted to keep the exterior of the truck as near to stock as possible. Russ was trying to insert some of his ideas on the build. He had taken the bed apart so that he could install tubs. Something Don did not want.
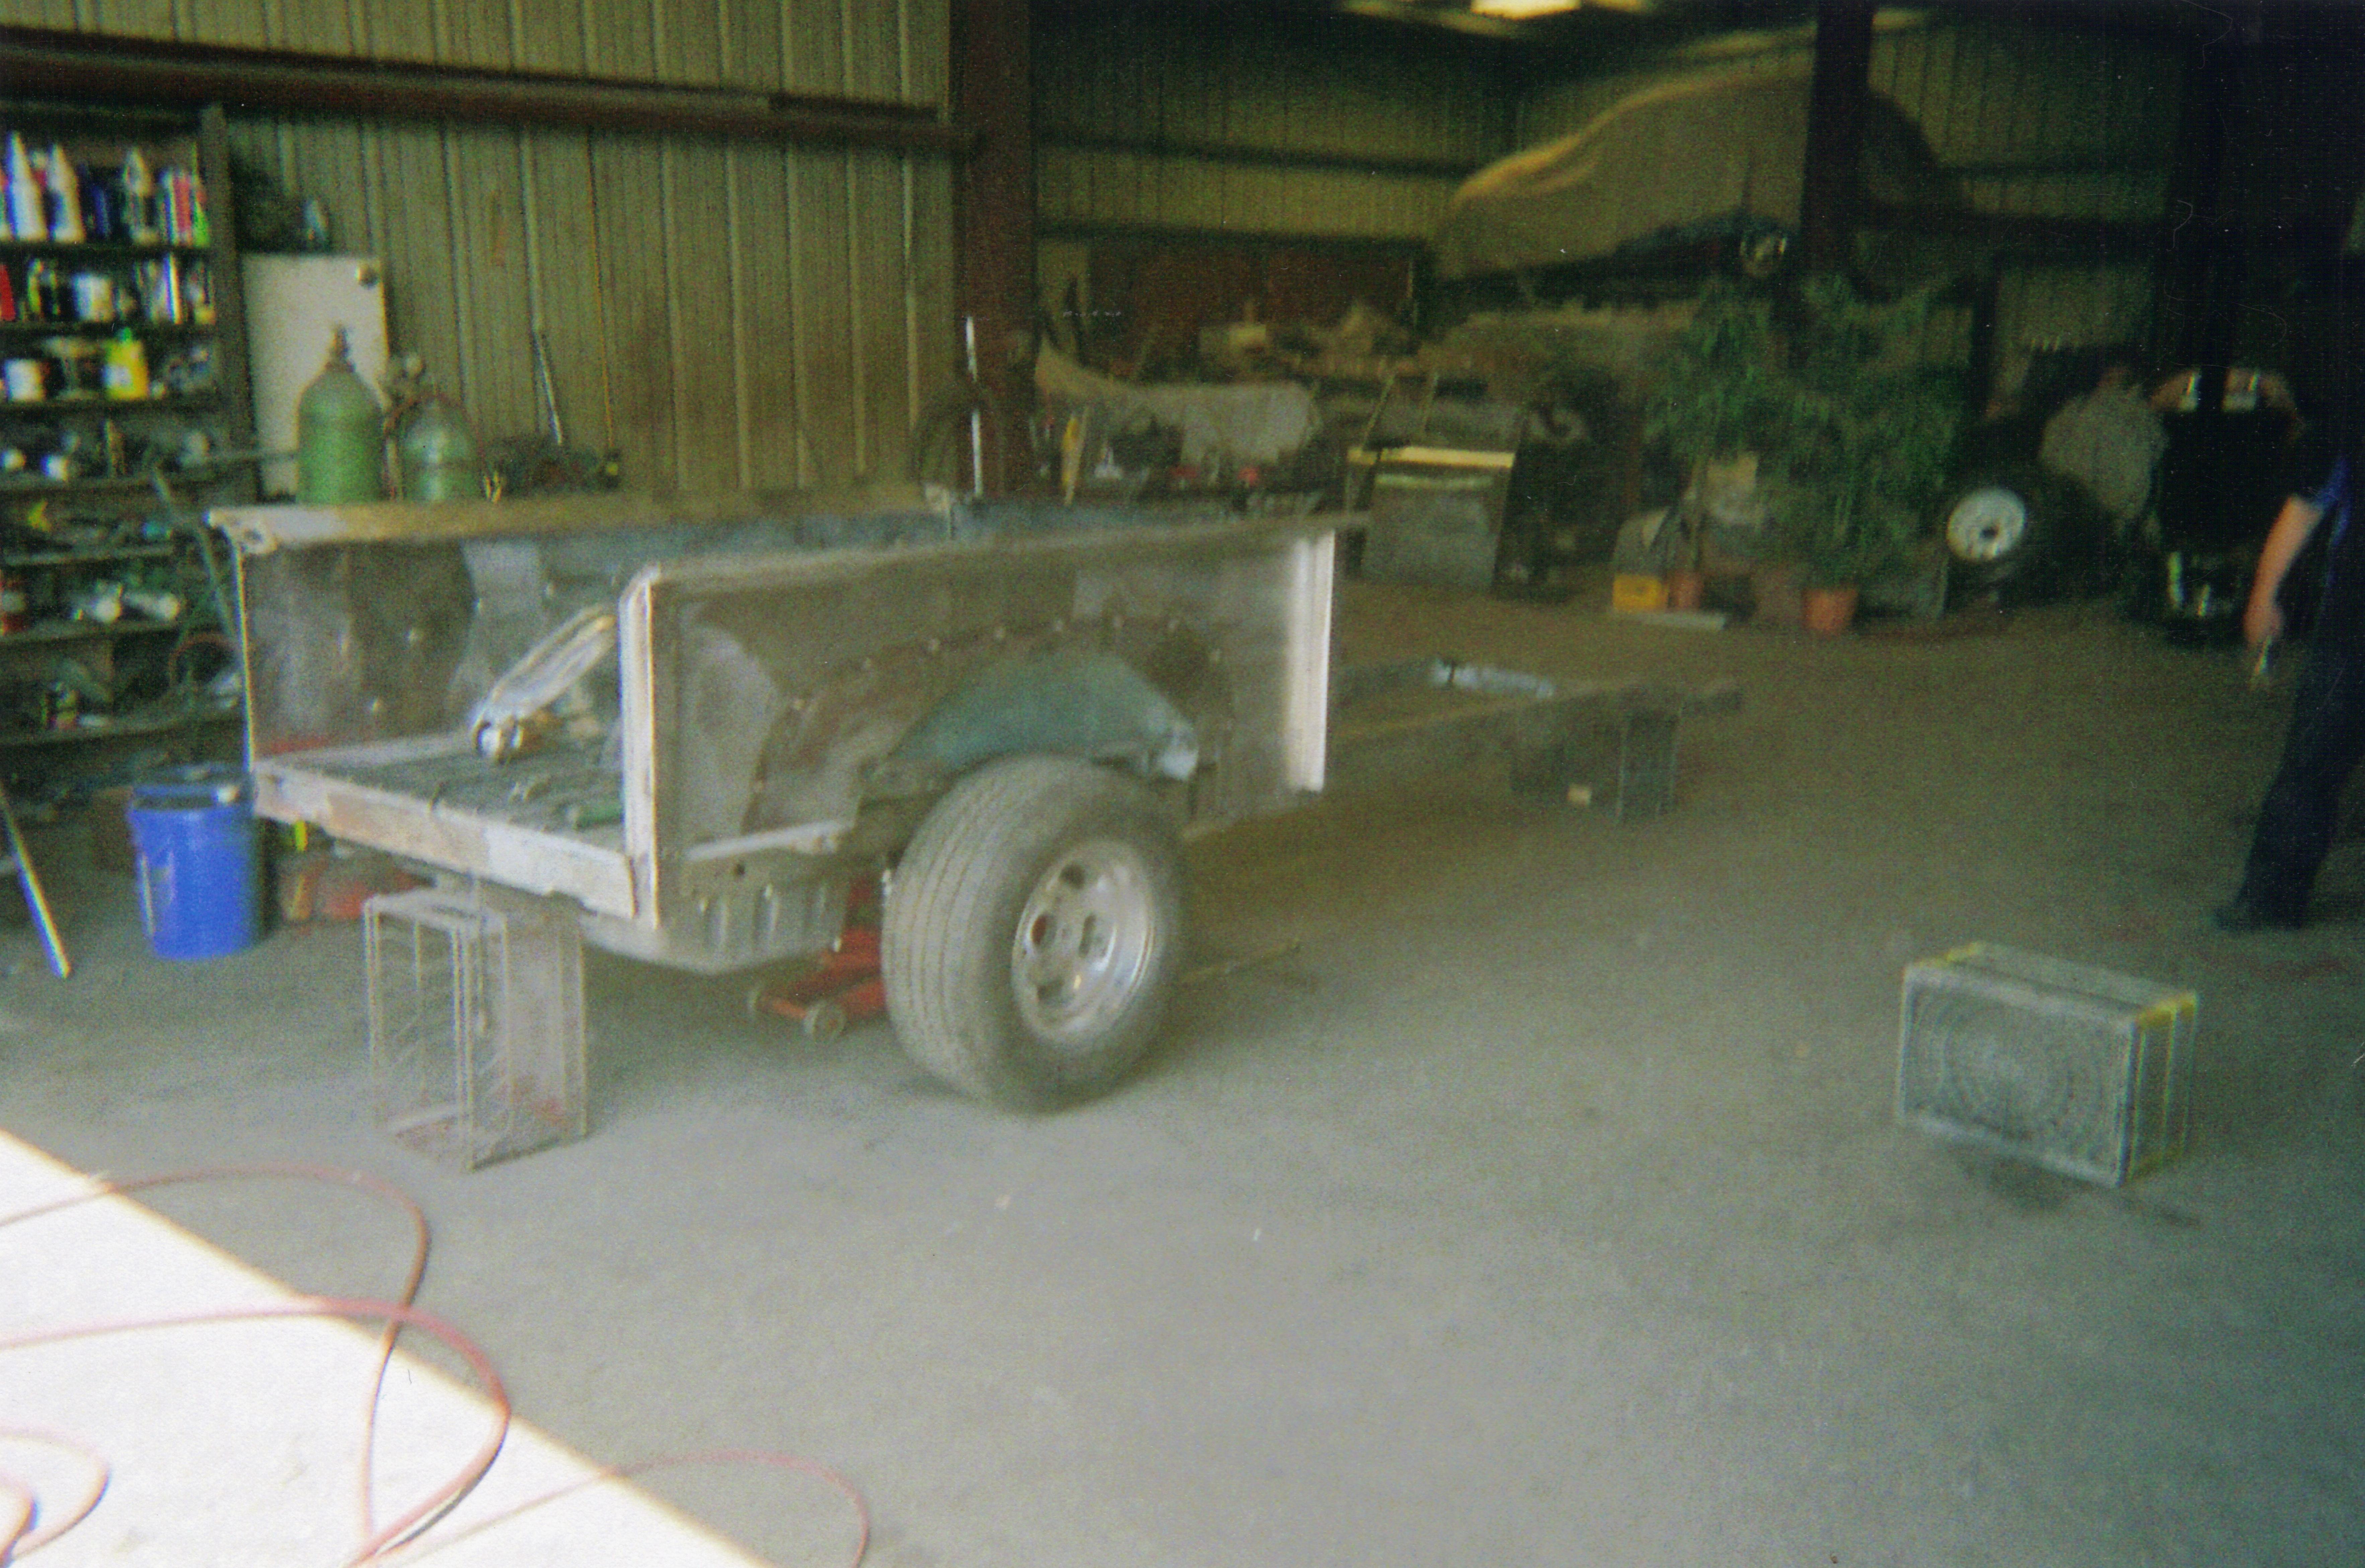
This required getting the bed from the second truck. More things were to come from the difference of opinions. There were many things that Russ wanted to do that conflicted with what Don wanted to do. While he was between trips to NV, Russ had done some things to the truck that were outside of what Don had envisioned. He had put a stainless liner on the firewall and filled the ribs on the rear of the cab.
These are things that started to make Don question the decision to have Russ work on the truck. He had Russ take the other cab and prep it for installation while he was back home.
More to follow.....
This is the axle that was used for most of the mock ups and assembly. They had decided to go with a 5 link suspension. The fuel tank was mounted. The motor and transmission were mocked up and mounts were placed. The front independent mustang suspension was put in.
Don had wanted to keep the exterior of the truck as near to stock as possible. Russ was trying to insert some of his ideas on the build. He had taken the bed apart so that he could install tubs. Something Don did not want.
This required getting the bed from the second truck. More things were to come from the difference of opinions. There were many things that Russ wanted to do that conflicted with what Don wanted to do. While he was between trips to NV, Russ had done some things to the truck that were outside of what Don had envisioned. He had put a stainless liner on the firewall and filled the ribs on the rear of the cab.
These are things that started to make Don question the decision to have Russ work on the truck. He had Russ take the other cab and prep it for installation while he was back home.
More to follow.....
#4
11-23-2016, 04:11 PM
Join Date: Aug 2009
Location: Idaho Falls, Idaho
Posts: 76
Likes: 0
Received 0 Likes
on
0 Posts
These photos are from June 06 and August 06.
I do know that this is the timeframe that there were things done to the truck that were not what Don wanted. They had to change things back to make it what it should have been. Sometime after August the truck was moved from Lovelock, NV to Fallon, NV to where Russ lived so that he could work on it without having to travel.
My wife and I stopped in Fallon on the way back from CA near the end of September and there was not as much progress from previous pictures. I know that the cab and most or the front end parts were painted. Both trucks were there and it almost seemed as though the one that Russ ended up with had more done to it that Don's did.
Shortly after this, things really fell apart. Don would ask where some parts that he had taken for the truck were at, and Russ couldn't come up with them. Don and his wife couldn't get Russ to provide receipts for items he claimed to purchase, even though he was asking for more money for them. They finally decided that it was time to cut losses and retrieve the truck and what parts they could.
During this fallout the truck that Don ended up with was again moved back to Lovelock. They went down and loaded up all of the items that were there and, after a bit of an argument about what was Don's, left and brought everything they had back home. After this, the work stopped for quite a while.
I believe that during the years from the first of '07 until about '12 there wasn't really anything done. Don had been going to car meets around town, talking with guy's and hoping to find someone that could help out and get the truck back on track. He had become good friends with one of the guys that had some building experience and offered to help out.
I will post more on this later.

#6
11-24-2016, 01:25 PM
Join Date: Aug 2009
Location: Idaho Falls, Idaho
Posts: 76
Likes: 0
Received 0 Likes
on
0 Posts
#7
11-27-2016, 10:50 AM
Join Date: Aug 2009
Location: Idaho Falls, Idaho
Posts: 76
Likes: 0
Received 0 Likes
on
0 Posts
So, since it has been back home there wasn't much done on the truck for quite some time. The radiator was ordered and installed by the oldest grandchild. They had carburetors sent off to the factory to be rebuilt and set up. They picked up more parts to be able to proceed with the build, but it took some time for things to happen.
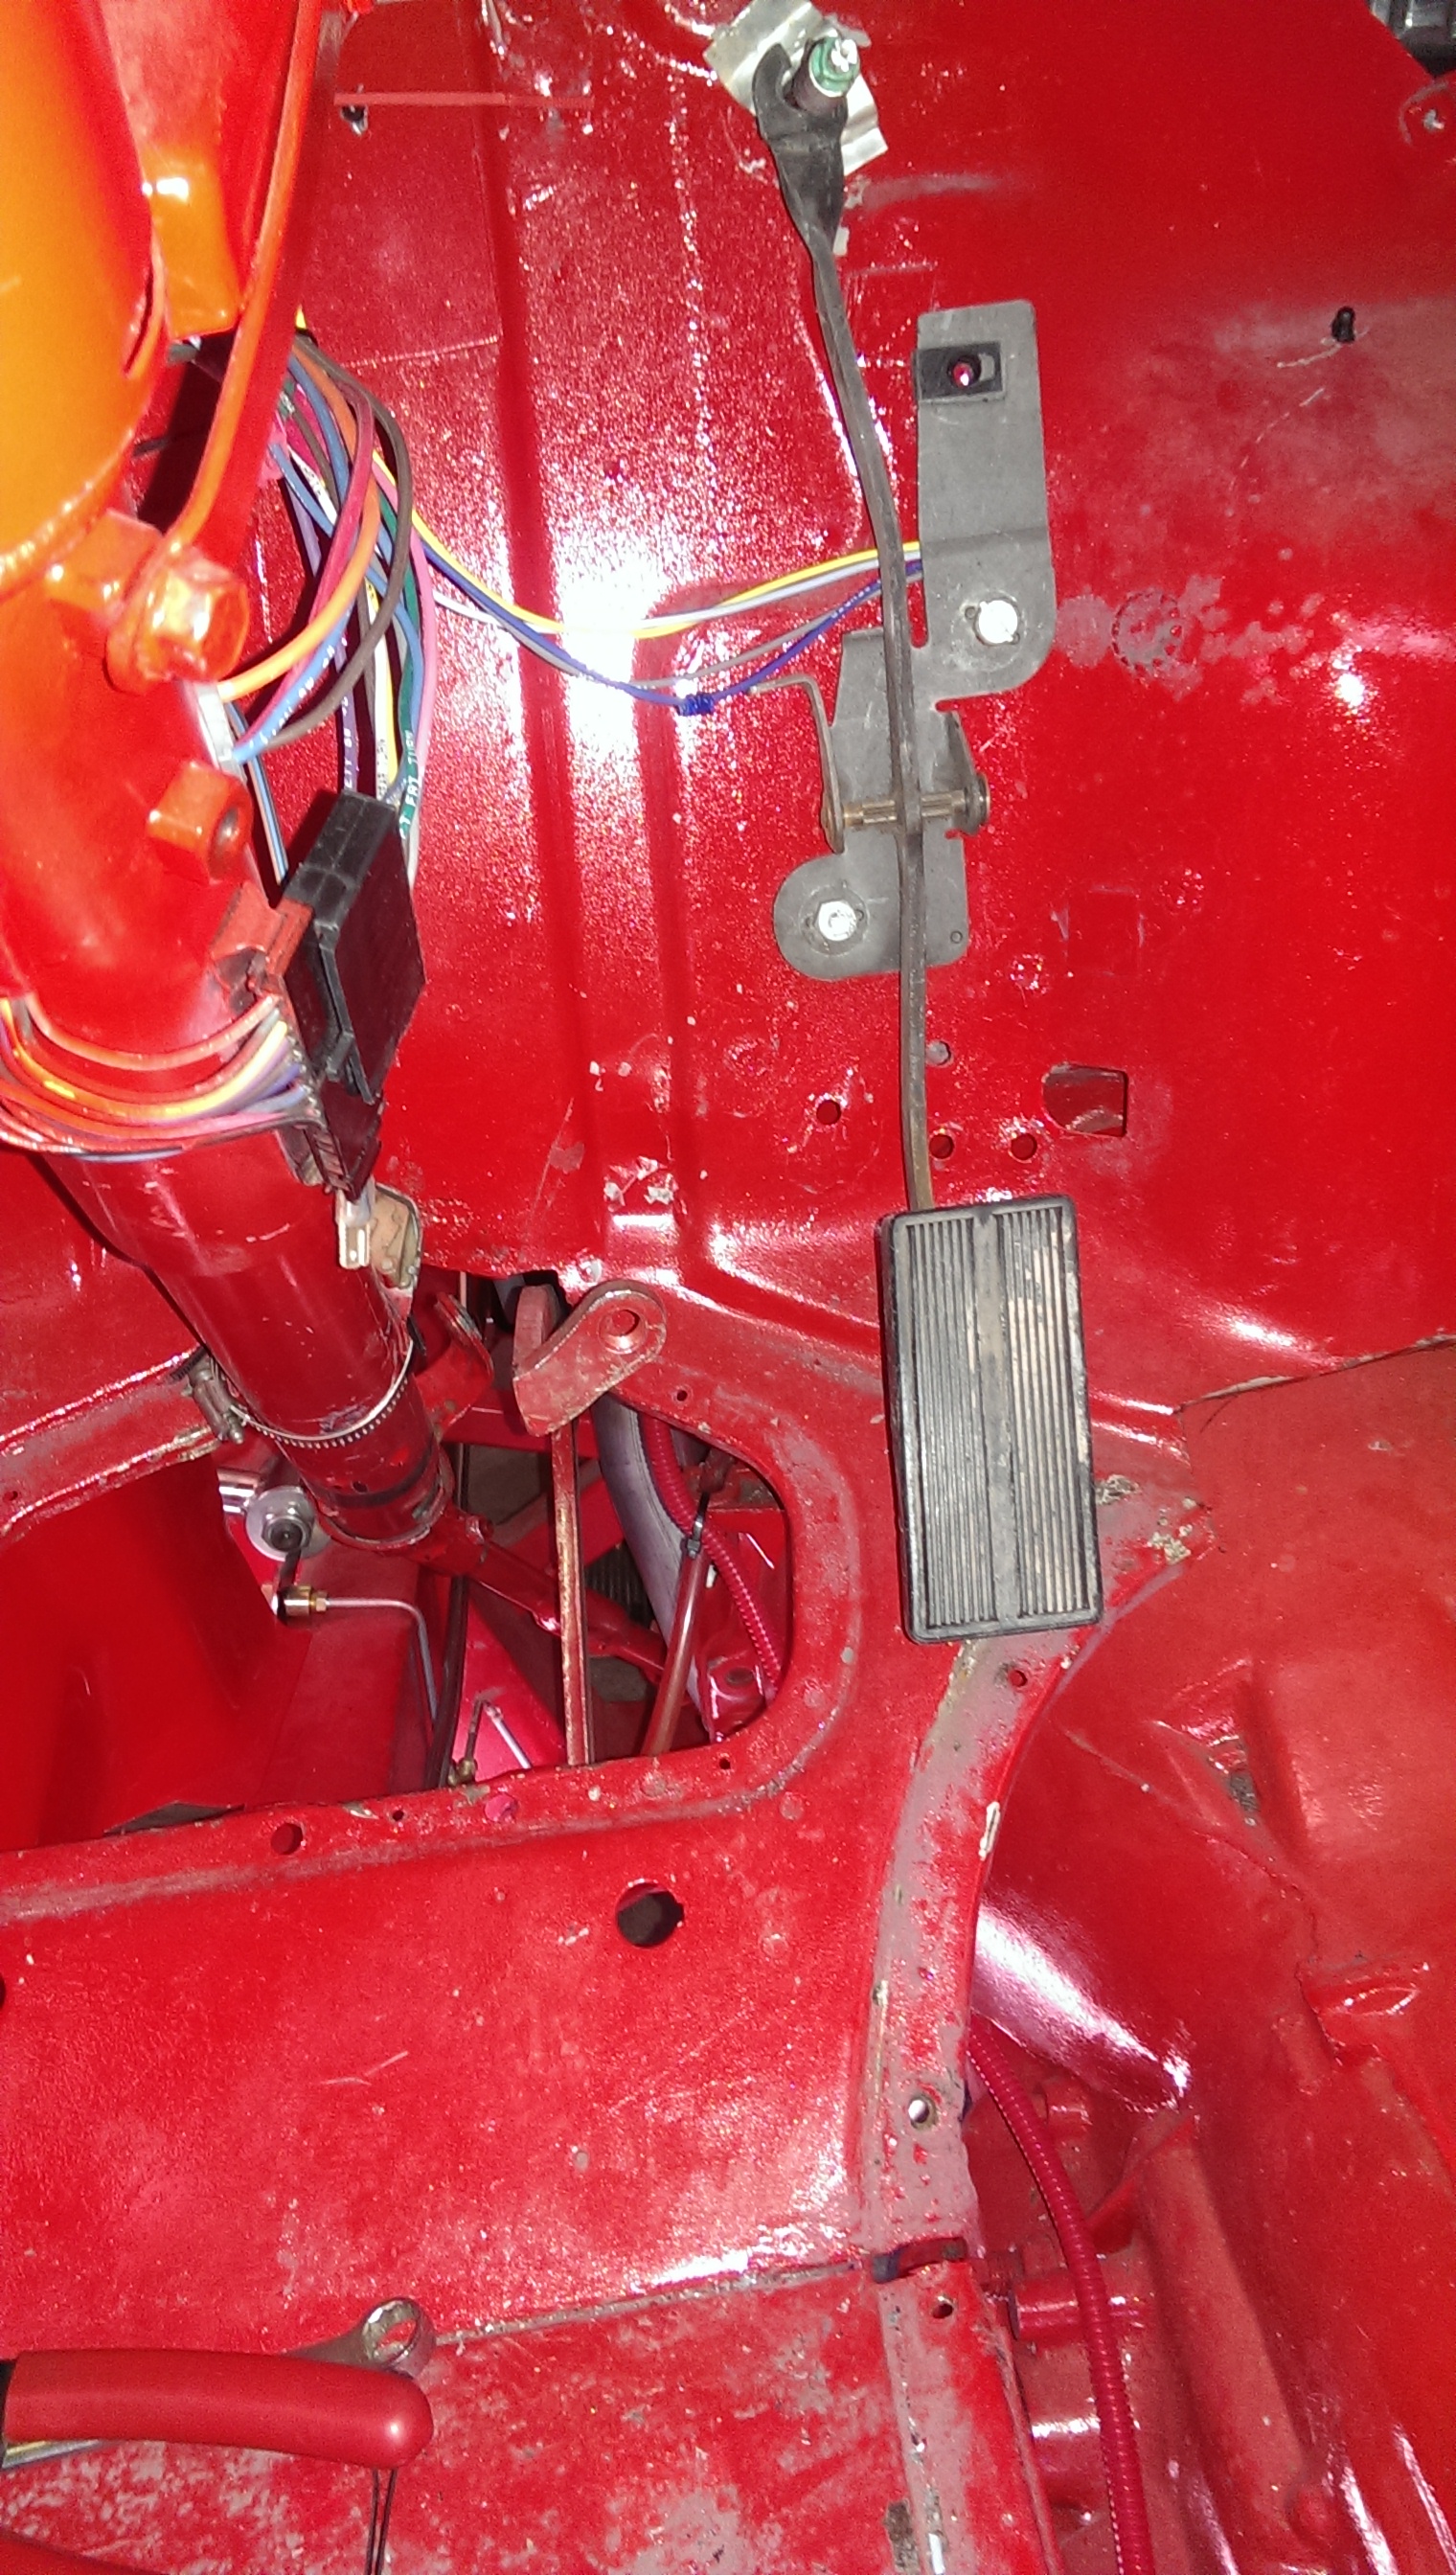
As I had said, Don found a guy that was going to help with getting the build going again and the truck was moved to his shop. This happened around 2012 as we recall. There he worked on getting brake lines installed and working on the wiring. Somewhere along the line a wiring kit was purchased. The guy working on the truck felt that the kit was far to confusing and had much more going on that what was needed, so they purchased a Ron Francis kit. (From looking at what was here when I started working on the truck, I think this was an excellent idea. The other kit had a lot of wiring that seemed to be excessive and not as clean as what the Ron Francis kit is.) After a short time, this guy had some health issues and was no longer able to help out. The truck was moved back to Don's house and sat again with little done.
As I had said, Don found a guy that was going to help with getting the build going again and the truck was moved to his shop. This happened around 2012 as we recall. There he worked on getting brake lines installed and working on the wiring. Somewhere along the line a wiring kit was purchased. The guy working on the truck felt that the kit was far to confusing and had much more going on that what was needed, so they purchased a Ron Francis kit. (From looking at what was here when I started working on the truck, I think this was an excellent idea. The other kit had a lot of wiring that seemed to be excessive and not as clean as what the Ron Francis kit is.) After a short time, this guy had some health issues and was no longer able to help out. The truck was moved back to Don's house and sat again with little done.
Trending Topics
#9
11-30-2016, 10:11 PM
Join Date: Aug 2009
Location: Idaho Falls, Idaho
Posts: 76
Likes: 0
Received 0 Likes
on
0 Posts
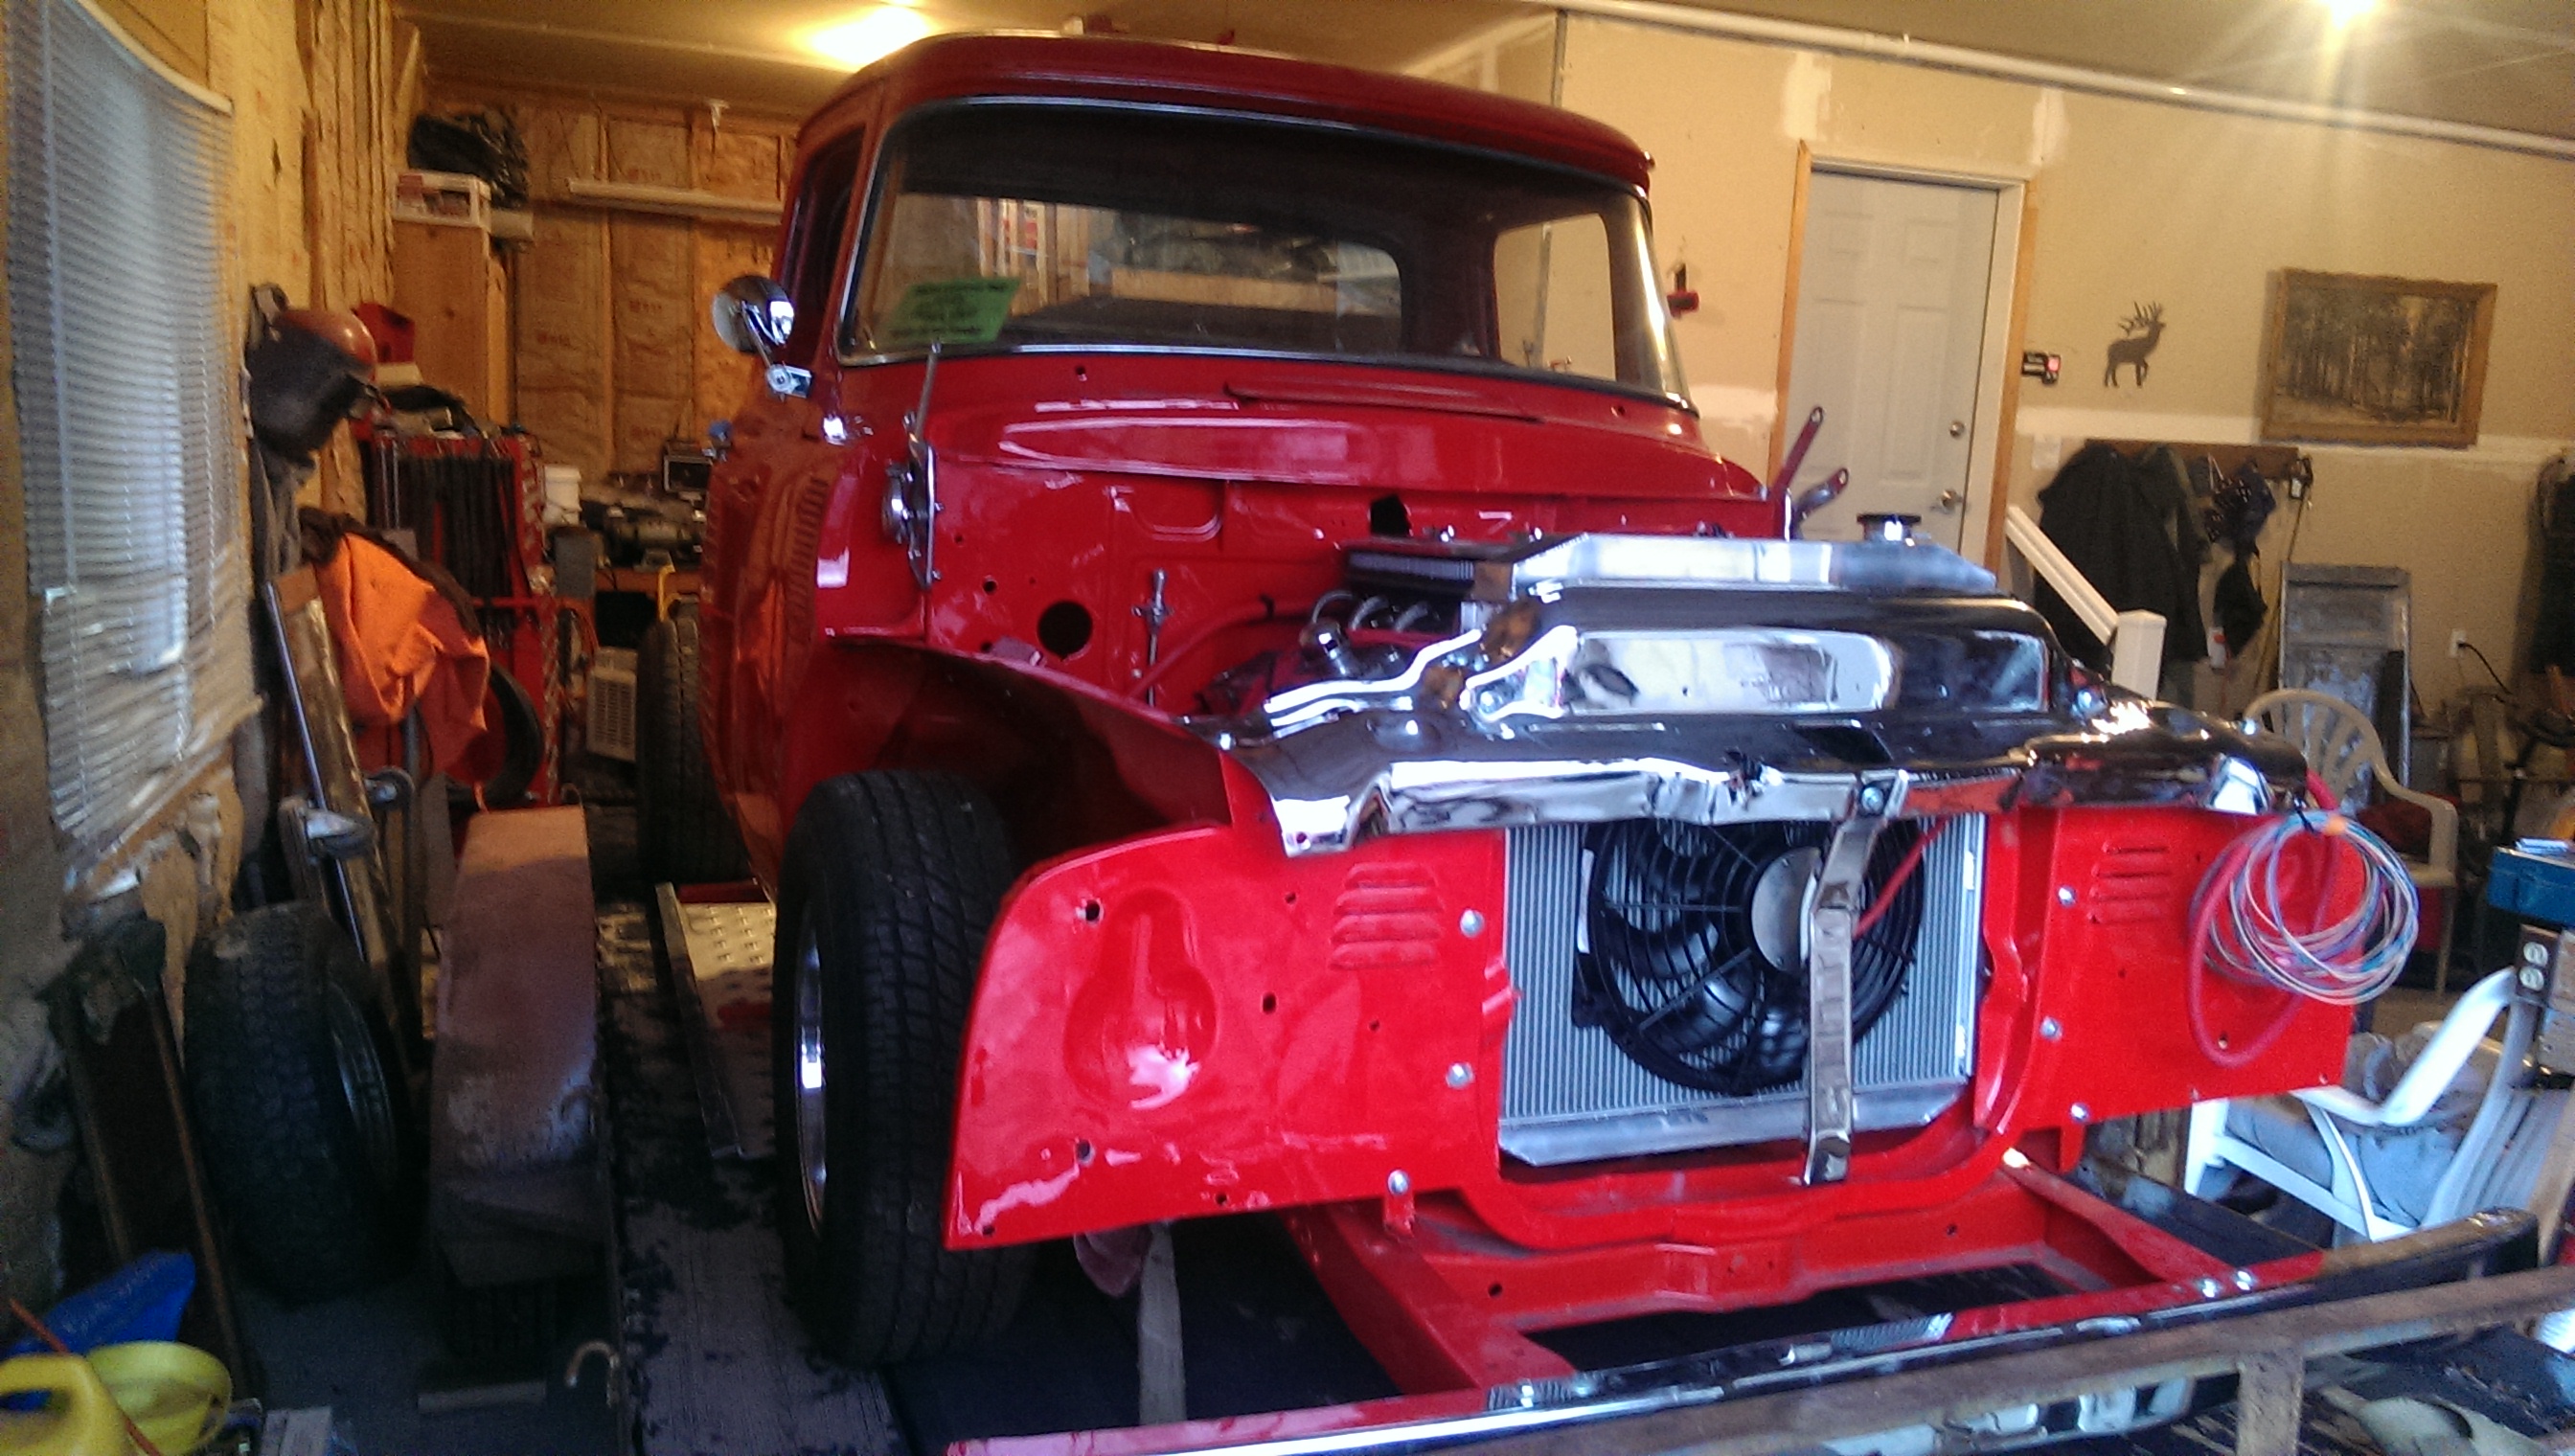
Now that I have laid out the backstory, on to the current progress. This is what I had to start with when I finally made a decision to get this back on track and get it going.
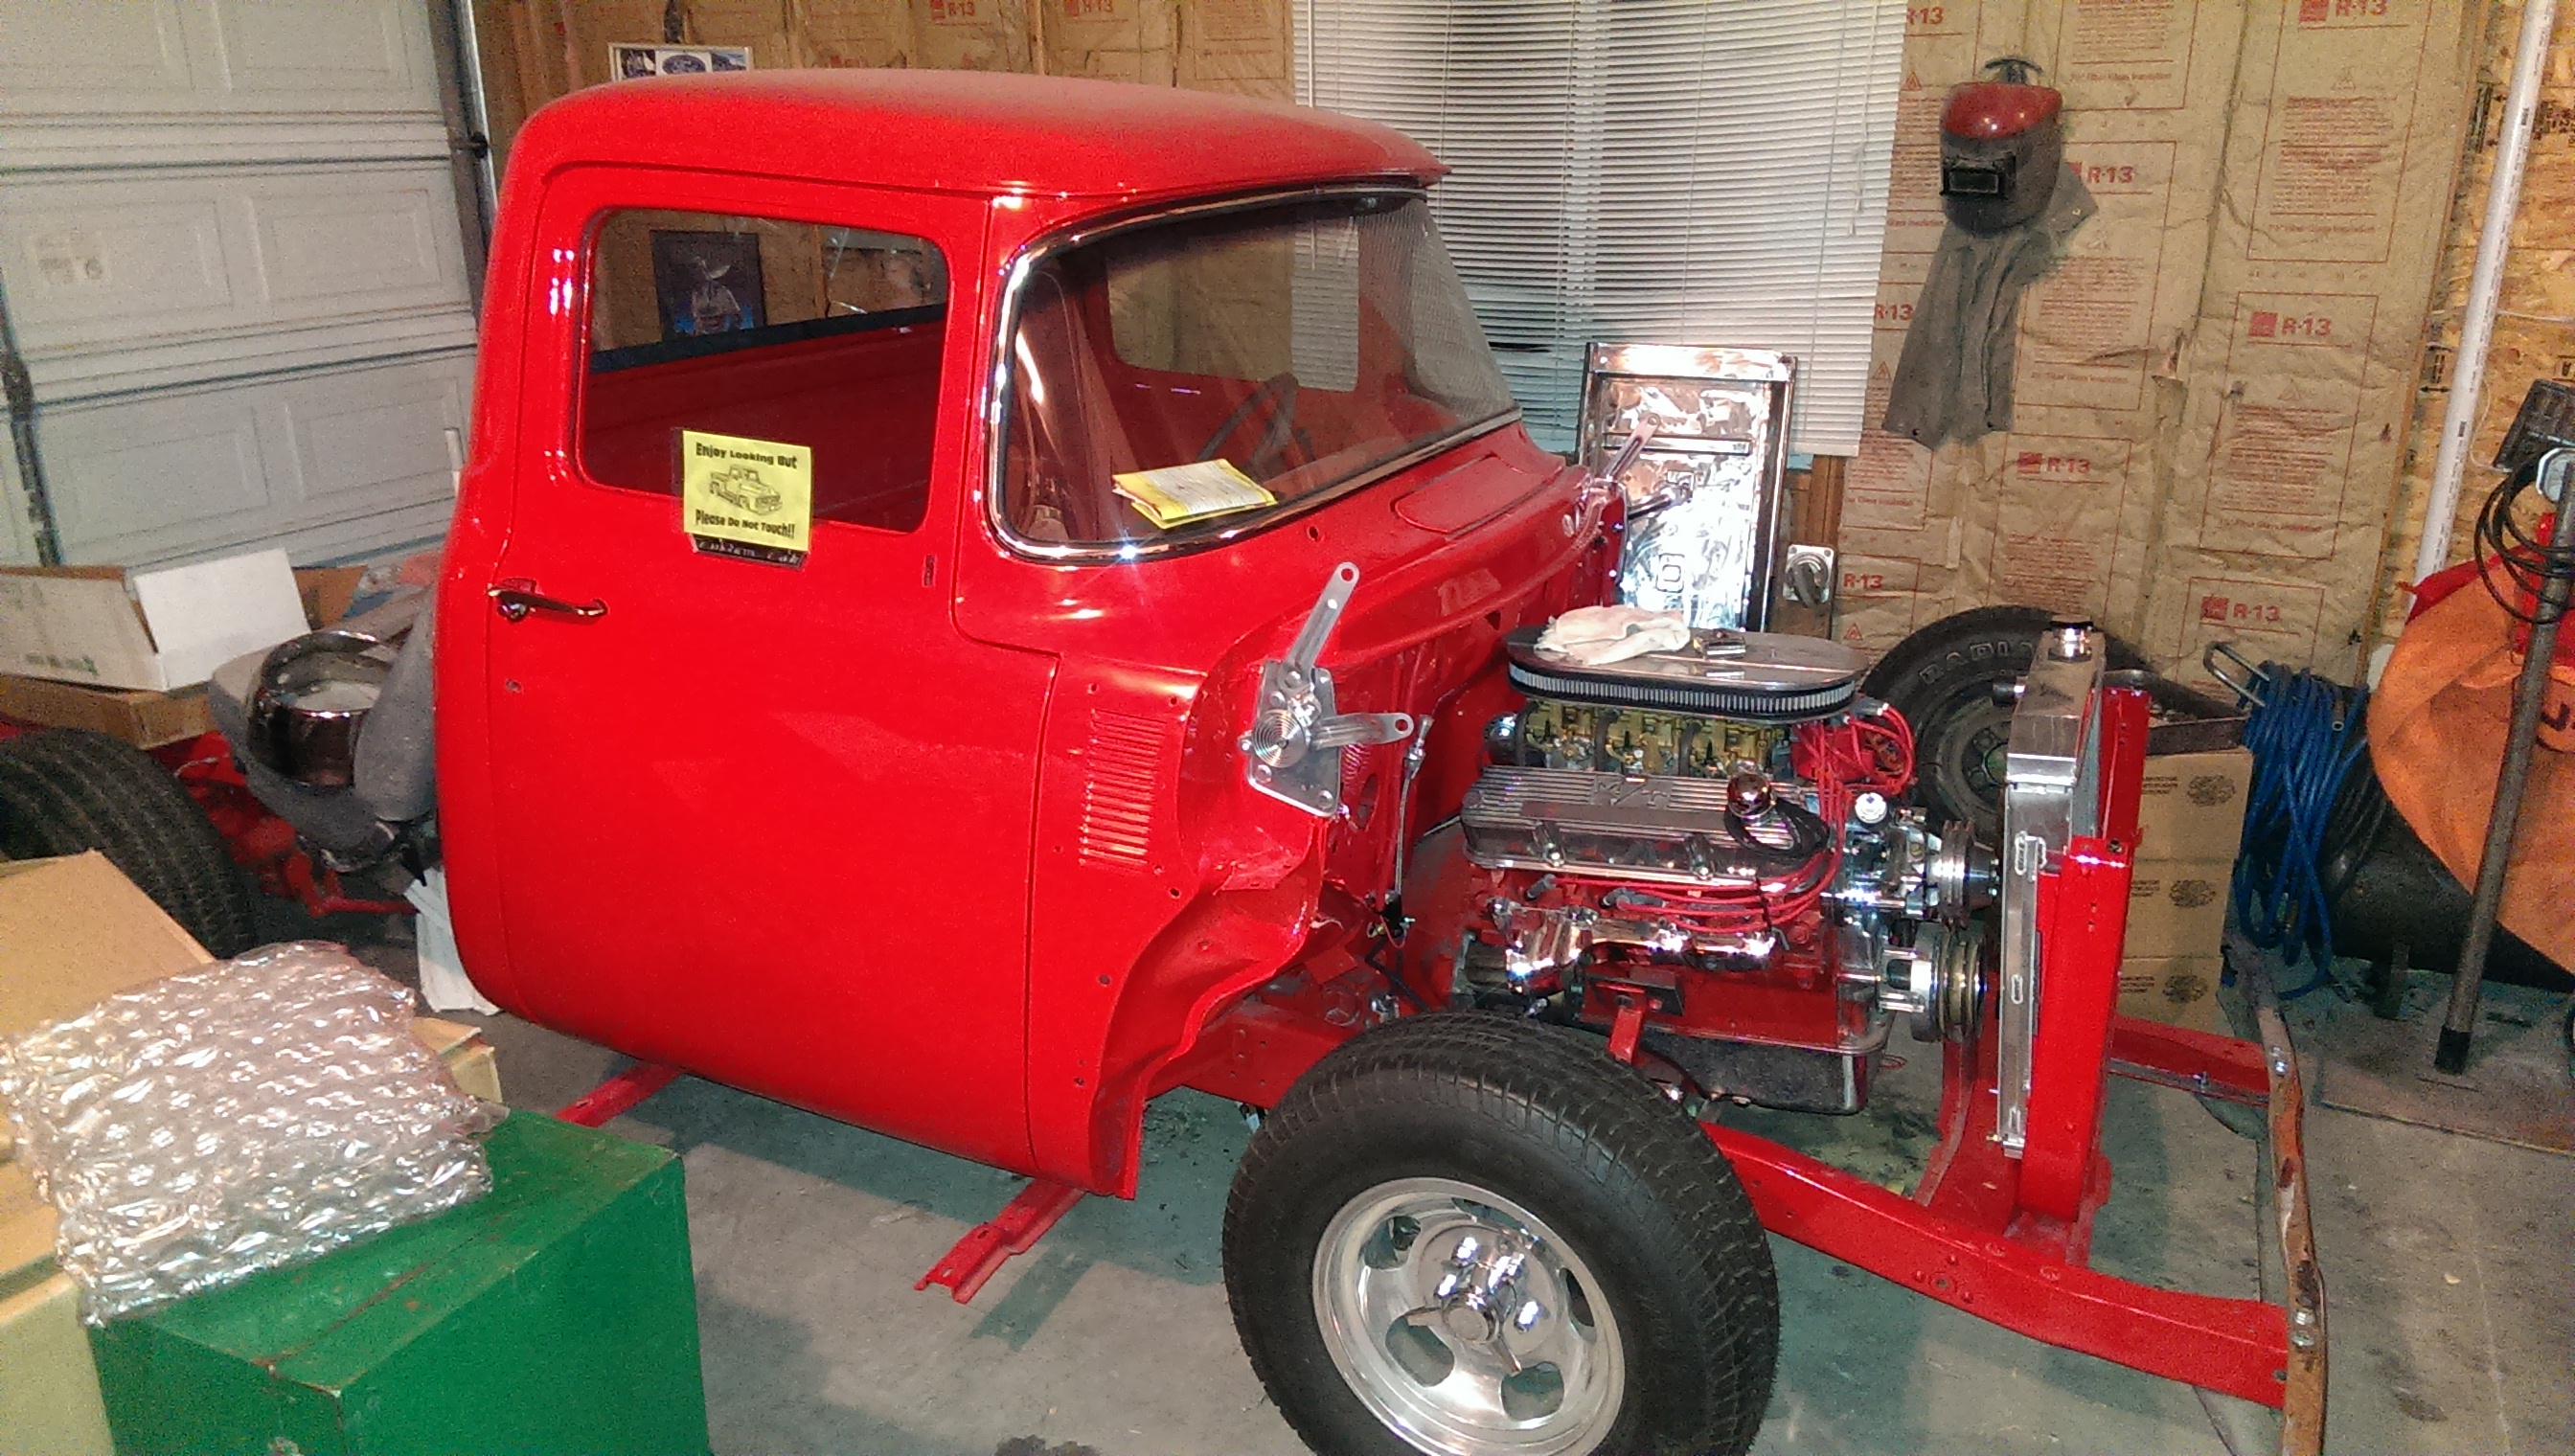
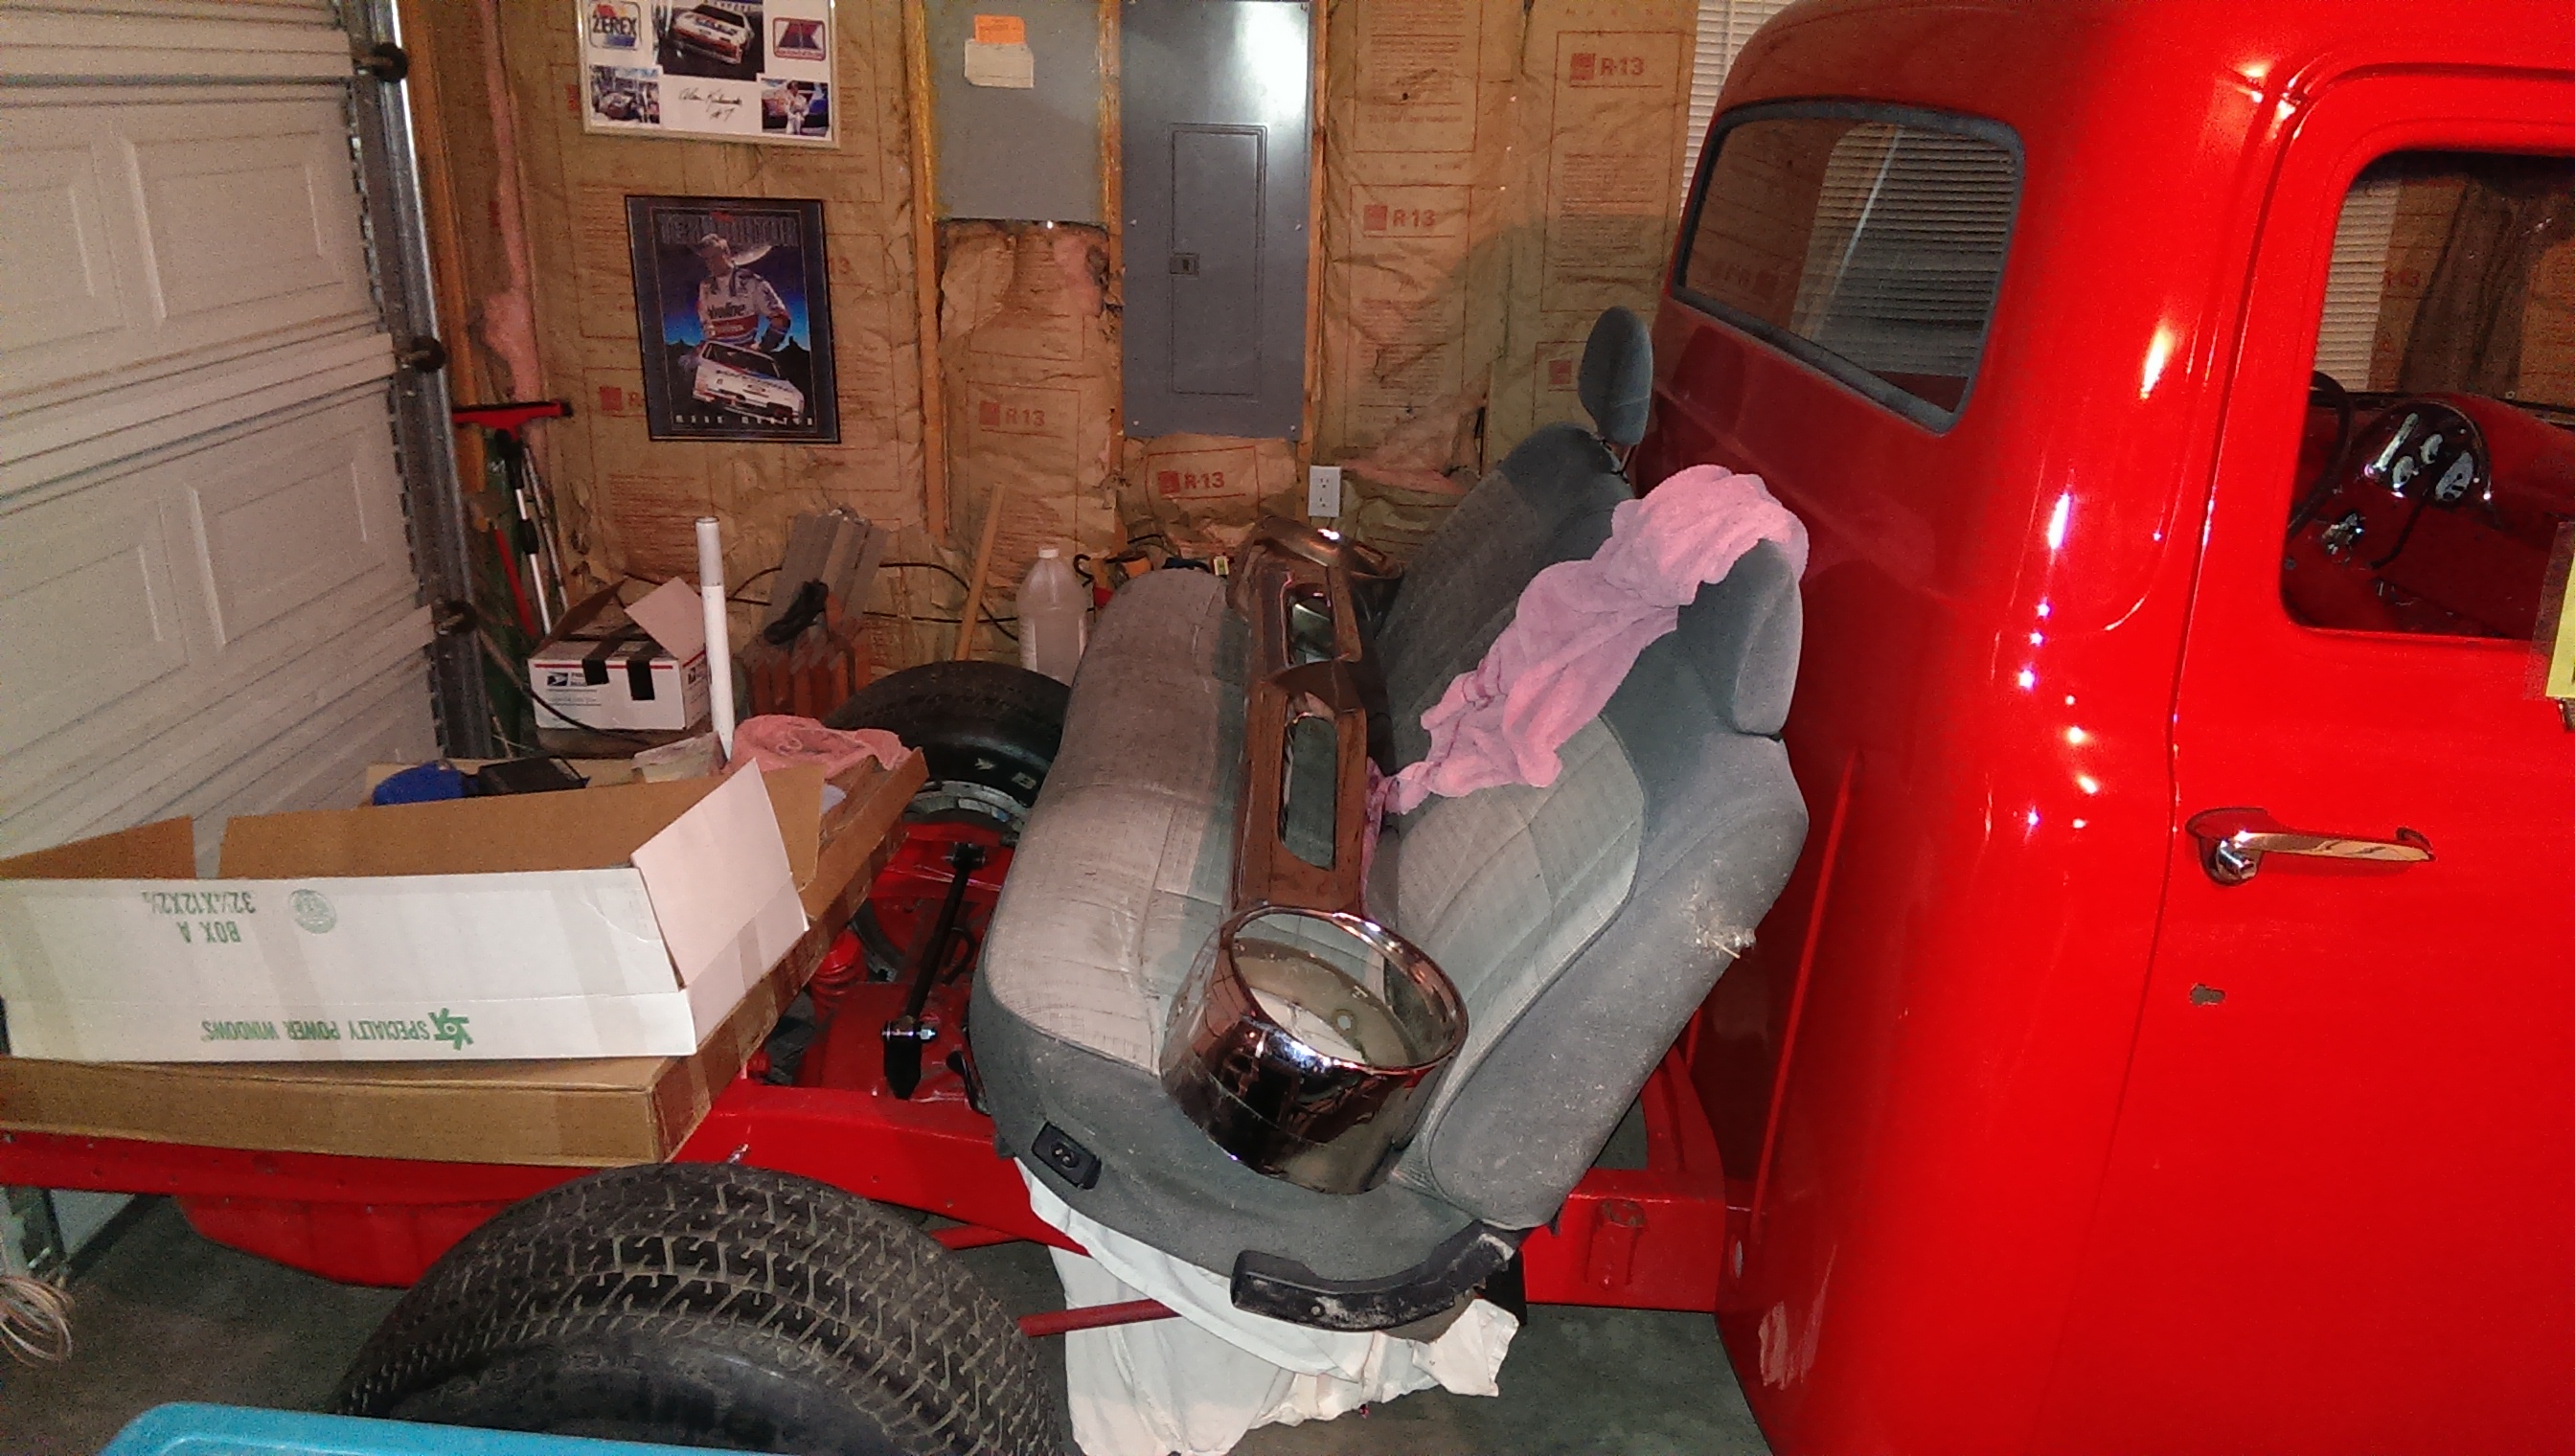
This is the condition it was in at the time, parts spread around the garage.
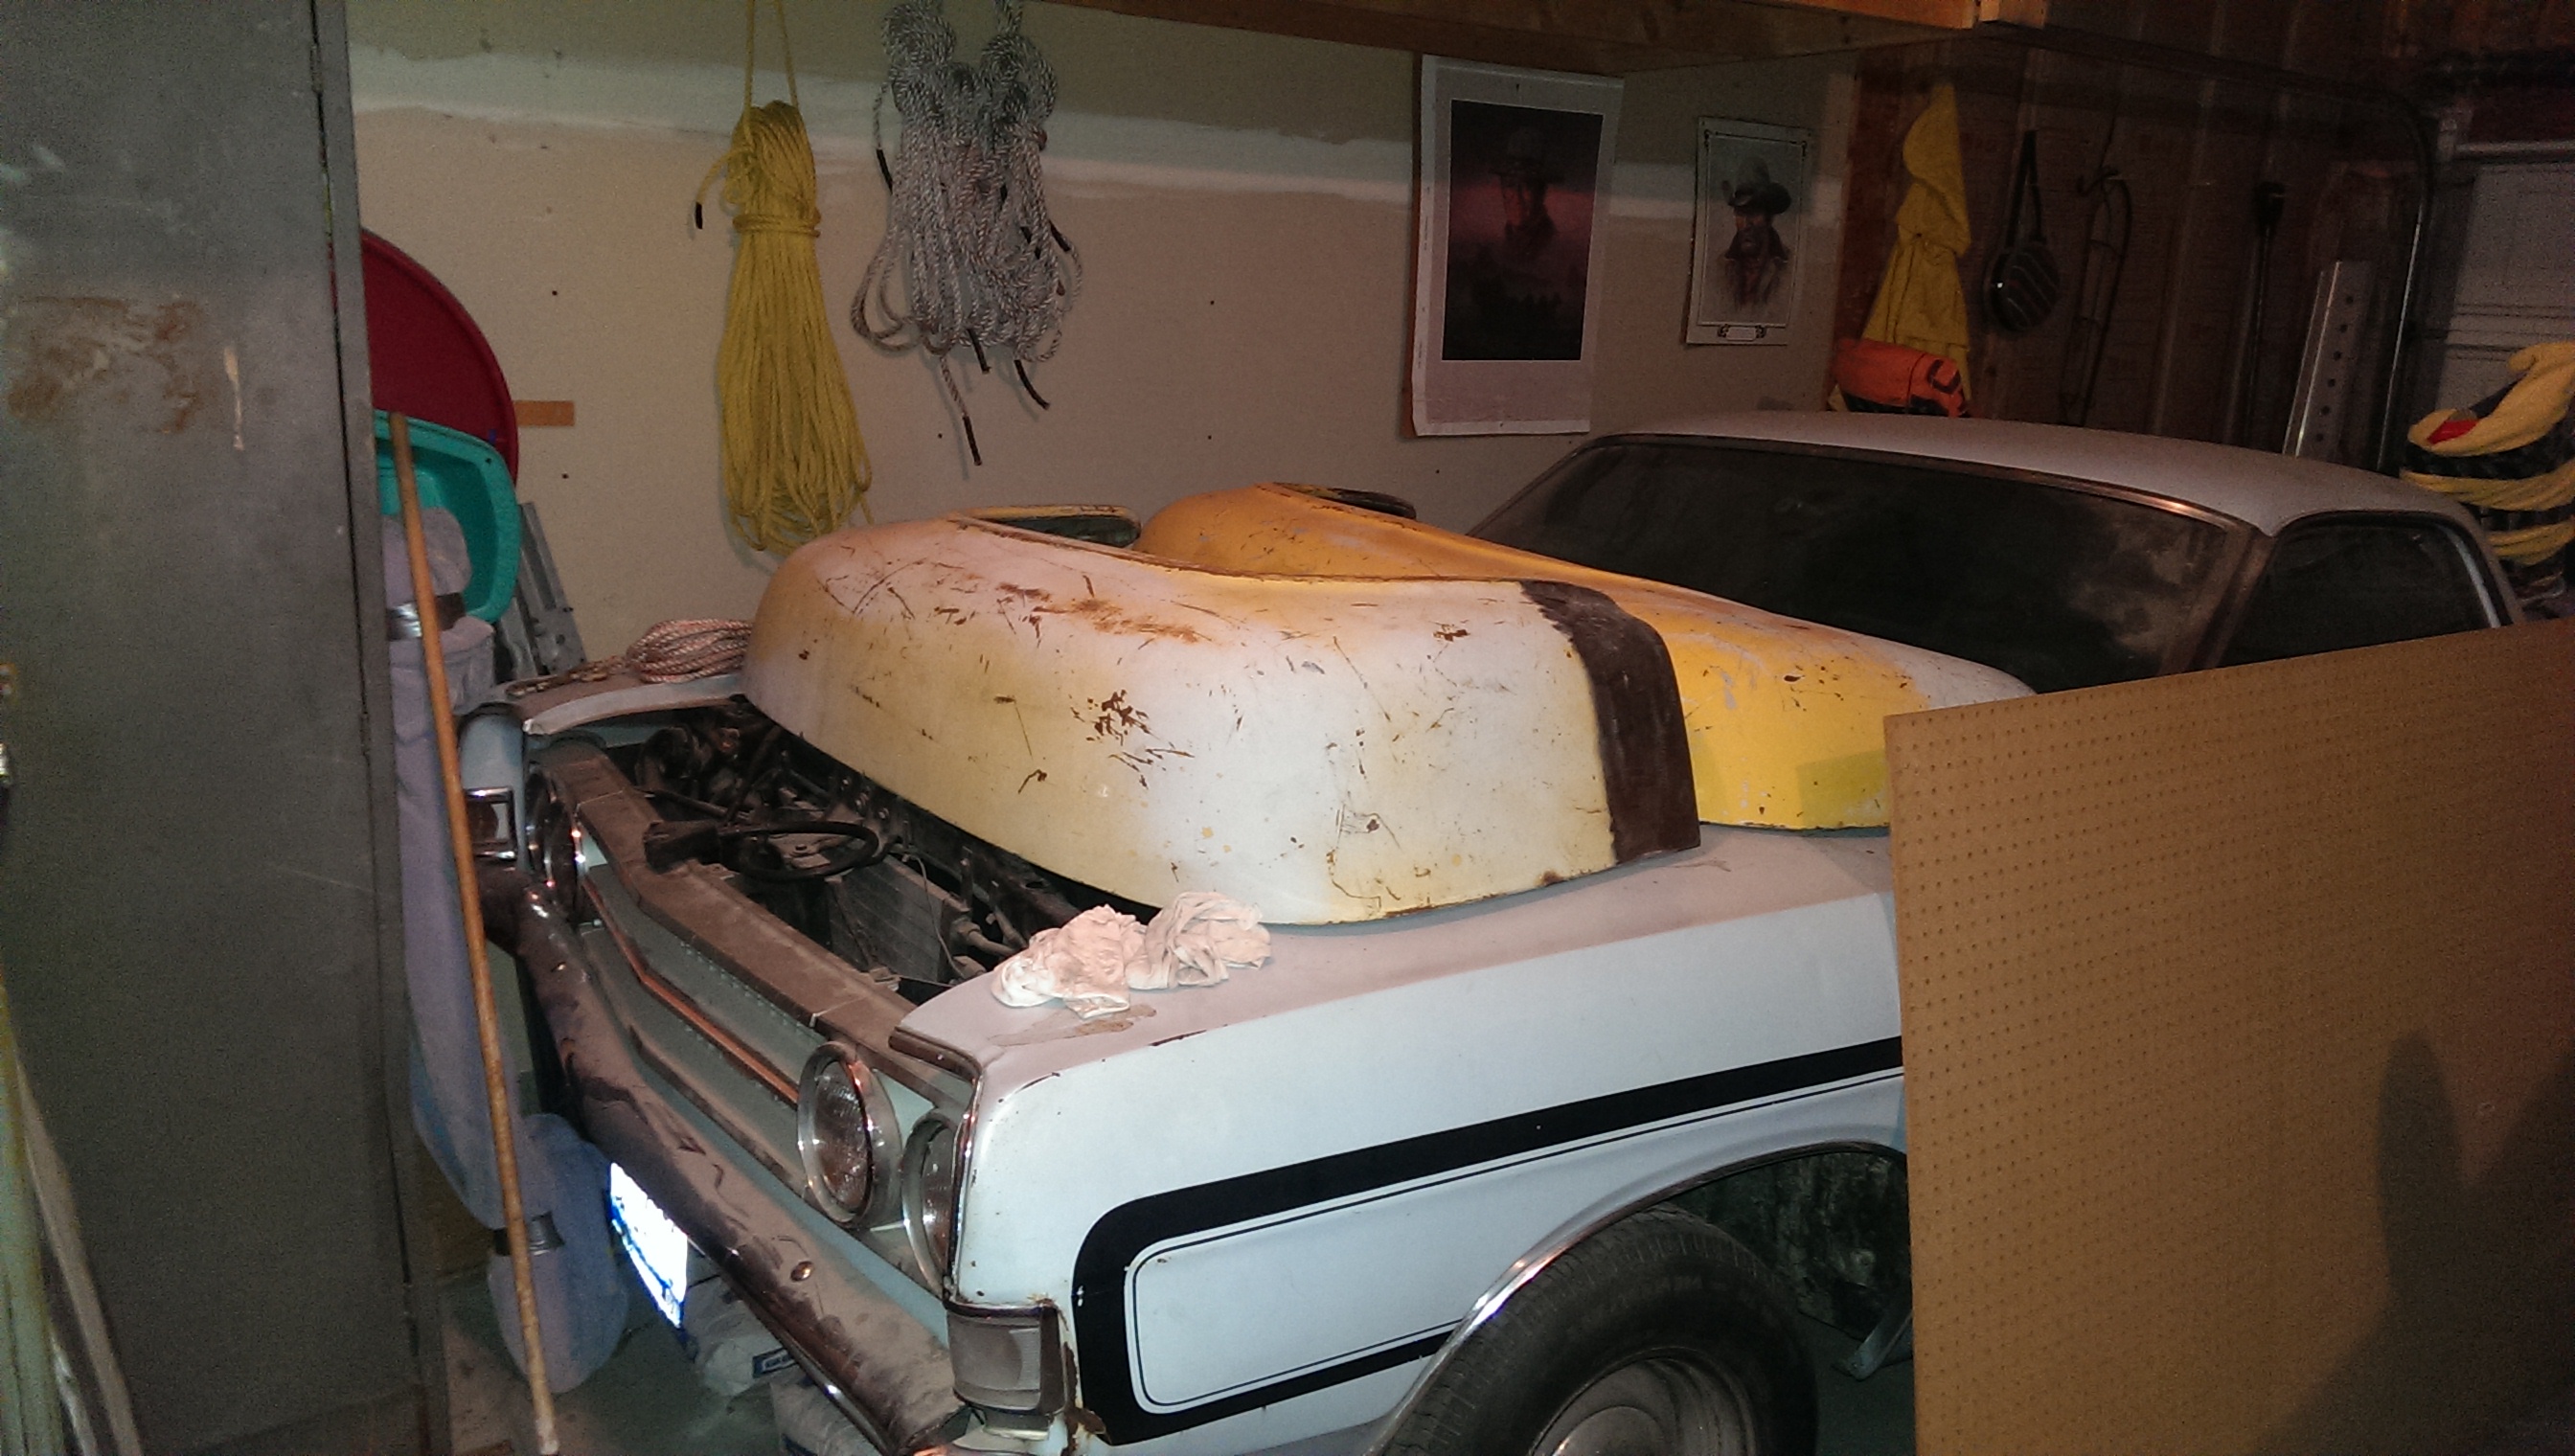
One of the first things I needed to do was to get space to be able to work. The fenders and the hood were sitting on a 69 Ranchero that was also taking space in the garage. The engine from that was on a stand that was in front of the pickup. So, the first step was to get the Ranchero back on the road. That took about 4 months of working mostly only one day a weekend and searching the garage over many times to find the components to reassemble it. Once that was done I was able to move parts around and make space to be able to work on the pickup.
This is the condition it was in at the time, parts spread around the garage.
One of the first things I needed to do was to get space to be able to work. The fenders and the hood were sitting on a 69 Ranchero that was also taking space in the garage. The engine from that was on a stand that was in front of the pickup. So, the first step was to get the Ranchero back on the road. That took about 4 months of working mostly only one day a weekend and searching the garage over many times to find the components to reassemble it. Once that was done I was able to move parts around and make space to be able to work on the pickup.
#10
12-03-2016, 02:30 PM
Join Date: Aug 2009
Location: Idaho Falls, Idaho
Posts: 76
Likes: 0
Received 0 Likes
on
0 Posts
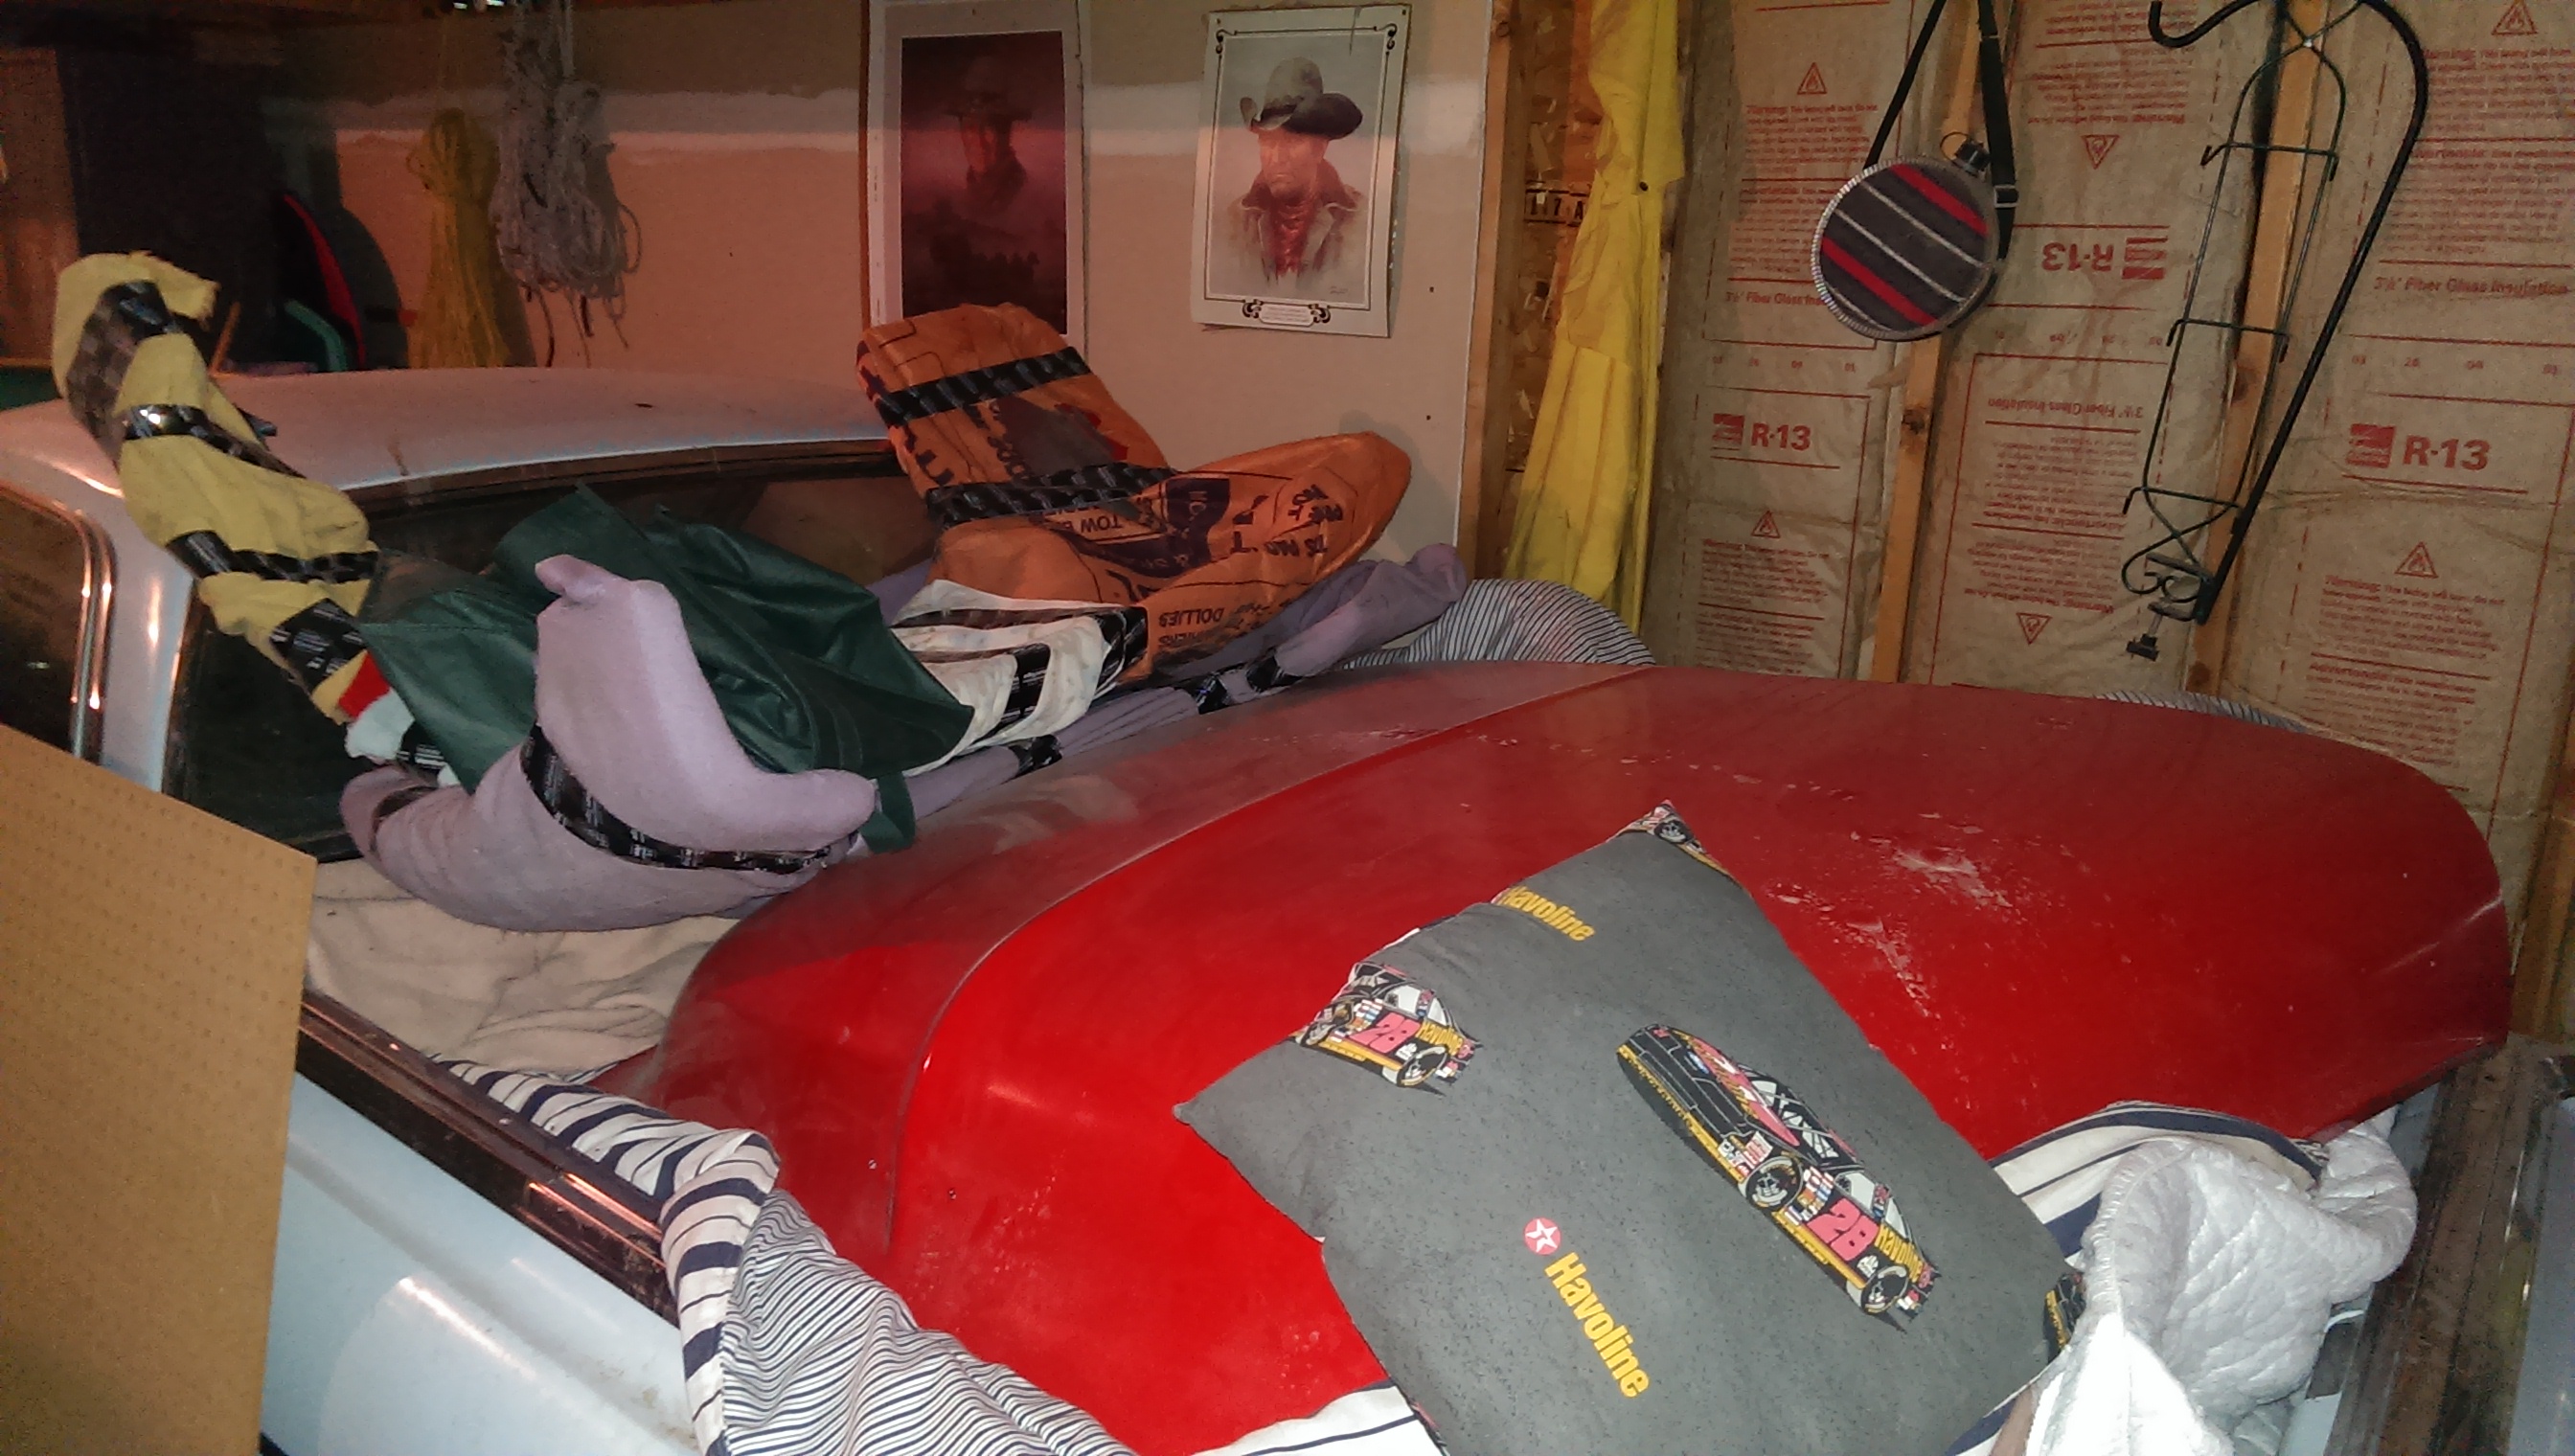
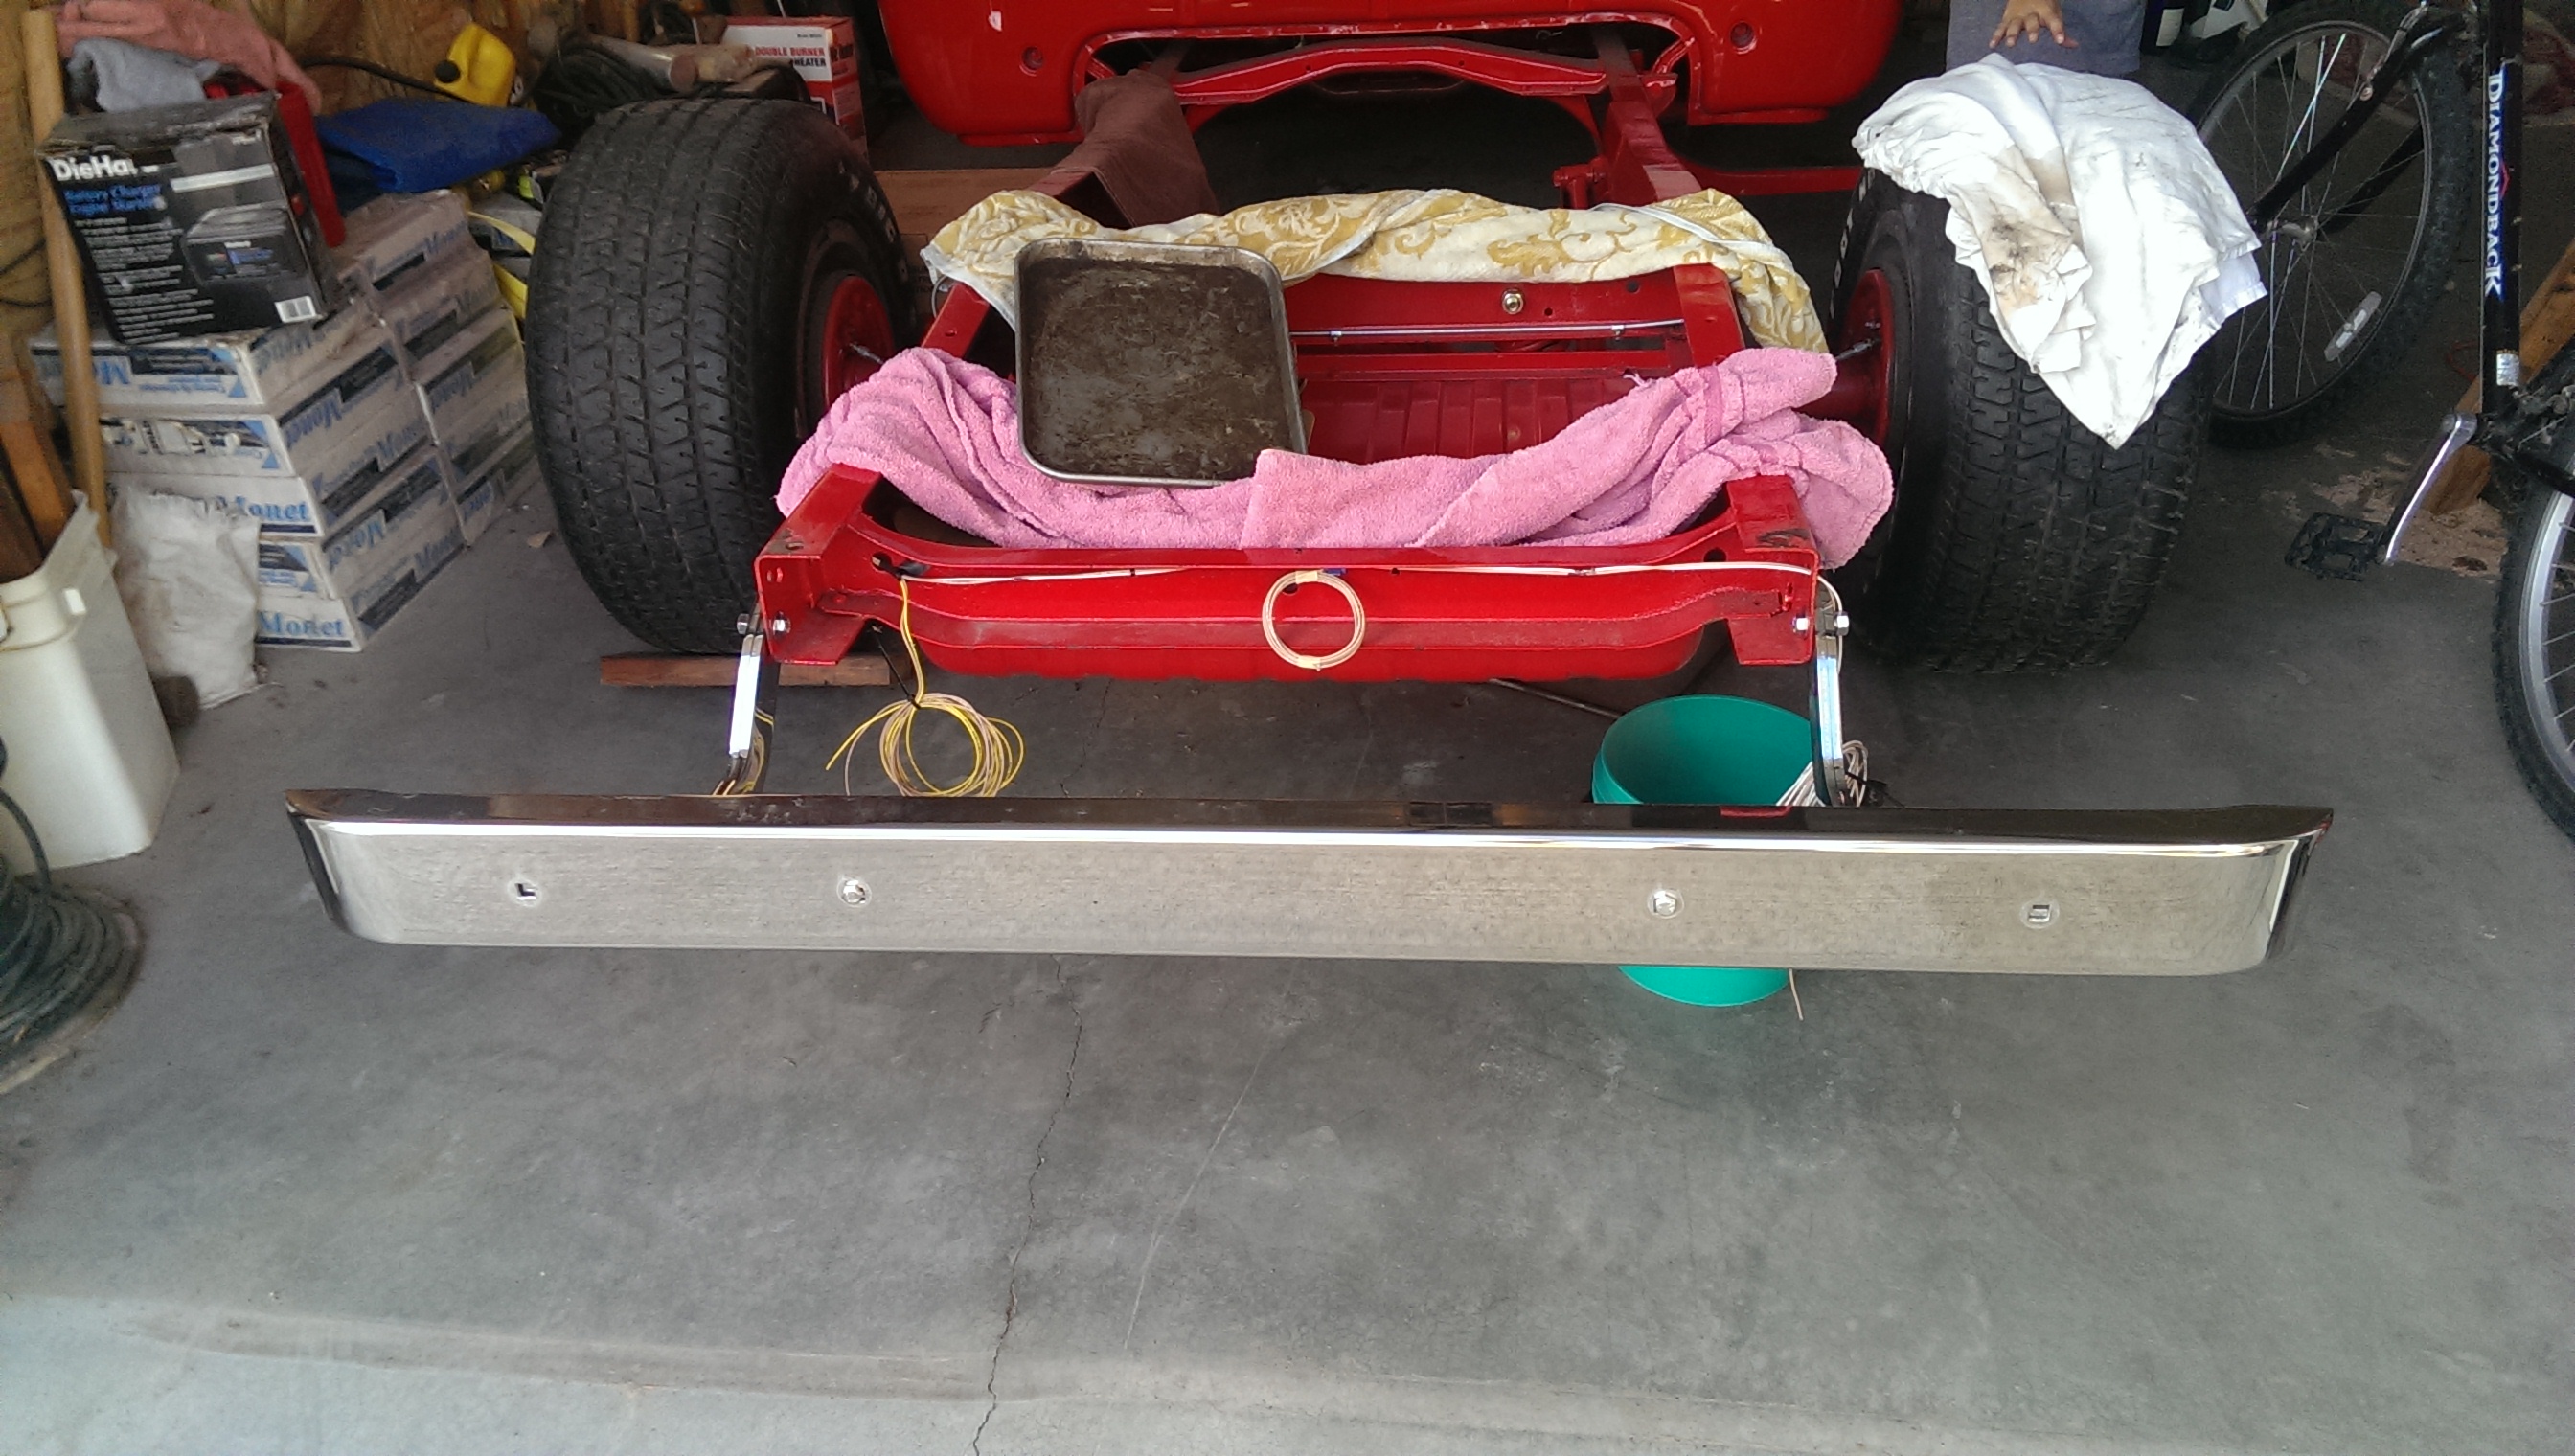
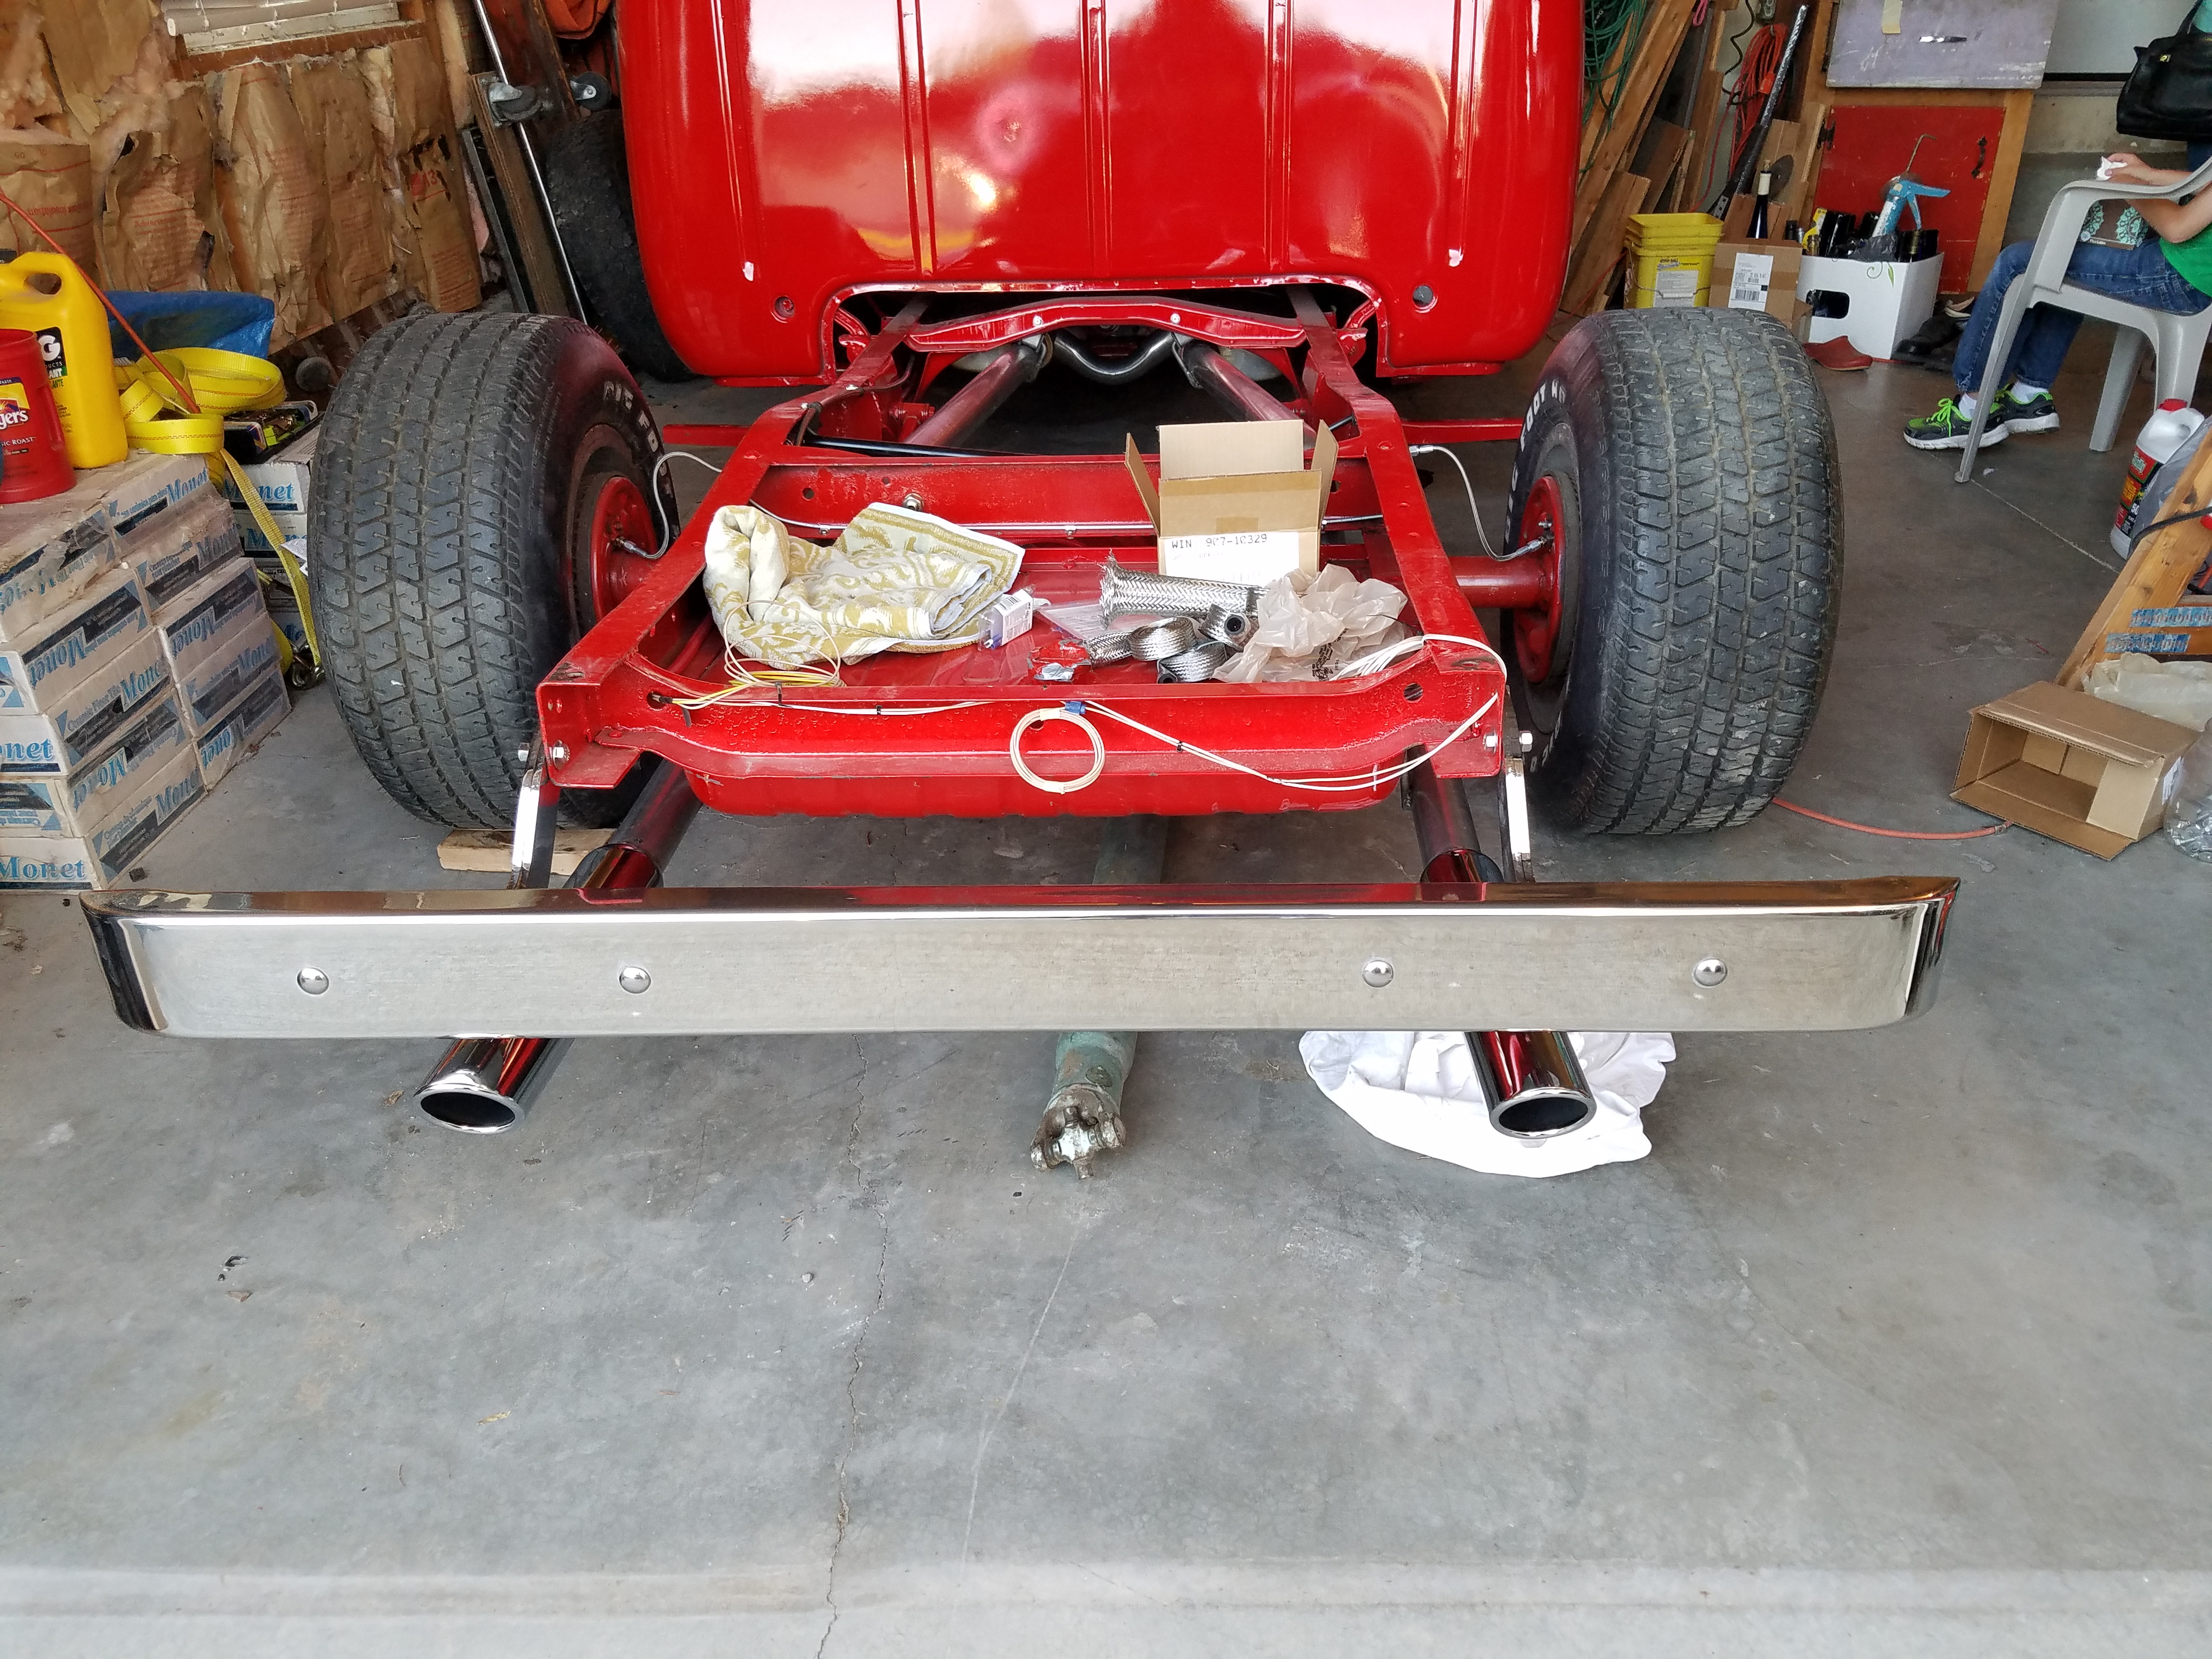
If you look in the last two pictures you can see parts wrapped up in the bed and standing in front of the Ranchero. I moved all of the parts around and got them stacked in the space where the Ranchero was. One of the things that I found wrapped up was the rear bumper.
Don said I might as well put it on since I had also found the brackets, that way I didn't have to find a place to put it.
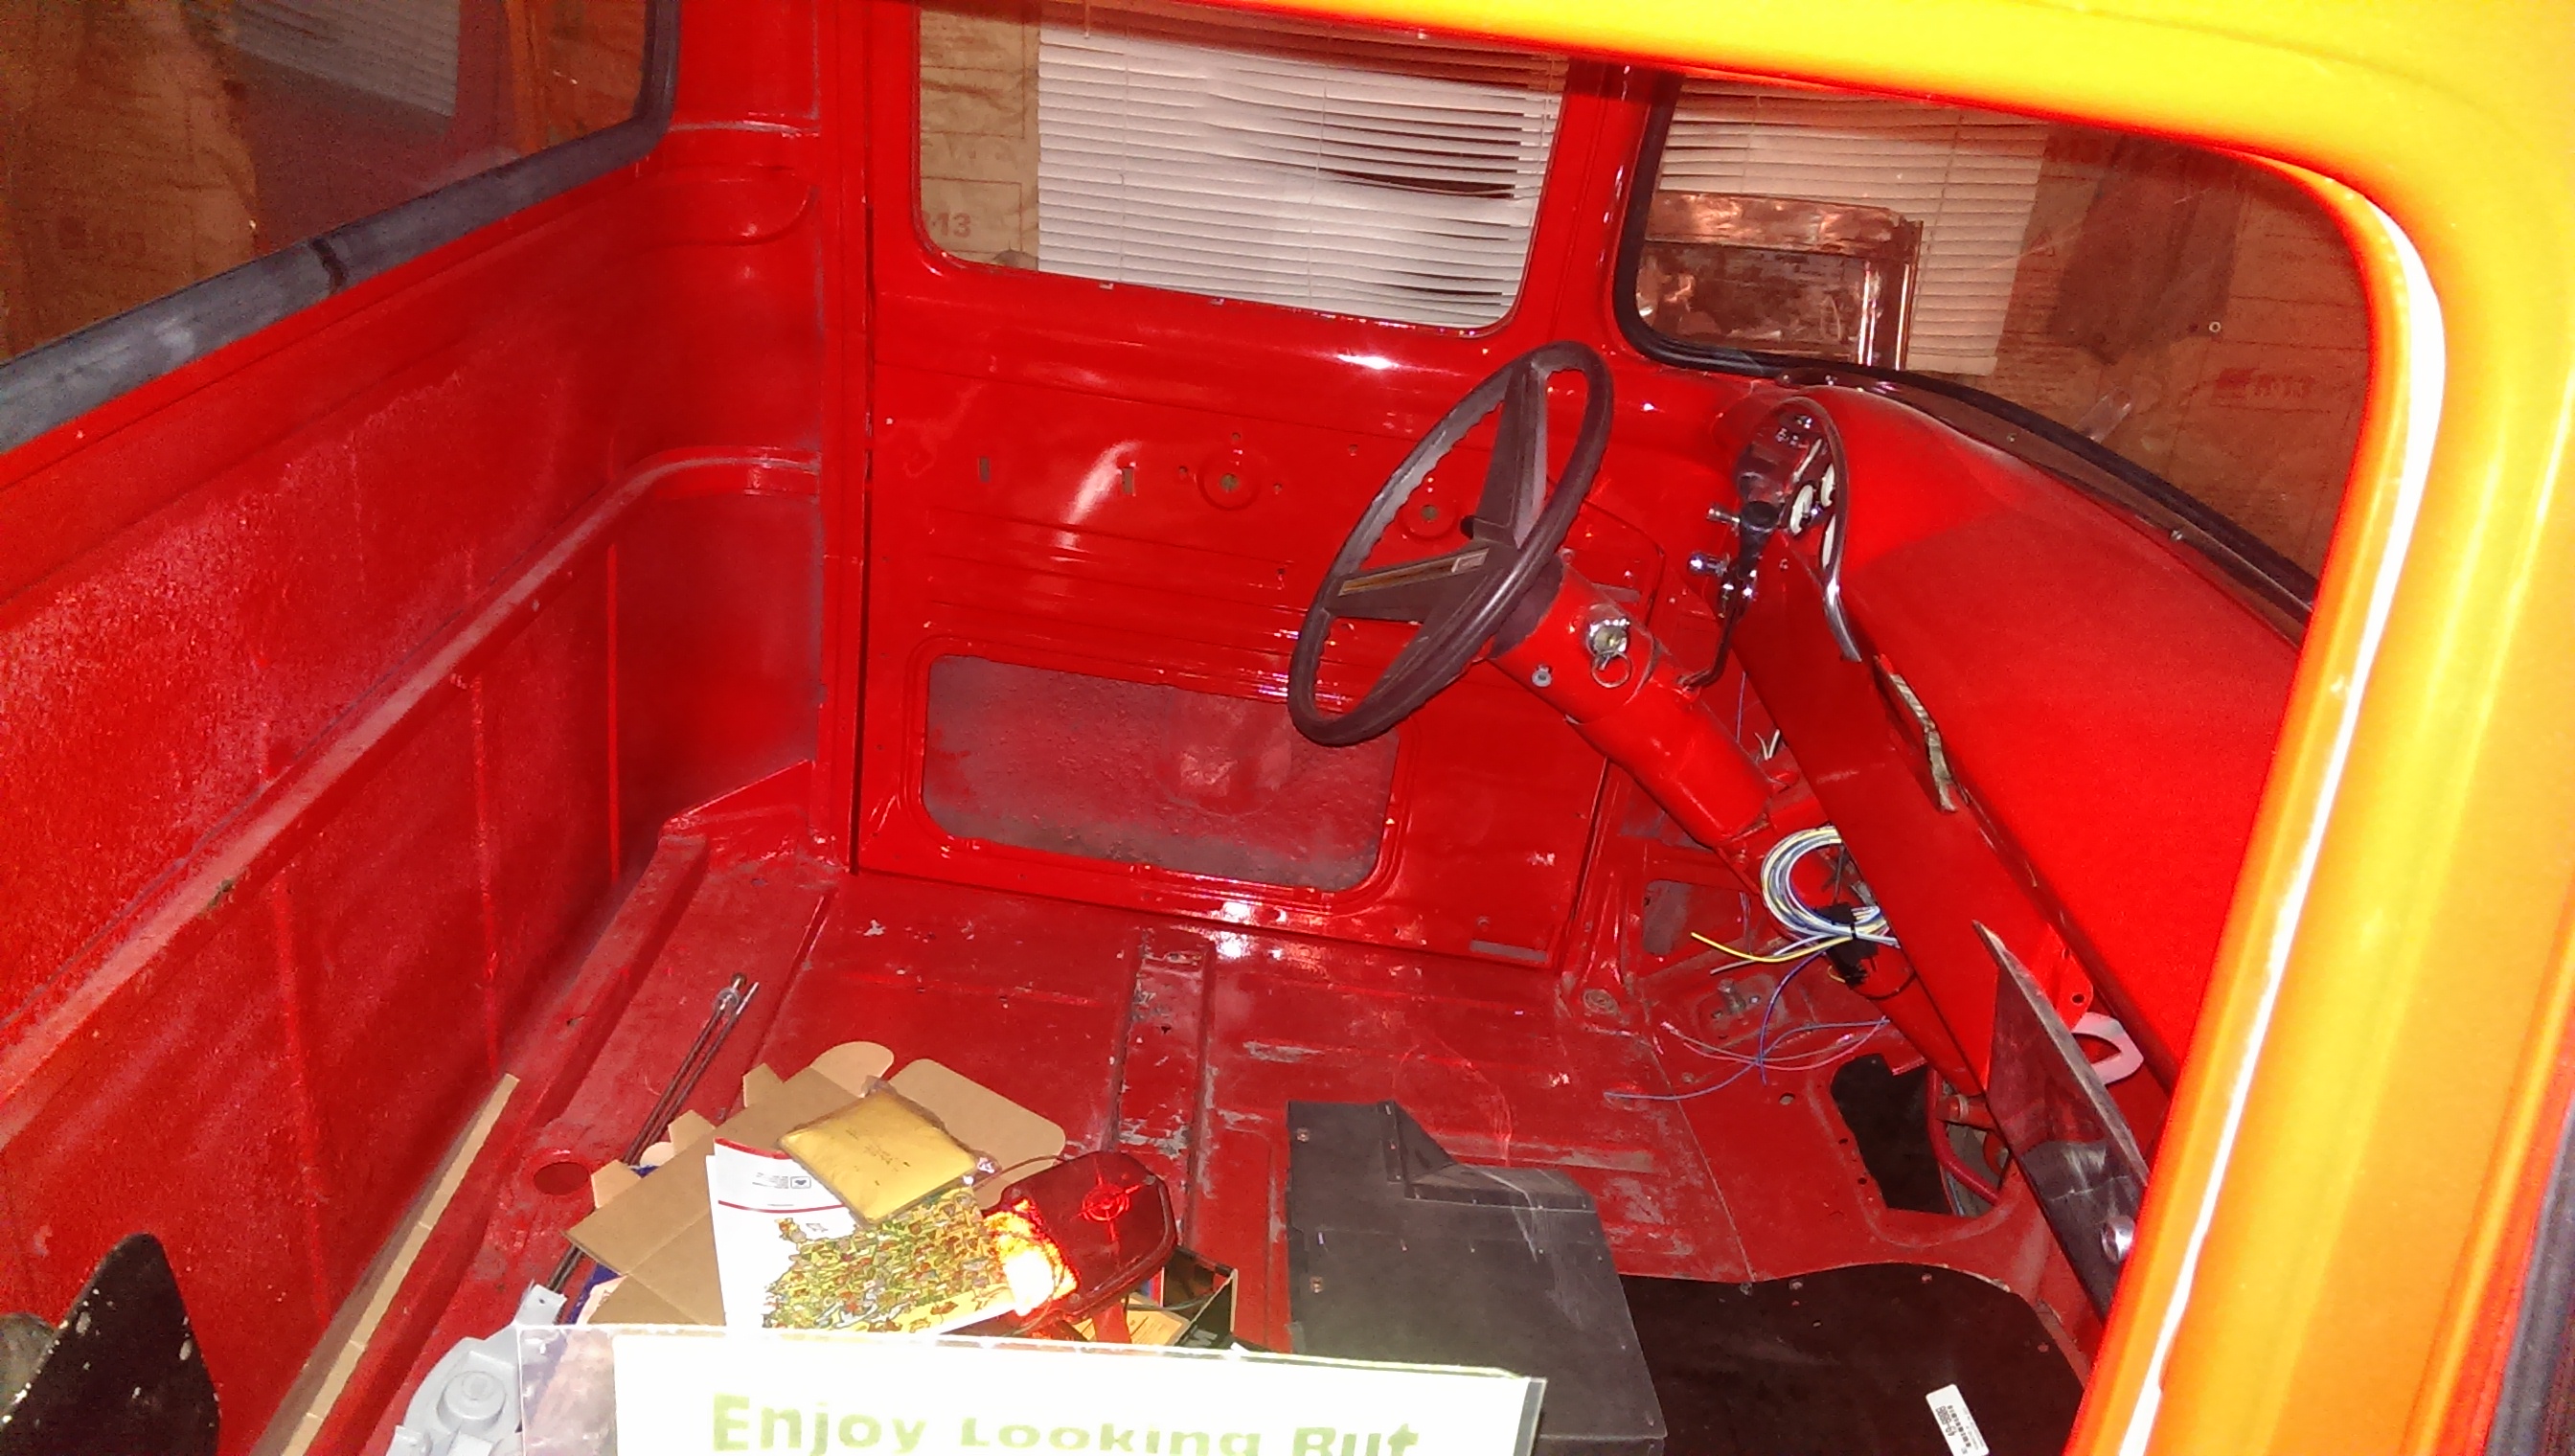
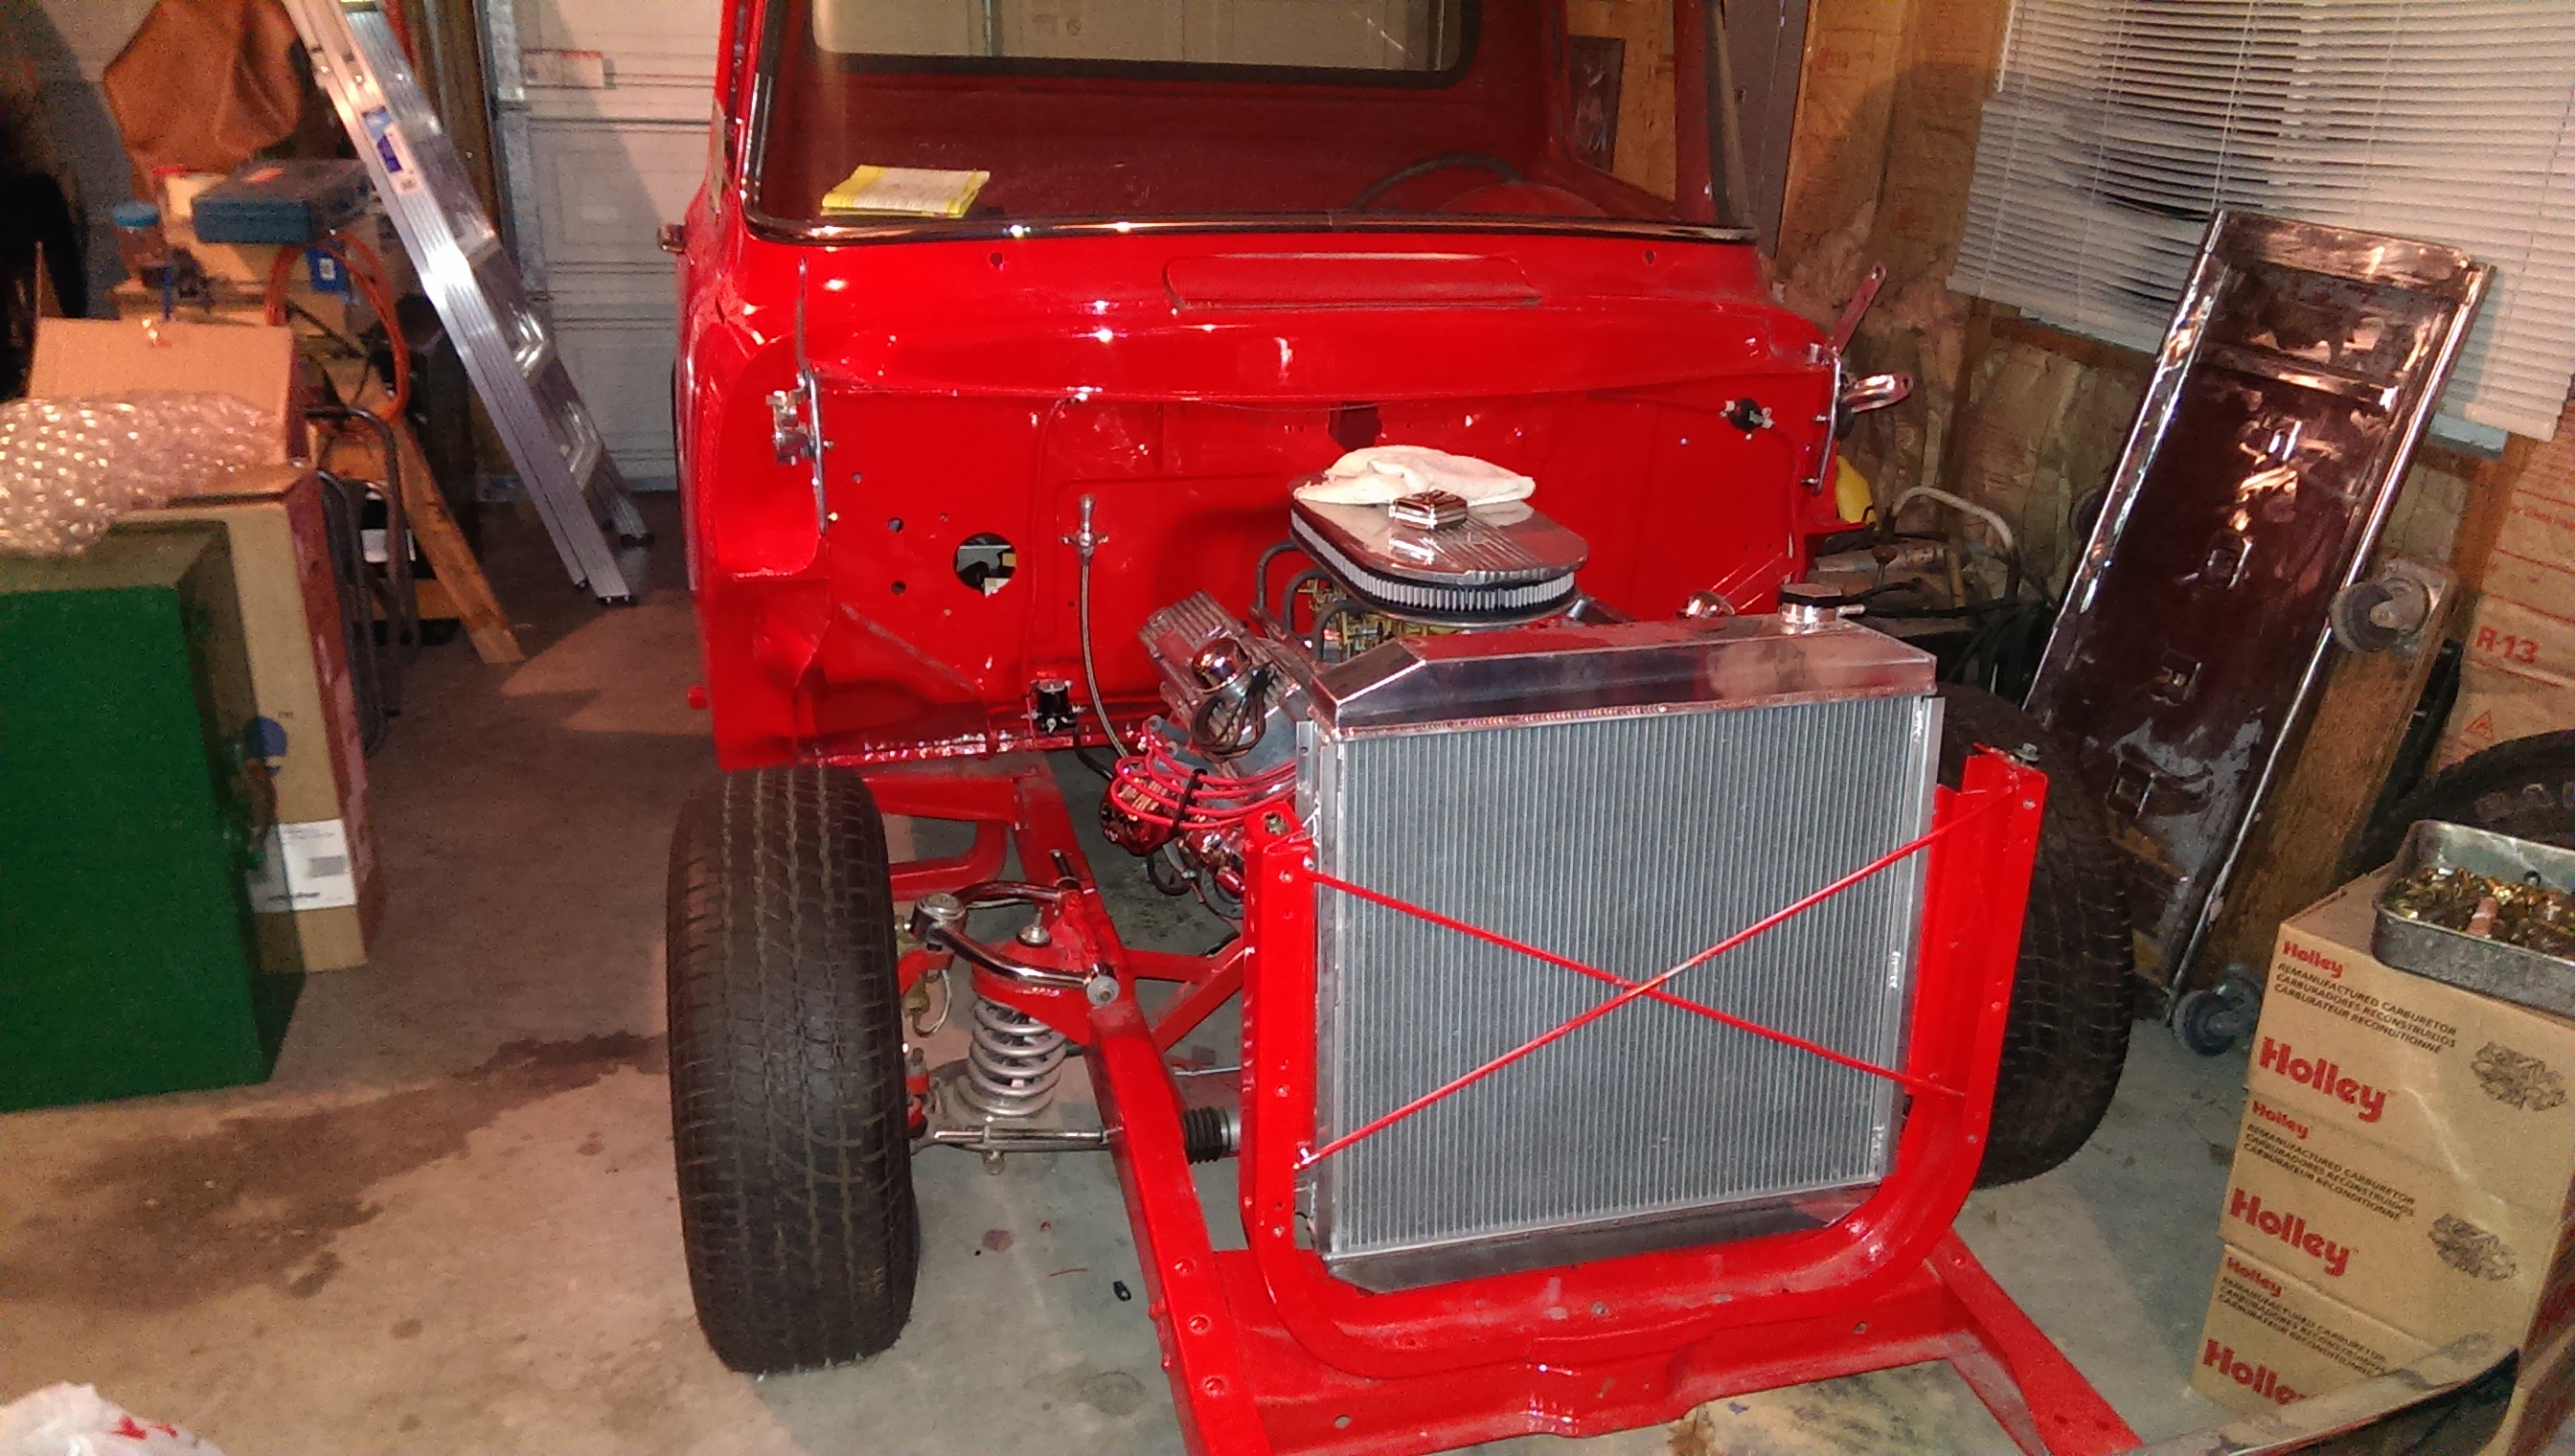
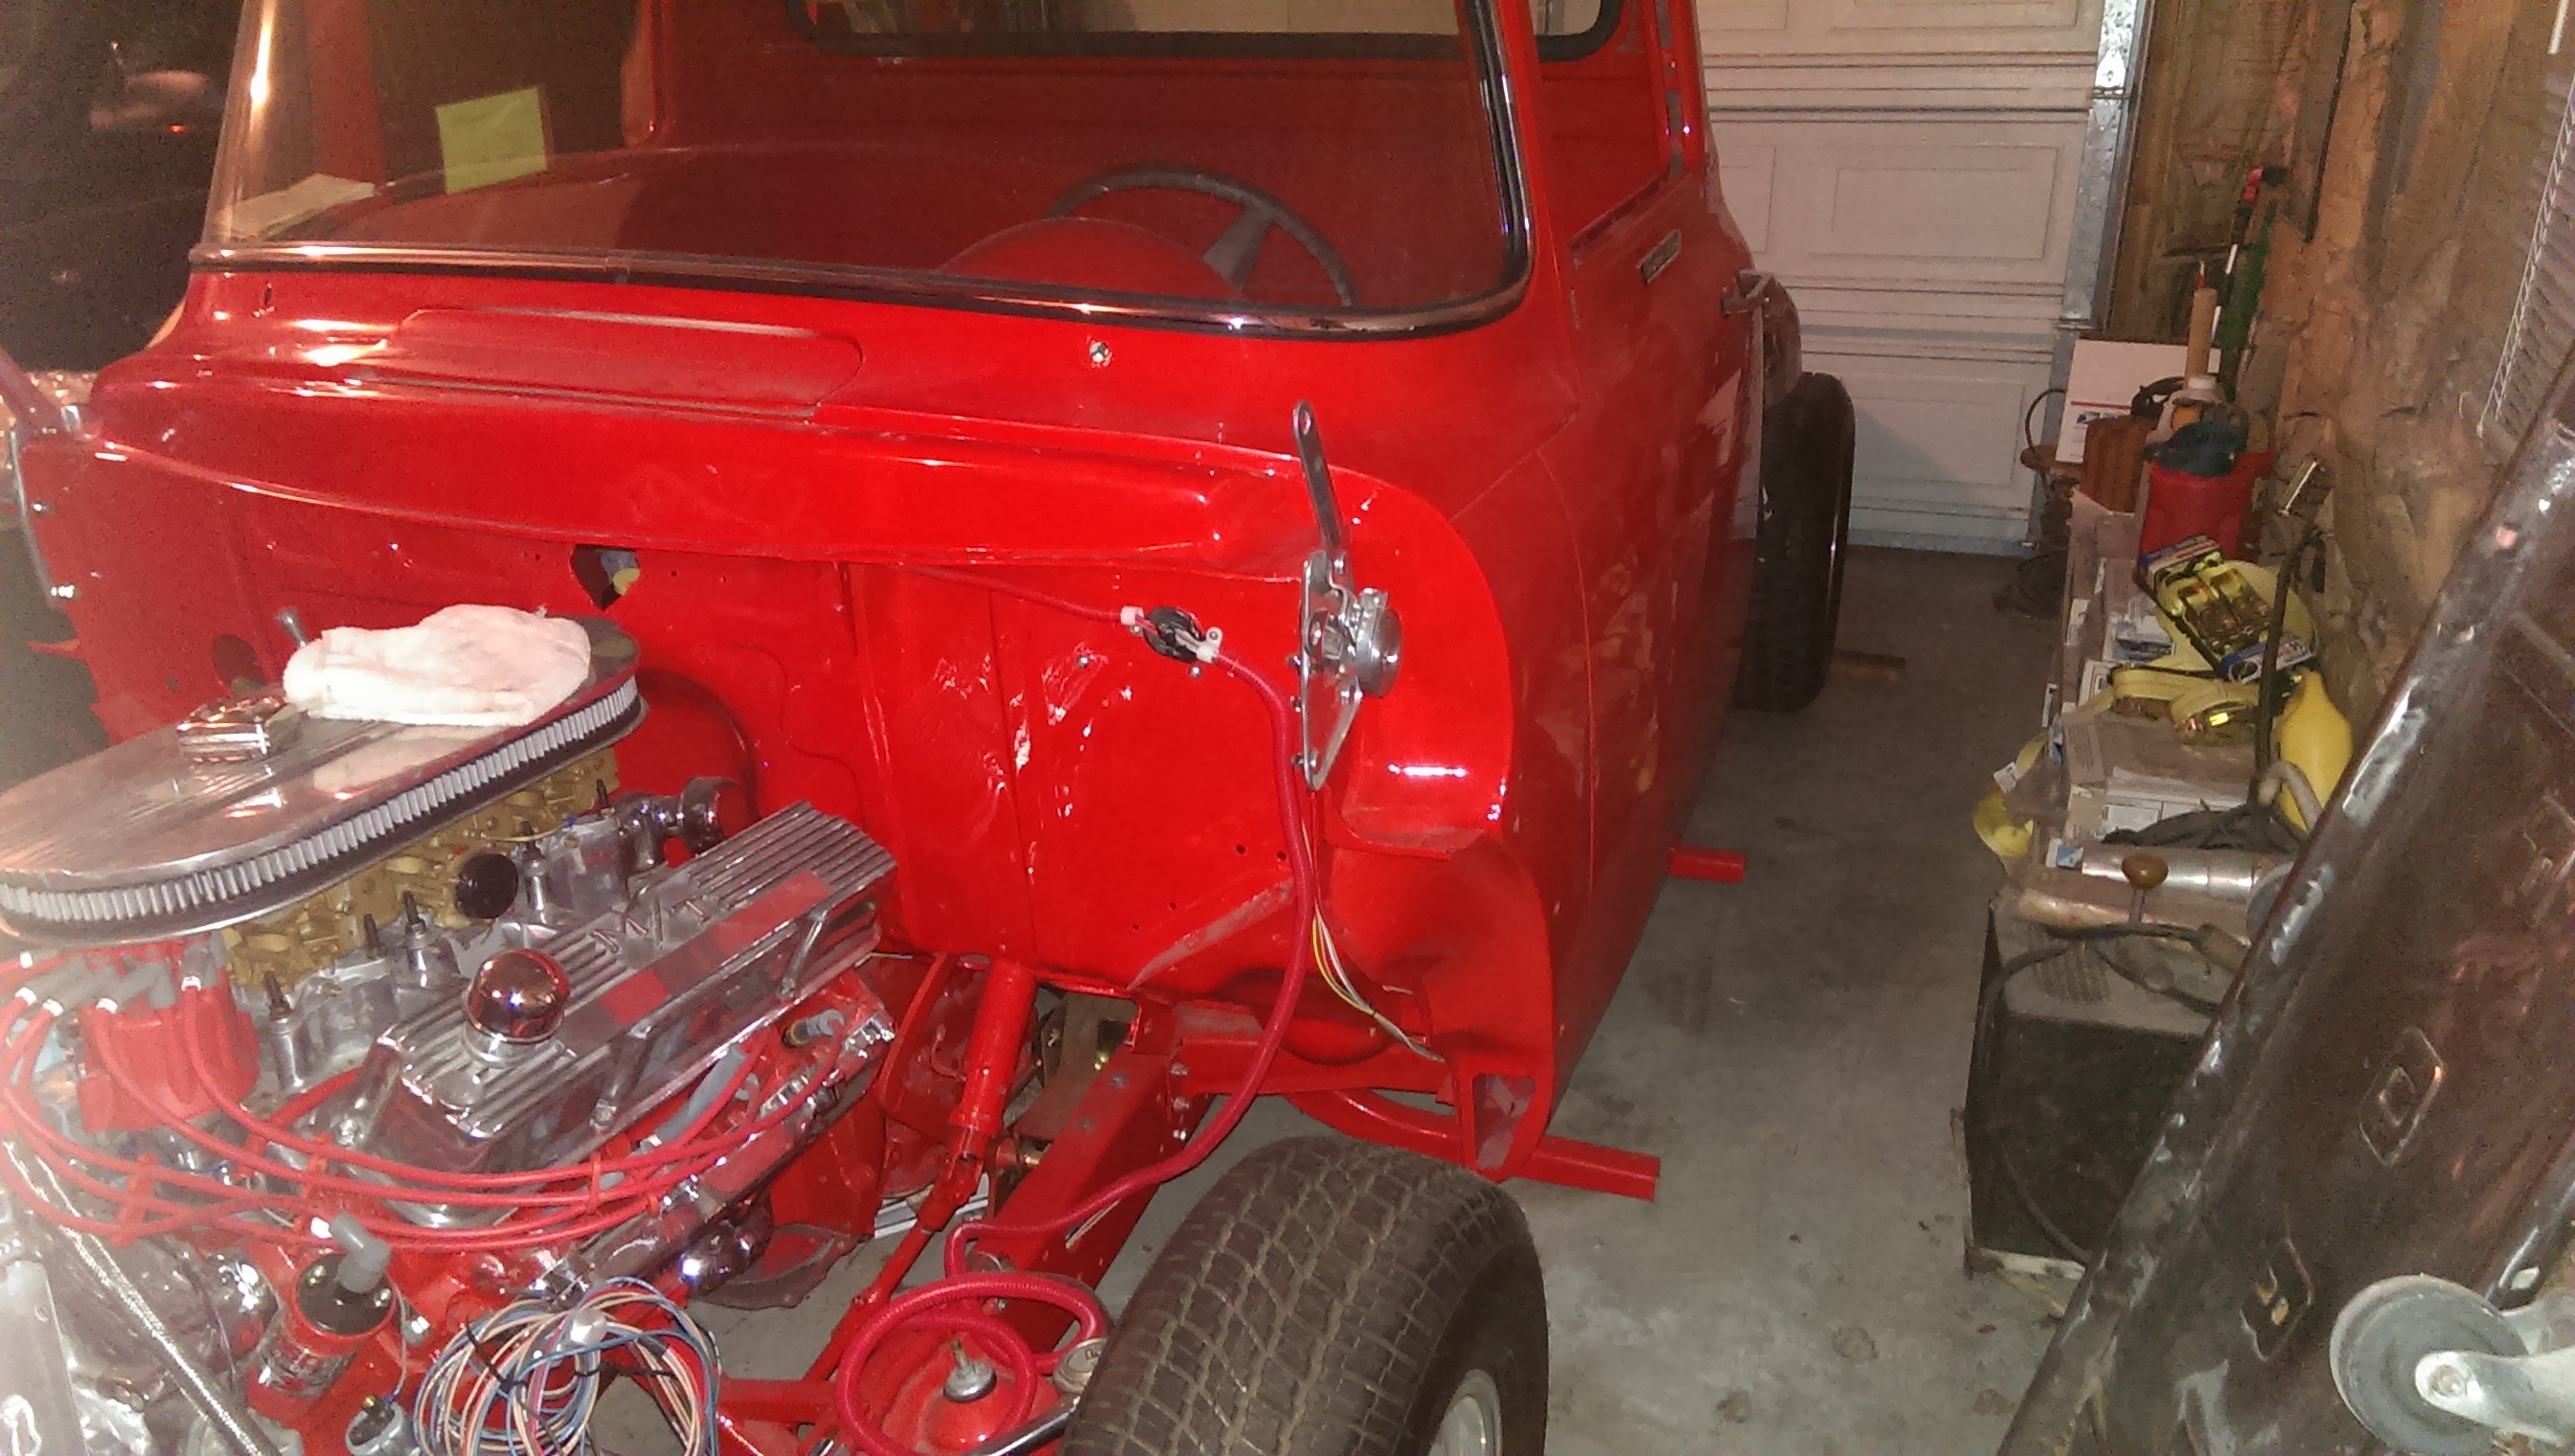
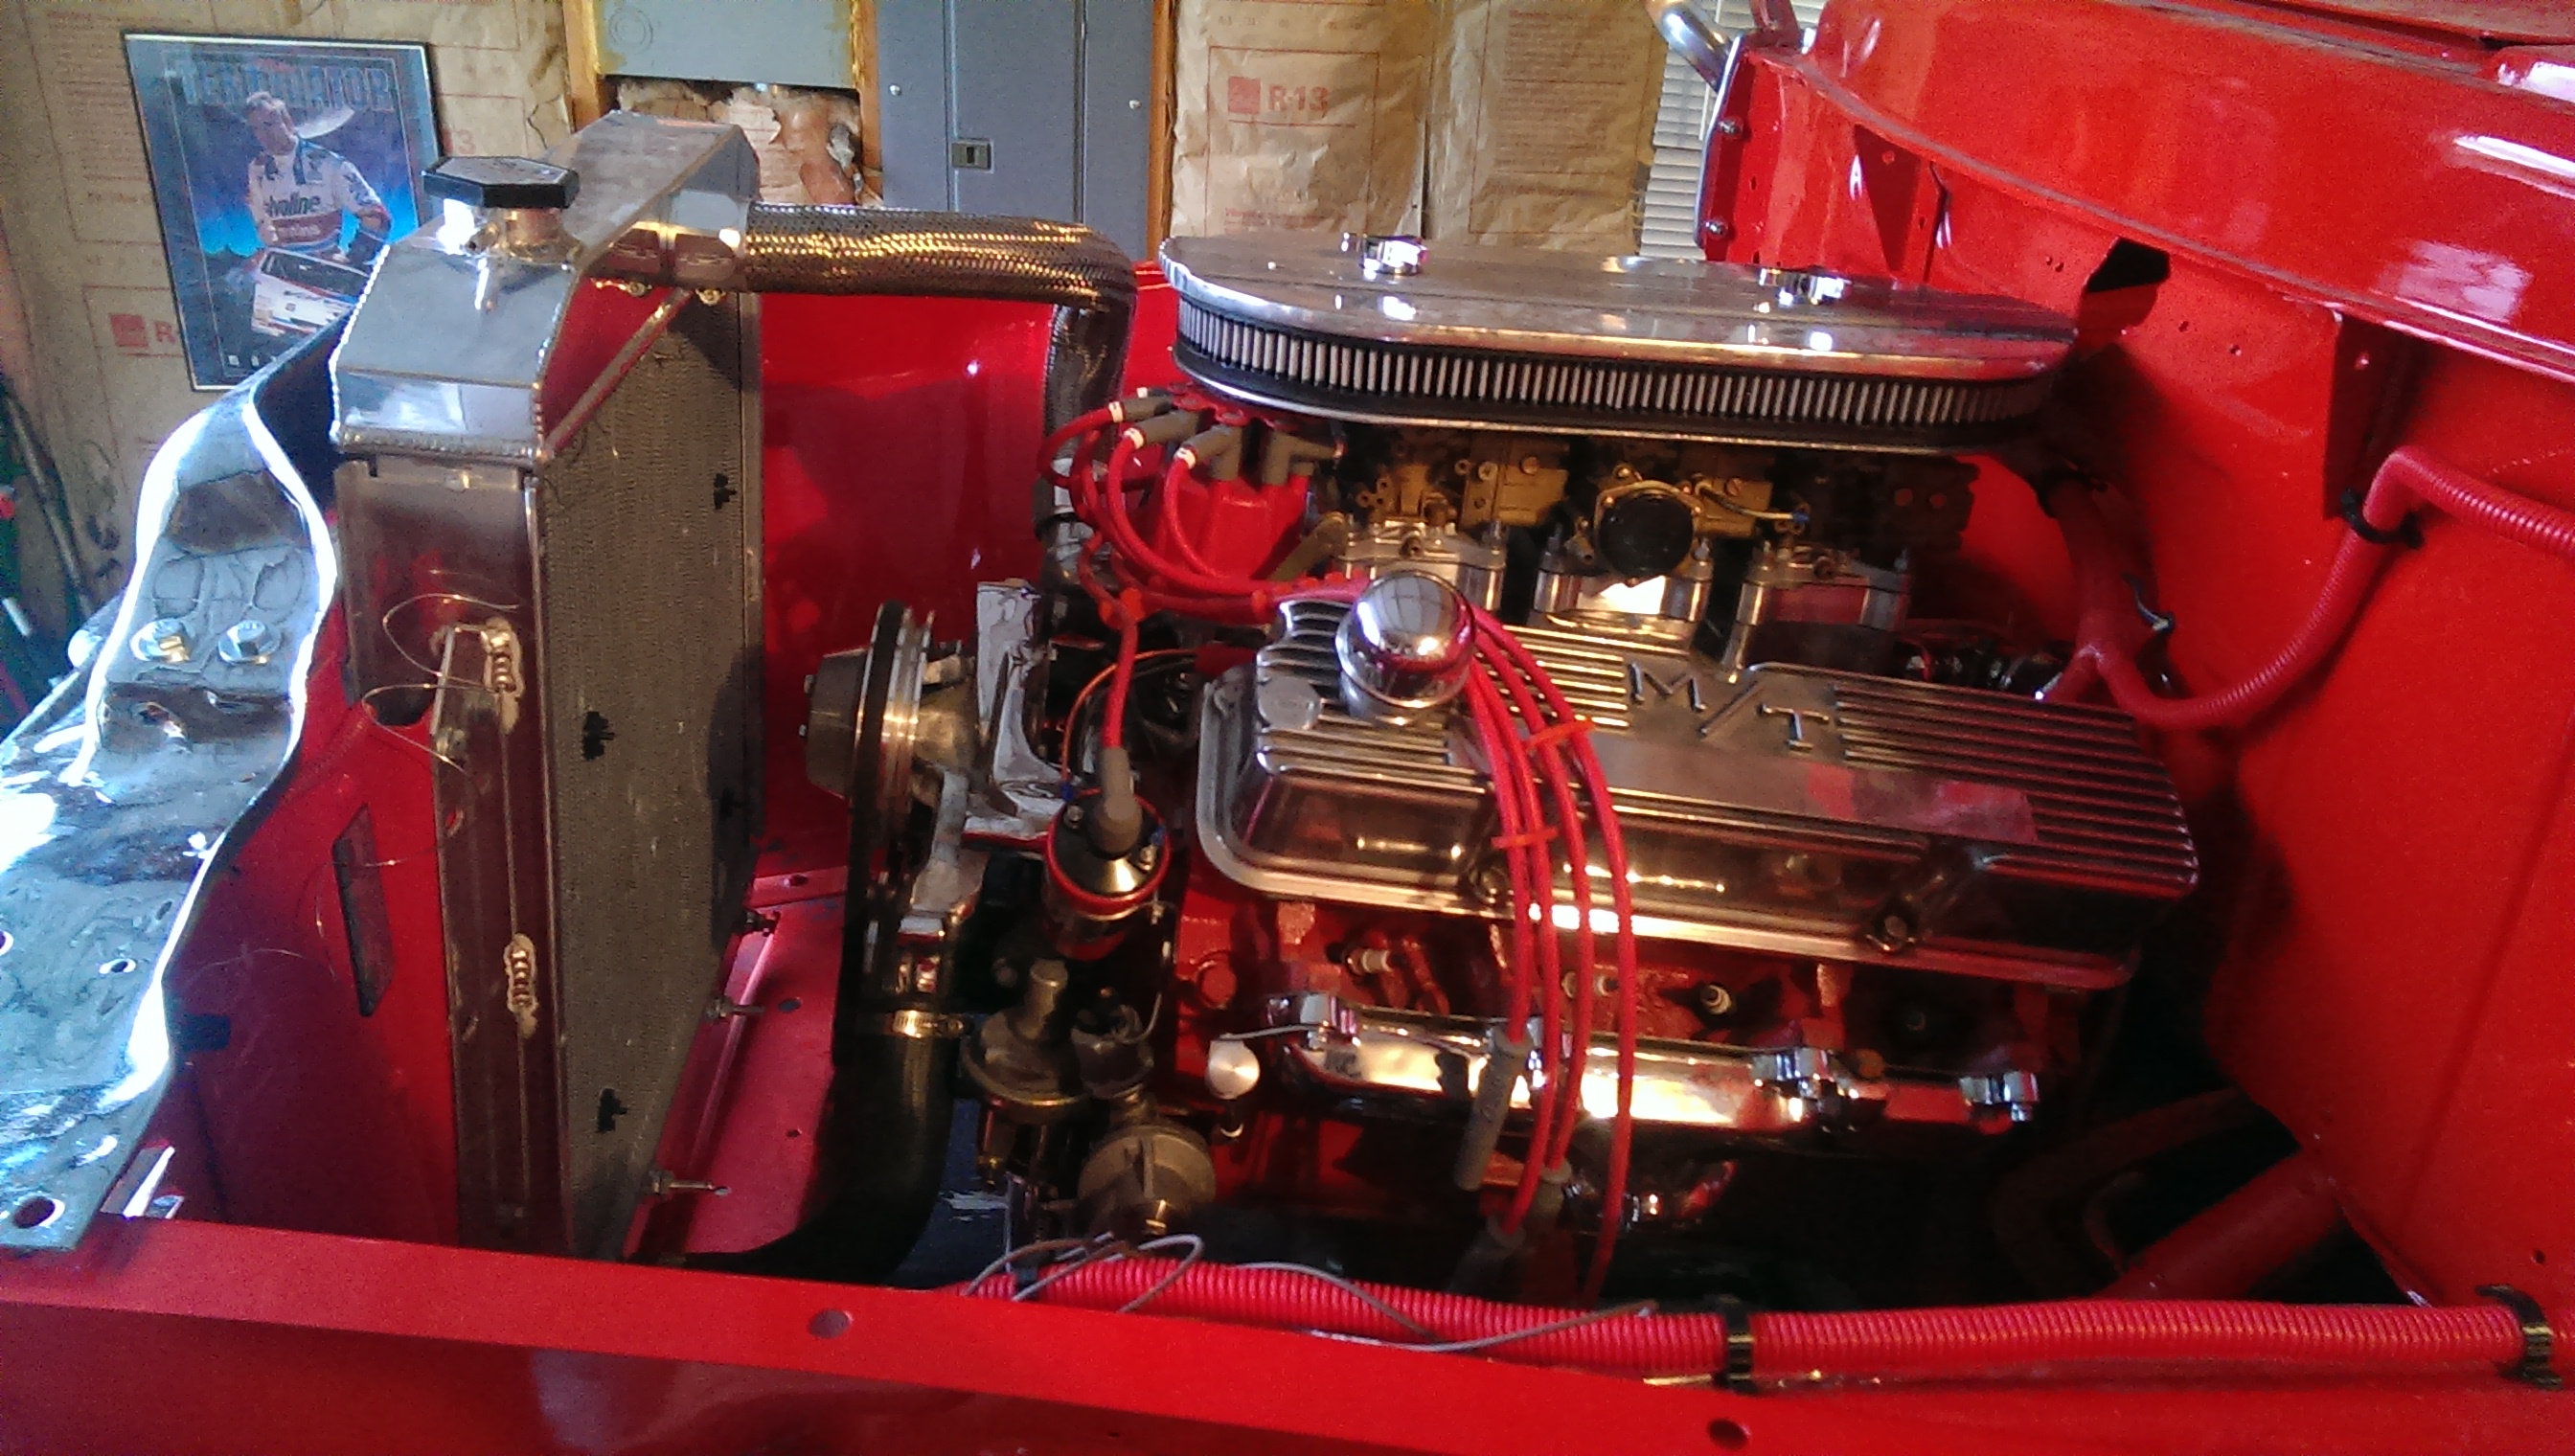
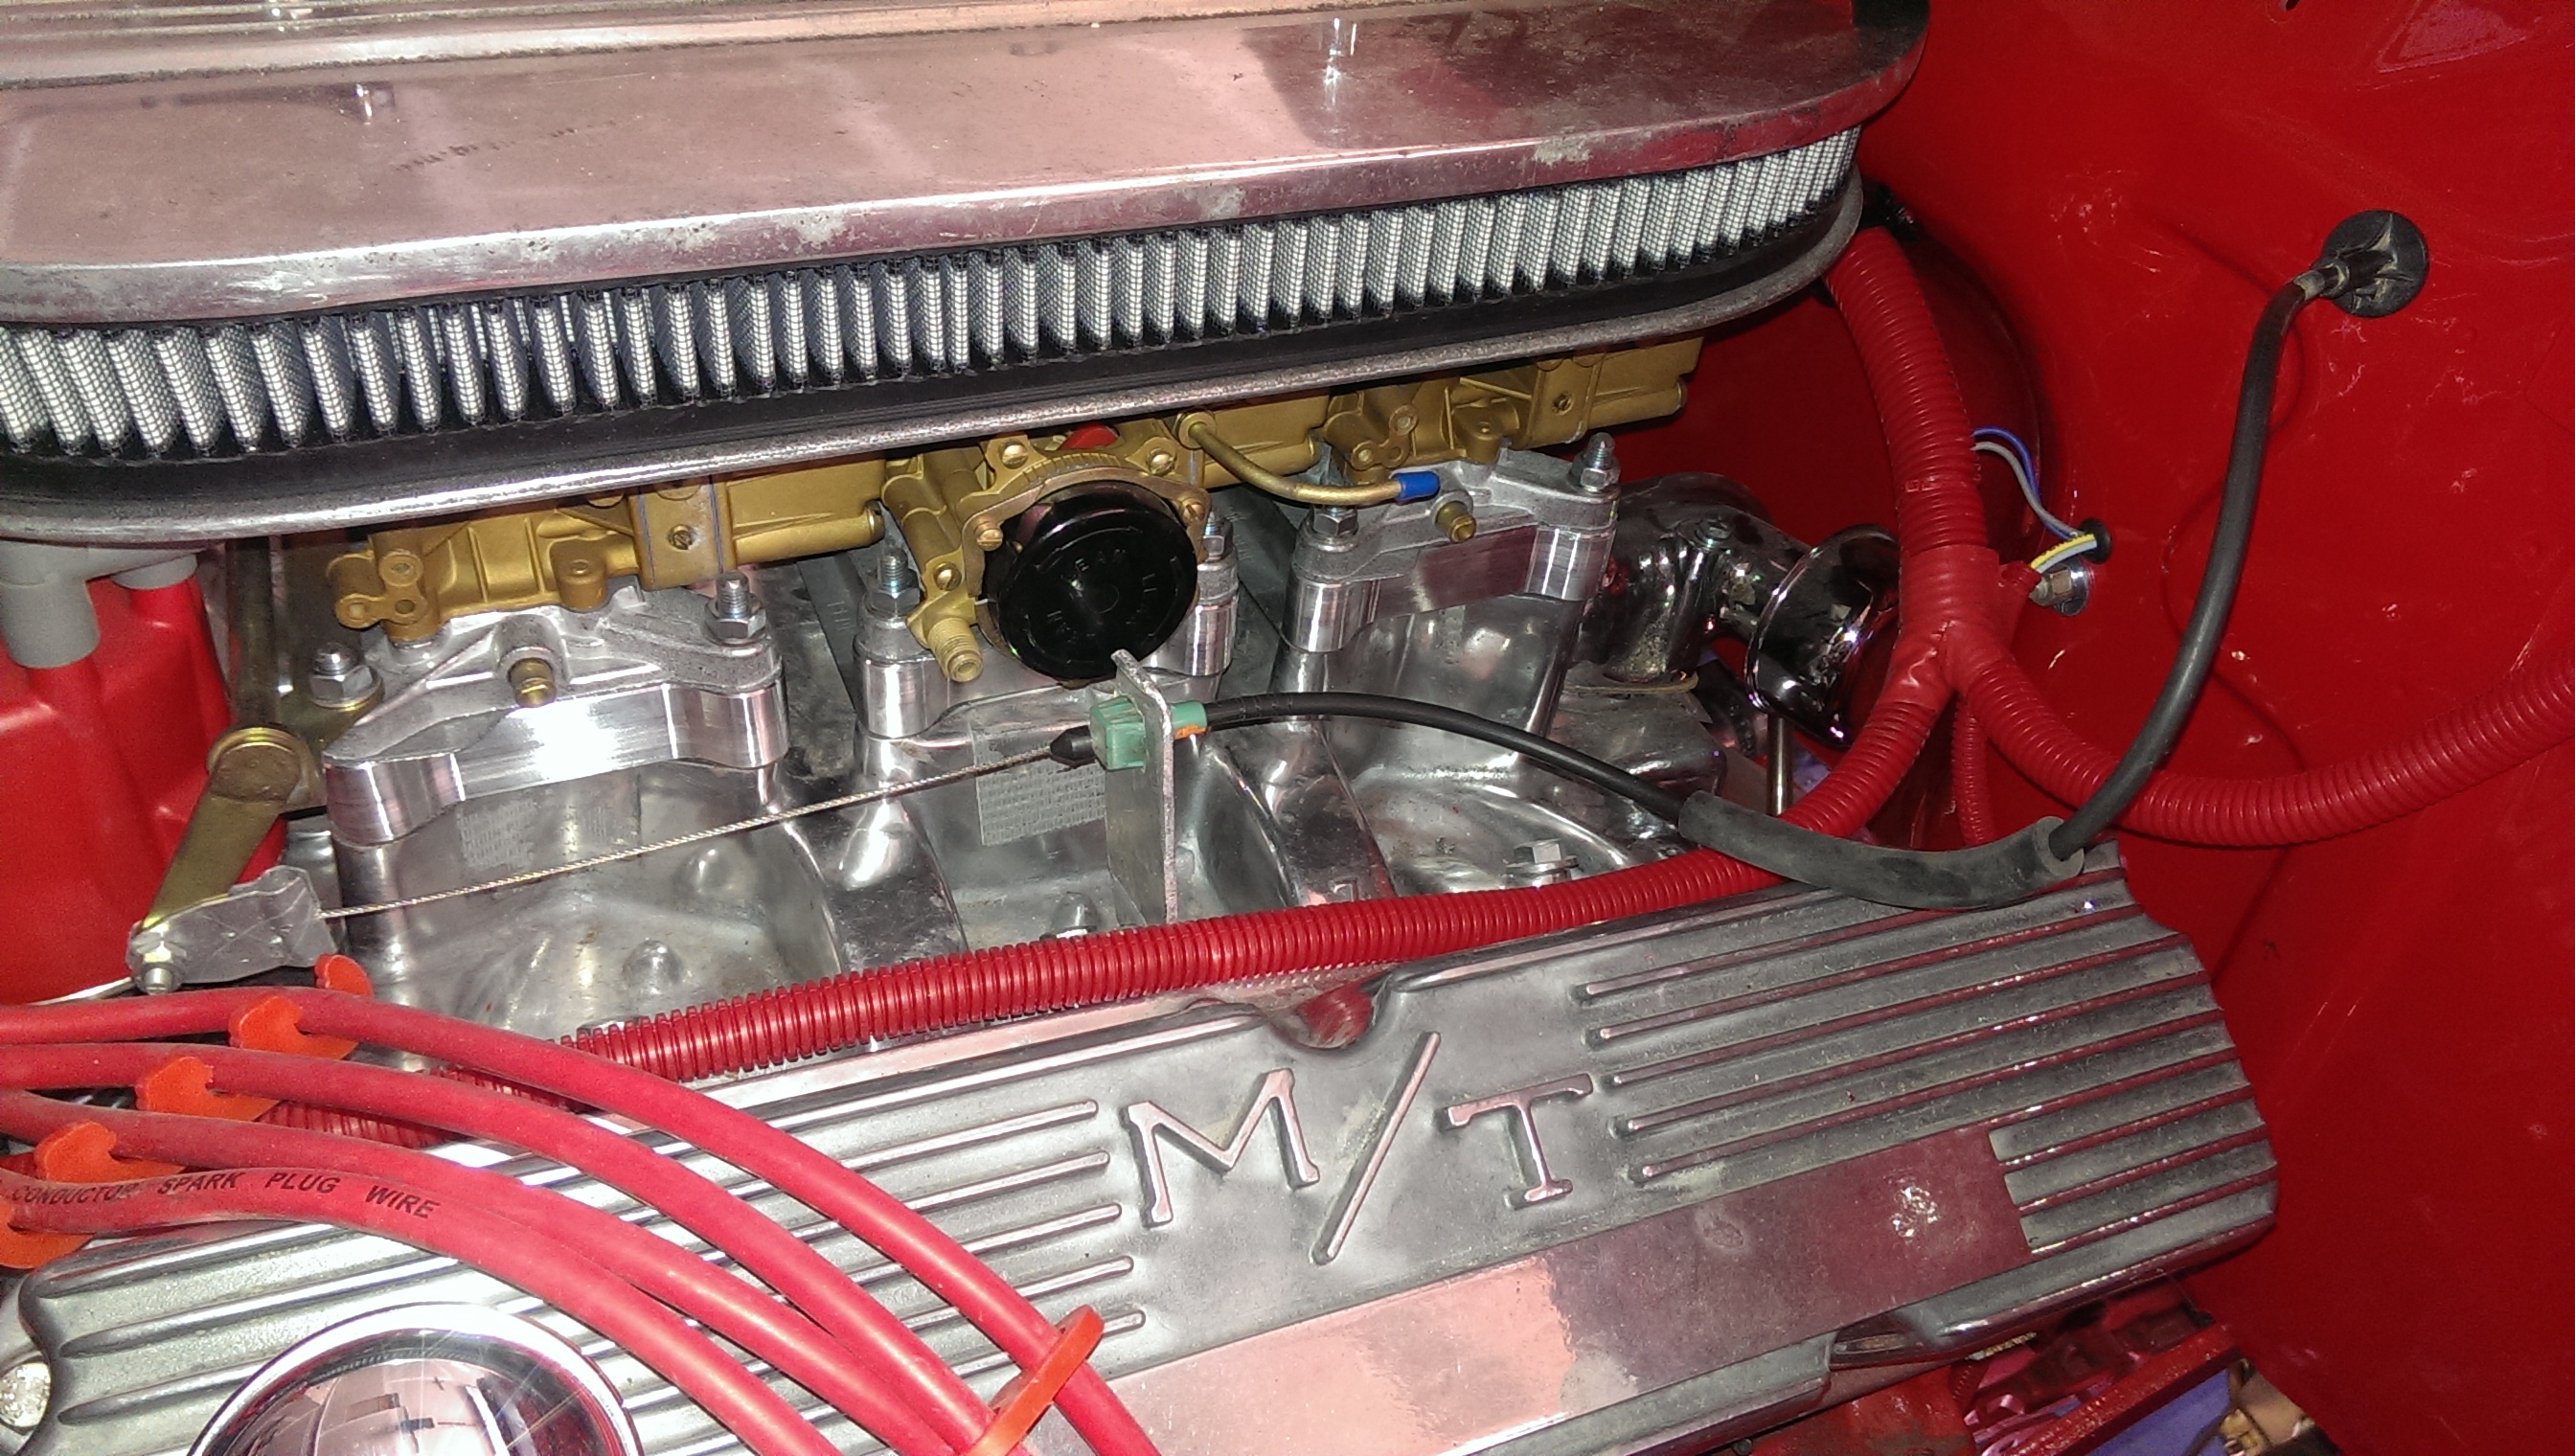
I had decided that the first step to moving forward was to get the engine running. I was a fair bit concerned about this as it had been sitting for so long. Anyway, I started to work to that end. One of the first things was to get the ignition module mounted and wired in. We tried a few different locations and decided that we would place it on the passenger inner fender. So I put on the air deflectors and inner fenders.
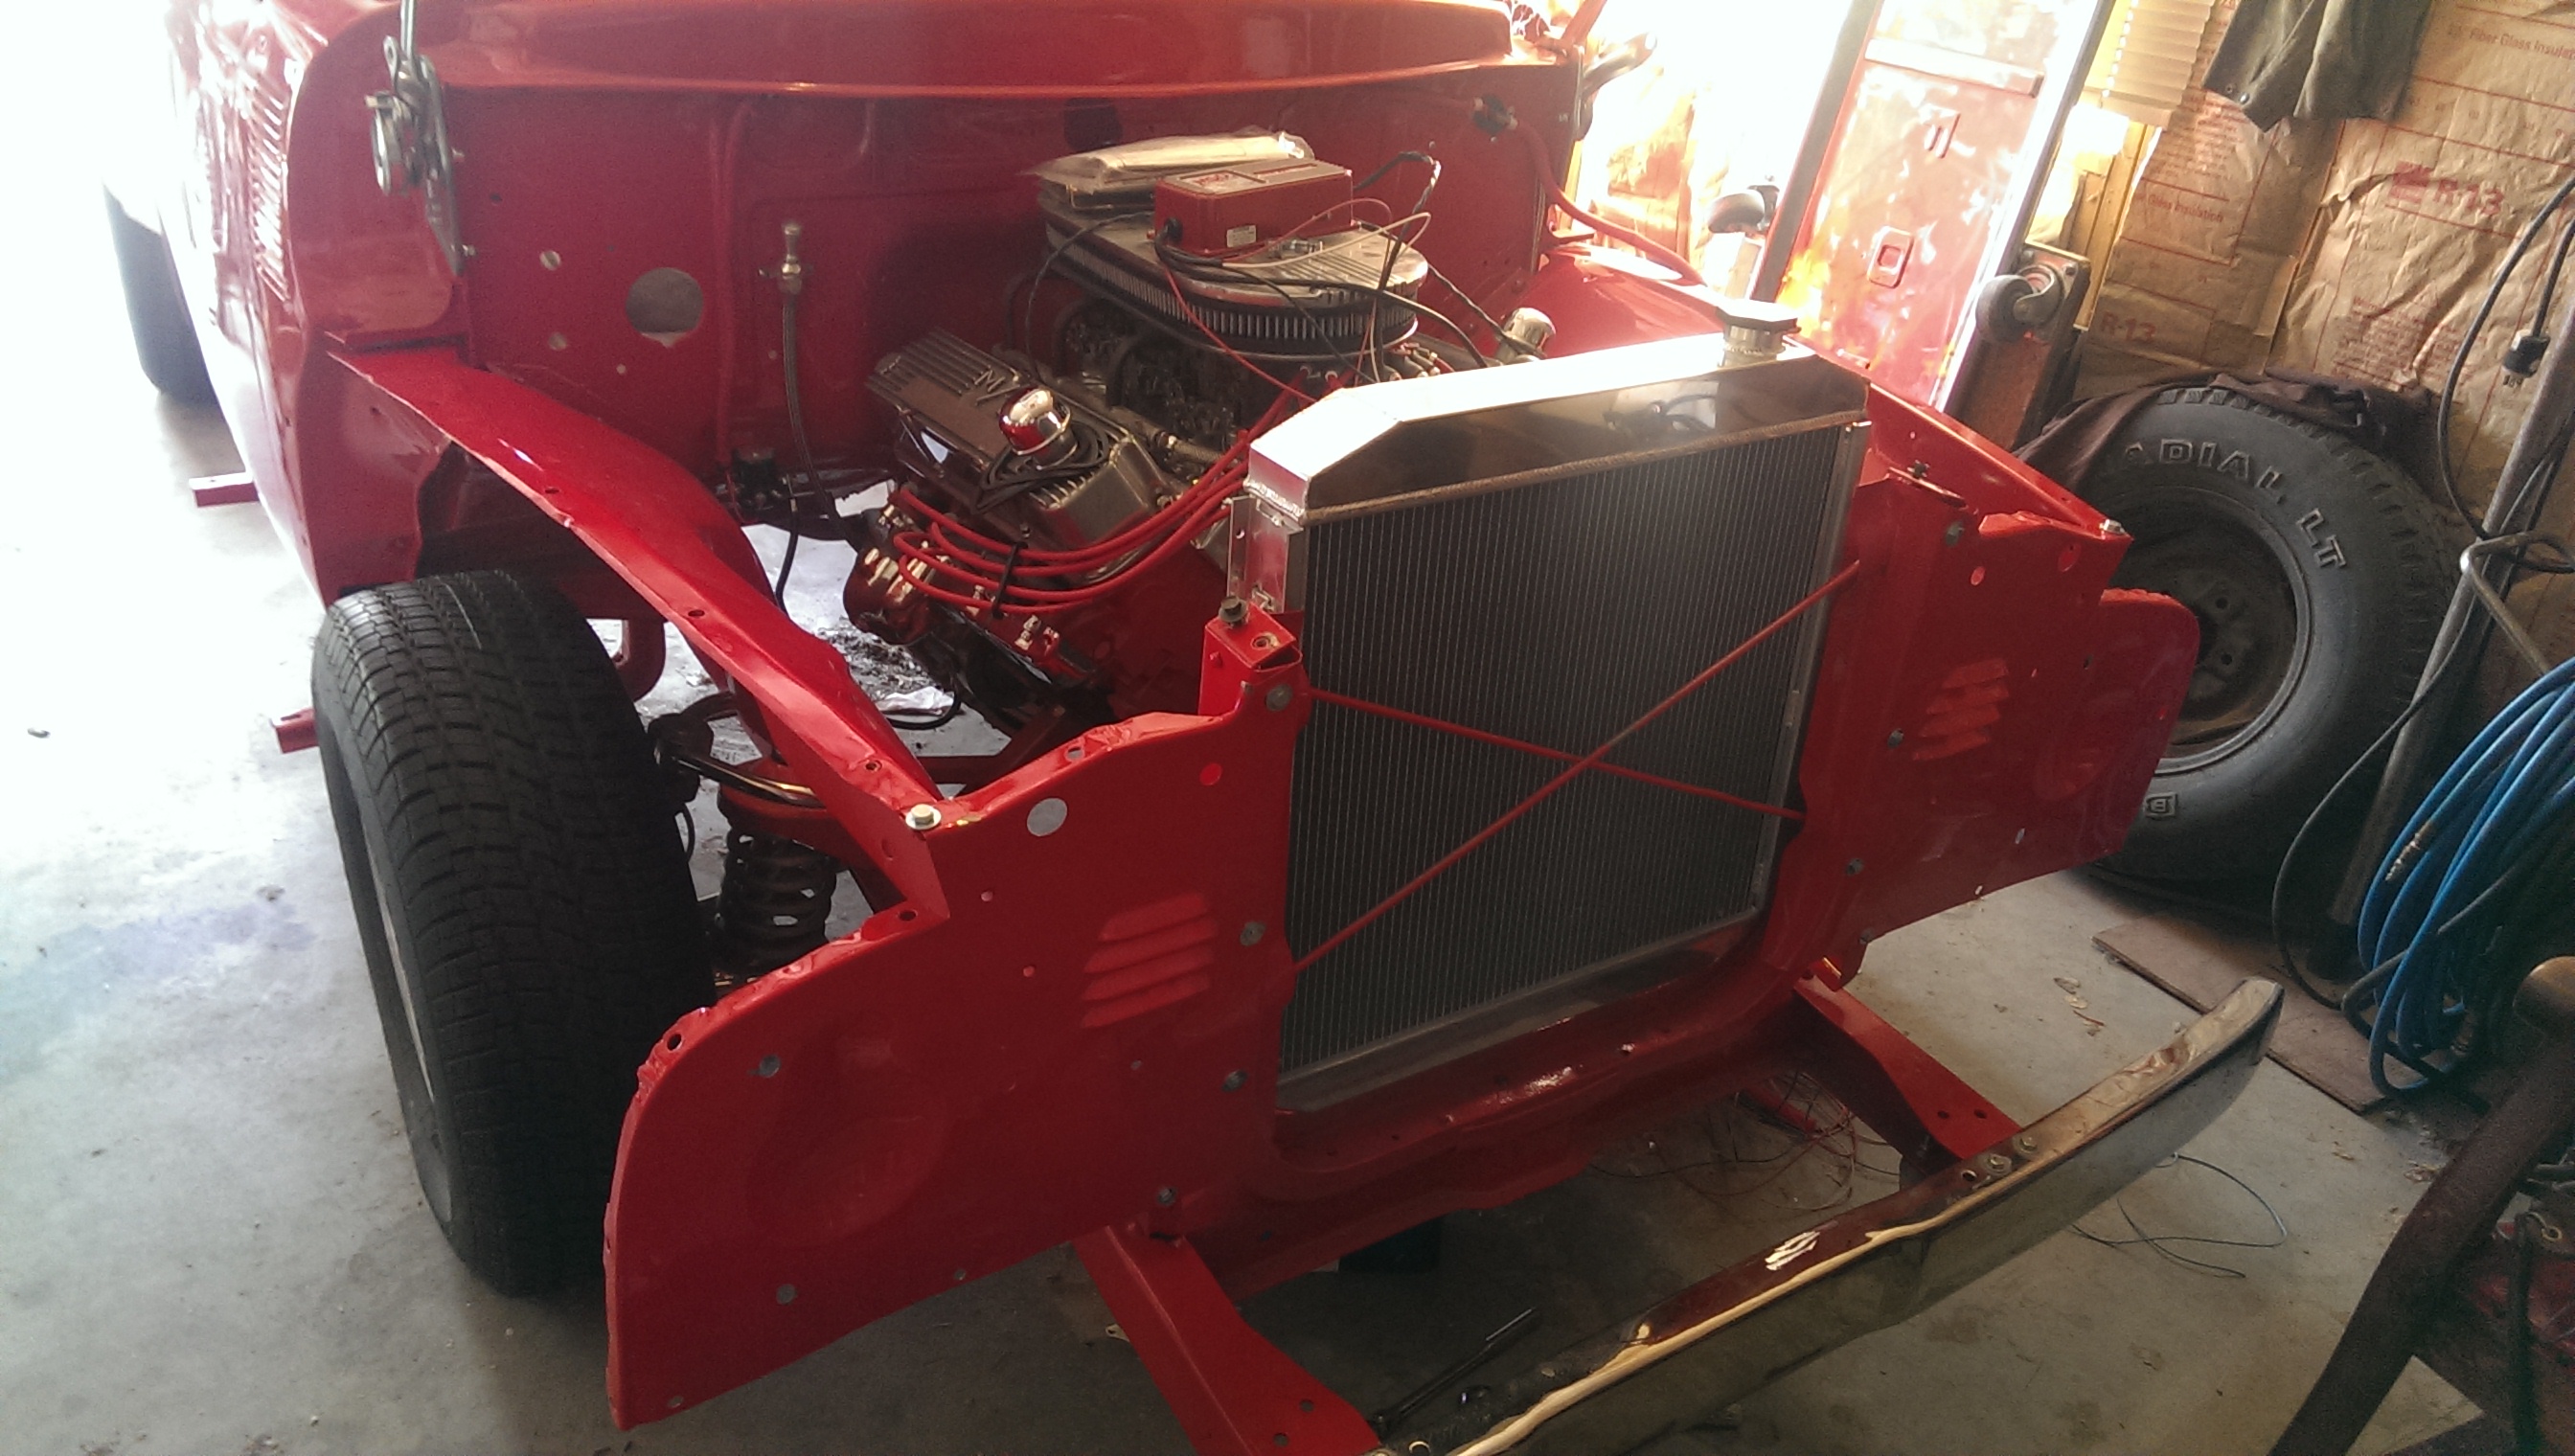
Something that is hard to see in the pictures is that the air cleaner doesn't sit on the carbs correctly. They sit to low and the air cleaner sits on top of the distributor cap. I had many suggestions on how to resolve this and finally decided to get spacers to raise them up 1 inch. This does put the air cleaner into the space where the window wiper motor goes, so we are going to come up with another option for that later.
I had wiring to resolve along with all of this. The wires that came across to the starter solenoid were routed in the space that is behind the fender alignment rod mount. I didn't really like this routing and re-routed it in convoluted tubing that I had gotten. It also allowed for the additional wiring that I had to run. I have been re doing all the wiring in the tubing, I felt that it was much better way to route it and looks cleaner.
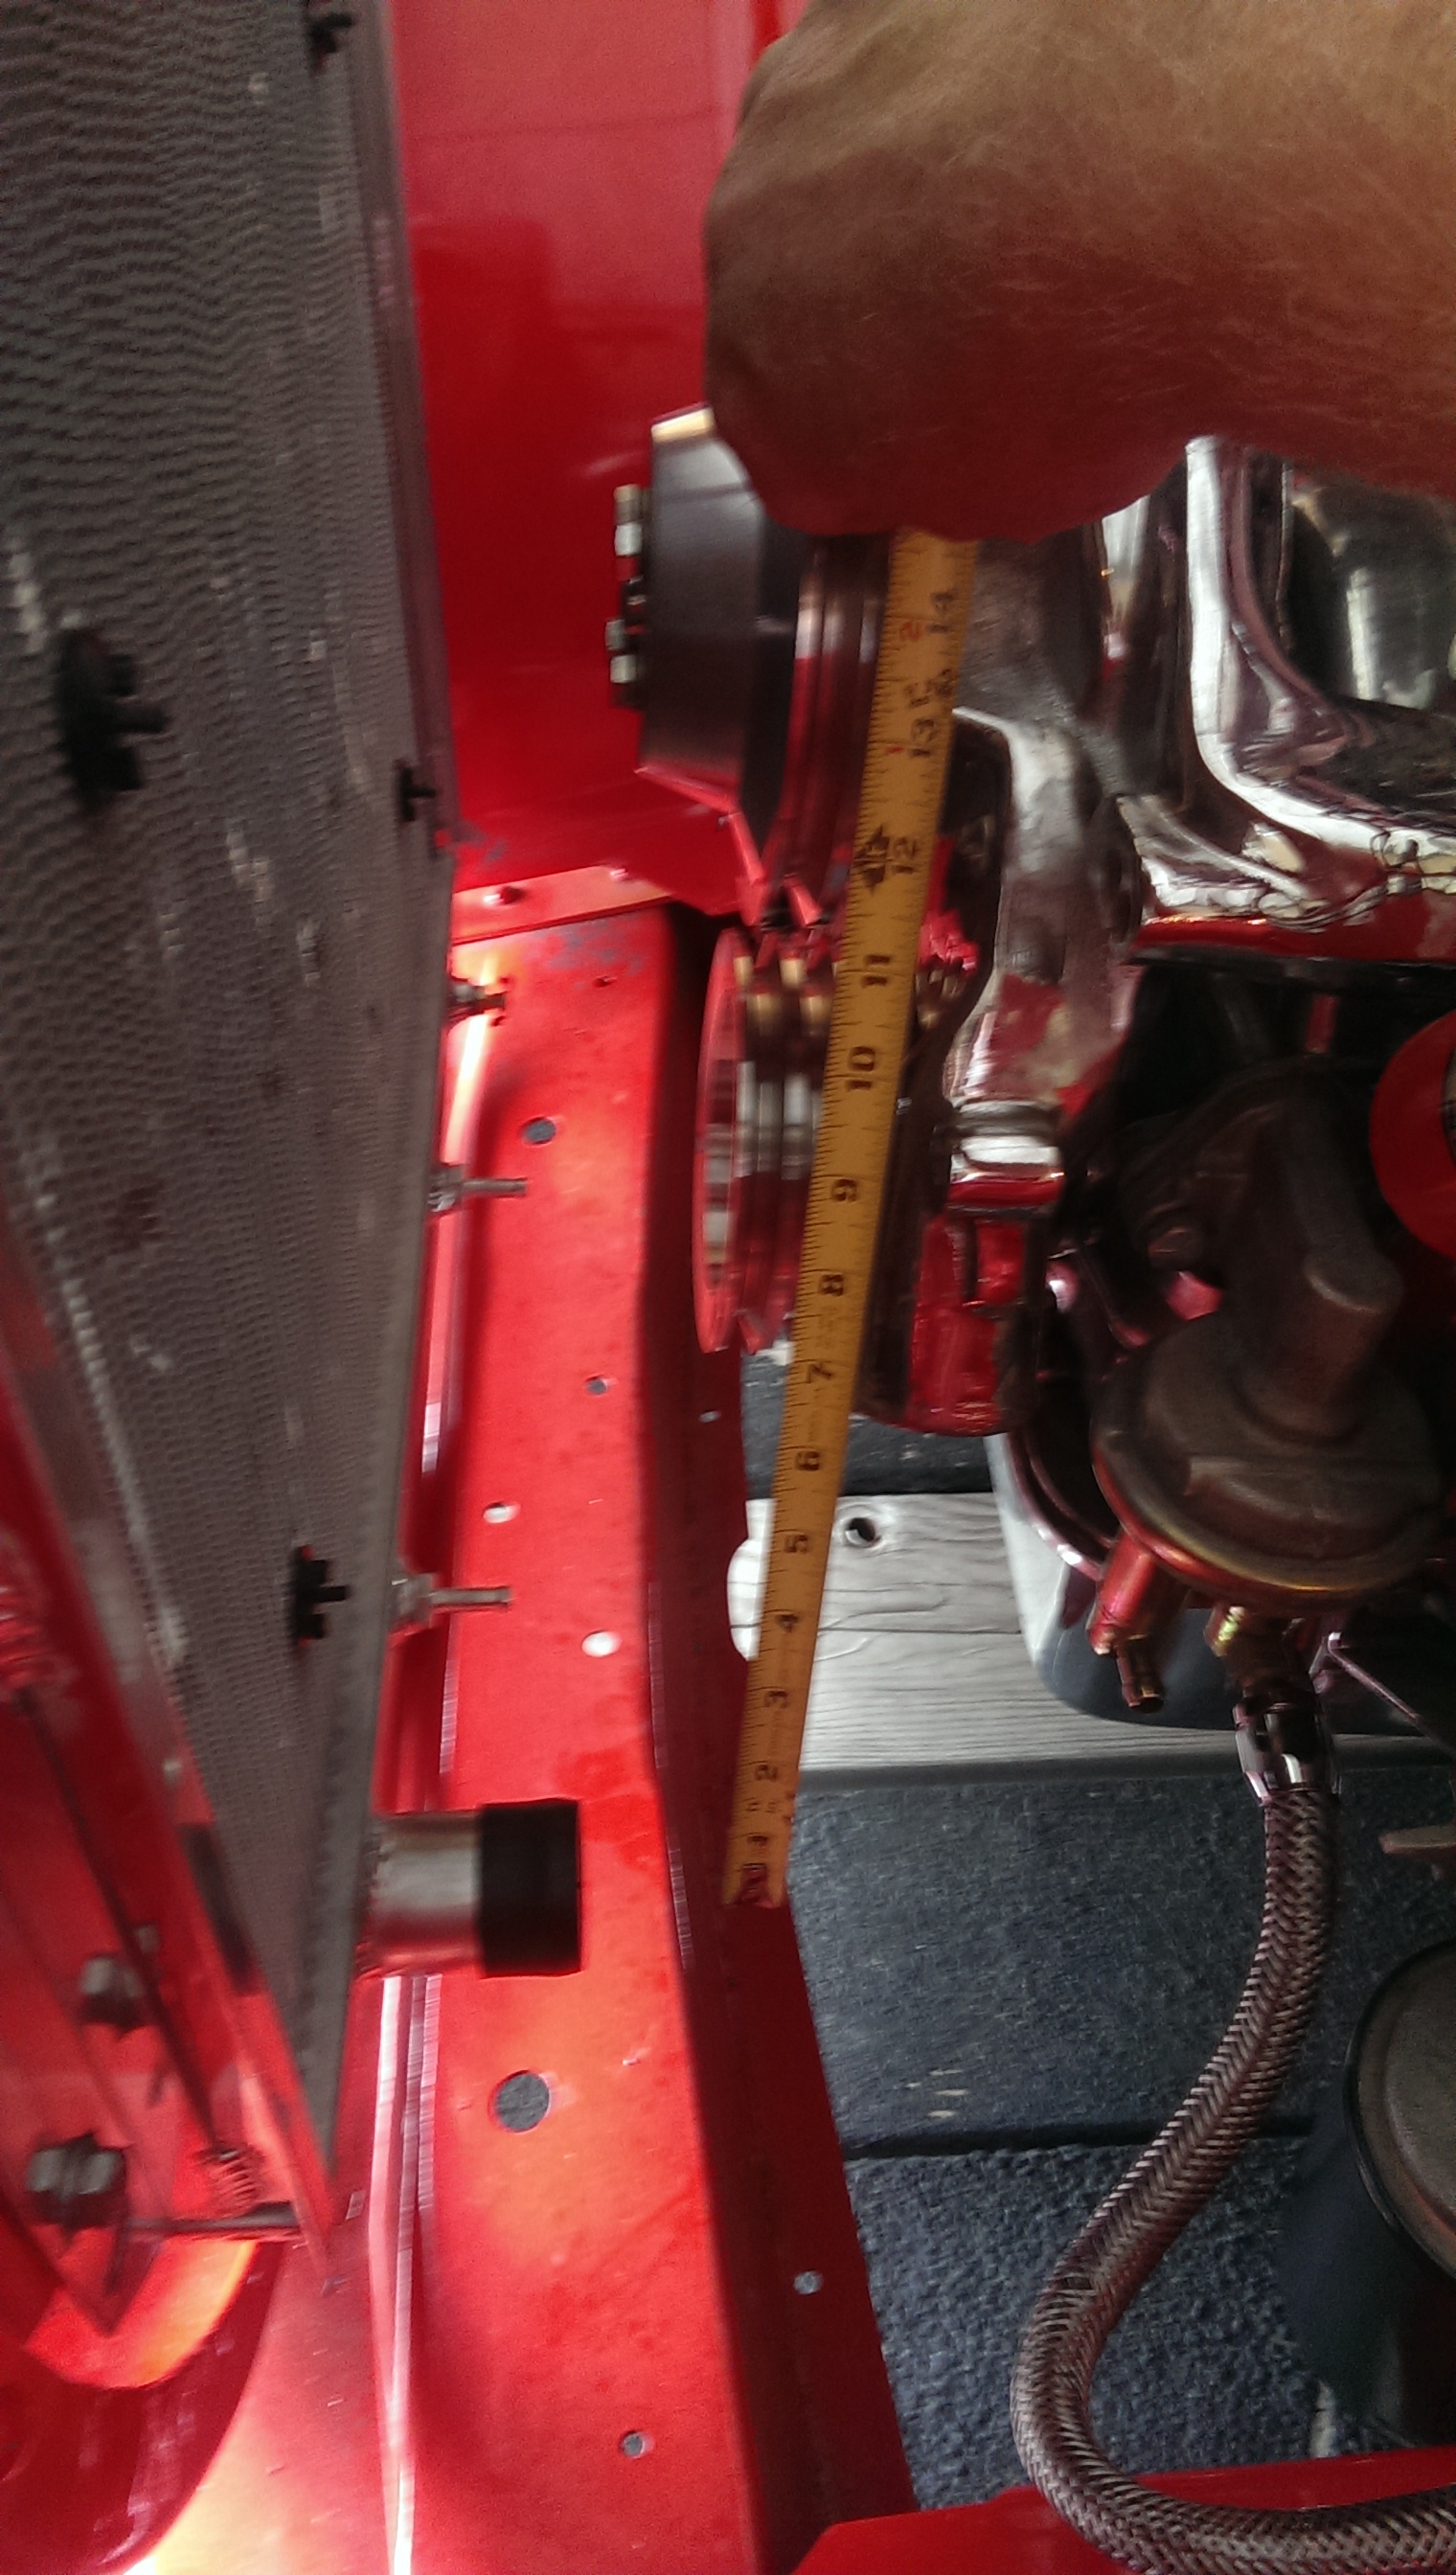
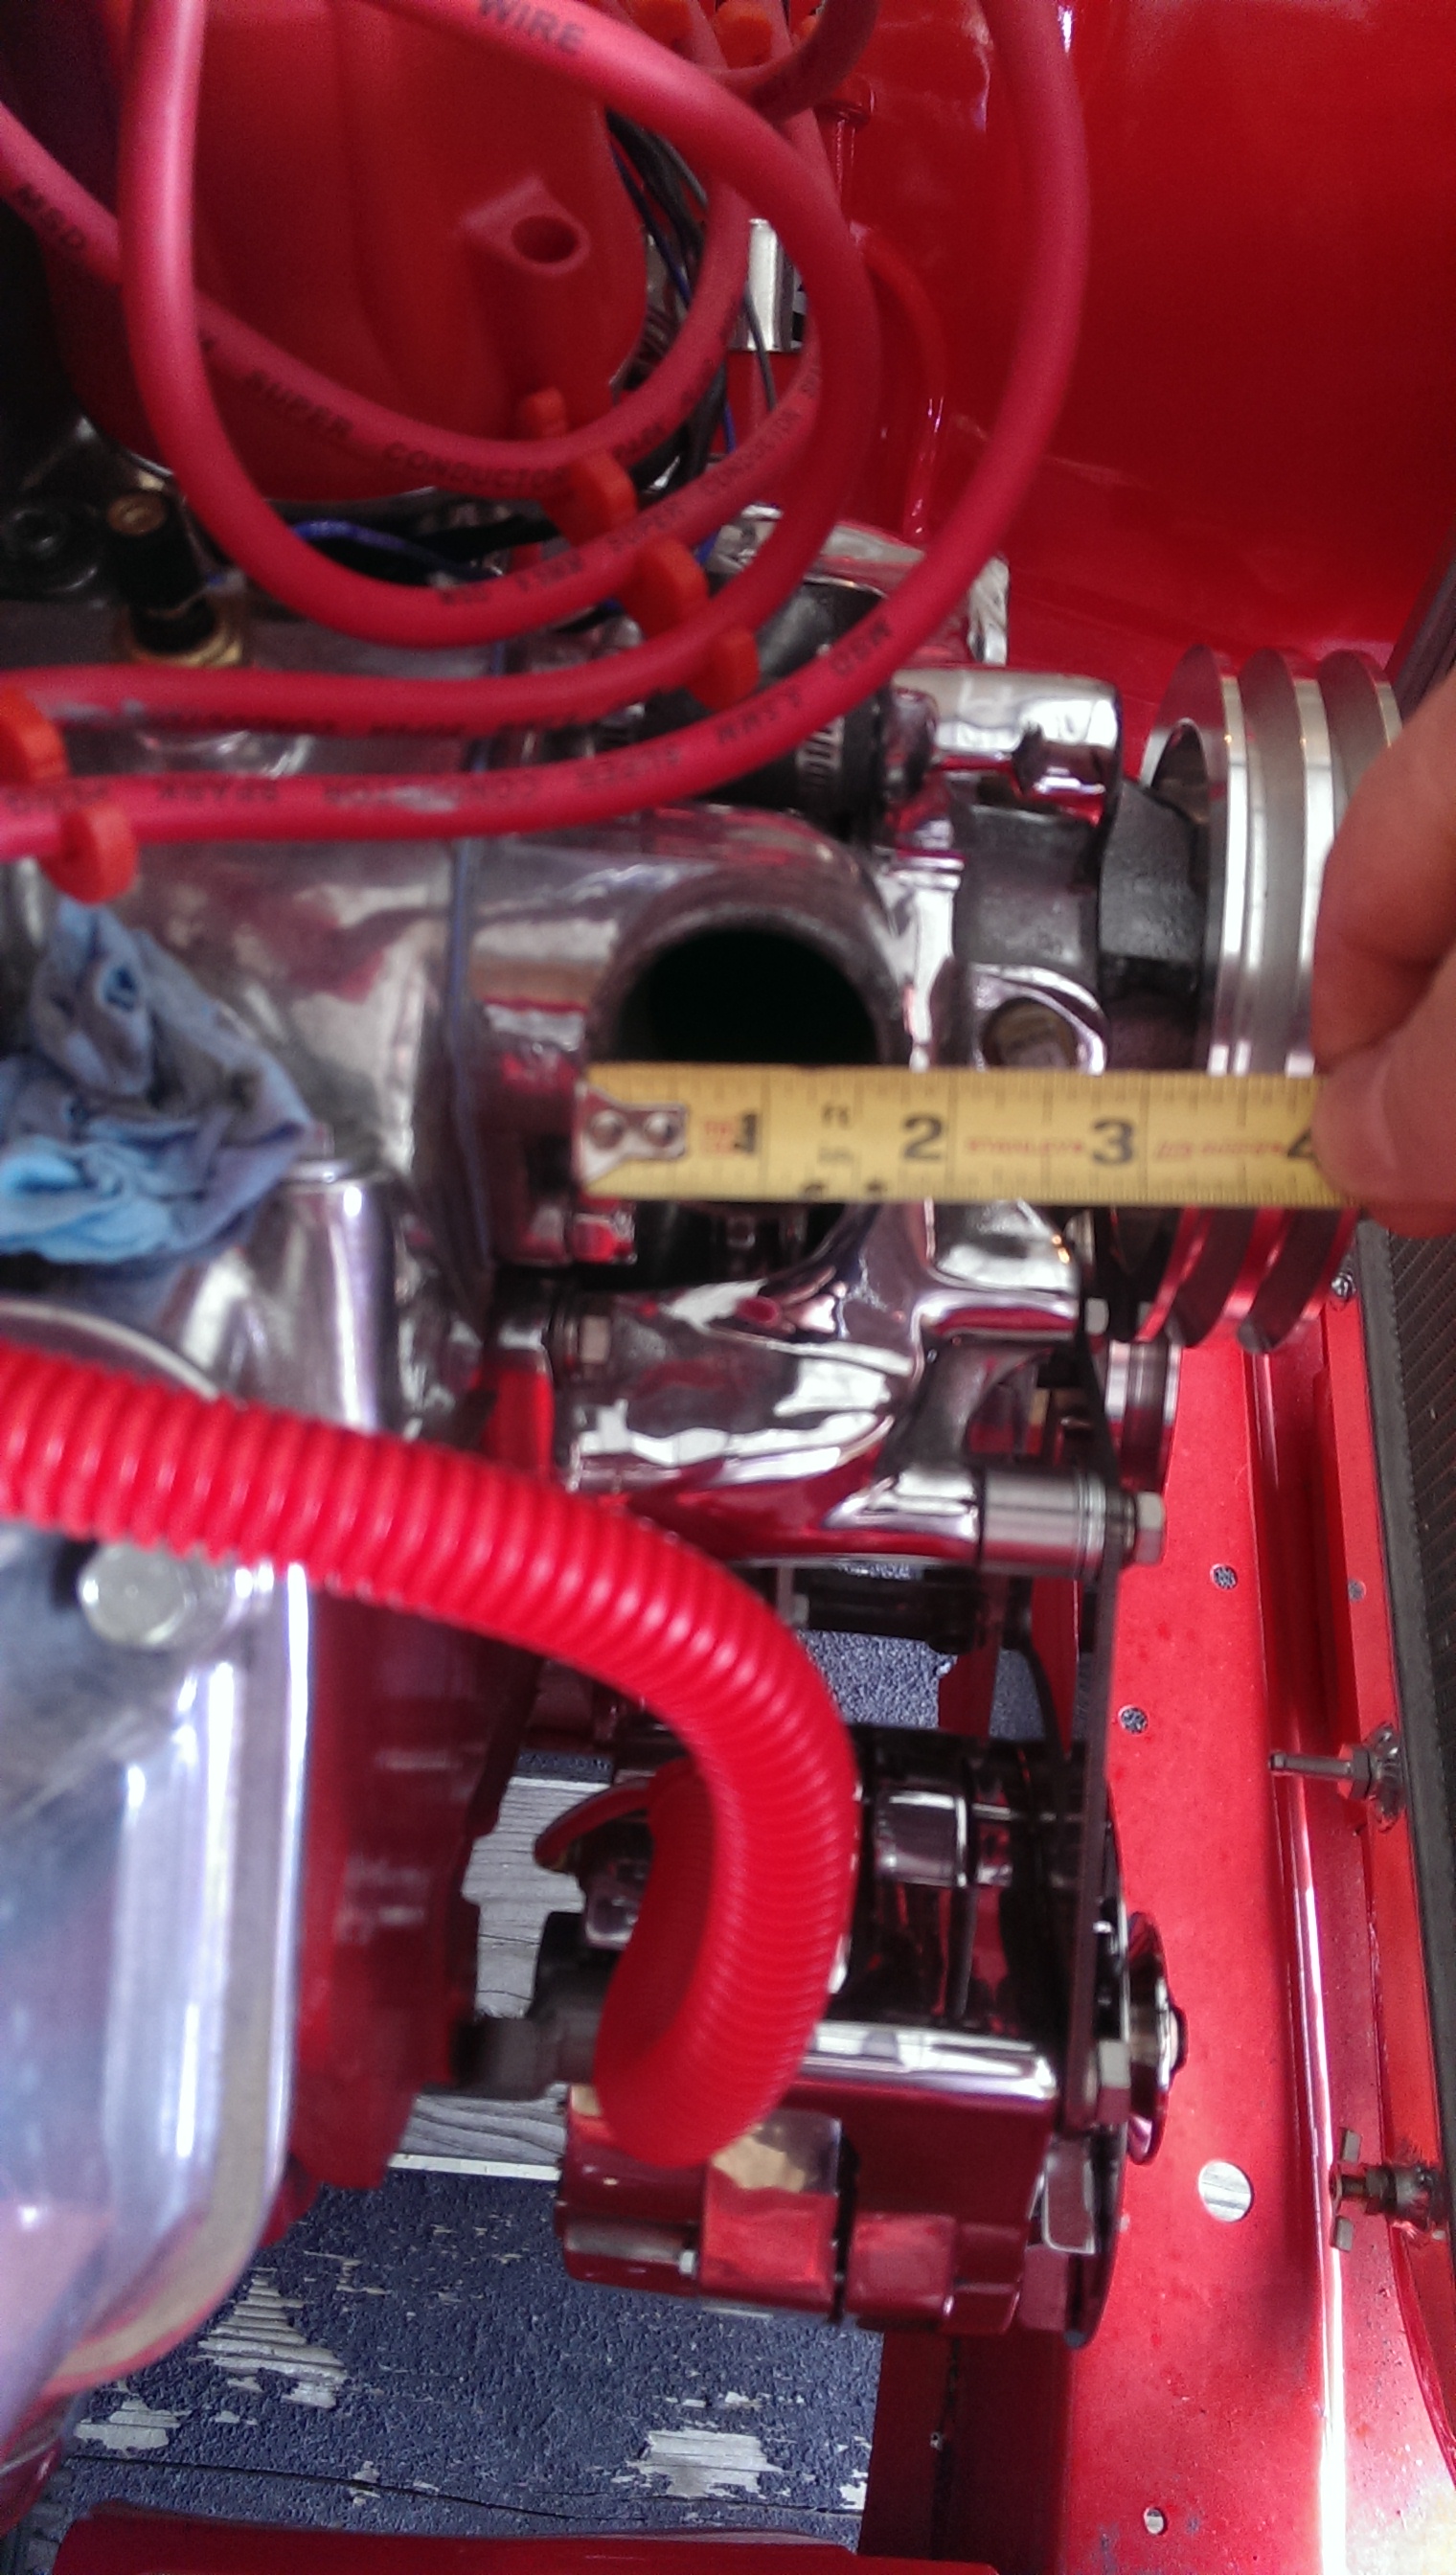
I ordered parts to mount the alternator from C.R.A.P. Industries, they had the bracket that would allow for mounting this to the FE block. It took a lot of searching to find this website.
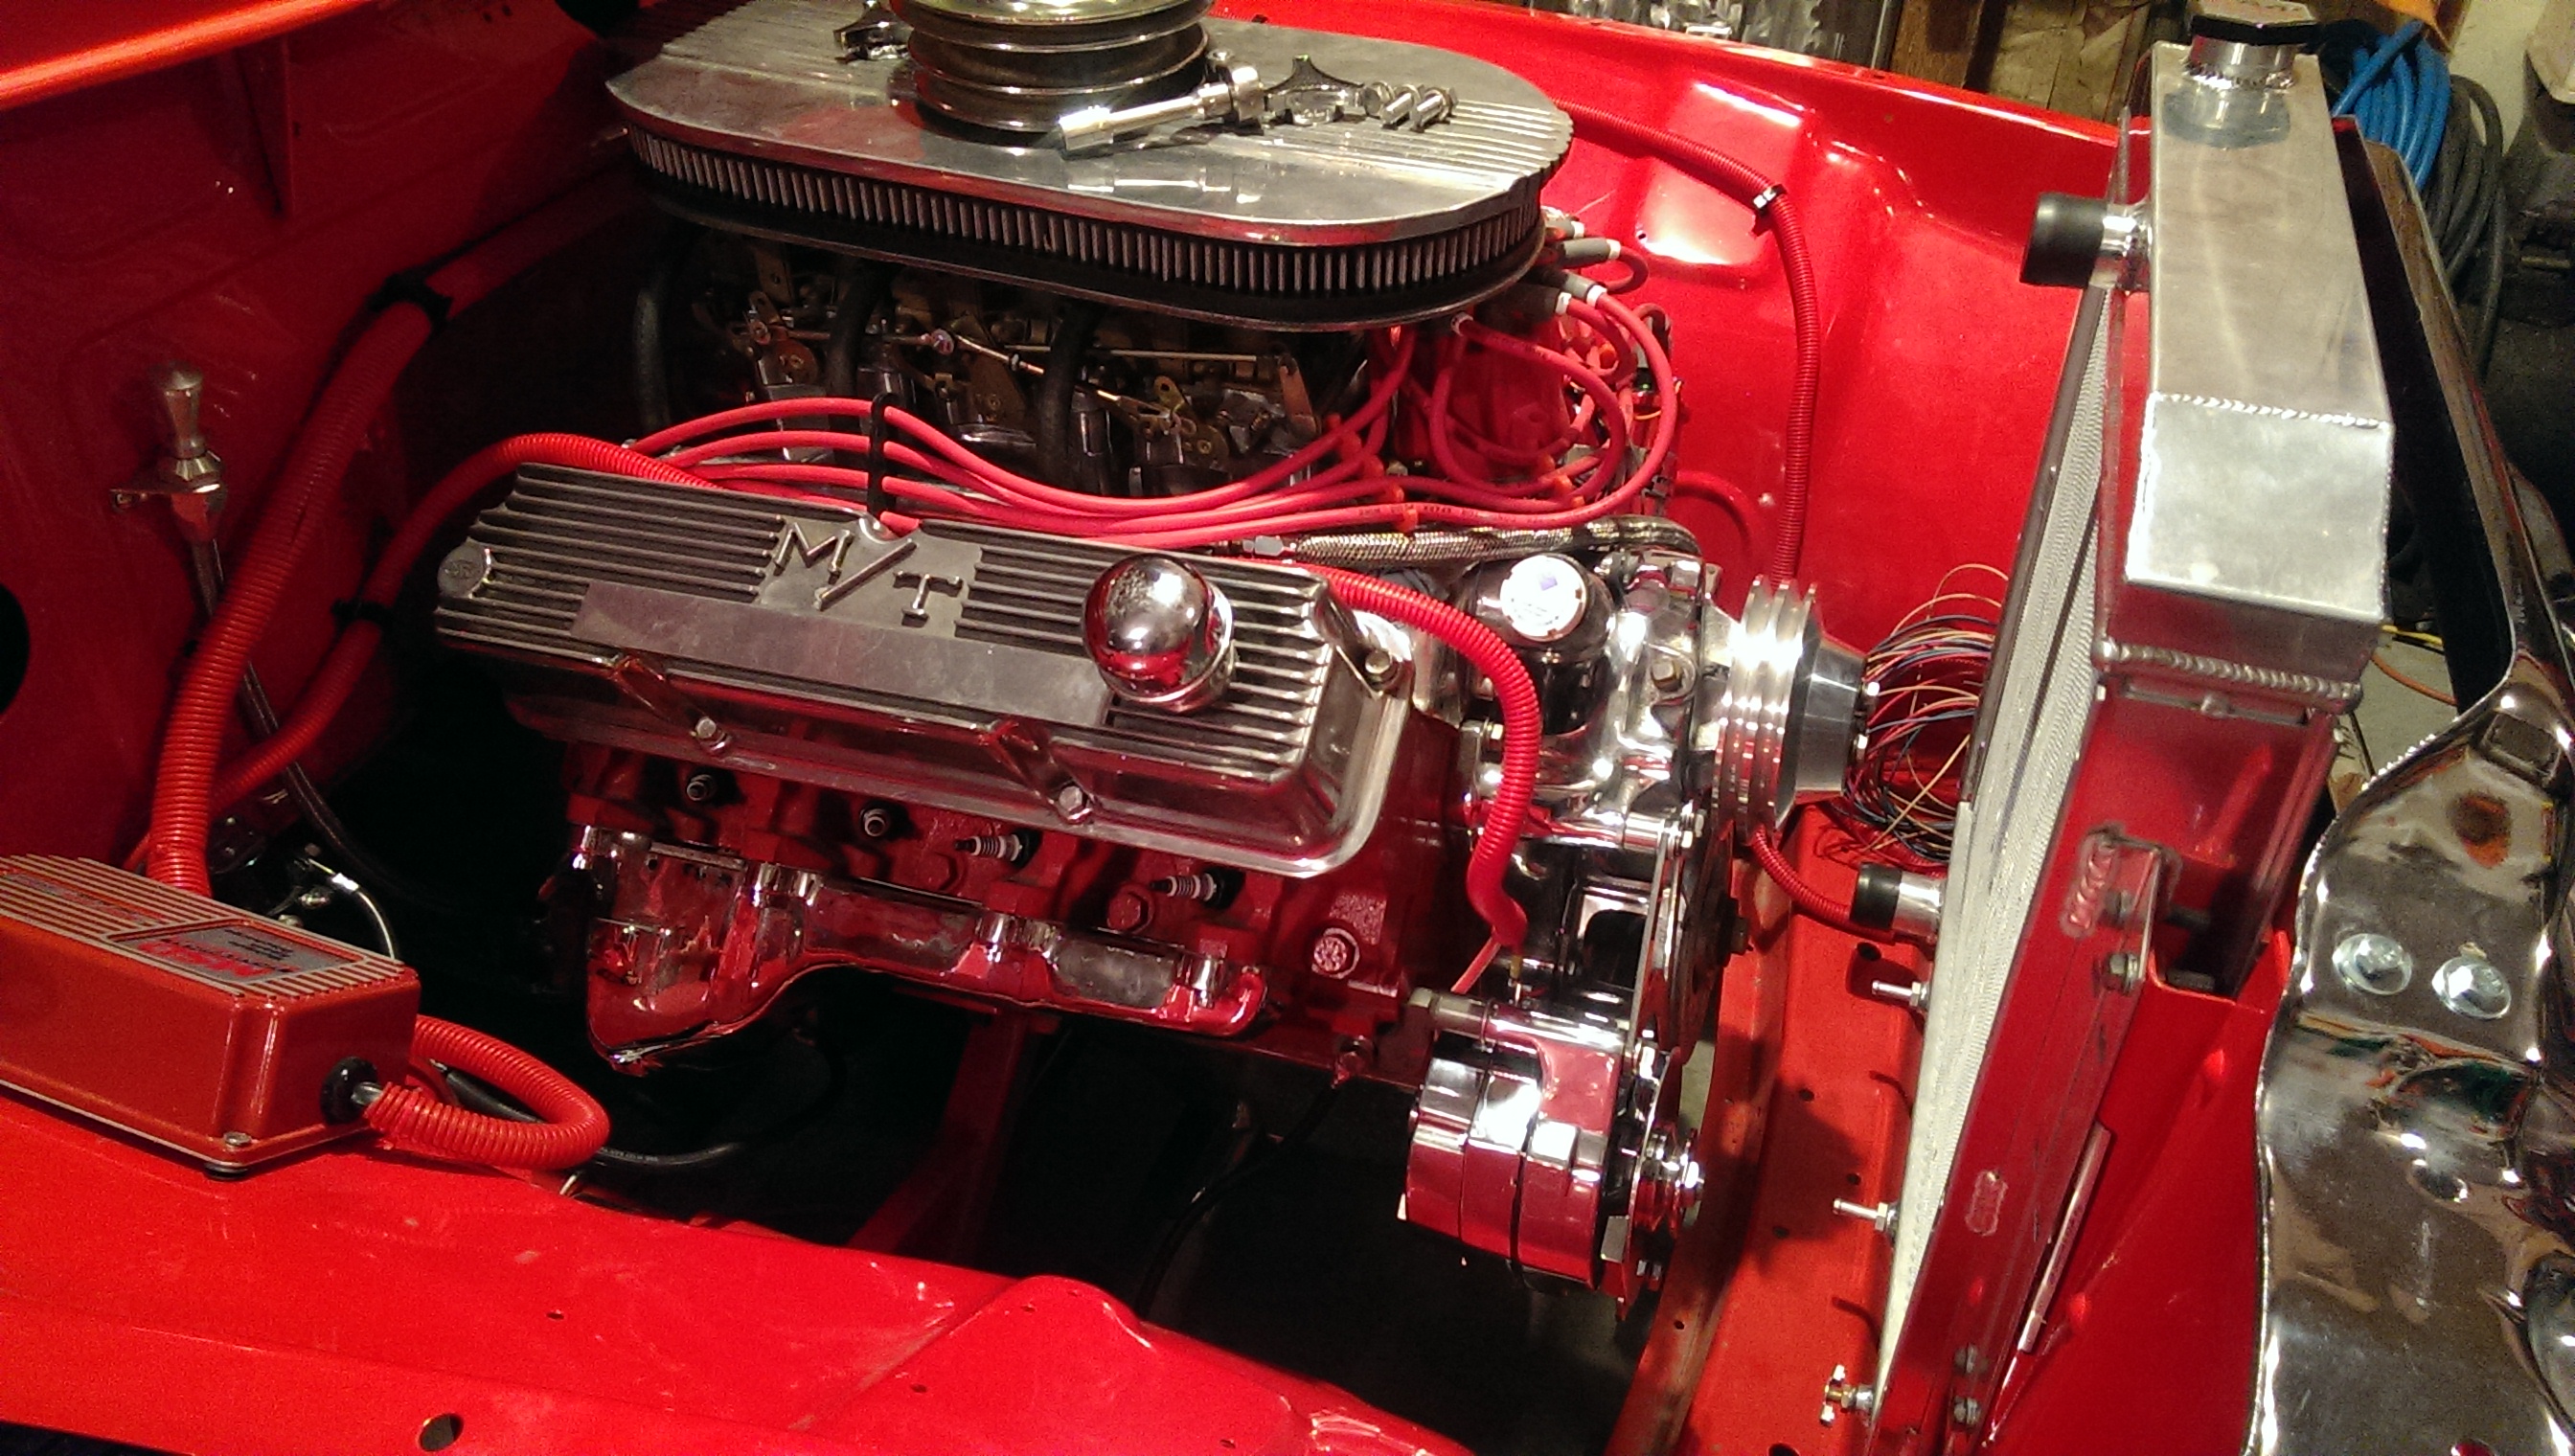
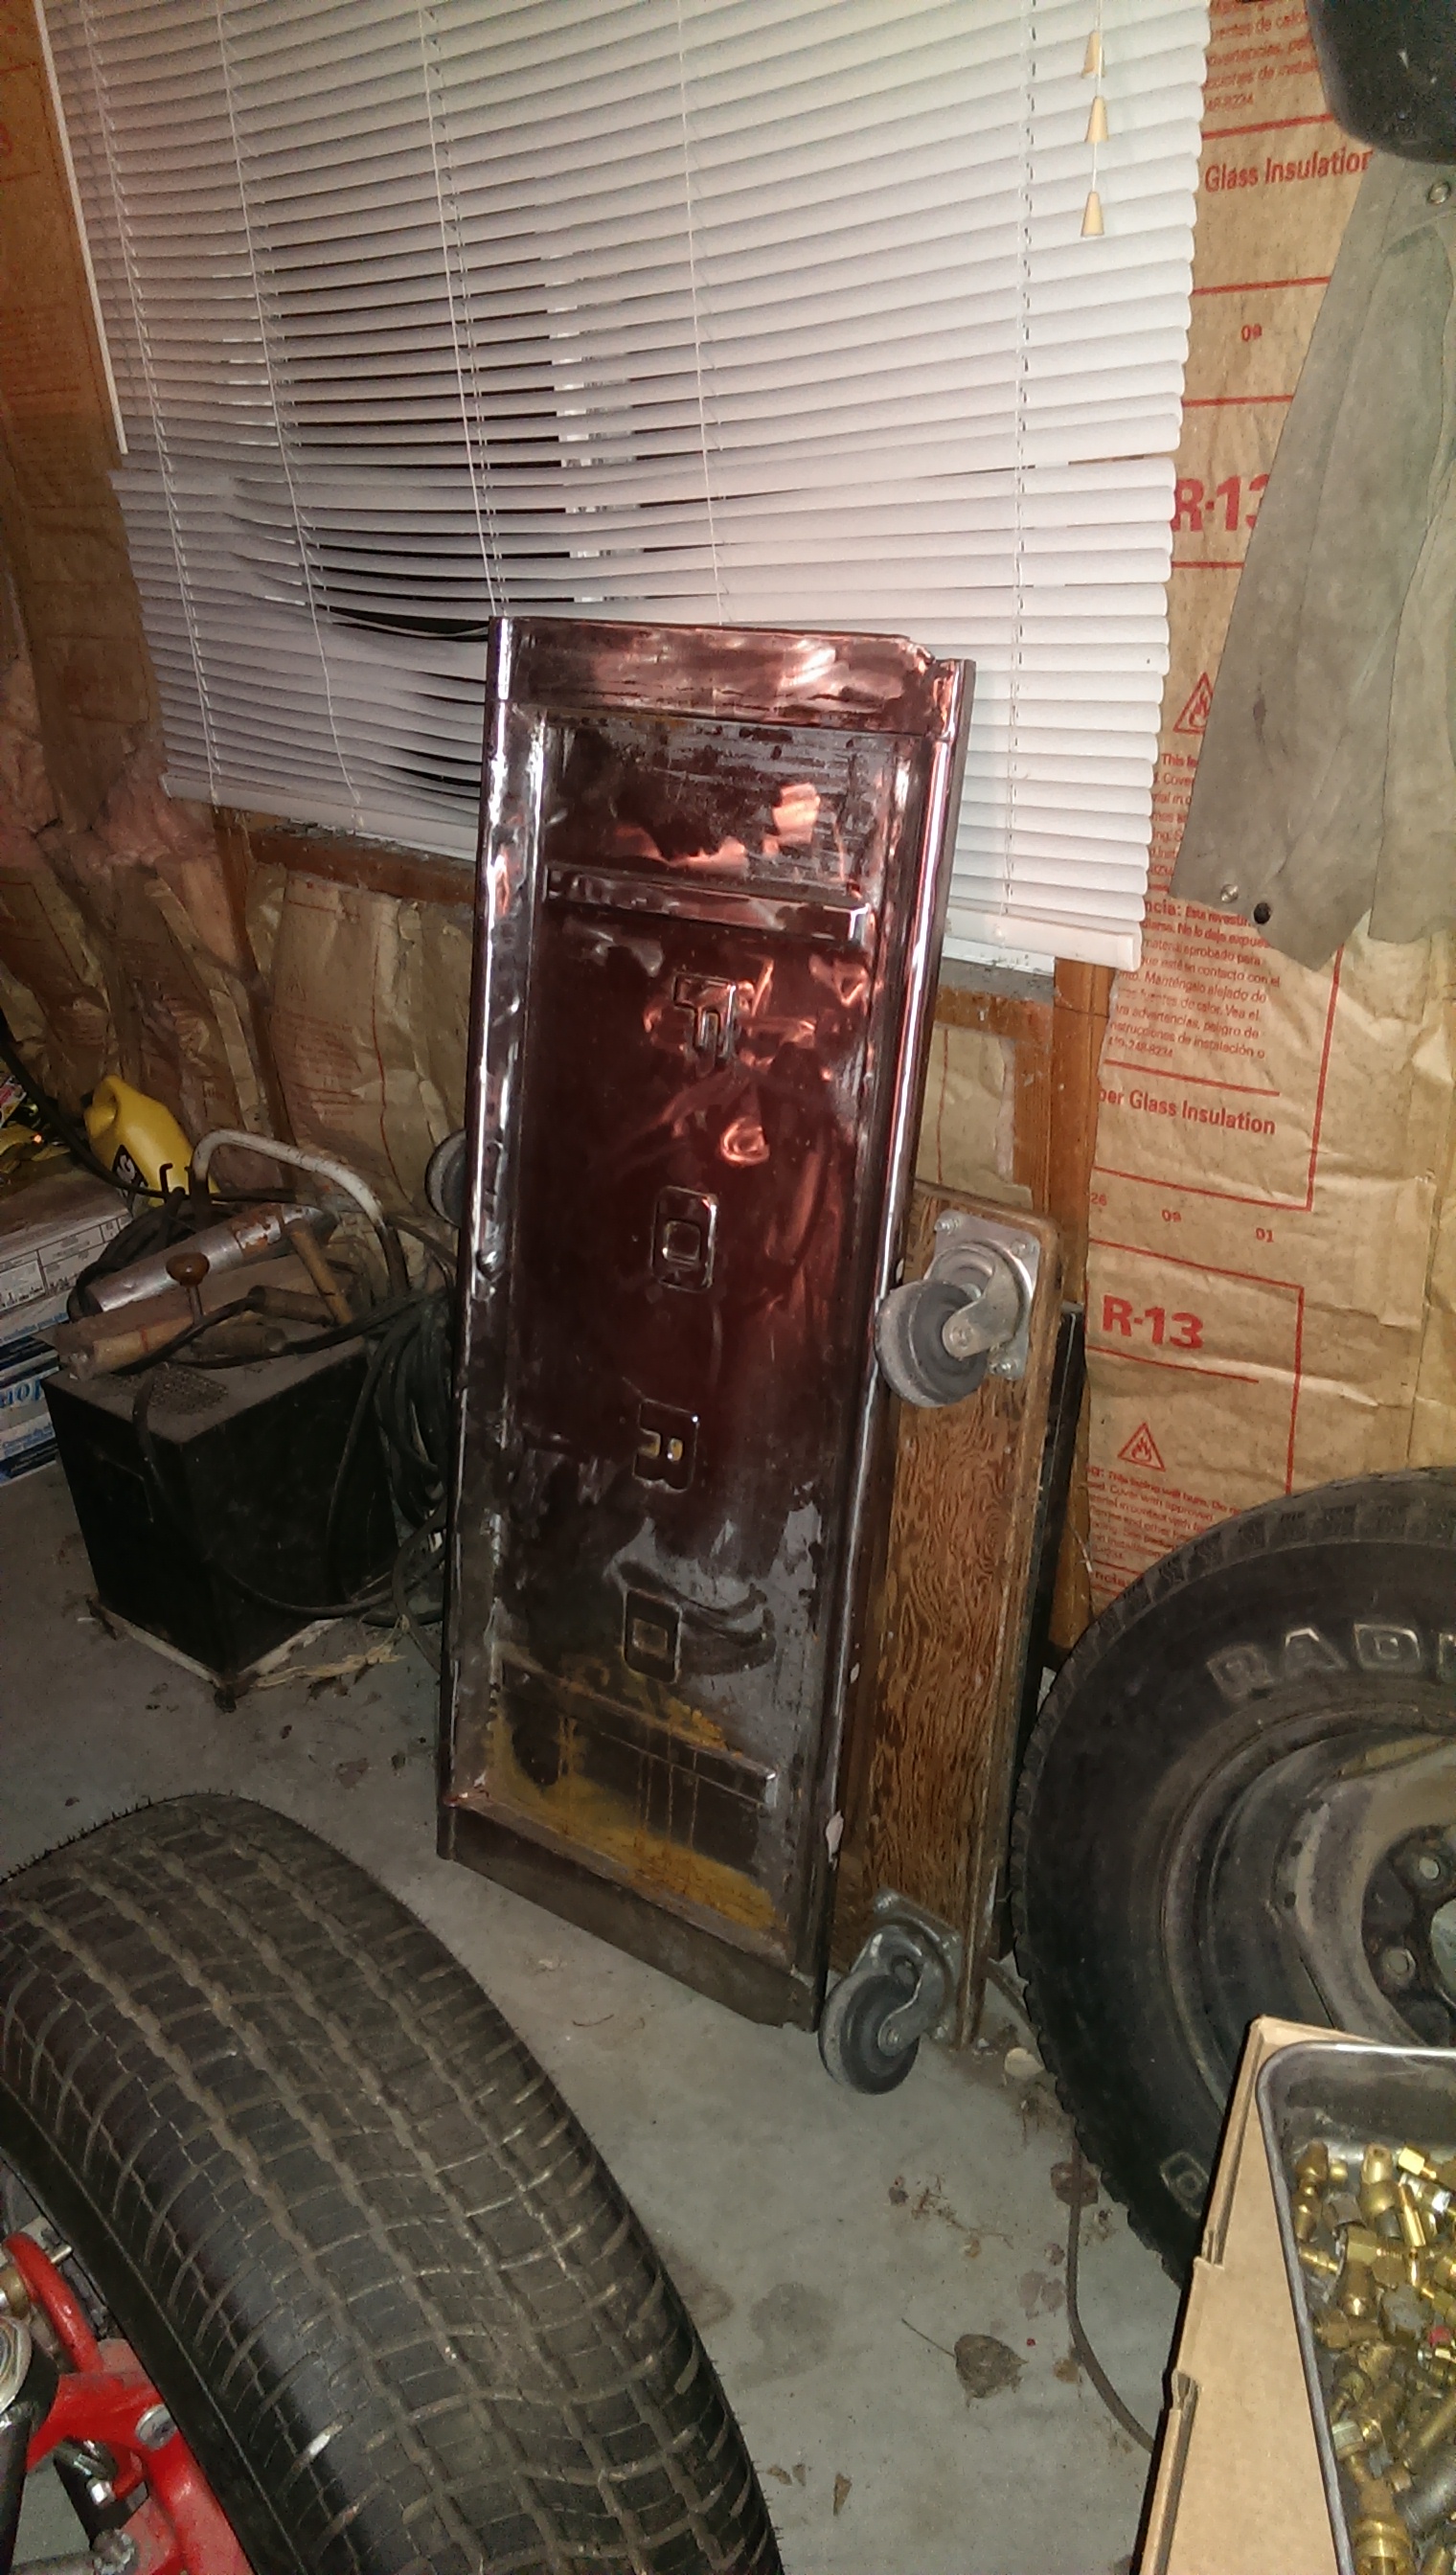
Once that was done I had to get a different crank pulley since the stock one didn't line up at all with either the alternator or the water pump. As you can see here I also ran across the Hood Locking Panel and put it in place. This part ended up getting chromed along the line, another thing that Don didn't really want, but is working out okay (Don really likes chrome....so it really surprised me).
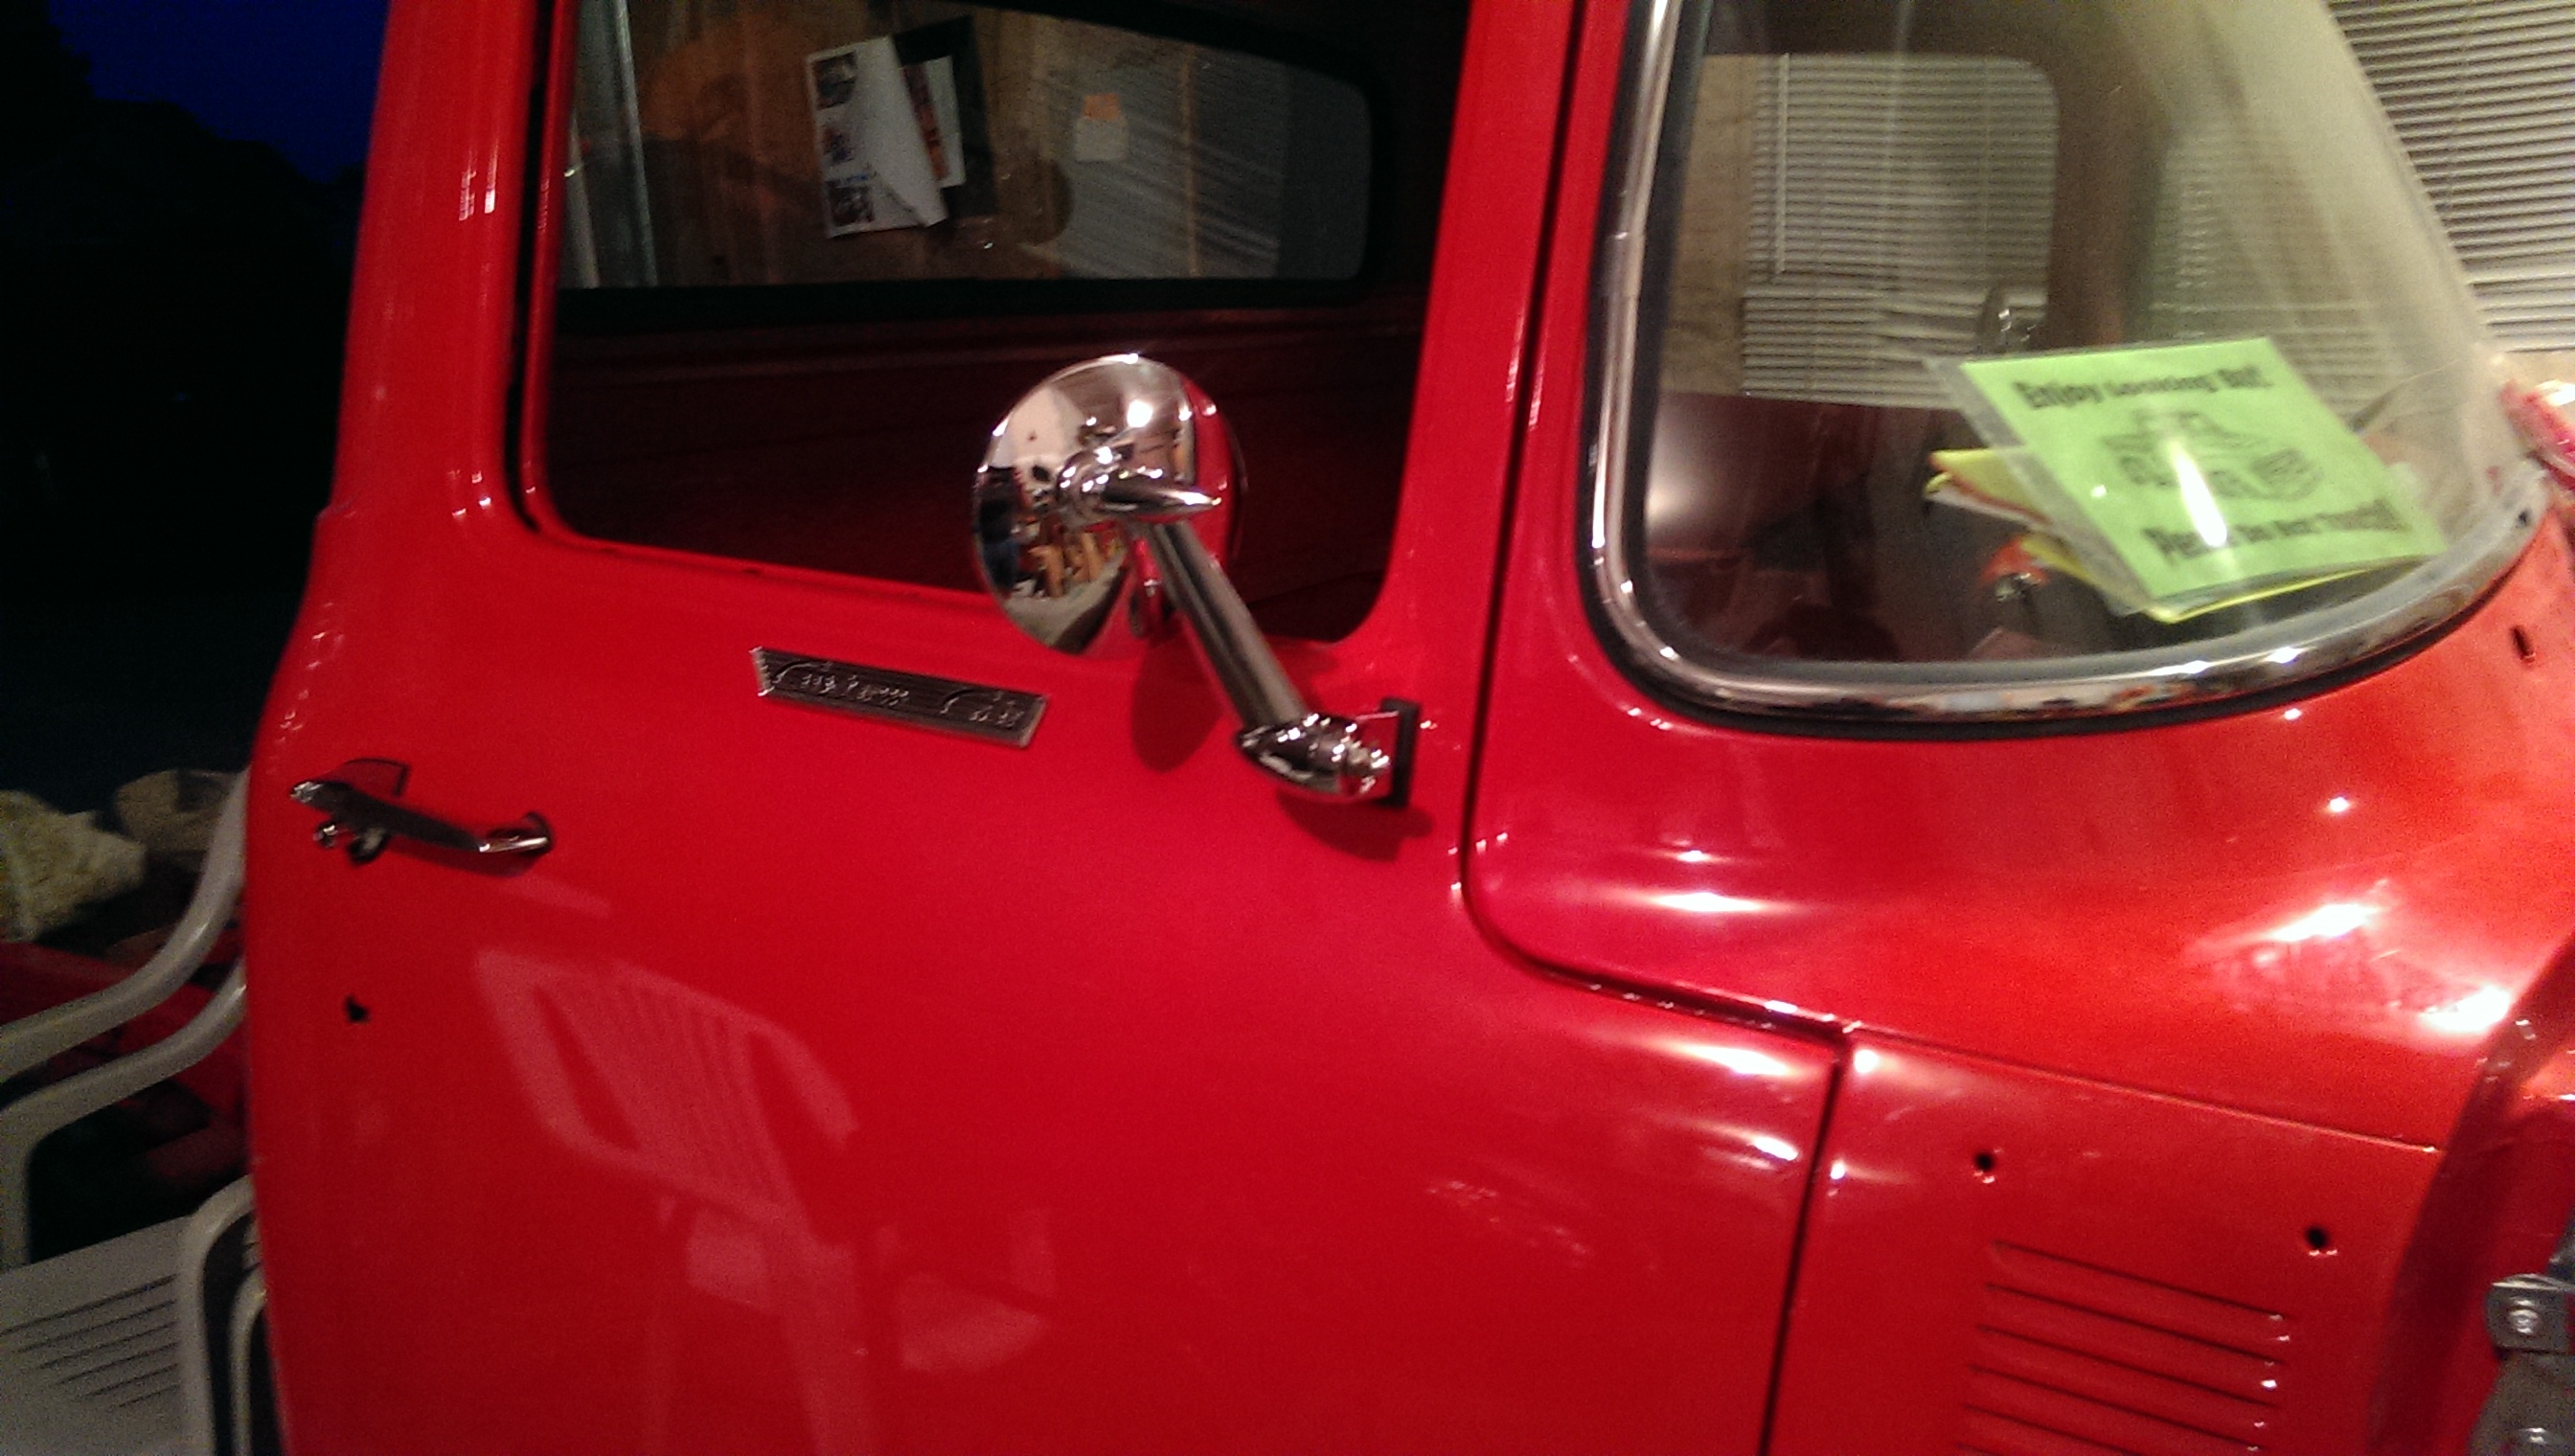
We also installed the mirrors since I had them ordered.
More to come.....
Don said I might as well put it on since I had also found the brackets, that way I didn't have to find a place to put it.
I had decided that the first step to moving forward was to get the engine running. I was a fair bit concerned about this as it had been sitting for so long. Anyway, I started to work to that end. One of the first things was to get the ignition module mounted and wired in. We tried a few different locations and decided that we would place it on the passenger inner fender. So I put on the air deflectors and inner fenders.
Something that is hard to see in the pictures is that the air cleaner doesn't sit on the carbs correctly. They sit to low and the air cleaner sits on top of the distributor cap. I had many suggestions on how to resolve this and finally decided to get spacers to raise them up 1 inch. This does put the air cleaner into the space where the window wiper motor goes, so we are going to come up with another option for that later.
I had wiring to resolve along with all of this. The wires that came across to the starter solenoid were routed in the space that is behind the fender alignment rod mount. I didn't really like this routing and re-routed it in convoluted tubing that I had gotten. It also allowed for the additional wiring that I had to run. I have been re doing all the wiring in the tubing, I felt that it was much better way to route it and looks cleaner.
I ordered parts to mount the alternator from C.R.A.P. Industries, they had the bracket that would allow for mounting this to the FE block. It took a lot of searching to find this website.
Once that was done I had to get a different crank pulley since the stock one didn't line up at all with either the alternator or the water pump. As you can see here I also ran across the Hood Locking Panel and put it in place. This part ended up getting chromed along the line, another thing that Don didn't really want, but is working out okay (Don really likes chrome....so it really surprised me).
We also installed the mirrors since I had them ordered.
More to come.....

#12
12-03-2016, 11:06 PM
Join Date: Dec 2003
Location: Saskatoon, Saskatchewan
Posts: 89,681
Received 1,353 Likes
on
1,112 Posts

#13
12-04-2016, 11:49 AM
Join Date: Aug 2009
Location: Idaho Falls, Idaho
Posts: 76
Likes: 0
Received 0 Likes
on
0 Posts
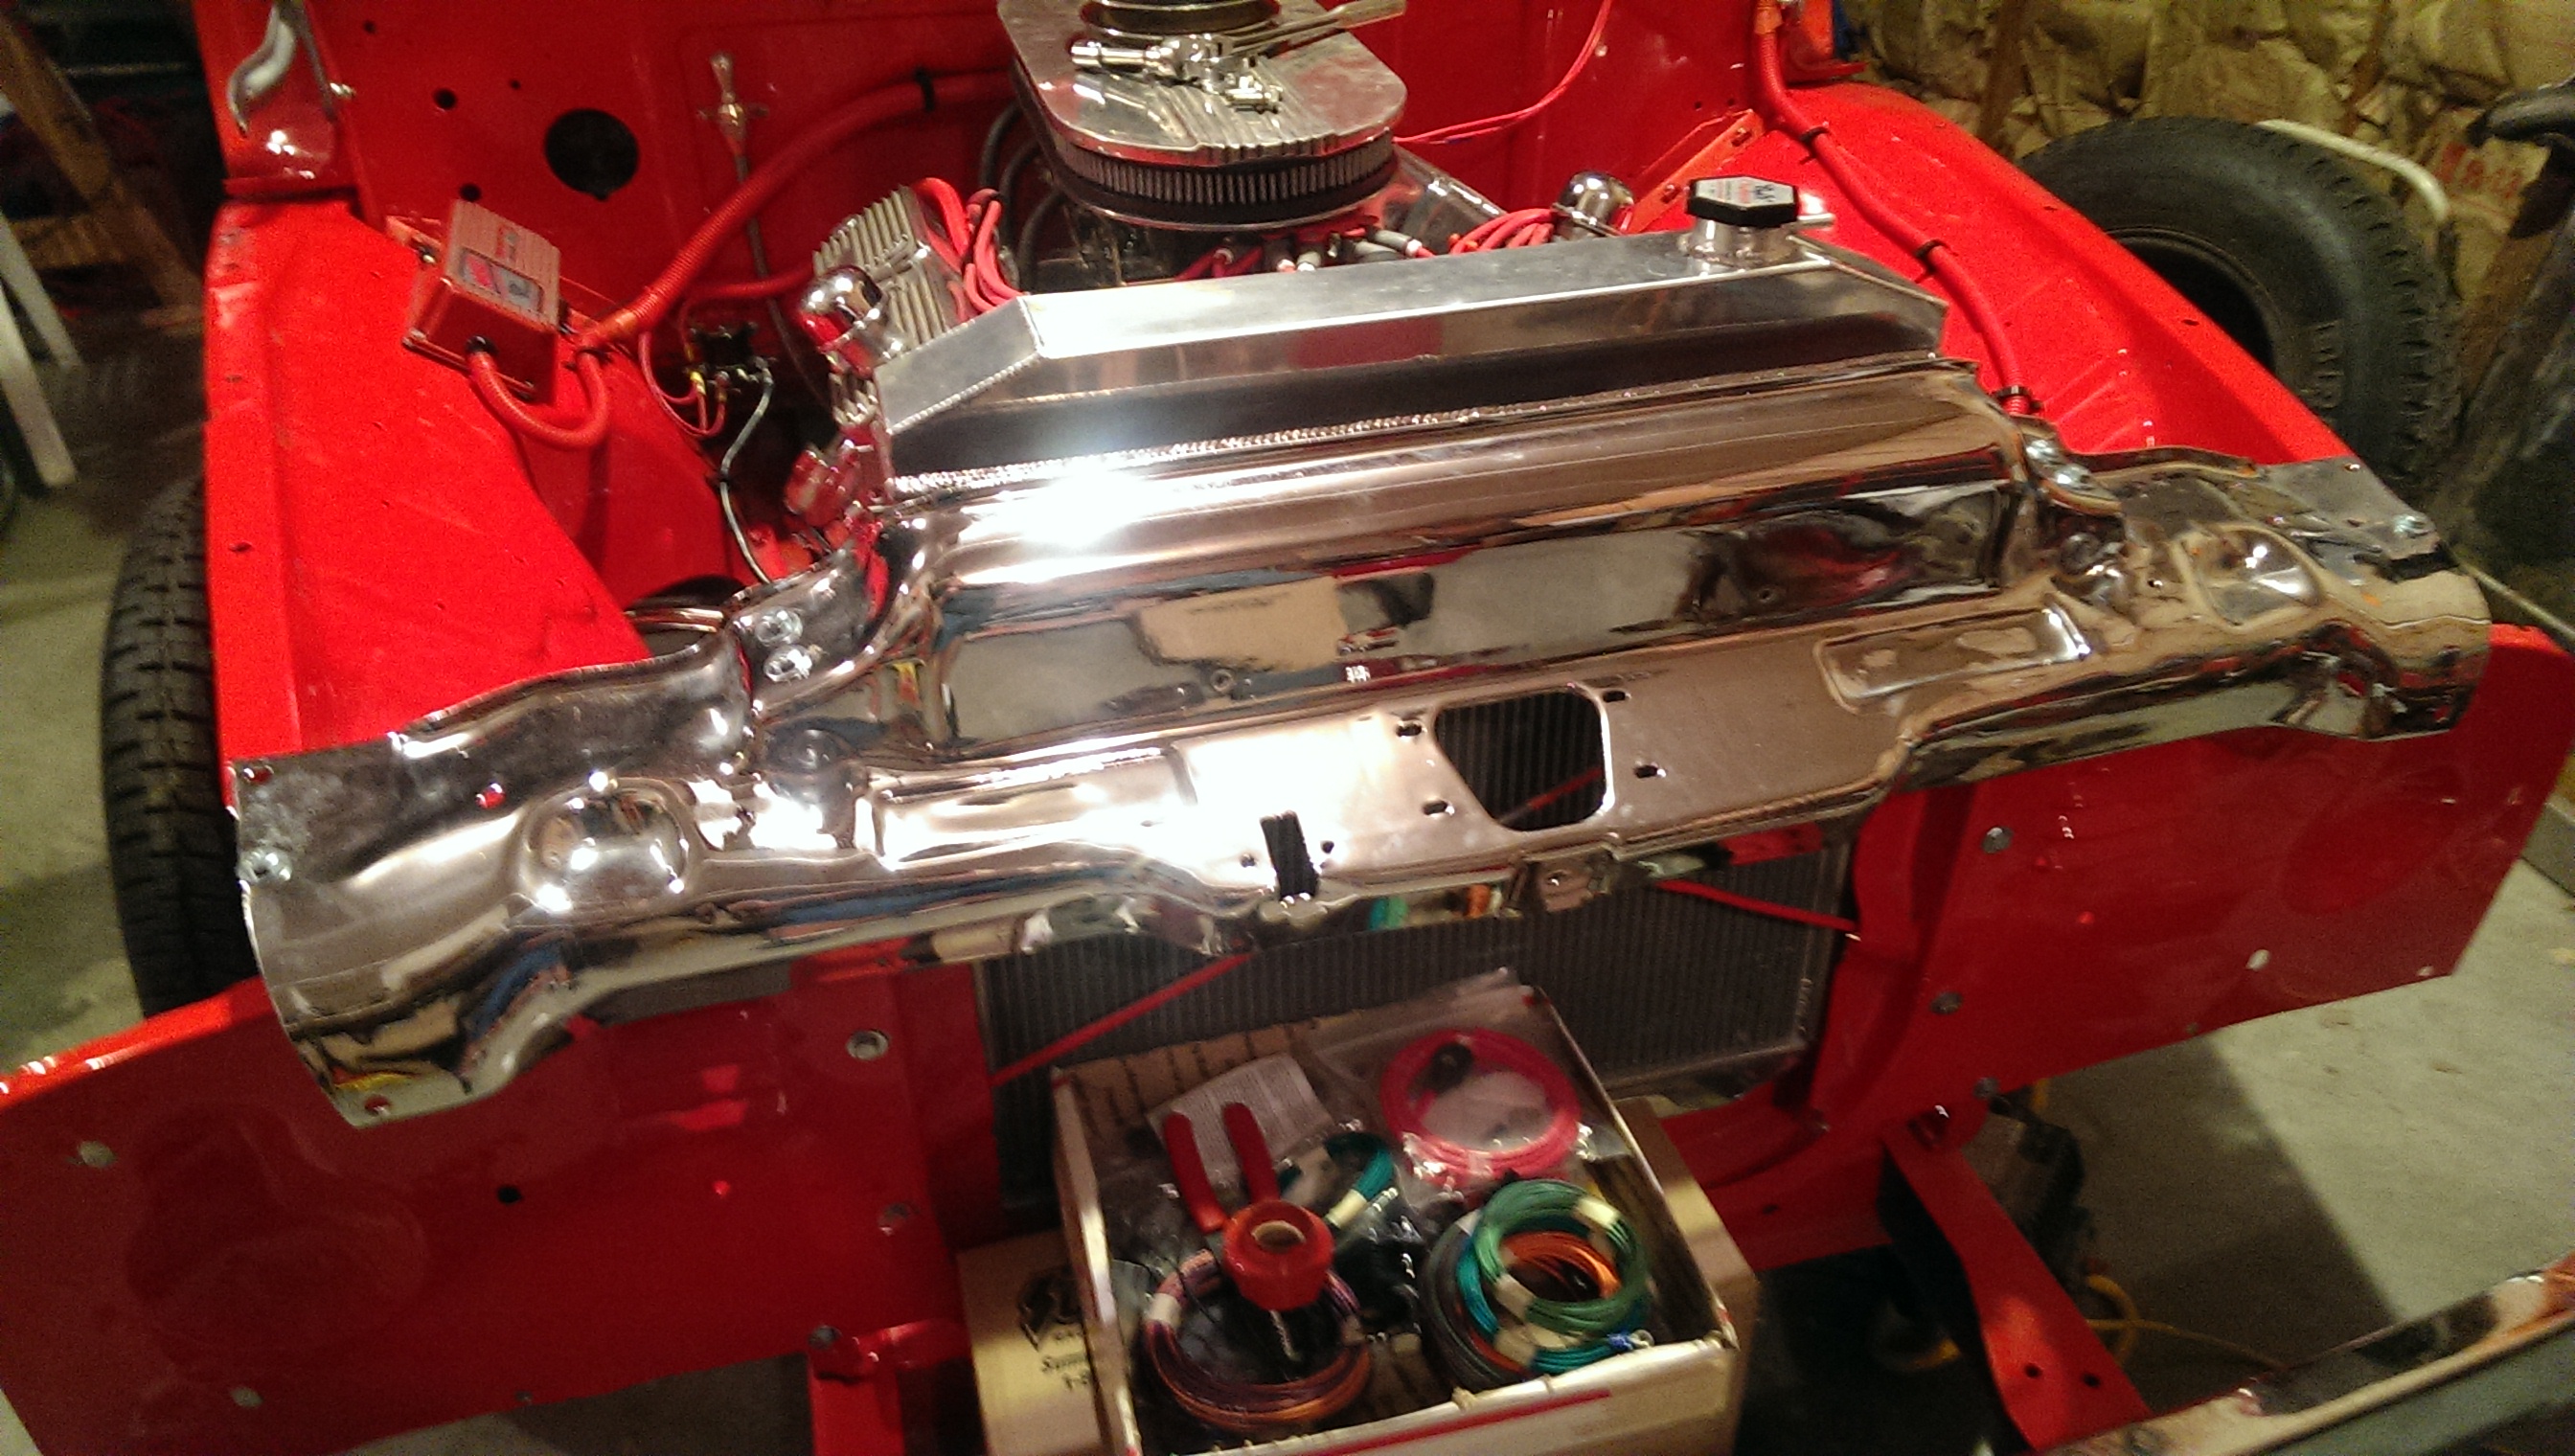
So I got the crank pulley and a fan belt on, pulled all of the plugs and squirted some oil in the cylinders and turned over the motor with a wrench. Got a stainless fuel line to run from the tank, what a challenge to bend that stuff. Then we loaded it on our trailer to take down and get exhaust installed and a drive line made.
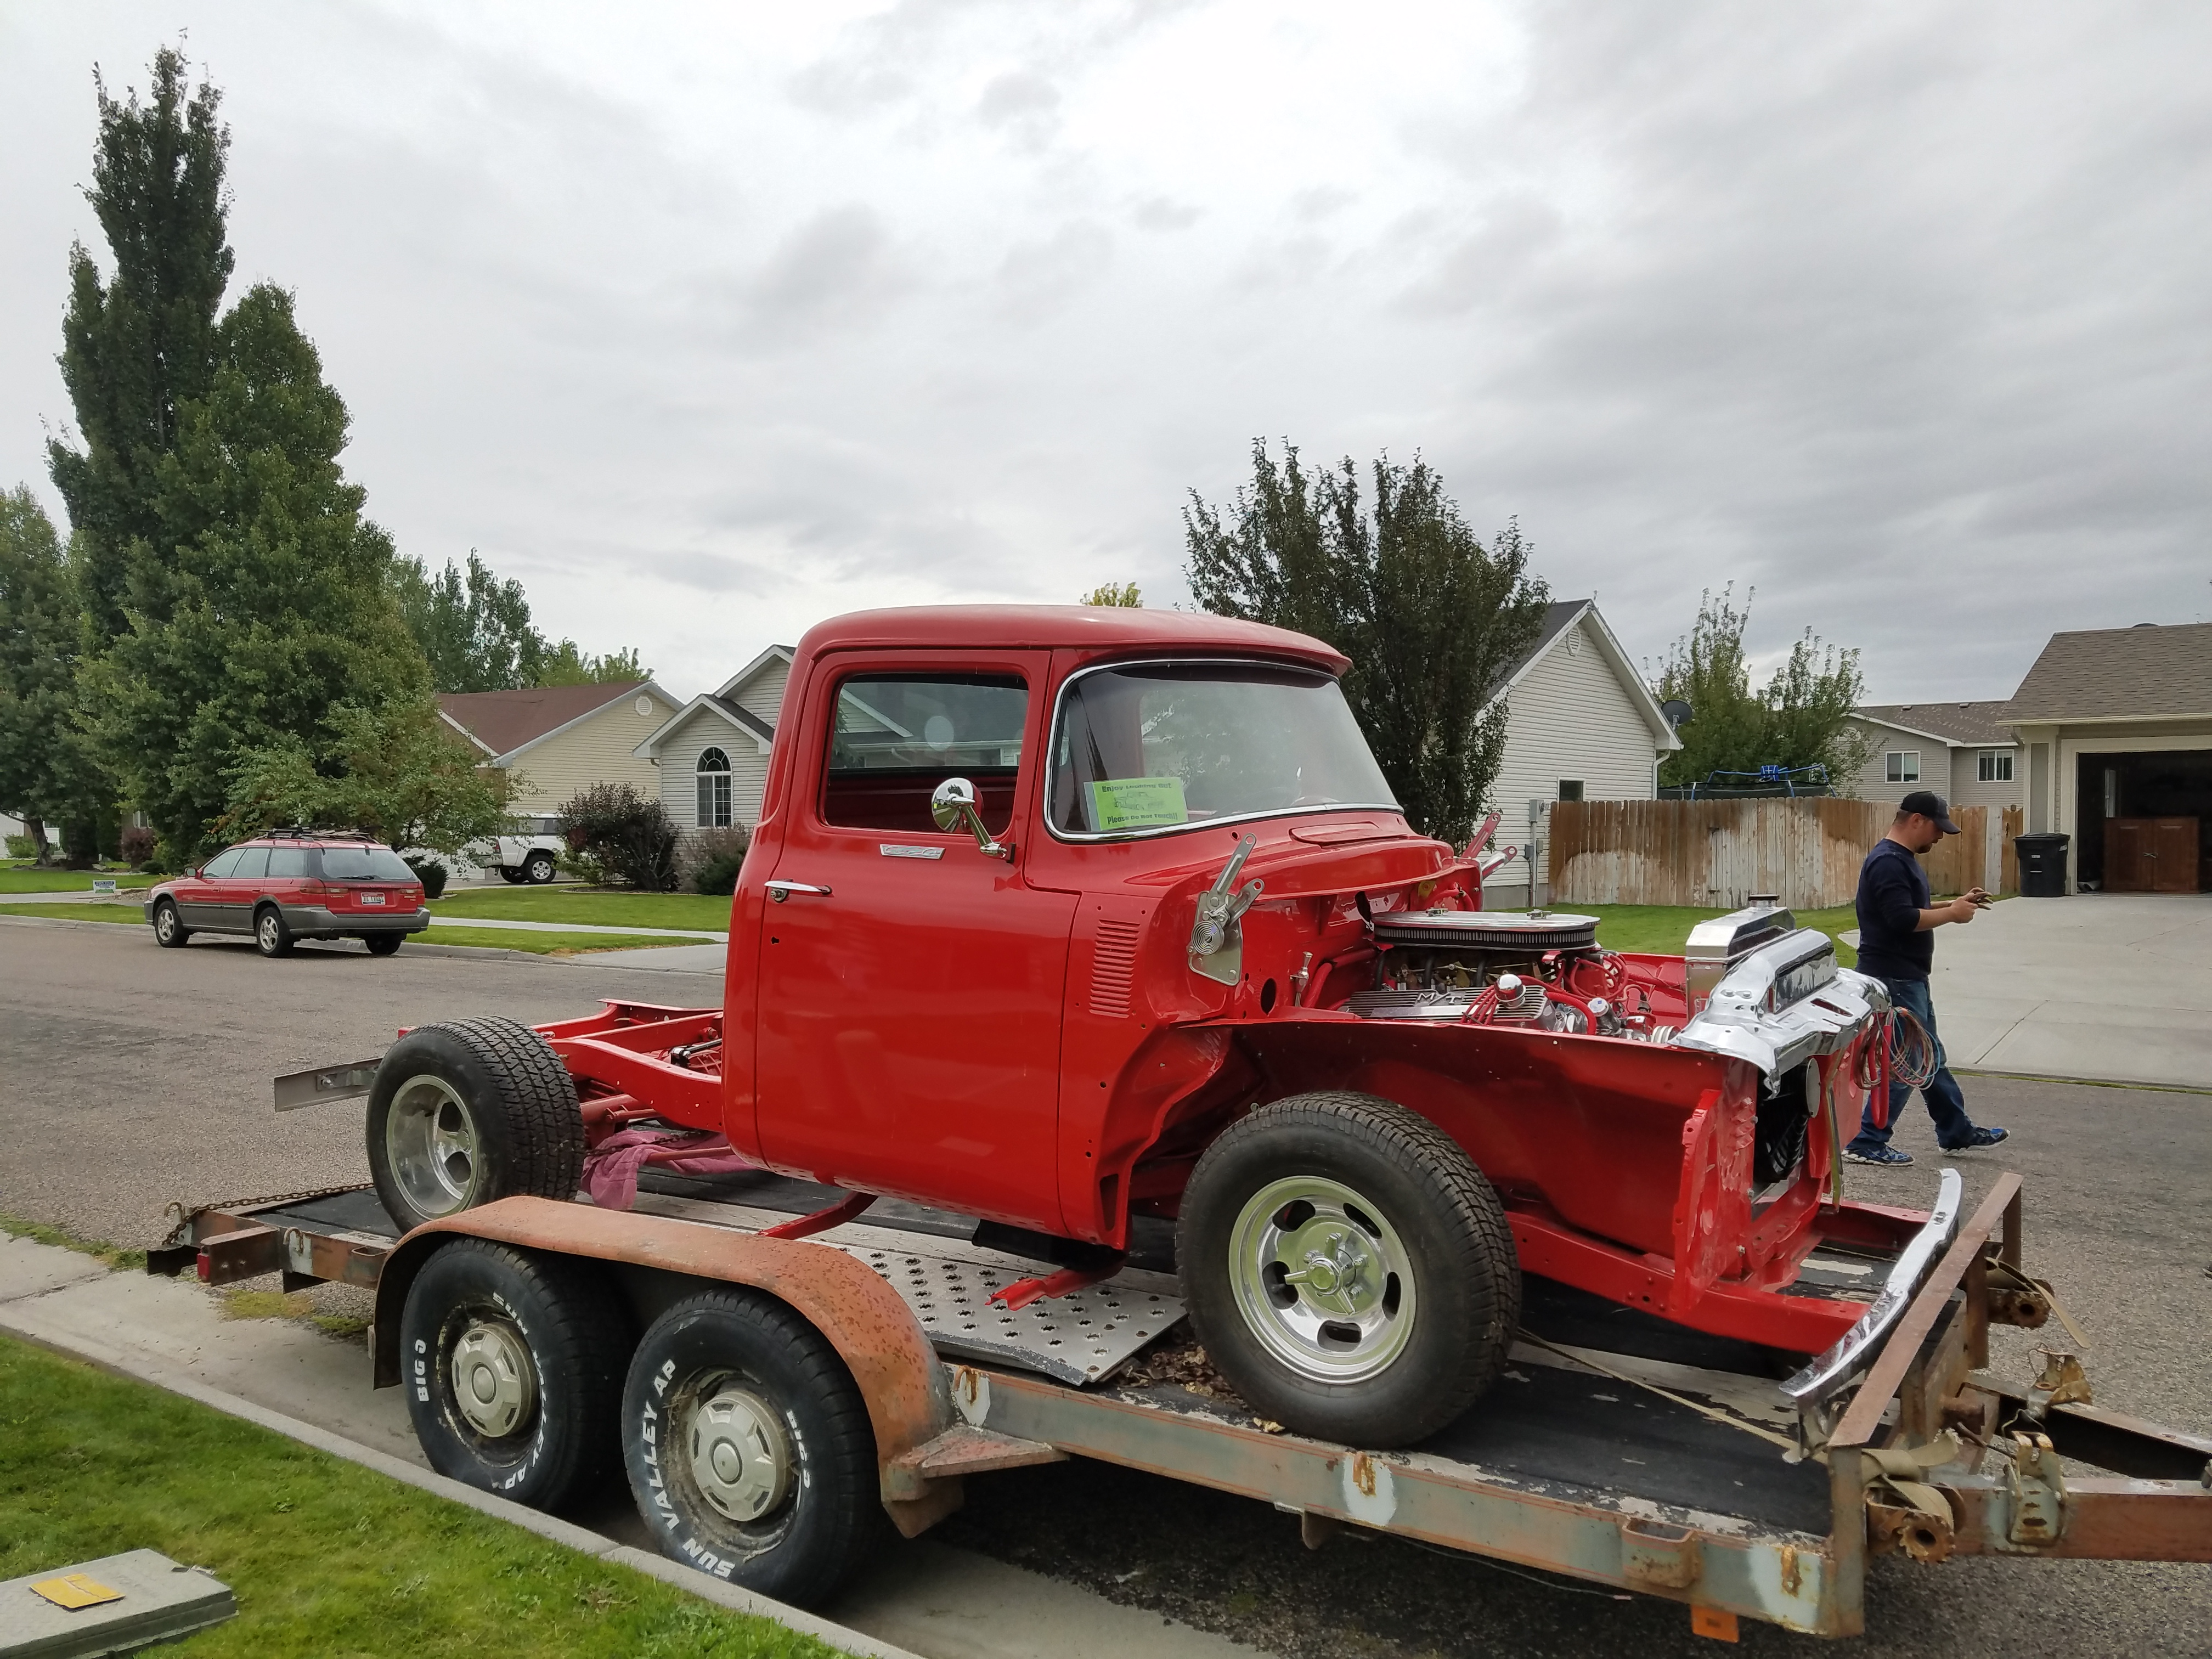

And then squeezed the trailer into the garage. You can also see here the fan that was installed. Due to space, we decided to put it in as a pusher.
While it was on the trailer I measured for radiator hoses. Went to the parts store and browsed the hose wall to find some that we thought would fit. Bought 3 or 4 of both upper and lower, figured out which one fit best and got them installed.
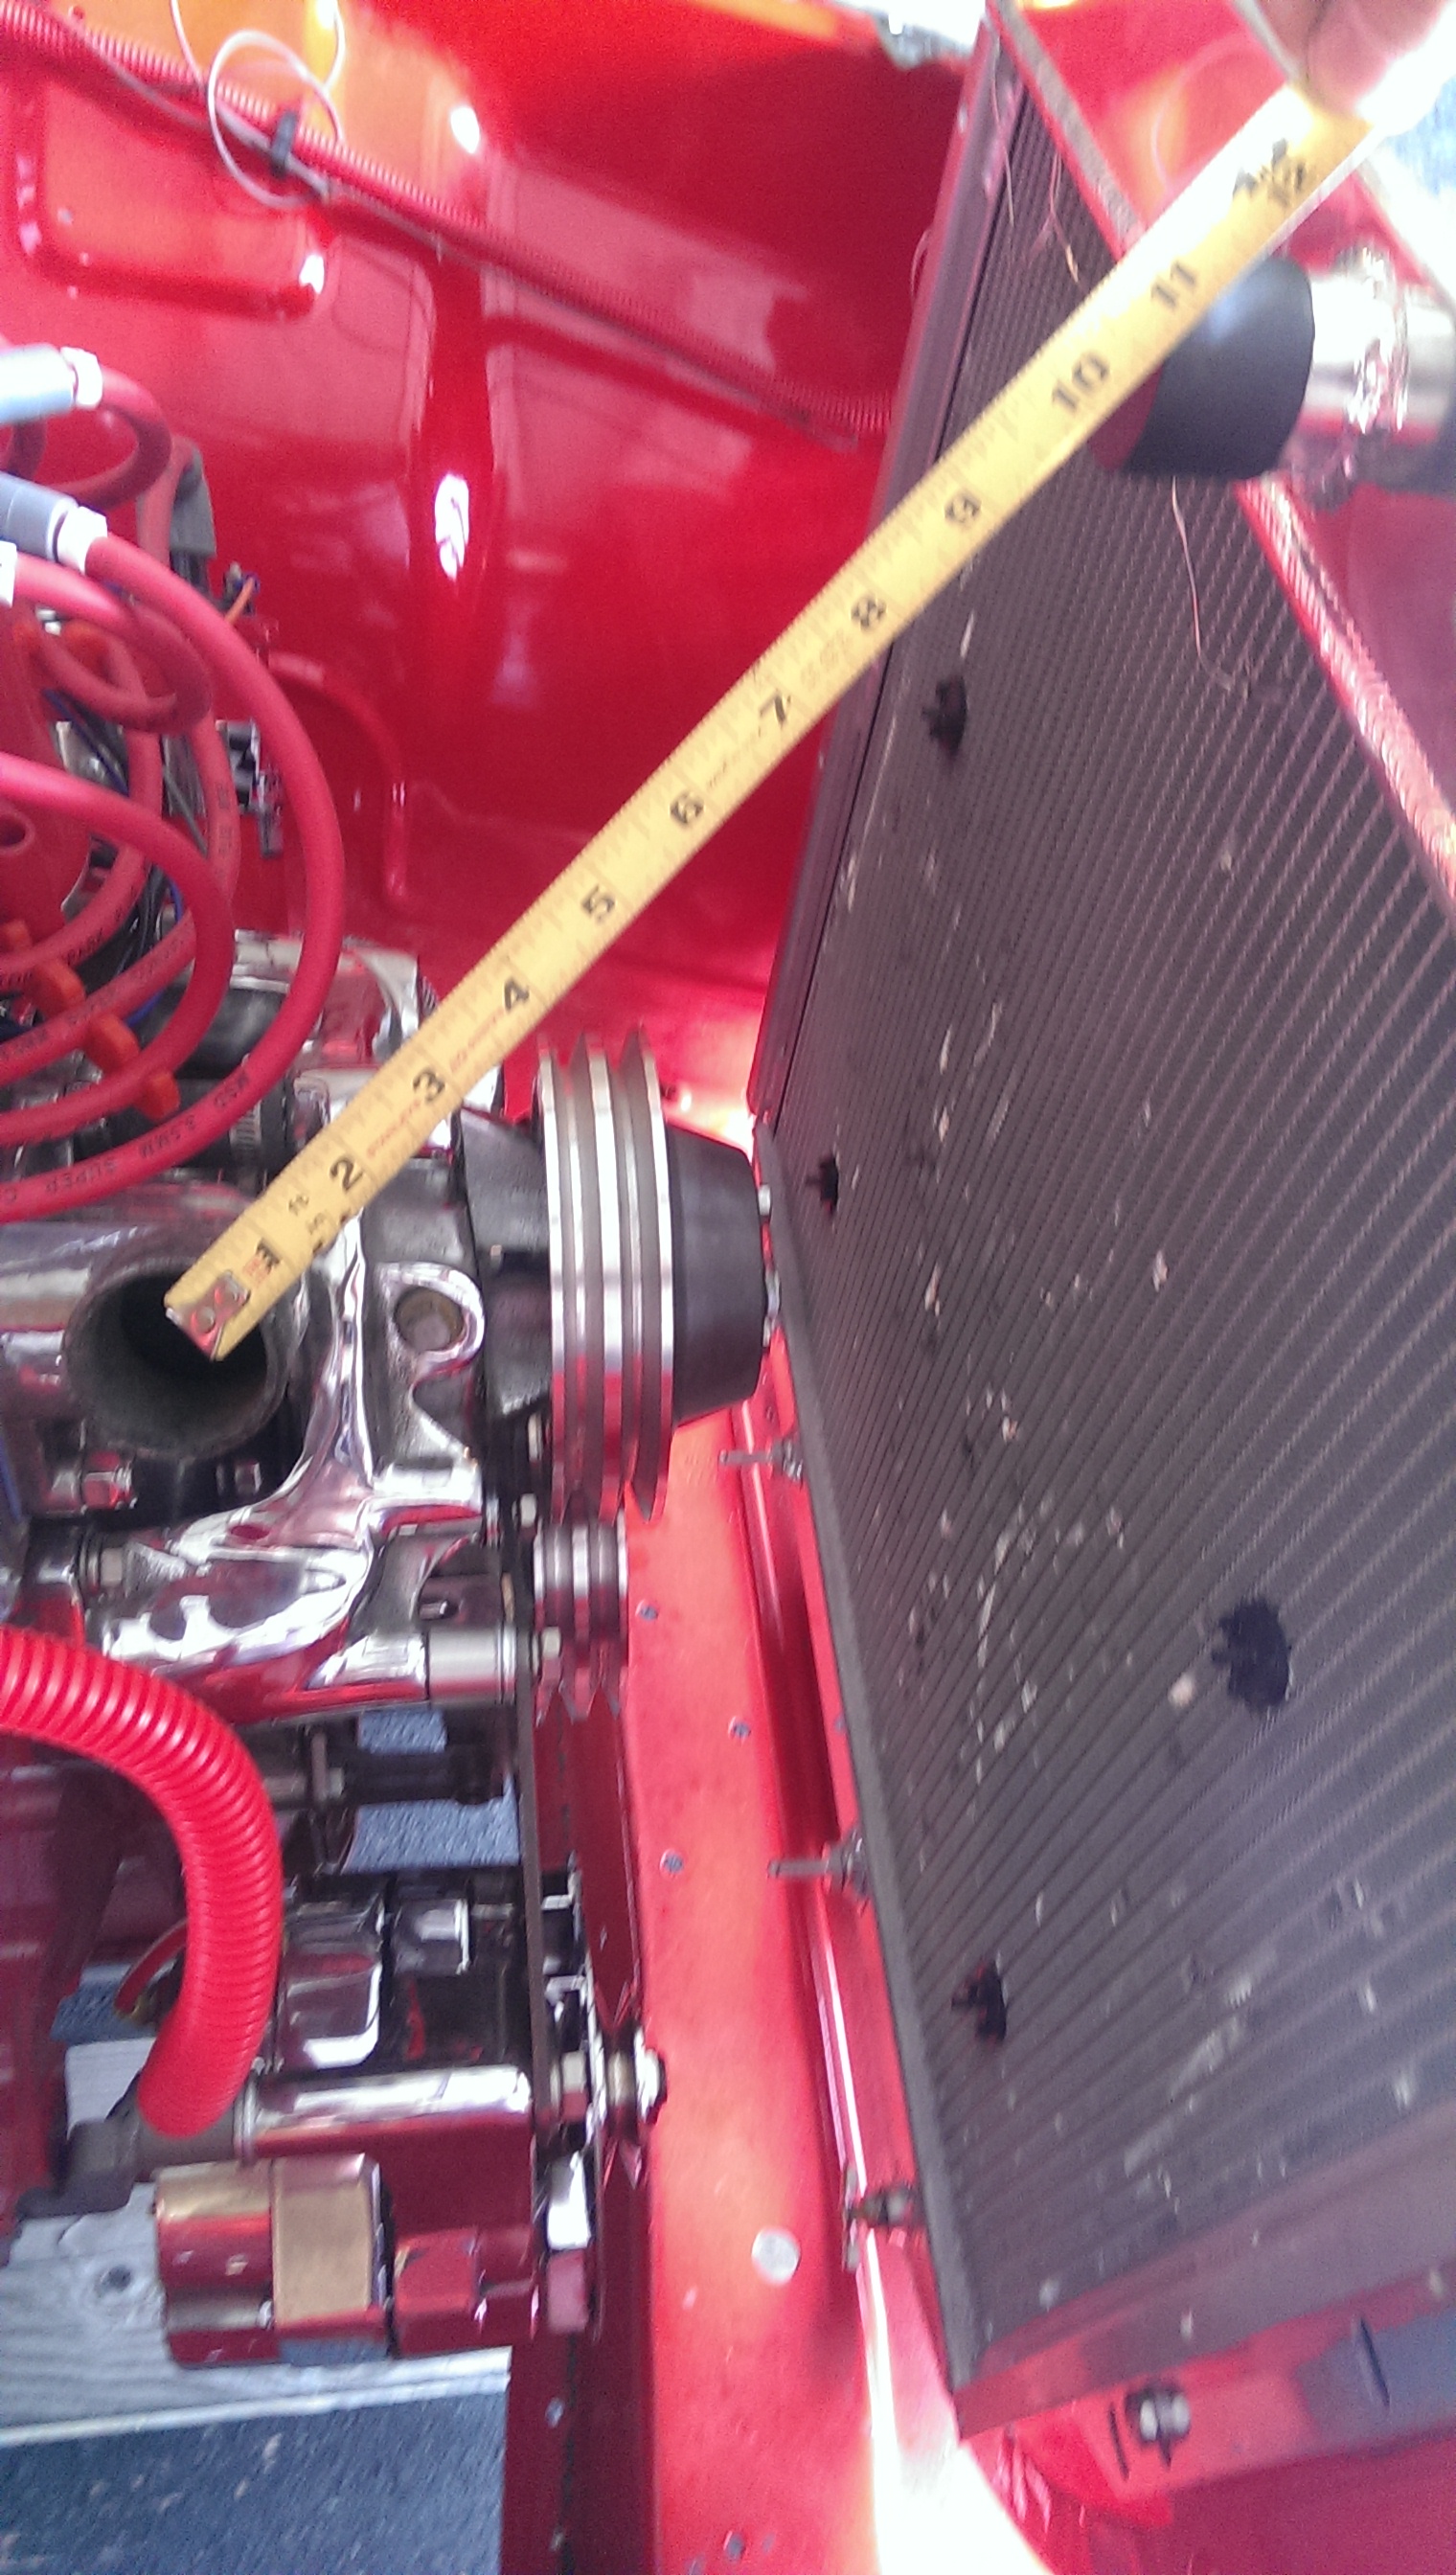
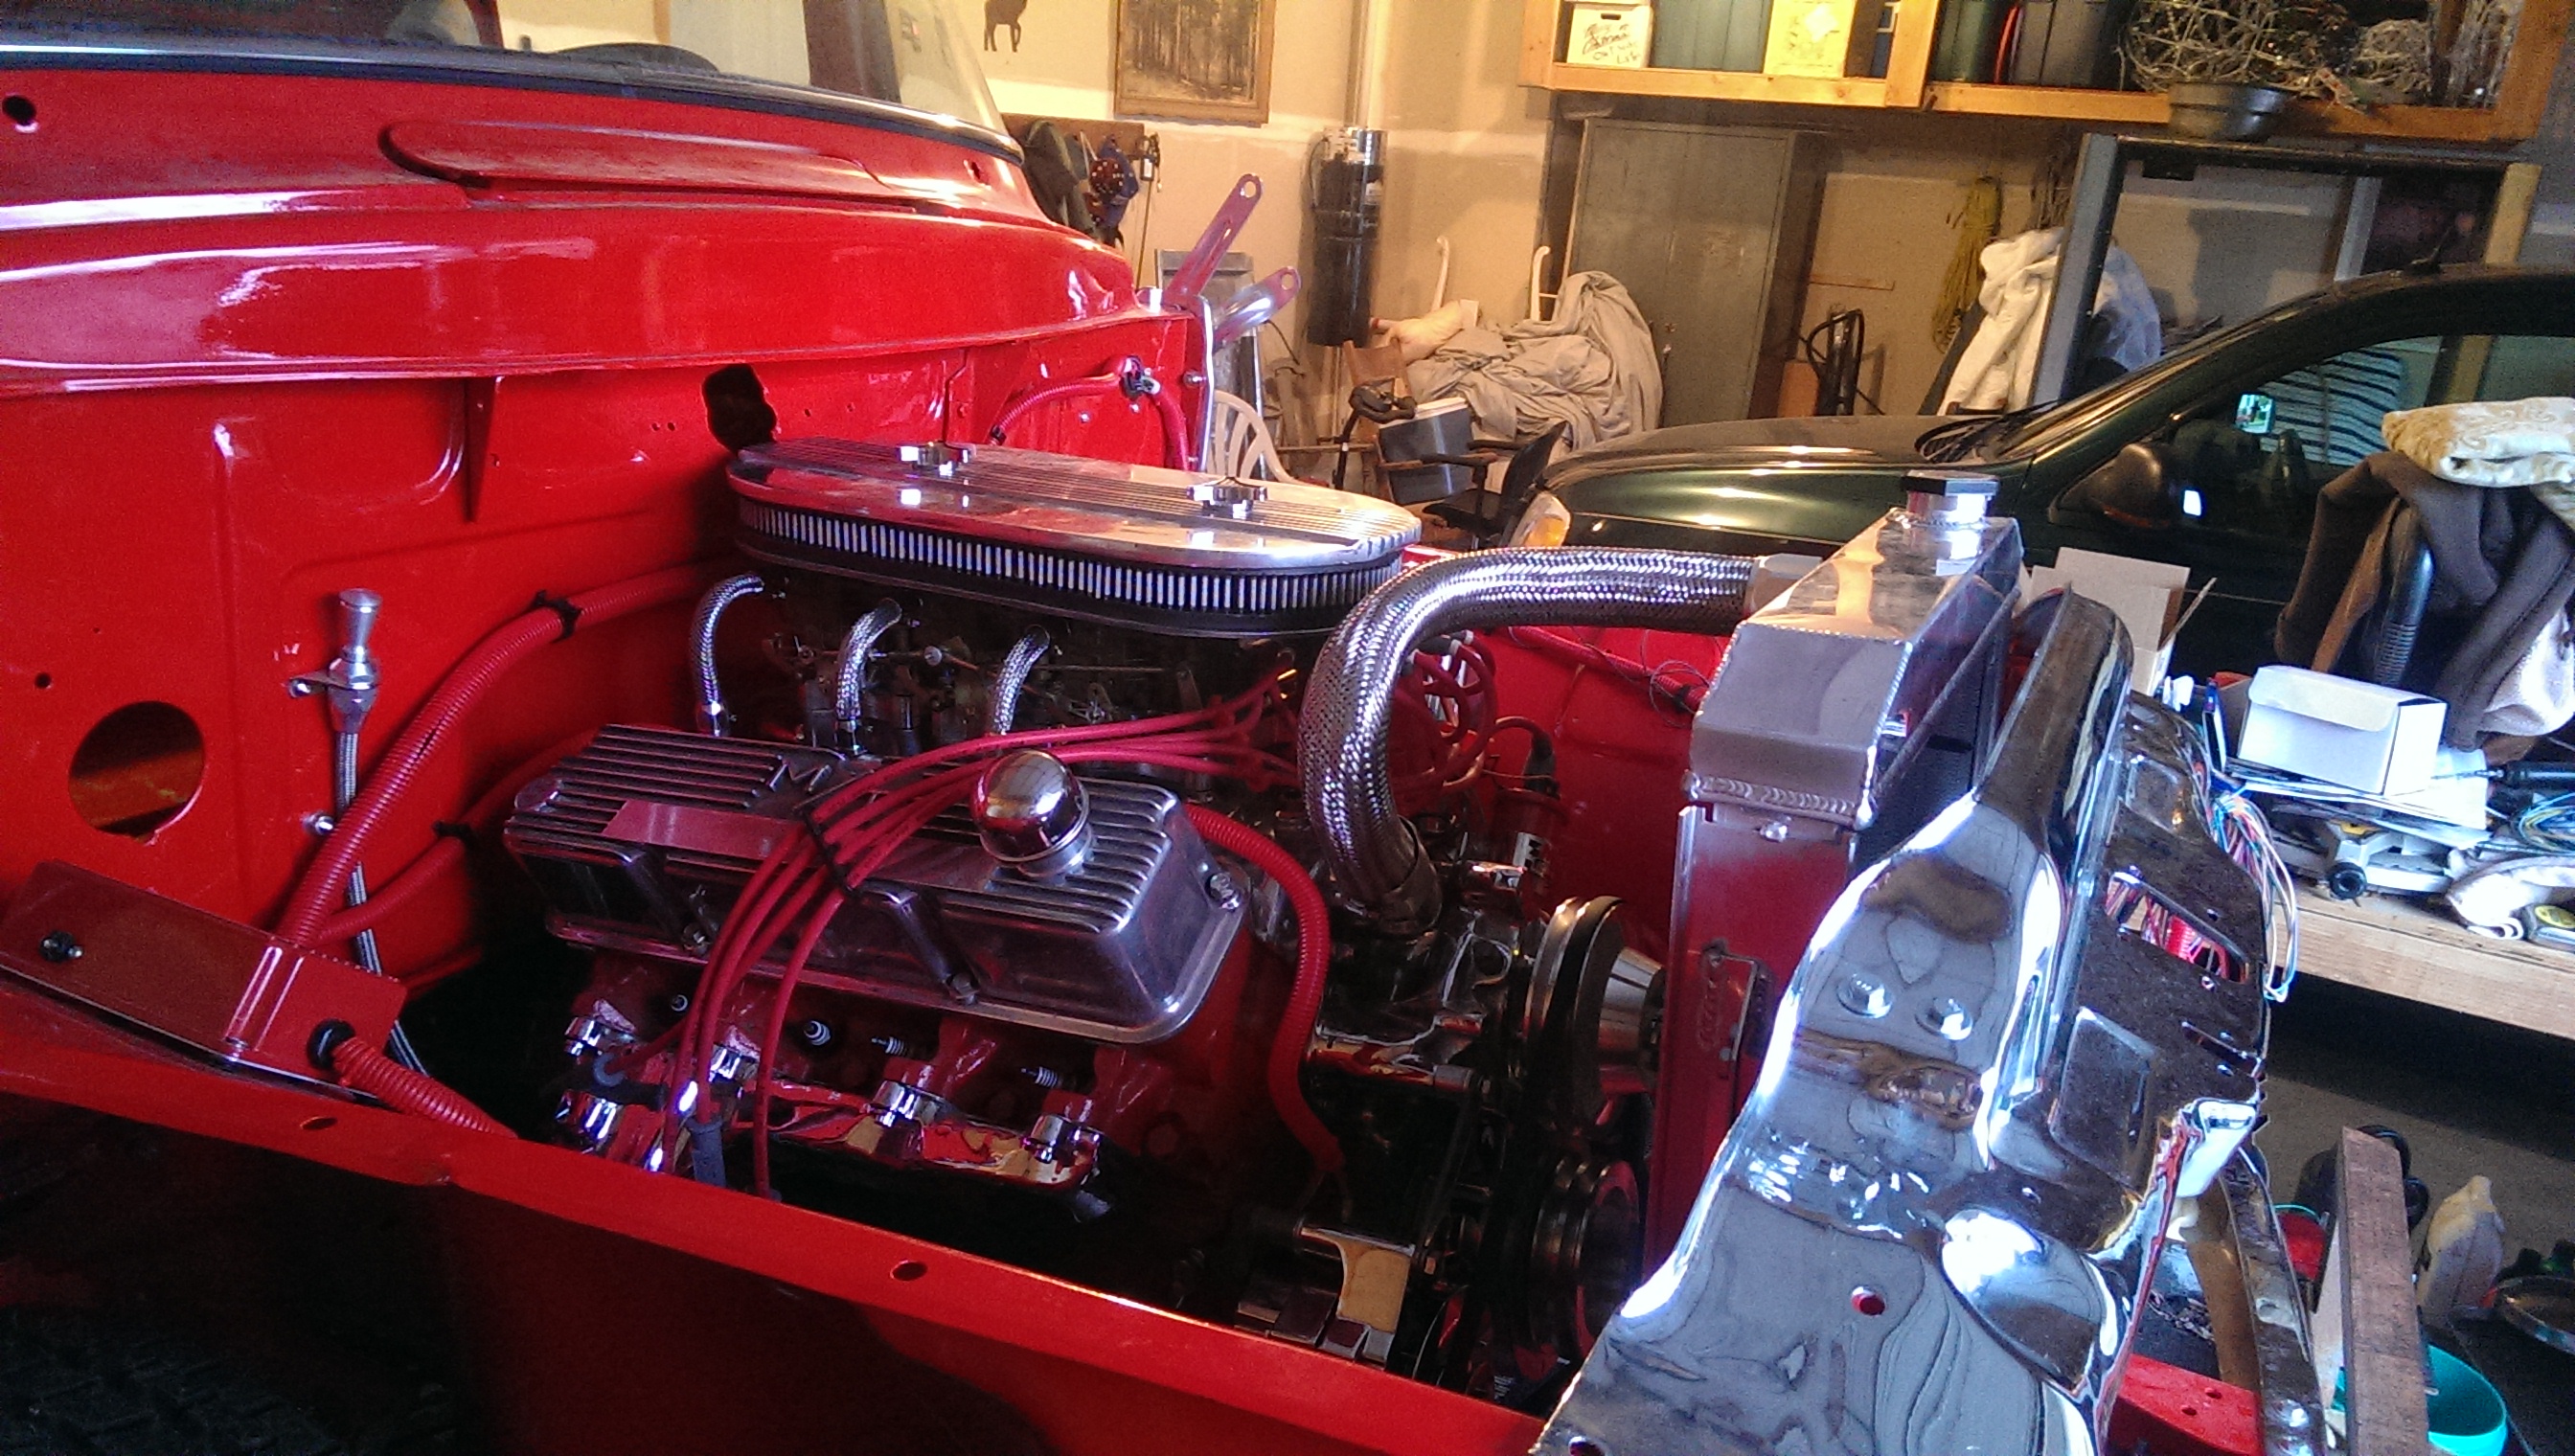
We also purchased a steel braided dress up kit to cover the hoses, all except the lower radiator, not one large enough.
And then squeezed the trailer into the garage. You can also see here the fan that was installed. Due to space, we decided to put it in as a pusher.
While it was on the trailer I measured for radiator hoses. Went to the parts store and browsed the hose wall to find some that we thought would fit. Bought 3 or 4 of both upper and lower, figured out which one fit best and got them installed.
We also purchased a steel braided dress up kit to cover the hoses, all except the lower radiator, not one large enough.
#14
12-04-2016, 12:06 PM
Join Date: Aug 2009
Location: Idaho Falls, Idaho
Posts: 76
Likes: 0
Received 0 Likes
on
0 Posts
Back from the exhaust shop. Looks pretty good, but I am going to have to take it back so they can fix one of the pipes, its to low...
After a trip to the wrecking yard trying to find trans cooler lines that would work, getting a gas pedal and cable, and a shift linkage rod.
After more searching for trans lines, we finally contacted a friend who is a car guy to see if he knew of a source. It turned out that he had a set from a Pontiac that he had no use for and let us have them. They worked perfectly after bending them for the proper route.

So now we are that much closer to getting it running.
After a trip to the wrecking yard trying to find trans cooler lines that would work, getting a gas pedal and cable, and a shift linkage rod.
After more searching for trans lines, we finally contacted a friend who is a car guy to see if he knew of a source. It turned out that he had a set from a Pontiac that he had no use for and let us have them. They worked perfectly after bending them for the proper route.
So now we are that much closer to getting it running.
#15
12-28-2016, 08:29 AM
Join Date: Aug 2009
Location: Idaho Falls, Idaho
Posts: 76
Likes: 0
Received 0 Likes
on
0 Posts