
1976 Super Cab Restore
#61
 12-06-2016, 02:41 AM


Join Date: Jul 2016
Location: Anderson Mo
Posts: 128
Likes: 0
Received 0 Likes
on
0 Posts
Hello Riley...Does yours have AC? I might be on hold for getting the bed off until I get the cherry picker freed up. If that is the case, I might go ahead and start on my AC/Heater Core assembly. I want to try and get something done at least every other day or so even if it is just a small step.
#62
12-08-2016, 07:53 AM
Join Date: Jul 2016
Location: Anderson Mo
Posts: 128
Likes: 0
Received 0 Likes
on
0 Posts
It is 30 degrees in the shop. I got a fire going and it will be warm by the time I get coffee in me. I used to despise winters but having a warm shop really makes winter time a far different experience. Had a dusting of snow but it will be here soon enough.
I got a HF cherry picker and it does great for what I need but when I went to lift the bed off with it, the arm is too short. Went and got a 2 1/2 inch square tubing and have to thin the sides down a little to make it fit. I got a 5 foot section so that the tube on the cherry picker will support the whole section and not just a small area. I will mark the new tubing with the old piece so as not to exceed weight limits. Kind of a poor design but a little work and it will do what I need for light loads.
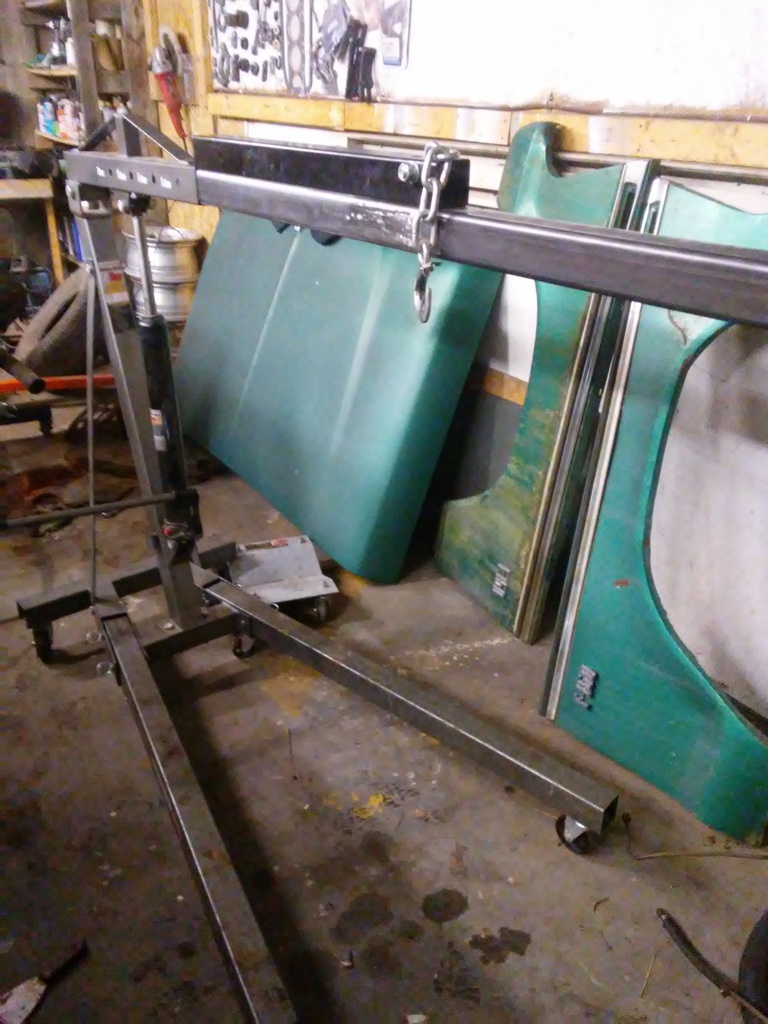
Here you can see the top has some room but the sides need thinning a little. I used a grind stone and then went over it with a flap disk.
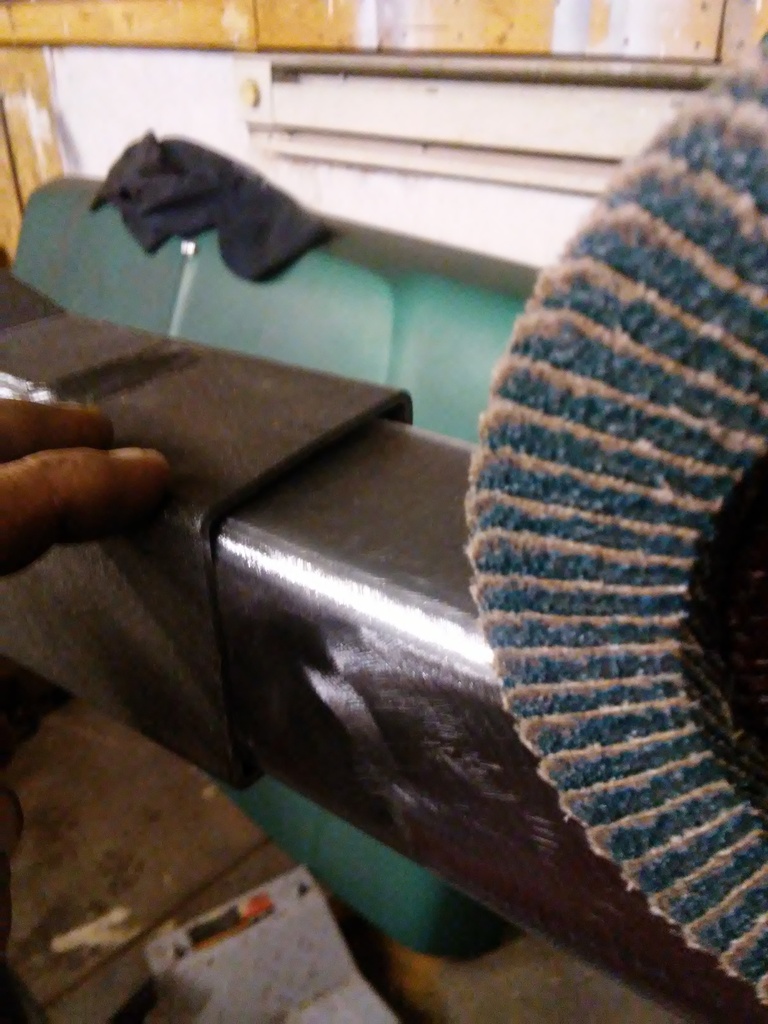
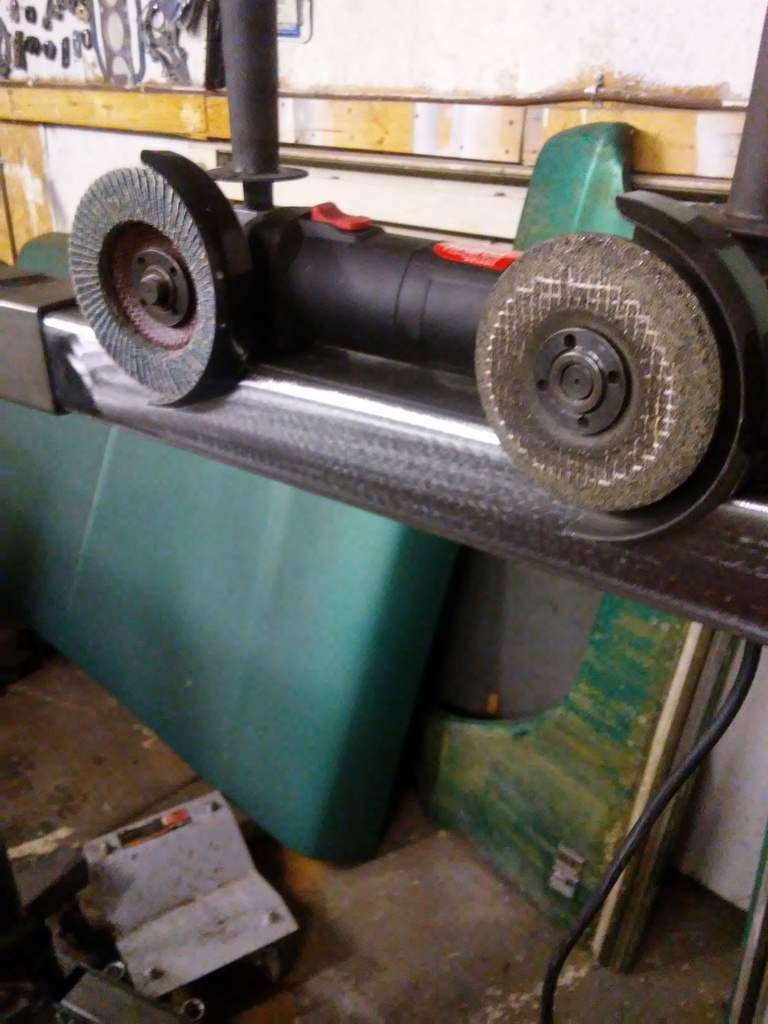
Having two different grinders is nice instead of having to swap disk all of the time. Each new project seems to increase the number of tools I need. I have 10 times the amount of tools then what I my dad ever had and it is still not enough. Each tool makes life easier and sometimes you have to improve what you have.
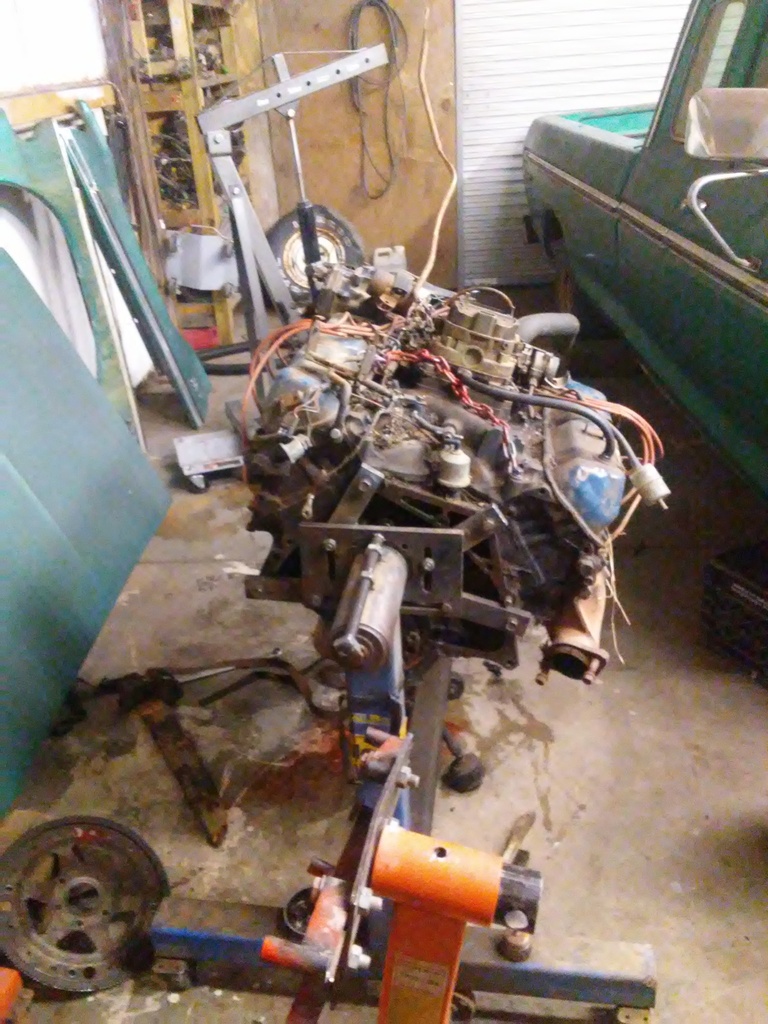
I got a friends engine stand for the time being. I am going to improve my engine stand in the near future. I dont care to borrow tools so will be working with what I have. It is still shop time and going toward the truck. Beats sitting in the house while it is snowing outside. Shop is getting crowded and am trying to get the things I want to work on seperate so that I can move around.
I got a HF cherry picker and it does great for what I need but when I went to lift the bed off with it, the arm is too short. Went and got a 2 1/2 inch square tubing and have to thin the sides down a little to make it fit. I got a 5 foot section so that the tube on the cherry picker will support the whole section and not just a small area. I will mark the new tubing with the old piece so as not to exceed weight limits. Kind of a poor design but a little work and it will do what I need for light loads.

Here you can see the top has some room but the sides need thinning a little. I used a grind stone and then went over it with a flap disk.

Having two different grinders is nice instead of having to swap disk all of the time. Each new project seems to increase the number of tools I need. I have 10 times the amount of tools then what I my dad ever had and it is still not enough. Each tool makes life easier and sometimes you have to improve what you have.

I got a friends engine stand for the time being. I am going to improve my engine stand in the near future. I dont care to borrow tools so will be working with what I have. It is still shop time and going toward the truck. Beats sitting in the house while it is snowing outside. Shop is getting crowded and am trying to get the things I want to work on seperate so that I can move around.

#65
12-08-2016, 05:36 PM
Join Date: Jul 2016
Location: Anderson Mo
Posts: 128
Likes: 0
Received 0 Likes
on
0 Posts
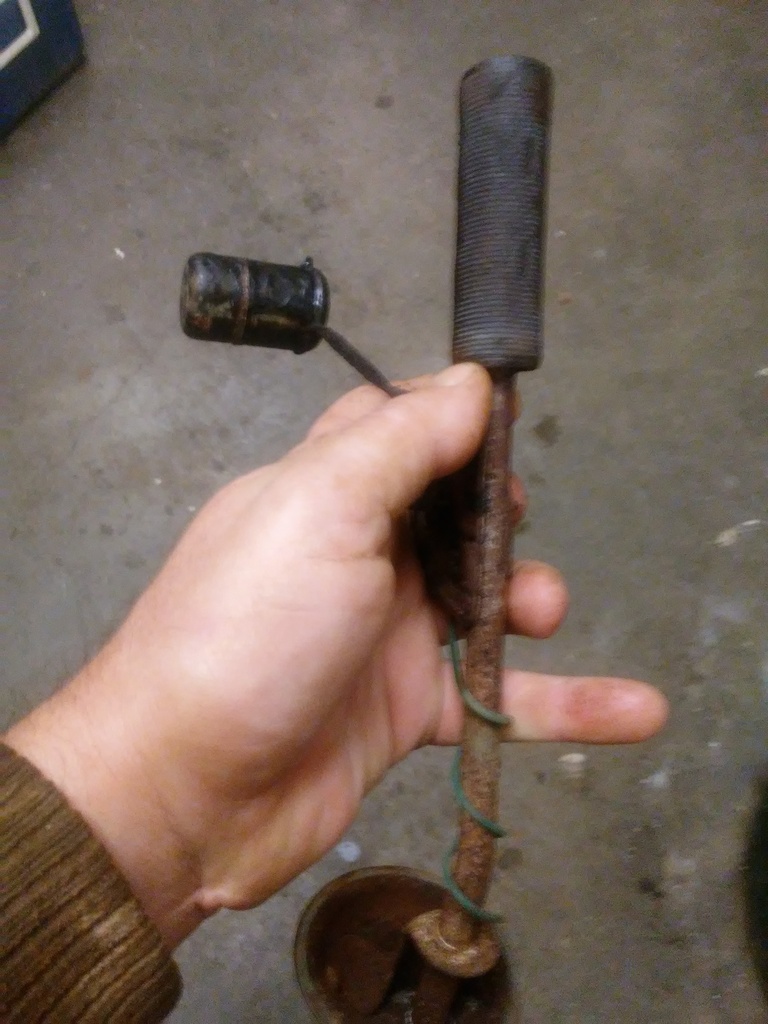
My son come out and helped me get the rear tank out. I was going to just lower it with my hands when he suggested using the transmission jack, Doh!!! Why didnt I think of that? Justin wanted to know why the spring was in the fill hose. I told him it was to keep gas from getting stolen.
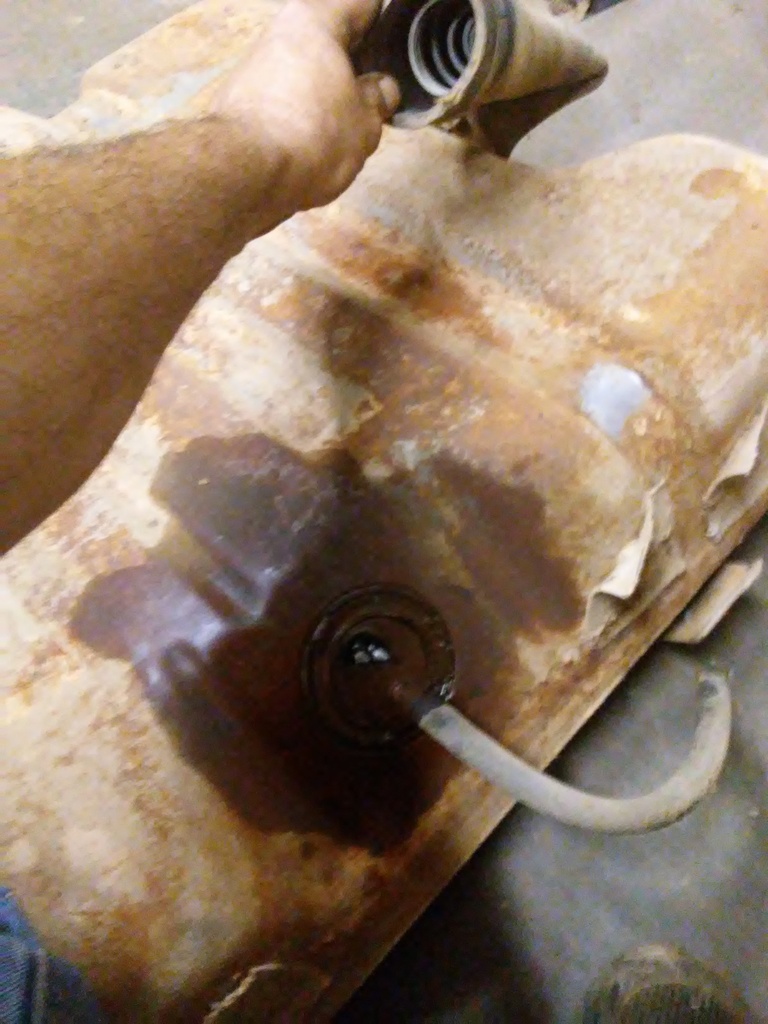
Soaking the lock ring with PB Blaster and a picture of the spring. Curious to see if this tank is real dirty or is usable. Having a tough time getting the straps loose on the Auxillary tank.
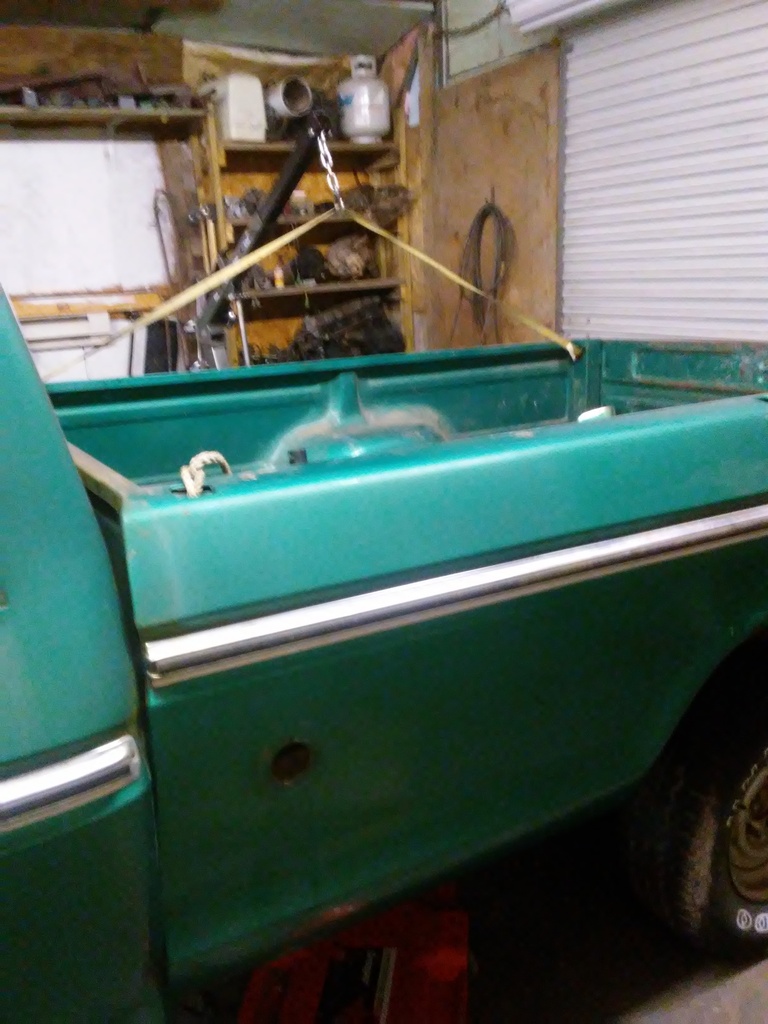
Really wishing I would of completed my overhead lift project. I am using my cherry picker to help get the bed up to access a few things under the bed. Hope to have the bed off tomorrow.

#66
12-08-2016, 05:40 PM

Senior User
Join Date: Oct 2016
Location: Rockville, IN Temporarily
Posts: 401
Likes: 0
Received 2 Likes
on
2 Posts
Another note on that engine stand is that your motor is really offset on it. Always try to level and center the engine on a stand. The damage to your motor or worse to your body parts are not worth it. HF has a much heavier stand that I have used for Big Block Chevy's, Mopar's and Fords is well worth the 125 bucks or so I paid for it.
#67
12-08-2016, 09:49 PM
Hello Riley...Does yours have AC? I might be on hold for getting the bed off until I get the cherry picker freed up. If that is the case, I might go ahead and start on my AC/Heater Core assembly. I want to try and get something done at least every other day or so even if it is just a small step.
#68
12-09-2016, 10:11 AM
Join Date: Jul 2016
Location: Anderson Mo
Posts: 128
Likes: 0
Received 0 Likes
on
0 Posts
Thanks redcreekauto.. I do have a new stand in the works for the 460. I did not realize they had a bigger stand. I would of got it instead. I have used this stand for small blocks and never had any problems before. It is an old stand, probably had it for 15 years.
Hello Riley.. I will get my system cleaned and in good shape before I get it on the road and will try to take some step by step pictures that may help you out when you get to yours.
Hello Riley.. I will get my system cleaned and in good shape before I get it on the road and will try to take some step by step pictures that may help you out when you get to yours.
#69
12-09-2016, 10:13 AM
Join Date: Jul 2016
Location: Anderson Mo
Posts: 128
Likes: 0
Received 0 Likes
on
0 Posts
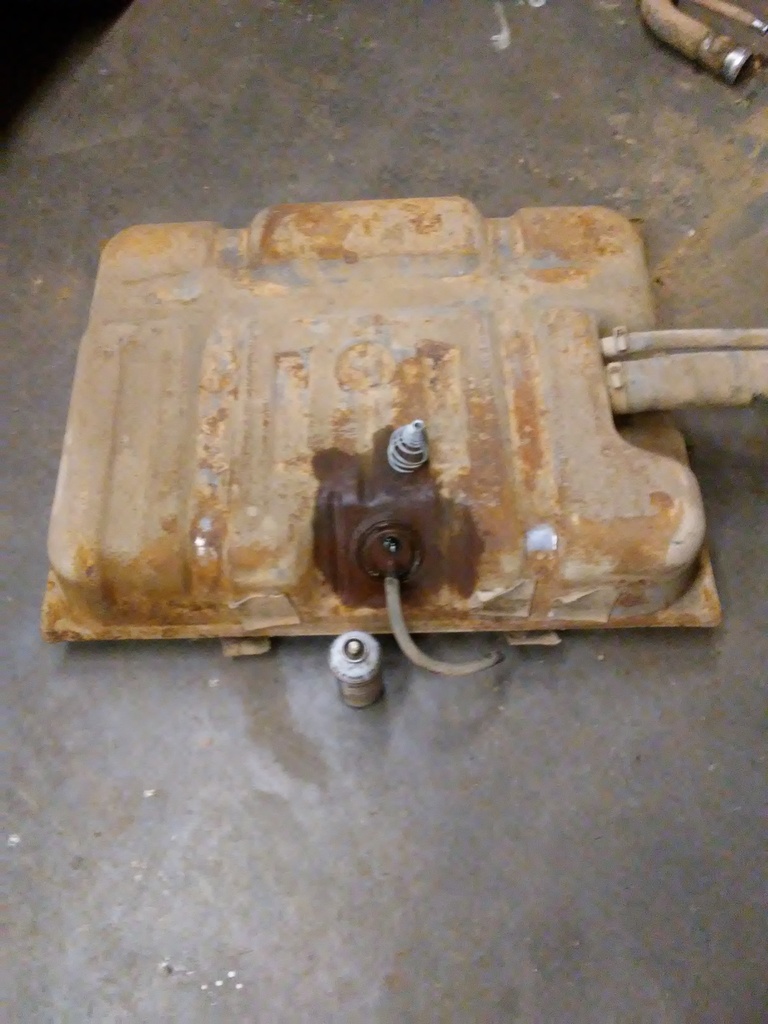
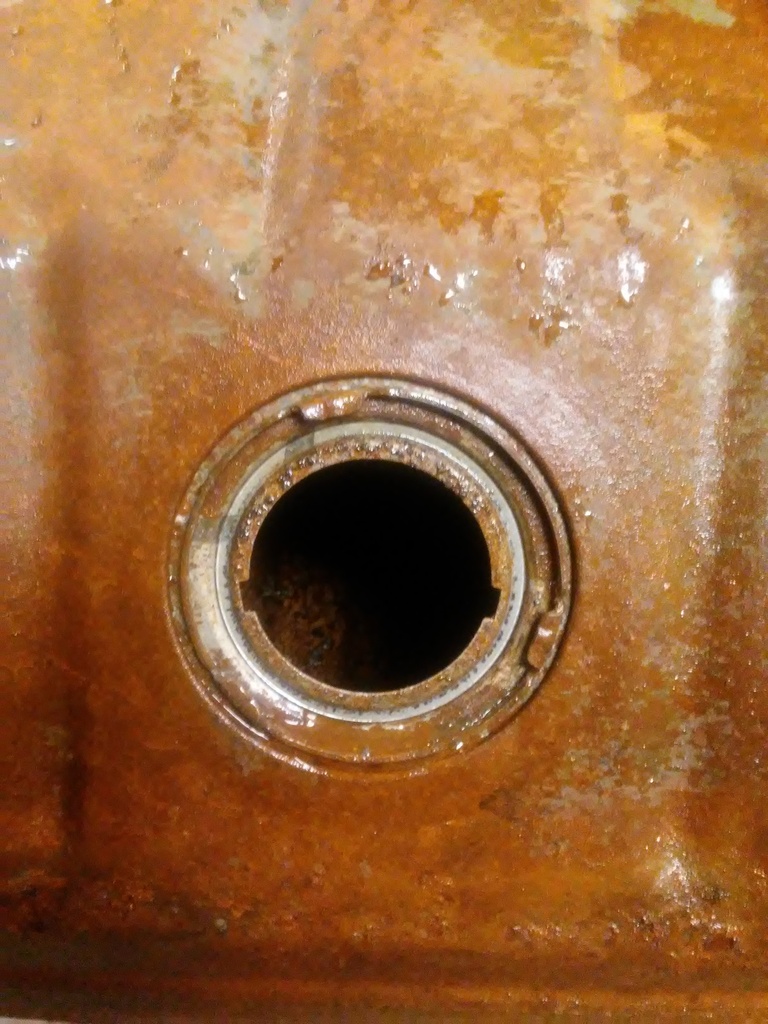
I have cleaned many tanks. What looks like rust on the inside is chemical build up from the fuel in todays gas. I will clean this one up and see how it turns out. I have seen rusty looking tanks come out with nice shiney metal and no pitting. One tank out and one to go.
Typical of what I have seen numerous times. You can see some in the bottom of the tank.
Typical of what I have seen numerous times. You can see some in the bottom of the tank.

#70
12-09-2016, 11:19 AM
Fleet Mechanic
#71
12-09-2016, 04:07 PM
Join Date: Jul 2016
Location: Anderson Mo
Posts: 128
Likes: 0
Received 0 Likes
on
0 Posts
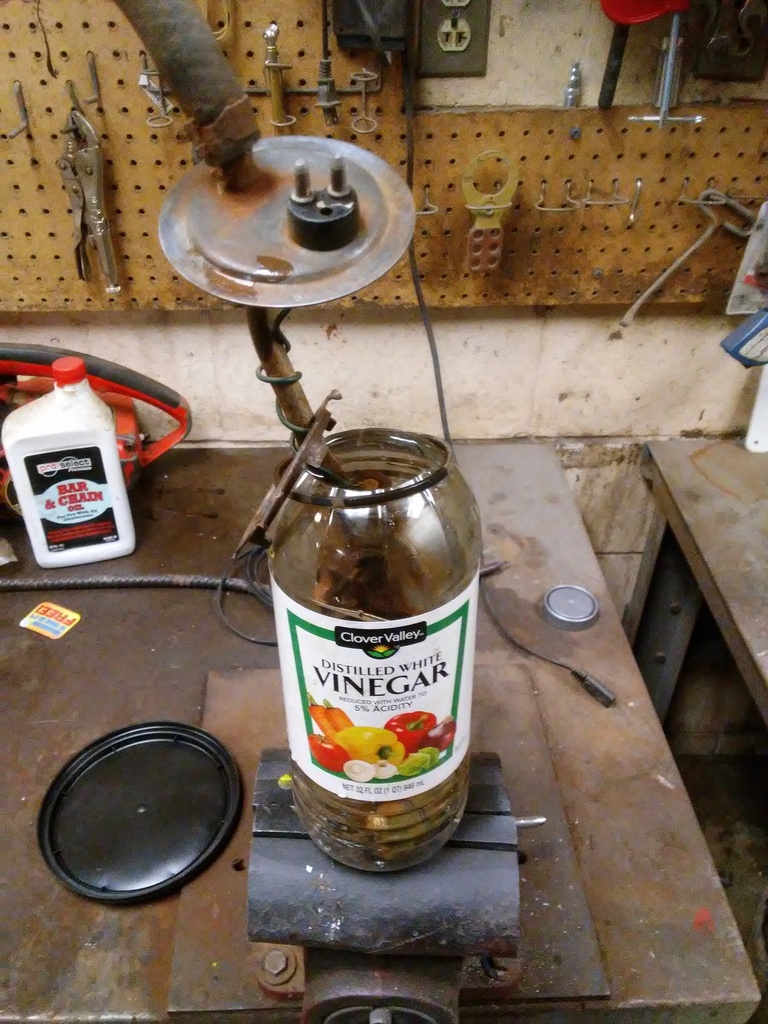
Hello emeraldcoupe...I am going to soak it in white vinegar. There are some other things you can use to clean a tank. I have heard of "The Works" which is a toilet bowl cleaner but have never tried it. Vinegar is a slow process and it would probably take a week or so. Since this is a long project, I will let it soak for a month and move the tank around every now and then to get the different areas of it.
With the temparture as cold as it is here I dont have to worry about fumes and sparks. Fumes are what is dangerous. I will flush it out with water at work and then fill with vinegar. I do not clean tanks in the summer time.
I have been told that some radiator shops can boil a tank but have not checked my local repair shop. I plan on asking him what he would charge and if he can do it. What looks like rust in the tank is not rust but build up. I have cleaned several tanks and you wont find any pitting like rust would leave behind. It will be smooth and flat when I get it cleaned.
#72
12-09-2016, 04:15 PM
Join Date: Jul 2016
Location: Anderson Mo
Posts: 128
Likes: 0
Received 0 Likes
on
0 Posts
I did some more scrapping under the truck to get some gunk off of what I could reach. Later on I am going to rent a pressure washer and give the front and rear of the frame a good cleaning. At a much later time, I will pull the cab and clean under there as well.
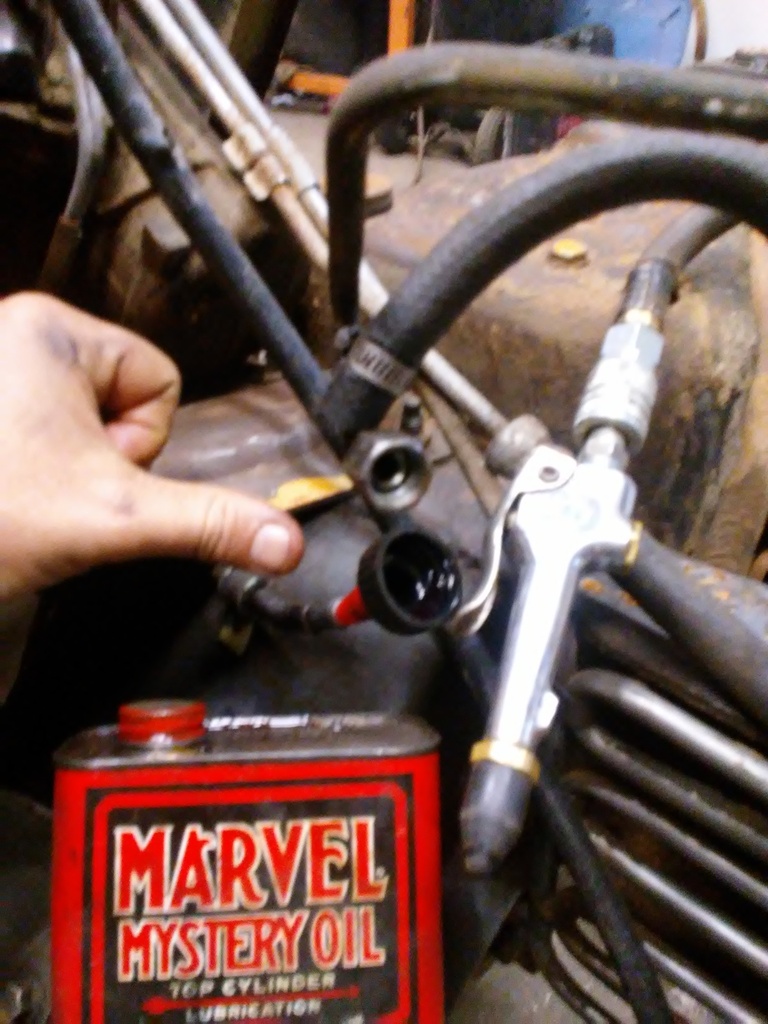
Today I filled the fuel line full of Marvel Mystery Oil and will let it soak for a few days. The fuel lines can get some build up in them as well. I used the rubber tipped air gun and it is flowing well but I want to get the lines cleaned out.
Later on I will do the brake lines. Brakes lines will have all kinds of nasty stuff come out of them when I flush them. Brakes will be one of the last things that I will rebuild. I will just replace all of the brake hardware with new pads, shoes, calipers, cylinders and other things I may have missed. Brake fluid seems to leave all kinds of nasty stuff when it gets old.
Here I use a gear oil bottle lid as a funnel to fill the lines and will do the same thing on the brake lines to fill them. After the brake lines have soaked a few days I will blow the lines out from front to rear and rear to front.
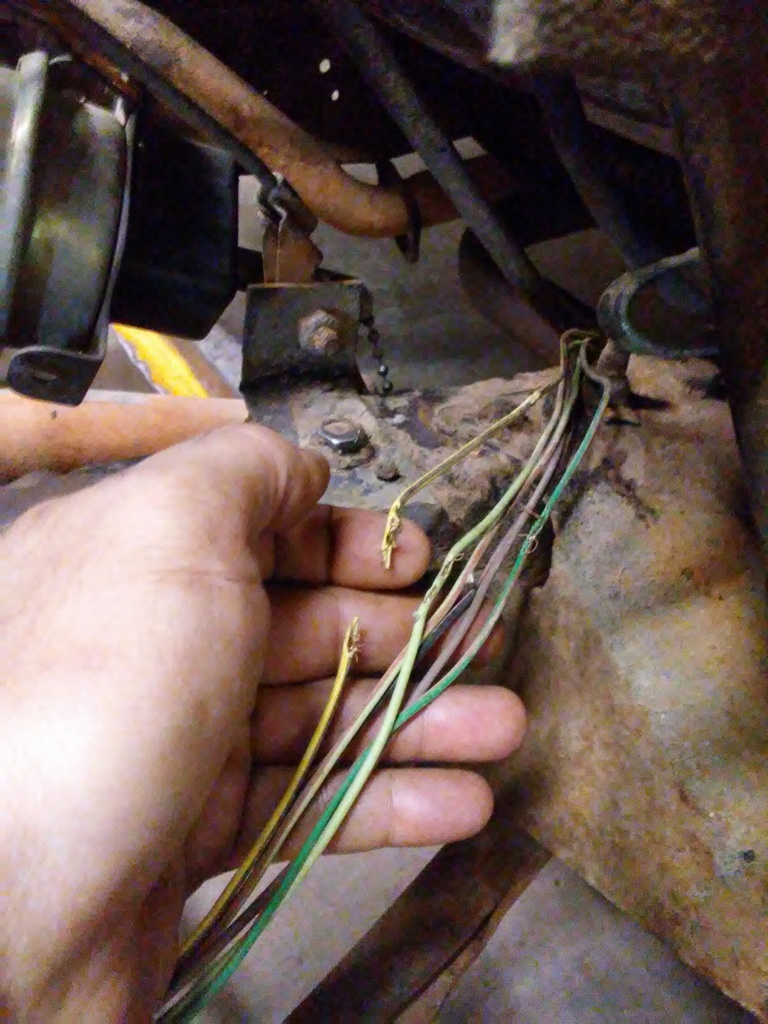
I have a few other wires to repair as these are chaffed or been chewed by a rat. I will go thru each of the wires and see what all is damaged and will repair as needed.
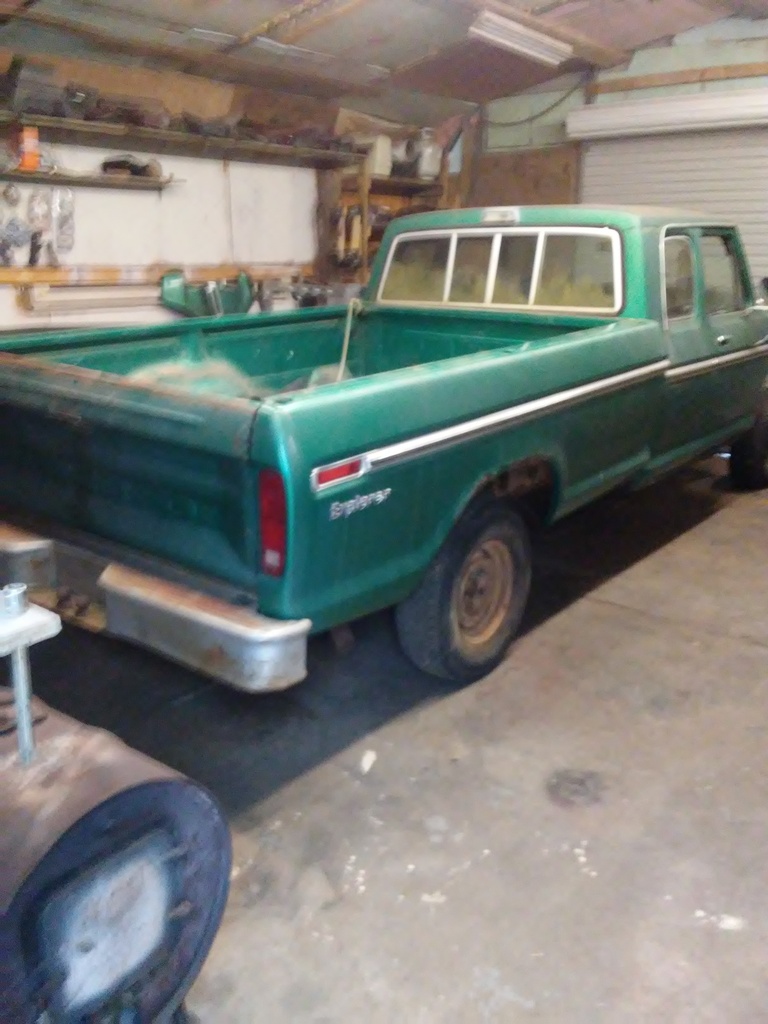
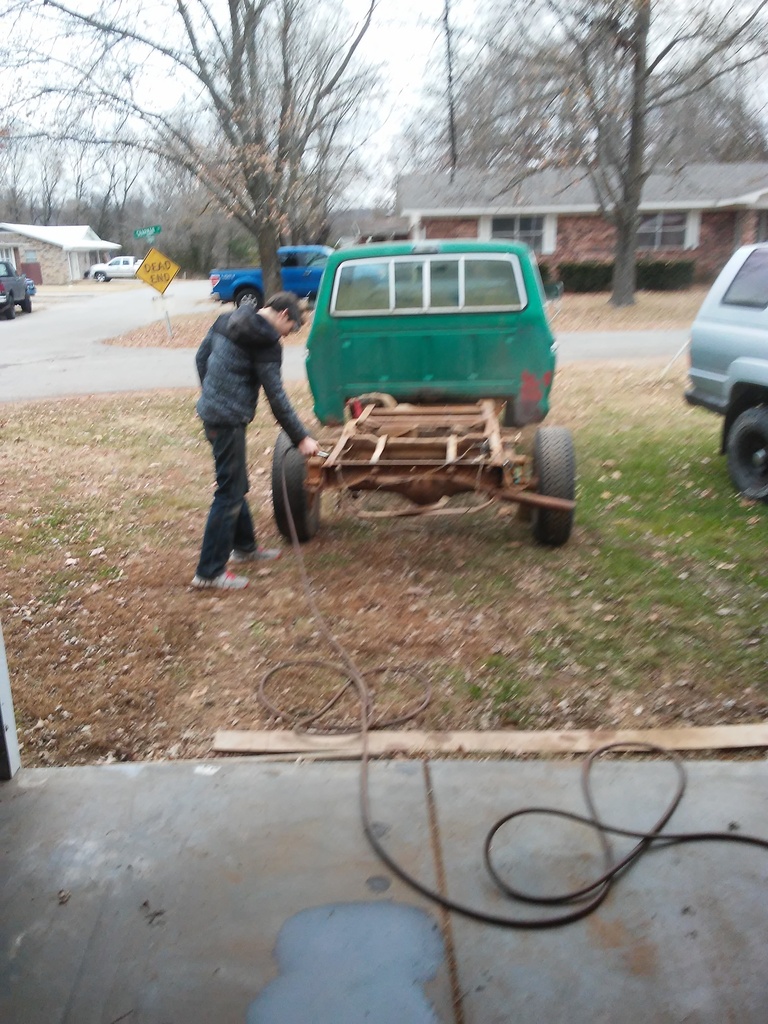
I got the truck in backwards in the shop. I am hoping in the next couple of days to get the rear bumper and bed off. I will lift the bed, roll the truck out and set the bed on my 4x8 trailer, then roll the truck back in and start cleaning and repairing any issues I may find. Doing a full tear down on a project truck can clear up several issues all at one time.
Today I filled the fuel line full of Marvel Mystery Oil and will let it soak for a few days. The fuel lines can get some build up in them as well. I used the rubber tipped air gun and it is flowing well but I want to get the lines cleaned out.
Later on I will do the brake lines. Brakes lines will have all kinds of nasty stuff come out of them when I flush them. Brakes will be one of the last things that I will rebuild. I will just replace all of the brake hardware with new pads, shoes, calipers, cylinders and other things I may have missed. Brake fluid seems to leave all kinds of nasty stuff when it gets old.
Here I use a gear oil bottle lid as a funnel to fill the lines and will do the same thing on the brake lines to fill them. After the brake lines have soaked a few days I will blow the lines out from front to rear and rear to front.

I have a few other wires to repair as these are chaffed or been chewed by a rat. I will go thru each of the wires and see what all is damaged and will repair as needed.

I got the truck in backwards in the shop. I am hoping in the next couple of days to get the rear bumper and bed off. I will lift the bed, roll the truck out and set the bed on my 4x8 trailer, then roll the truck back in and start cleaning and repairing any issues I may find. Doing a full tear down on a project truck can clear up several issues all at one time.

#73
12-10-2016, 02:45 AM
Join Date: Jul 2016
Location: Anderson Mo
Posts: 128
Likes: 0
Received 0 Likes
on
0 Posts
Not sure if you can really see the difference from the above picture, but I was able to use high pressure water to knock a majority of the build up out of the tank. I will now fill it with white vinegar and let it sit for a week or so and continually rotate the tank around to get the rest of the build up dissolved and removed. After the vinegar has dissolved all of the build up, I will put a hair dryer on it and let it dry the tank. Then to get the red dust that is going to look like baking flour, I will get a vacuum cleaner to get the dust out. If you are concerned with any residue, you can use Red-Kote to seal the tank.
I got most of the exterior cleaned up. I will cover it with some POR and then paint the tank with some rustolem.

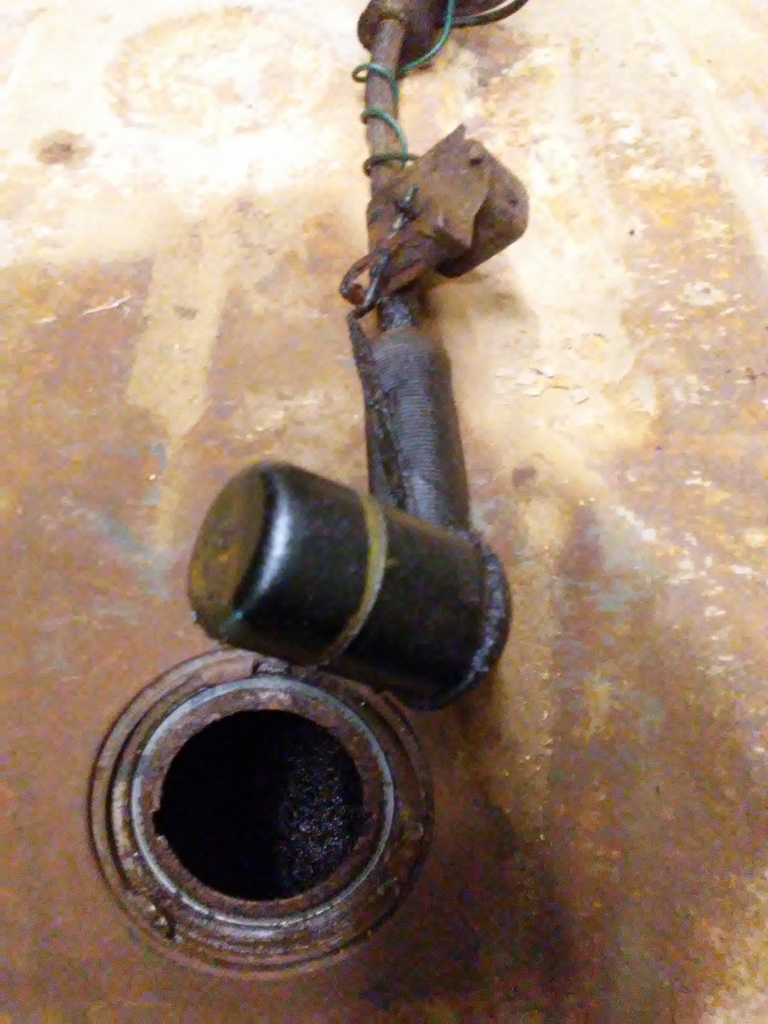
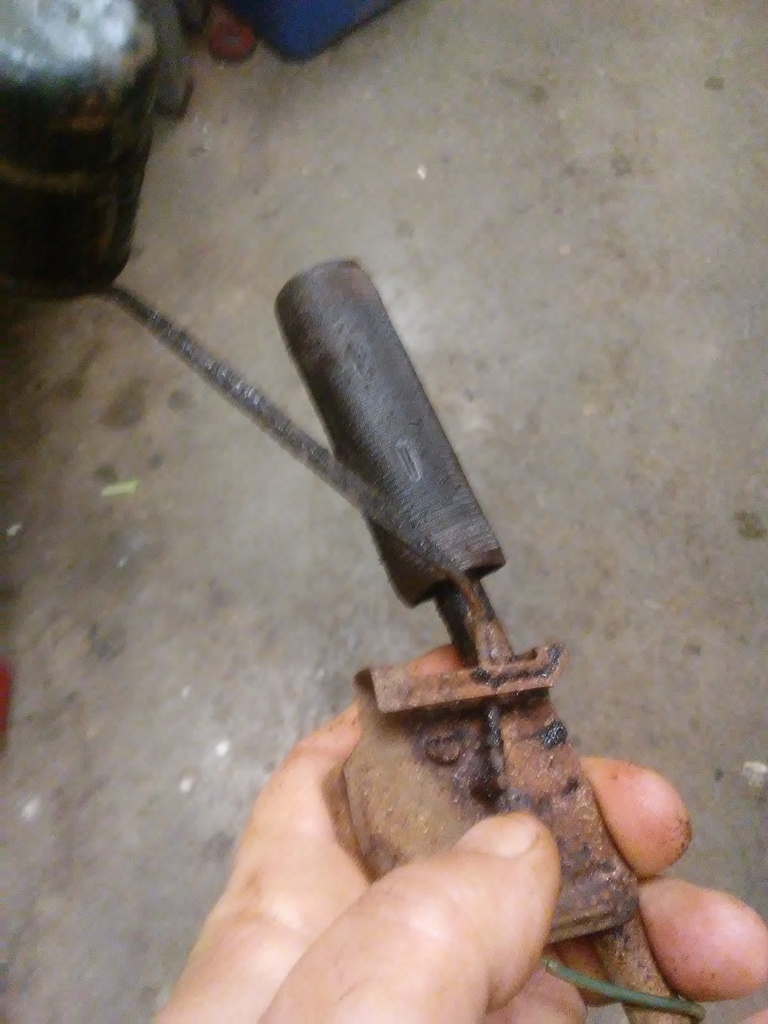
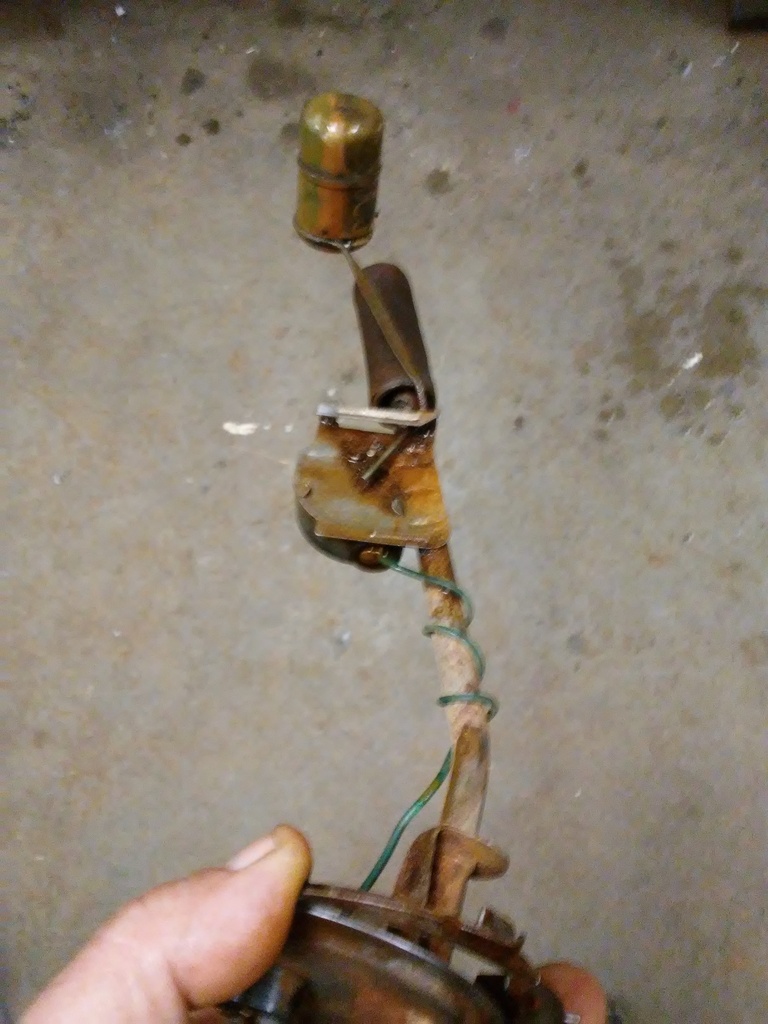
This assembly is in better shape then some I have seen. My thumb is on a filter. I have seen some filters that have such a build up that fuel can barely flow into the tube. I will start looking on rockauto, ebay, partsgeek, amazon... for the best price.
Another problem I have seen is where the build up gets to where the float can not operate. This is going to be a project soon that I will be doing is getting it cleaned and then will do a resistance check and see if the float is operating. You can see some more build up on the float itself.
I got the exterior cleaned and painted. I am keeping the old hoses for a reference as they are dry rotted and need replaced.

I got most of the exterior cleaned up. I will cover it with some POR and then paint the tank with some rustolem.

This assembly is in better shape then some I have seen. My thumb is on a filter. I have seen some filters that have such a build up that fuel can barely flow into the tube. I will start looking on rockauto, ebay, partsgeek, amazon... for the best price.

Another problem I have seen is where the build up gets to where the float can not operate. This is going to be a project soon that I will be doing is getting it cleaned and then will do a resistance check and see if the float is operating. You can see some more build up on the float itself.

I got the exterior cleaned and painted. I am keeping the old hoses for a reference as they are dry rotted and need replaced.

#74
12-10-2016, 03:42 PM
Join Date: Jul 2016
Location: Anderson Mo
Posts: 128
Likes: 0
Received 0 Likes
on
0 Posts
I had Justin to paint the bottom half of the tank. I explained it to him to use the same pattern as using a spray gun. He has helped me do some painting on trucks in the past.
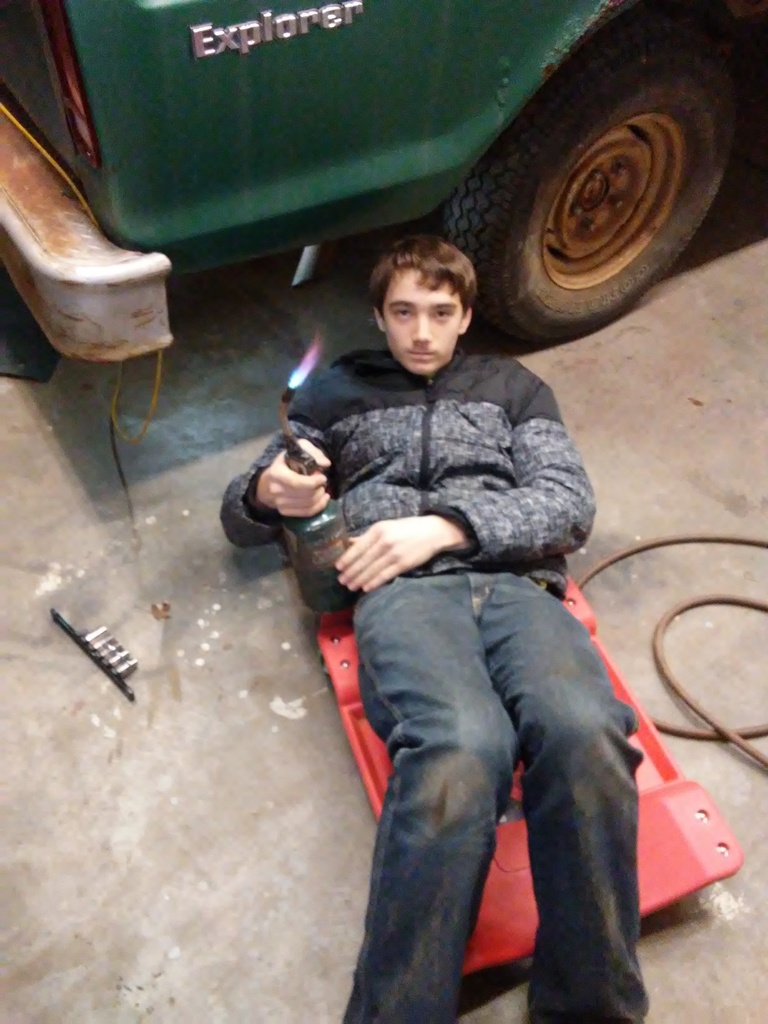
We have been having a tough time with getting a bolt out. I do not have a cutting torch but do have a heating torch. I explained to him about using heat to help get some rusty bolts loose. This was his first time of using heat on a bolt. We finally got the bumper off.
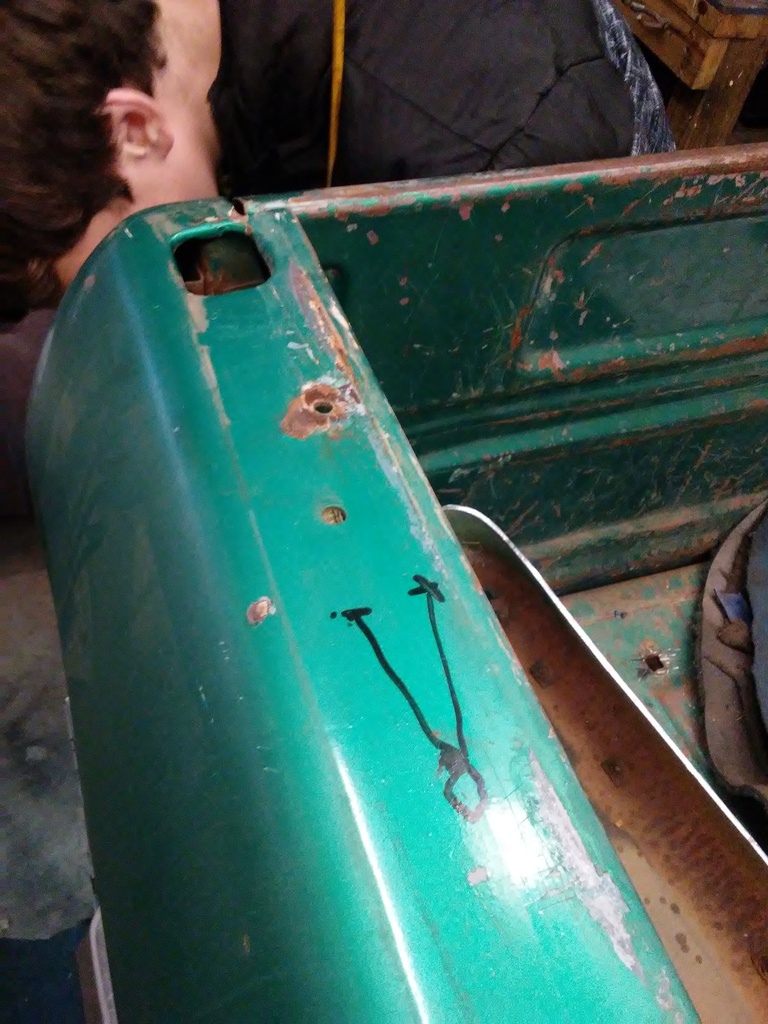
Here is my diagram explaining to him about the lights that if "Current dont flow, the bulb wont glow". He is removing a ground wire to the side marker light in the tail light area. He already knows to put any bolts back in their place when we get a part removed. It sure helps having him in the shop. It has slowed me down at times explaining things to him but it is now starting to pay off. He is really getting into working on trucks and am surprised at some of the things he is starting to understand.
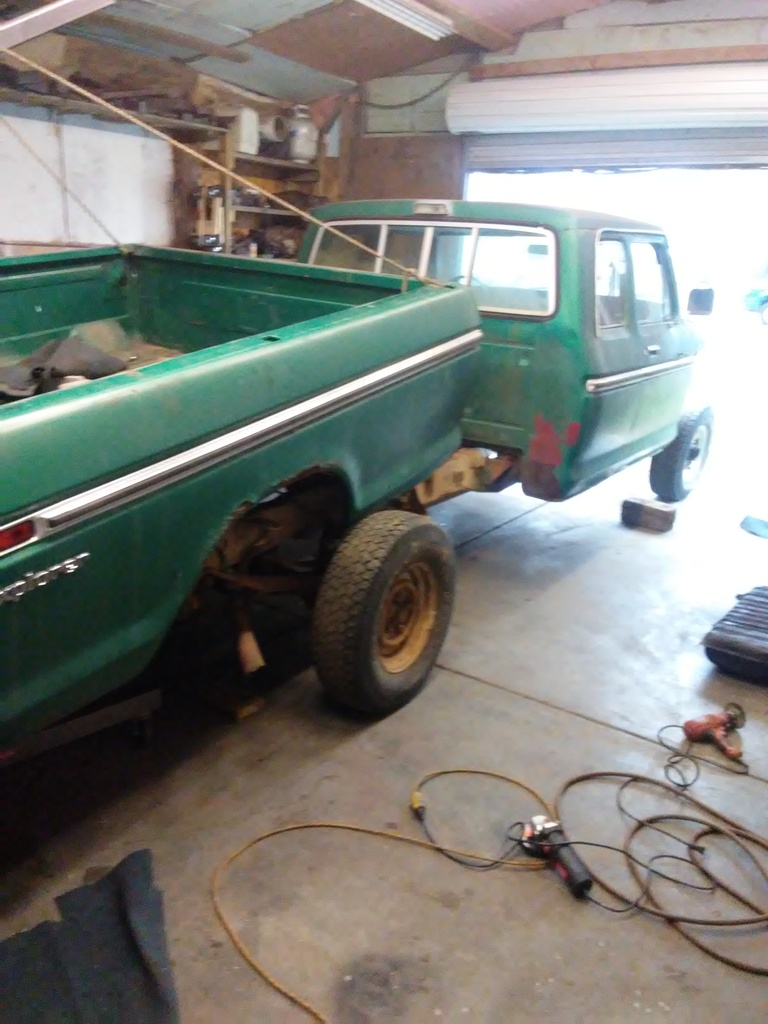
He was anxious to get the bed off. I do not have my extension completed yet but was able to make it work for what we needed it to.
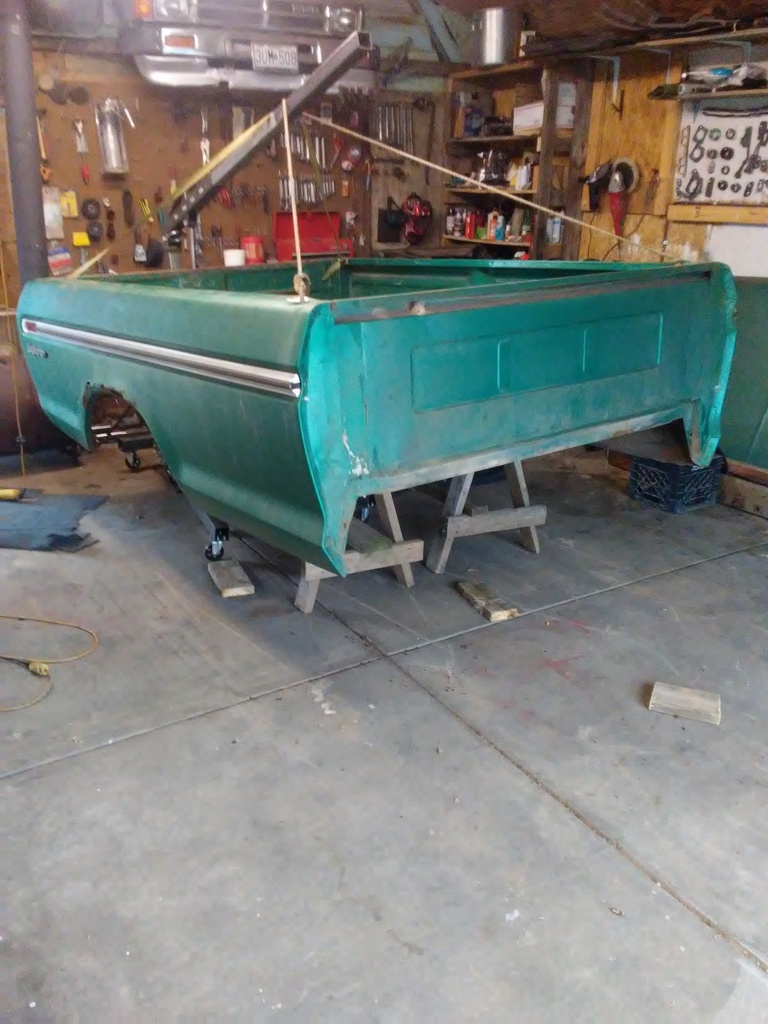
I am not sure if I want to keep this bed or replace it. I know where a couple of '77 beds are that are in great shape and have the fuel doors built into them. But this bed would be a good learning experience with patch panels. I do not have a MIG welder but will be getting one for Christmas and have always wanted to do patch repair. Still debating on the bed. It will be getting put on my 4x8 trailer so as I can get the truck back in the shop to start doing some cleaning.
It was getting cold and the fire was going out in the shop, but Justin wanted to take the air hose to the frame and see how much cleaner it would get. I told him there is going to be a lot of wire brushing to do on the frame and eventually I will rent a pressure washer for a good cleaning before painting. He was ready to pull the cab. At this time I do not have the ability to lift the cab. It will eventually get pulled off, just not at this time.

We have been having a tough time with getting a bolt out. I do not have a cutting torch but do have a heating torch. I explained to him about using heat to help get some rusty bolts loose. This was his first time of using heat on a bolt. We finally got the bumper off.

Here is my diagram explaining to him about the lights that if "Current dont flow, the bulb wont glow". He is removing a ground wire to the side marker light in the tail light area. He already knows to put any bolts back in their place when we get a part removed. It sure helps having him in the shop. It has slowed me down at times explaining things to him but it is now starting to pay off. He is really getting into working on trucks and am surprised at some of the things he is starting to understand.

He was anxious to get the bed off. I do not have my extension completed yet but was able to make it work for what we needed it to.

I am not sure if I want to keep this bed or replace it. I know where a couple of '77 beds are that are in great shape and have the fuel doors built into them. But this bed would be a good learning experience with patch panels. I do not have a MIG welder but will be getting one for Christmas and have always wanted to do patch repair. Still debating on the bed. It will be getting put on my 4x8 trailer so as I can get the truck back in the shop to start doing some cleaning.

It was getting cold and the fire was going out in the shop, but Justin wanted to take the air hose to the frame and see how much cleaner it would get. I told him there is going to be a lot of wire brushing to do on the frame and eventually I will rent a pressure washer for a good cleaning before painting. He was ready to pull the cab. At this time I do not have the ability to lift the cab. It will eventually get pulled off, just not at this time.

#75
12-11-2016, 01:24 AM
Join Date: Jul 2016
Location: Anderson Mo
Posts: 128
Likes: 0
Received 0 Likes
on
0 Posts
I could replace the entire fuel system and looking online it would be $300-400. I got other things to take care of so I am going to get my fuel system done for a lot less. I found this Sending Unit for about $25 online but it will clean up nicely. I took a brass tooth brush and got what I could. It was dirty as can be seen from pictures above.
Since I have plenty of time, I will let it soak in vinegar and then check to see if the resistance changes with a meter at a later time. One thing I do like a project is that I can move on to other things while one thing is cleaning. I need to get my electrolisis tank set up and let it do some rust removal.

Since I have plenty of time, I will let it soak in vinegar and then check to see if the resistance changes with a meter at a later time. One thing I do like a project is that I can move on to other things while one thing is cleaning. I need to get my electrolisis tank set up and let it do some rust removal.
