Power window Kits?
#16
Join Date: Oct 2005
Location: northwestern Ontario
Posts: 262,990
Received 4,131 Likes
on
2,656 Posts
#17
The horizontal bar is bolted to the door using long enough bolts and spacers( I used tubing) to line up with the window track and it supports the motor and the bottom of the power window track, I've been looking to see if I have any pictures but haven't found any yet...
#18
This instruction sheet from Mid Fifty makes it pretty clear.
Instructions - Mid Fifty F-100 Parts
I can't tell from the pictures if the the tubing is 1" or 3/4"
Instructions - Mid Fifty F-100 Parts
I can't tell from the pictures if the the tubing is 1" or 3/4"
#19
#20
Join Date: Oct 2005
Location: northwestern Ontario
Posts: 262,990
Received 4,131 Likes
on
2,656 Posts
This instruction sheet from Mid Fifty makes it pretty clear.
Instructions - Mid Fifty F-100 Parts
I can't tell from the pictures if the the tubing is 1" or 3/4"
Instructions - Mid Fifty F-100 Parts
I can't tell from the pictures if the the tubing is 1" or 3/4"

#21
I'm starting my install and have questions. I have 2 different instructions and one says put the motor on the hinge side the other says put it on the latch side. I like it better on the hinge side, does it make a difference?
I followed the dimensions for the locating the unit in the door. It centers it in the panel opening/door. It seems to be slightly off center. Should the vertical bar be perfectly in the center glass? (I am keeping the vent windows)
I followed the dimensions for the locating the unit in the door. It centers it in the panel opening/door. It seems to be slightly off center. Should the vertical bar be perfectly in the center glass? (I am keeping the vent windows)
#22
One piece windows
Finished the instl. of my Nu-relics one piece electric windows in my 52.
Motor unit was a bolt in deal in the original holes.
Forming the felts was a bitch until I carried them down with one window to an old time glass company which did them in about 45 minutes!
I trashed several trying myself but I was keeping my hands too close trying to bend them. This guy worked about a foot or more apart with his hands and wider.
They went in like a dream, I cut them off to the correct lengths and the window roll up and down like a dream.
TractormanBill
#23
#24
I got the driver side done. It works great. The hardest part was determining the correct spacers to use. Once I got that the unit fit in the door perfectly. Now the other side should be a lot quicker. I need new glass so I will get that before I take it apart so I can do it all at once.
#26
Join Date: Oct 2005
Location: northwestern Ontario
Posts: 262,990
Received 4,131 Likes
on
2,656 Posts
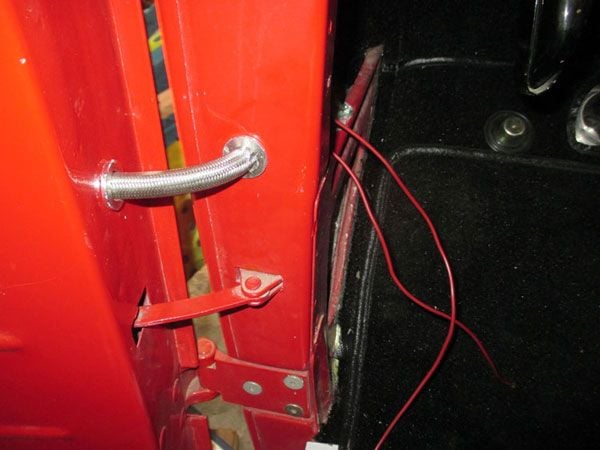
I like using these looms because they are less likely to bind because of the pivots and slide much easier
https://www.electric-life.com/produc...ip-on-collars/
https://www.electric-life.com/produc...ip-on-collars/
#27
I used these looms for the wires.
https://www.amazon.com/gp/product/B0...?ie=UTF8&psc=1
I originally drilled the holes in the center of the door jamb but the bend was too tight. I used the hole for the dome light switch which is very close to the inner edge of the jamb and it worked much better.
Mine is a 56 and the door angle is different than the 52 like tractormanbill showed
#28
#29
I like using these looms because they are less likely to bind because of the pivots and slide much easier
https://www.electric-life.com/produc...ip-on-collars/
https://www.electric-life.com/produc...ip-on-collars/
I had the ones Smallello used and I did not like the crimp in the tubing when door was wide open. I like the design of the electric life product you used so I ordered them.
I actually looked into a hyme joint to see if I could make the ones I have work but it would have been totally to big.
On a side note if anyone on here needs a power window kit, bought from Mid-Fifties with install kit, never been used. I bought the Nu-Relics. It is yours for the cost of shipping.
Page 96 Mid-Fifties 2015 catalog-part #1740-ex
MERRY x-MAS to all


