Help me build my $200.00 expedition
#1
 08-10-2016, 09:59 AM

Help me build my $200.00 expedition
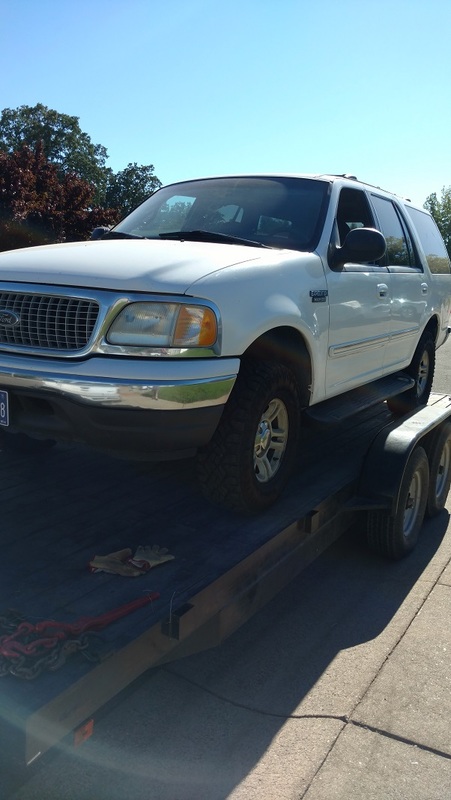
Ive wanted an expi for awhile but waited for the right one... and yesterday I bought the $200.00 two hundred dollar one. The owner was from out of town when the head gasket blew and he was stuck hundreds of miles from home under pressure to get it moved off the public street..desperate he contacted pick and pull and they offered him 150.00, their going rate.. I was in the right place at the right time with more cash and a trailer
1999 Expi xlt 4 x 4.. 250 k needing a 5.4 motor.. it runs and drives well but blew a head gasket, which as others have already discussed is not unusual with high mileage engines of this vintage. The body is clean and rust and damage free.. no frame or off road damage. there is no oil leaking except from the engine area.. the tires are nearly new. the interior is clean abet the drivers seat.. which is worn out. I think it was a mommie truck for most of its life. All the electrical stuff works down to the running board lights and programmable door lock (which I will have to figure out). I feel bad for the owner who just dumped 600.00 in a new stereo the week before. He had only owned the truck for six weeks. He paid 1500.00 for the truck and had 2300.00 in it. I think it was just good luck being in the right place to snag it.
I am an experienced fabricator and have a fully complemented shop
I intend on going through the truck component by component upgrading it wherever possible for whatever performance additions make sense. It will be used 80/20 road off road.
I will build the 5.4 with California smog in mind but would love any suggestions as to how to improve it.. stainless smog legal headers? better exhaust
I will build the transmission with all the good stuff to improve it
I like the height of the truck and dont really need a lift but I would like to maximize the suspension ability of the truck...add skid plates, better shocking ability etc but I would love to know what others have done more than just bolt on additions.. poly bushings will be added where appropriate... a true trac for the front and rear.. better rotors etc... thats all the easy stuff.. Im interested in some more trick parts to upgrade it
Ill build out bumpers and exocage it...( to accommodate a rooftop platform for a tent etc)
The third seat will be pulled and the interior will be set up to off road car camp...
I would really like to know what others have done to make their expis better and more capable trucks of this vintage
Please help me with your suggestions to build this low buck truck.. I will document all aspects of the build.. normally Im in the 73-79 build section where I have multiple builds going.
I appreciate any input and expertise
Thanks
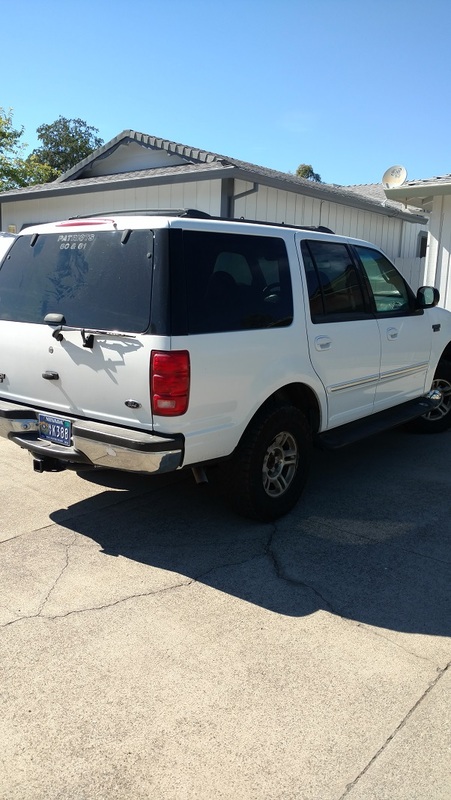
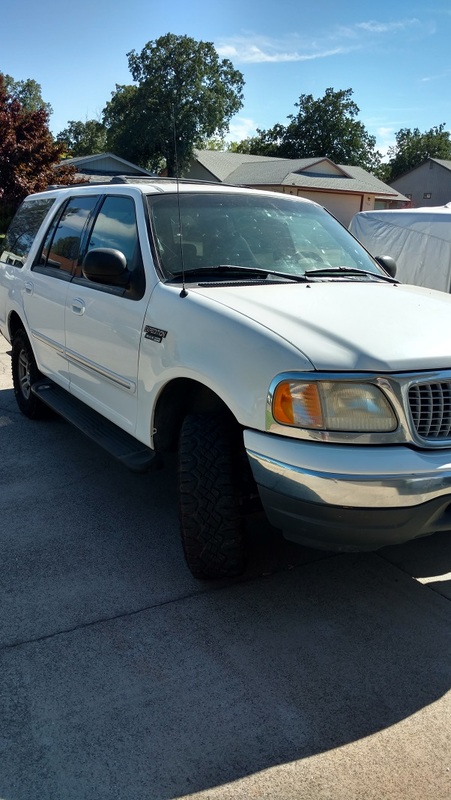


#2
08-10-2016, 05:50 PM
Nice find! I'd say you have things covered quite well. As for it being a trail camper, ala Top Gear, I have a couple of ideas to keep in mind from the voice of experience.
With the rear seats folded flat. you have 7ft of cargo length by 4ft of width and approximately 3ft of height.
Most air beds will take up a LOT of this room unless you're clever. The company InteX makes one that is 2ft wide by 6ft long, they call it a 'camp mat'. I found them at Meijer for $10. Air it up about 2/3 and you can still flip the rear seat back up with no fuss. I can do it from the driver's seat.
As for the remaining space, an end table will be useful for many tasks and adds usable space on top and storage underneath. 2ft tall seems about perfect for most tasks. After a junkyard trip, I disassembled an overhead console on such a table in the back of my expy, then made a t-bone steak for dinner on the Coleman butane camp stove & folding frying pan, all stored underneath the table.
#3
08-12-2016, 10:52 PM
Expi got a new windshield today,,, I replaced its prior Chinese broken replacement with OEM CARLITE.. for 200.00.. that cost included responding to my shop
Cali dmv is never cheap so I think that will be another 200.00.. I wont get it registered until it smogs and that wont be until after it gets a motor.. but it drives fine abet blowing white smoke.
I spent the entire install watching and asking many questions. It was interesting seeing it done right...
Remove old windshield
Thoroughly clean all windshield pillar surfaces removing any leftover urethane..inspect for any rust (there wasn't any) then priming all surfaces with a specialized primer. R and R any clips that were missing or broken from the prior install
Some more primer/accelerant on the glass itself. Makes the urethane cure better. A generous application of 3m one hour urethane..not the lo-buck stuff. Careful bonding...
While my windshield guy was working I vacuumed out ten dollars of "truck money"... steamed cleaned the interior and used some goof off for some dirty spots.. now it's clean and years of kiddy grime and french fries long since forgotten are outta there
I learned a lot.. and definitely know the ins and outs of windshield replacement..
Then we did one of my classic 70s vintage ford trucks
I am looking at simplifying this xlt into more of an xl model
Way too many electronic gizmos for me
Im debating selling the cherry third seat..lll never use it and it would never be in the truck,, and it fetches what the truck cost me...I know someone else might want it... but its more crap to hang onto
This is going to be a fire road camping truck... I dont need cd inputs to the rear.. electric seats.. power everything,, the more of that I can downgrade the happier Ill be and the more I can make the systems simpler the less there will be to go wrong with them off road
I discovered a broken e-brake front cable... cheap fix Raybestos BC95389.. 17.00 Oriellys
and one broken roof vent for the rear ac 8.00 Ebay
Total expi cost to date+/- 600.00
The costs will mount but Ill be using new upgraded parts... and I would do what Im going to do to any truck I refurb'd
Better than stock if at all possible
Next chore... strip the mommie running boards and build some rock sliders
#4
08-13-2016, 06:57 AM
Expi got a new windshield today,,, I replaced its prior Chinese broken replacement with OEM CARLITE.. for 200.00.. that cost included responding to my shop
Cali dmv is never cheap so I think that will be another 200.00.. I wont get it registered until it smogs and that wont be until after it gets a motor.. but it drives fine abet blowing white smoke.
I spent the entire install watching and asking many questions. It was interesting seeing it done right...
Remove old windshield
Thoroughly clean all windshield pillar surfaces removing any leftover urethane..inspect for any rust (there wasn't any) then priming all surfaces with a specialized primer. R and R any clips that were missing or broken from the prior install
Some more primer/accelerant on the glass itself. Makes the urethane cure better. A generous application of 3m one hour urethane..not the lo-buck stuff. Careful bonding...
While my windshield guy was working I vacuumed out ten dollars of "truck money"... steamed cleaned the interior and used some goof off for some dirty spots.. now it's clean and years of kiddy grime and french fries long since forgotten are outta there
I learned a lot.. and definitely know the ins and outs of windshield replacement..
Then we did one of my classic 70s vintage ford trucks
I am looking at simplifying this xlt into more of an xl model
Way too many electronic gizmos for me
Im debating selling the cherry third seat..lll never use it and it would never be in the truck,, and it fetches what the truck cost me...I know someone else might want it... but its more crap to hang onto
This is going to be a fire road camping truck... I dont need cd inputs to the rear.. electric seats.. power everything,, the more of that I can downgrade the happier Ill be and the more I can make the systems simpler the less there will be to go wrong with them off road
I discovered a broken e-brake front cable... cheap fix Raybestos BC95389.. 17.00 Oriellys
and one broken roof vent for the rear ac 8.00 Ebay
Total expi cost to date+/- 600.00
The costs will mount but Ill be using new upgraded parts... and I would do what Im going to do to any truck I refurb'd
Better than stock if at all possible
Next chore... strip the mommie running boards and build some rock sliders
Cali dmv is never cheap so I think that will be another 200.00.. I wont get it registered until it smogs and that wont be until after it gets a motor.. but it drives fine abet blowing white smoke.
I spent the entire install watching and asking many questions. It was interesting seeing it done right...
Remove old windshield
Thoroughly clean all windshield pillar surfaces removing any leftover urethane..inspect for any rust (there wasn't any) then priming all surfaces with a specialized primer. R and R any clips that were missing or broken from the prior install
Some more primer/accelerant on the glass itself. Makes the urethane cure better. A generous application of 3m one hour urethane..not the lo-buck stuff. Careful bonding...
While my windshield guy was working I vacuumed out ten dollars of "truck money"... steamed cleaned the interior and used some goof off for some dirty spots.. now it's clean and years of kiddy grime and french fries long since forgotten are outta there
I learned a lot.. and definitely know the ins and outs of windshield replacement..
Then we did one of my classic 70s vintage ford trucks
I am looking at simplifying this xlt into more of an xl model
Way too many electronic gizmos for me
Im debating selling the cherry third seat..lll never use it and it would never be in the truck,, and it fetches what the truck cost me...I know someone else might want it... but its more crap to hang onto
This is going to be a fire road camping truck... I dont need cd inputs to the rear.. electric seats.. power everything,, the more of that I can downgrade the happier Ill be and the more I can make the systems simpler the less there will be to go wrong with them off road
I discovered a broken e-brake front cable... cheap fix Raybestos BC95389.. 17.00 Oriellys
and one broken roof vent for the rear ac 8.00 Ebay
Total expi cost to date+/- 600.00
The costs will mount but Ill be using new upgraded parts... and I would do what Im going to do to any truck I refurb'd
Better than stock if at all possible
Next chore... strip the mommie running boards and build some rock sliders
And yeah, stock running boards aren't too great as they put the user's entire weight on the rocker panels which are only 2mm thick. Add in Ohio winters and it explains why mine are gone, boards and rockers...
 . I'm gonna make some proper step bars which will mount to the frame and only use the rockers for triangulation. And they'll have lights like the running boards too :P
#5
08-13-2016, 07:42 AM
I wouldn't necessarily perform downgrades in certain areas, such as the rear audio controls. Instead, why not re-use the existing switches for different functions? As my truck didn't have vent quarter windows, the overhead console has the switch holes blanked out. It'll be getting upgraded from 2 to 5 with a custom switch frame/bracket, then wired to relays to handle enough current for stuff like a winch, extra lights and so on.Perhaps some latching relays will help with those too. Oh, and vent windows will happen someday too, just done with one switch tho.
And yeah, stock running boards aren't too great as they put the user's entire weight on the rocker panels which are only 2mm thick. Add in Ohio winters and it explains why mine are gone, boards and rockers.... I'm gonna make some proper step bars which will mount to the frame and only use the rockers for triangulation. And they'll have lights like the running boards too :P
And yeah, stock running boards aren't too great as they put the user's entire weight on the rocker panels which are only 2mm thick. Add in Ohio winters and it explains why mine are gone, boards and rockers...
. I'm gonna make some proper step bars which will mount to the frame and only use the rockers for triangulation. And they'll have lights like the running boards too :PI like my trucks simple.. always buy xl models manual everything... as to this truck as is typical with this vintage and miles.. one door doesnt open because electric lock is dead and one window is super slow as motor is dying.. door chimes etc.. all the junk that fails and is a pita to chase
#6
08-13-2016, 08:35 AM
Good idea on switch reallocation ..thanks
I like my trucks simple.. always buy xl models manual everything... as to this truck as is typical with this vintage and miles.. one door doesnt open because electric lock is dead and one window is super slow as motor is dying.. door chimes etc.. all the junk that fails and is a pita to chase
I like my trucks simple.. always buy xl models manual everything... as to this truck as is typical with this vintage and miles.. one door doesnt open because electric lock is dead and one window is super slow as motor is dying.. door chimes etc.. all the junk that fails and is a pita to chase
My power locks were questionable when I got the truck in January. Swapped in some known good relays (15 minute job with basic metric sockets), PB blastered the latches (to correct misbehaving door chime/dash light due to a sticking microswitch) and exercised the actuators a bit to un-sticky them. As for windows, all the current runs through the switches, so you get voltage drop and slow operation. Add relays to correct this, 2 per window. I've not done the relay mod yet as my windows are quick and have no issues. Might mod the main switch for one touch down on the passenger side tho.
These parts are good, they're just saddled with 'accountant logic' which trips them up so they can't perform at their best. Remove the bottlenecks and they work incredibly well. For example, we both have a fantastic 130 amp alternator, but it runs through a cheap, flimsy fuse block with hardware that rusts together. Look at it wrong and the whole block breaks in half. So I made my own with stainless studs and locknuts so it won't vibrate loose and a nice solid base that surrounds the hardware properly on all sides so it can't break free to spin. I spent under $10 making it.
It's not old vs new, it's "what materials, parts and reasoning are correct for what we're doing here"
#7
09-03-2016, 04:11 PM
Time to play,,
Factory service manuals and OEM glove box manuals showed up...
I worked up the price for doing the motor,, and since the truck is nice enough to put the money in I'm going for a new motor
about 2800 with hyper pistons and some goodies.. and fixing the oem head issues
with new accessories ..upsized radiator.. OEM coils.. front accessories.. new gel battery...sensors ..belt.. etc
about another 800.00
I repaired the front drivers seat with custom cut foam and one piece of ford grey material.. trading the sew job for a little welding to my old school auto upholsterer neighbor,,, he's recovering the lid on the center console while he's at it.. and that will square away the interior (for now anyway until I get a bug up my rear one day and put a racing interior in it)... after I used a bunch of goof off on grease stains on the carpet and shampooed them the thousands of little feet that made their way into this truck are gone.. and I found another couple of bucks of truck money.
Ok while Im at the build and touching everything.. changing all the fluids Im going to upgrade parts as I go through the truck..
And its always a good thing when this box shows up...
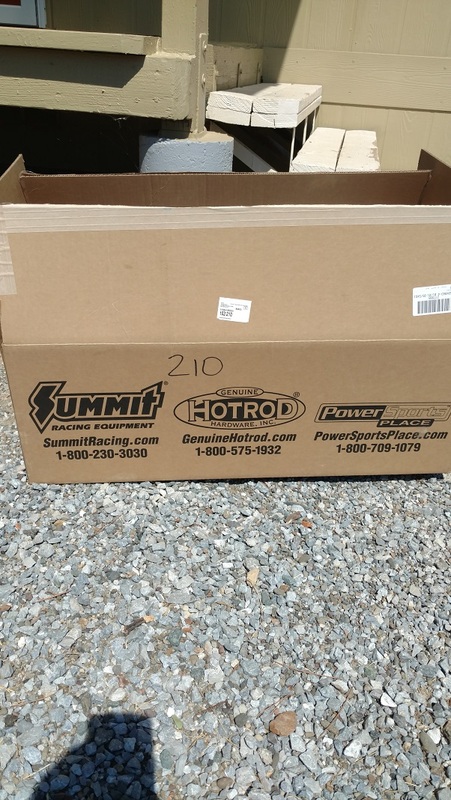
And stuff pours out.. like this
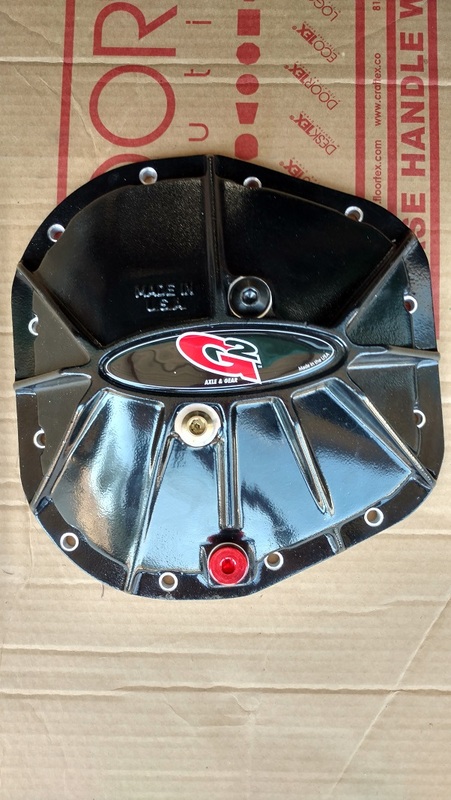
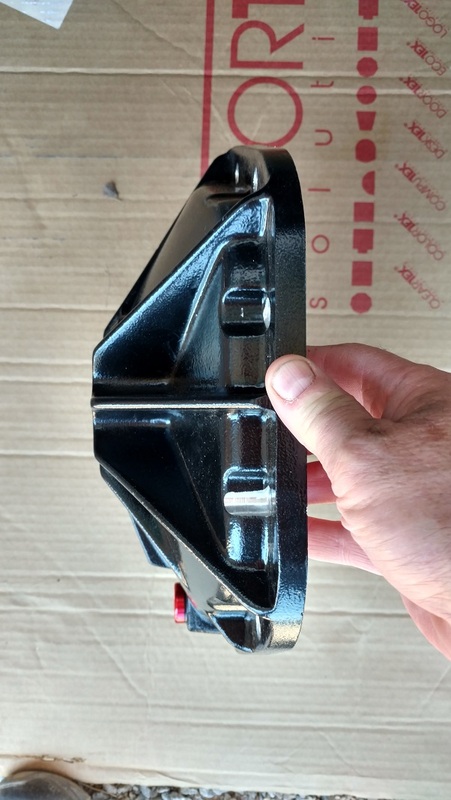
But good stuff sometimes doesn't fit without work.. in this case this deep diff cover would hit the factory rear track bar by about an inch. But the extra fluid is worth it.. and I have to change it anyway so why not?
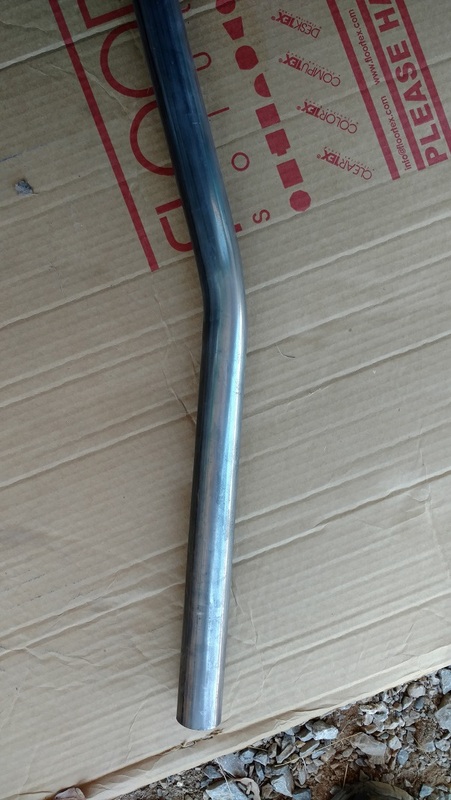
So that lead me to a potential solution and PLEASE CHIME IN IF ANYONE thinks Im going wrong... I went to the bender and just bent up a piece of 1 3/4 .120 wall dom
Just a little clearance bend in the center.. enough to miss the spare but enough to give plenty of clearance for the cover
The pics get a little hard to discern but this is what it might look like in place...
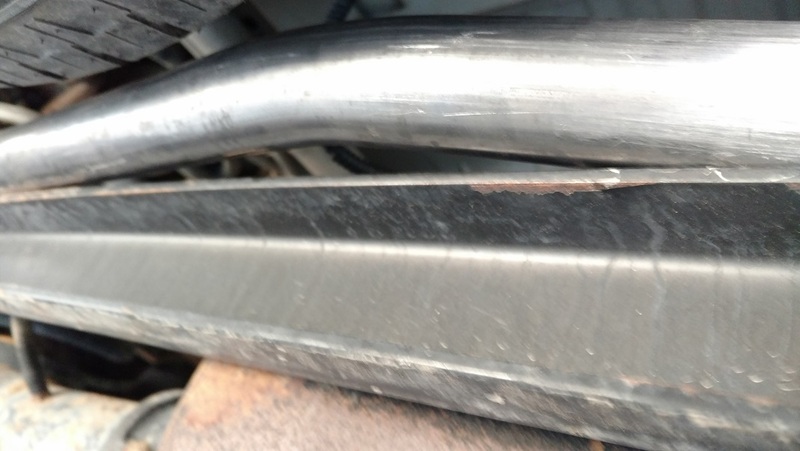
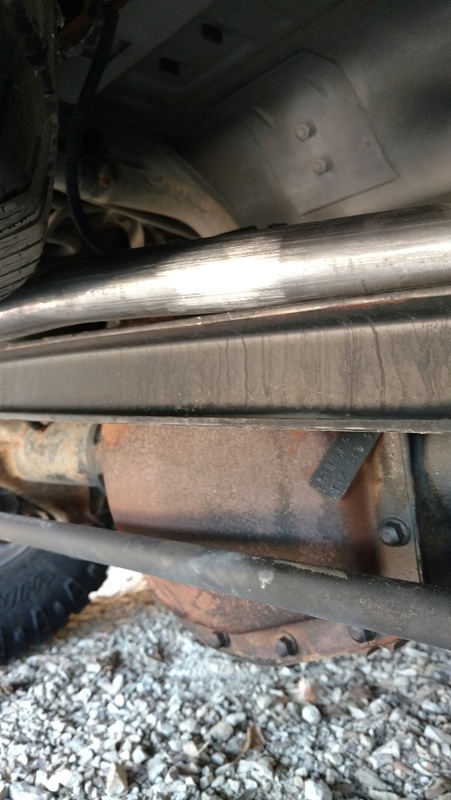
My plan is to cut out the center section and graft in the tubular clearance tube ( as opposed to remaking an entire tubular bar.. which I can do but is more work..
Anyone see any issues?
While the big summit box arrived this showed up too
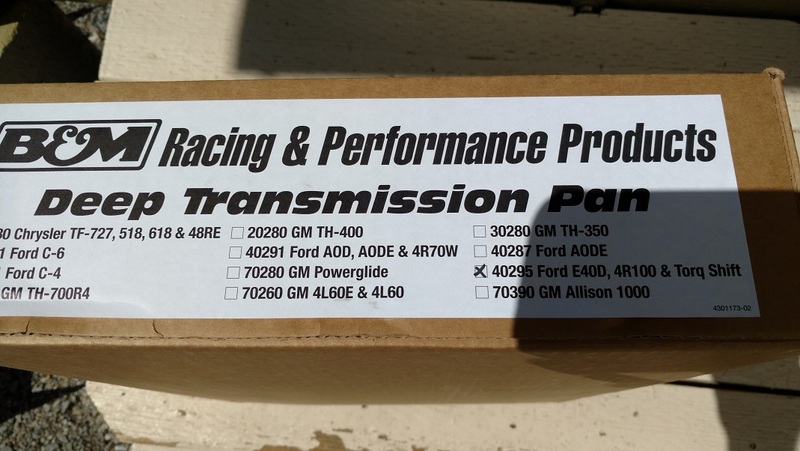
Hey.. I have to change the tranny fluid.. ( I was going to build the tranny but it shifts fine so Im going to leave it for now)
Three more quarts.. no appreciable loss of ground clearance that I can tell... and a good time to change the filter too

Mercon v spec was expensive.. Walmart had their rebranded stuff for 4.27 a quart.. Valvoline at Oriellys was 6.38... but I haggled and whined and they gave me Valvoline at the same price (in case quantities with my commercial account)
Cost to date
truck 200
registration one year with taxes 100
rear diff cover 130
Bm pan 230
Fluid 4.27 a quart until it full
Wix filter.. like 23
And a new E brake cable,, the dash one.. and darn was that expensive.. that little handle and cable was like 25 bucks.. the huge intermediate cable was half that.. that's how they get you.. the stuff that breaks they hammer the markup on... but no more pliers for the ebrake.. its Hollywood "stylin" now
About 725-750 including a gallon of goof off.. and two rounds of steam cleaning,,diesel and gas.. but I can eat off the bottom now.. and some surprises and then again no surprises
OEM shocks still working and not leaking,, they will be replaced
Someone put poly bushings in the swaybars.. they look new
Even the brake pads are fairly fresh and no wear on the rotors
Nothing is broken or messed with underneath
I keep waiting for the unseen bad.. but so far nothing I can see
FYI I have a number of builds going on simultaneously on FTE... several in the 73-79 thread and one in the large truck thread.. all full restomods.. from 20-95 percent done... so this project will move slower than some of yours..only because I jump around and hide money from mommas cookie jar all the time for them..
And she is SOOOO on to me by now...
Factory service manuals and OEM glove box manuals showed up...
I worked up the price for doing the motor,, and since the truck is nice enough to put the money in I'm going for a new motor
about 2800 with hyper pistons and some goodies.. and fixing the oem head issues
with new accessories ..upsized radiator.. OEM coils.. front accessories.. new gel battery...sensors ..belt.. etc
about another 800.00
I repaired the front drivers seat with custom cut foam and one piece of ford grey material.. trading the sew job for a little welding to my old school auto upholsterer neighbor,,, he's recovering the lid on the center console while he's at it.. and that will square away the interior (for now anyway until I get a bug up my rear one day and put a racing interior in it)... after I used a bunch of goof off on grease stains on the carpet and shampooed them the thousands of little feet that made their way into this truck are gone.. and I found another couple of bucks of truck money.
Ok while Im at the build and touching everything.. changing all the fluids Im going to upgrade parts as I go through the truck..
And its always a good thing when this box shows up...

And stuff pours out.. like this

But good stuff sometimes doesn't fit without work.. in this case this deep diff cover would hit the factory rear track bar by about an inch. But the extra fluid is worth it.. and I have to change it anyway so why not?

So that lead me to a potential solution and PLEASE CHIME IN IF ANYONE thinks Im going wrong... I went to the bender and just bent up a piece of 1 3/4 .120 wall dom
Just a little clearance bend in the center.. enough to miss the spare but enough to give plenty of clearance for the cover

The pics get a little hard to discern but this is what it might look like in place...


My plan is to cut out the center section and graft in the tubular clearance tube ( as opposed to remaking an entire tubular bar.. which I can do but is more work..
Anyone see any issues?
While the big summit box arrived this showed up too

Hey.. I have to change the tranny fluid.. ( I was going to build the tranny but it shifts fine so Im going to leave it for now)
Three more quarts.. no appreciable loss of ground clearance that I can tell... and a good time to change the filter too


Mercon v spec was expensive.. Walmart had their rebranded stuff for 4.27 a quart.. Valvoline at Oriellys was 6.38... but I haggled and whined and they gave me Valvoline at the same price (in case quantities with my commercial account)
Cost to date
truck 200
registration one year with taxes 100
rear diff cover 130
Bm pan 230
Fluid 4.27 a quart until it full
Wix filter.. like 23
And a new E brake cable,, the dash one.. and darn was that expensive.. that little handle and cable was like 25 bucks.. the huge intermediate cable was half that.. that's how they get you.. the stuff that breaks they hammer the markup on... but no more pliers for the ebrake.. its Hollywood "stylin" now
About 725-750 including a gallon of goof off.. and two rounds of steam cleaning,,diesel and gas.. but I can eat off the bottom now.. and some surprises and then again no surprises
OEM shocks still working and not leaking,, they will be replaced
Someone put poly bushings in the swaybars.. they look new
Even the brake pads are fairly fresh and no wear on the rotors
Nothing is broken or messed with underneath
I keep waiting for the unseen bad.. but so far nothing I can see
FYI I have a number of builds going on simultaneously on FTE... several in the 73-79 thread and one in the large truck thread.. all full restomods.. from 20-95 percent done... so this project will move slower than some of yours..only because I jump around and hide money from mommas cookie jar all the time for them..
And she is SOOOO on to me by now...
Trending Topics
#8
09-03-2016, 04:54 PM
I'm digging where this is going. Just out of curiosity, what color is your interior again? Mine is the two-tone grey, with light grey carpet. And like yours was, lots of stains of various origin. I was wondering how well Goof Off works on carpet, as mine desperately needs rehabbed.
Since you're doing quite a bit of off-roading work, what were your plans for accessory lights? I'm currently working on a killer modification specifically for off-roaders that will sew up lights, winches and anything else electrical you could desire in one tidy package.
Since you're doing quite a bit of off-roading work, what were your plans for accessory lights? I'm currently working on a killer modification specifically for off-roaders that will sew up lights, winches and anything else electrical you could desire in one tidy package.
#9
09-03-2016, 10:21 PM
I'm digging where this is going. Just out of curiosity, what color is your interior again? Mine is the two-tone grey, with light grey carpet. And like yours was, lots of stains of various origin. I was wondering how well Goof Off works on carpet, as mine desperately needs rehabbed.
Since you're doing quite a bit of off-roading work, what were your plans for accessory lights? I'm currently working on a killer modification specifically for off-roaders that will sew up lights, winches and anything else electrical you could desire in one tidy package.
Since you're doing quite a bit of off-roading work, what were your plans for accessory lights? I'm currently working on a killer modification specifically for off-roaders that will sew up lights, winches and anything else electrical you could desire in one tidy package.
Ok switches.. I have you dialed,, and I use this setup on all my trucks.. even boats
Whalen makes good quality stand along switch boxes at very resonable prices (if you shop) I use the 10 switch version as I never run out of switches for that little extra light
Power Control Centers and Switches - Whelen Engineering Automotive
For example..on my 74 f600 service truck that Ive restored it has
(all LED) switched to the Whalen box in the cab
Headache rack
(1) 60" light bar facing forward spot flood, (1) 54" rearward spot flood, (2) 9" 45 degree rearward (alley), rear ICC bumper and underbody (2) 9 inch 45 degree, (1) 30 inch center rearward (1) 4" flood facing forward and down onto 16k rear mount winch (that big mudda Harbor freight sells.. and its a monster (great for night hookups). (1) for right service boxes led light inside (1) for left service boxes led light inside (1) for a 4" flood pointed at the welder panel (1) for the air compressor controls, One for (2) bumper mount 7 " led spots...
For the winch I ran 00 welding cable from the switched dual agm batteries in the front though flexible conduit for protection to the rear.. two runs.. one for the winch and one for power beyond for jumper cable circuit.. it all runs up front to a blue seas hi voltage junction.. so hookups were super easy
You cant operate any power to the welder.. 12Hp air compressor.. winch or front or rear jumper cable circuits (with BWD hi voltage plugs.. similar to wreckers)unless they are energized by the battery switch in the cab
There's some pictures in this thread on that truck and pictures of the Whalen and lights... Im almost done now
https://www.ford-trucks.com/forums/1...my-choice.html
The expi is going to get a plethora of lights but very sedate and low profile.. alley lights will be single row cree led bars fitted on an exo rack close to the body line.. front facing will be dual.. I think Im going to retain the factory bumpers for now and cut holes for low mount lights front and rear.. again keeping it as low profile as possible
I thought I found a grill that had driving lights built into it.. but Im not sure they are for 99's.. I could fab a grill out of stainless blacked out but it comes down to time.. we will see when I get there
Go light makes really cool wireless spotlights.. they are awesome for campsite hunting... and they have a couple of configurations if integrated into bar design aren't too ugly. Its awesome to be a couple of hundred feet away at night and light up the truck and be able to rotate and focus a light.. scares the bejesus out of people when no one is in the truck and the light starts following them
GOLIGHT |
When I get around fabbing rock bars Ill use the original circuit for the running boards and equip them with leds so at night stepping in and out of the truck will be well lit. Im too old and wise to fall down some cliff because I parked too close to an edge and stepped out into a dark abyss.
So its easy to fill the panel right away.. the panels is all individually fused... I give it a 10/10. They come in a variety of configurations
The second thing I use in all my project tricks is anything Blue Seas (for the marine industry).. but I really like their stand alone fuse panel.. they too come in different configurations
https://www.bluesea.com/products/502..._Bus_and_Cover
You never cut into any factory harness and they are stand alone..
Another 10/10
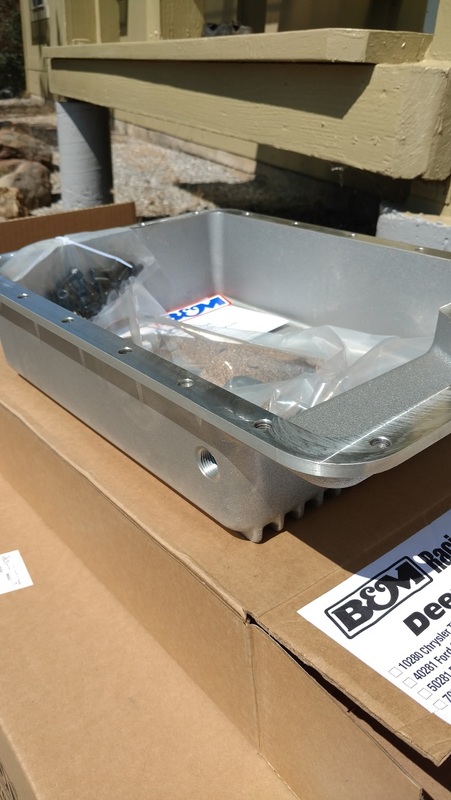
I pulled the factory trans pan and it was sano clean with no material.. yea..score..
I went to install the BM pan but oriellys gave me the wrong filter..so it awaits for tomorrow,, I would say this is a 1/10 on the difficulty scale and would have been done in under 45 minutes start to clean if I had the right filter.. Im going to add a big trans cooler but I need to research that some more
I also scoped out mounting hard points for tow hooks,,Im going to grab some factory ones for the front and I have an extra set of gm ones Im going to use for the rear.. after I reinforce the side plates from the curt hitch they will naturally mount there and be super strong
#10
09-05-2016, 08:01 AM
Mine is medium grey graphite.. with medium grey carpet..
Ok switches.. I have you dialed,, and I use this setup on all my trucks.. even boats
Whalen makes good quality stand along switch boxes at very resonable prices (if you shop) I use the 10 switch version as I never run out of switches for that little extra light
Power Control Centers and Switches - Whelen Engineering Automotive
For example..on my 74 f600 service truck that Ive restored it has
(all LED) switched to the Whalen box in the cab
Headache rack
(1) 60" light bar facing forward spot flood, (1) 54" rearward spot flood, (2) 9" 45 degree rearward (alley), rear ICC bumper and underbody (2) 9 inch 45 degree, (1) 30 inch center rearward (1) 4" flood facing forward and down onto 16k rear mount winch (that big mudda Harbor freight sells.. and its a monster (great for night hookups). (1) for right service boxes led light inside (1) for left service boxes led light inside (1) for a 4" flood pointed at the welder panel (1) for the air compressor controls, One for (2) bumper mount 7 " led spots...
For the winch I ran 00 welding cable from the switched dual agm batteries in the front though flexible conduit for protection to the rear.. two runs.. one for the winch and one for power beyond for jumper cable circuit.. it all runs up front to a blue seas hi voltage junction.. so hookups were super easy
You cant operate any power to the welder.. 12Hp air compressor.. winch or front or rear jumper cable circuits (with BWD hi voltage plugs.. similar to wreckers)unless they are energized by the battery switch in the cab
There's some pictures in this thread on that truck and pictures of the Whalen and lights... Im almost done now
https://www.ford-trucks.com/forums/1...my-choice.html
The expi is going to get a plethora of lights but very sedate and low profile.. alley lights will be single row cree led bars fitted on an exo rack close to the body line.. front facing will be dual.. I think Im going to retain the factory bumpers for now and cut holes for low mount lights front and rear.. again keeping it as low profile as possible
I thought I found a grill that had driving lights built into it.. but Im not sure they are for 99's.. I could fab a grill out of stainless blacked out but it comes down to time.. we will see when I get there
Go light makes really cool wireless spotlights.. they are awesome for campsite hunting... and they have a couple of configurations if integrated into bar design aren't too ugly. Its awesome to be a couple of hundred feet away at night and light up the truck and be able to rotate and focus a light.. scares the bejesus out of people when no one is in the truck and the light starts following them
GOLIGHT |
When I get around fabbing rock bars Ill use the original circuit for the running boards and equip them with leds so at night stepping in and out of the truck will be well lit. Im too old and wise to fall down some cliff because I parked too close to an edge and stepped out into a dark abyss.
So its easy to fill the panel right away.. the panels is all individually fused... I give it a 10/10. They come in a variety of configurations
The second thing I use in all my project tricks is anything Blue Seas (for the marine industry).. but I really like their stand alone fuse panel.. they too come in different configurations
https://www.bluesea.com/products/502..._Bus_and_Cover
You never cut into any factory harness and they are stand alone..
Another 10/10
I pulled the factory trans pan and it was sano clean with no material.. yea..score..
I went to install the BM pan but oriellys gave me the wrong filter..so it awaits for tomorrow,, I would say this is a 1/10 on the difficulty scale and would have been done in under 45 minutes start to clean if I had the right filter.. Im going to add a big trans cooler but I need to research that some more
I also scoped out mounting hard points for tow hooks,,Im going to grab some factory ones for the front and I have an extra set of gm ones Im going to use for the rear.. after I reinforce the side plates from the curt hitch they will naturally mount there and be super strong
And with some ingenuity, they'll later be relabeled for that added bit of OE-gradeness

I like the idea of movable lights that can be remotely operated. Try using a power mirror switch for it and you can operate two lights from one switch in a tidy, clean package
#11
09-05-2016, 08:04 AM
Take a look at the 12 volt switch guy..,
You might like his stuff...and totally customizable....
The B and m pan took longer than I thought... BM specs a certain motorcraft filter to clear... I had to shorten the pickup of the power torque filter oriellys had in stock...so that took another ten minutes...
Today I going to work on the rear end cover install...pics later
#12
09-05-2016, 09:55 PM
Take a look at the 12 volt switch guy..,
You might like his stuff...and totally customizable....
The B and m pan took longer than I thought... BM specs a certain motorcraft filter to clear... I had to shorten the pickup of the power torque filter oriellys had in stock...so that took another ten minutes...
Today I going to work on the rear end cover install...pics later
You might like his stuff...and totally customizable....
The B and m pan took longer than I thought... BM specs a certain motorcraft filter to clear... I had to shorten the pickup of the power torque filter oriellys had in stock...so that took another ten minutes...
Today I going to work on the rear end cover install...pics later
#13
09-12-2016, 09:02 PM
Ok.. today is tow hook day
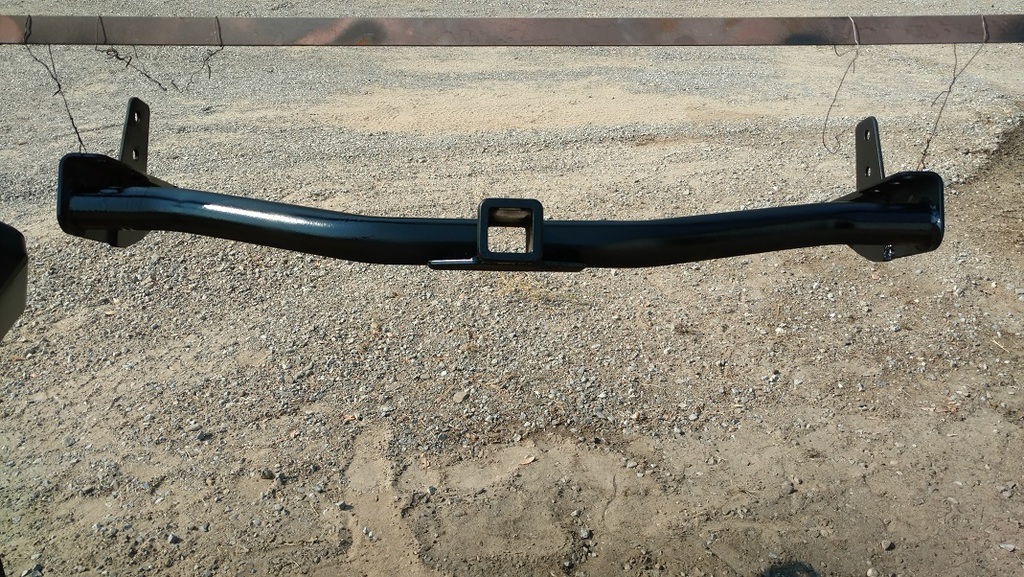
I removed the v5 curt hitch.. it needed to be blasted anyway from a life of rock chips to the powerdercoat...
Im going to use a set of Chevy tow hooks I had laying around for the rear.. and I scored a set of factory tow hooks for the front off stealbay for thirty bucks
After blasting the hitch I reinforced it with some 3/8" plate and welded it all together... I added a triangle to the hitch so that when you are using the hitch you are pulling in two planes.. you can hang the truck from it. Before if you pulled hard you could risk bending the side plates... now it is bulletproof strong.. it added a couple of pounds in steel)
Hopefully Ill install everything tomorrow and update the progress.
Truck has gone through a third cleaning of the interior...one last one with the steam cleaner this weekend.it will finally be factory new clean when Im done... and 17 years and probably several thousand kids sticky messes and old smudge prints will be a memory
Im selling the third seat for 150.00.... that will almost pay for the truck
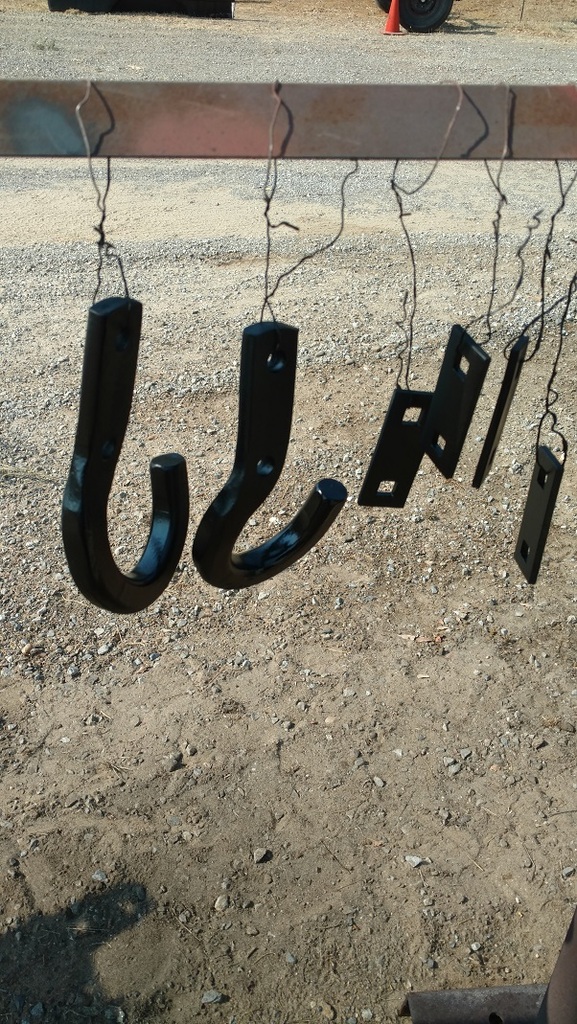

Front hooks.. still need to be cleaned and coated

The hitch... all painted and coated (backside is coated in rubberized undercoat which will solve the rock chip problem in the future ( Im also going to add some molded mudflaps to the body)
After this...
I found the odometer giving intermittent reads so it sounds like Ill get to do the circuit board solder mod...
Get on the rear diff cover install and bar mod
Then new bilsteins coming from 4 wheel parts... 250.00 good guy pirate deal..no tax free ship
About 1000.00 total invested so far... with all parts, taxes, and reg... still awaiting pulling the motor.. spending some time on the other trucks in the fleet
I removed the v5 curt hitch.. it needed to be blasted anyway from a life of rock chips to the powerdercoat...
Im going to use a set of Chevy tow hooks I had laying around for the rear.. and I scored a set of factory tow hooks for the front off stealbay for thirty bucks
After blasting the hitch I reinforced it with some 3/8" plate and welded it all together... I added a triangle to the hitch so that when you are using the hitch you are pulling in two planes.. you can hang the truck from it. Before if you pulled hard you could risk bending the side plates... now it is bulletproof strong.. it added a couple of pounds in steel)
Hopefully Ill install everything tomorrow and update the progress.
Truck has gone through a third cleaning of the interior...one last one with the steam cleaner this weekend.it will finally be factory new clean when Im done... and 17 years and probably several thousand kids sticky messes and old smudge prints will be a memory
Im selling the third seat for 150.00.... that will almost pay for the truck


Front hooks.. still need to be cleaned and coated

The hitch... all painted and coated (backside is coated in rubberized undercoat which will solve the rock chip problem in the future ( Im also going to add some molded mudflaps to the body)

After this...
I found the odometer giving intermittent reads so it sounds like Ill get to do the circuit board solder mod...
Get on the rear diff cover install and bar mod
Then new bilsteins coming from 4 wheel parts... 250.00 good guy pirate deal..no tax free ship
About 1000.00 total invested so far... with all parts, taxes, and reg... still awaiting pulling the motor.. spending some time on the other trucks in the fleet
#14
10-15-2016, 10:43 PM
Ok.. the hitch project morphed into an expedition grade bumper tire carrier project.. its almost done sans some light tabs,antenna mount, and Jerry can mount. Then a quick sandblast and some weld cleanup and painting
I used a 3000 pound bearing.. swings with one finger
As an afterthought I decided to make it ALSO bolt to the hitch.. so its attached to the truck in (12) places with 1/2" grd 8 bolts backed by structural washers... you can lift the truck by it. The rear window can be accessed when the tire is installed
The factory oem steel spare will be replaced with a factory oem aluminum wheel I got off stealbay and a new BF Goodrich AT
Total investment now up to 1400.00
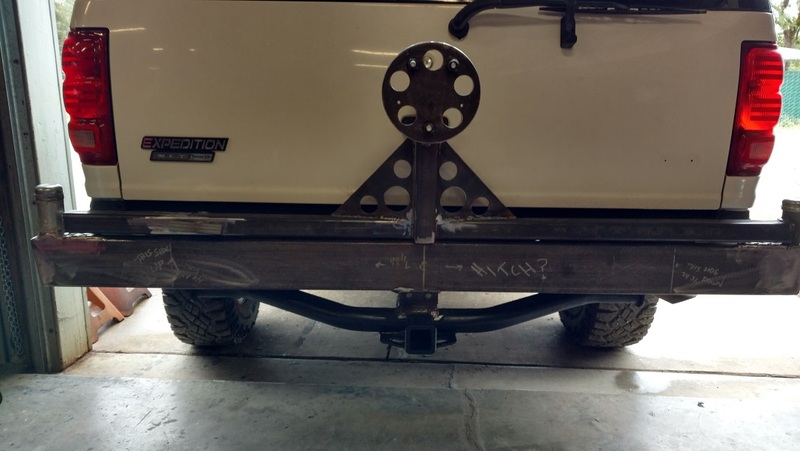
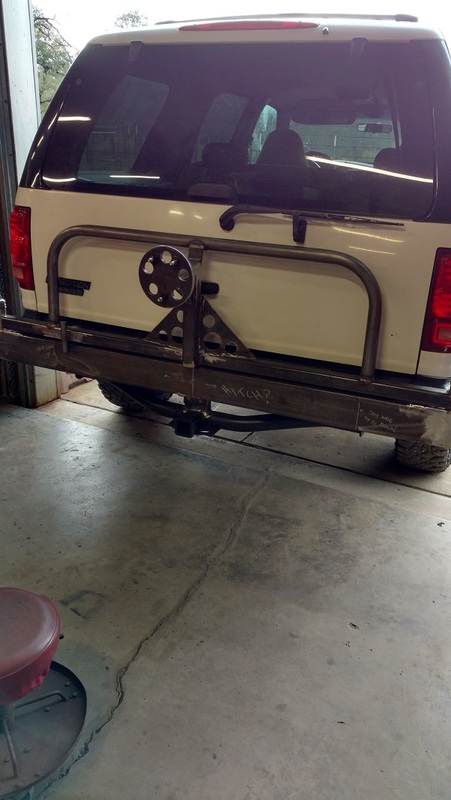
Pics dont show it but the bumper wraps around the side and follows the contour of the expi. I can back into a tree on the corner..or lift the entire truck with a high lift jack and the bumper wont move.. Weight.. Im guessing about 60-70 pounds... I lift it fairly easily.. 2 x 5" 1/8" square tube with 3/16 tire mount... and 1 3/4" 120 wall round... (because that's the biggest bender die I have right now). The contours and corners are constructed of 3/16 diamond plate. The actual tire mounting plate is 1/2". It looks like it sticks out from the sides but it doesnt,,it follows the contour very tightly
I ran into a switch issue that has me scratching my head.. drivers door lock switch
It works to lock all doors but wont work to unlock them.. I tried a new OEM switch to no avail... time to chase and trace I guess...