86 F250 4x2 5.8L Resurrection
#1
 06-13-2016, 08:53 PM


Join Date: Jun 2016
Posts: 26
Likes: 0
Received 0 Likes
on
0 Posts
86 F250 4x2 5.8L Resurrection
Hello!
I purchased the truck listed in the title about 2 months ago, slowly bringing the truck back from the brink after being left to rot since 07. The truck was originally built in my home state (MN) and lived in NM till 06 or so.
My friend purchased the truck from his friend just for the steel rims to use on his trailer. When i originally looked at the truck it seemed like it was gonna be an easy turn around to get it back on the road...... yeah no.
So after it made its way to my house the first thing on the list was washing off 9 years of tree droppings what a pain.
Before:
After:
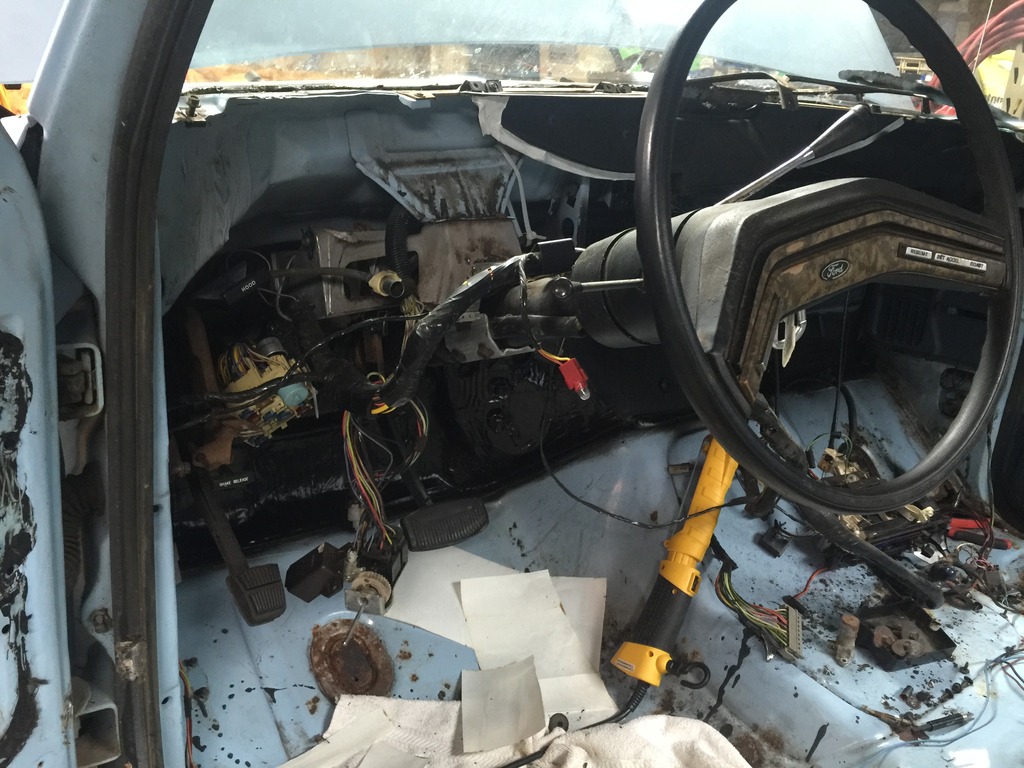
So after that was getting the truck into the garage, to clean out the overwhelming mouse house smell, and look the truck over better and inspect for total amount for rust to repair and what it needs to get it road worthy.
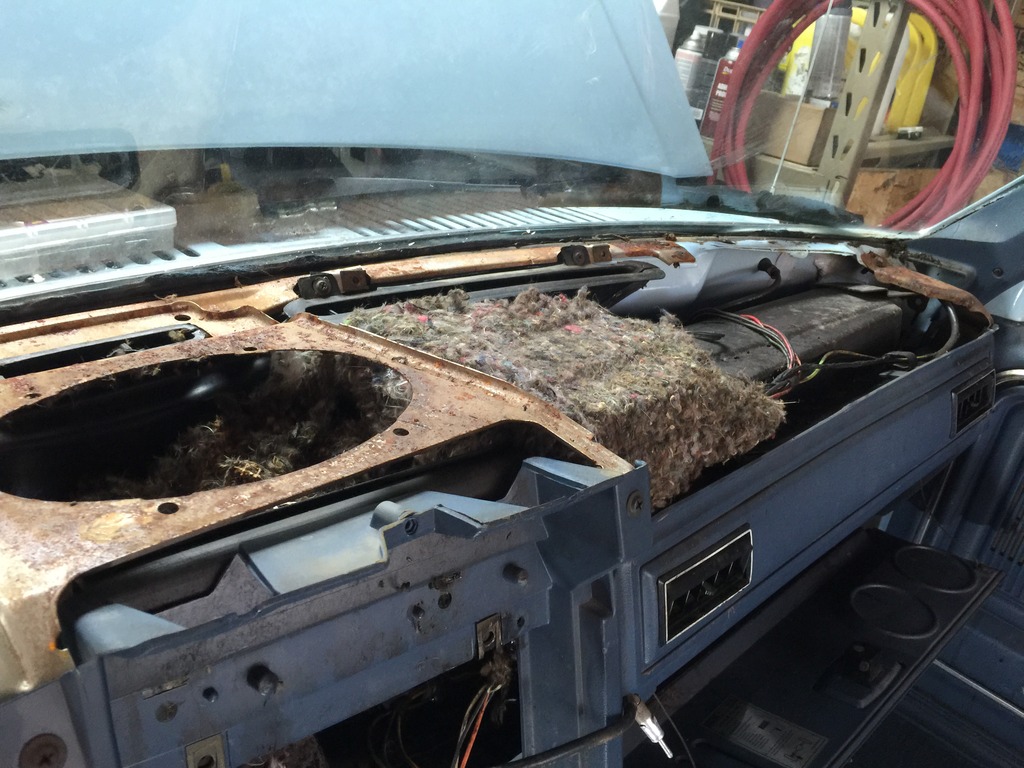
Thee entire factory heat ducts were filled to the brim with mouse droppings and insulation from every part of the cab, along with the dealer installed A/C system, that was also filled to the brim.

I purchased the truck listed in the title about 2 months ago, slowly bringing the truck back from the brink after being left to rot since 07. The truck was originally built in my home state (MN) and lived in NM till 06 or so.
My friend purchased the truck from his friend just for the steel rims to use on his trailer. When i originally looked at the truck it seemed like it was gonna be an easy turn around to get it back on the road...... yeah no.
So after it made its way to my house the first thing on the list was washing off 9 years of tree droppings what a pain.
Before:

After:

So after that was getting the truck into the garage, to clean out the overwhelming mouse house smell, and look the truck over better and inspect for total amount for rust to repair and what it needs to get it road worthy.
Thee entire factory heat ducts were filled to the brim with mouse droppings and insulation from every part of the cab, along with the dealer installed A/C system, that was also filled to the brim.


#2
06-13-2016, 09:17 PM
Join Date: Jun 2016
Posts: 26
Likes: 0
Received 0 Likes
on
0 Posts
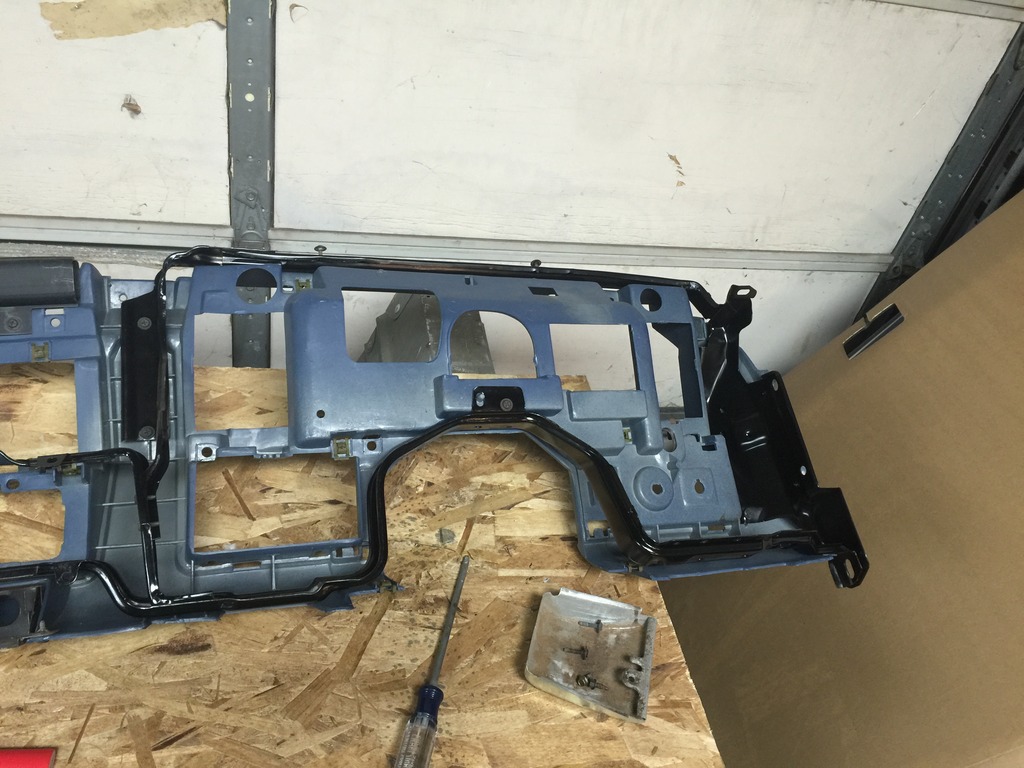
So far, after removing thee entire interior to rid the truck of the smell, and assess the rot, I decided to clean the dash frame that was rotting from the mice P, wire brushed and painted thee entire frame, then reassembled.

Next was Hvac Duct work disassembly to soak and clean every bit of it. The Dealer installed A/C was completely destroyed so i decided to remove it from the truck entirely.
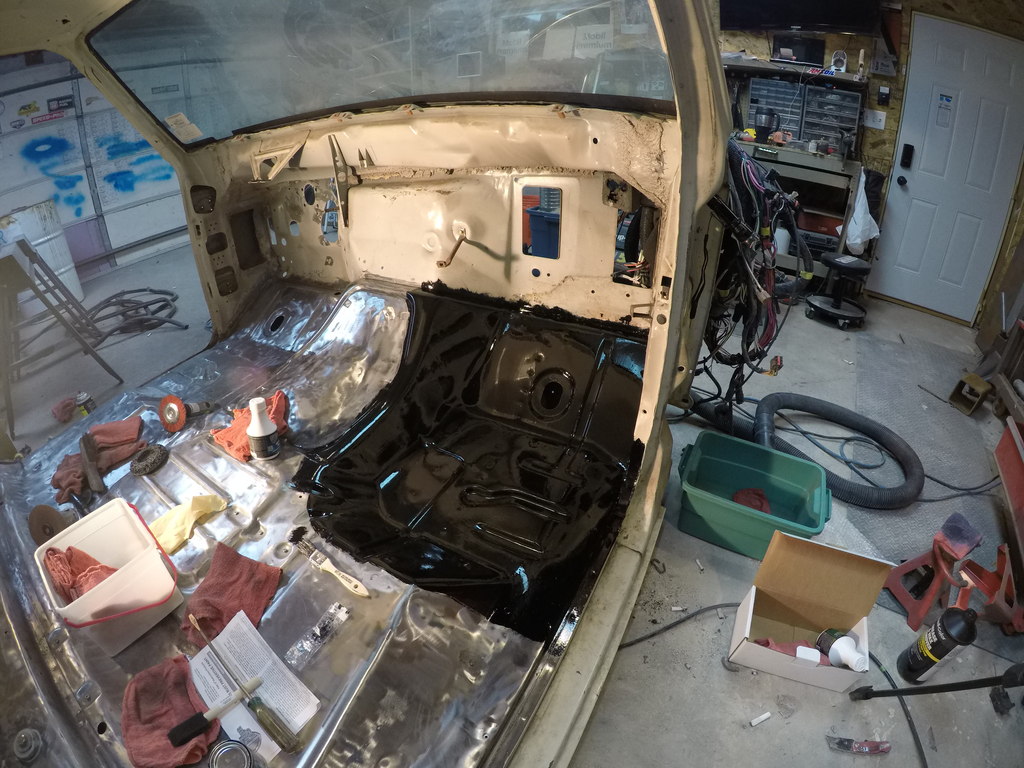
While that was soaking I decided to remove the soaked and half chewed firewall insulation so i could Poor man's Dynamat the entire firewall.
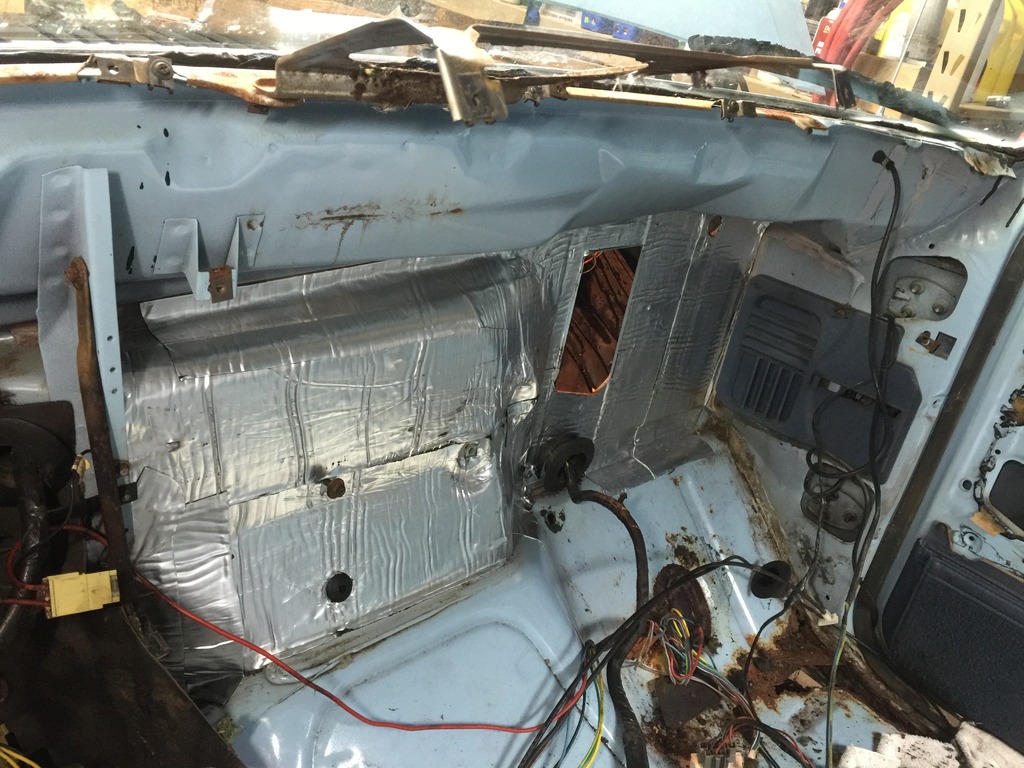
Once the Ducting was cleaned i reassembled and sealed every seam of the ductwork, then reinstalled the Ducting along with a brand new Heater Core.
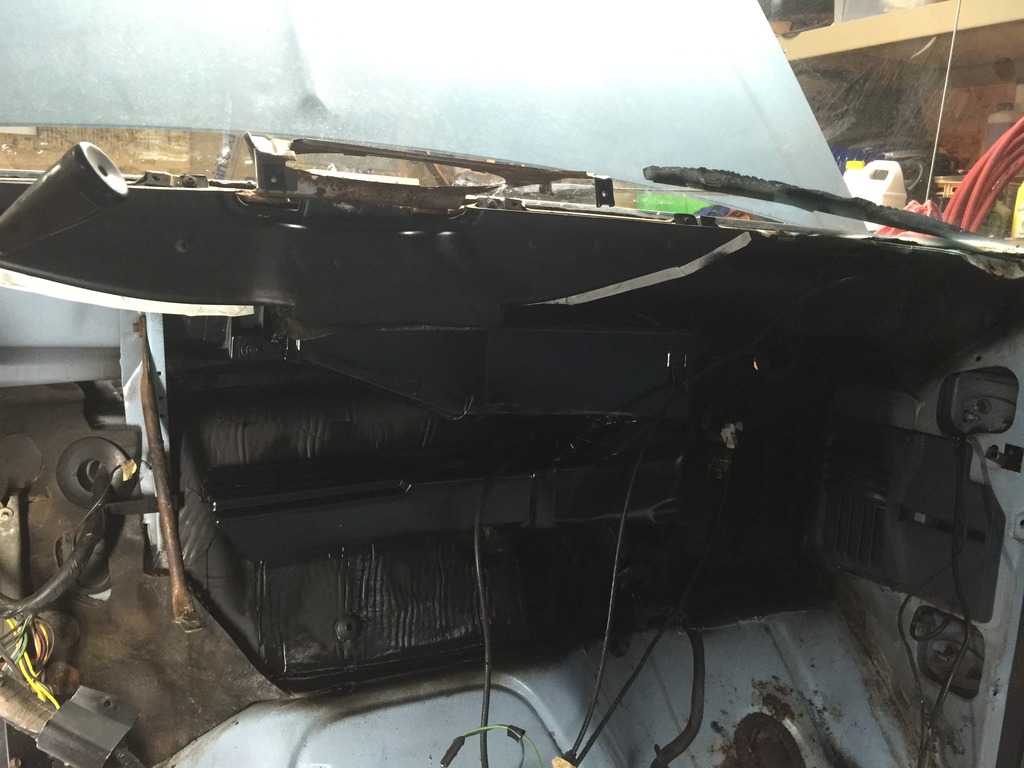
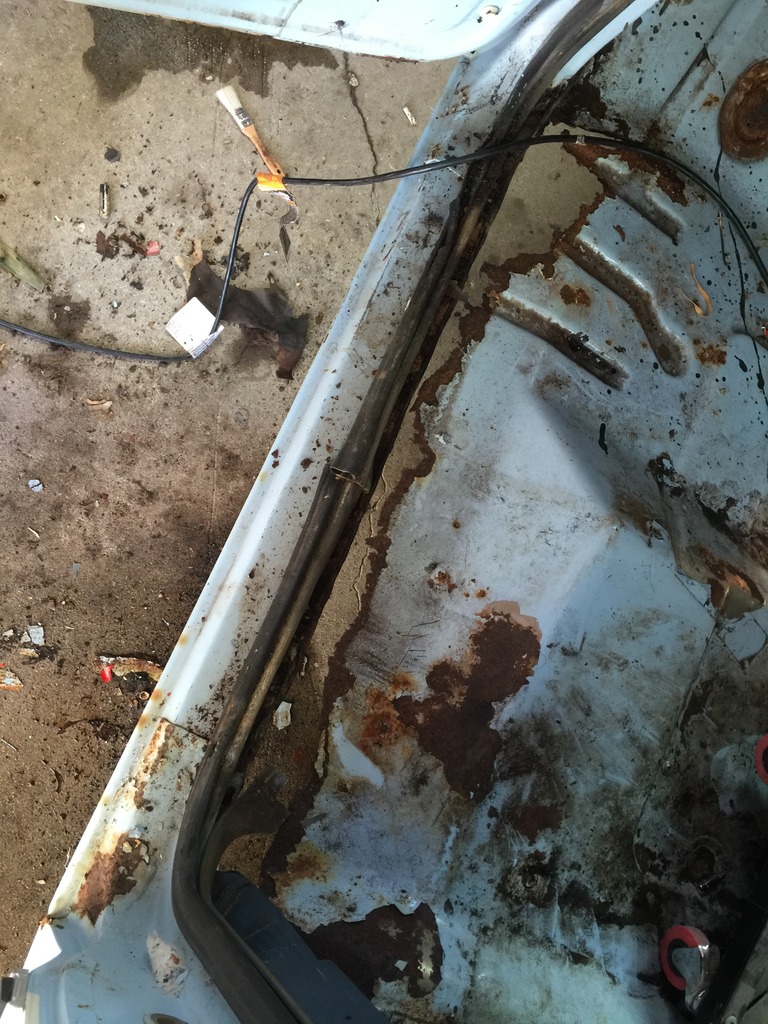
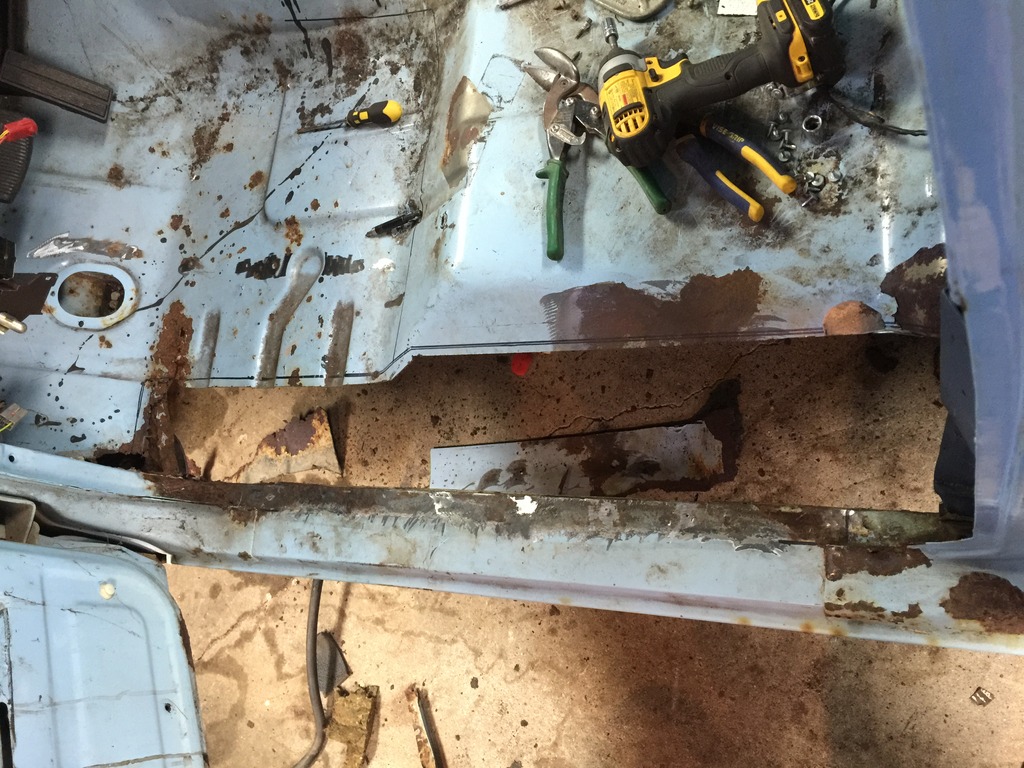
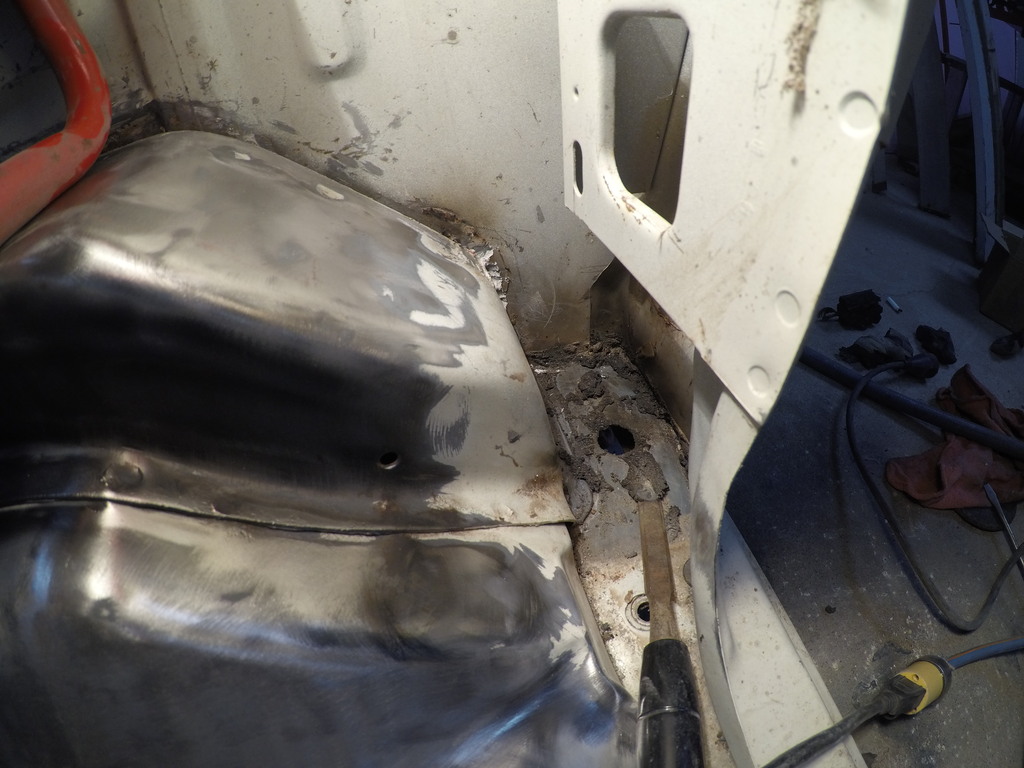
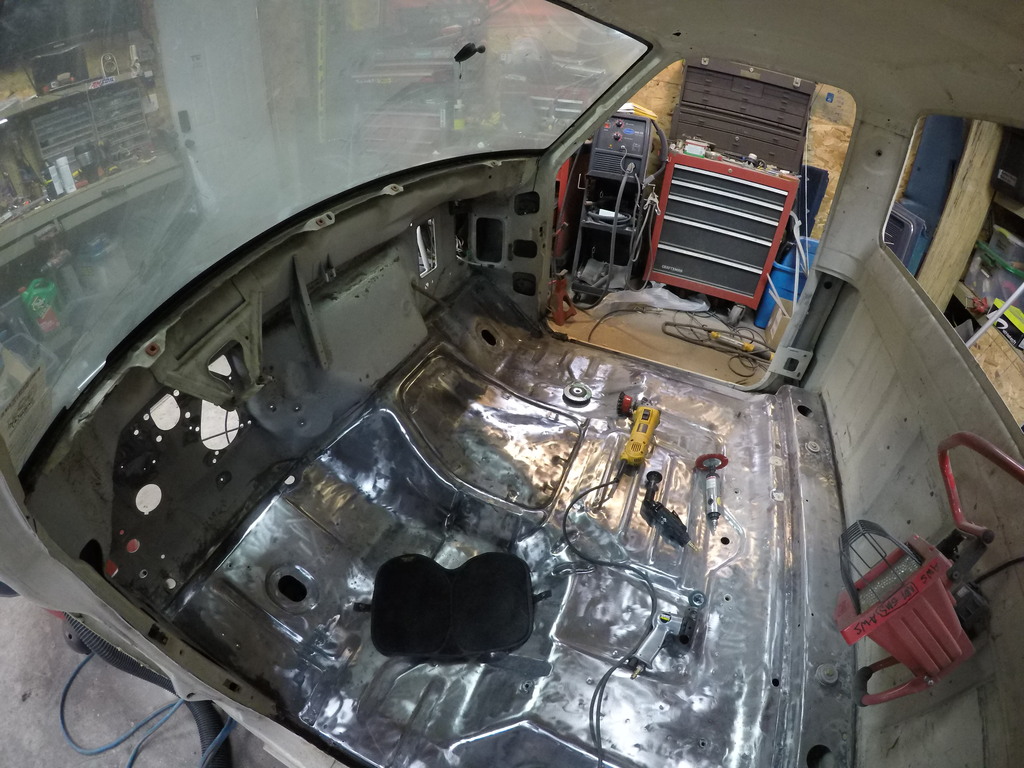
Next was trying to tackle the floor cancer, I ordered new pans from LMC then began cutting out the rust, only to realize the truck would be better off with a rust free cab as a replacement, but these patches will suffice till i can buy a rust free 91 Cab my friend has sitting in his barn.
To date (6/13/16) this is as far as the cab has gotten after i found out my Welder decided to crap out on me, updates to come.


Next was Hvac Duct work disassembly to soak and clean every bit of it. The Dealer installed A/C was completely destroyed so i decided to remove it from the truck entirely.
While that was soaking I decided to remove the soaked and half chewed firewall insulation so i could Poor man's Dynamat the entire firewall.

Once the Ducting was cleaned i reassembled and sealed every seam of the ductwork, then reinstalled the Ducting along with a brand new Heater Core.


Next was trying to tackle the floor cancer, I ordered new pans from LMC then began cutting out the rust, only to realize the truck would be better off with a rust free cab as a replacement, but these patches will suffice till i can buy a rust free 91 Cab my friend has sitting in his barn.

To date (6/13/16) this is as far as the cab has gotten after i found out my Welder decided to crap out on me, updates to come.
#3
06-13-2016, 10:07 PM
Join Date: Jun 2016
Posts: 26
Likes: 0
Received 0 Likes
on
0 Posts
Next came Engine work.
The truck with fresh gas from a jerry can stuffed into the engine bay, return line pinched off and line shoved into the can she purrs like a kitten, pops right off.......except she is pouring gas from the accelerator pump diaphragm nearly as fast as the pump can get the fuel in.
After removing *cough* unnecessary items IMO and cleaning up the bay a bit, i installed
New ground cable from the battery to frame to engine.
New cable from battery + to solenoid (Had laying around from previous blue ovals)
New MSD Blaster 2 Coil
New MSD Cap & Rotor (TFI style Cap with Duraspark style rotor and vacuum advance explain that one to me plz haha)
New 9mm Ford Racing Black Spark Plug Wires
New NGK V-Power plugs
Rebuilt The Carb
New Blower Motor Fan
New Heater Core Hoses
Used Returnless Fuel Pump
Pre Pump Filter (Removed in Carb Filter)
New PCV
New PCV Grommet
New Edelbrock Black Air Cleaner (along with an elbow to pipe in Crankcase vent)
New Billet 1/2'' Air Cleaner Spacer (so elbow can clear throttle linkage movement)
Ran all new vacuum lines
The Battery tray was completely rotted away from a leaking battery and road salt im sure. So I am building a custom battery tray that will go into the exact same position as the factory except i havent decided how i want to secure the battery down.
I am going a bit over board with my design because i am using some 1/4'' plate steel i had laying around.
I can post up measurements of my design along with better photos of it, if anyone is interested once i assure the design works (i am making it out of 3 separate pieces i will weld together since getting bends into the 1/4'' plates would delay the build process for me.)
#4
06-13-2016, 10:38 PM
Join Date: Jun 2016
Posts: 26
Likes: 0
Received 0 Likes
on
0 Posts
So after sitting 9 years and getting second hand info that only the rear fuel tank worked and the front leaked. I decided to forgo the hassle of cleaning a tank that might be bad and just go ahead and replace both tanks, and after removal i found the sending/pickup units were completely destroyed.
One had the sending arm laying in the tank clinging by the wire, as well as both floats completely eaten away, as well as corrosion inside and outside of the tubes.
(upon testing old sender units, readings were erratic or non existent at certain points at best)
Having gotten a used returnless pump i decided to eliminate the return lines completely (even ordered single outlet pickups) of course once i even touched the tank to pump lines they shattered as i touched them.
So after a quick removal of the plastic line from the quick couplers I decided to run rubber fuel line in the frame rail from the switching valve forward (hopefully that works, my luck it will work for a week then fail)
Everything is now reinstalled, and after taking a hit of gas while siphoning the line fuel of fuel it started right up. SHE LIVES AGAIN! After a few small adjustments to the idle circuits it will be even better.
Now the Priority is to finish the floor once i get my welder back, reinstall the interior along with some good door speakers and trying to custom install a double din. In the mean time i am trying to track down a set of 20'' rims that will fit.
#5
08-24-2016, 11:12 AM
Postmaster
#7
08-25-2016, 11:17 PM
Join Date: Jun 2016
Posts: 26
Likes: 0
Received 0 Likes
on
0 Posts
OK update time.
I got the welder back.
I did a "ah thats good enough" repair job on the trucks floor after finding the rear main cab support badly rotted away.
So much for a cheap fix and drive job.....plans just got way more expensive.
I threw the main section of the dash back in as well as the gauges for a shakedown run. Re installed the bench seat as well.
Next issue was getting a better tune on the carb so it would start and run a bit better, after a few turns of the idle jets she is good to go, fires up right away.
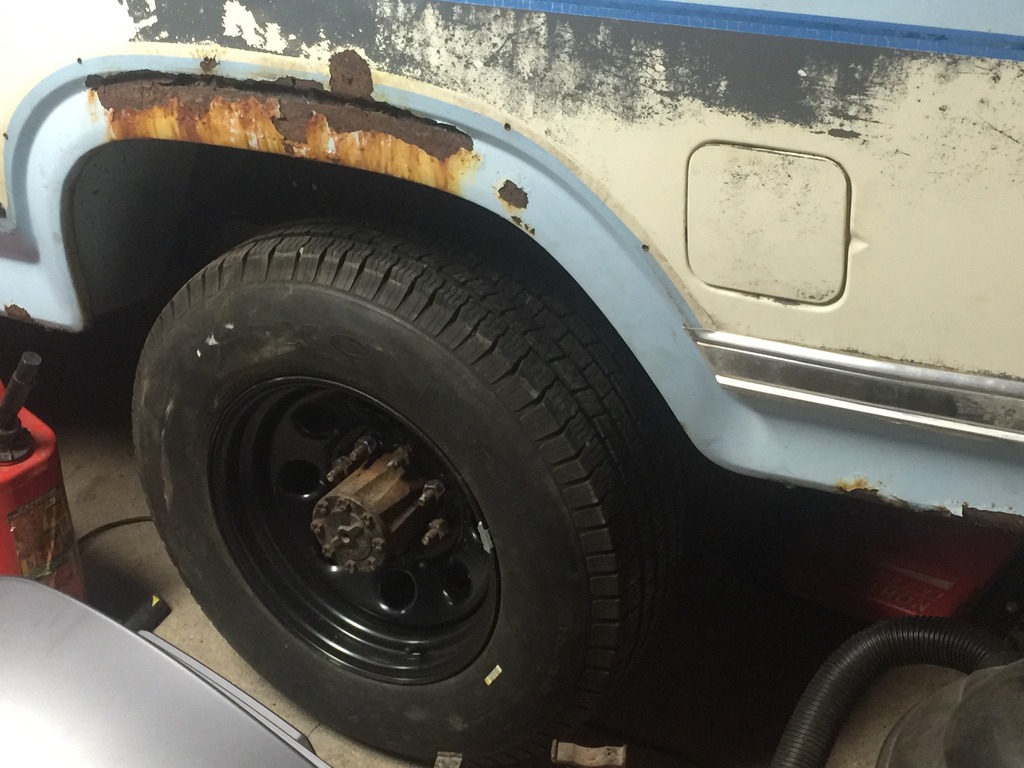
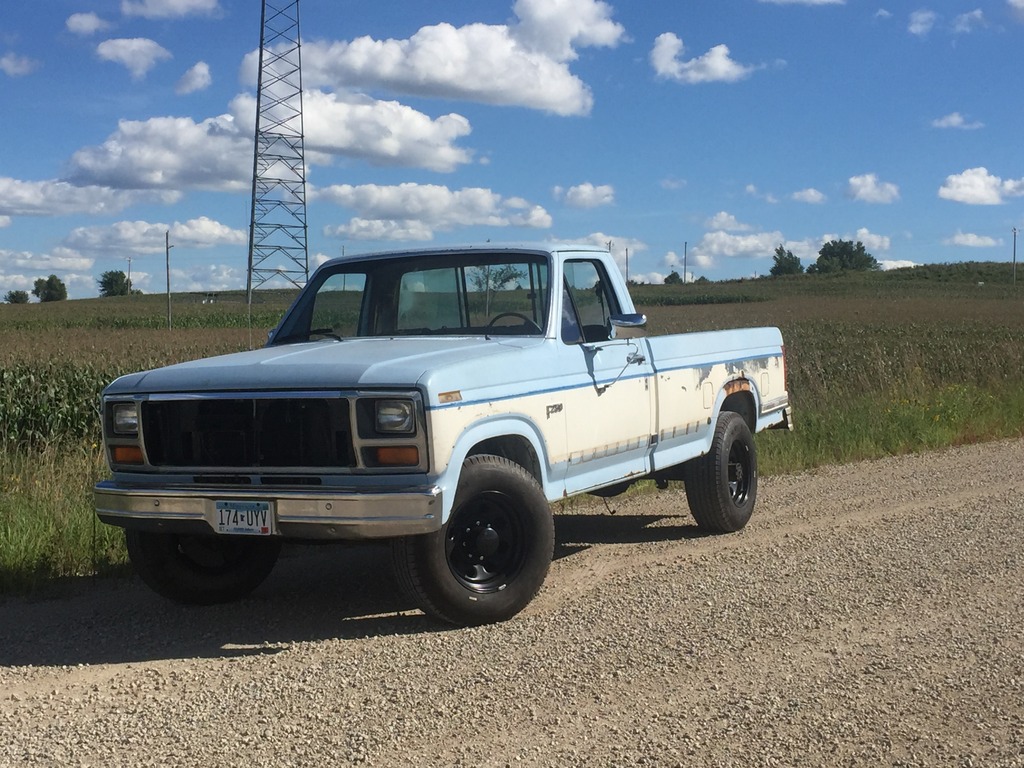
I acquired a set of 17'' Michelins, so the hunt for a cheap set of 17'' rims to throw on the truck got under way. I ended up buying a set of Black Rock 997 Type 8 17x9 rims. Best part was i didnt have to pay to have them shipped, i was able to pick them up in Minneapolis at a tirerack.com warehouse.
Here is a stock photo of the rim, a shot of the rear rim mounted up as well as a photo of the truck during the shakedown run.

The shakedown went as planned..... filled with many a issue you would expect with a truck that sat for 8 years. I didnt even get the truck out of the garage and the rear brake line sprung a leak. Cut the line and smashed it together a bit ahead of the leak. Issue solved.
Next, even through i sprayed the slides and gave the calipers a few good raps with a hammer, the brakes decided they didnt wanna let we win, so on the run they randomly locked up from left to right, not enough to slide the tire but enough to yank you into the ditch if your sleepin at the wheel.
The freshly installed rear fuel tank filler line decided it didnt wanna seal while filling the tank. Luckily the front worked perfectly.
Next the left turn signal wanted to work but i knew it wouldnt flash with led bulbs installed, but the right no such luck. I also have a ground out issue i need to track down because the taillights light up when the truck is started.
All in all very minor issues but none the less its all gonna add up $$$$
Next things planned:
Full front brake repair (rotors, calipers, pads & lines)
Full rear brake repair (drums, shoes, cylinders and lines from front to rear)
Dream beams
Rear axle flip kit
bring the rust free cab i bought home and prep for winter install
I got the welder back.
I did a "ah thats good enough" repair job on the trucks floor after finding the rear main cab support badly rotted away.
So much for a cheap fix and drive job.....plans just got way more expensive.
I threw the main section of the dash back in as well as the gauges for a shakedown run. Re installed the bench seat as well.
Next issue was getting a better tune on the carb so it would start and run a bit better, after a few turns of the idle jets she is good to go, fires up right away.
I acquired a set of 17'' Michelins, so the hunt for a cheap set of 17'' rims to throw on the truck got under way. I ended up buying a set of Black Rock 997 Type 8 17x9 rims. Best part was i didnt have to pay to have them shipped, i was able to pick them up in Minneapolis at a tirerack.com warehouse.
Here is a stock photo of the rim, a shot of the rear rim mounted up as well as a photo of the truck during the shakedown run.


The shakedown went as planned..... filled with many a issue you would expect with a truck that sat for 8 years. I didnt even get the truck out of the garage and the rear brake line sprung a leak. Cut the line and smashed it together a bit ahead of the leak. Issue solved.
Next, even through i sprayed the slides and gave the calipers a few good raps with a hammer, the brakes decided they didnt wanna let we win, so on the run they randomly locked up from left to right, not enough to slide the tire but enough to yank you into the ditch if your sleepin at the wheel.
The freshly installed rear fuel tank filler line decided it didnt wanna seal while filling the tank. Luckily the front worked perfectly.
Next the left turn signal wanted to work but i knew it wouldnt flash with led bulbs installed, but the right no such luck. I also have a ground out issue i need to track down because the taillights light up when the truck is started.
All in all very minor issues but none the less its all gonna add up $$$$
Next things planned:
Full front brake repair (rotors, calipers, pads & lines)
Full rear brake repair (drums, shoes, cylinders and lines from front to rear)
Dream beams
Rear axle flip kit
bring the rust free cab i bought home and prep for winter install
Trending Topics

#9
05-02-2017, 11:55 PM
Join Date: Jun 2016
Posts: 26
Likes: 0
Received 0 Likes
on
0 Posts
MAY 2017 Update.
Geez, haven't updated this since Nov-2016. Life gets hectic for me when the snow flies, so my spare time is filled with sleeping and relaxing haha.
Here is the update. (i will put all the photos at the bottom)
Picked up the 91 F250 Cab, and I built a dolly for it to be moved around in the garage. The dolly works great, I wish I would have built it a bit taller, but that would have taken more pipe than I have to reinforce it.
The cab regarding no rust is excellent since it came from Texas originally. Except the cab was from a Texas HVAC Company, so after washing the cab inside and out the roof looked like a golf ball as well as a fair amount of other dents on the cab. (knew about some of them before buying)
I have gotten most of the dents out with a puller.
I got the dash pulled out of the 91' cab, stripped the rest out so the only thing left is the sheetmetal. Painstakingly stripped all the seam sealer out from the floor perimeter, and found a few gaps around the trans tunnel/firewall area, that are so large they shouldn't have been sealed with seam sealer. (no photos yet sorry)
Next, i took the entire floor of the truck down to bare metal so I could fix fire extinguisher bracket holes, CB bracket mount holes, as well as some weird gouge and crack over where the tail of the trans would be (maybe a u-joint failure, but it was dented and cracked down)
I have started coating the floor in POR15, I am currently only a third of the way since it needs to be applied in 50 plus degrees, and its been cold and rainy here in seattl........no, no Minnesota I mean. So when I get home, I have to start a fire, let the garage warm up and get the sheetmetal warm enough to work on, so i only get like an hour to get stuff done.
I, ordered an axle flip kit from (insert horror movie scream) Airbagit.com, now I know all about them, read reviews, complaints, and even employee gripes, but I thought how hard is it to screw up axle flip brackets.................... they sent me the 82 - 96 kit, well this covers a lot of years of truck with a variety of axles.
Needless to say, I had to call them because the axle saddles are about a half inch to big, they quickly commented "how do you know its wrong"
I will keep you updated on how they respond to my issue.
I got bored last Friday and decided I needed to paint the grille of the truck which I haven't even had on the truck since I got it running. Let me tell you if you haven't sanded and prepped a grille like this before, make sure you have patience and the willingness to figuratively bash your skull into a wall for an hour.
Oh and I bought a 2011 F250 Ex Cab Long Box 6.2L
On to the photos, sorry I tried to break it up so it wasn't a wall of text, sorry for poor punctuation and no understanding of sentence and paragraph structure.
Here is the update. (i will put all the photos at the bottom)
Picked up the 91
F250 Cab, and I built a dolly for it to be moved around in the garage. The dolly works great, I wish I would have built it a bit taller, but that would have taken more pipe than I have to reinforce it.The cab regarding no rust is excellent since it came from Texas originally. Except the cab was from a Texas HVAC Company, so after washing the cab inside and out the roof looked like a golf ball as well as a fair amount of other dents on the cab. (knew about some of them before buying)
I have gotten most of the dents out with a puller.
I got the dash pulled out of the 91' cab, stripped the rest out so the only thing left is the sheetmetal. Painstakingly stripped all the seam sealer out from the floor perimeter, and found a few gaps around the trans tunnel/firewall area, that are so large they shouldn't have been sealed with seam sealer. (no photos yet sorry)
Next, i took the entire floor of the truck down to bare metal so I could fix fire extinguisher bracket holes, CB bracket mount holes, as well as some weird gouge and crack over where the tail of the trans would be (maybe a u-joint failure, but it was dented and cracked down)
I have started coating the floor in POR15, I am currently only a third of the way since it needs to be applied in 50 plus degrees, and its been cold and rainy here in seattl........no, no Minnesota I mean. So when I get home, I have to start a fire, let the garage warm up and get the sheetmetal warm enough to work on, so i only get like an hour to get stuff done.
I, ordered an axle flip kit from (insert horror movie scream) Airbagit.com, now I know all about them, read reviews, complaints, and even employee gripes, but I thought how hard is it to screw up axle flip brackets.................... they sent me the 82 - 96 kit, well this covers a lot of years of truck with a variety of axles.
Needless to say, I had to call them because the axle saddles are about a half inch to big, they quickly commented "how do you know its wrong"
I will keep you updated on how they respond to my issue.
I got bored last Friday and decided I needed to paint the grille of the truck which I haven't even had on the truck since I got it running. Let me tell you if you haven't sanded and prepped a grille like this before, make sure you have patience and the willingness to figuratively bash your skull into a wall for an hour.
Oh and I bought a 2011 F250 Ex Cab Long Box 6.2L
On to the photos, sorry I tried to break it up so it wasn't a wall of text, sorry for poor punctuation and no understanding of sentence and paragraph structure.


Thread
Thread Starter
Forum
Replies
Last Post
dusterbd13
1973 - 1979 F-100 & Larger F-Series Trucks
32
08-11-2017 08:25 PM
Notmeofficer
1973 - 1979 F-100 & Larger F-Series Trucks
41
06-06-2016 10:53 PM
KIKKUP
1973 - 1979 F-100 & Larger F-Series Trucks
4
03-27-2013 09:18 AM