
ShaneNP's 4x4 conversion thread
#1
 11-29-2015, 12:04 AM

ShaneNP's 4x4 conversion thread
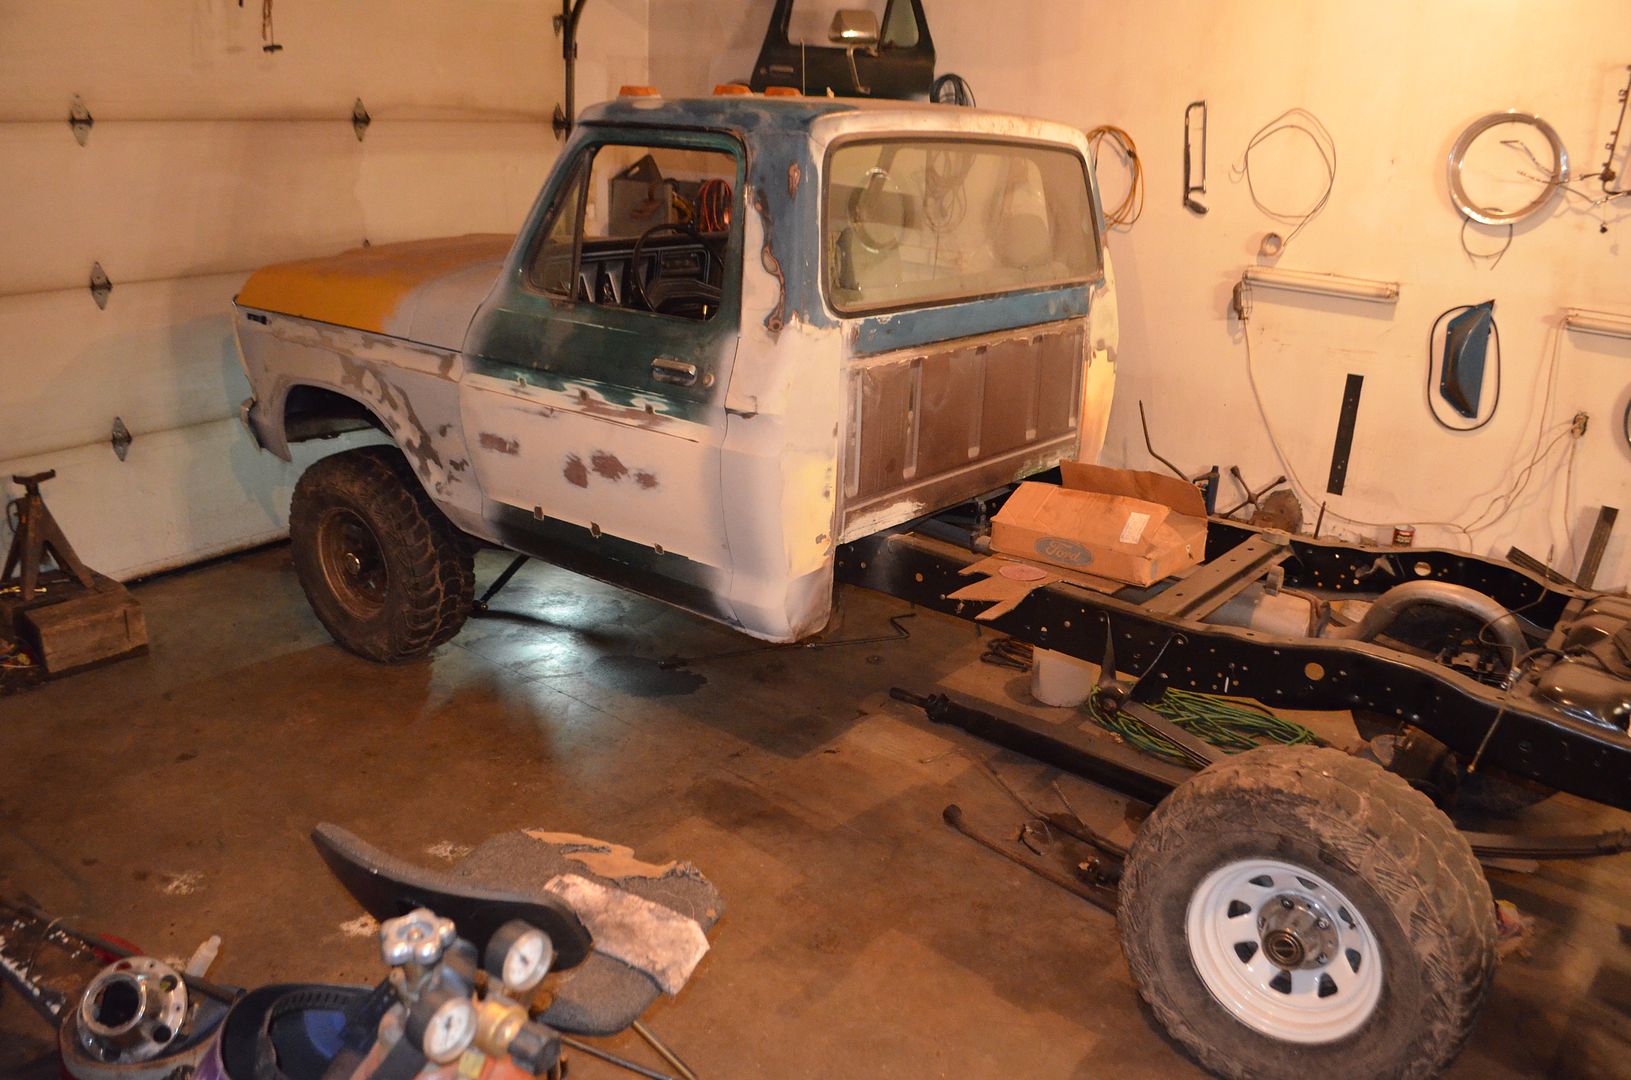
I decided I would make a separate thread for my 4x4 conversion. I'm starting with a 1979 F100 2wd with 300/T-18 and a dana 44 rear end.
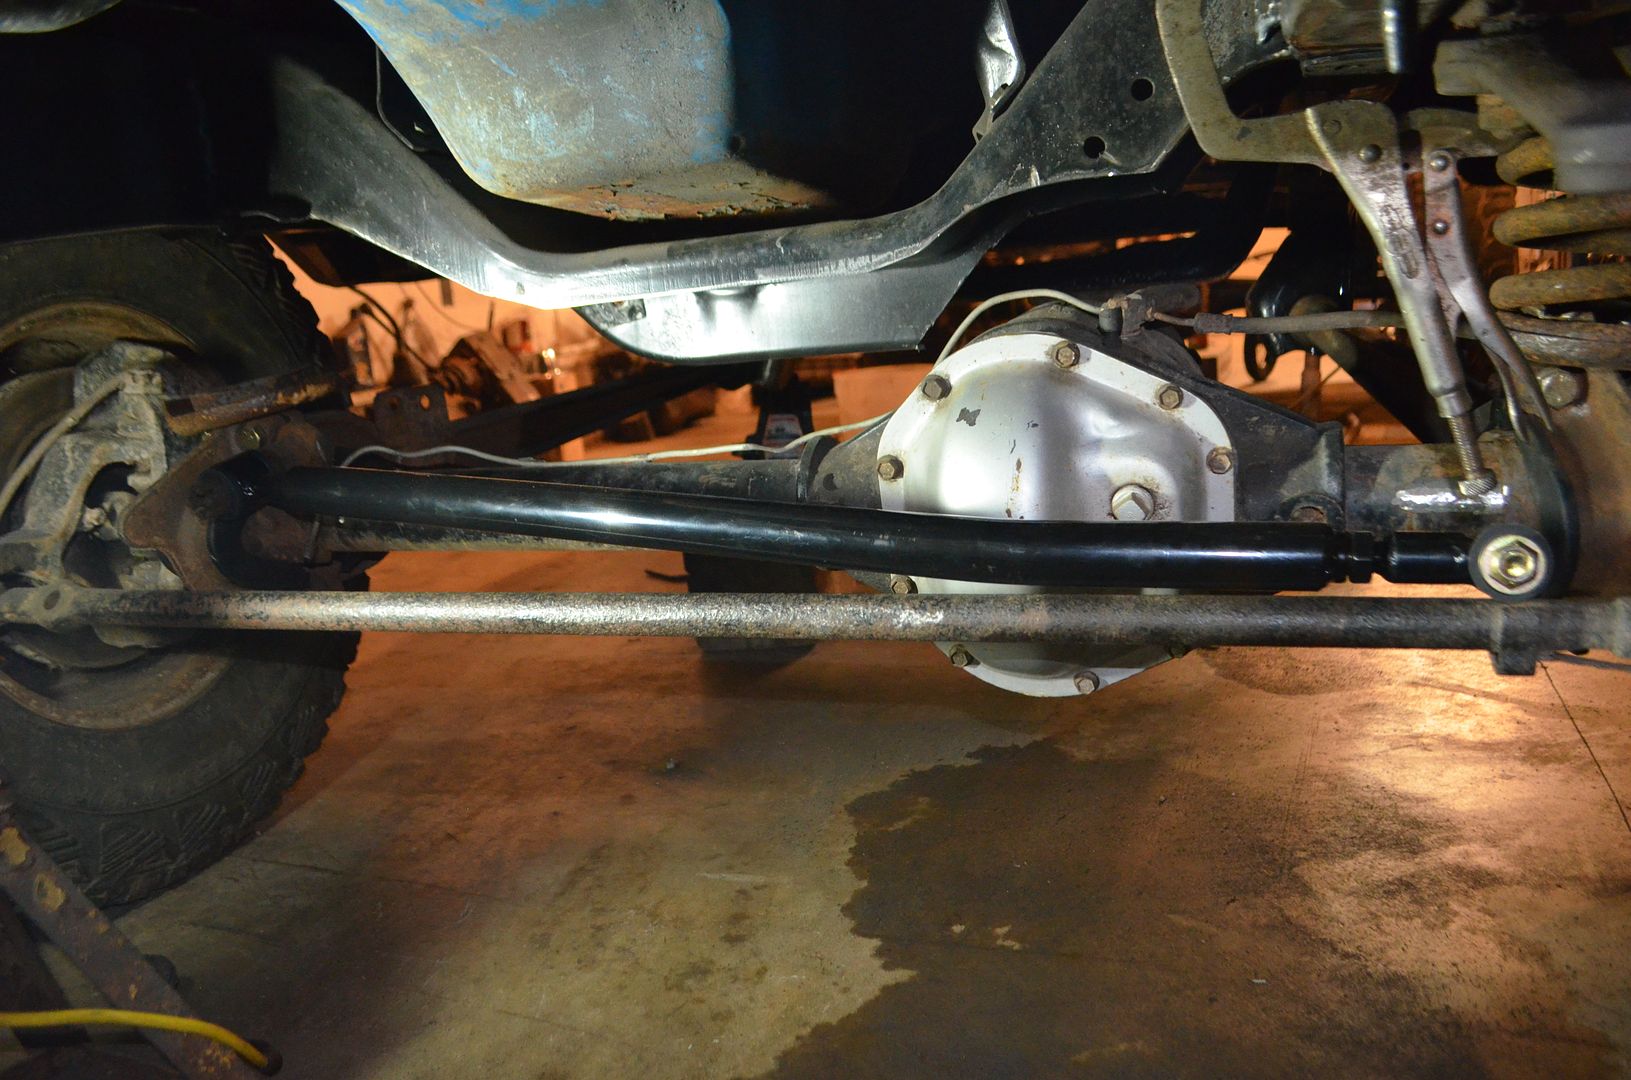
Here are the beginnings of th swap, I am installing all the 4x4 components on my 4x2 frame. I started the swap by installing a 9" rear end with 2.5" lift blocks in place of the original dana 44 rear.
I am using a Dana 44 from a 1977 F150, this is one of the stronger 44's used in 1/2 ton Fords, It had welded on radius arm wedges and 1/2" thick axle tubes, as opposed to the 78/79 D44's that had 3/8" tubes cast/hollow wedges. I had cut the wedges off when using this axle in a previous project that was leaf sprung, good thing I hung on to the wedges.
I trimmed the original crossmember for clearance. I may end up removing it completely depending on final ride height.
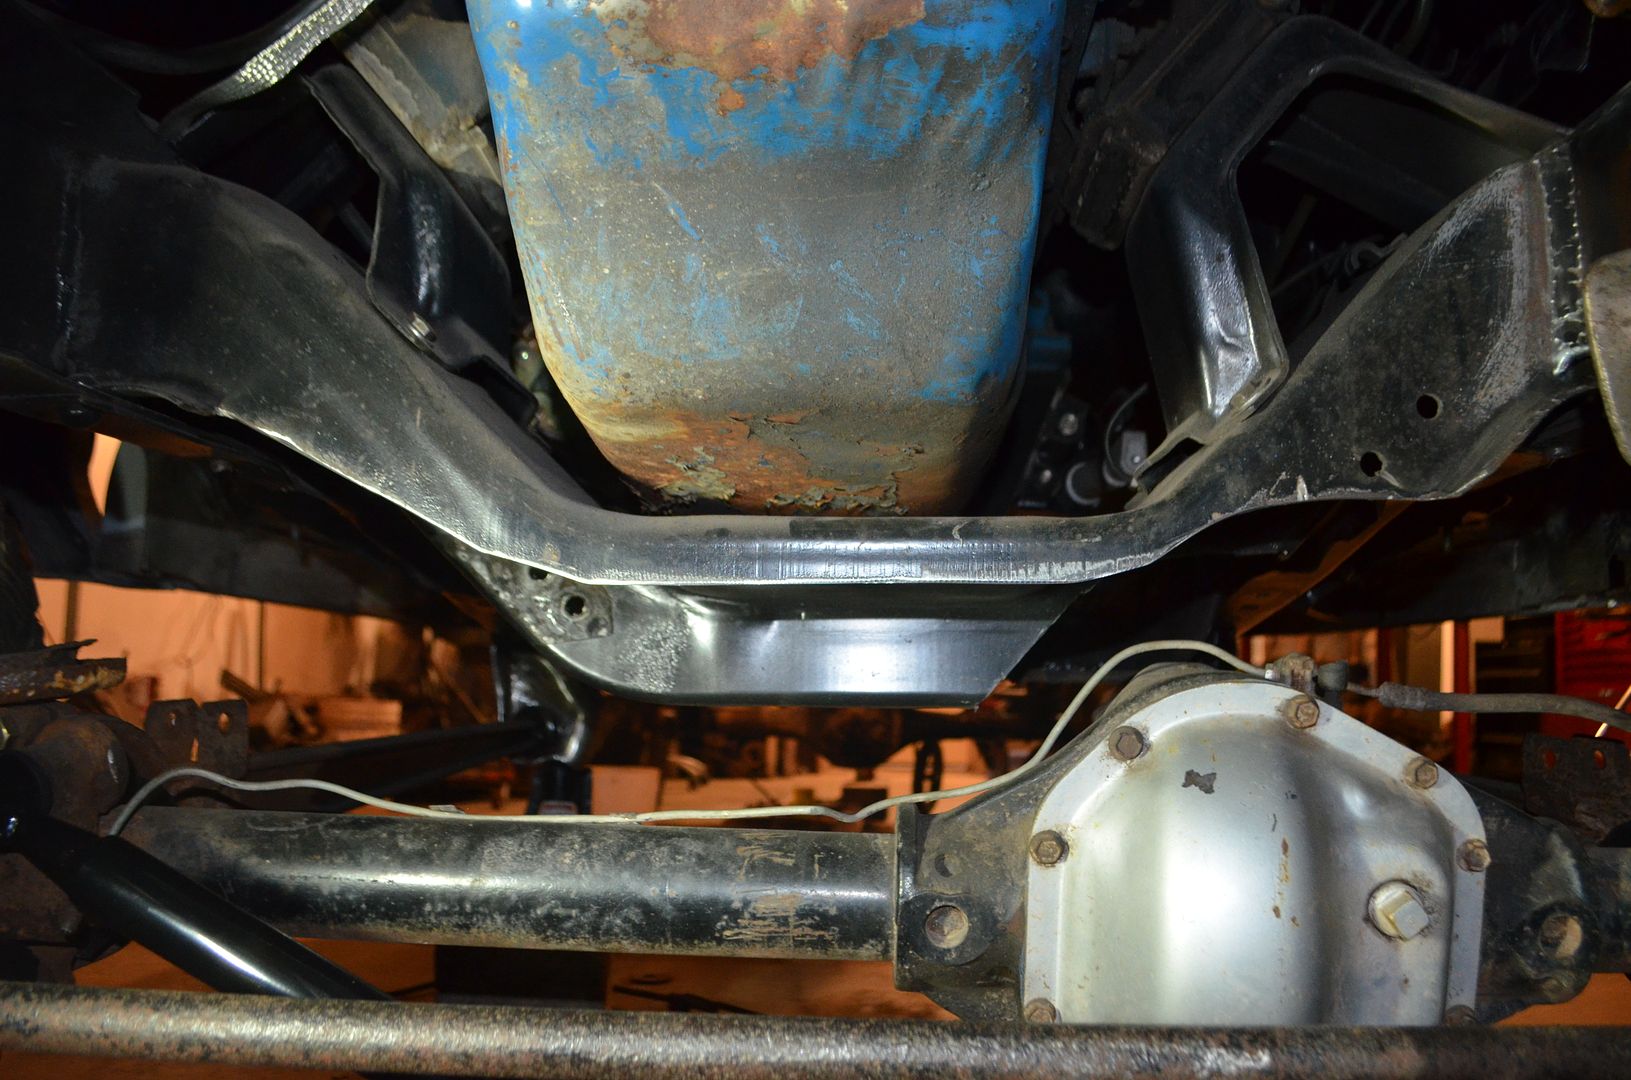
The radius arm bracket rear bolt hole lined up just right with the original transmission crossmember hole on the 2wd frame, this will work out great for locating the other bolt holes and as a reference point.
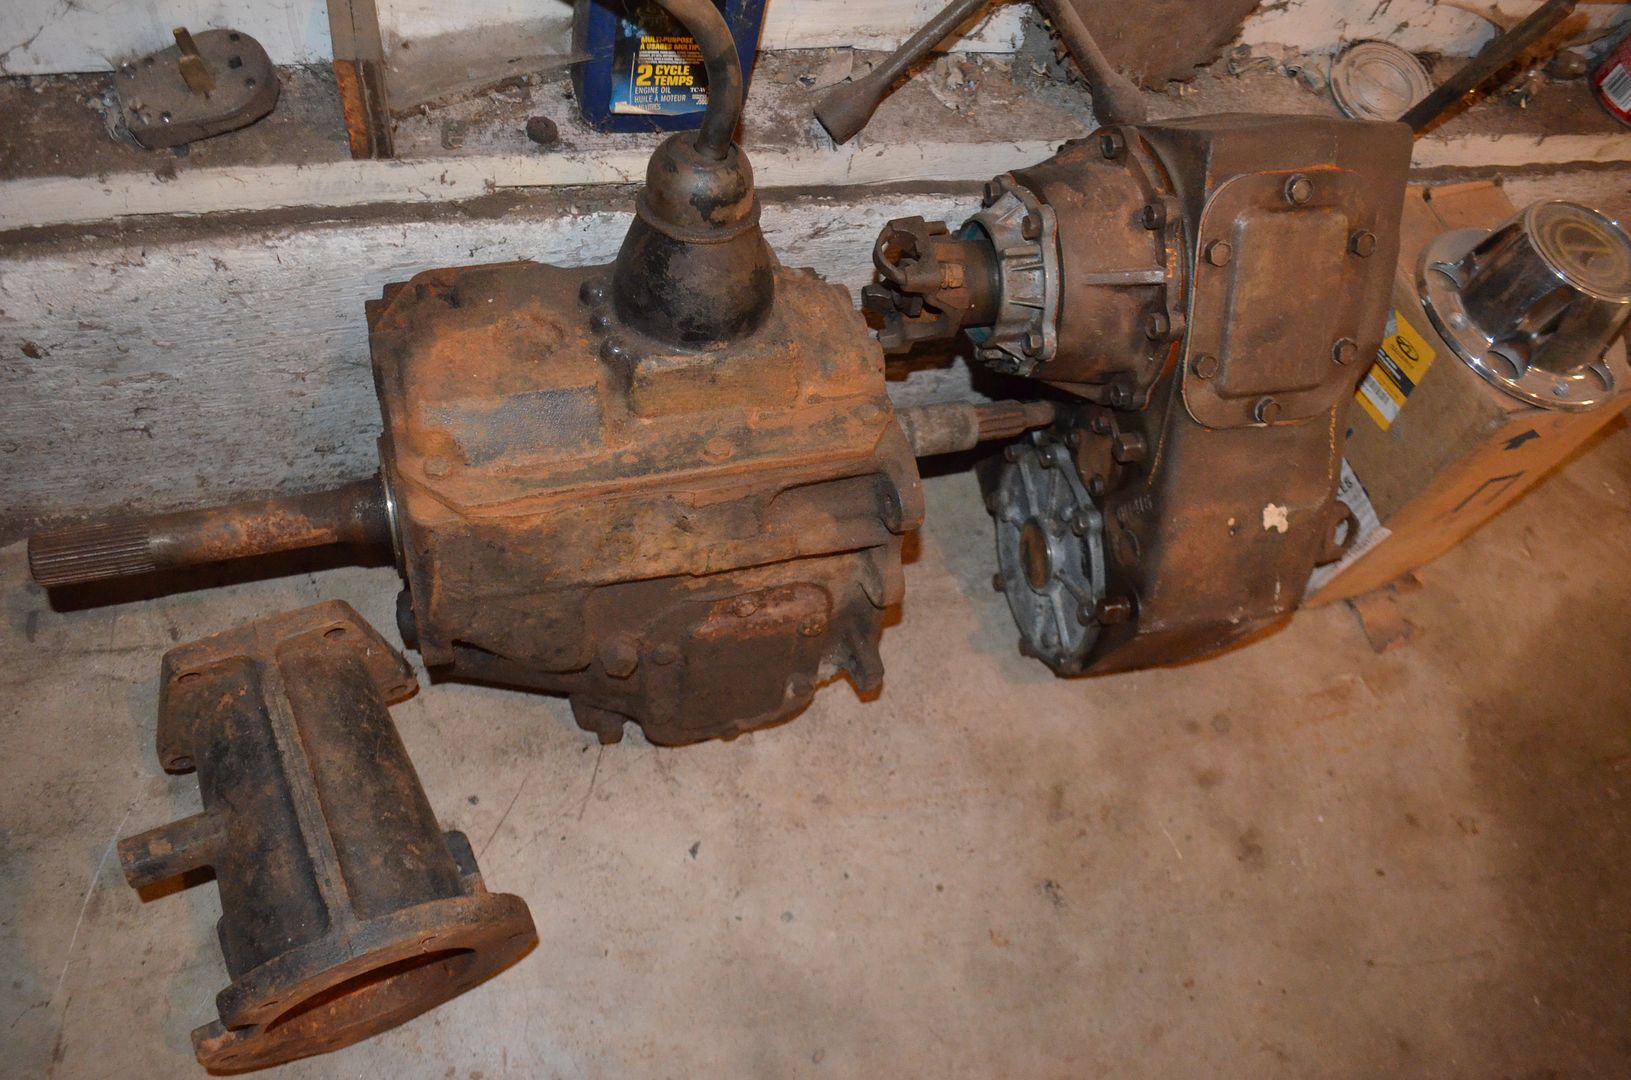
I picked up a T-18, adapter and a 205, I traded for a ZF5 I had laying around that I had no use for.
I just received my adjustable track bar in the mail on Friday, It's a SuperLift track bar I got from Jegs. The next task will be fabbing a frame bracket for this.
I want the ride height to be about where the truck sits now and I plan to run 33" tires. It is currently sitting on 32x11.50x15's.

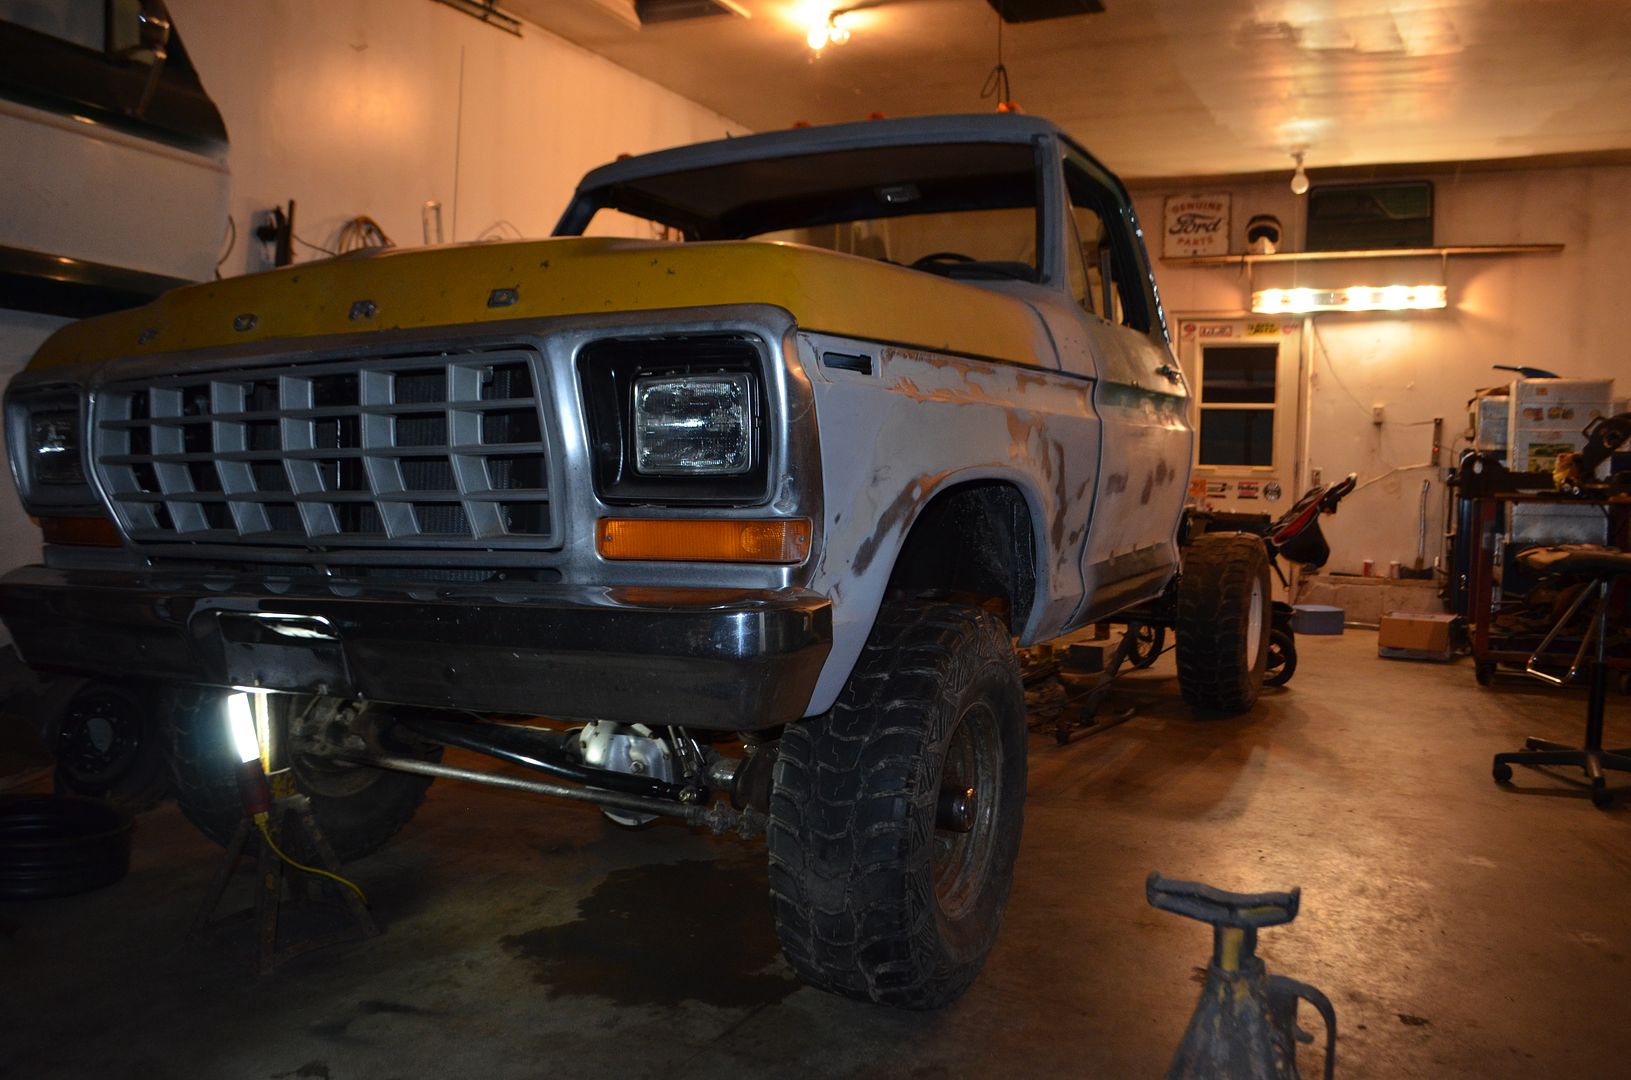
I installed a 2.5" block under the stock F100 springs, it sits just right now, I will see how much it drops with the bed installed. I will do a shackle flip if I need the extra height.
Here are the beginnings of th swap, I am installing all the 4x4 components on my 4x2 frame. I started the swap by installing a 9" rear end with 2.5" lift blocks in place of the original dana 44 rear.
I am using a Dana 44 from a 1977 F150, this is one of the stronger 44's used in 1/2 ton Fords, It had welded on radius arm wedges and 1/2" thick axle tubes, as opposed to the 78/79 D44's that had 3/8" tubes cast/hollow wedges. I had cut the wedges off when using this axle in a previous project that was leaf sprung, good thing I hung on to the wedges.

I trimmed the original crossmember for clearance. I may end up removing it completely depending on final ride height.

The radius arm bracket rear bolt hole lined up just right with the original transmission crossmember hole on the 2wd frame, this will work out great for locating the other bolt holes and as a reference point.

I picked up a T-18, adapter and a 205, I traded for a ZF5 I had laying around that I had no use for.

I just received my adjustable track bar in the mail on Friday, It's a SuperLift track bar I got from Jegs. The next task will be fabbing a frame bracket for this.

I want the ride height to be about where the truck sits now and I plan to run 33" tires. It is currently sitting on 32x11.50x15's.


I installed a 2.5" block under the stock F100 springs, it sits just right now, I will see how much it drops with the bed installed. I will do a shackle flip if I need the extra height.


#3
11-29-2015, 12:10 AM
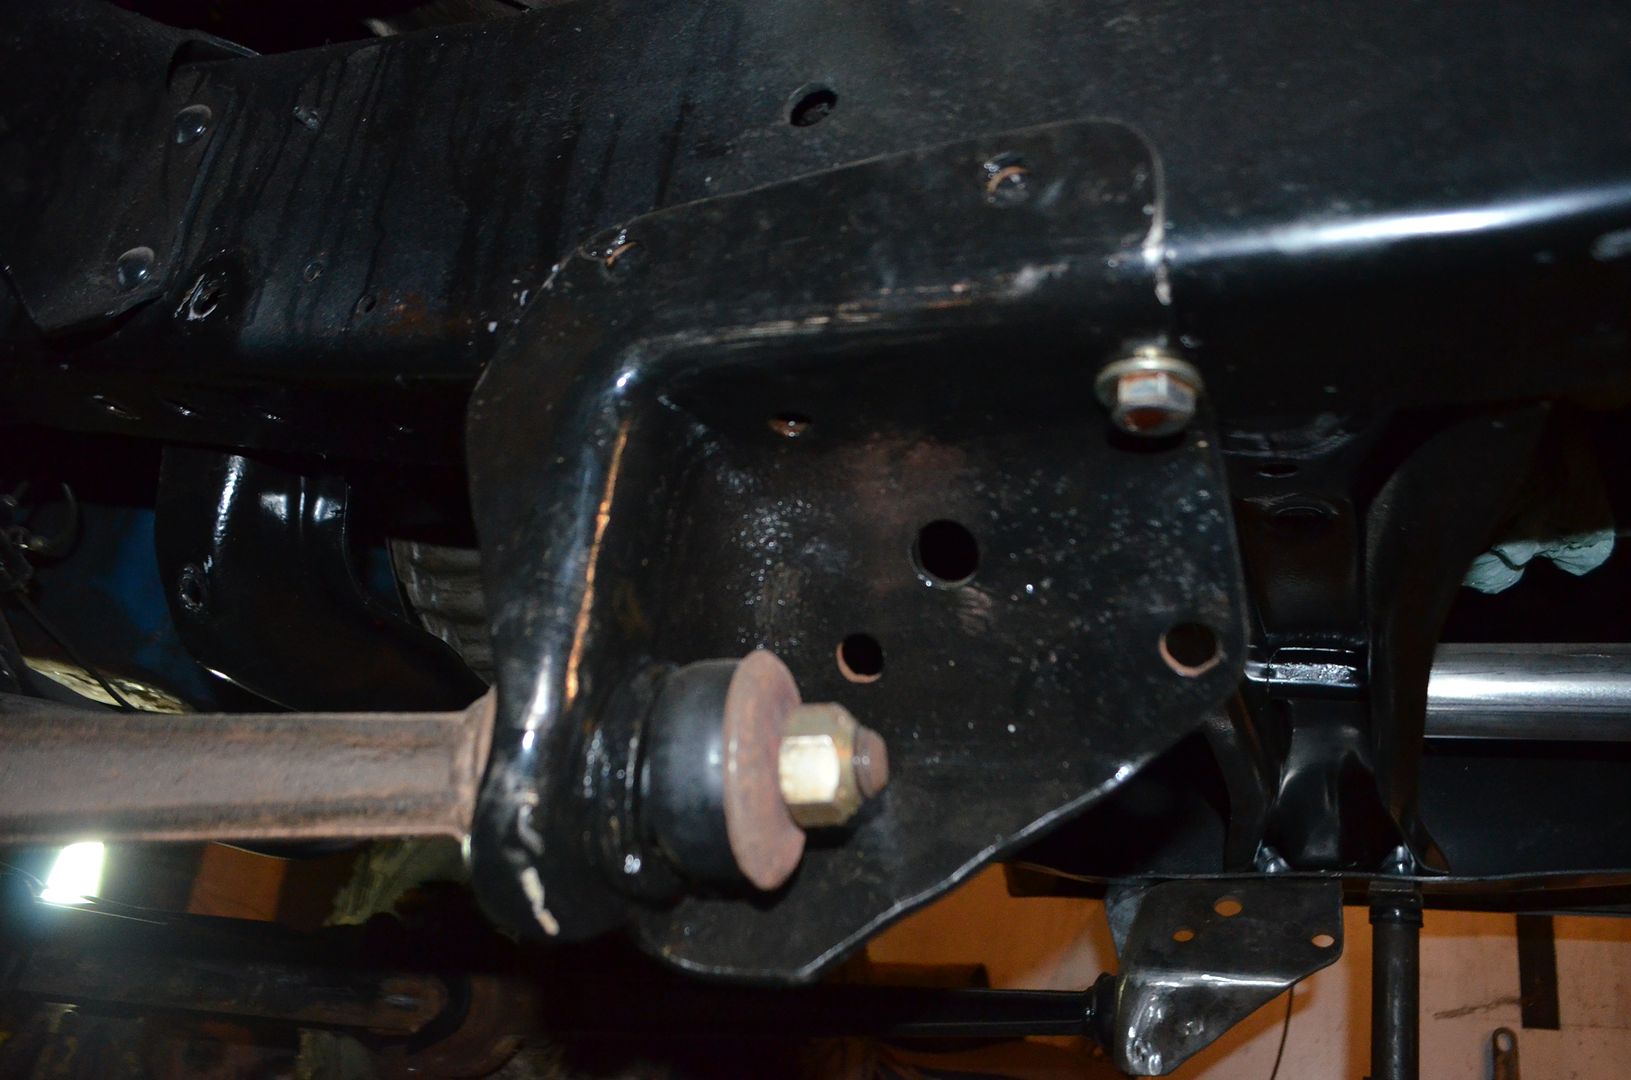
I boxed in the driver side frame horn for steering box mounting, I am going to run 1/2" I.D. pipe through the frame for the steering box bolts. I am running a stock box from a '79 Bronco. I swapped the steering column shaft foe one from a 4x4 column, I will be fabbing a steering shaft between the box and column.
Frame boxed in, I have yet to do the passenger side. I will be building a bolt-in crossmember that mounts just ahead of the steering box to remove any flex the frame horns may have due to the forces from the steering box.
I had to take a hump out of the top of the frame rail just ahead of the steering box for clearance.
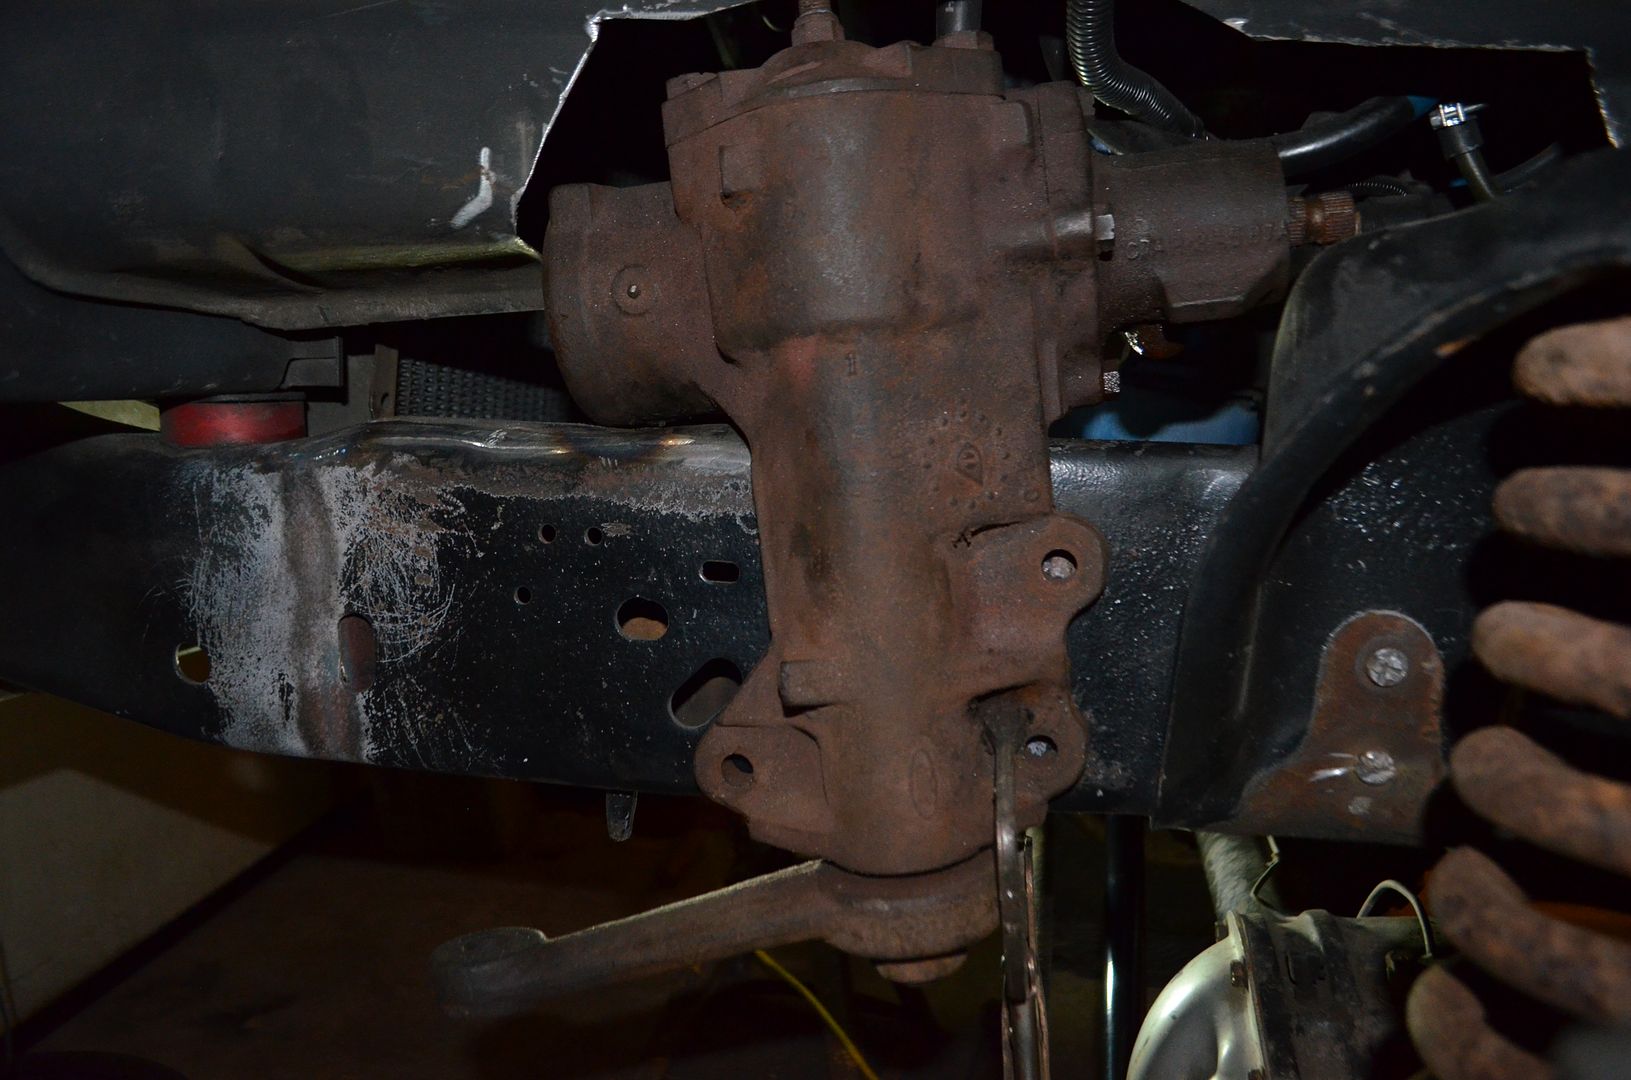
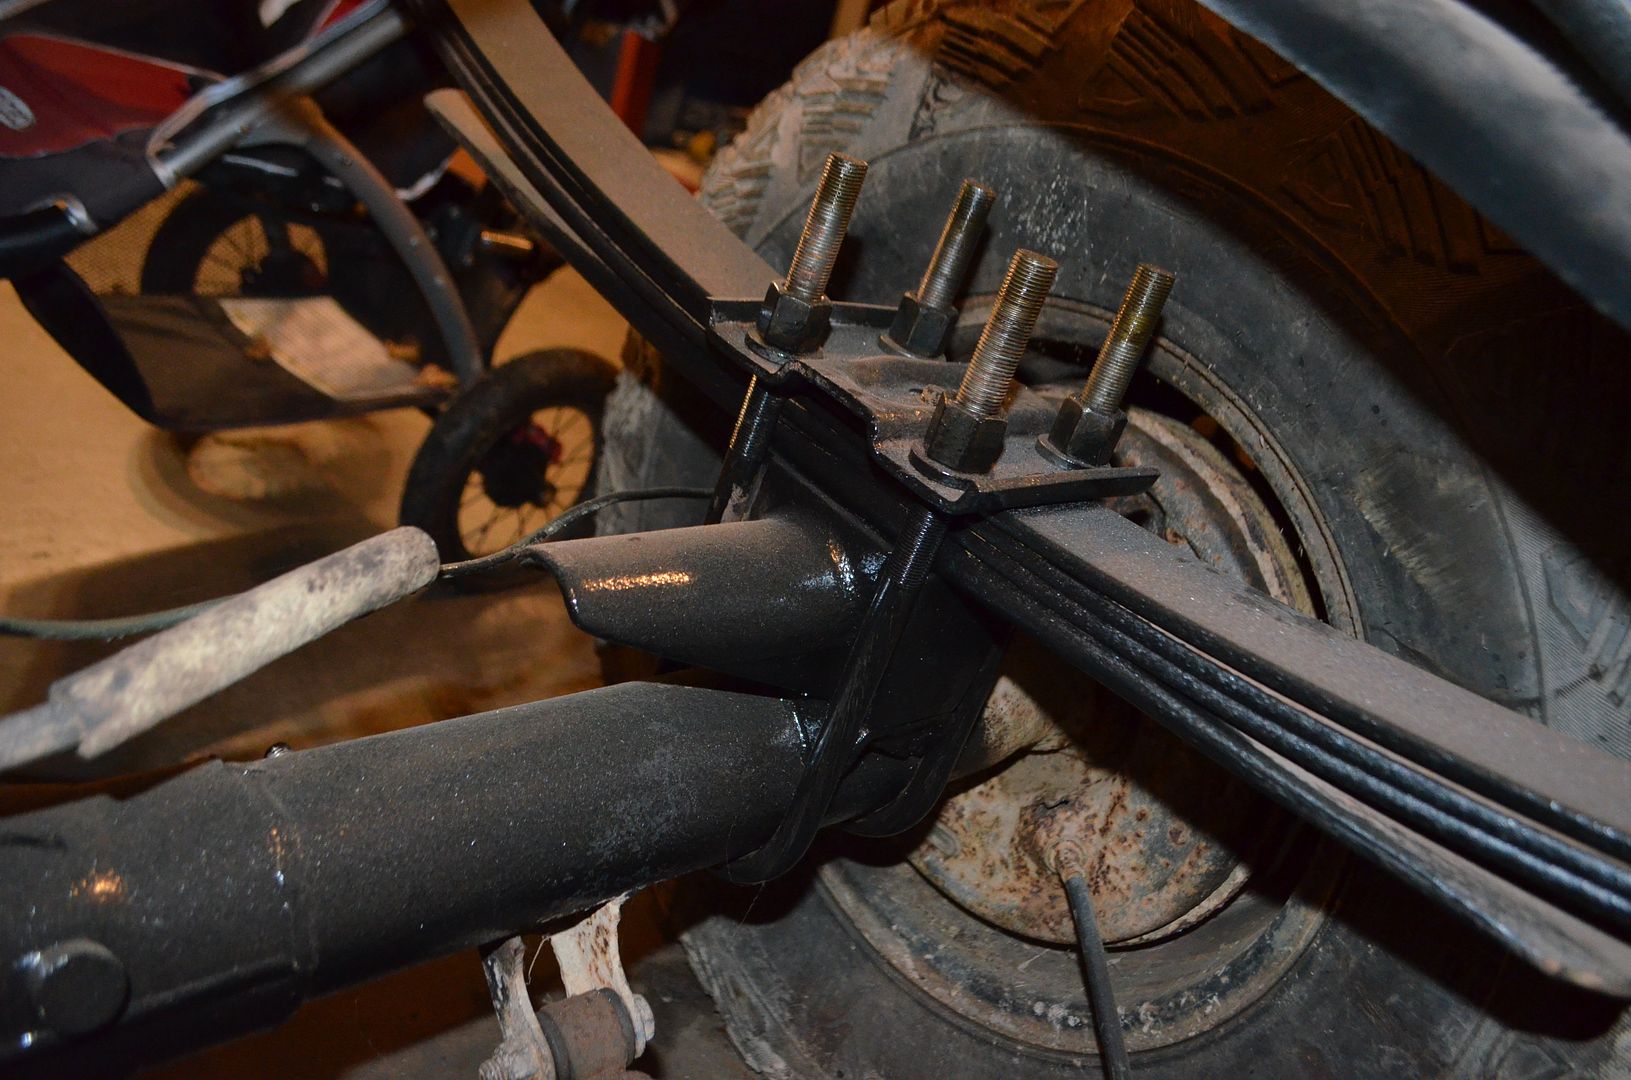
I installed Poly C-bushings and radius arm bushings. They are stock offset, The wedges on my axle are not welded on yet, so I can rotate the axle to get the proper caster and pinion angle then burn the wedges on.
Left to do:
-Box in passenger side frame horn
-Fab crossmember
-Mount steering box
-Go through trans and T-case
-fab trans crossmember and tie it into the radius arm brackets
-Fab T-case support
-Buy springs
-Driveshafts
Frame boxed in, I have yet to do the passenger side. I will be building a bolt-in crossmember that mounts just ahead of the steering box to remove any flex the frame horns may have due to the forces from the steering box.

I had to take a hump out of the top of the frame rail just ahead of the steering box for clearance.

I installed Poly C-bushings and radius arm bushings. They are stock offset, The wedges on my axle are not welded on yet, so I can rotate the axle to get the proper caster and pinion angle then burn the wedges on.

Left to do:
-Box in passenger side frame horn
-Fab crossmember
-Mount steering box
-Go through trans and T-case
-fab trans crossmember and tie it into the radius arm brackets
-Fab T-case support
-Buy springs
-Driveshafts
#4
11-29-2015, 07:19 PM
Post Fiend
Given what you need to fabricate, consider fab parts from Ruff Stuff Specialties:
Off-Road Fabrication Parts - RuffStuff Specialties
... mount the steering box after fabricating and installing the track bar mount. As pictured above, it's a touch too far back.
Panhard / Trackbar Options - RuffStuff Specialties
EDIT... A couple of suggestions
1. Adding flange plates to the underside of the 2WD crossmember that was sectioned for axle clearance.
2. There are lots of holes on the left frame where the steering box will be positioned and it is inherently weak. Consider sectioning the frame with a solid plate.
#5
11-29-2015, 07:23 PM
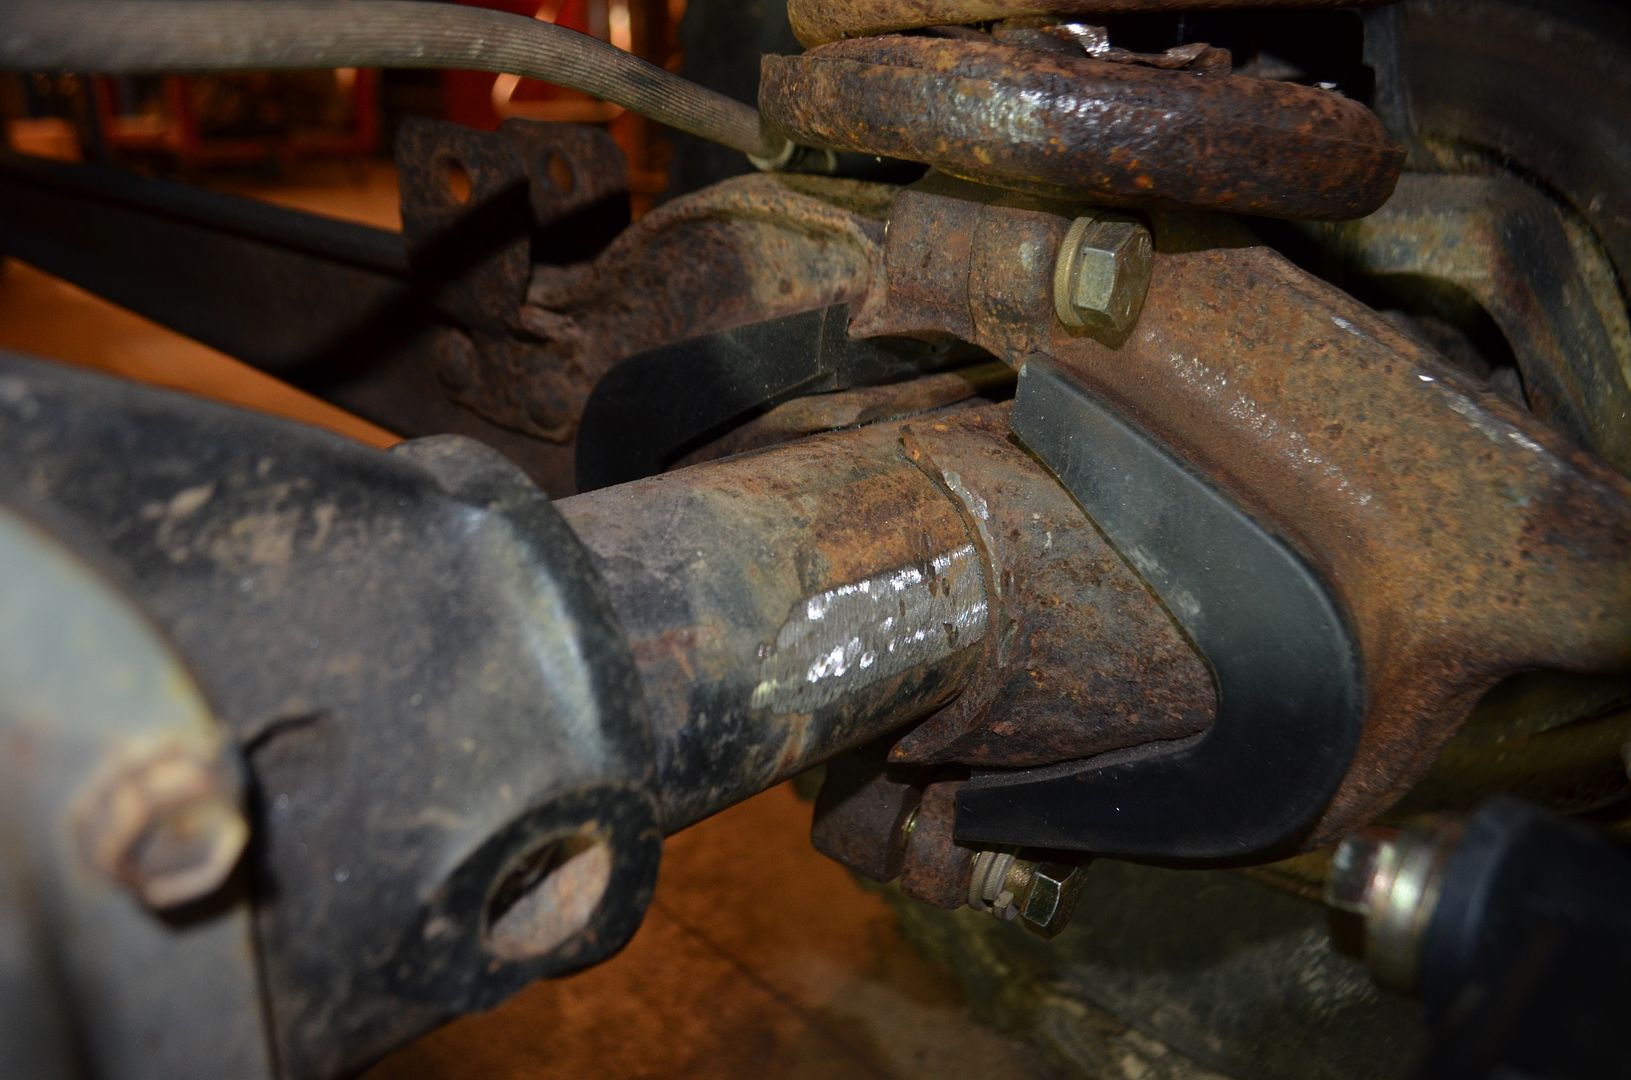
Today I removed the coil spring buckets, the 2wd buckets are spaced wider than the spring pads on the front axle, I will be installing a set from a 4x4 or modifying the 2wd buckets.
I got my axle close to center between the frame rails and made a template for the track bar mount.
I pulled the top cover of the T-18, It has a few chipped teeth on 1st and reverse gears. Hopefully the gears are good in my 2wd trans. I will build 1 good one out of the two.
I got my axle close to center between the frame rails and made a template for the track bar mount.
I pulled the top cover of the T-18, It has a few chipped teeth on 1st and reverse gears. Hopefully the gears are good in my 2wd trans. I will build 1 good one out of the two.
#6
11-29-2015, 07:27 PM
Given what you need to fabricate, consider fab parts from Ruff Stuff Specialties:
Off-Road Fabrication Parts - RuffStuff Specialties
... mount the steering box after fabricating and installing the track bar mount. As pictured above, it's a touch too far back.
Panhard / Trackbar Options - RuffStuff Specialties
EDIT... I also suggest adding flange plates to the underside of the 2WD crossmember that was sectioned for axle clearance.
The crossmember will have a flange added if I keep it. May end up removing it to get a lower ride height. I don't want it jacked up to the sky.
#7
01-21-2016, 07:20 PM

Trending Topics
#8
01-21-2016, 08:37 PM
Cargo Master
I just dont think there is enough space there between the x member and the axle. I would flex that front suspension out for sure before you go for a ride. I think my swap has about 7-8 " after the new X member was fabbed and I was still worried about it. No way was it going to work with the stock one in place.
Maybe it's just looking at pics instead of in person.
Maybe it's just looking at pics instead of in person.
#9
01-21-2016, 09:02 PM
I just dont think there is enough space there between the x member and the axle. I would flex that front suspension out for sure before you go for a ride. I think my swap has about 7-8 " after the new X member was fabbed and I was still worried about it. No way was it going to work with the stock one in place.
Maybe it's just looking at pics instead of in person.
Maybe it's just looking at pics instead of in person.
Crossmember will be coming out, oil pan and sump are going to be swapped for a rear sump setup and a new crossmember built.
#10
01-24-2016, 08:39 PM
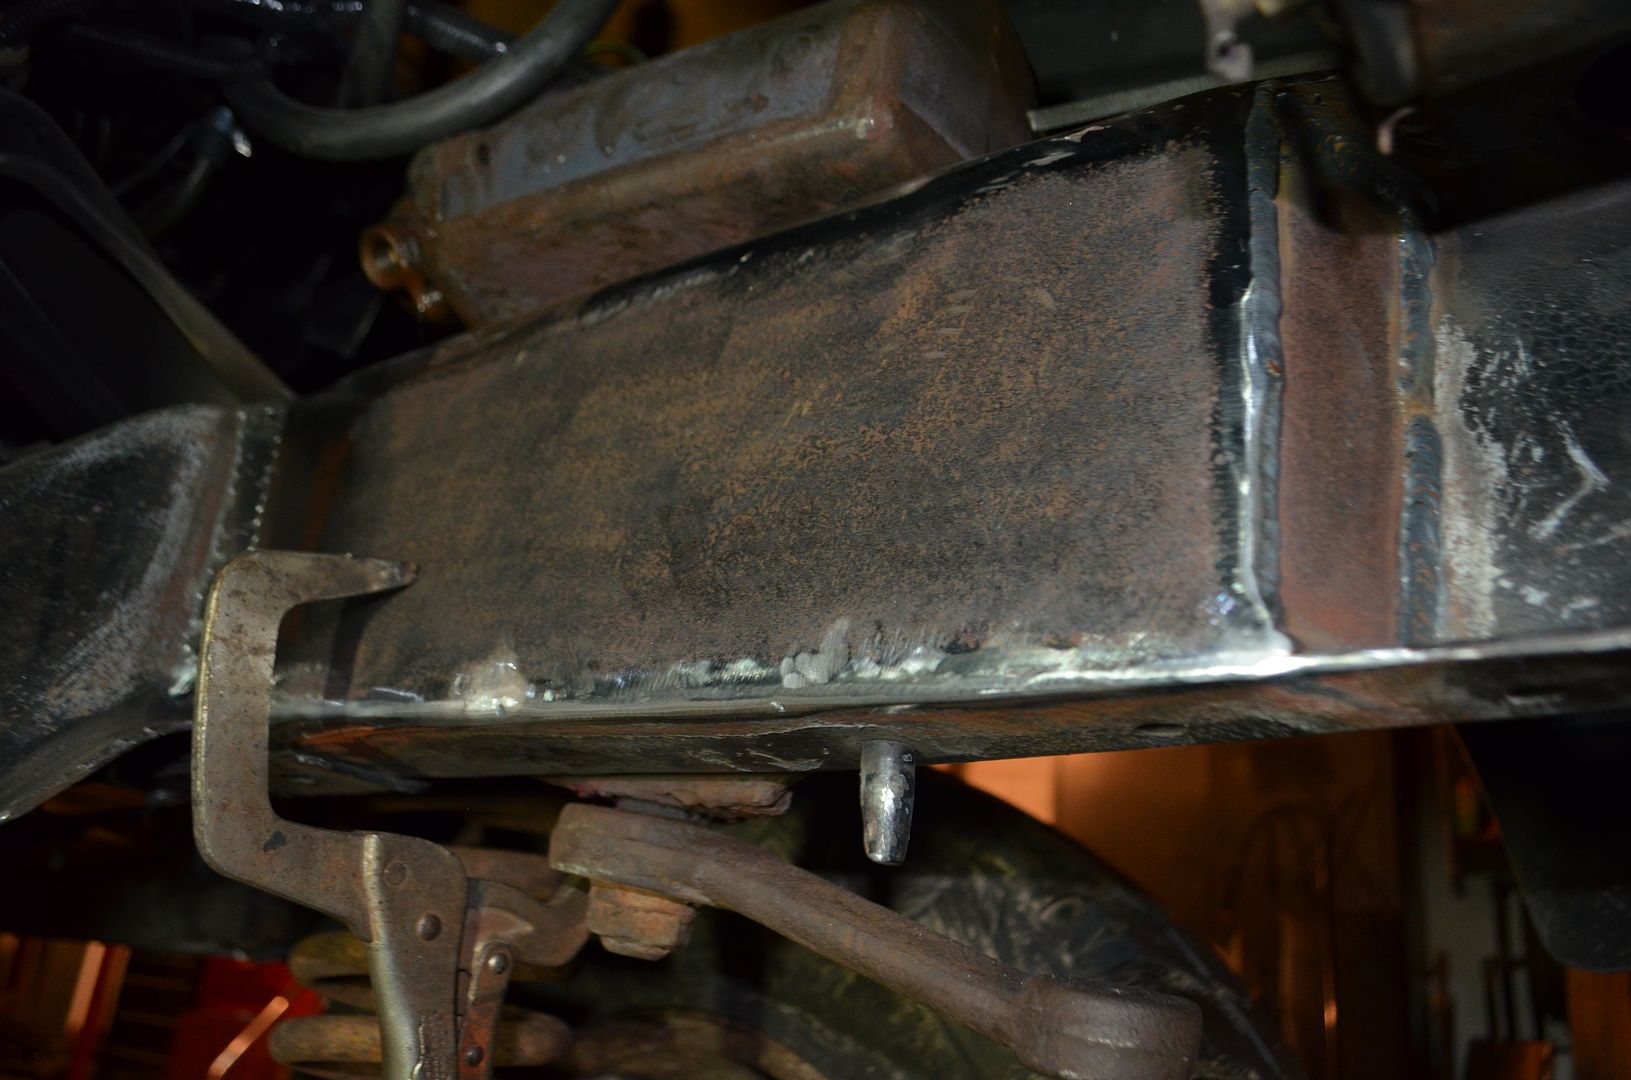
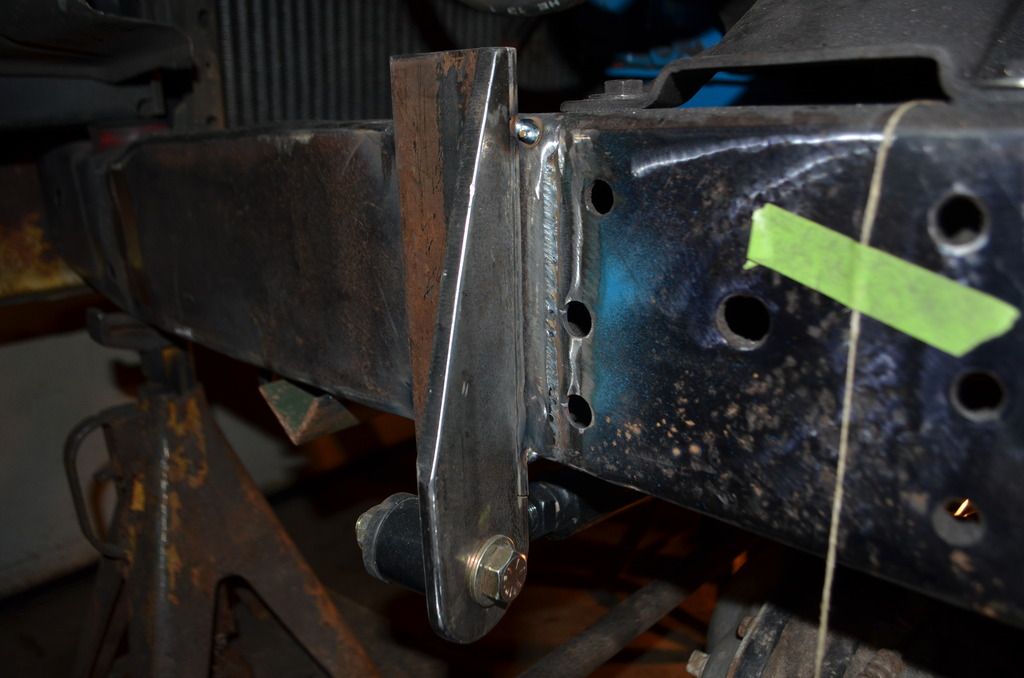
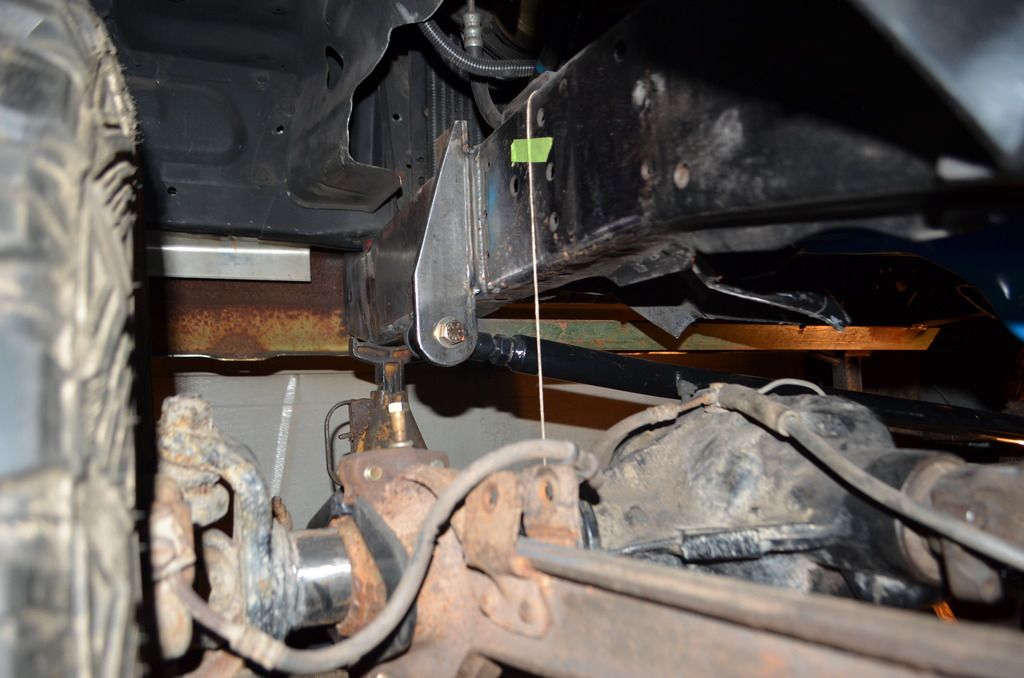
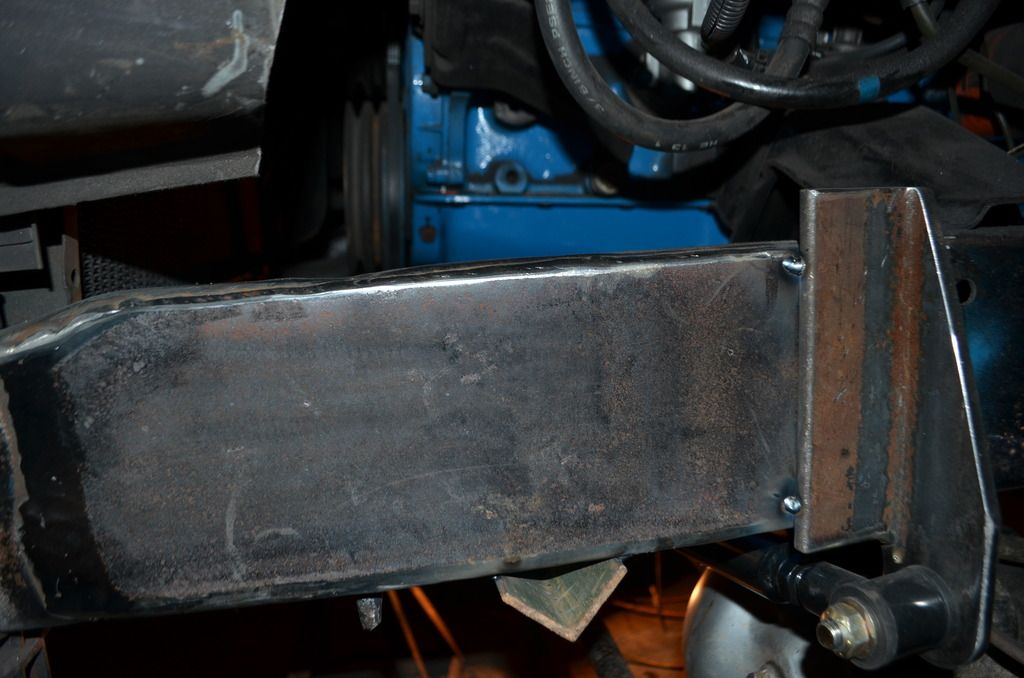
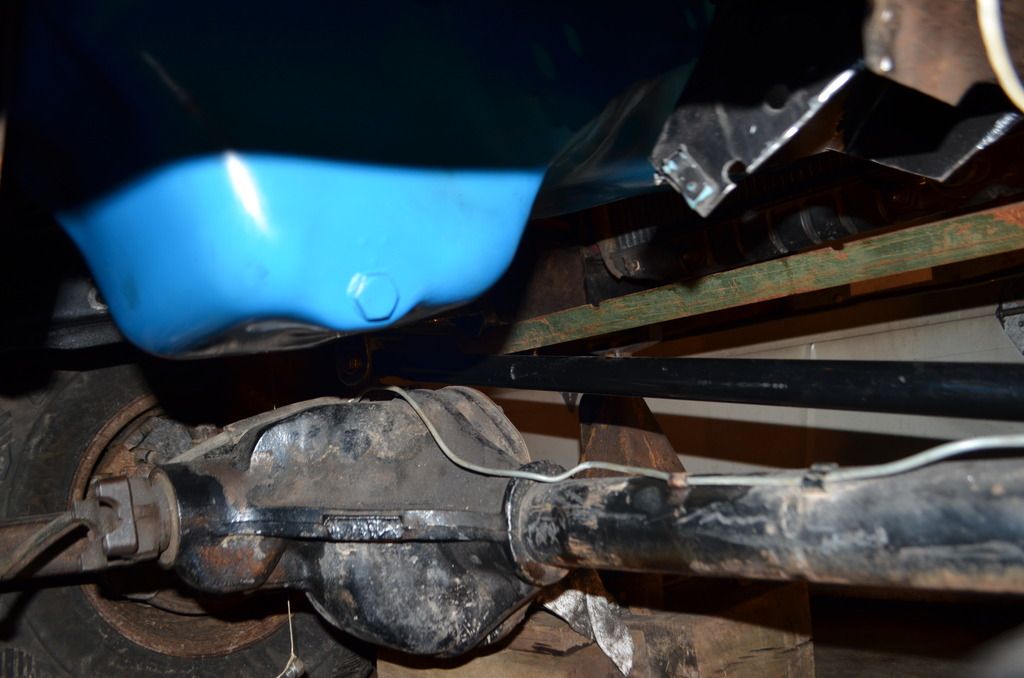
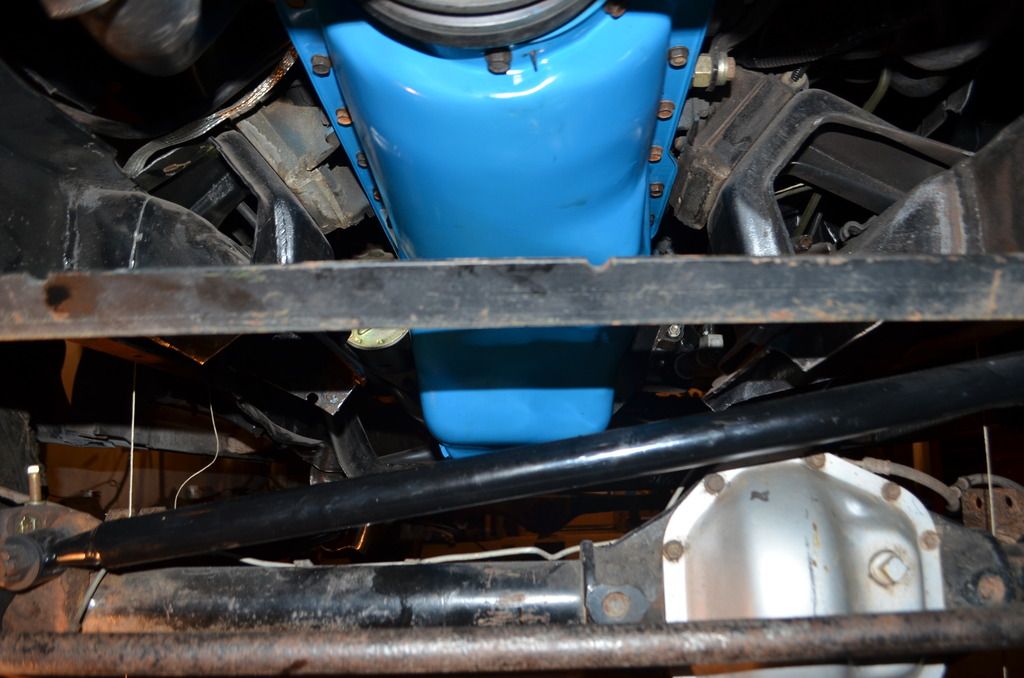
Progress report for today. I hacked out the center section of the big 2wd crossmember, plated the outside of the drivers side frame horn, started a track bar bracket and tacked it on to cycle the axle from full droop to compression.
Also installed a rear sump pan, I will have all kinds of room after I cut out the remaining pieces of the 2wd crossmember and modify the engine stands. I will be fabbing a tubular crossmember to replace the one I removed. The piece of angle iron in the last picture is just a temporary brace i tacked in to prevent the frame from moving when I cut the original crossmember.
All pictures are taken at my planned ride hieght, I now have over 12" of clearance between the axle and oil pan, lots of room for a small crossmember.
Pictures aren't of the best quality, my garage has terrible lighting.


#11
02-23-2016, 08:24 PM


#12
02-23-2016, 09:06 PM
Not pictured but I got my 2 transmissions stripped down, swapped the 4wd output shaft into the 2wd trans as it was in much better shape and felt a lot tighter when shifting. I went to install the t-case but was only getting about 1/2" of engagment on the output shaft spline, I think my adapter may have been from a NP435. I have a 1980 parts truck with a T18/208 combo, it's t-case adapter should work for this truck, just need some warm weather to pull it, it was -21 C today. Brr
#13
02-23-2016, 09:08 PM
#15
02-24-2016, 03:53 AM