When you click on links to various merchants on this site and make a purchase, this can result in this site earning a commission. Affiliate programs and affiliations include, but are not limited to, the eBay Partner Network.
First off I see there is another thread with similar info posted, I should of searched first! No intent to trump the original poster, didn't know it was out there.
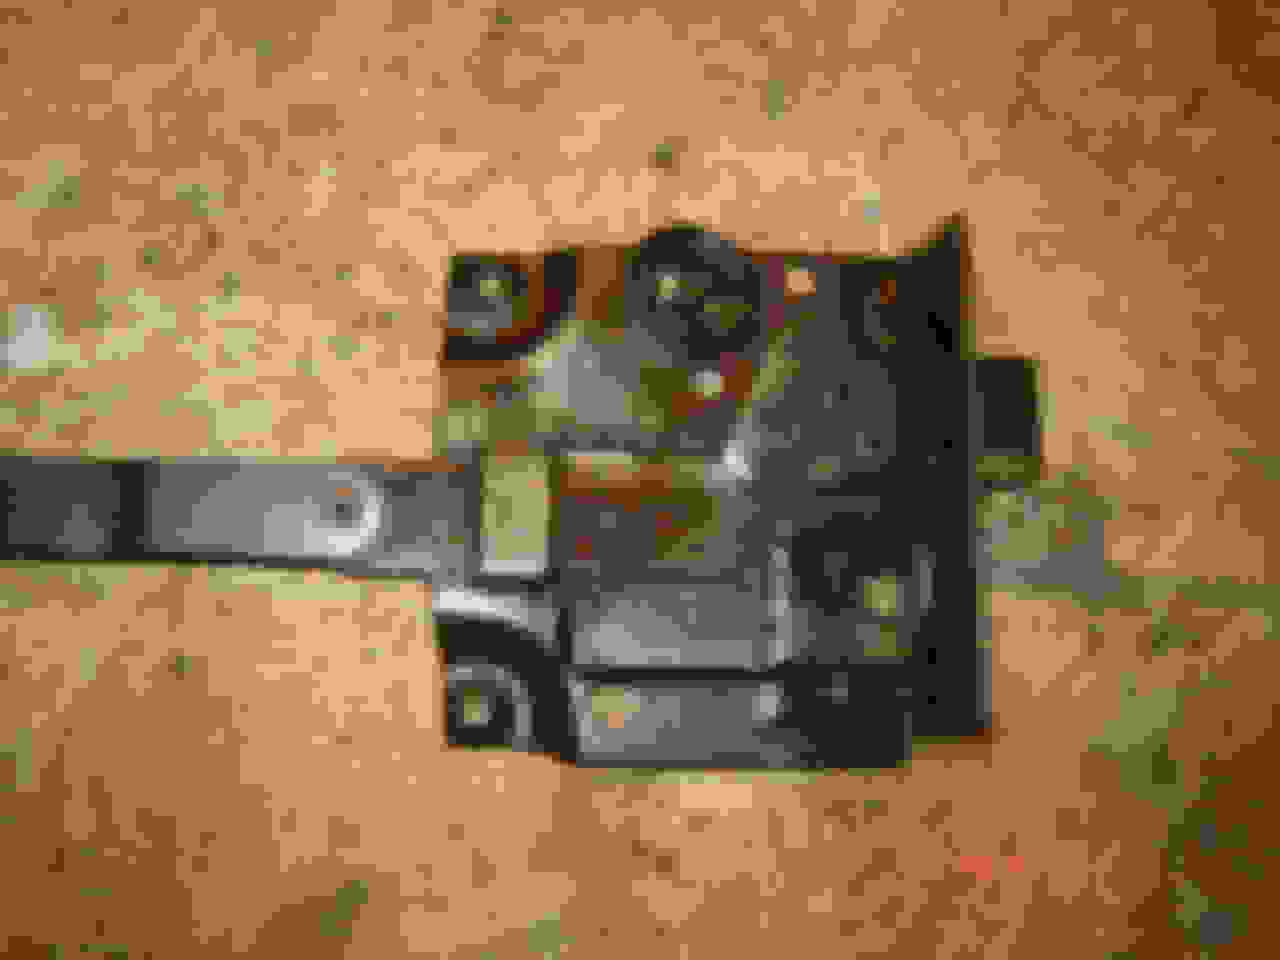
So to finish this up I started checking the drivers side latch tonight, talk about plain worn out.
First problem from the back it is obvious there is a lot of wear where the cam rides in the latch housing.
Flipped over to remove the cover and check the cam.
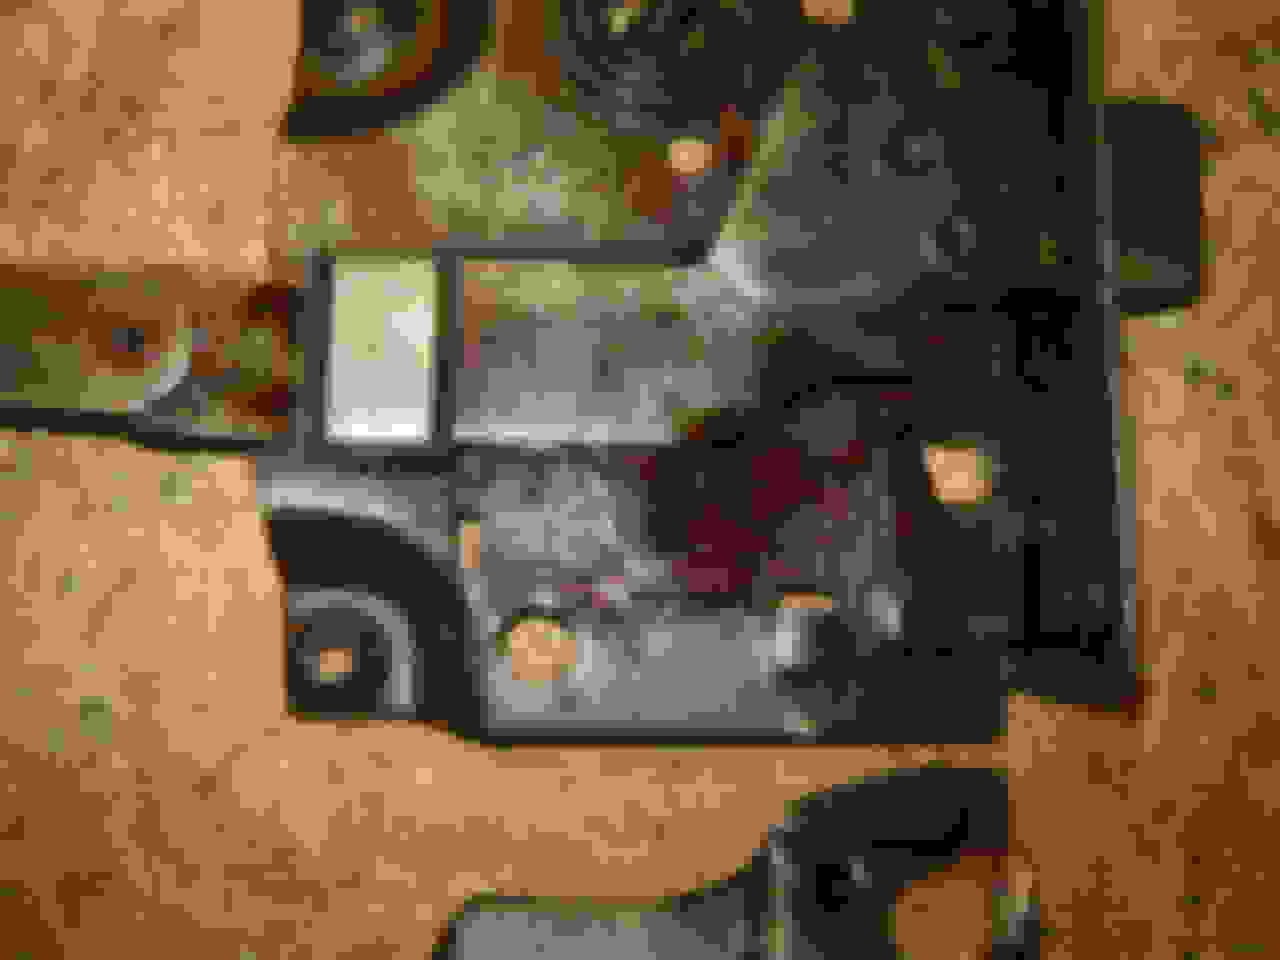
spacer removed, more wear at the cam and latch contact points, same as passenger side.
Top of the cam doesnt look so bad but is worn and you can see where the metal is worn away from the handle mount area. Square hole is also oversized.
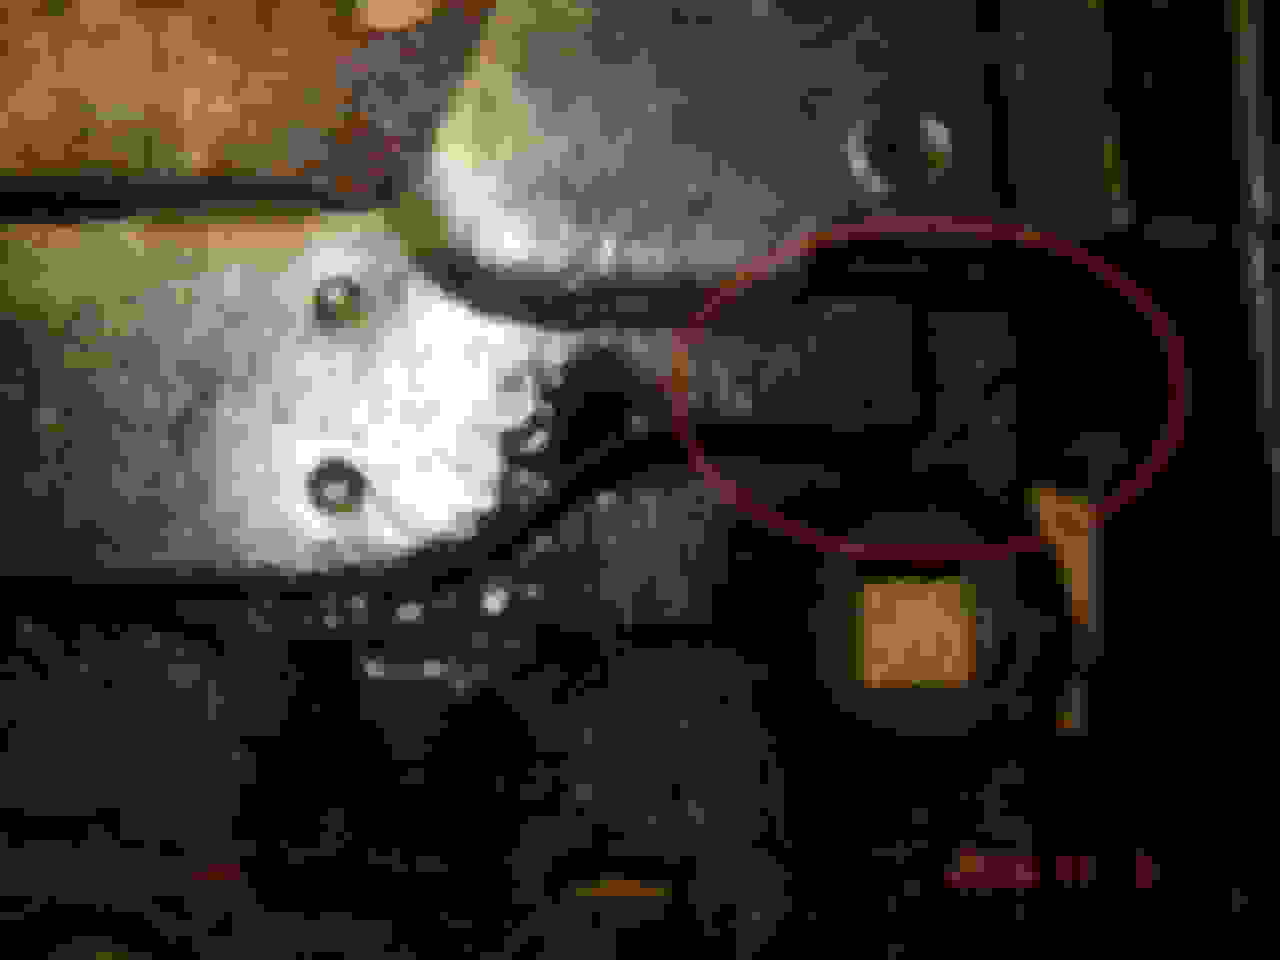
Latch contact point worn out
Contact point for the inside latch release also worn. So not only was the outside handle sagging the inside had slop as well.
This is what the handle looked like, just a bit saggy!
Parts have been cleaned and welding starts tomorrow, more pics to come.
First off I see there is another thread with similar info posted, I should of searched first! No intent to trump the original poster, didn't know it was out there.
.
No worries
There's several similar threads on droopy door handles. Its a subject that comes up every couple of years and each one is always worth reading through. Thanks for taking the time to document your experience and post up the pics. It'll help out a lot of folks
I'll throw in my two bits. I was worried about bending the tabs up, and having them break off. So I used a small tip in the O/A torch to heat them right at the bend. It did help but still had one break off. A tack weld replaced it.
I'll throw in my two bits. I was worried about bending the tabs up, and having them break off. So I used a small tip in the O/A torch to heat them right at the bend. It did help but still had one break off. A tack weld replaced it.
Same here, and I actually did heat one of them with a mapp gas torch, but I didnt want to heat up the latch too much and risk hurting the spring. I have been bending them cold and so far no breaks, they are tough.
Great tutorial, Dave! I'm going to bookmark this for later use.
One point I will bring up, though. I've got my machine loaded with Easy Grind wire, as recommended by AXracer in his welding tutorial. Great stuff, and like the name says, it does grind much easier than ER70S-3. I will assume that the Easy Grind wire will also wear away easier than ER70S-3, or ER70S-6.
So for welding up the wear surface on the Cam and Latch, I would burn the ER70S wire.
I'll use the Easy Grind wire for everything else, though.
I don't know how much difference it will make in the grand scheme of things. After all, it took 60+ years to wear out like it did, but I plan to pass my truck down to my Grandkids.
Thanks, I have not tried that wire, but I have not had issues with the regular wire I use. I normally use the edge of a cutoff wheel to knock down welds, it works faster and doesn't build up as much heat as just hitting it with a grinding wheel.
I'm using a file on mine. takes a long time but so far so good. Thanks again for this write up! once my new springs arrive, I should be in good shape! you guys painting these parts or just greasing them up? I was going to slather some lithium grease on all the moving parts.
great post on the door handles, i am going to re build mine this winter when i cant do any outside projects, thank you for adding the step by step pictures,
Dumb question, How do you get the inner door handle off? The manual just says to remove it.
I pushed back the rubber escutcheon/grommet/ trim whatever you call it and I can see a hole in the handle like a pin or set screw should be there but nothing. I don't see any clips either.
Here's after 15-30 minutes in the Phosphoric acid. I sprayed with a degreaser and brushed off any heavy grease first. This is just after a soak. No brushing. I love this stuff.
Much easier to see what needs to be fixed and easier to weld and work on.
 11-03-2015, 11:26 AM