When you click on links to various merchants on this site and make a purchase, this can result in this site earning a commission. Affiliate programs and affiliations include, but are not limited to, the eBay Partner Network.
Yah my engine runs a pretty steady 195 to 198 degrees.
Flushed system a couple months ago, when I got the Ex.
Guess I will just dig into the front and hope I can squeeze in and cut the core tubes. If not I will tinker with quick connects using my long 45 degree needle nose plyers. If it takes over 10 min I will break out my drimmal and try to cut core tubes on firewall side.
Easy as pie, used drimel to cut heater core tubes from inside.
I was able to cut them off close to firewall and just pulled them out from engine compartment.
Pulled hoses out and used plyers to rotate the stub tube and needle nose plyers to remove cut tubes from quick connector.
Both sides took about 15 min from starting drimel work to removal of cut off core tubes.
When you flushed before, you do use a pressure reducing adapter, right? The Tee (or valve, depending) comes in most of the flushing kits.
If it were my project, while I had the rear disconnected, I'd flush out the long under body lines from the front to the rear. Going to need a piece of hose/tubing and be careful of water getting into the cargo area.
From what I understand, those lines are next to impossible to find. I wouldn't disassemble the core to flush them, but if the core is going to be disconnected, and likely the front of the rear lines under the hood, too, I'd probably throw a little water in the back and flush forwards into a bucket, just to make sure it is clear and see what might be clogging it.
Only a suggestion to help prevent anything from getting pushed into your new core.
I probably wouldn't have replaced the cores until I flushed them and confirmed a problem, but I do admire the "throw a few $$ at it and be certain" approach.
Sometimes the time and troubleshooting you save is worth it
I will do the suggested flushing. Thanks for the advise.
You won't believe it but while driving to work yesterday with my new heater cores in the back waiting to be installed, I smelled antifreeze and my windshield fogged up.
Got to work and seen clean green antifreeze draining out the AC drain on passenger side.
That's why I started this project last night instead of on Saturday like I planned.
Odd how things happen.
Wow, that is fortunate! That has the possibility of being quite...messy...if it were to leak inside the cab
I have found a few hose/clamp leaks after my flush and ELC change. Not sure if and for how long it was leaking before, but the tell-tale "Pepto Bismal" residue is pretty easy to spot
Did you end up getting a new valve?
Might want to grab quality stainless hose clamps for a bunch of places while you're at it. It seems the squeeze clamps are what have fatigued in my case. No sense doing all the work you are and then one of those things making you tear back into it later.
Once and done
If you get a chance, grab a few pics of your rear core location, once it is exposed (plastic off) and such. Not a lot of pics around for the insides of that rear heating system. Probably because it is only in the Excursions
Yes I have a new valve too. Have not installed it yet.
I will snap a few photos of rear auxiliary system this weekend while I am R&R,ing the rear heater core.
Just a side note.
I bought 2 Dorman 800-404 heater hose connectors in case I damaged mine. Plus I wanted to put new o-rings and spacer in oem connector. Dorman website and oriliey parts show the 800-404 as the part. IT'S NOT!!! The 800-404 is a 3/4"x 5/8" connector.
On my 2000 excursion the 3/4" is too big. It needs a 5/8"X5/8" connector. That is part # Dorman 800-403.
Plus the outlet OEM connector (quick disconnect) is a 90 degree fitting not a straight one. I think it's Dorman 800-416. Neither Dorman or orilies show this connector for our excursions.
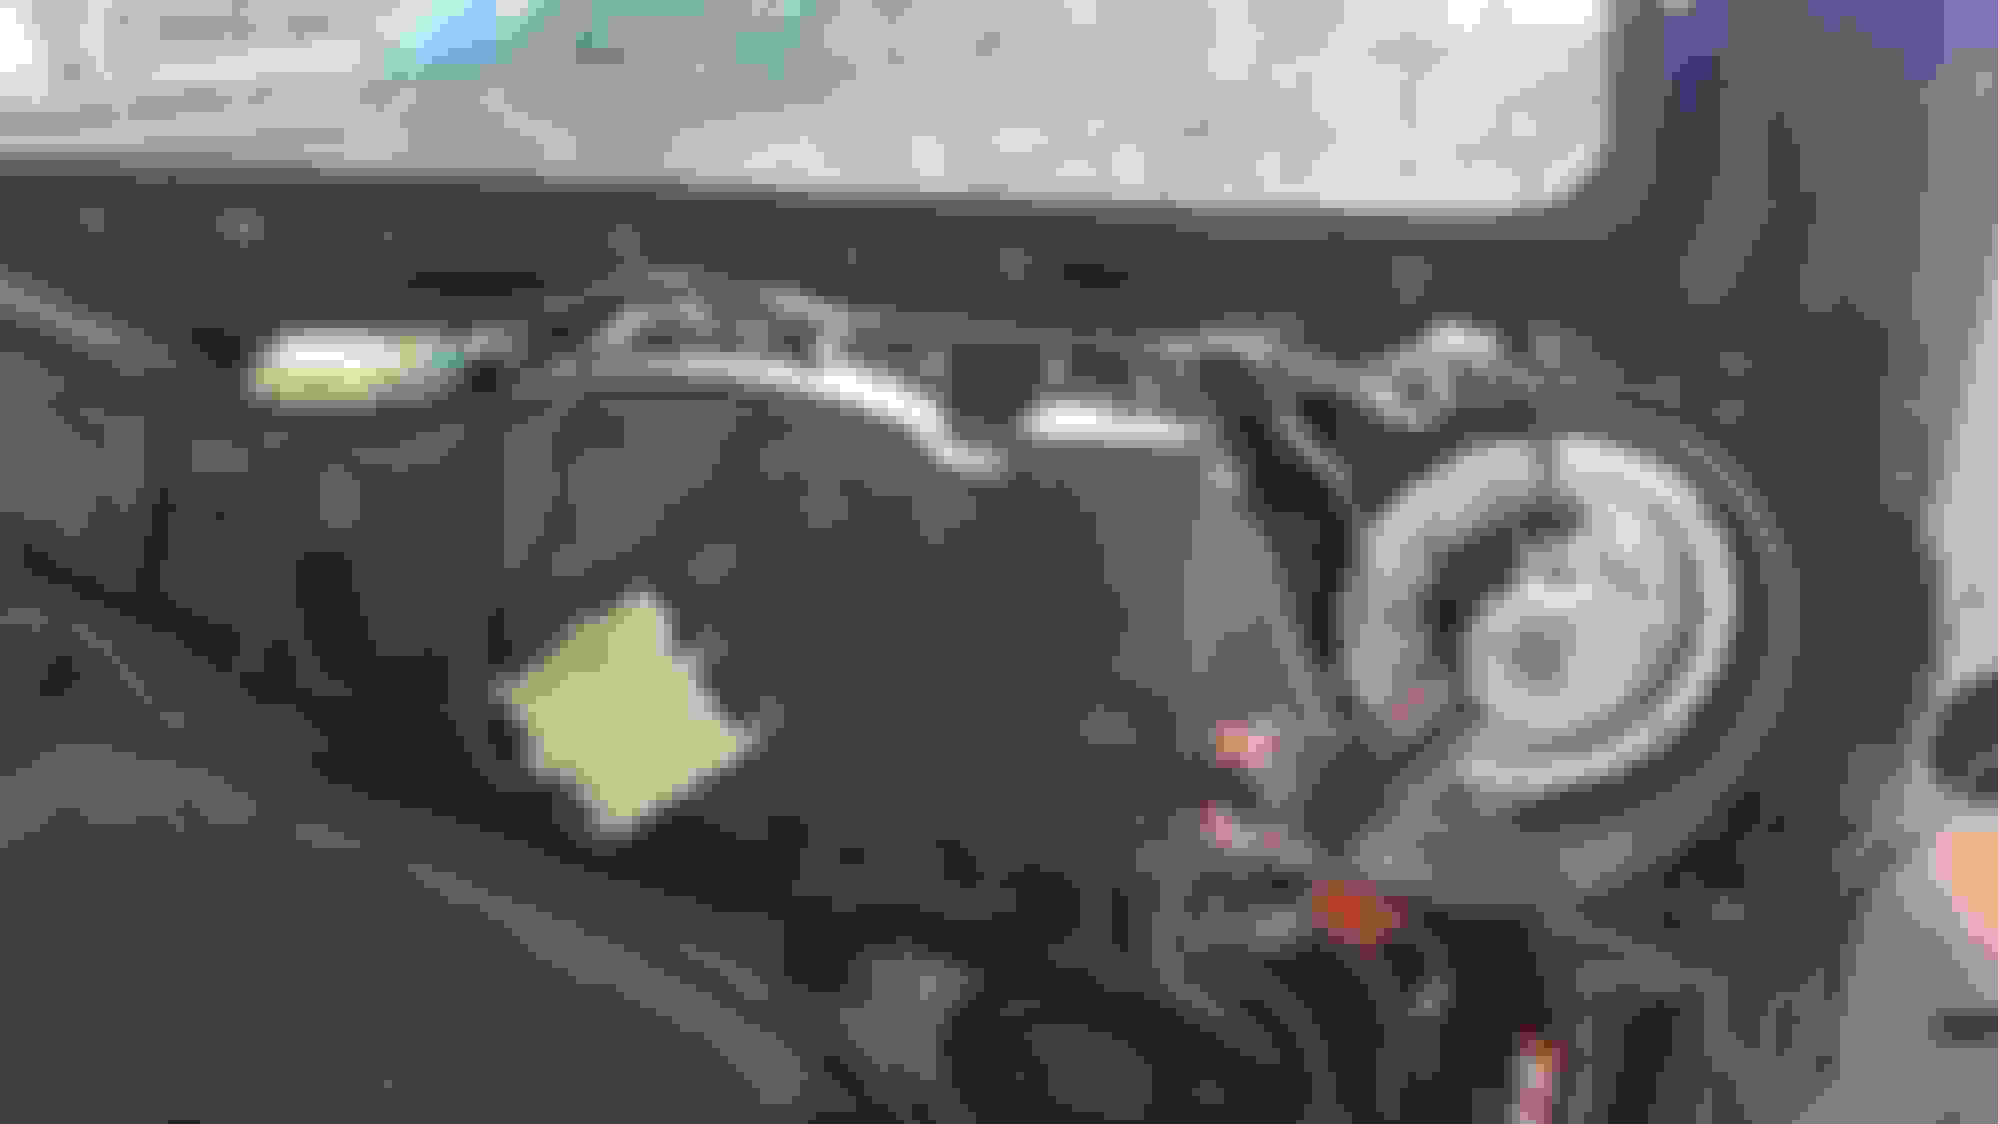
Here are some photos of my rear heater core project.
Kinda out of order, actuators and electric unplugged.
This is what it looks like after panel is off.
Front aux. HVAC panel off. Hundreds of screws. Don't rush it, if panel don't come off easy you missed a screw.
The whole thing needs removed to access heater core hoses.
This is what's left after most all plastic taken off.
New core installed.
Cleaned up with rear HVAC panel on too.
All back togather, don't rush things if if does not snap togather easy something is not right. Just be calm and tinker until it's right. Blend door was difficult, you have to put it in and use a small screw driver thru actulator hole to keep it in place while front HVAC panel is installed.
But the foam that is supposed to be attached to the panel/floor door was off and had blown into system plugging up air.
See photo
See screw driver holding up panel/floor door. It has no foam on it. I had to re-glue the foam to door.
Lots better heat now in front and back. I think the foam was the issue. Not enough air movement.
Front is really HOT now just like my other excursion.
It took me 4 hours, but I had all 5 of my kids wanting to help. Had to look for some screws too....kids. found all and I'm happy.
It's not hard, just time consuming. Best to entirely remove panel, trim, back seat, and carpet. You need the room to lay down and remove all the screws

 11-04-2015, 03:38 PM