When you click on links to various merchants on this site and make a purchase, this can result in this site earning a commission. Affiliate programs and affiliations include, but are not limited to, the eBay Partner Network.
Too bad you couldn't do a heat treating on the inner fenders, akin to welding heat signatures. I like the look of raw metal that's been welded. Actually if you had access to a bead roller it would be sweet to mimic your speed holes on the inner fenders.
Damn!!!! Look at all those fantastic things you guys all said. Thanks everyone for keeping up with the thread and providing some useful feedback.
I can always use the input.
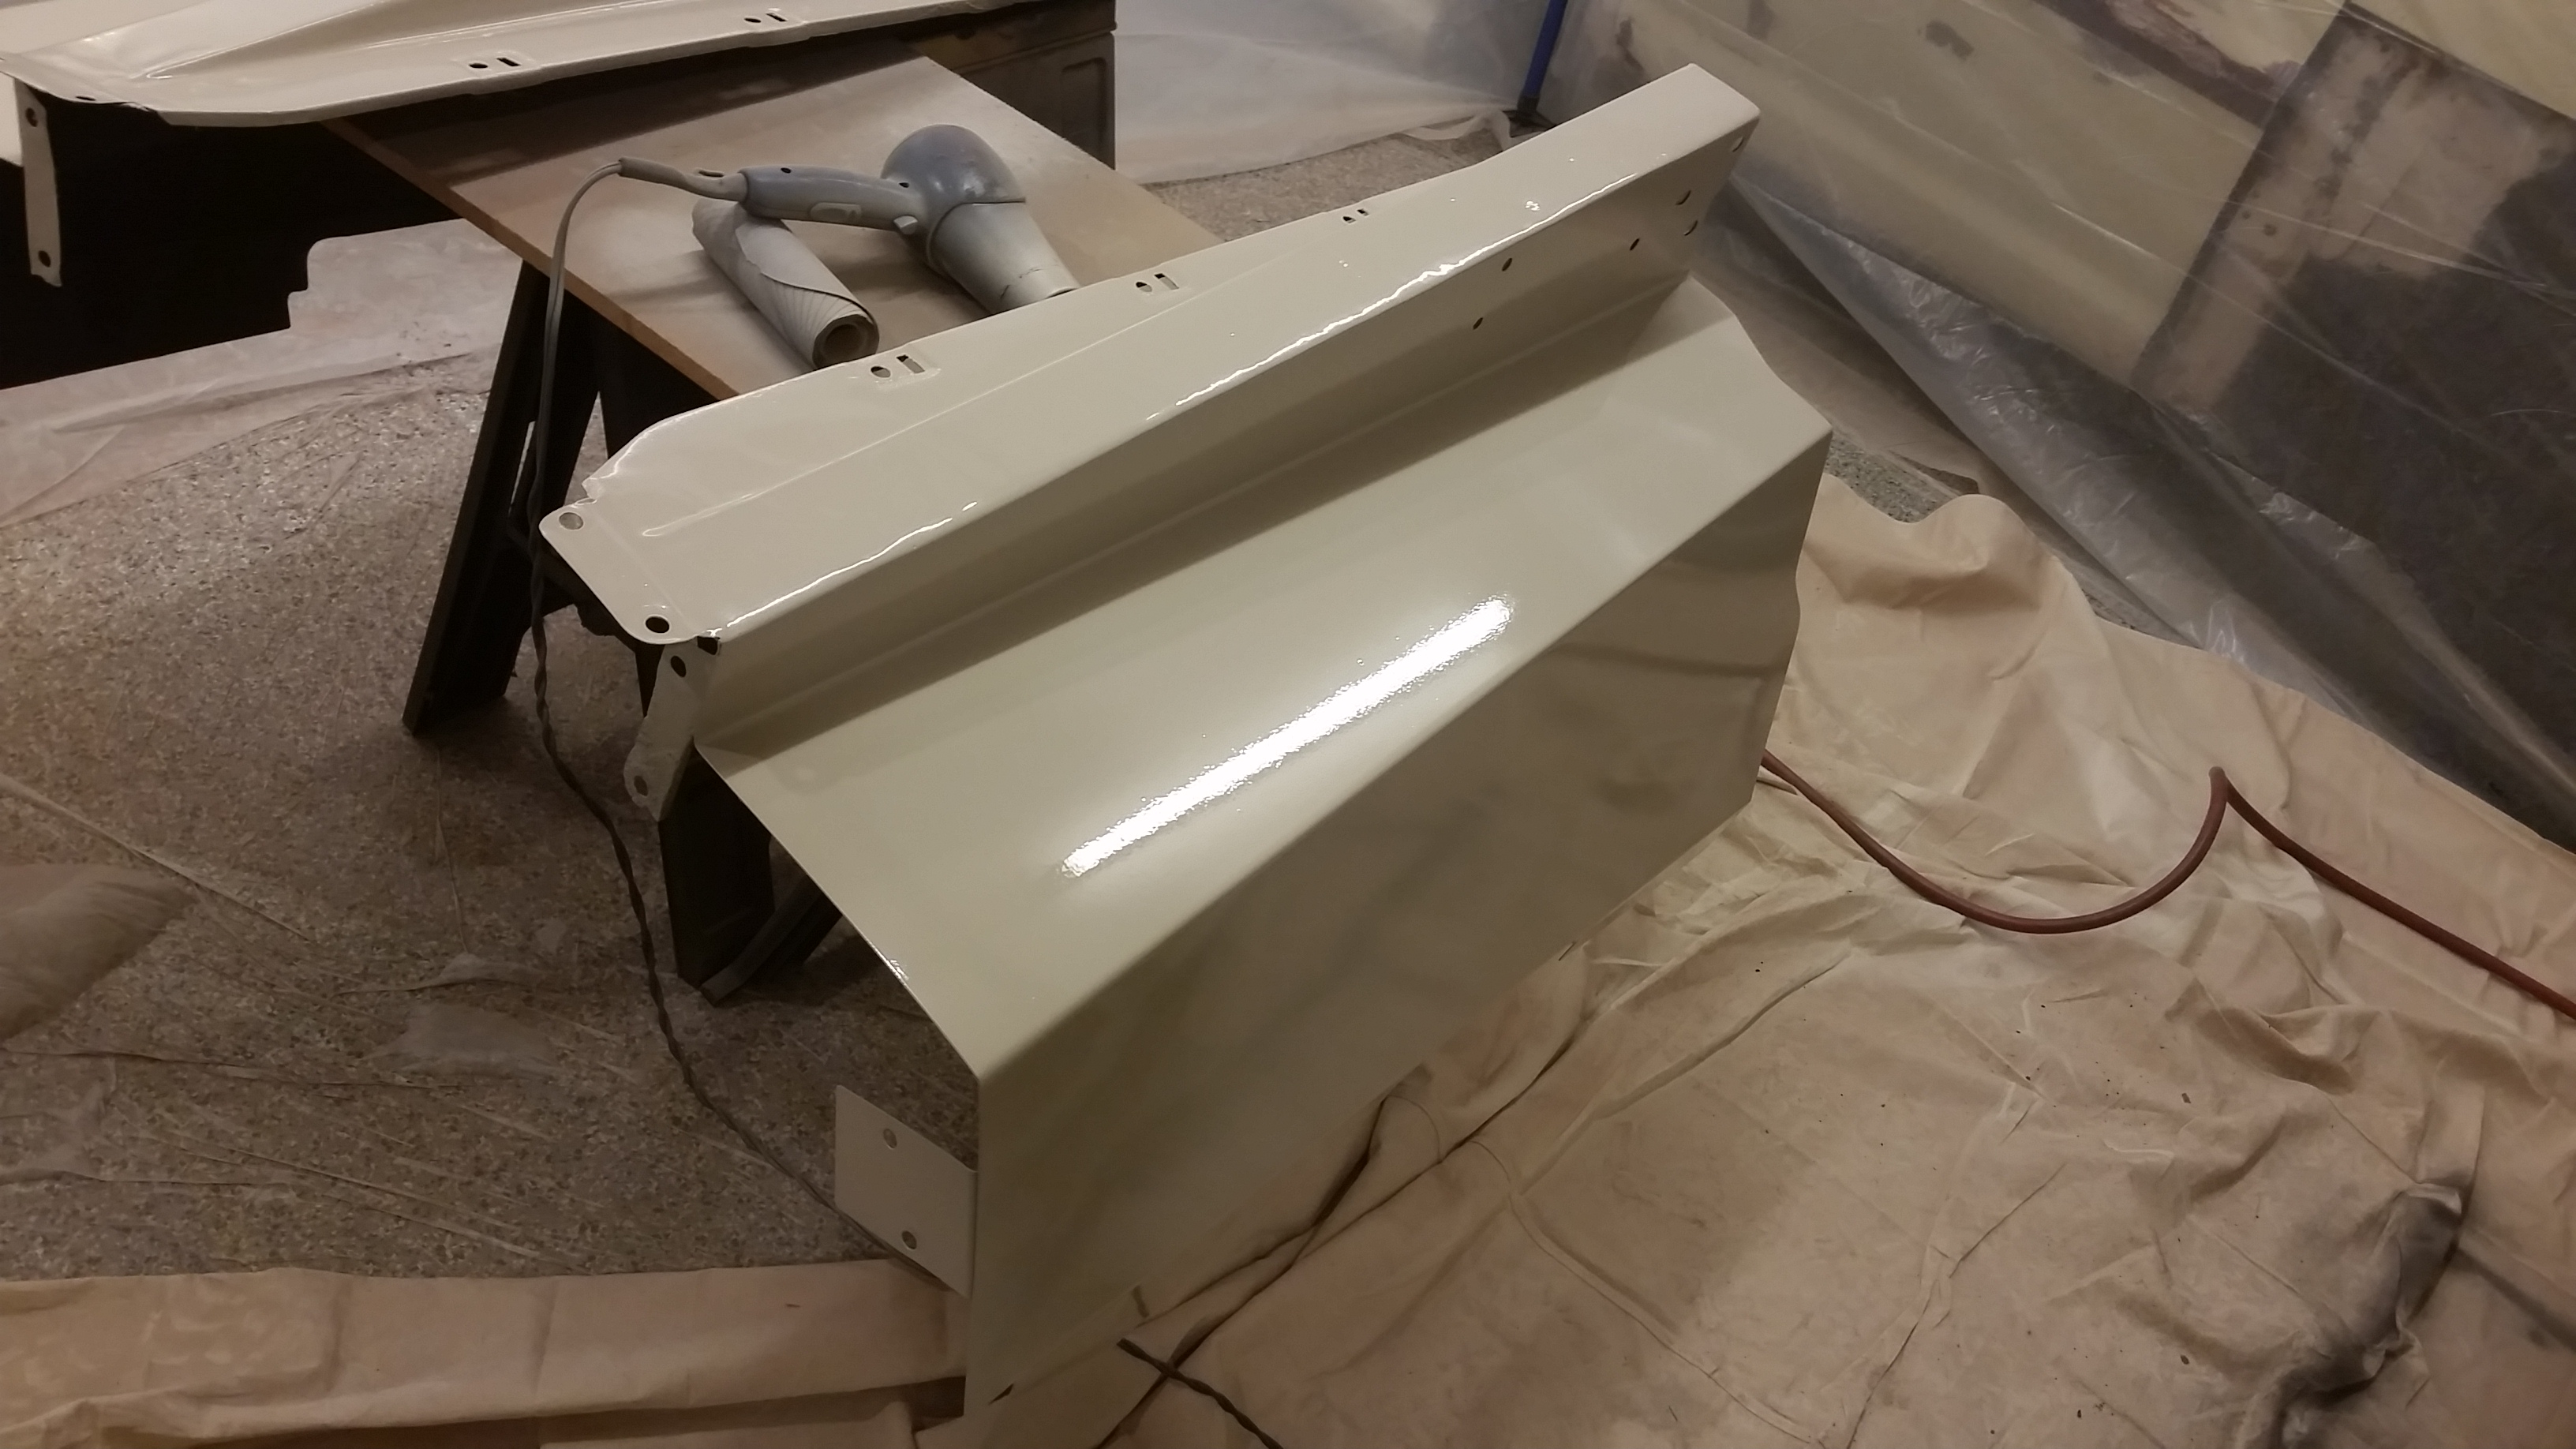
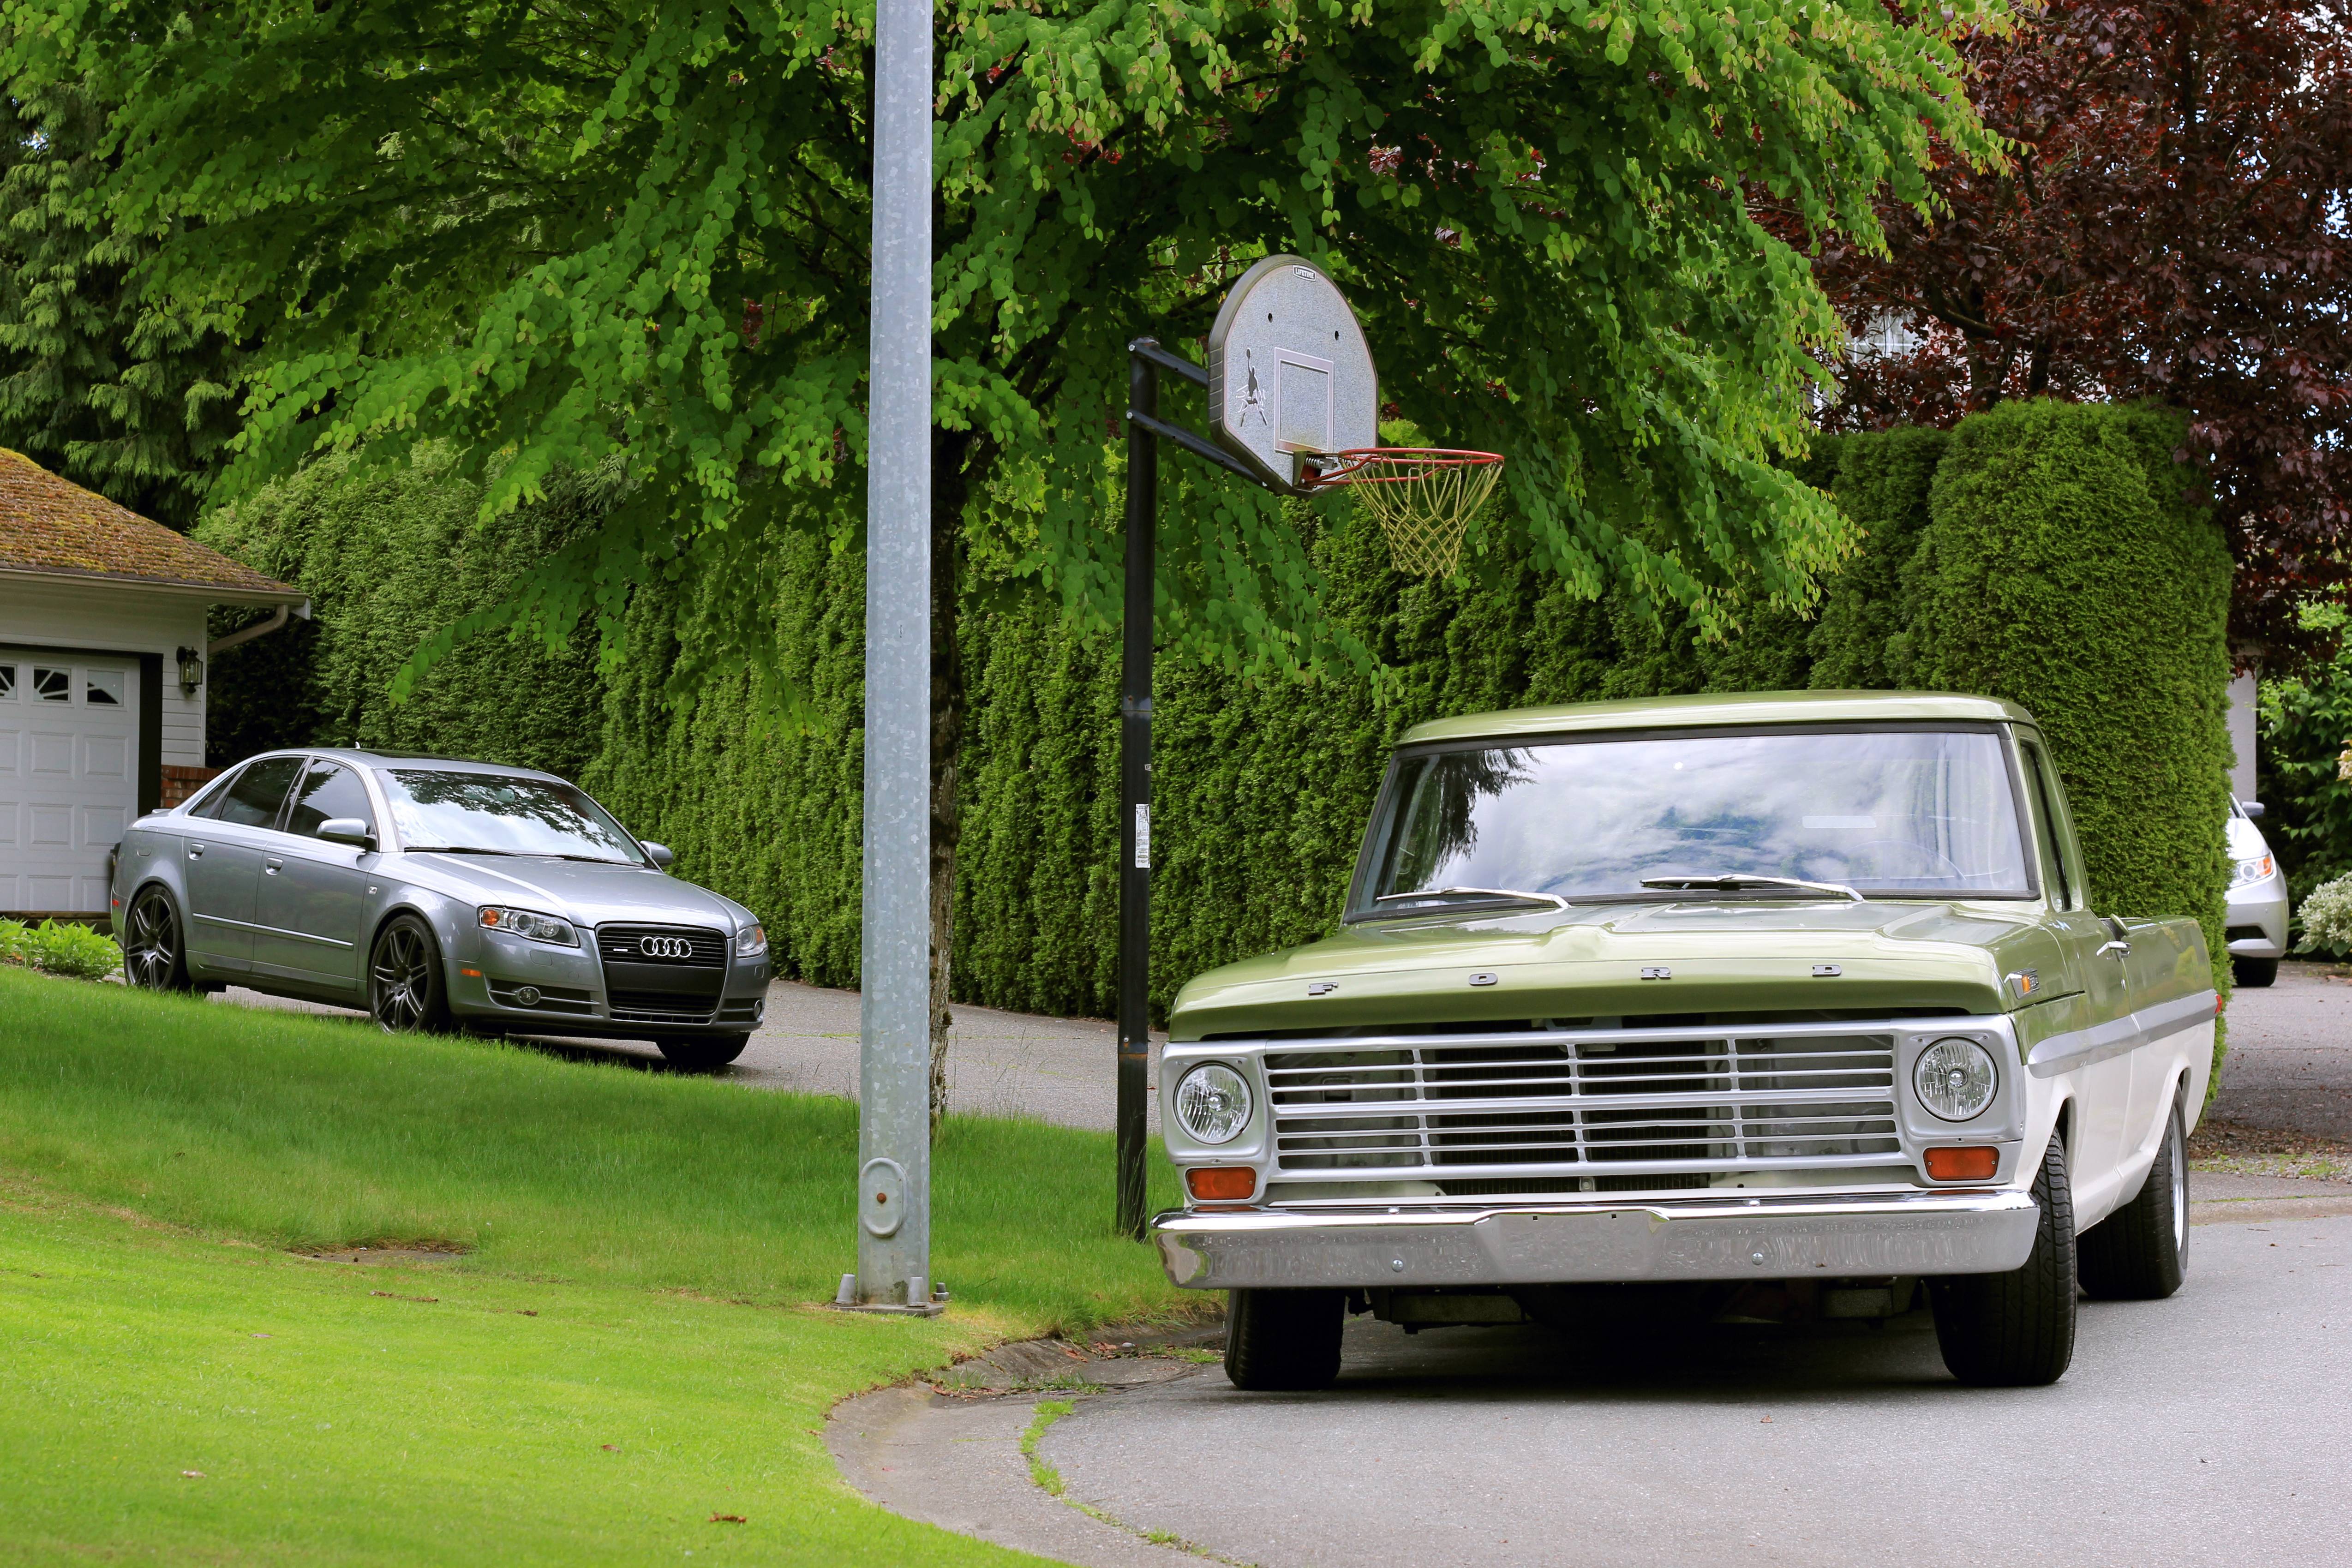
So I picked up a raptor liner kit today and some satin pebble beige paint to mix it up. It is pretty close to the stock color although the truck is pretty faded and a shade or so off.
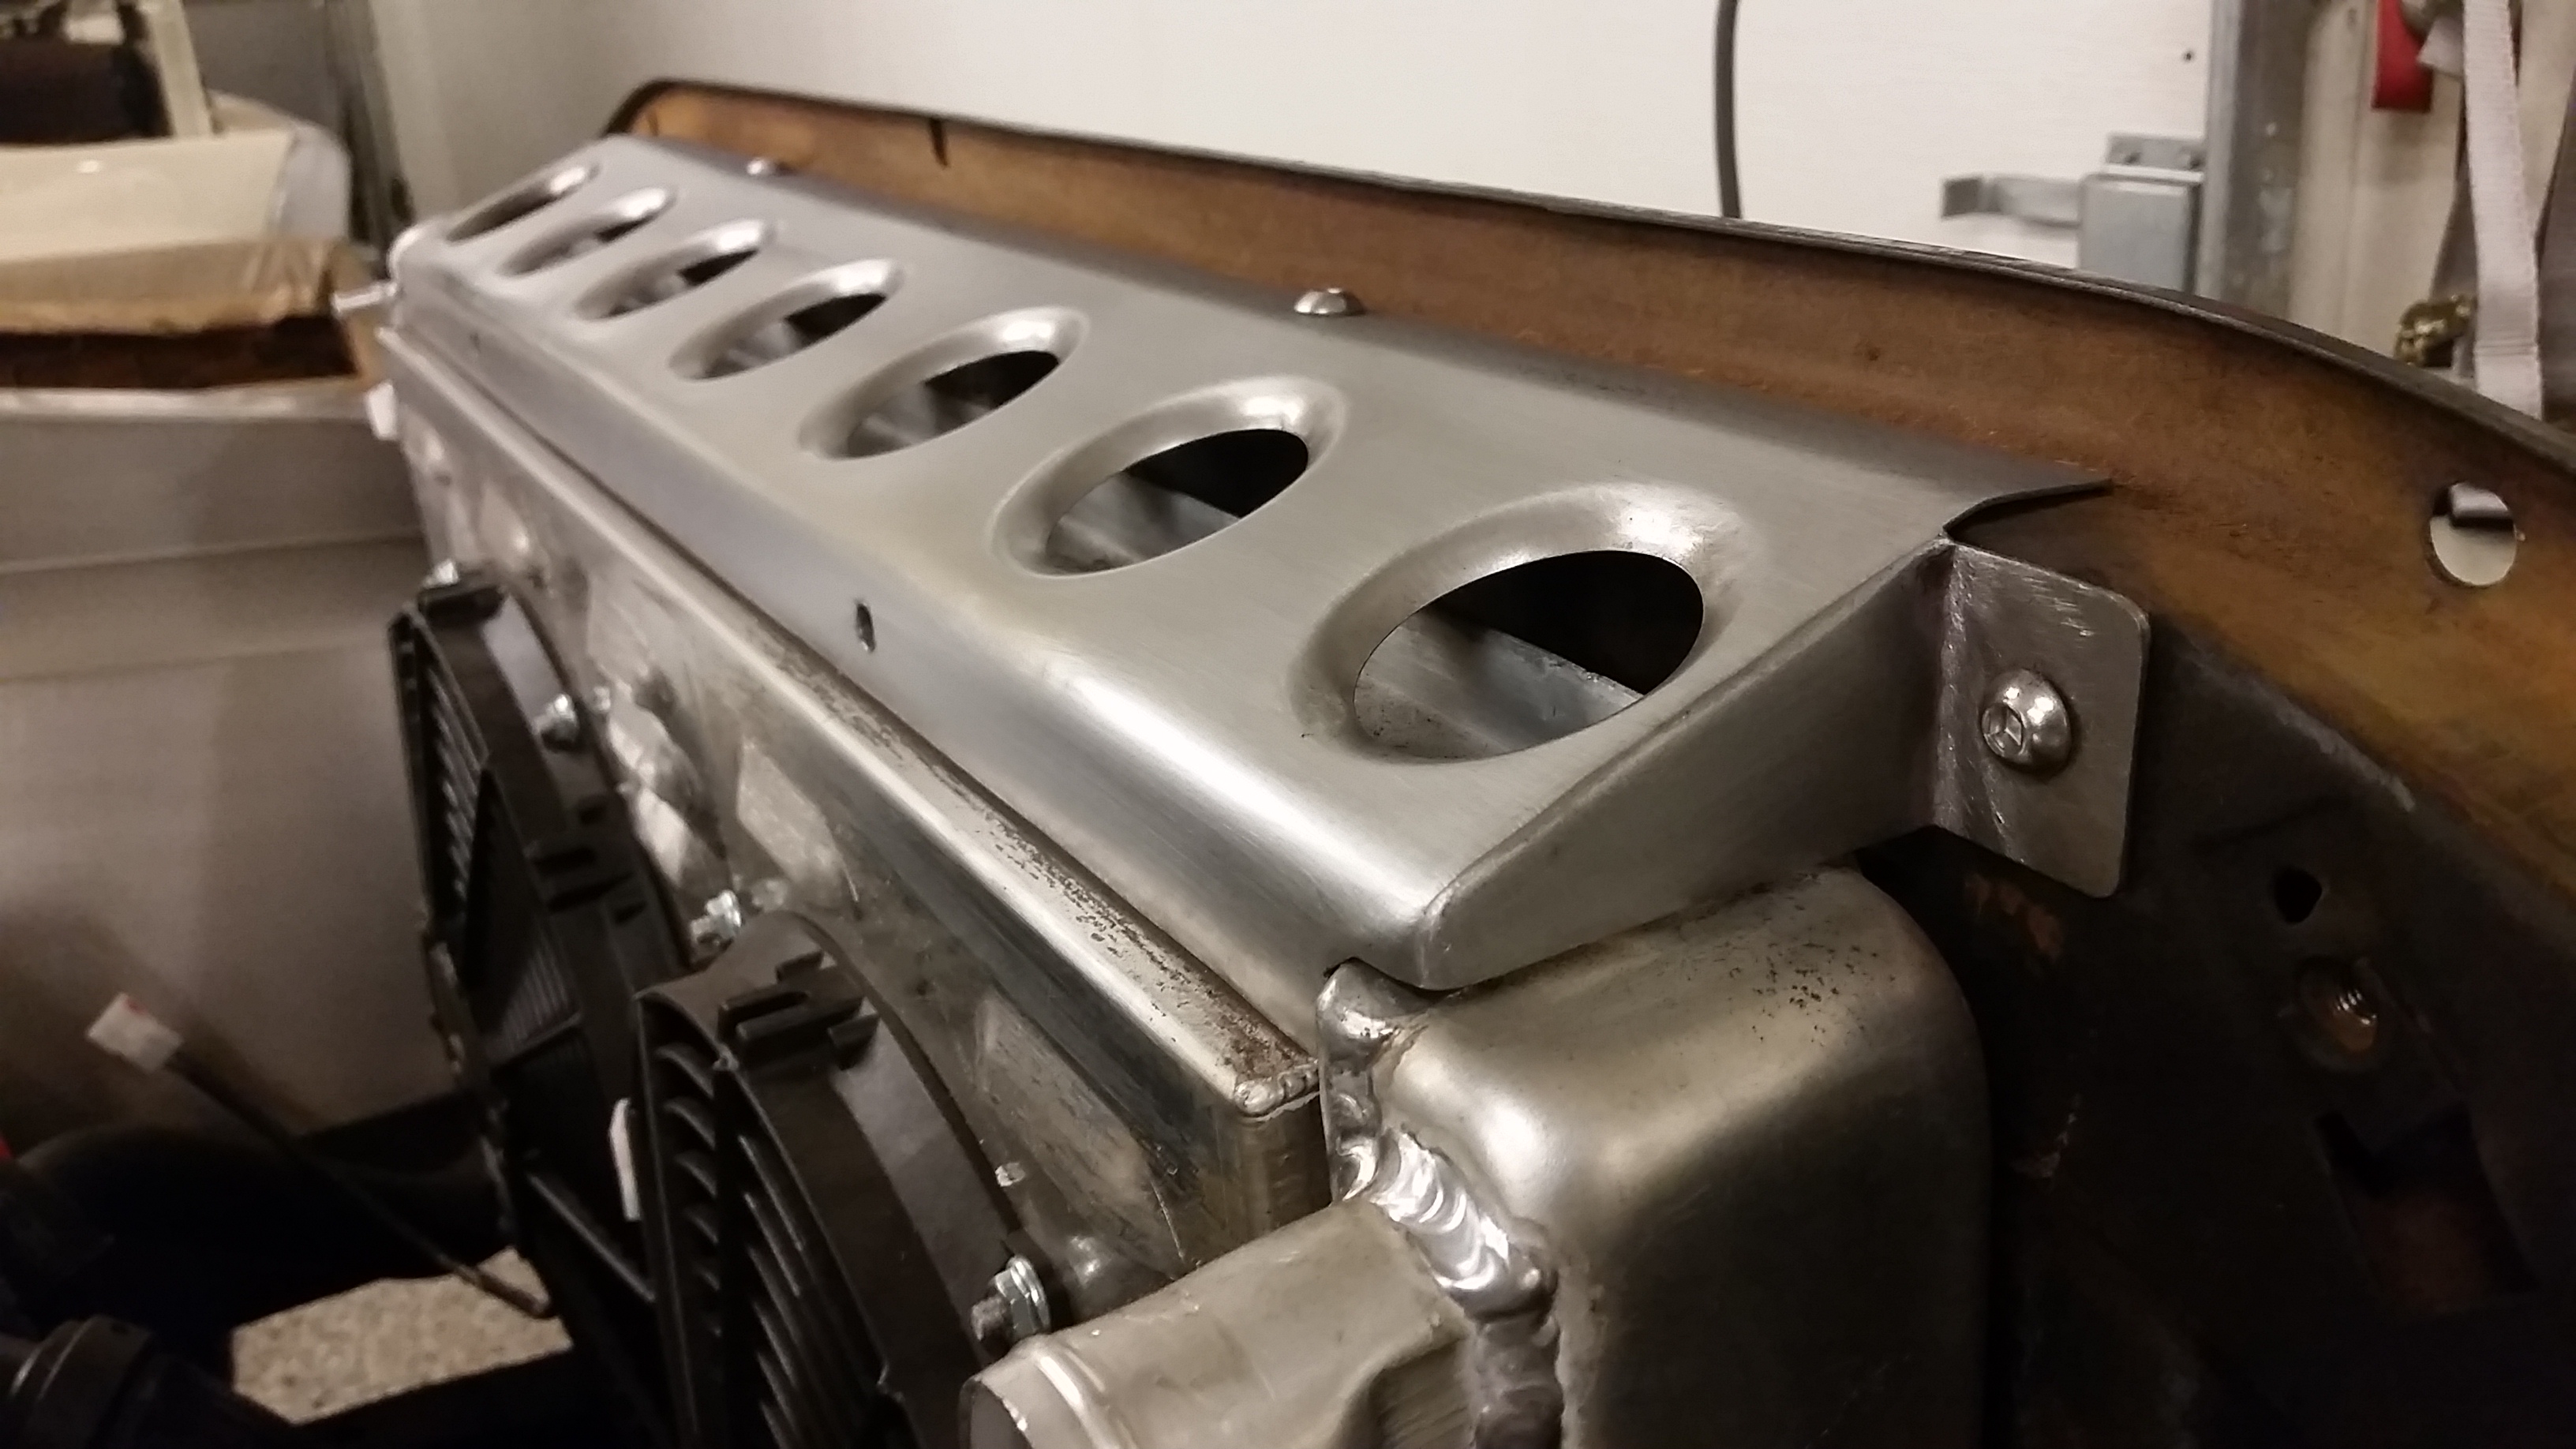
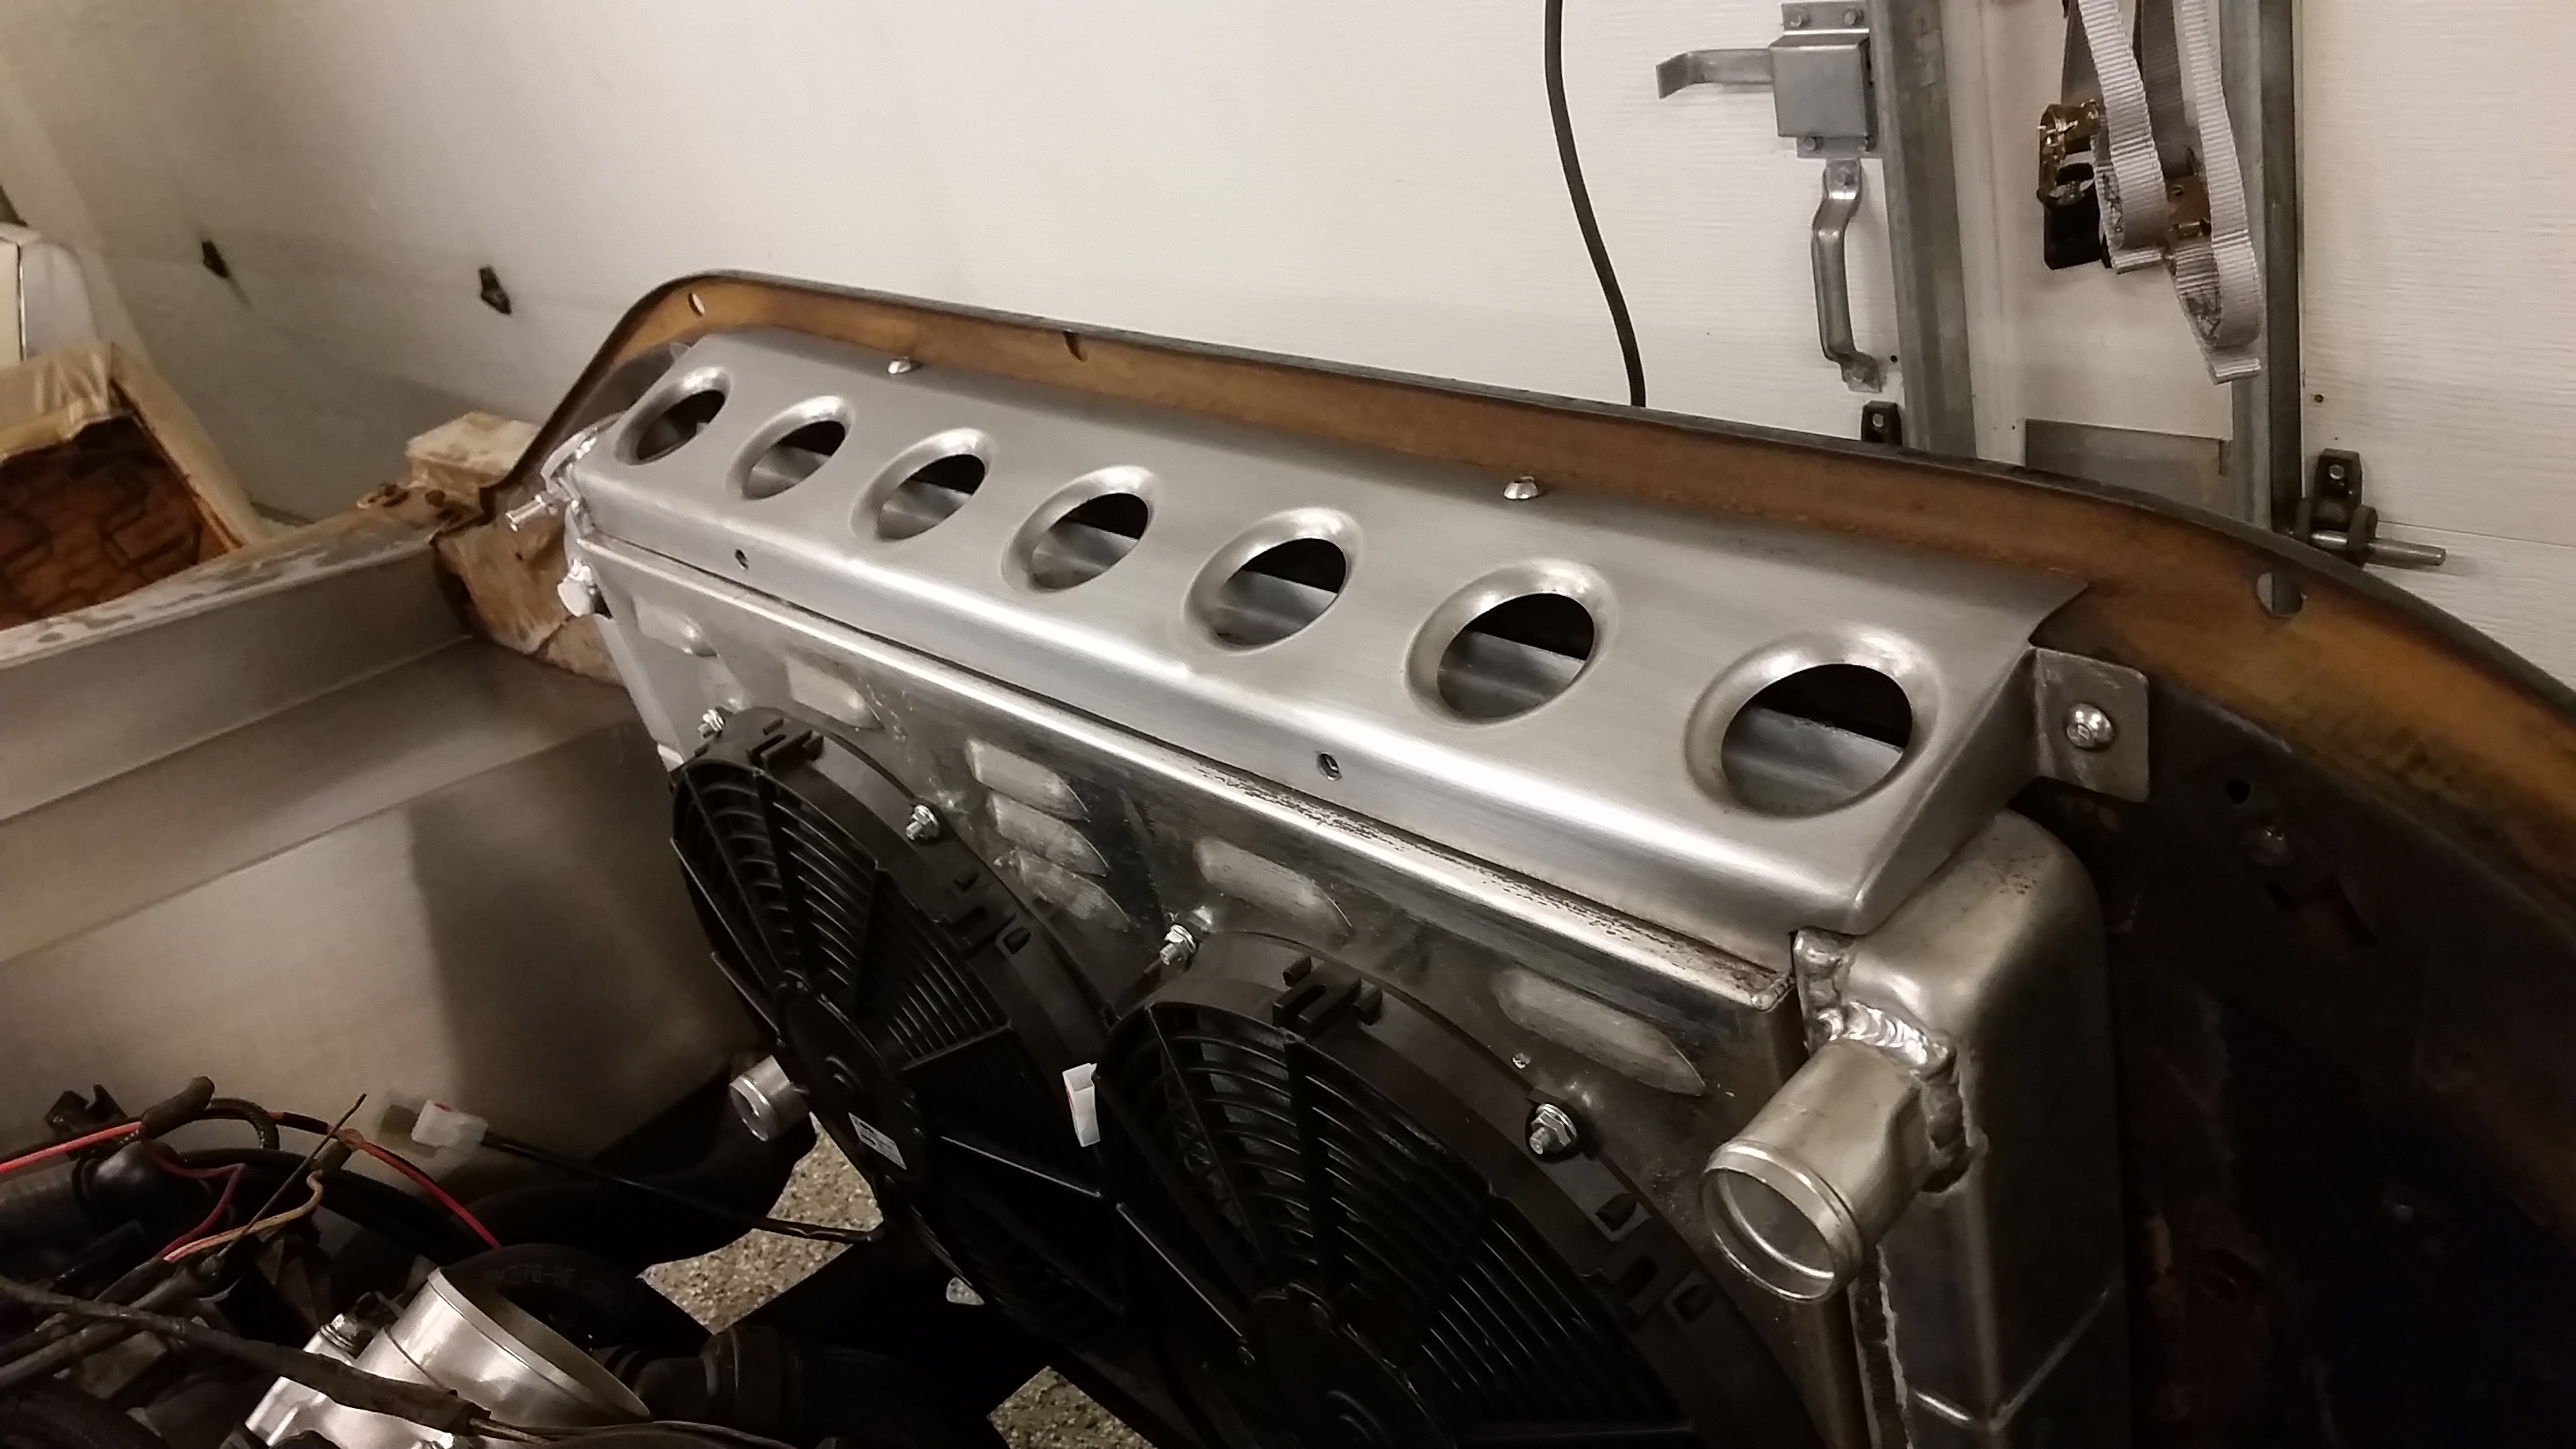
I built the end caps for the radiator top mount and got it all welded up with some additional tabs to mount it. Finished it out with a fair bit of metal work (Still learning this stuff) but super happy with how this turned out.
I am thinking of shooting the inner fenders with etch primer in grey, then dark red like the factory and some satin pebble beige on top of that. If I dont like it and it looks too new, I can hit it with a little bit of paper and polish it out to match the exterior finish. I also dont think I am going to do any additional bodywork on the fenders, they are how they are.
Well, not a great weekend for work on the truck really but I was able to sell the shell of the mustang today!! And even sold the front brakes off of it yesterday, so I did get some stuff done.
I messed around with the ****ty core support some more yesterday Patched up some more rust and welded up the lower radiator mount to the core support. I scuffed it down and hit it with some etch primer.
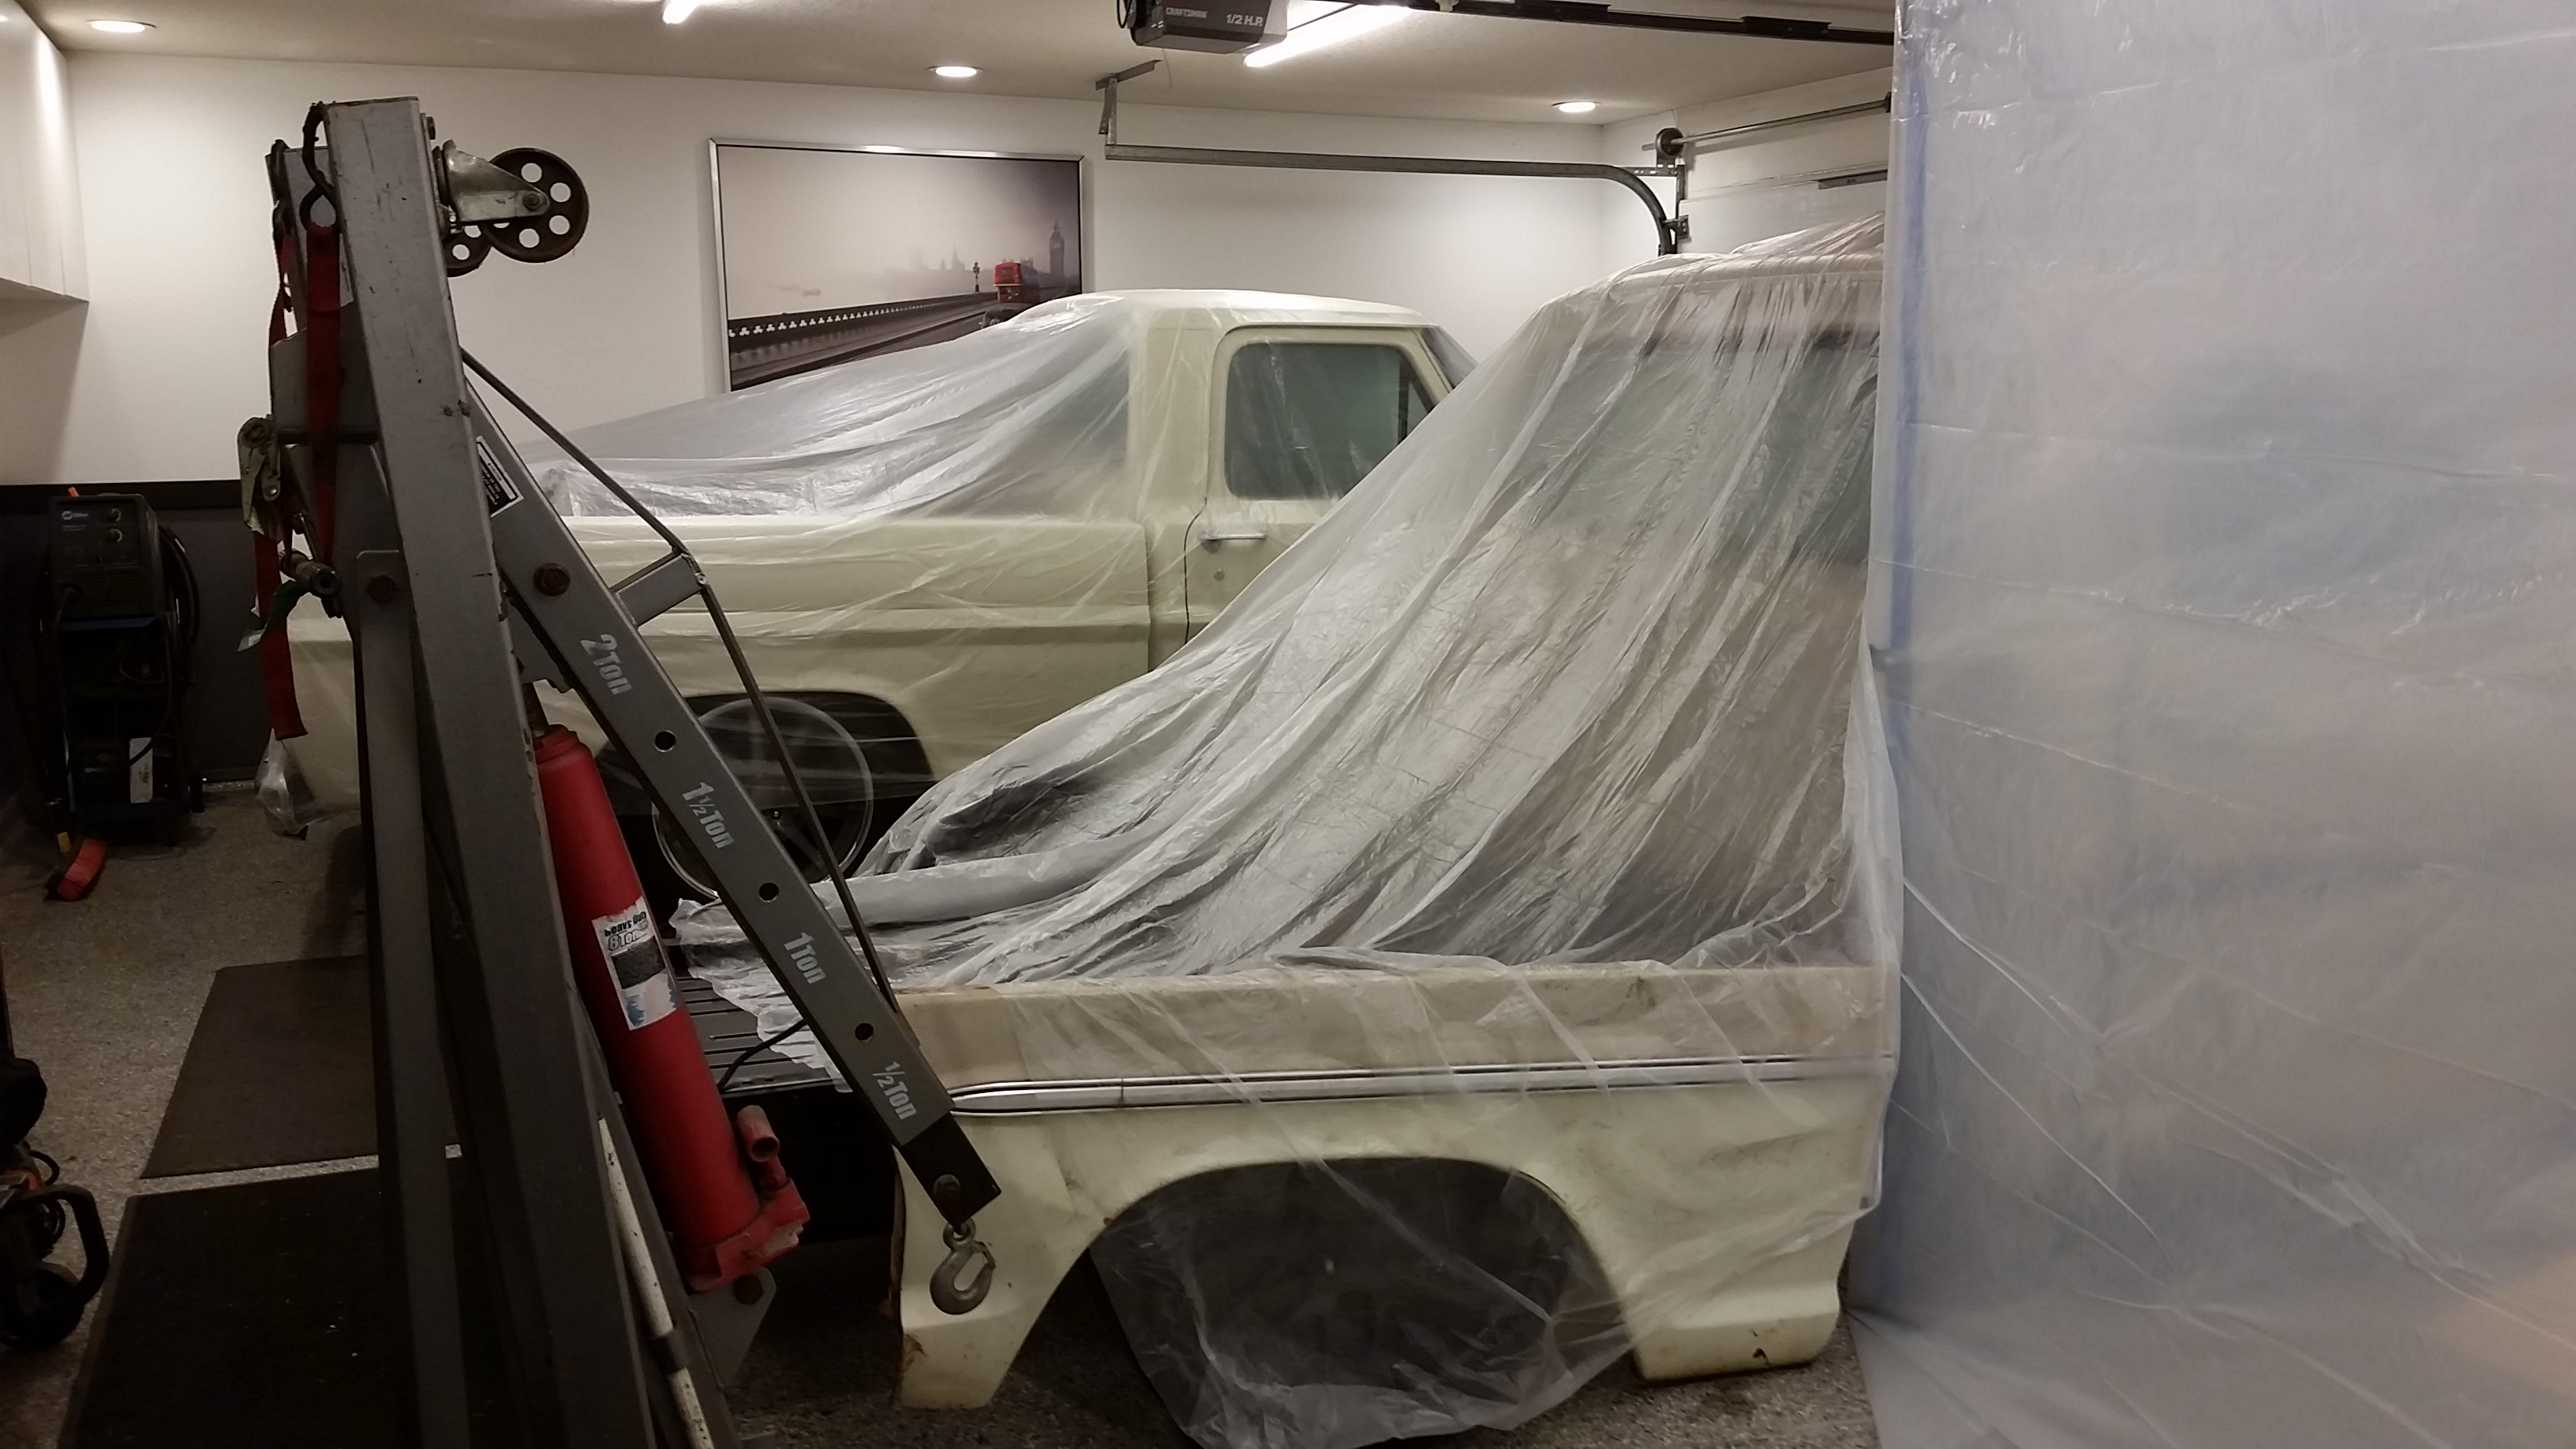
This morning I had to clean up the shop, it was totally getting out of hand so I spent a couple of hours cleaning up all of my messes and mopping out the side of the shop that I had been working on. I also manage to box up the rest of the mustang parts and just do a nice clean up, it was overdue!!
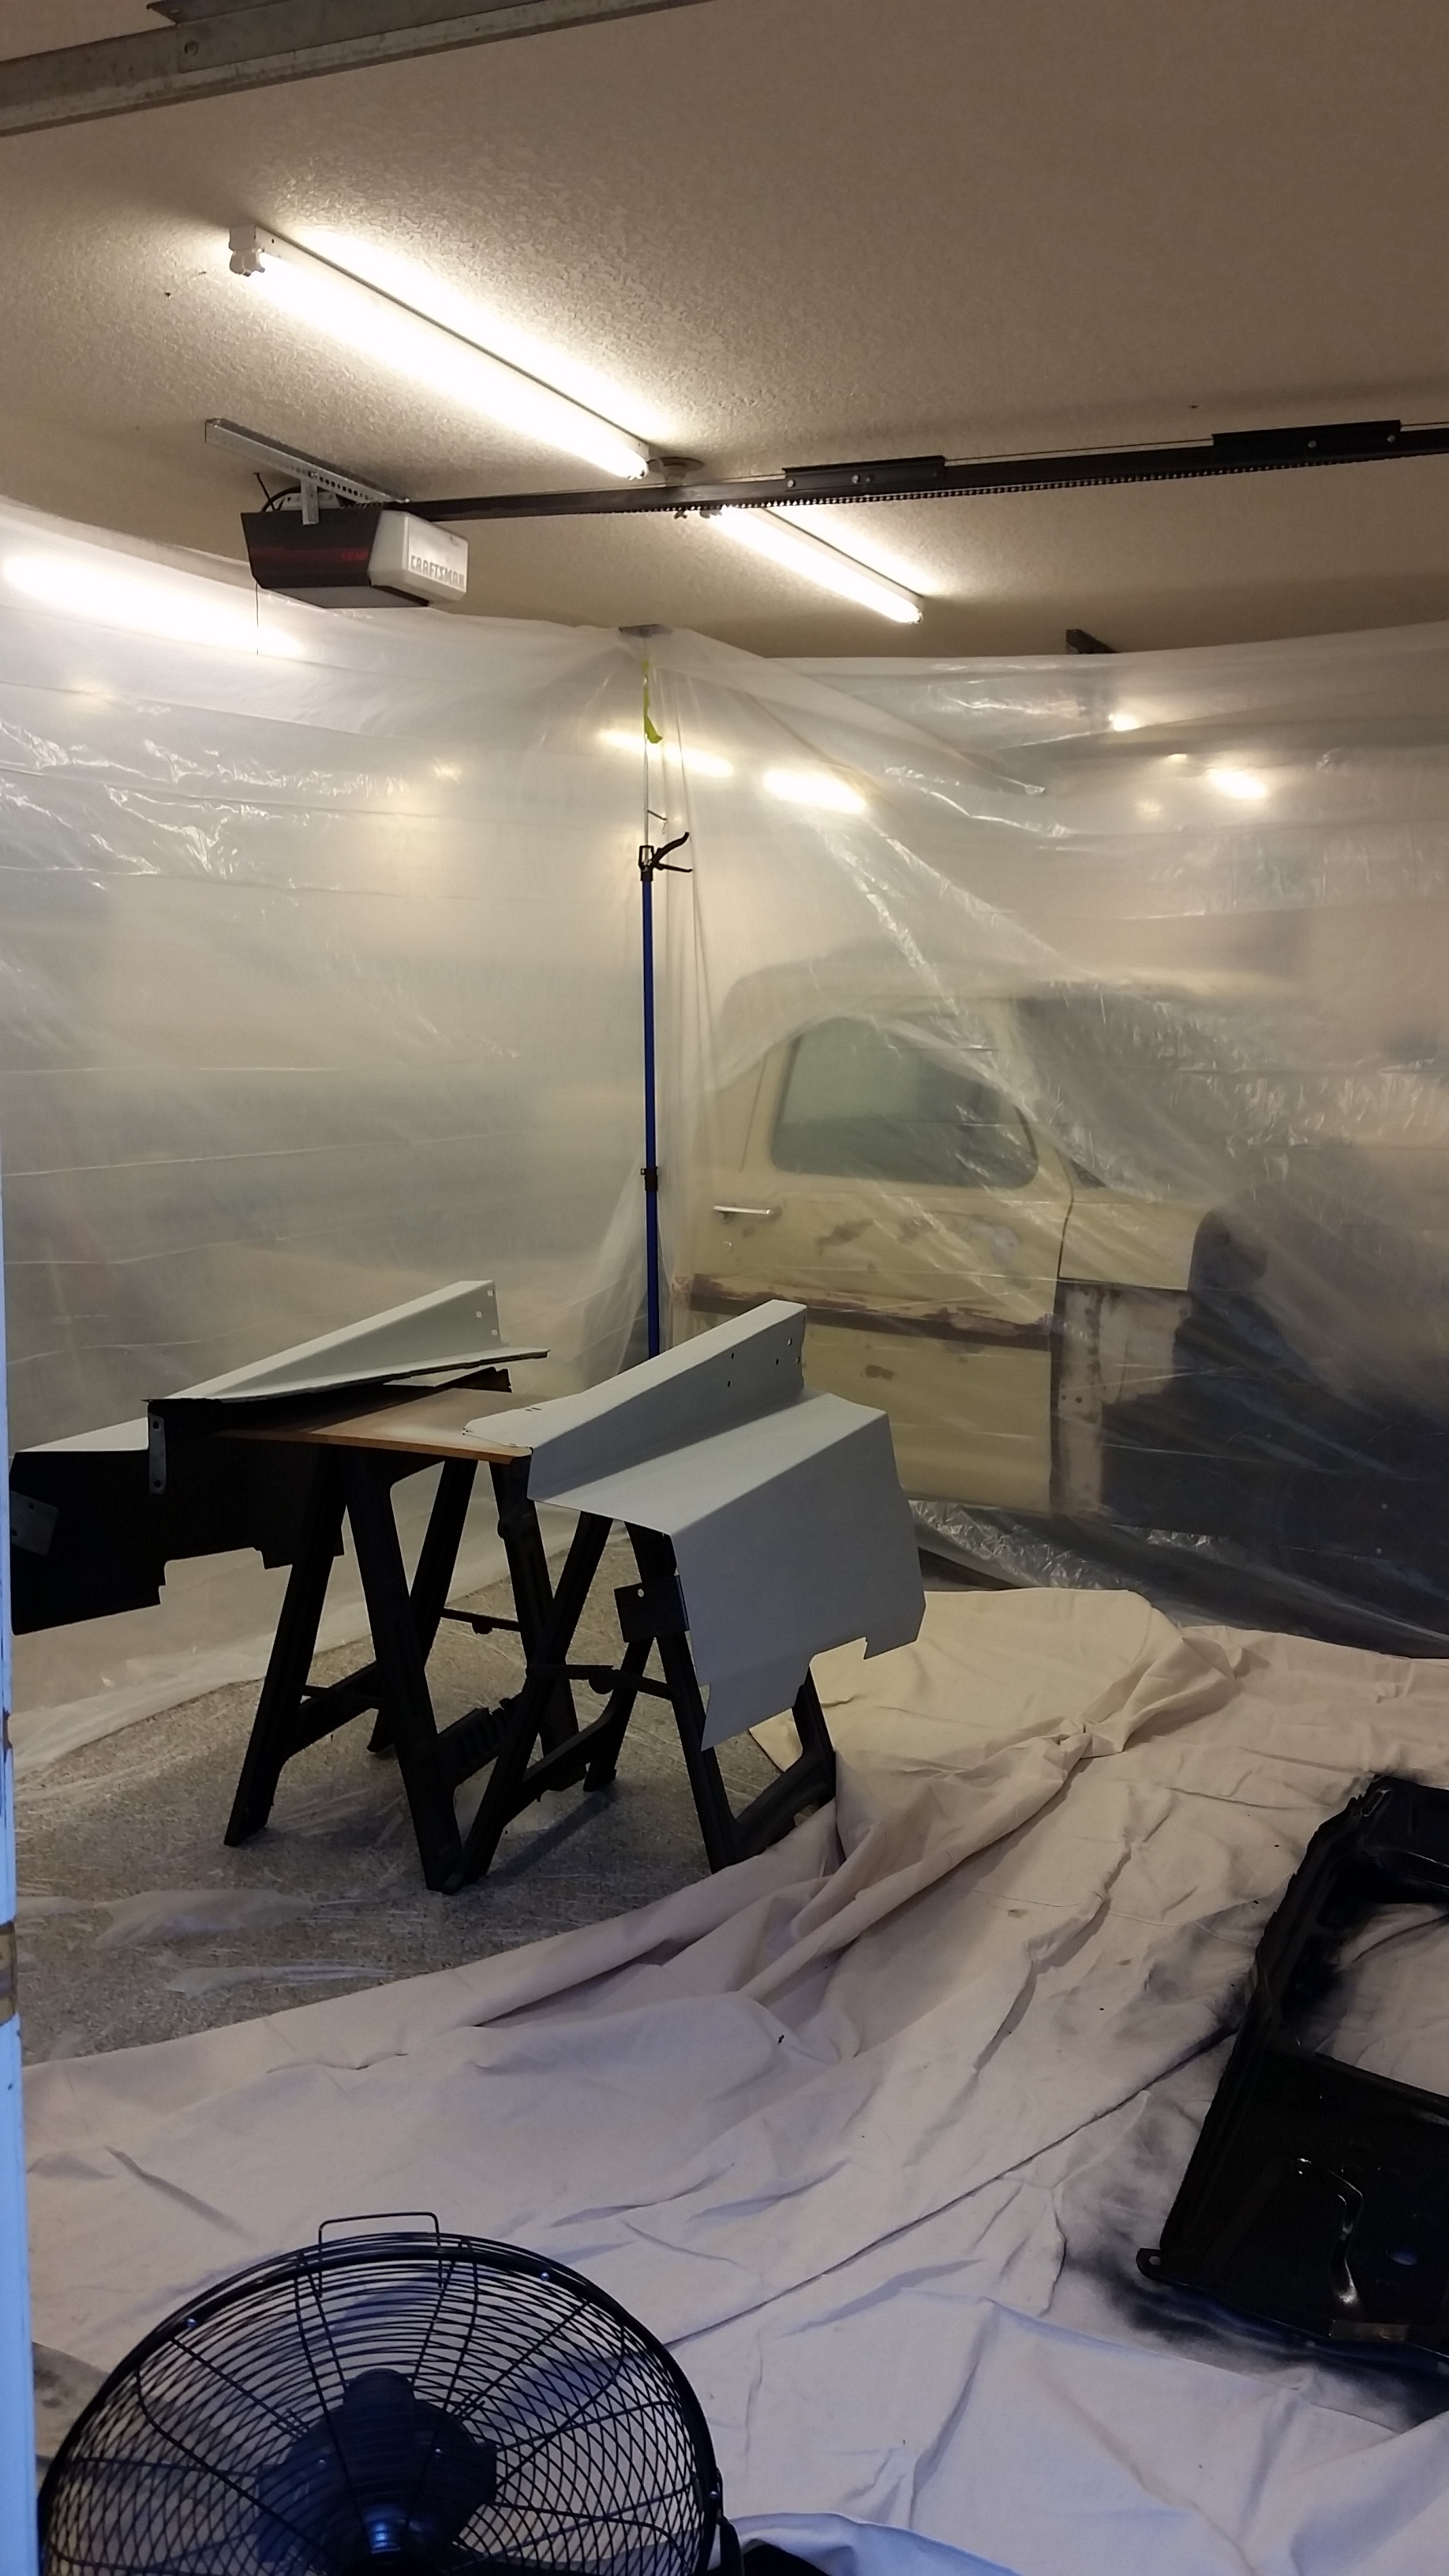
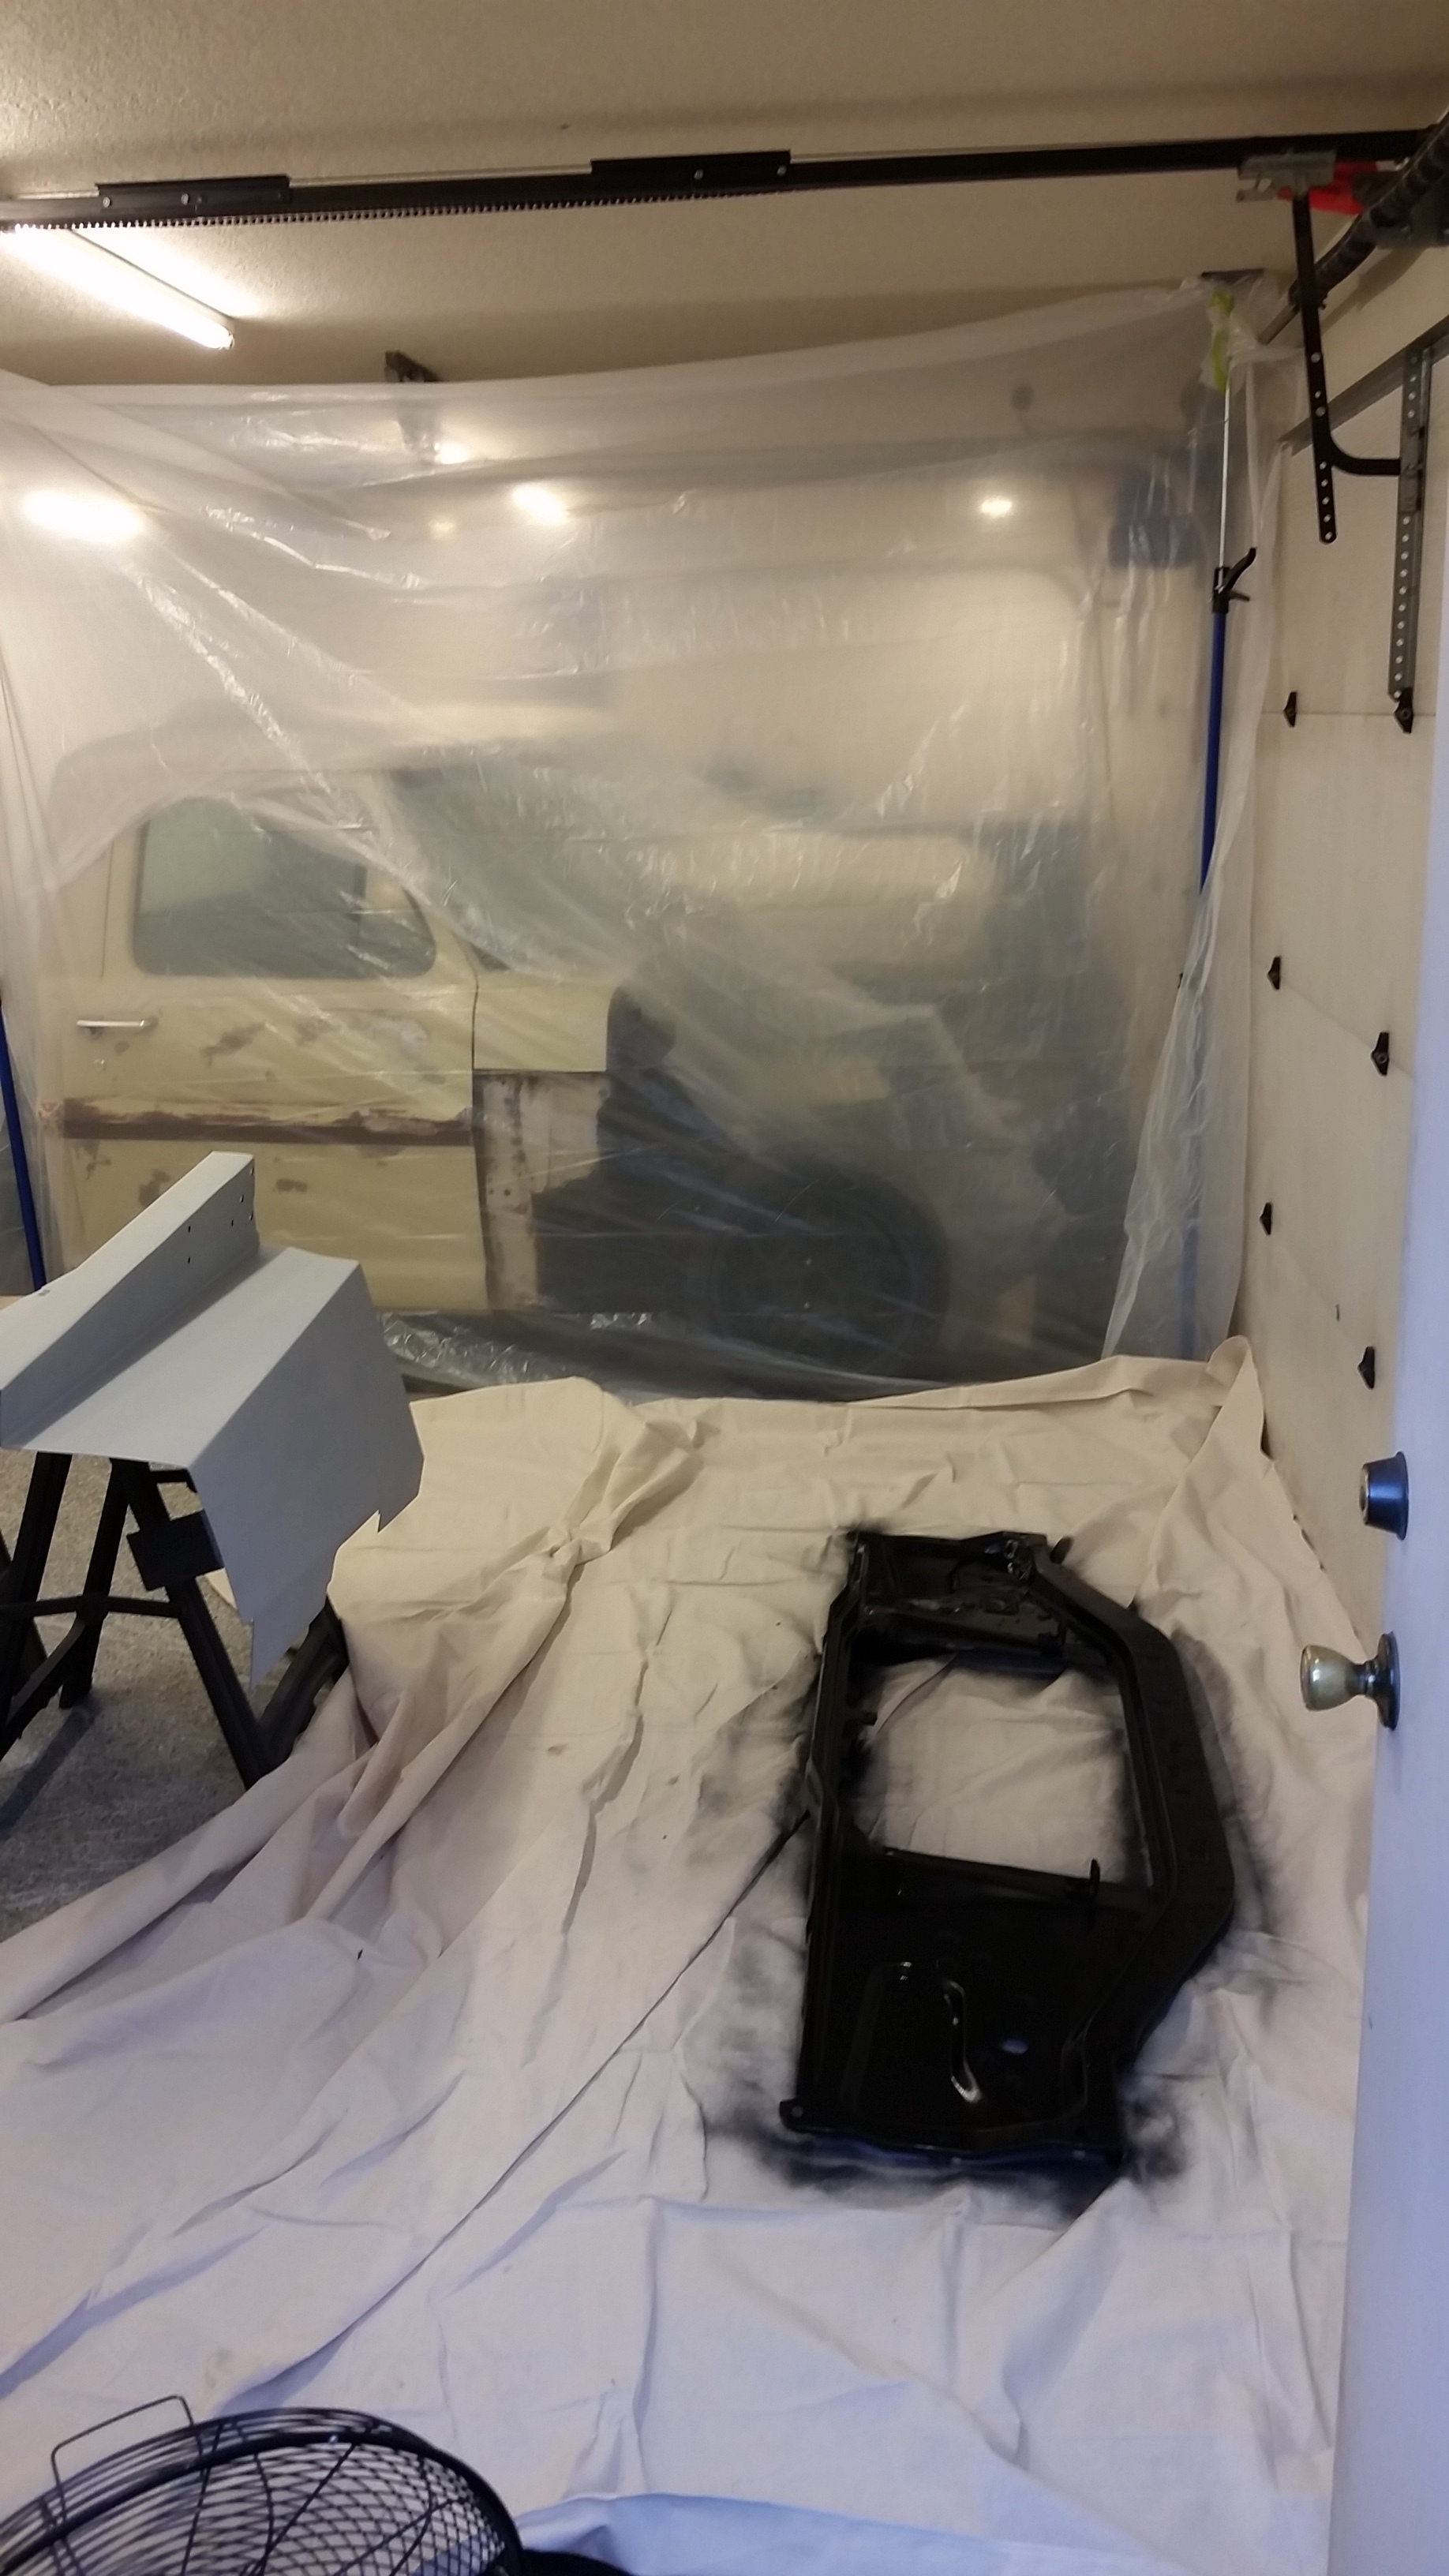
So with all of that done, I got to building my Paint booth...haha.
As you can see, I am protecting just about everything.
Self etch, then high build grey primer
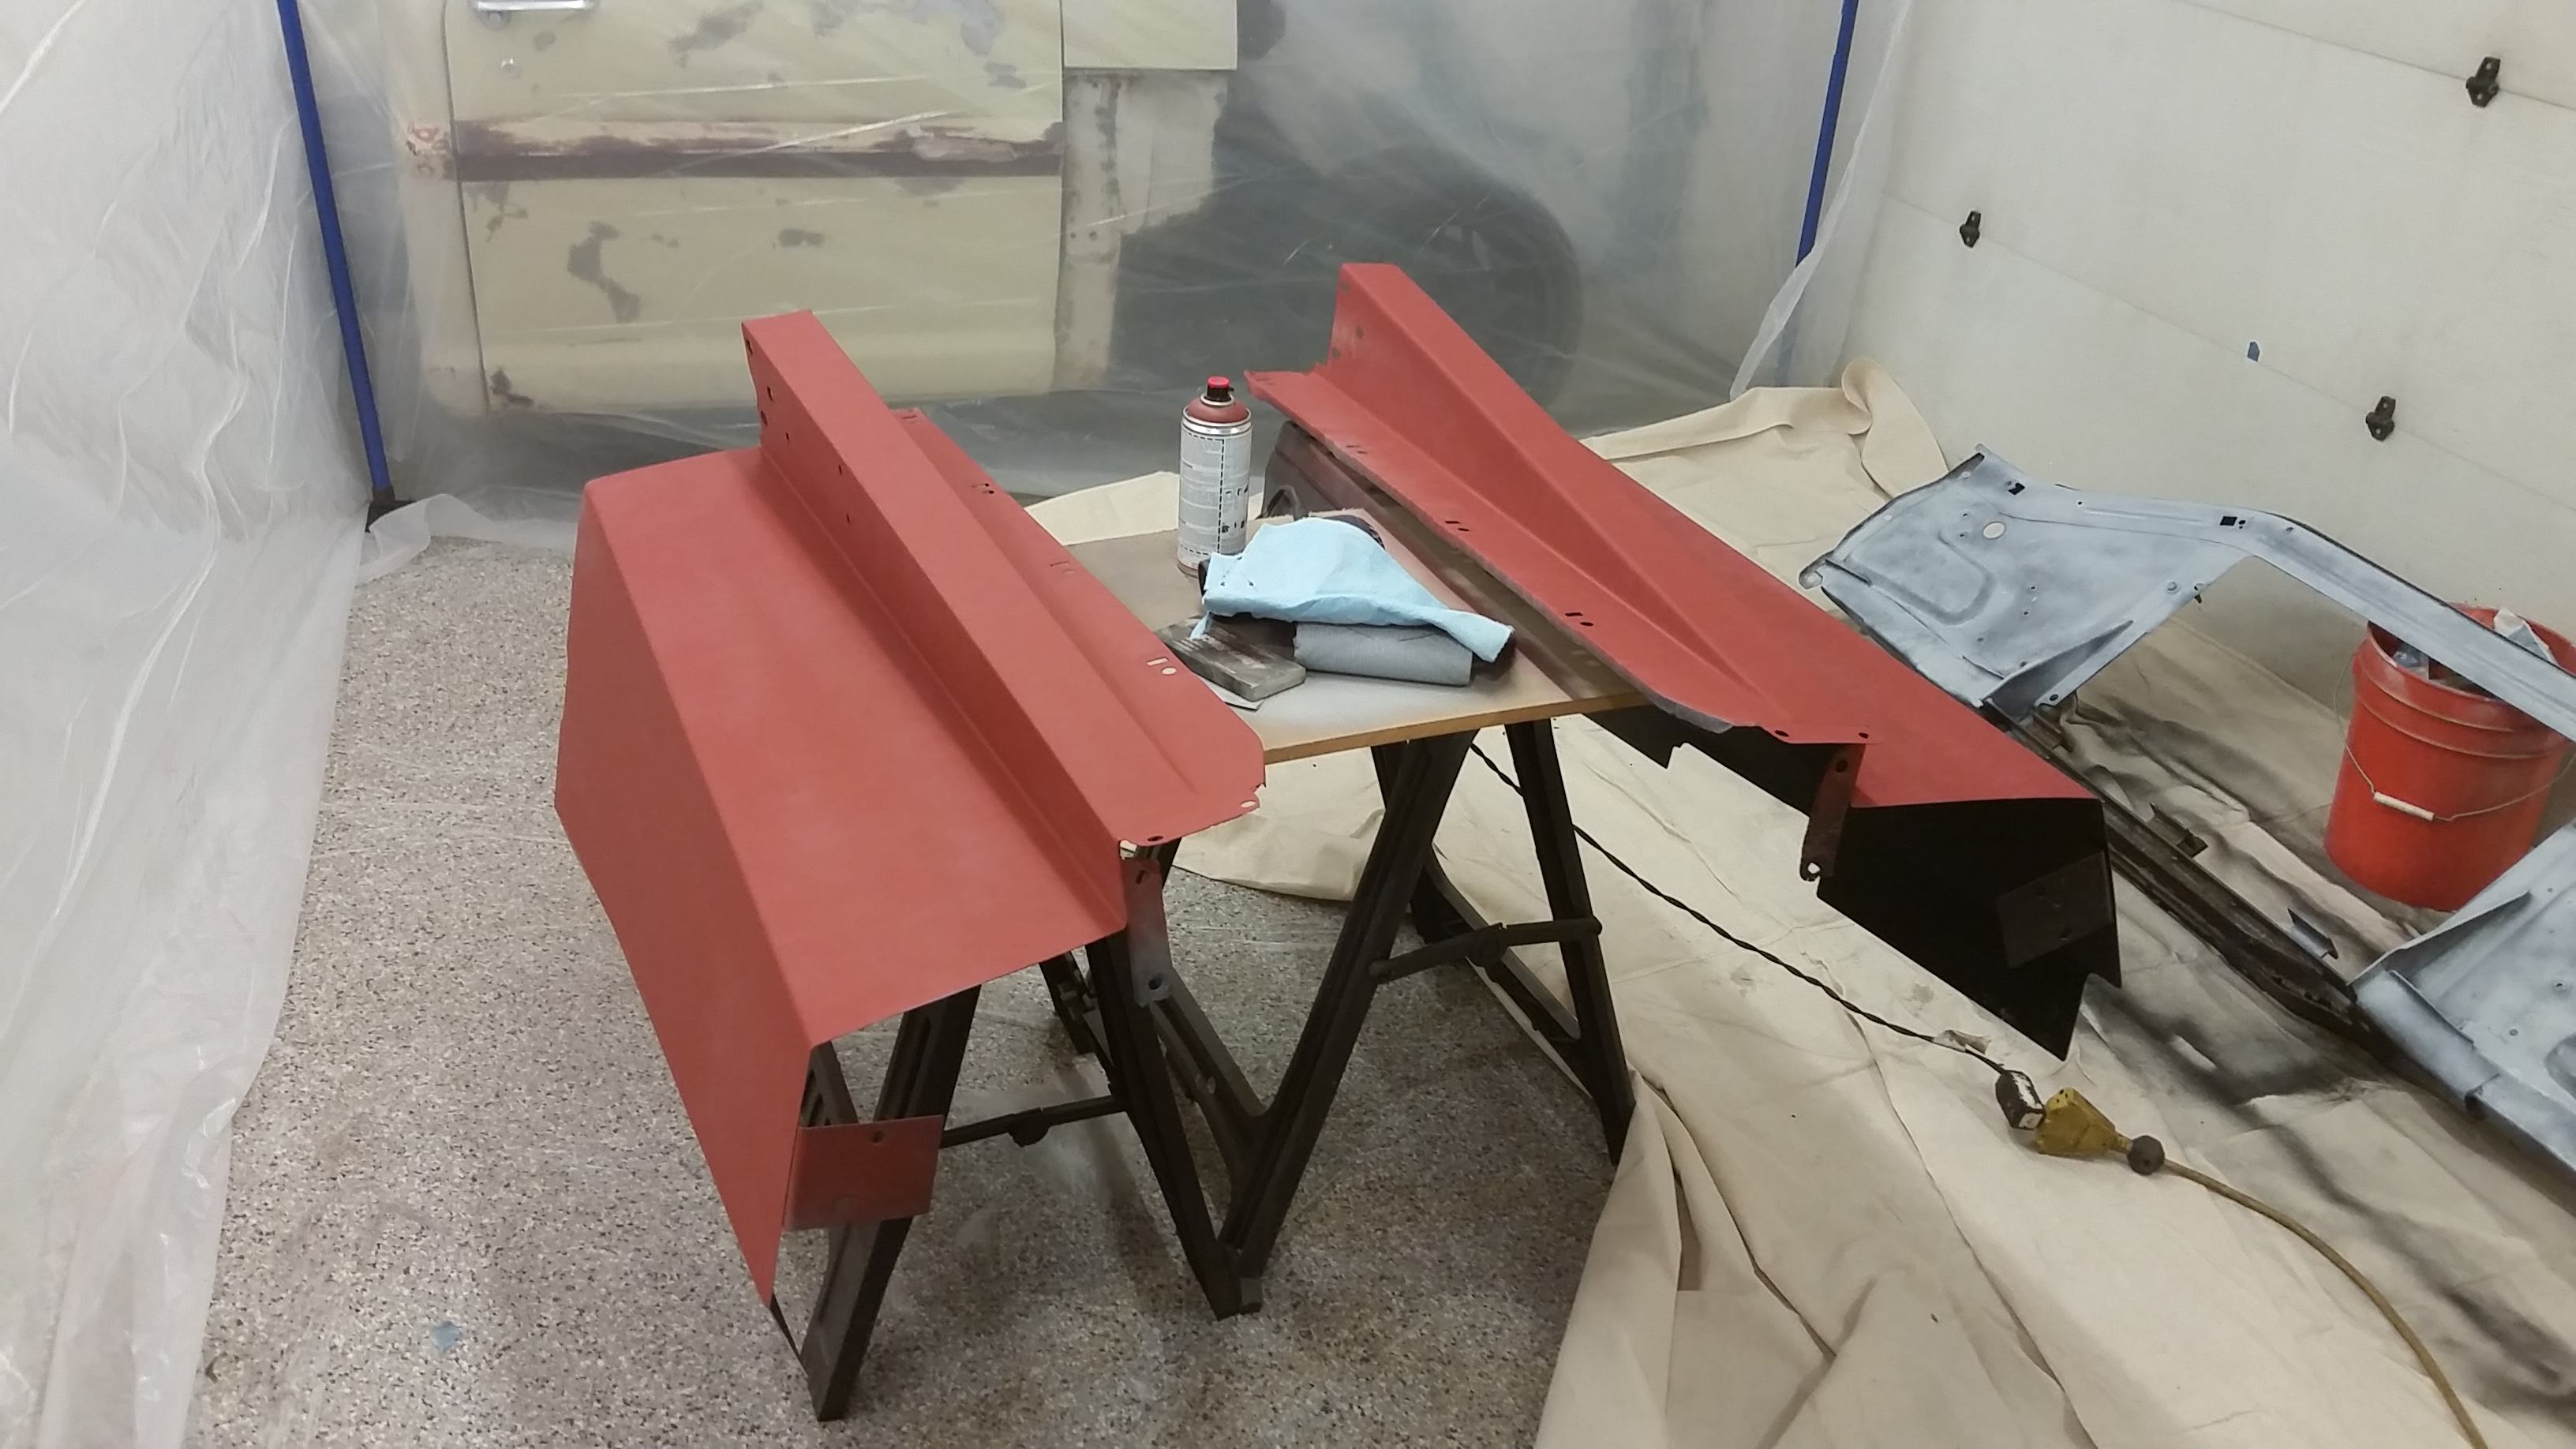
Here is the brown/red primer laid down. each layer of primer got hit with some 320 before the next coat of paint went on to try and keep things nice and flat. Keep in mind I am no body and paint guy....
Laying down some color
Now this is supposed to be satin, pretty sure the paint shop does not know what satin means cause this **** it shiny.
Anyways, that brings us up to the end of the weekend. If this stuff cures, it would be awesome to get the frontend put together this week and start hooking some stuff up!!
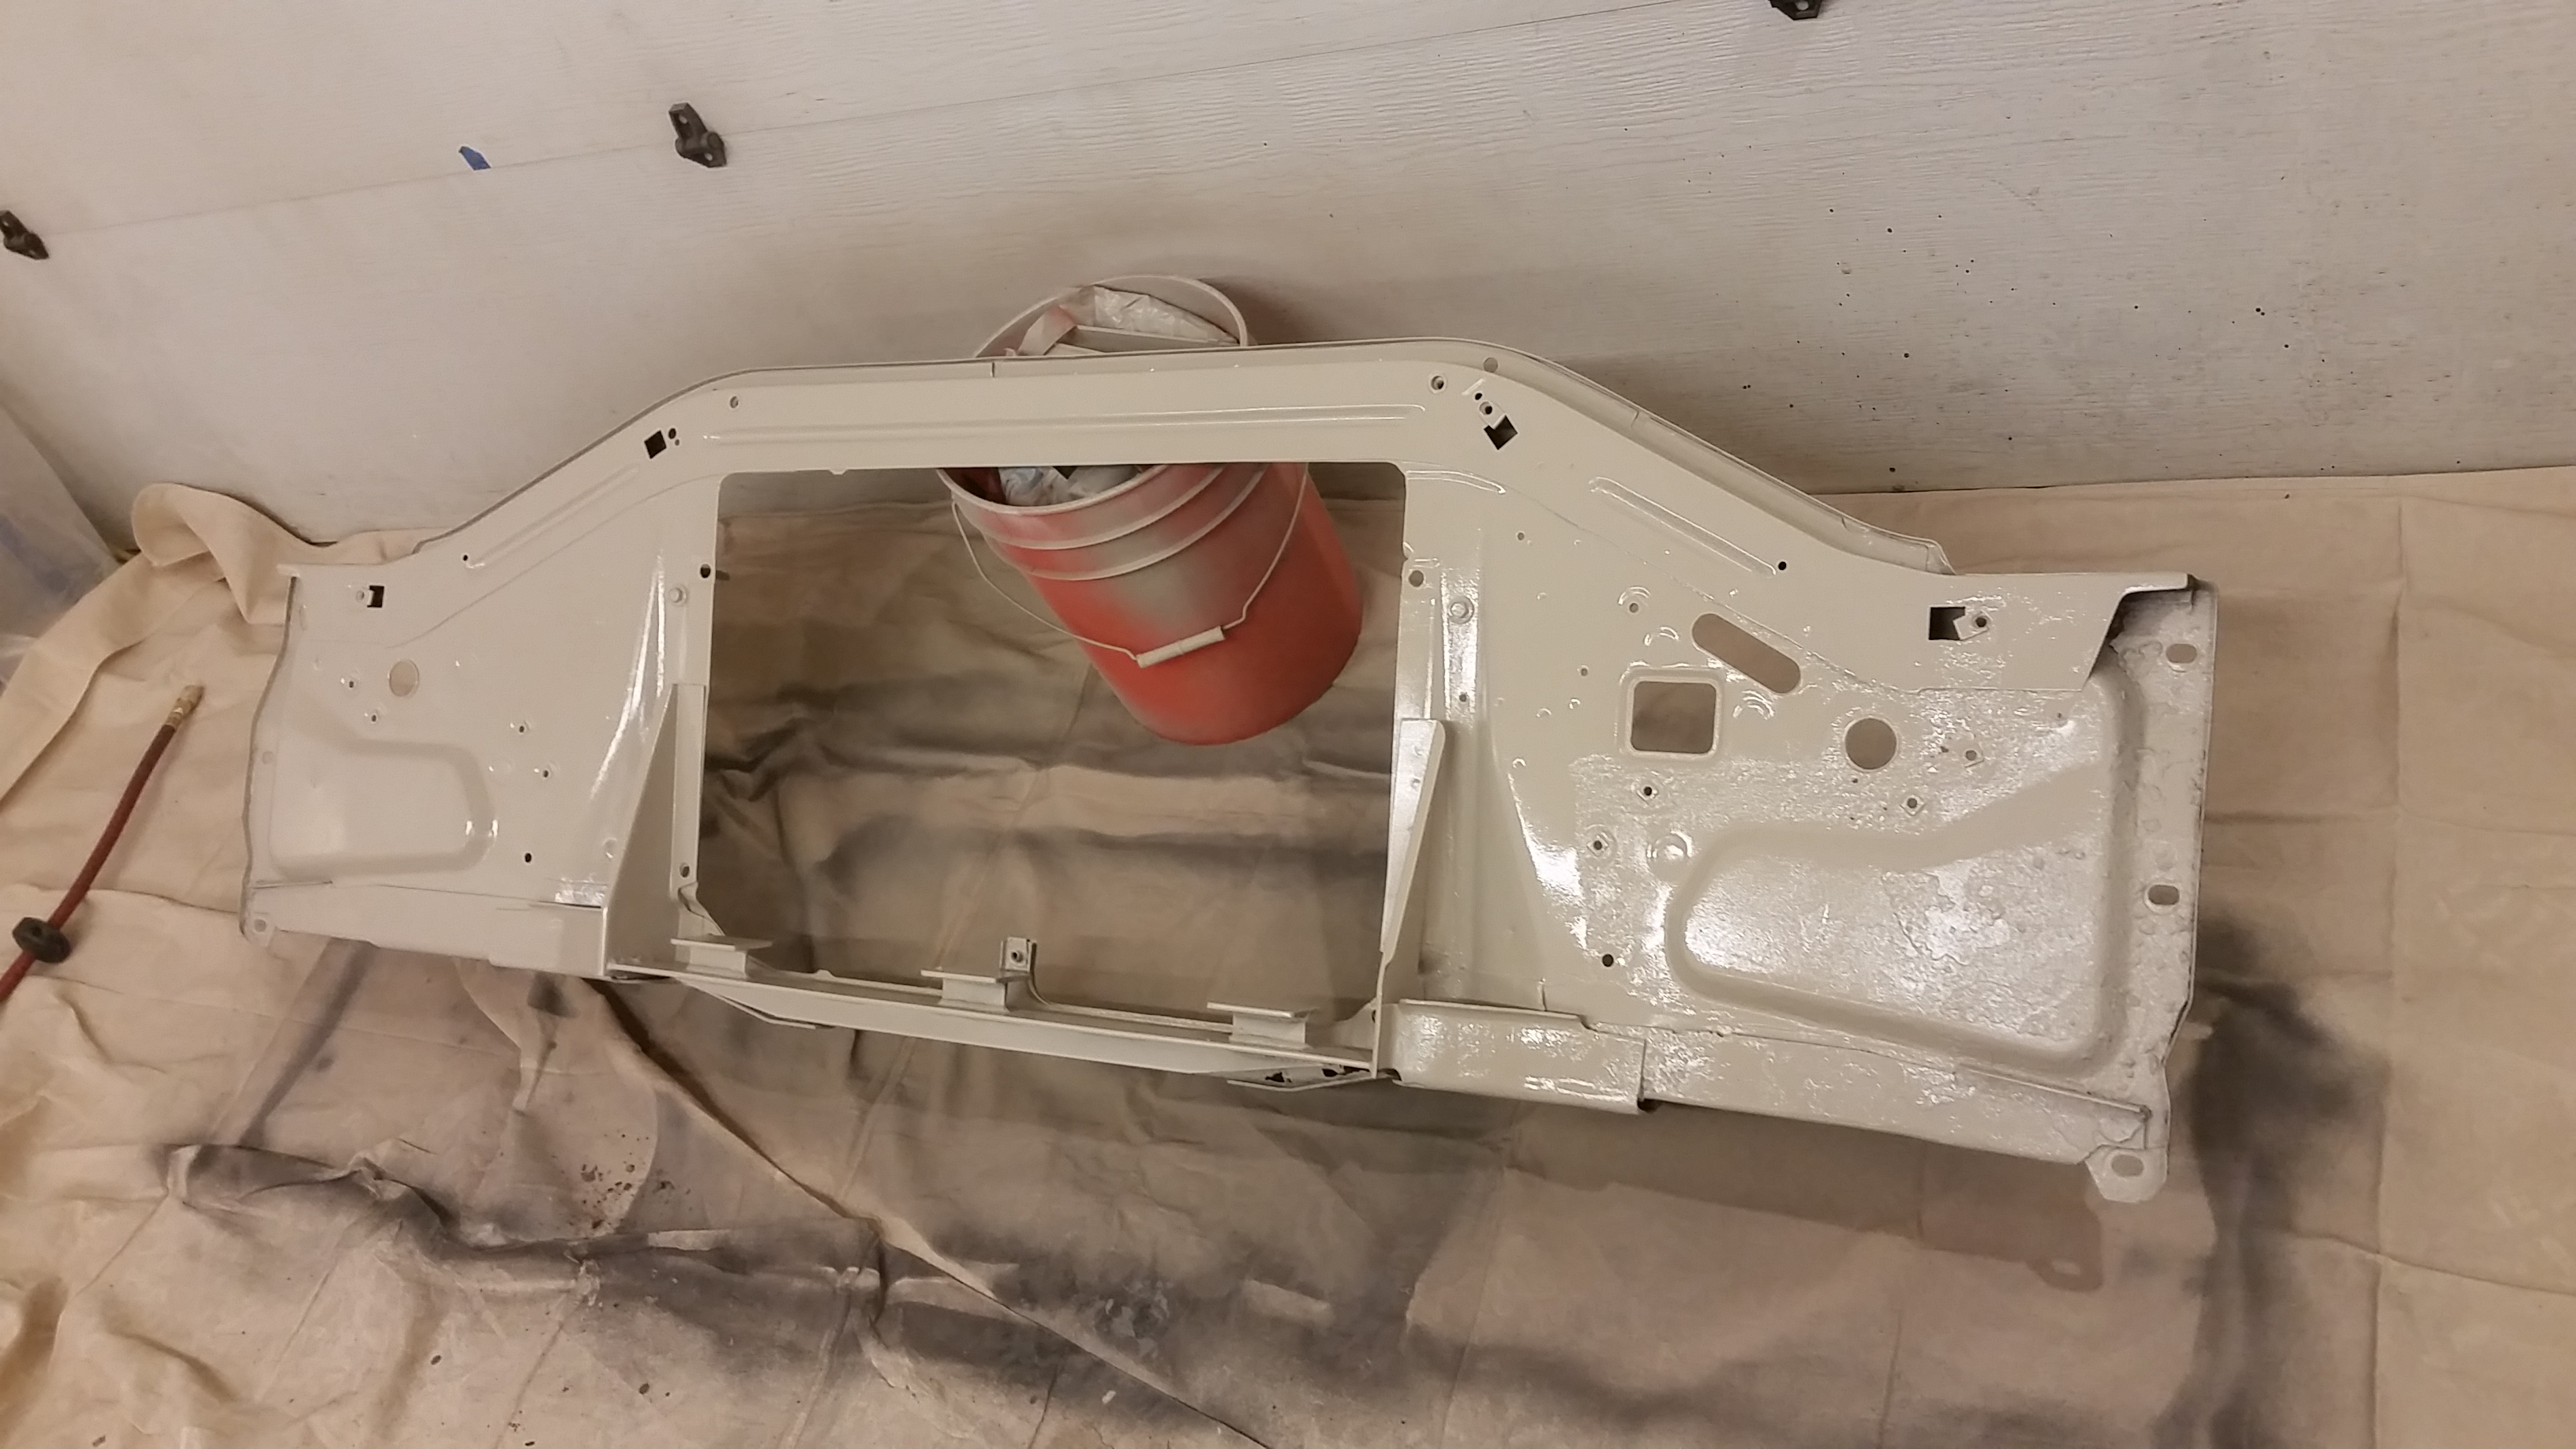
I'm not sure if the intent is to paint the entire core support the same color as the body of the truck(?). Unless the body color of a vehicle is black, painting the front side of the core support the color of the body is going to take away from the grille. Your attention will be drawn through the grille and onto the core support, and core supports aren't very interesting items to look at.
I think the back side of the core support would look fine in the light body color but, I think the front side of it would look better if sprayed in black.
Here is an example to illustrate what I'm talking about. --front of core support painted the same color as the body. Your attention is drawn through the grille and onto the core support behind it.
Same truck as pictured above with the front of the support painted black. Now, your attention is on the grille, where it should be, and not on the support behind it.
Just read through the whole thread. Fantastic work. You've definitely answered some questions of my own and motivate me to build like you have.
I definitely agree with the above point though. Whoever last painted my truck oversprayed all over the rad support and I truly hated it. I photoshopped it out one day and it really makes a difference. Paint the front of the rad support black.
I've been following this build, and it's a great build thread. You've given many people on here some great ideas. That said, I also agree on the core support being "Black" After polishing grilles for almost ten years, every customer who I have talked with agree that the core support should have been painted black.
This is forgotten due to the fact that the engine bay is to look a certain way. The core support gets the color of what's going on in the engine bay. Then the truck is assembled. It's not until the grille get's put on that the body color on the front of the support stands out. This is the perfect time to do the front in black.
I like the make shift paint booth. Reminds me of one of my favorite shows, "Dexter"
Keep up the good work.
Ill have to touch it up when I flip it over, trying to keep the vintageness of the core support.
Appreciate all the compliments as well....it lets me know that someone is reading all this crap I am writing
I do have one thing though...On my LS truck I have the core support painted white on the front. I have it this way because there is no good place to tape off to split the color and a totally black core support would look horrible on that truck. I think one of these days I am going to pull the grille and stuff off of it and make it black with some plasti dip.
Paint dried a little more satin than expected. I think it will be ok in there.
Happy Monday and I am so looking forward to getting this stuff bolted on.
Ohhh, I'd be willing to bet there's more folks than you think reading this stuff and following along Buddy. Now and in the future.
You are probably right, I read a lot of threads and don't comment on them. I will say though that this forum has been great very active with lots of great builds and talent. I think you guys might be stuck with me for a while.
Originally Posted by Randle
I'm with Jeff, you have people following this build that you will never hear from. Love watching good work.
Thanks you, I think you must know the feeling, you have a great thread on your truck.
Originally Posted by rustED_
^^^This is true, I have followed Randle's build, although I have never posted on his build thread. By the way, awesome work Randle, lol.
Sean, can't wait to see the front sheetmetal start getting reinstalled!!!
Thanks me too!!
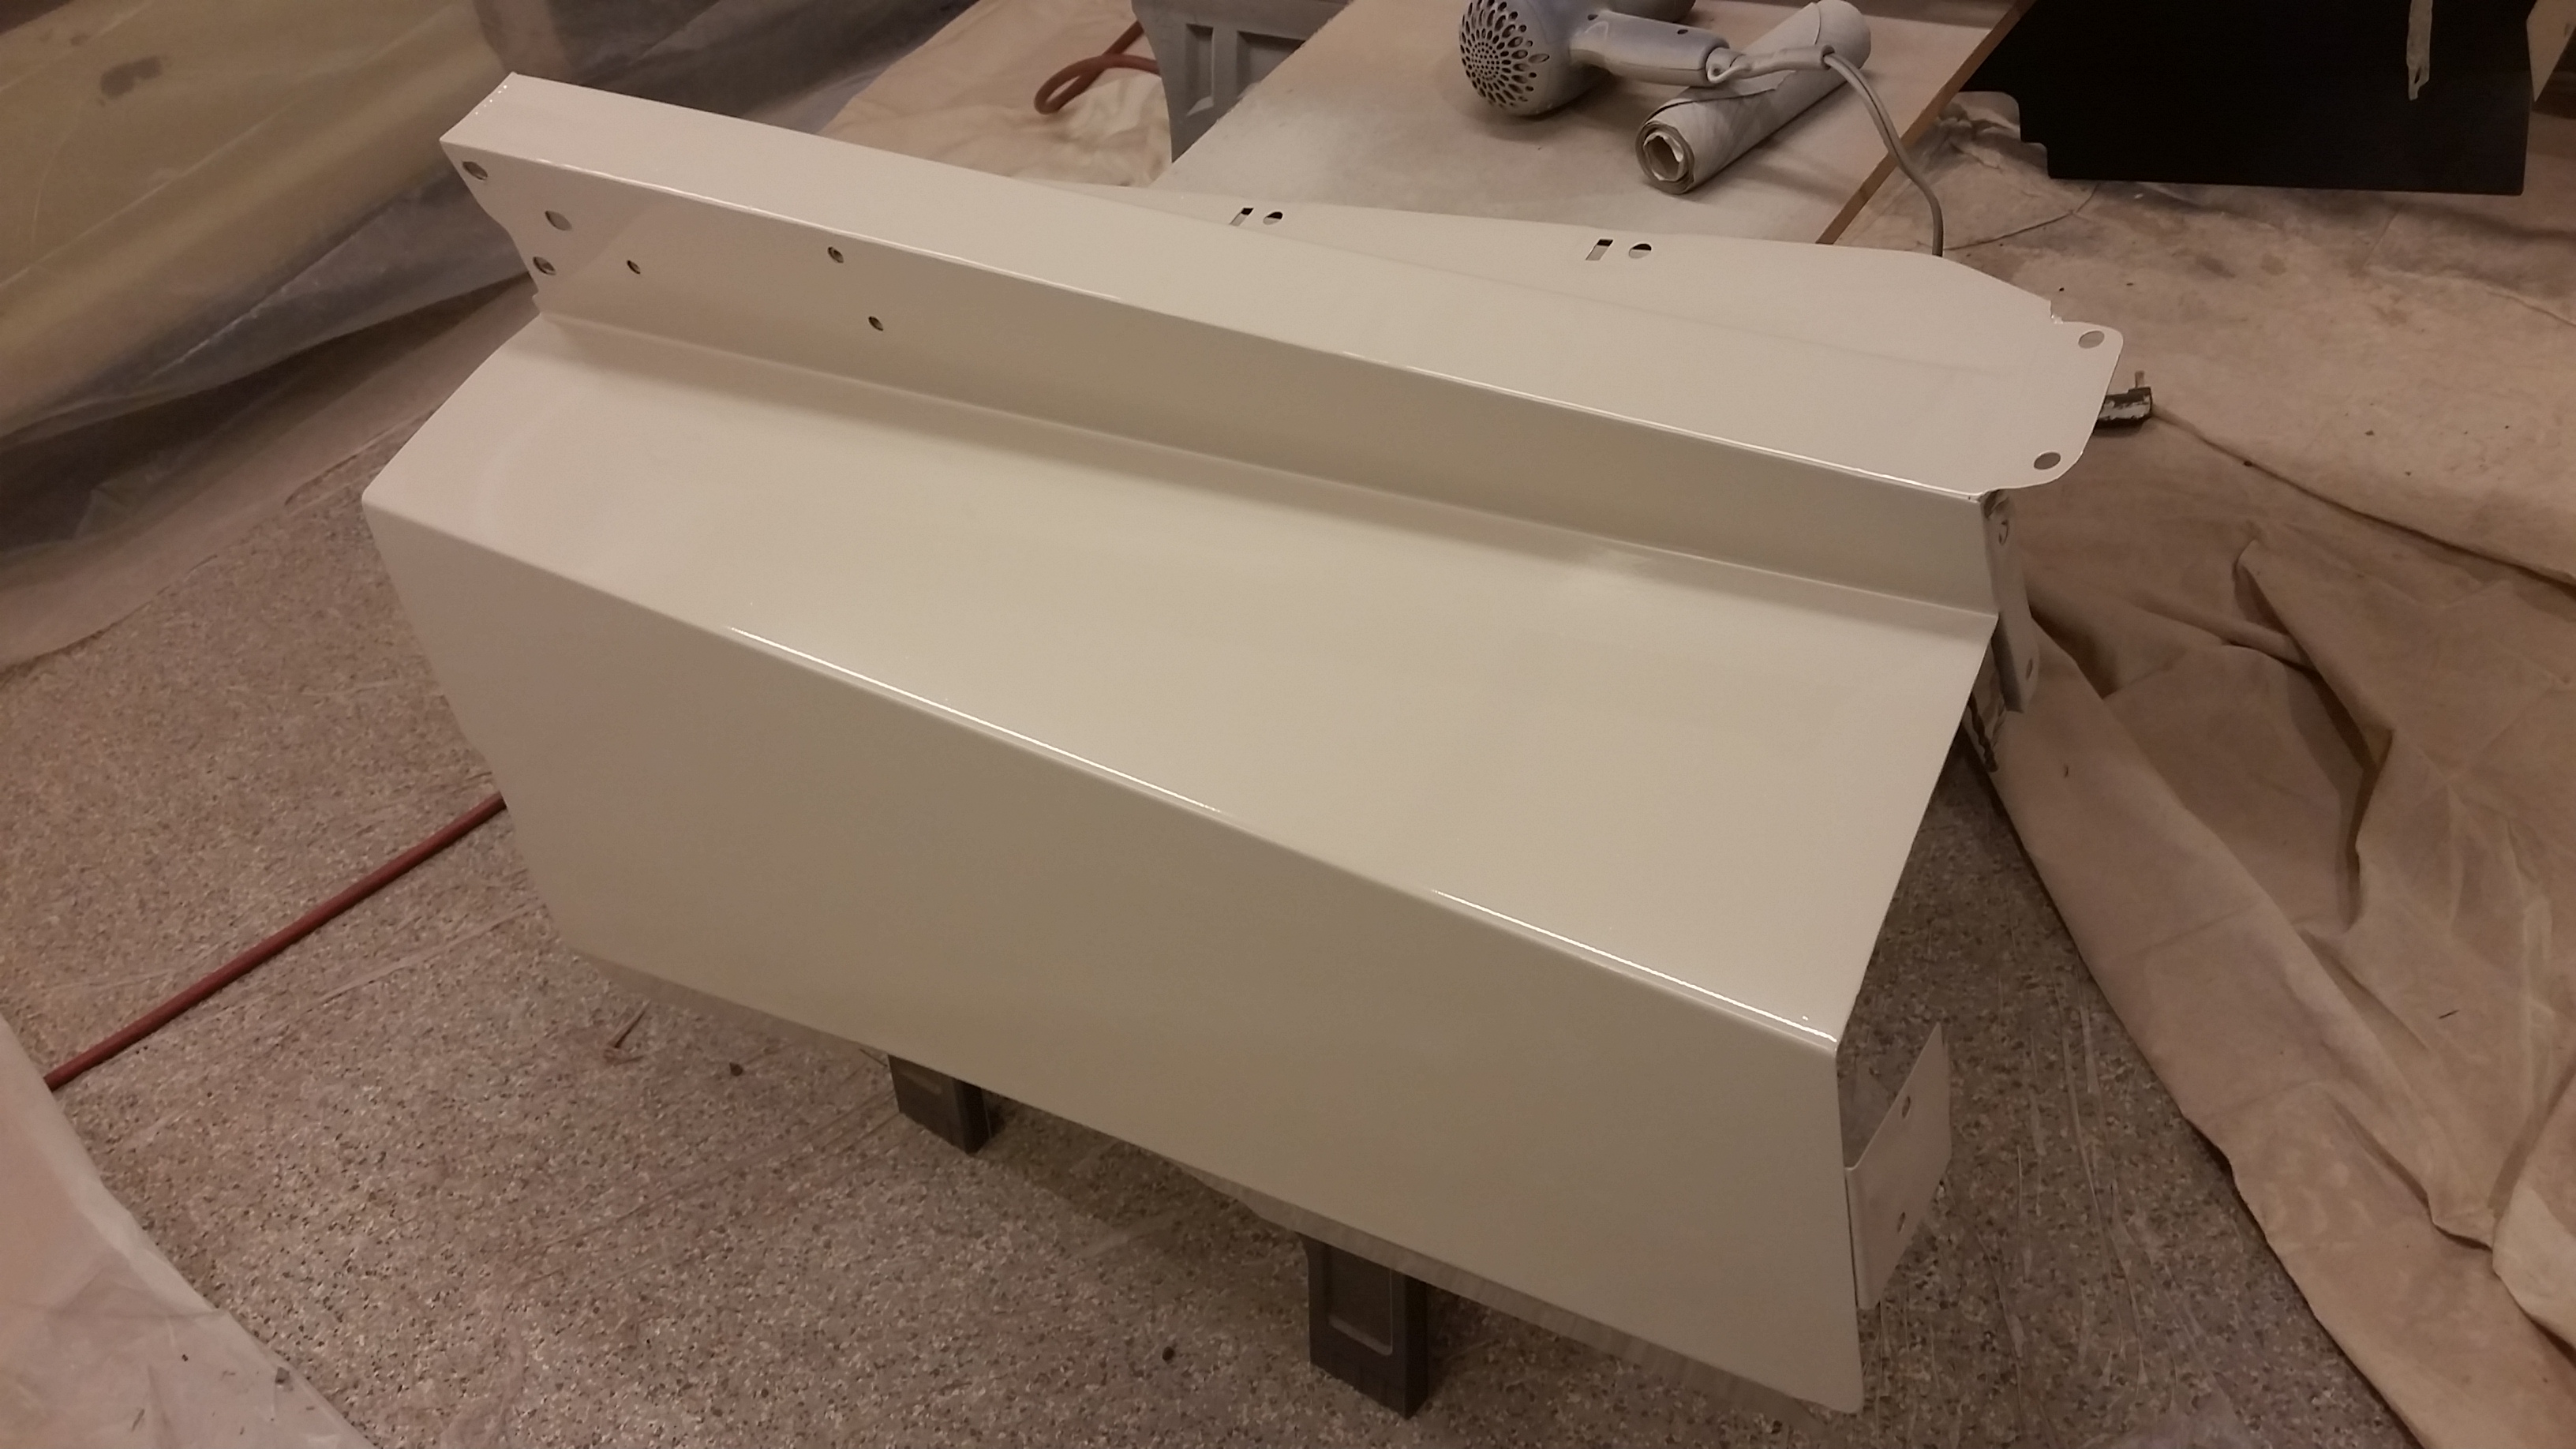
The paint dried much flatter than it originally looked. Its just about perfect. Barely any shine to it but not Chalky at all. In person it looks pretty damn cool The black on the tan pops incredibly well.
Well, I believe my OCD is in full swing. Spent most of the evening cleaning, deburring sanding priming and painting the inner fender to cab mounts. Also picked up some hardware for those and some additional 5/16" button head allens for all the front sheetmetal.
Apparently I forgot to take a pic of them painted before they went on the truck. Anyways, these got a couple of coats of high build primer and then roughed up and hit with the same black as all the other black crap on the truck.
Some parts and pieces bolted back on for a little bit, not sure that they will stay on for good but it was a little rewarding seeing stuff on there and painted.
Trying to figure out what to do with the upper radiator bracket, brush it and clear coat it since it matches the radiator? Black or body color. I am tempted to do wrinkle black so it closely matches the black stuff on the engine.
Oh and I messed up the threads on the tank just trying to test fit the power steering hoses. Stainless Aeroquip fittings and aluminum Moroso tank do not go well together. I just barely screwed them on for mockup....stupid.


 12-18-2015, 01:02 PM


 Now and in the future.


