another bump
#31
 09-14-2015, 07:06 PM

i think after i get the truck back together i can check to see how the carb sits.. will make a spacer from some 1" aluminum stock to set the carb where it needs to be.. i dont think it will be a problem.. just dont wanna pull my other 390 apart..things start getting lost when scattered about..
#32
09-26-2015, 03:05 AM
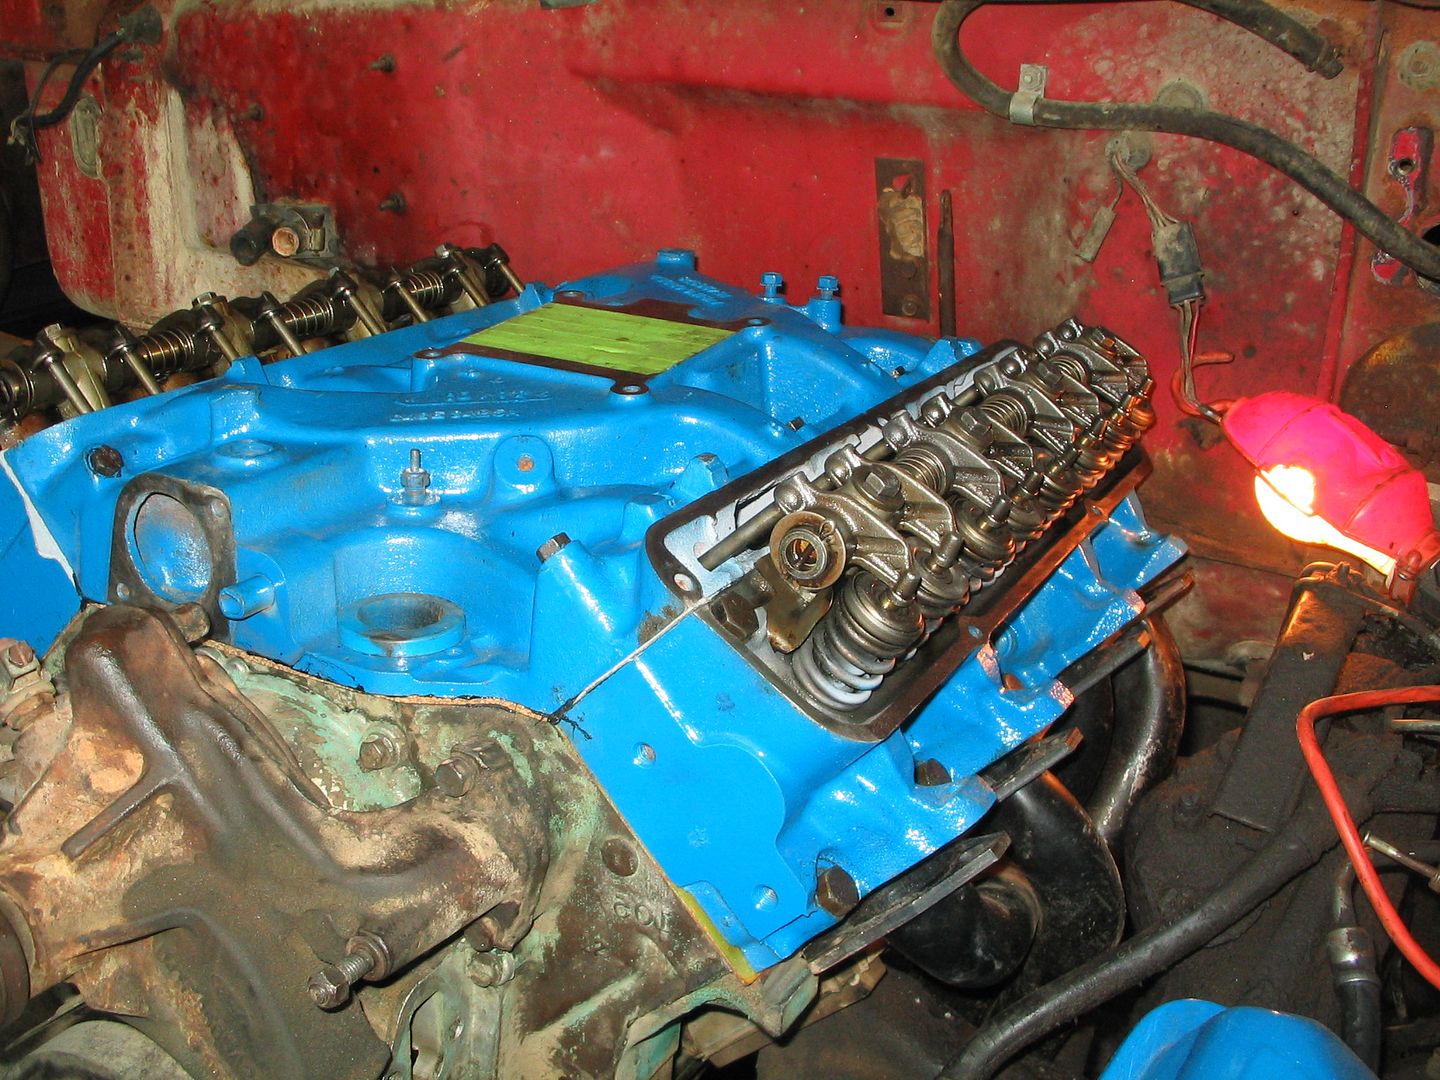
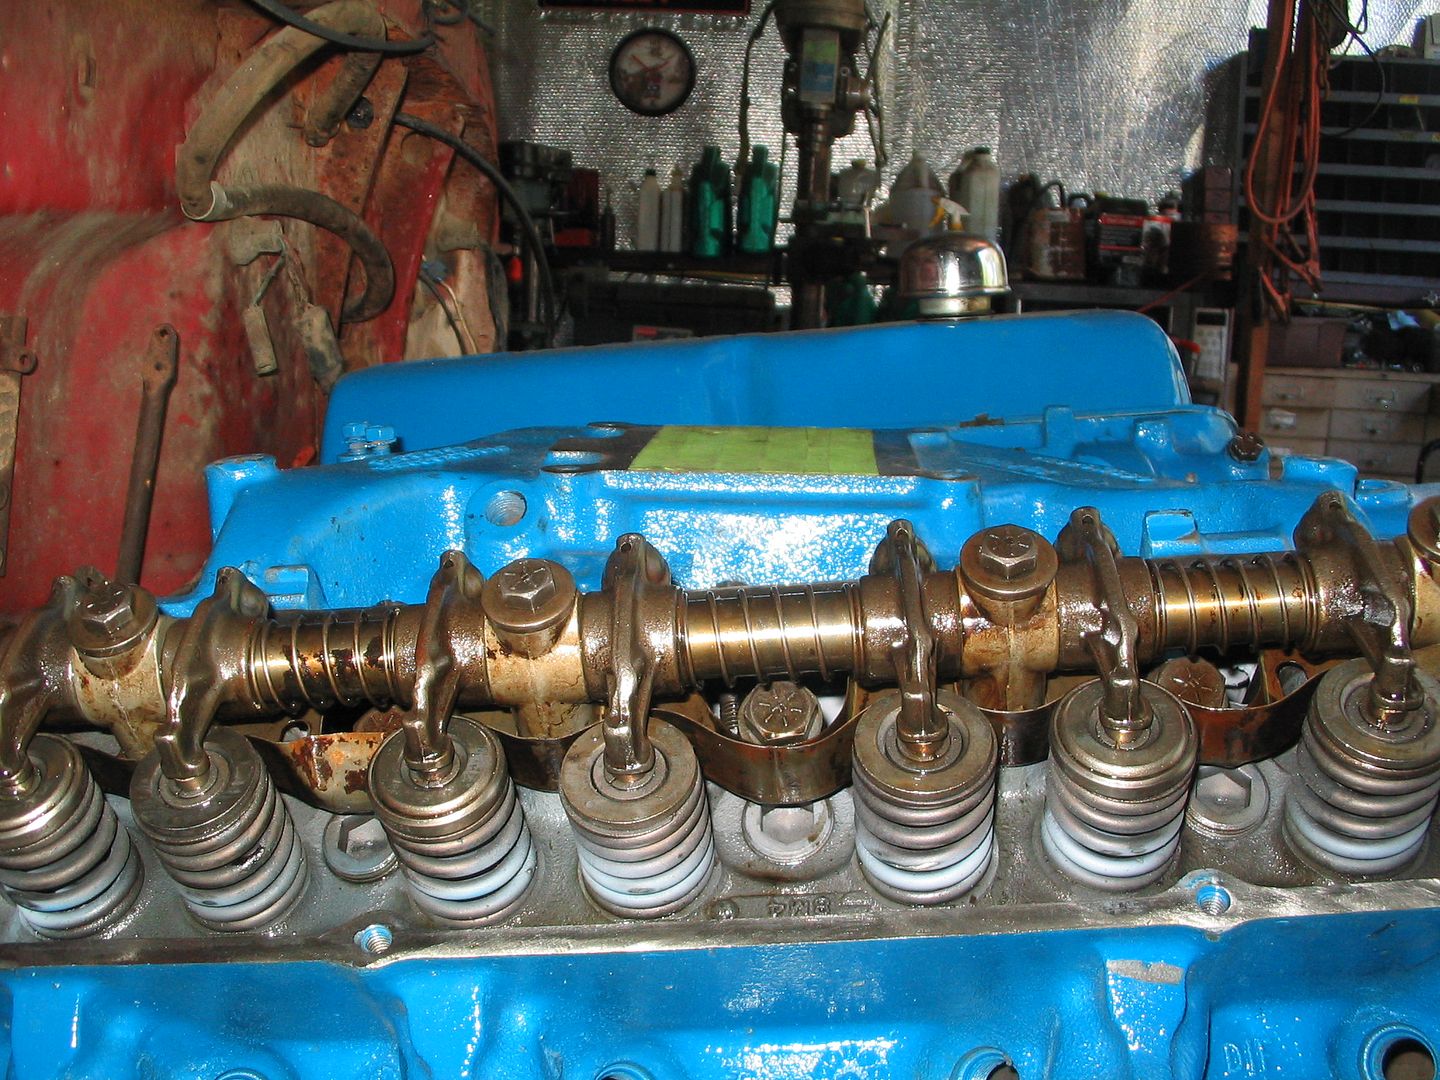
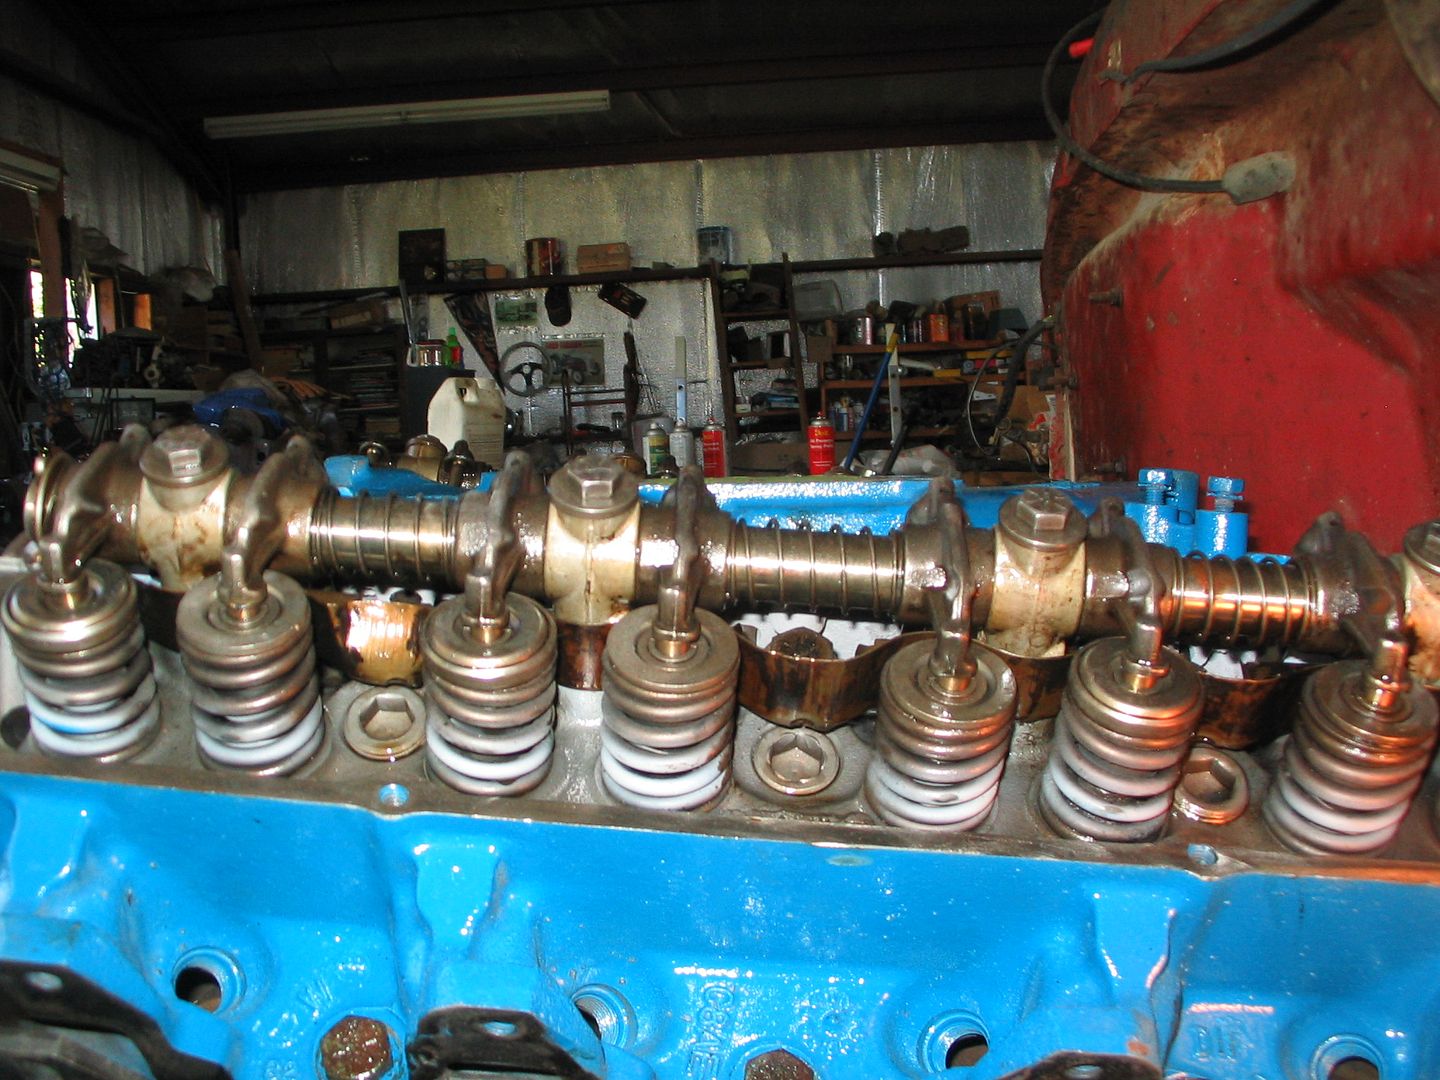
got to play with the flat-bump a little yesterday got the heads and the 1963 thunderbird intake on .. wont know for sure how much the angle of the flange on the intake will affect the carb. I may have to get or make a spacer to level it up more for the truck.
I have also got the frt. brakes ready to go back on. I cleaned the spindle and tie-rod ends. didn't have any grease for the grease gun so I will have to pick some up maybe today.. I have all the parts for the back brakes , just waiting on the paint to dry to assemble them


I have a new larger capacity radiator coming for it. then i was wanting to take the carb apart to clean and inspect..it is a new holley but has been on my shelf for several years and I don't want any surprises
#33
09-26-2015, 04:54 AM

#34
09-26-2015, 05:12 AM
I don't know about the order..i cleaned and painted my backing plates oiled up the e-cables put the new rubber line on the diff. and made, installed new steel lines.. then put on the wheel cyl., e-brake lever and cable assembly, cable guide and adjuster pin on the shoes, upper spring, hold downs, lower spring, adjuster and spring.. clean the hubs put the new seals in. shove the drums and axles back on with new lock nuts and gasket.. then the wheels lower it back down and drive off.... hopefully!!!!! ha ha ha ha
#35
09-26-2015, 06:28 AM

#37
09-26-2015, 10:21 PM
#39
09-27-2015, 08:49 AM

#40
09-30-2015, 03:43 PM
Hotshot
I wouldn,t worry about the angle where the carb sits and a spacer wouldn't be necessary unless you're using a factory air cleaner housing with clearance issues.
I've never assembled all the brakes on a loose backing plate. That must have been a challenge to pull the springs on.
I've never assembled all the brakes on a loose backing plate. That must have been a challenge to pull the springs on.
 You're going to run a Holley so you'll be adjusting the float levels separate.
#41
09-30-2015, 03:58 PM
Cargo Master
#42
09-30-2015, 08:04 PM
#43
10-22-2015, 06:30 PM
good afternoon all... I didn't get a lot done but at least I made it to the shop for more than a hour... did get the new serp. belt and wiper on the S10 so that was something.
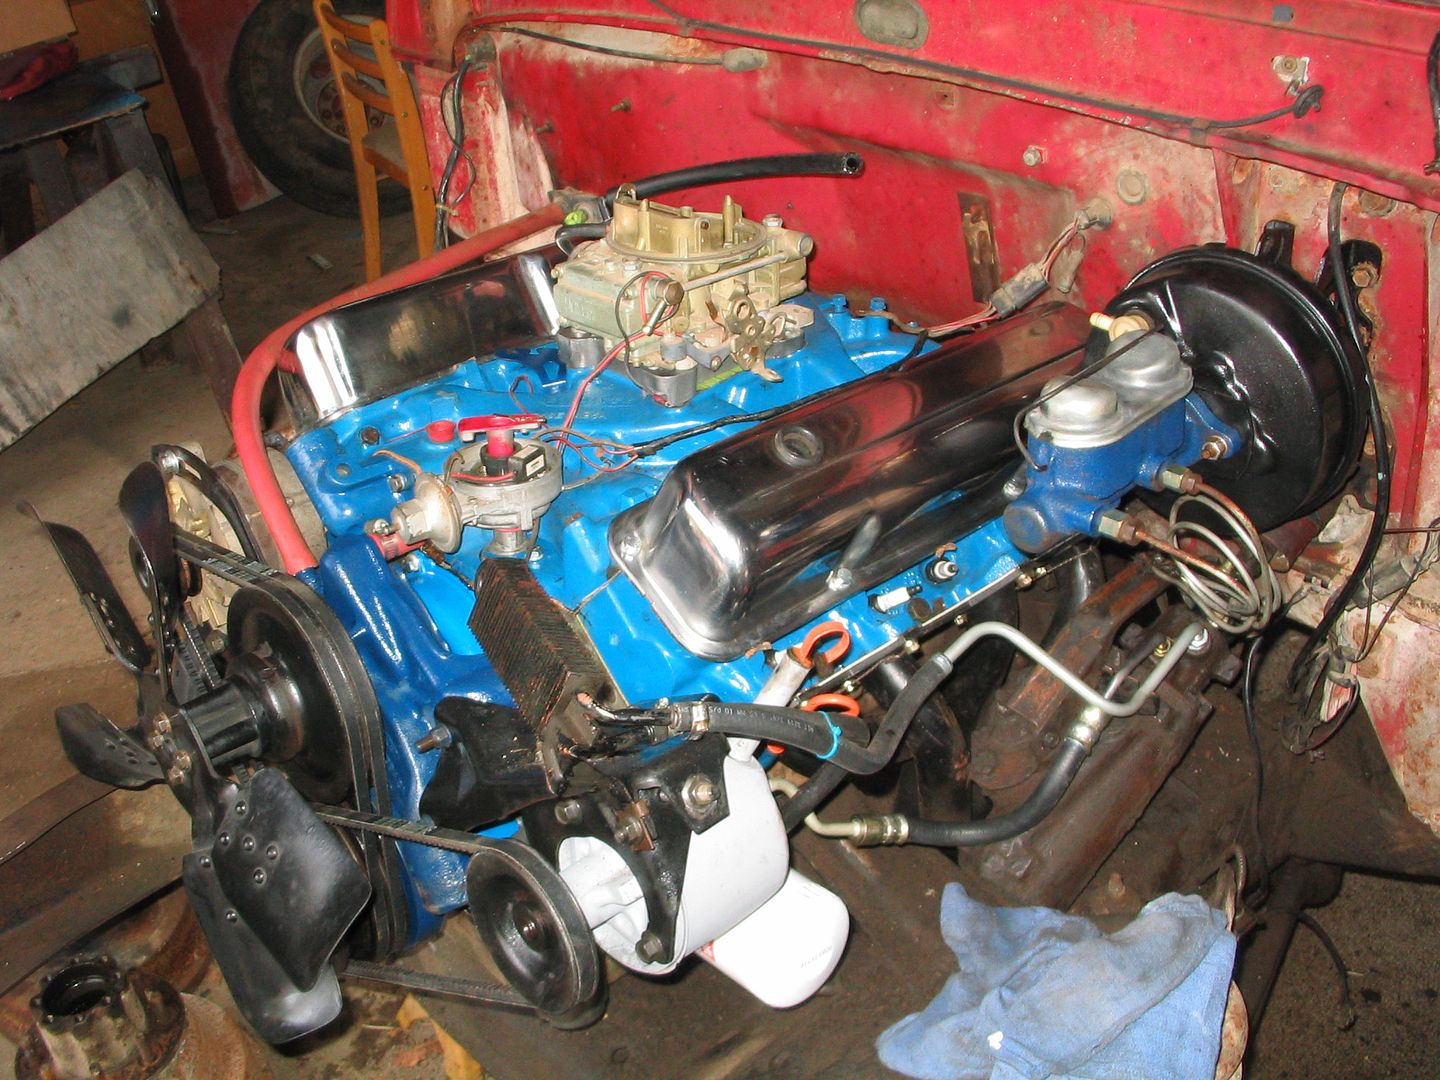
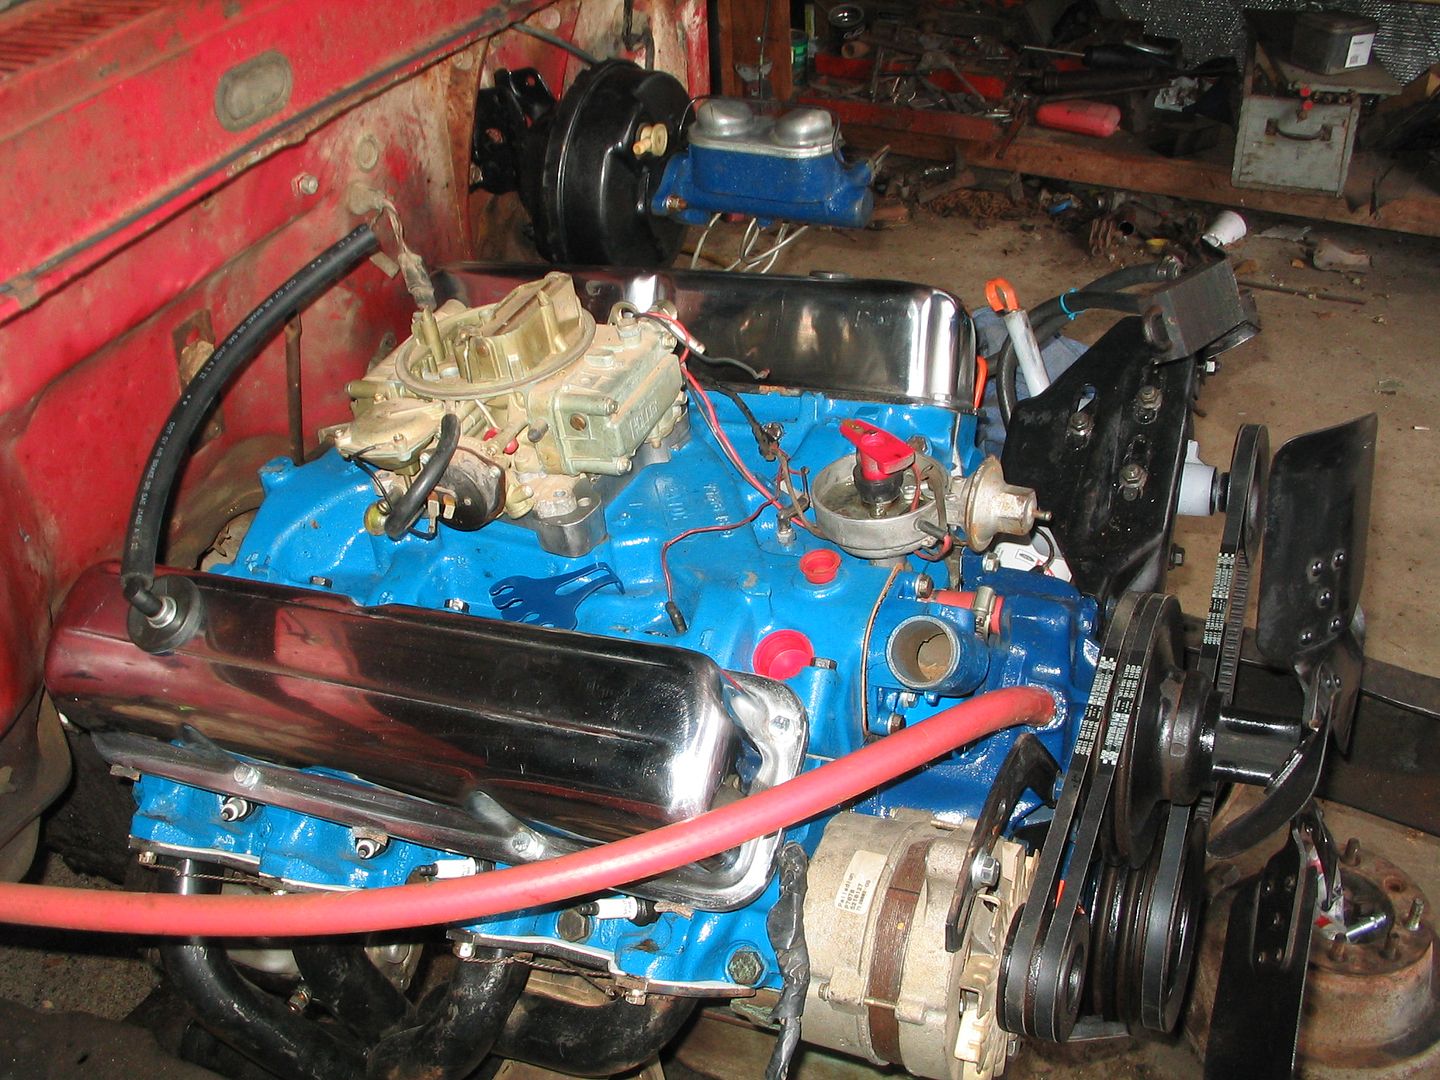
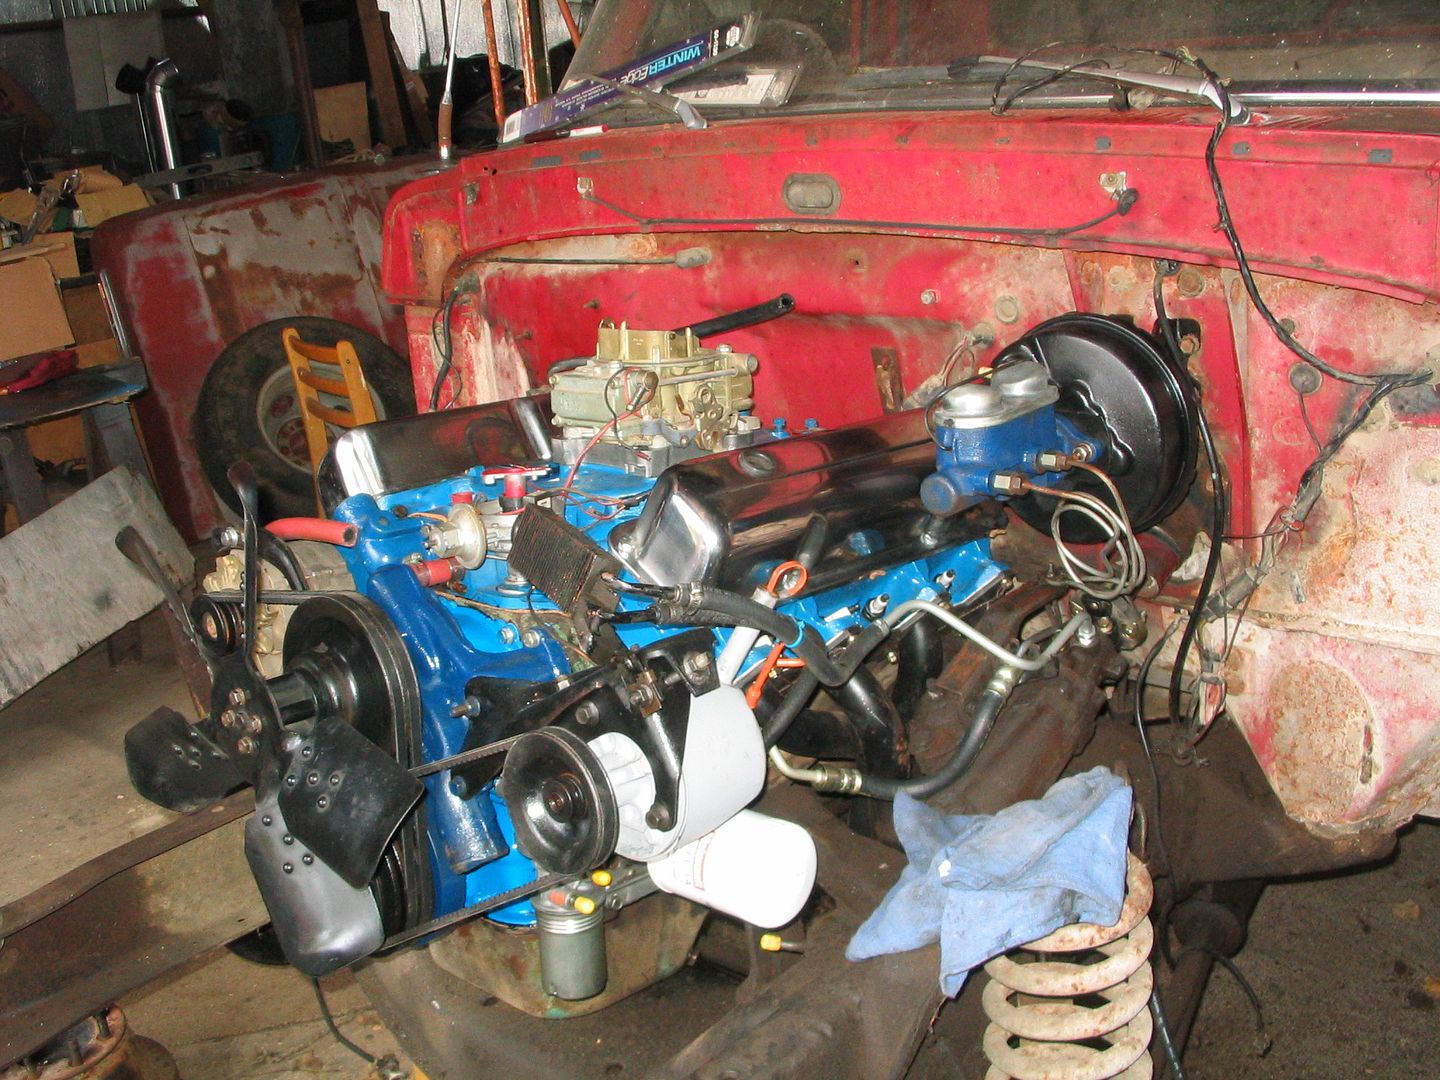
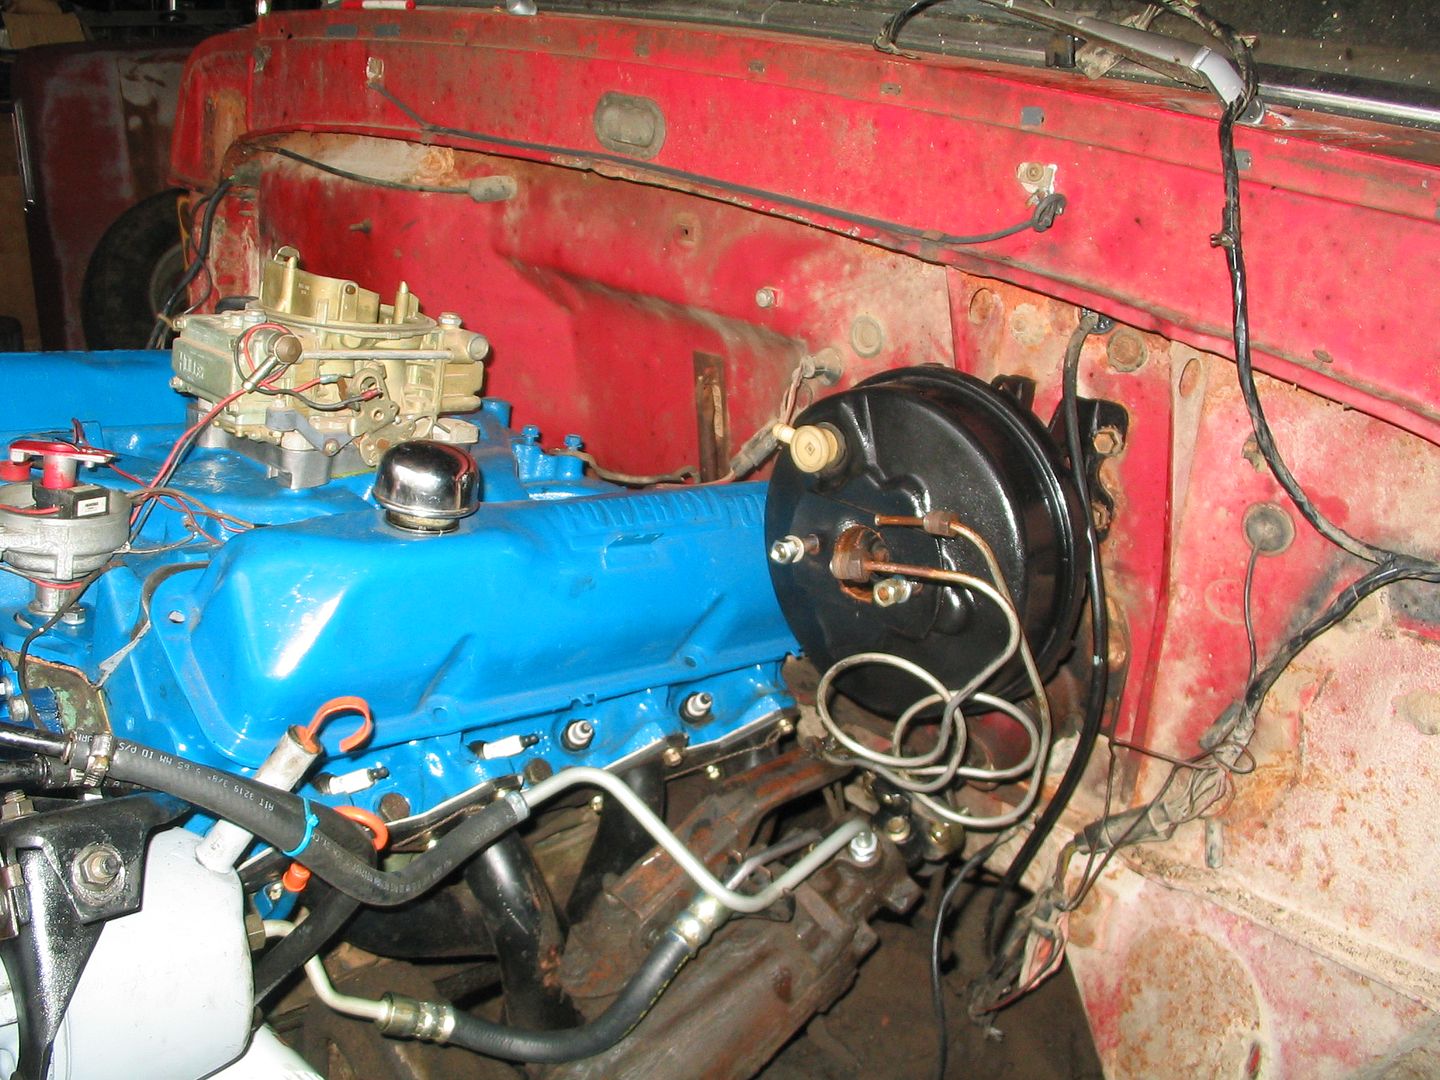
I played with the flat-bump some.... made a wedge spacer for the intake on the flat-bump...I got the oil drained, thermostat installed new alt put on.. alt, power steering belts, distributor cleaned and the pertronix unit I got offa rich installed and a few other items done.. I took a few pics.. don't have the energy to clean, grease, install new seals and install the heavy hubs so will put that off till the weekend..
<a href="http://s202.photobucket.com/user/rcplumley/media/72%20flat%20bump%20project/carb%20spacer/IMG_9053.jpg.html" target="_blank">
<a href="http://s202.photobucket.com/user/rcplumley/media/72%20flat%20bump%20project/carb%20spacer/IMG_9051.jpg.html" target="_blank">
<a href="http://s202.photobucket.com/user/rcplumley/media/72%20flat%20bump%20project/carb%20spacer/IMG_9054.jpg.html" target="_blank">
<a href="http://s202.photobucket.com/user/rcplumley/media/72%20flat%20bump%20project/carb%20spacer/IMG_9055.jpg.html" target="_blank">
<a href="http://s202.photobucket.com/user/rcplumley/media/72%20flat%20bump%20project/carb%20spacer/IMG_9052.jpg.html" target="_blank">
<a href="http://s202.photobucket.com/user/rcplumley/media/72%20flat%20bump%20project/carb%20spacer/IMG_9049.jpg.html" target="_blank">
<a href="http://s202.photobucket.com/user/rcplumley/media/72%20flat%20bump%20project/carb%20spacer/IMG_9050.jpg.html" target="_blank">
<a href="http://s202.photobucket.com/user/rcplumley/media/72%20flat%20bump%20project/carb%20spacer/IMG_9047.jpg.html" target="_blank">
<a href="http://s202.photobucket.com/user/rcplumley/media/72%20flat%20bump%20project/carb%20spacer/IMG_9046.jpg.html" target="_blank">
<a href="http://s202.photobucket.com/user/rcplumley/media/72%20flat%20bump%20project/carb%20spacer/IMG_9048.jpg.html" target="_blank">
<a href="http://s202.photobucket.com/user/rcplumley/media/72%20flat%20bump%20project/carb%20spacer/IMG_9044.jpg.html" target="_blank">
<a href="http://s202.photobucket.com/user/rcplumley/media/72%20flat%20bump%20project/carb%20spacer/IMG_9045.jpg.html" target="_blank">
<a href="http://s202.photobucket.com/user/rcplumley/media/72%20flat%20bump%20project/carb%20spacer/IMG_9043.jpg.html" target="_blank">
__________________
i have forgot more than i ever knew
71 f100 "rip van winkle" been asleep for 25 years
300-6 np435.. years to get that patina just right
72 ford f350.. the flat-bump.. 410 FE NP435
75 courier 4x4.. mazda, jeep,+ ford emblem
39 ford p/u project in the works.. a long ways off
I played with the flat-bump some.... made a wedge spacer for the intake on the flat-bump...I got the oil drained, thermostat installed new alt put on.. alt, power steering belts, distributor cleaned and the pertronix unit I got offa rich installed and a few other items done.. I took a few pics.. don't have the energy to clean, grease, install new seals and install the heavy hubs so will put that off till the weekend..
<a href="http://s202.photobucket.com/user/rcplumley/media/72%20flat%20bump%20project/carb%20spacer/IMG_9053.jpg.html" target="_blank">
<a href="http://s202.photobucket.com/user/rcplumley/media/72%20flat%20bump%20project/carb%20spacer/IMG_9051.jpg.html" target="_blank">
<a href="http://s202.photobucket.com/user/rcplumley/media/72%20flat%20bump%20project/carb%20spacer/IMG_9054.jpg.html" target="_blank">
<a href="http://s202.photobucket.com/user/rcplumley/media/72%20flat%20bump%20project/carb%20spacer/IMG_9055.jpg.html" target="_blank">
<a href="http://s202.photobucket.com/user/rcplumley/media/72%20flat%20bump%20project/carb%20spacer/IMG_9052.jpg.html" target="_blank">
<a href="http://s202.photobucket.com/user/rcplumley/media/72%20flat%20bump%20project/carb%20spacer/IMG_9049.jpg.html" target="_blank">
<a href="http://s202.photobucket.com/user/rcplumley/media/72%20flat%20bump%20project/carb%20spacer/IMG_9050.jpg.html" target="_blank">
<a href="http://s202.photobucket.com/user/rcplumley/media/72%20flat%20bump%20project/carb%20spacer/IMG_9047.jpg.html" target="_blank">
<a href="http://s202.photobucket.com/user/rcplumley/media/72%20flat%20bump%20project/carb%20spacer/IMG_9046.jpg.html" target="_blank">
<a href="http://s202.photobucket.com/user/rcplumley/media/72%20flat%20bump%20project/carb%20spacer/IMG_9048.jpg.html" target="_blank">
<a href="http://s202.photobucket.com/user/rcplumley/media/72%20flat%20bump%20project/carb%20spacer/IMG_9044.jpg.html" target="_blank">
<a href="http://s202.photobucket.com/user/rcplumley/media/72%20flat%20bump%20project/carb%20spacer/IMG_9045.jpg.html" target="_blank">
<a href="http://s202.photobucket.com/user/rcplumley/media/72%20flat%20bump%20project/carb%20spacer/IMG_9043.jpg.html" target="_blank">

__________________
i have forgot more than i ever knew
71 f100 "rip van winkle" been asleep for 25 years
300-6 np435.. years to get that patina just right
72 ford f350.. the flat-bump.. 410 FE NP435
75 courier 4x4.. mazda, jeep,+ ford emblem
39 ford p/u project in the works.. a long ways off
#44
10-25-2015, 06:09 PM
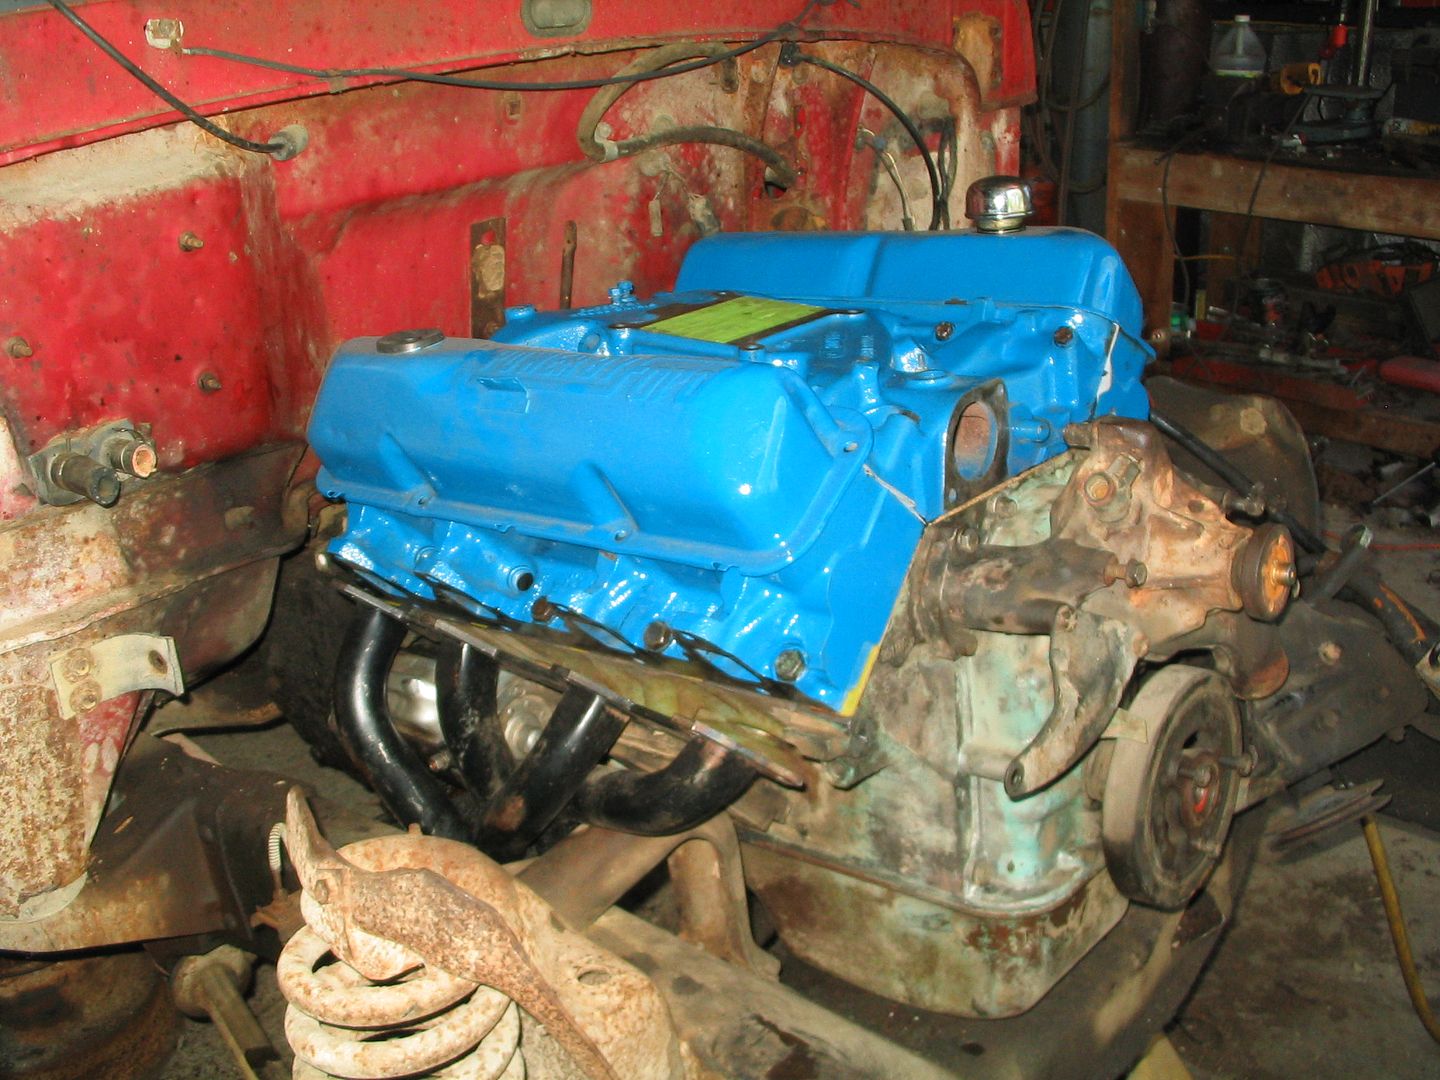
well another day and not much done.. i did get a few more parts on the engine. i have a 2" carb spacer coming so cant do much till i get it.. i was digging thru my parts stash and found a brand new set of those cheap chrome valve covers from another project.. i didnt really want a lot of chrome on the f350 but i figured it is better to use them than just let em sit around and get banged up and rusty.. i think it does add a little to the engine...
pics of the progress so far.. 72 Flat Bump Project by Russell Plumley | Photobucket
pics of the progress so far.. 72 Flat Bump Project by Russell Plumley | Photobucket


#45
10-26-2015, 03:18 PM
Cargo Master