When you click on links to various merchants on this site and make a purchase, this can result in this site earning a commission. Affiliate programs and affiliations include, but are not limited to, the eBay Partner Network.
FYI, the R etched into the solenoid indicates it's a remanufactured injector.
Thanks for that info, kinda weird though sense I bought the truck back in June of 03 with 39K miles and I'm 2nd owner pretty much sense new. I guess they did something between 0 miles and the 39K when I got it.
Originally Posted by petrokiller
The Grinch is gonna have a Happy Face after this project. Maybe even like the folks down in Whovillle,
Haha, no kidding. I got all the parts back from the powder coater and nee to get the pics up on the main guid thread. They look good!
Originally Posted by Andy's Beast
Thanks for posting the pics! I am very close to doing the cups. Are you doing anything with the injectors?
No worries glad I can share. Nothing to the injectors other than new O-rings. Just can't afford them any more. Maybe a new thread on them next summer.
Are you afraid of a piece of wire breaking off of the brush and getting down into the engine? Do you have plans to post pictures of cleaning the fuel rails as well?
Are you afraid of a piece of wire breaking off of the brush and getting down into the engine? Do you have plans to post pictures of cleaning the fuel rails as well?
Shop vac in the holes after cleaning helps quite a bit. Anything left in there goes to the coolant - no biggy. As for the fuel rails, I'll do better than a photo:
I do, but it's akin to dusting patio furniture in a wind storm.
Awesome, let the dust storm begin. I hope your doing ok with all those fires. We have a few hitting close to home as well. Can't even breath with all this smoke.
Originally Posted by Sous
Are you afraid of a piece of wire breaking off of the brush and getting down into the engine? Do you have plans to post pictures of cleaning the fuel rails as well?
Ya, I was a little worried. But went ahead with it. I got the cups in and fuel rail cleaned out. Have a bunch of pics and will try to post them later.
Originally Posted by Tugly
Shop vac in the holes after cleaning helps quite a bit. Anything left in there goes to the coolant - no biggy. As for the fuel rails, I'll do better than a photo:
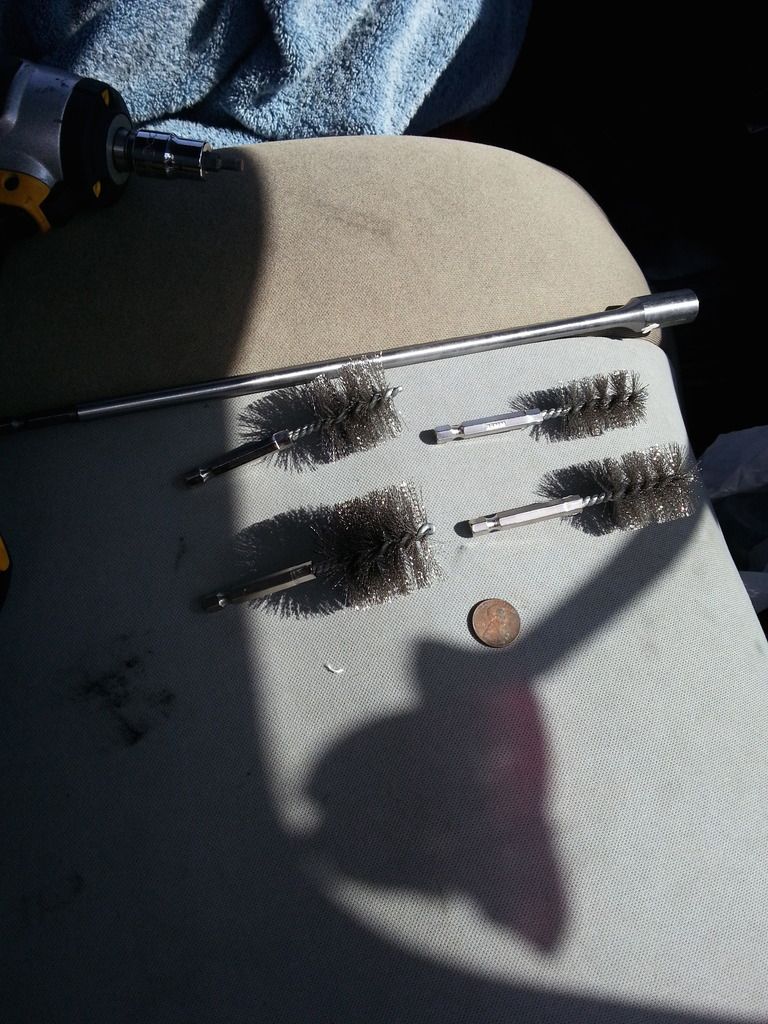
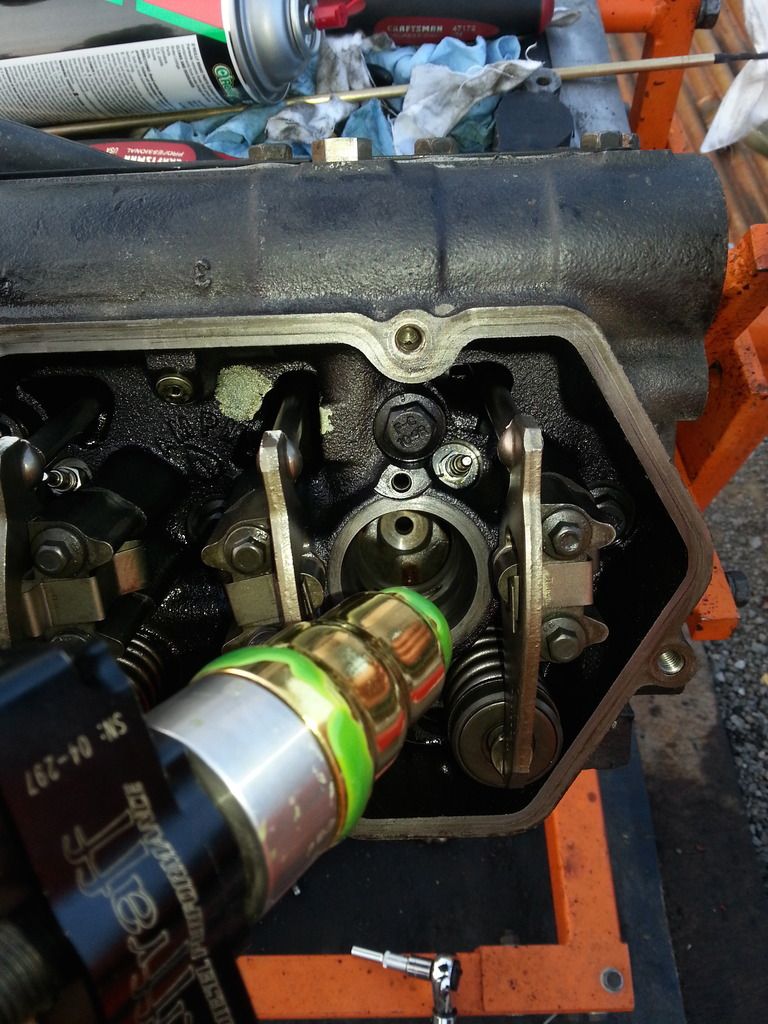
Found a good set of bore brushes at summit and an extension to get deep down into the bore. Worked beautifully.
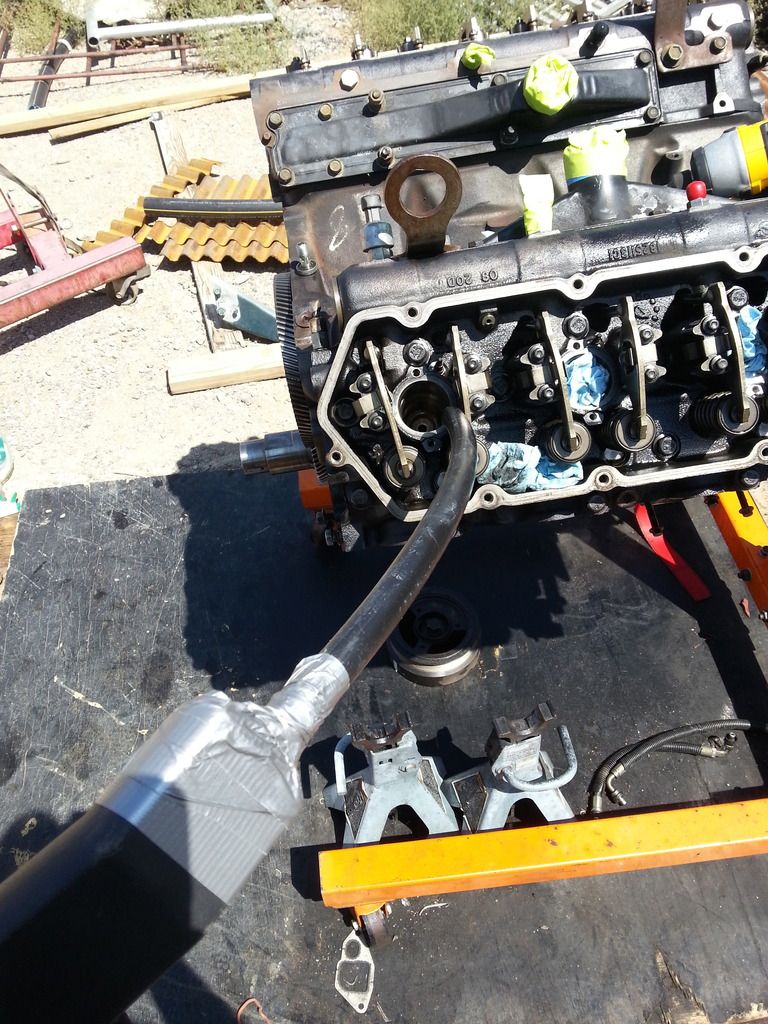
I used a piece of plastic sprinkler tubing I had lying around and duct taped it to the end of the shop vac.
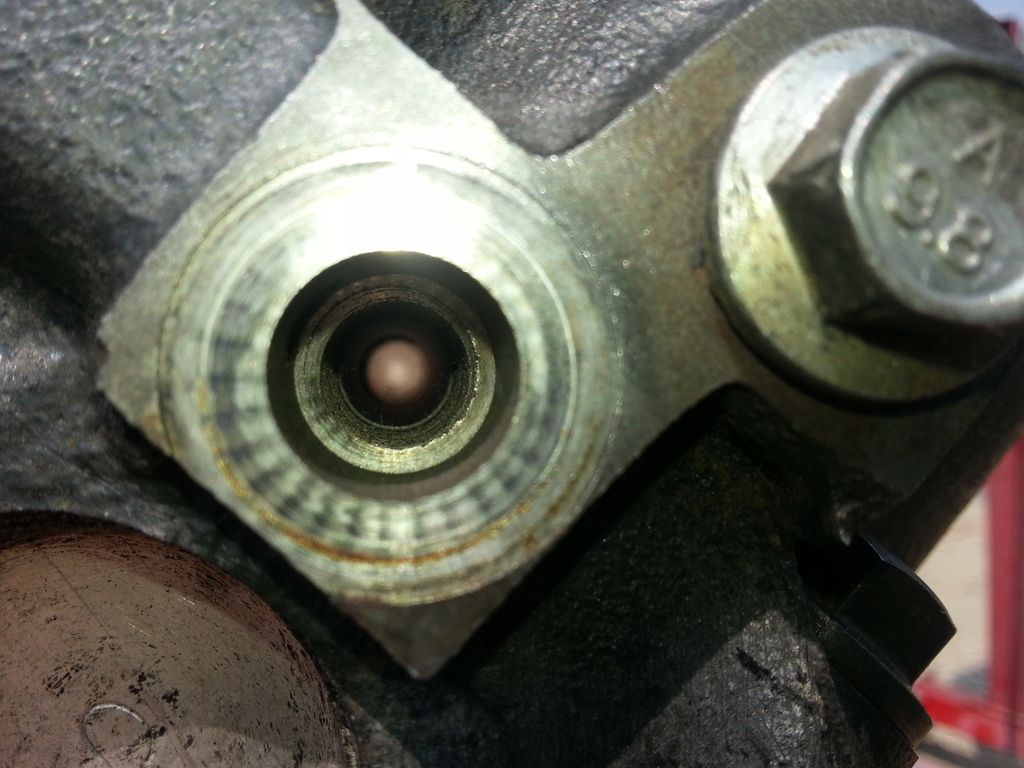
You really need to get a pick down in there to scrape off the old loc-tite and get it as clean as you can.
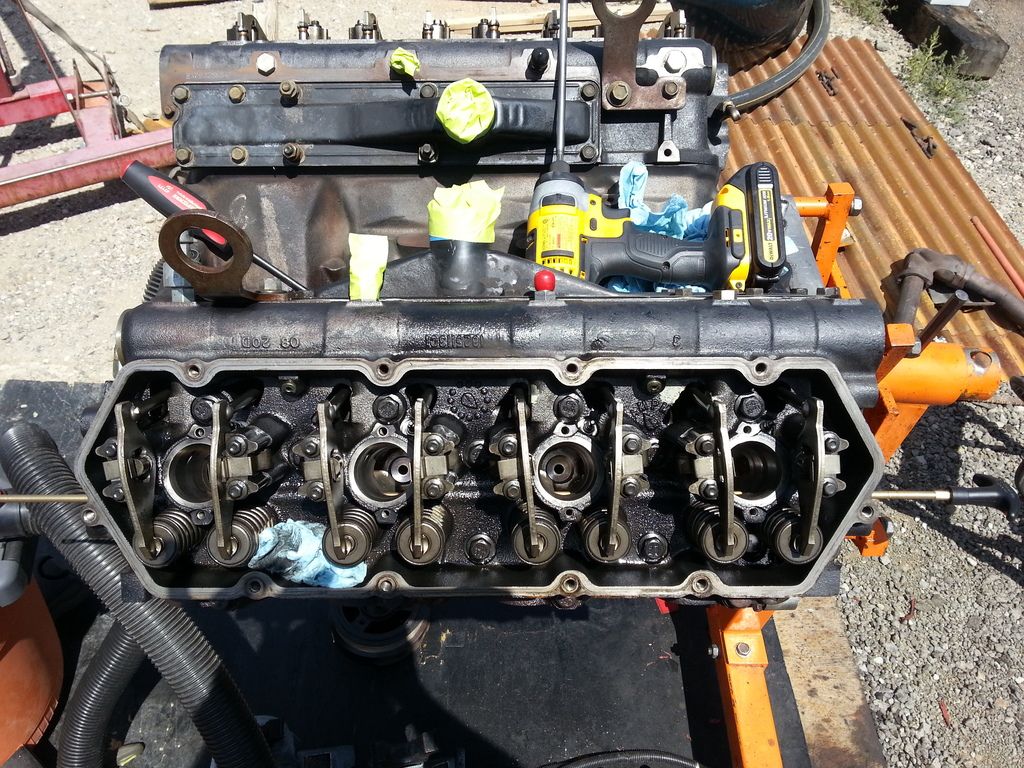
Thanks Tugly for the gun cleaning rod idea. I removed both Banjo bolts and put a gun cleaning cloth on the end, sprayed it with brake cleaner and scrubbed till clean. (bad pic) but look for the cloth at the end of the rod.
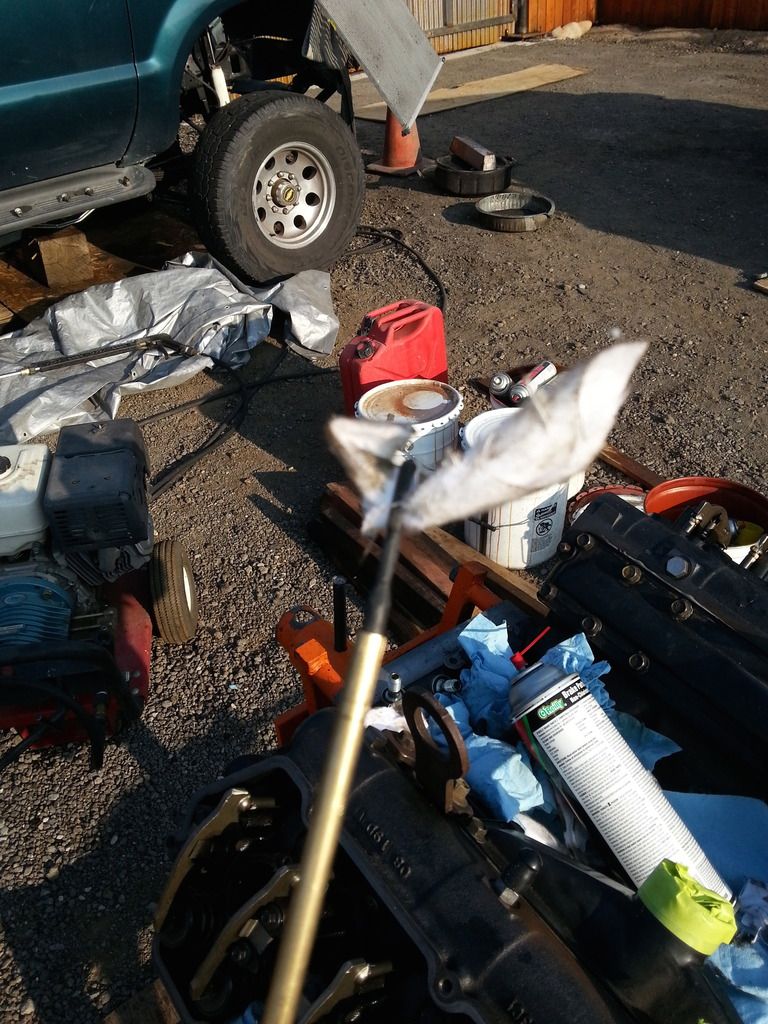
Another bad pic, but you can see the rod from the back side of the block to the front.
This pic shows the light at the end of the tunnel. It's a shot of the Banjo bolts removed on both sides.
Vacuum up, end result.
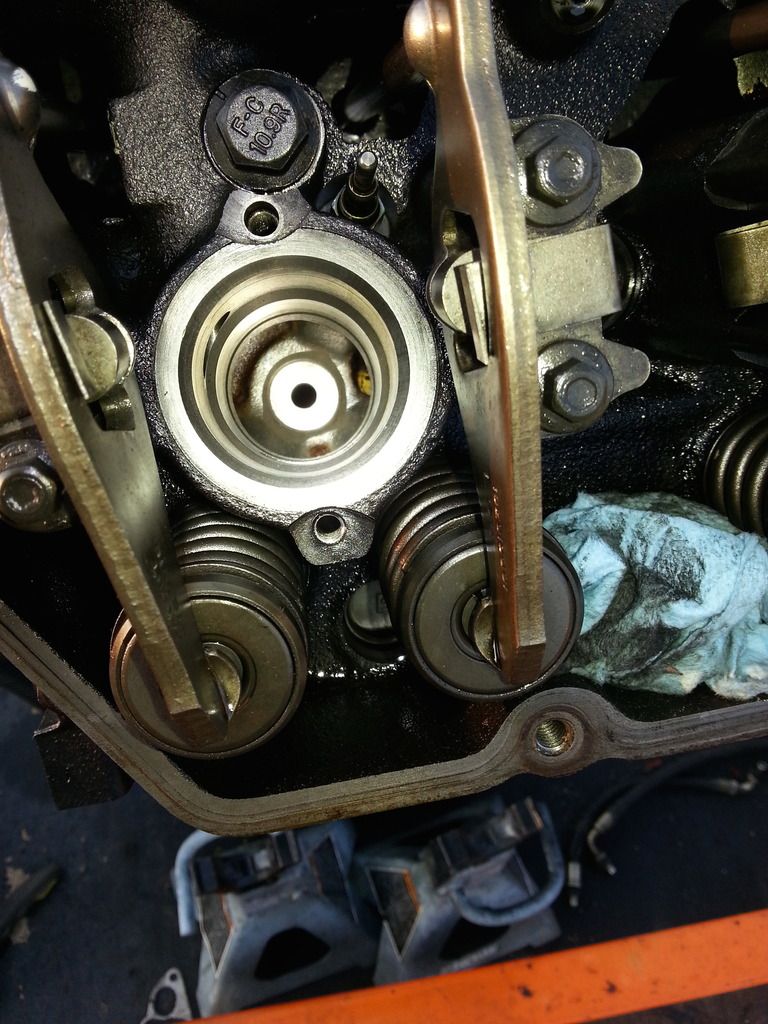
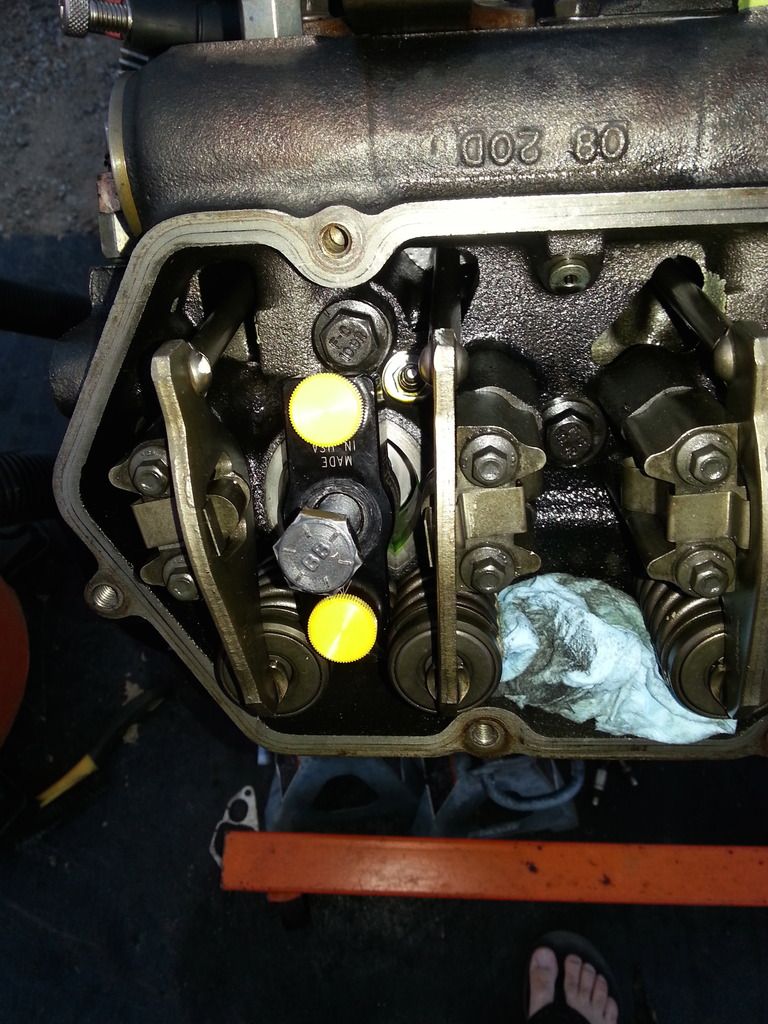
Wipe the install tool and cup clean. Push cup past the O-rings up to the lip.
Put on the green Loc-tite #620. Put it on the bottom flat portion and the top flat portion.
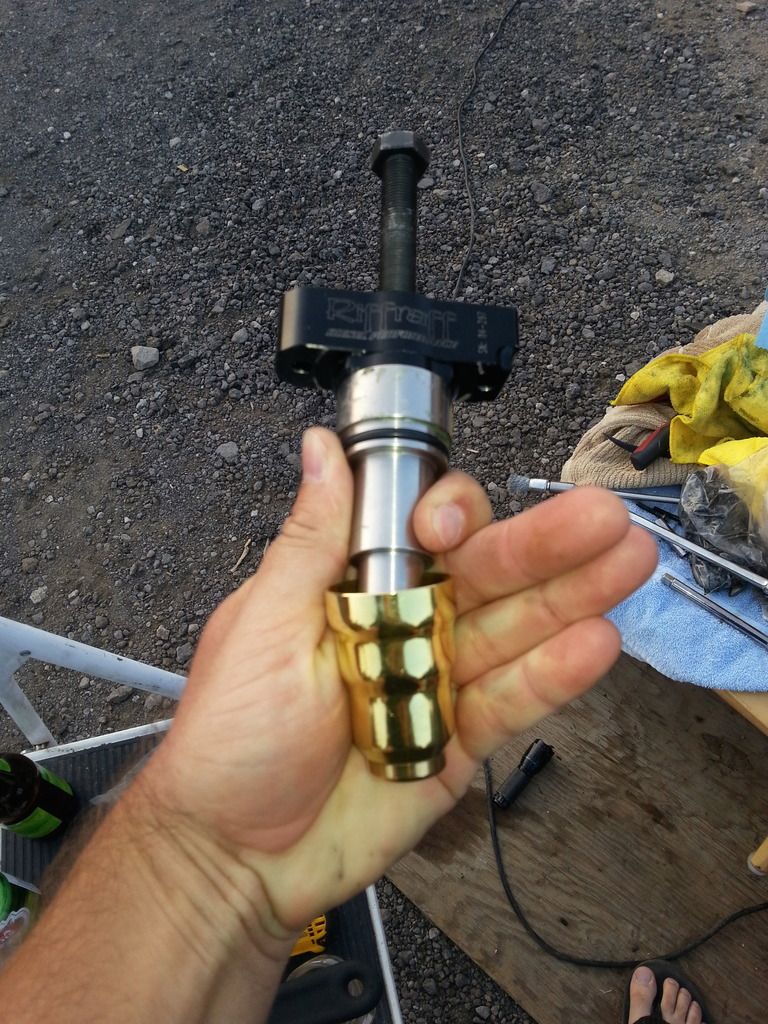
Install the tool, arrow pointing down toward springs. If you rent the tool from Riffraff and comes with the 2 bolts with the yellow tops, use those. DO NOT use the original injector hold down bolts. They are not long enough and as soon as you tighten it up, it will strip the first 3 or 4 threads. My mistake as the instructions said to tighten to 10 ft lbs an assumed that you use the factory injector hop down bolts. I just hand tighten them.
Next tighten the bolt all the way down to 35 ft lbs to seat the cup. loosen bolt and loosen the 2 hold down bolts, remove tool and clean off excess Loc-tite off the bore.
Your pictures and instruction will be a helpful hand for many years to come. I hope I never have to do this job, but if I do I will certainly refer to this thread for sage advice.
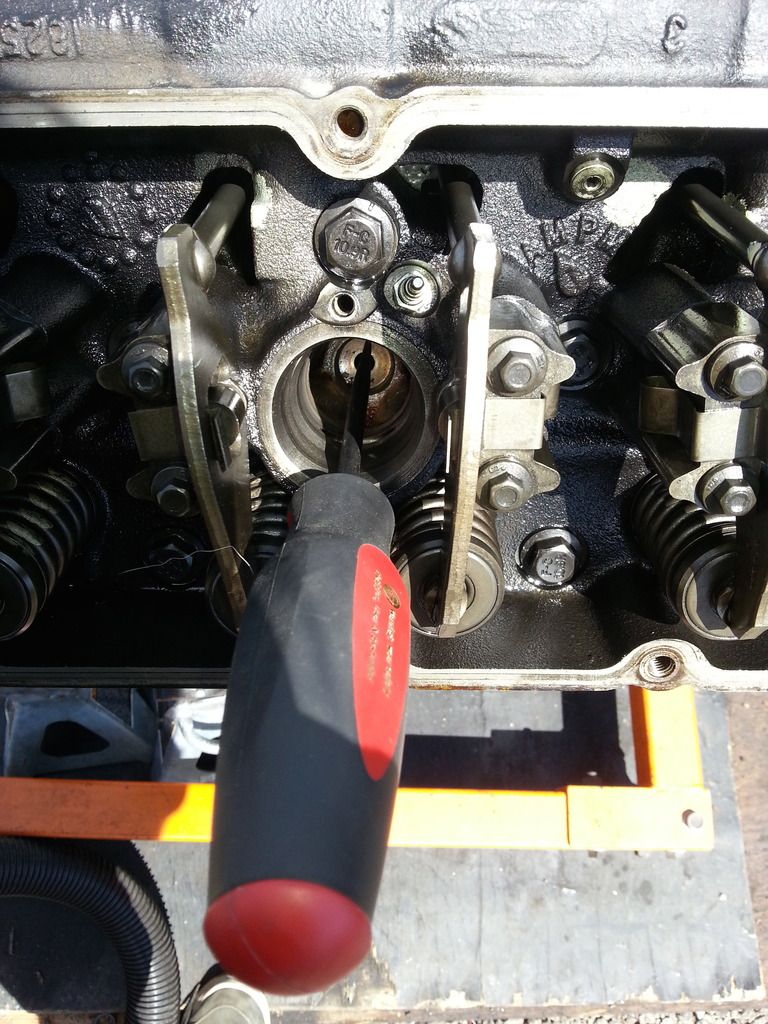
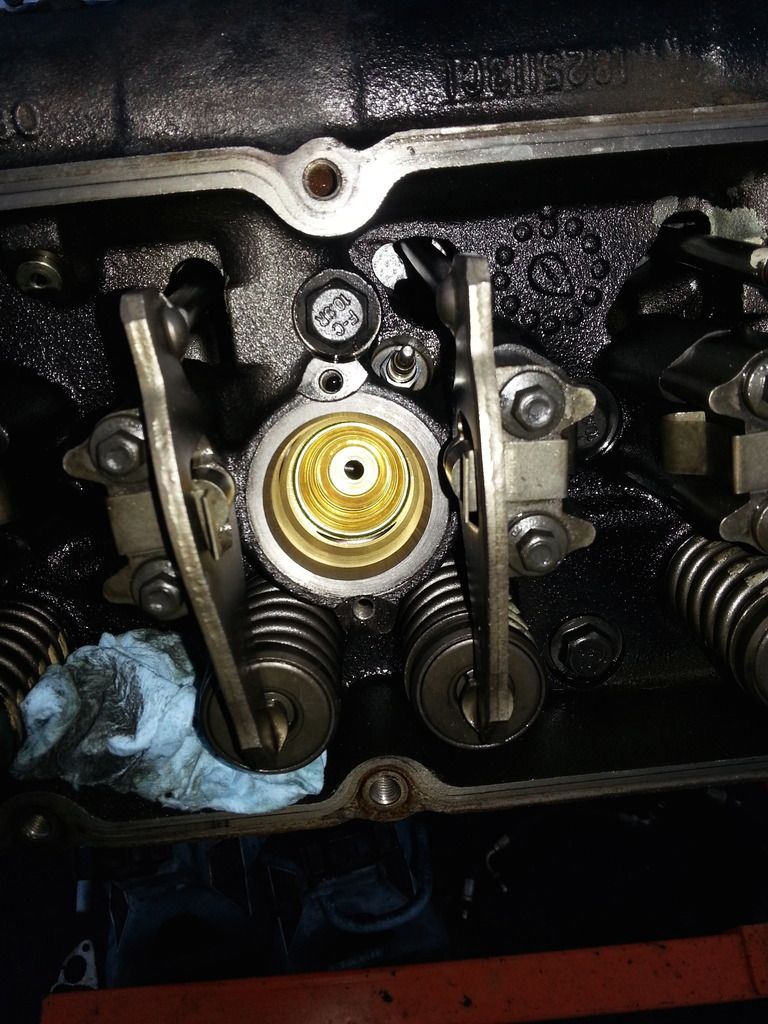
One question, in the picture below you mentioned using a pick to scrape off the old loc-tite. I assume that the reason for the pick being in the hole for the injector nozzle is for picture purposes and you were not scraping down into the hole?
Your pictures and instruction will be a helpful hand for many years to come. I hope I never have to do this job, but if I do I will certainly refer to this thread for sage advice.
One question, in the picture below you mentioned using a pick to scrape off the old loc-tite. I assume that the reason for the pick being in the hole for the injector nozzle is for picture purposes and you were not scraping down into the hole?
Thank you for that.
I had to do a double take on this pic as well, but if you look real close you can see the end of the pick is actually not in the hole but goes towards the top above the hole.
More great pics. Definitely easier to be this thorough with the engine out of the truck. I can see where this is a big advantage. I would be very worried of the debris created doing this in truck but I suppose many folks do.

 08-19-2015, 06:36 PM