
Does your A/C not seem as cold as it once was?
#1
 07-13-2015, 07:21 PM

Does your A/C not seem as cold as it once was?
The A/C in my truck has never been what I'd consider great. When the humidity was high, it was marginal at best. When it wasn't humid, it was acceptable. It had been evacuated, the orifice tube checked and replaced and recharged to the proper weight and it only got a little bit better. The system pressures were in the normal range, and there weren't any signs of compressor problems. A while back, the evaporator core developed a leak so I ordered pretty much everything to change the entire system.
Since the engine was out for the last few days (again), I decided it was the best time to put the new evap core in. The old one was pretty nasty. Nearly 4 full rows were fully blocked with debris. The rest of the rows are pretty well clogged up as well. Looking through them, I could only see light from the edges of each row of fins, along the tubes; the centers of them are all blocked up. I'll try to get a picture of that tomorrow to illustrate what I'm trying to say.
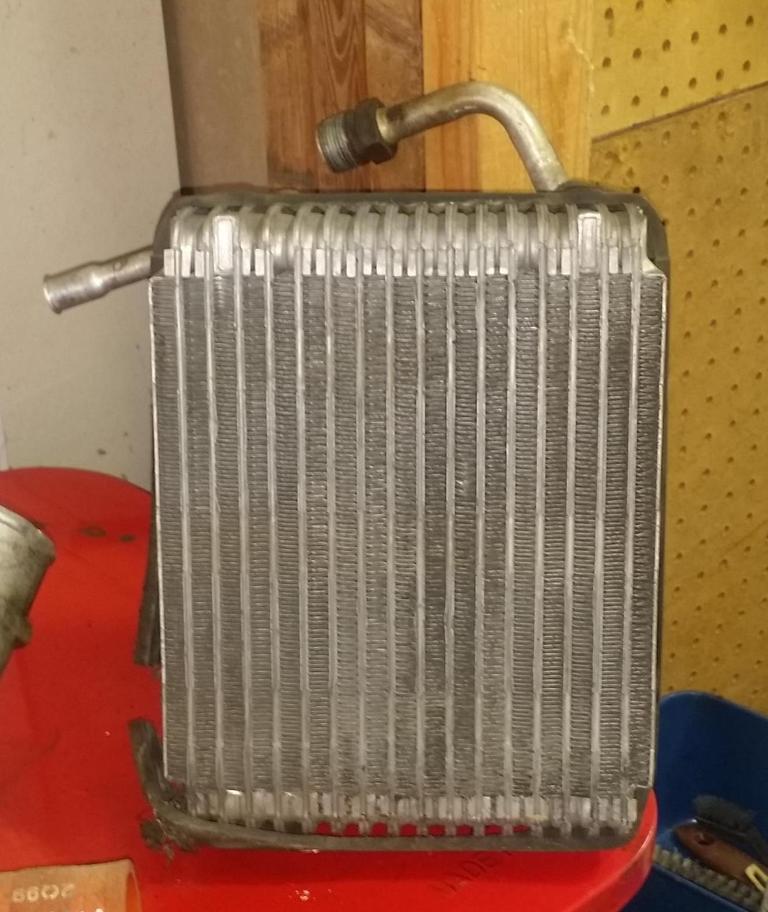
For those who have never seen one out of the HVAC box, the evap core is nearly 4" thick. There is really no way to effectively clean it without opening up the box, IMO. Hell, the evap core is thicker than the radiator. I spent over $10 worth of quarters at the car wash cleaning the radiator, and the water was still carrying debris out of it. Here are some of the pics.
This is the side that faces away from the blower. The air exits this side to enter the cabin. Doesn't look too dreadful . . .
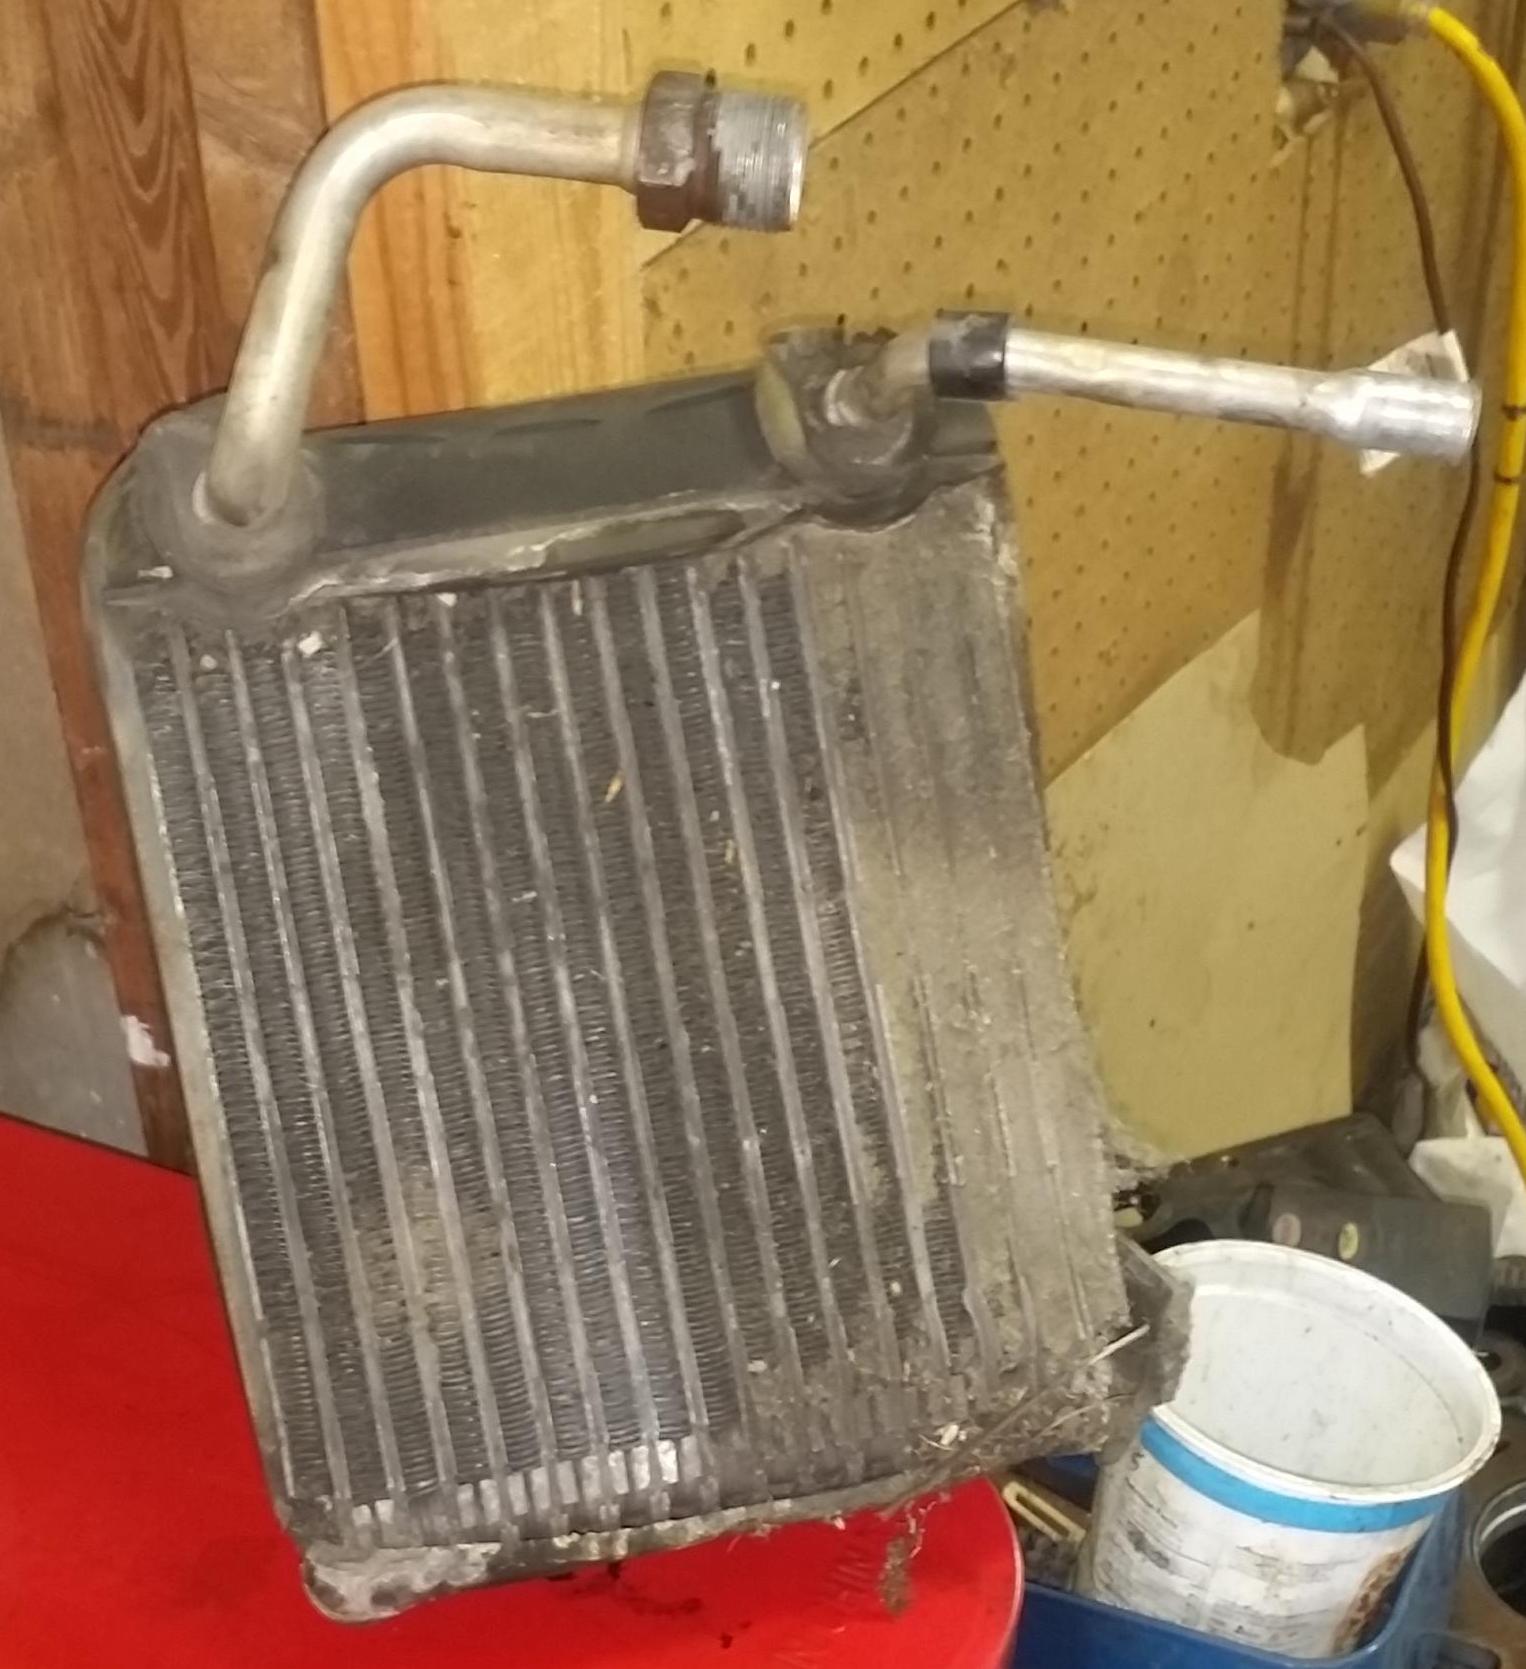
The side facing the blower, where the air enters the core.
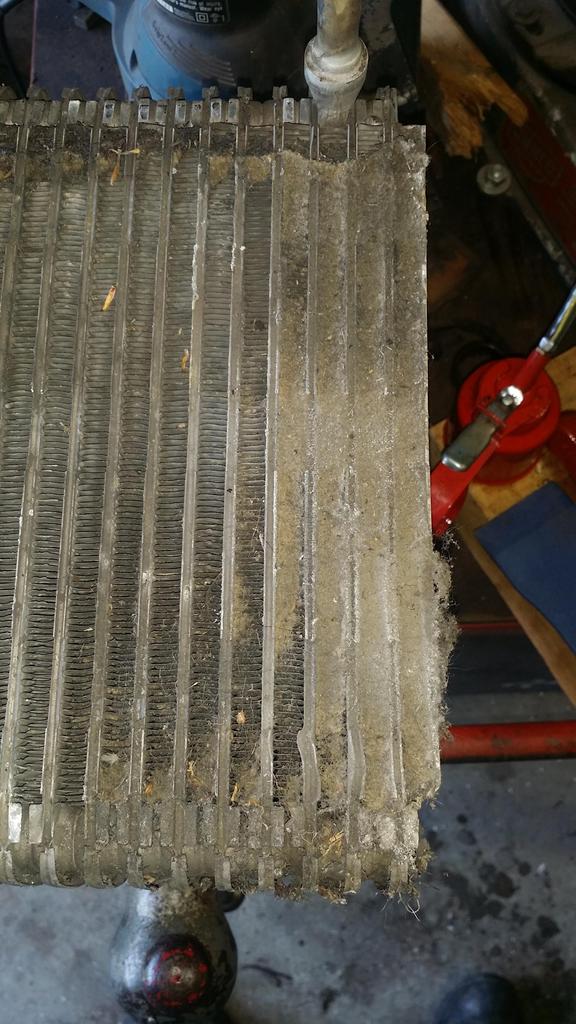
Closer view of the debris. You can see that 4 rows are near completely blocked.
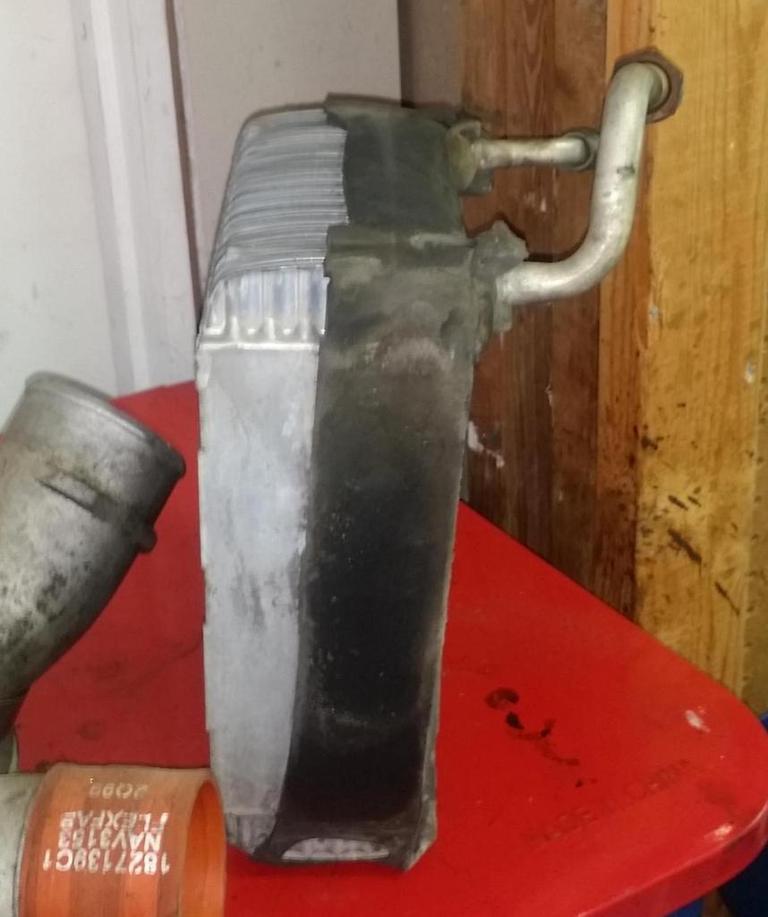
Profile view. Thickness is roughly 3.875".
Since the engine was out for the last few days (again), I decided it was the best time to put the new evap core in. The old one was pretty nasty. Nearly 4 full rows were fully blocked with debris. The rest of the rows are pretty well clogged up as well. Looking through them, I could only see light from the edges of each row of fins, along the tubes; the centers of them are all blocked up. I'll try to get a picture of that tomorrow to illustrate what I'm trying to say.
For those who have never seen one out of the HVAC box, the evap core is nearly 4" thick. There is really no way to effectively clean it without opening up the box, IMO. Hell, the evap core is thicker than the radiator. I spent over $10 worth of quarters at the car wash cleaning the radiator, and the water was still carrying debris out of it. Here are some of the pics.
This is the side that faces away from the blower. The air exits this side to enter the cabin. Doesn't look too dreadful . . .
The side facing the blower, where the air enters the core.
Closer view of the debris. You can see that 4 rows are near completely blocked.
Profile view. Thickness is roughly 3.875".
#2
07-13-2015, 07:34 PM

#4
07-13-2015, 10:00 PM

Mine probably cools better than when new.
Every two years I will recover the 134a, change the Orifice Tube (use the next size smaller) and Dryer, Clean the Evaporator, and recharge the system.
It's been 100*F here and I'm getting about 50*F - 55*F from the vents. In the 80's and low 90's I have seen 40*F from the vents.
Another overlooked part is the condenser. And between the CAC and Radiator. Any restriction can affect the systems ability to cool.
Tom
#5
07-13-2015, 11:41 PM

Yep- that's prettty well blocked up. Definitely losing some cooling effectiveness with all that grime.
I cleaned my evaporator coil when I bought my truck 3 years ago since I thought the airflow out the vents was lower than what it should be. All I did was remove the blower motor squirrel cage and hosed out the coil thru that opening where the squirrel cage was located. I took a piece of 1/4" copper tubing, crimped the end to make it 'squirt', bent it into the right angle and hooked it up to my garden hose. It was amazing how much 'mud' came out the drain hole. I even soaked the coil with Simple Green for a few mins to help loosen the grime. Simple way to do a basic clean job without removing the coil.
I'm sure your cleaning is way better... but I'm lazy
#7
07-14-2015, 11:25 AM

Laughing Gas
It's in the big black box right behind the passenger side fender well. I'll be cleaning mine on Saturday on Skippy so if Picachu doesn't do a step-by-step then I'll have one in my build thread Sunday.

Trending Topics
#8
07-14-2015, 11:55 AM


#9
07-14-2015, 12:04 PM
Laughing Gas
Well if you're wanting to remove the whole thing there's two connections that'll need re-sealing. You'll also need to get a new dryer, 6 cans (iirc) of R134a and 2 bottles of oil. Oh, and a vacuum machine to suck a vacuum on the system prior to filling. Or a reclaiming machine to suck all you have in a bottle then squirt it back in.
I just did all that and don't have the funds to break open the system again so Picachu will have to pic that part up. I'll be tearing open the housing and cleaning the bugs and fins off without opening the system itself.
#10
07-14-2015, 12:17 PM
#11
07-14-2015, 01:02 PM
Laughing Gas
Step 1, remove engine. LOL! ( I probably should learn how to do that too. )
Don't feel bad Pikachu, I can't tell you how many post-repair pics I've had to take because I forgot my camera, or my hands were full, or my "helper" was taking selfies.
The important thing was drawing attention to a real problem on a 15 year old truck. Thanks!

#12
07-14-2015, 01:17 PM
#13
07-14-2015, 04:33 PM
Thanks guys anyway. I don't think this has been shown before so it would be a good video or even pictures. I would think the box would have to be sealed again around the fire wall, correct? Or is it just a reusable seal? I need to work on mine also, going to start with the clutch mod first. It shuts down ever once an a while, then comes back. I think it kick off. I'll check the gap.
#14
07-14-2015, 05:03 PM
The box splits in half like a clam shell. The half closest to the engine is the removable side, and there is no seal, per se. The way it seats together acts as the seal. When the upper support bracket, accumulator bracket and inner half of the box are removed, the disconnected evap core comes right out.
#15
07-14-2015, 06:50 PM
Elder User
Join Date: Dec 2002
Location: UT
Posts: 797
Likes: 0
Received 0 Likes
on
0 Posts