When you click on links to various merchants on this site and make a purchase, this can result in this site earning a commission. Affiliate programs and affiliations include, but are not limited to, the eBay Partner Network.
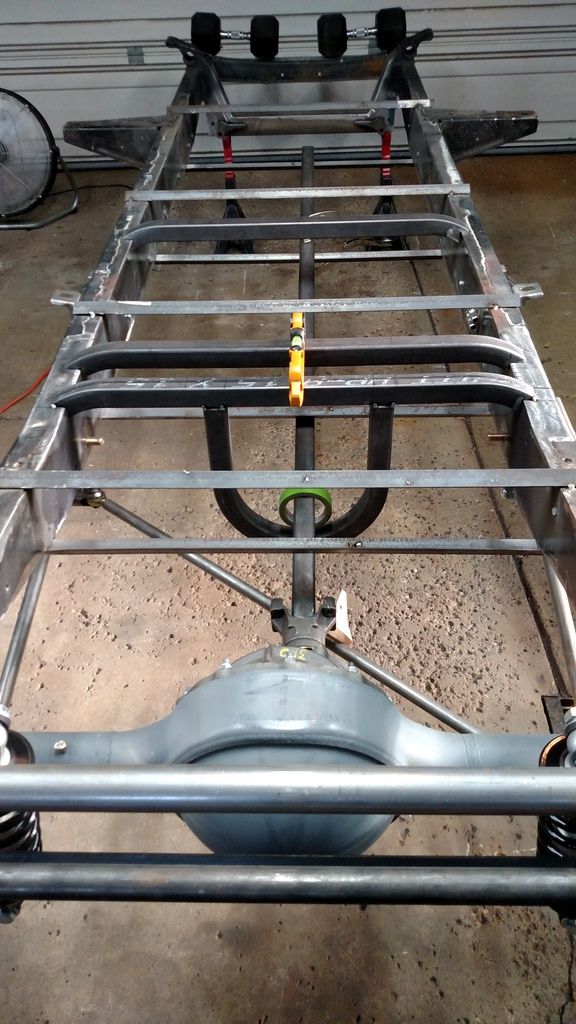
I welded in my shock mount and rear splined sway bar tube. Before I fabricate cross members I decided to do a little mock up again just to check my work. I mounted the axle and checked the axle fit up into my frame notches. Came out nice.
I also mounted the sway bar links and mocked up the linkage. Someone asked a while back about being interested in how the TCI sway bar mounts. The splined sway bar slides through a machined tube that gets welded through the frame. There are plastic spacers that slide in and keep the bar from bumping around in the tube. The upper link bar gets a special bolt for both the link bar, and sway bar linkage.
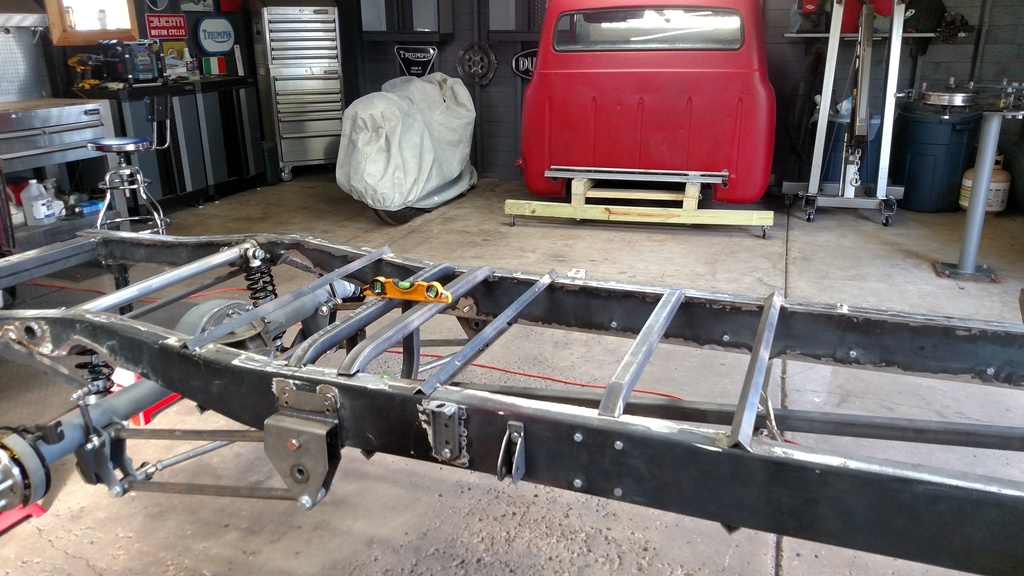
So now that my previous work checks out okay and double checking that everything is level and straight... I'll move on to the next. A sturdy cross member mounted by where the 4 link attaches to the frame.
I should also mention that I mounted the shock tube 5/8" higher in the frame than the directions said to. This will lower the rear of the truck by the same amount. In my mockups that should get me the stance I want which is 1.5� rake. When the truck is done I'll adjust the preload on the coilovers so that 1/3rd of the travel is used up at ride height (static sag). Any further ride height adjustment will be done with the lower shock mount and I'll make new ones to adjust the ride height with.
I made the brackets for the calipers to adapt to the Dodge Dakota spindles and I am using the Dodge D150 big rotors on the front.
Phil
Hey Phil,
Sounds like a cool project you have going. I'm not sure I can be of much help on your question though. My rear end is actually Currie 9". Not sure if the axle flanges are the same as a Ford 9". My rear calipers are 4 piston and front are 6 so that would make my kit different as well. Good luck with your build!
Nick,
Currie 9 inch can be had with the a variety of Ford bearing ends. That is because Ford changed the bearing sizes and the flange bolt patterns on the 9 inch over the time that it was manufactured.
I was mostly interested at what Wilwood calipers you used. Wilwood makes kits to fit different bearing sizes rearends and uses the same caliper that uses the D154 brake pads, which are a GM design actually.
From the pictures the kit you have installed looks a lot like the one I selected and is shown by the link.
Nick,
Thanks for the feedback. You have a great rear disk brake setup.
The Wilwood kit I've selected is a direct replacement for some GM mid-size calipers and uses the same design brake pads. I selected it because if I was ever in a pinch for pads I could just use the stock GM pads.
I've subscribed to your build thread as it's full of ideas. Thanks again.
Starting on the crossmember brace. I'll call this one the middle brace. With the shock tube/sway bar tube and rear brace behind fuel tank I think the rear will be plenty sturdy. So now my efforts are to sound up the area where the four link bars mount to the frame. I'll have two braces on top, two on the bottom and two loops around the drive shaft.
First I drew up a plan. I wanted it simple and strong. I wanted to give enough room to run the exhaust so I wanted to raise the top tubes as high as I could without interfering with the bed. Its still in the works.
I bent some 1 1/2" square stock in my Model3 bender. 40� on each end.
I made 3 of these so far.
Then with the frame level in all directions, I clamped the new bent pieces to a piece of straight stock. Because everything is level I can use a level and straightedge to get all my marks.
Then I trimmed out all three to look like this.
I leveled one on the frame and tacked it in. Then bent another piece of 1 1/2" square into a 180� bend with a 5.5" radius. This will give me plenty of room for my drive shaft. I used a piece of steel I had laying around as a mock up drive shaft and a roll of tape to simulate the diameter of the shaft.
Now I need to finish the other middle brace. It will be just like the one I just made but the loop will be a little shorter. This is just the top side, once I finish the top I'll flip the frame and connect the loops to the bottom side of the frame simar to the top. I'll also make another up by the rear running board mount.
I welded I my 4 link brackets. Used some weld through primer between the plates and frame. Here's a pic of the first pass. I flipped the frame over and welded up the rest.
I also finished up my "middle" crossmember". I originally was going to double it up, one on each side of the 4 link brackets. I changed my mind and moved the brace to the center of the brackets, then took the bottom legs of the brace right to the brackets them selves. The driveshaft will go through the center loop and there is plenty of room to run an exhaust pipe through the side rectangles.
Nice welding Nicholas, you should do a tutorial ,some of the better welding I've seen. Your frame is a thing of beauty, going to really look killer once painted/ powder coat which ever you decide to do.
Thanks John. I'm not a tutorial kind of guy, and we already have one around here . Lol. My welds aren't always the prettiest, some guys, guys that actually do it day in and day out for a living are AMAZING. I'm just a dude with a welder getting better as I go. Once I get the frame all complete I think I'll get it blasted and paint it. I'll have to get a price from my powder coat guy though. He has been reasonable in the past with my M/C frames.
Nice job on frame!! I asked about the sway bar mounting, so thanks for the pictures. I just got a quote for sandblasting and powder coating my frame, they want 500.00 which I thought was pretty good. The place is near Buffalo.
Nice job on frame!! I asked about the sway bar mounting, so thanks for the pictures. I just got a quote for sandblasting and powder coating my frame, they want 500.00 which I thought was pretty good. The place is near Buffalo.
Thanks for the compilment Last Chance. What place was that? I usually use Aurora Powder Coating on Maple Rd. Elma. They do mostly commercial stuff but will get me in when they are slow. They are real good and reasonable. But 4-500 bucks is about what I thought it would cost.
 08-17-2015, 09:37 PM


 . Lol. My welds aren't always the prettiest, some guys, guys that actually do it day in and day out for a living are AMAZING. I'm just a dude with a welder getting better as I go. Once I get the frame all complete I think I'll get it blasted and paint it. I'll have to get a price from my powder coat guy though. He has been reasonable in the past with my M/C frames.