When you click on links to various merchants on this site and make a purchase, this can result in this site earning a commission. Affiliate programs and affiliations include, but are not limited to, the eBay Partner Network.
That motor looks monstrous in there Nick but in a very nice way, sorry to hear about the pan interference, hope it all works out when the new one arrives.
Thanks John. It is pretty monstrous. Wide. Glad that was the only issues. Well only issues so far lol. I had pretty much expected it.
Thanks for the pics Mike. The Moroso oil pan gives a measurement for the sump portion of the pan being 9" long.
So that should give me another 1.5" of clearance even if I removed the bubble like you did. I am thinking if I need to do any further mods to the pan, it will be easier (at least for me) to work with the squared shape of a fabricated pan.
Nick, I was looking at the Moroso pan but was worried about the wings sticking out the sides of the pan. Was worried they would interfere with starter access and the steering shaft. I think starter would have been OK but because my steering shaft runs between the headers and block that pan would have been a problem.
Thanks again Mike. I did check that out too. I should be able to run the steering shaft on either side of the exhaust manifold. My steering is gonna be a little different. I want to raise the steering column inside for more foot space so I'm using a Wizard steer clear. It allows the column to be mounted more horizontally, and can also be clocked and take out hard angles. So with that the steering shaft entry to the cab can be moved by using a different length unit.
I do think the wider oil pan might interfere using a stock type steering column angle.
Nick, I've got some info from the Factory Five Coyote people.
I just happened run across these notes regarding the 2015 control pack use on 2015 Coyote engines. FWIW.
"Designed to run the M-6007-M50A and M-6007-A50NAA 5.0L 4 Valve 435HP crate engine and salvage motors pulled out of 2015+ Mustang GT Manual Transmission Cars. Will also work on M-6007-A50SCA and salvage motors from 2015+ F150's with aftermarket custom software tuning and Mustang GT engine harness from a manual transmission car. The compression ratio of these motors is different and requires a custom tune to run properly."
So is your engine harness a FU5Z-12A581-E if so I think that's what i need, and maybe an oil pan with an oil sensor, or weld a fitting into my oil pan.
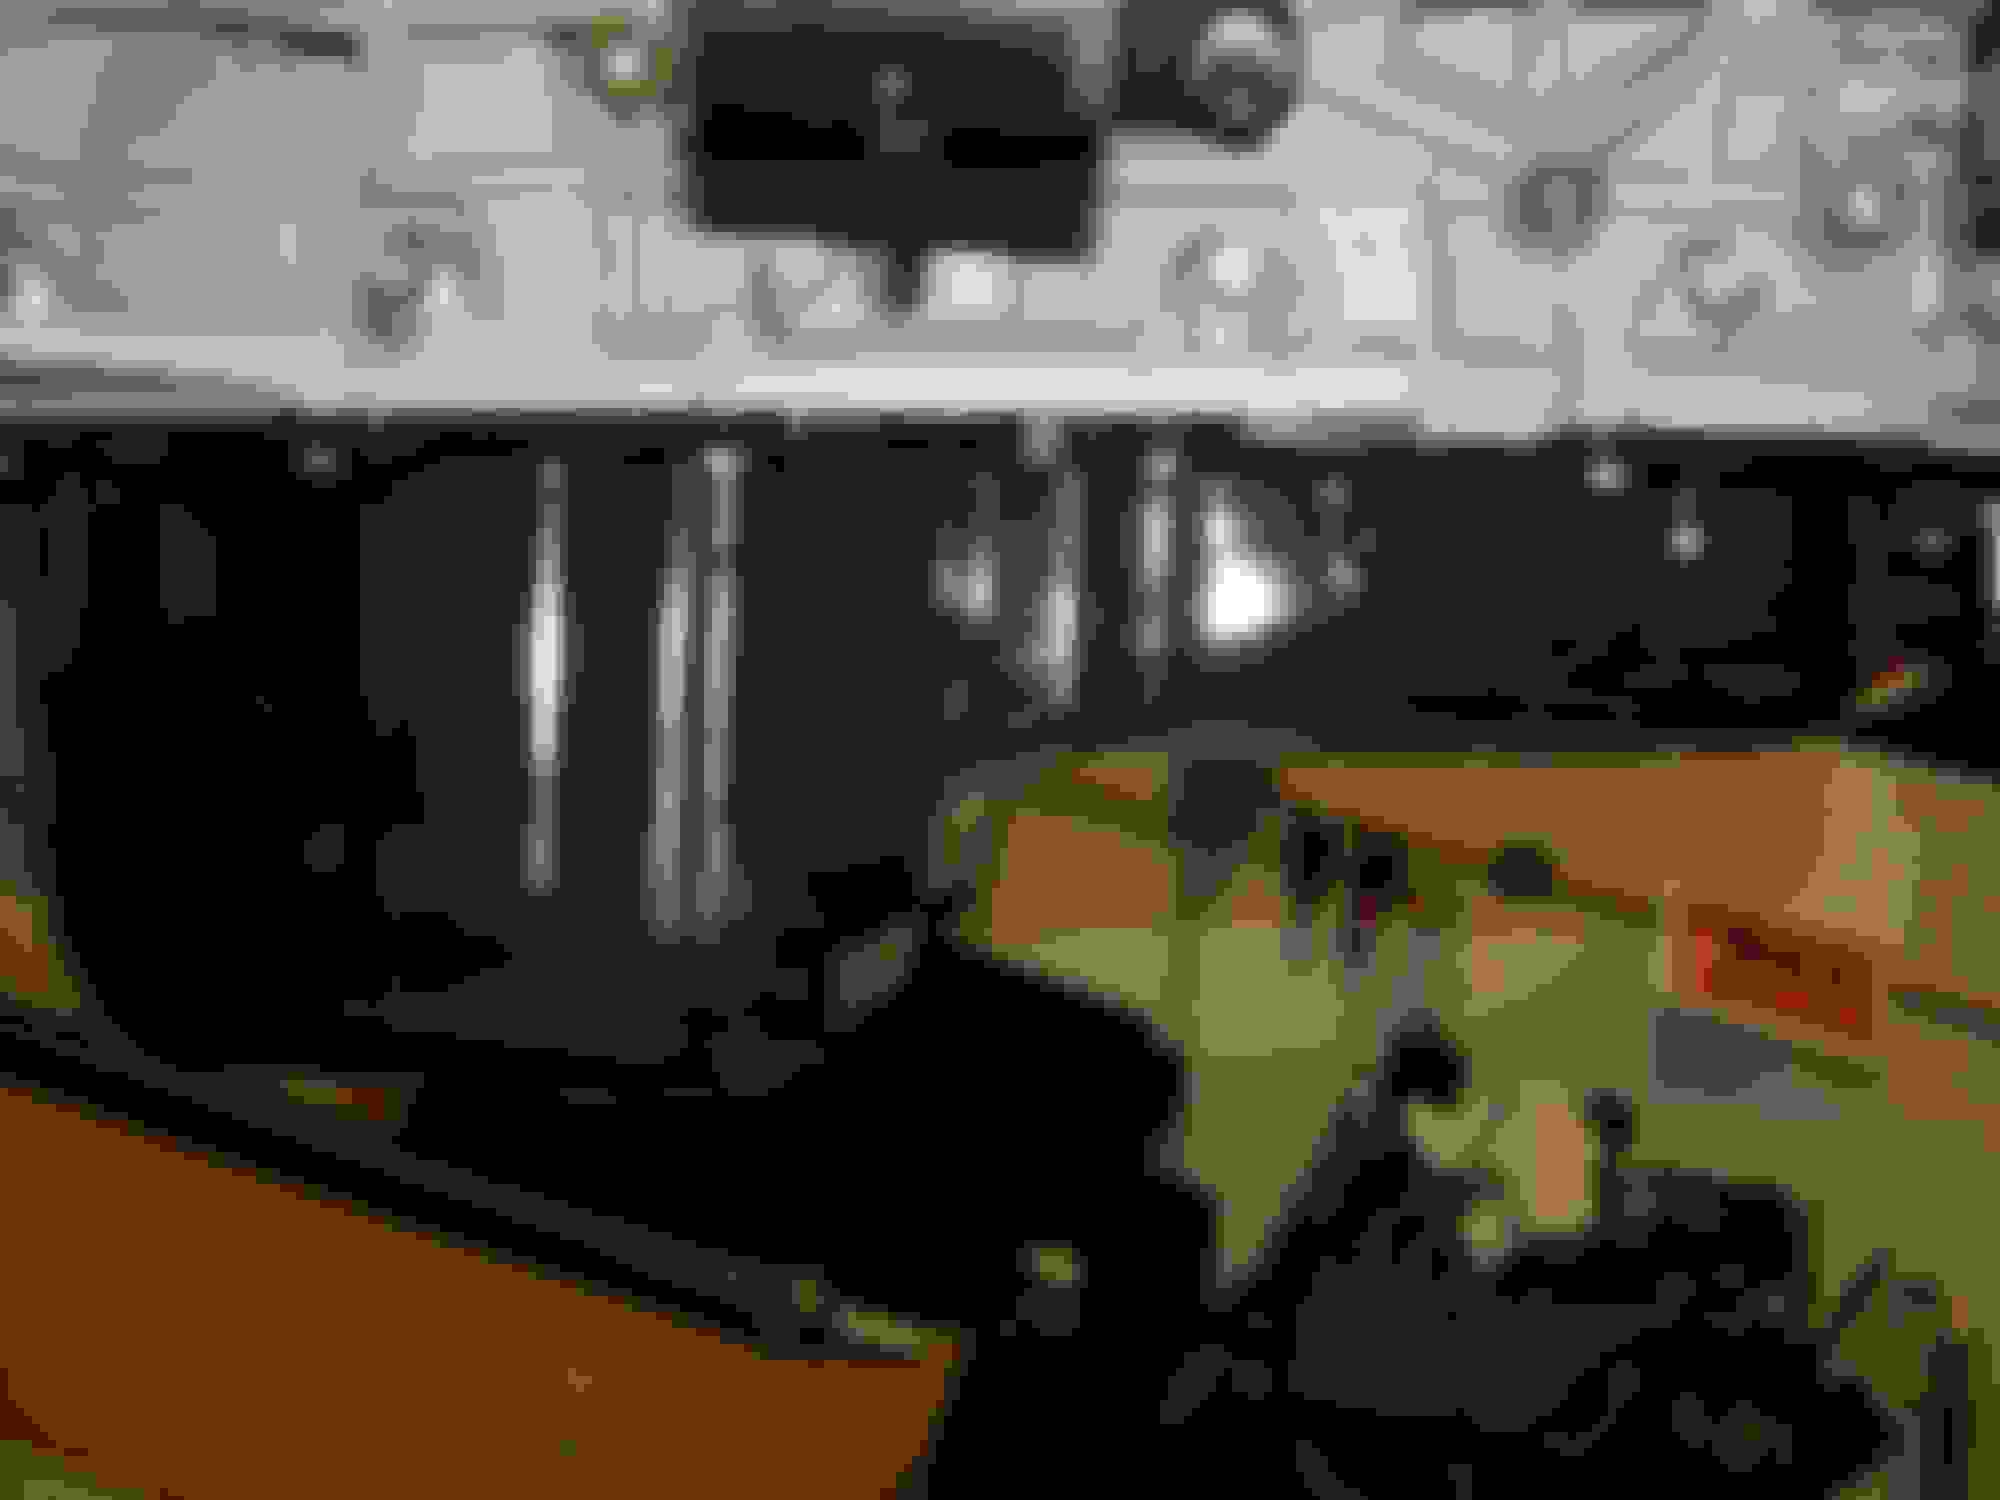
I got my new oil pan today. Moroso #20571. It uses the factory pickup and dipstick. It looks like a real high quality made piece. It has the road race baffle and a trap door to keep oil around the pickup. I took a few pics to compare. The pans are lined up even with a straight edge showing the clearance difference:
Looking at them from the side you can see the bubble and even more material that this pan will take out of the equasion. This pic pretty much tells the story.:
Looks pretty good on there too. Torqued bolts down to 89 in lbs + 45�. The manual is pretty handy as it has all the torque specs. I was wondering how it would fit bieng a welded and fabricated product. It fit completely flush. No warpage at all. Them guys are pretty dang good.
So I did a quick and dirty test fit. This fixed my oil pan clearance issues perfectly. There is actually room to move it forward more if I'd like. Tis a good day.
Drivers side.
Passenger side.
On the 2015+ Coyotes there is a few vacuum canisters rear of the intake manifold to operate flaps in the runners. They tuck perfectly in the recessed firewall. Its almost as if it was designed to be put there. Thanks for thinking ahead Henry.
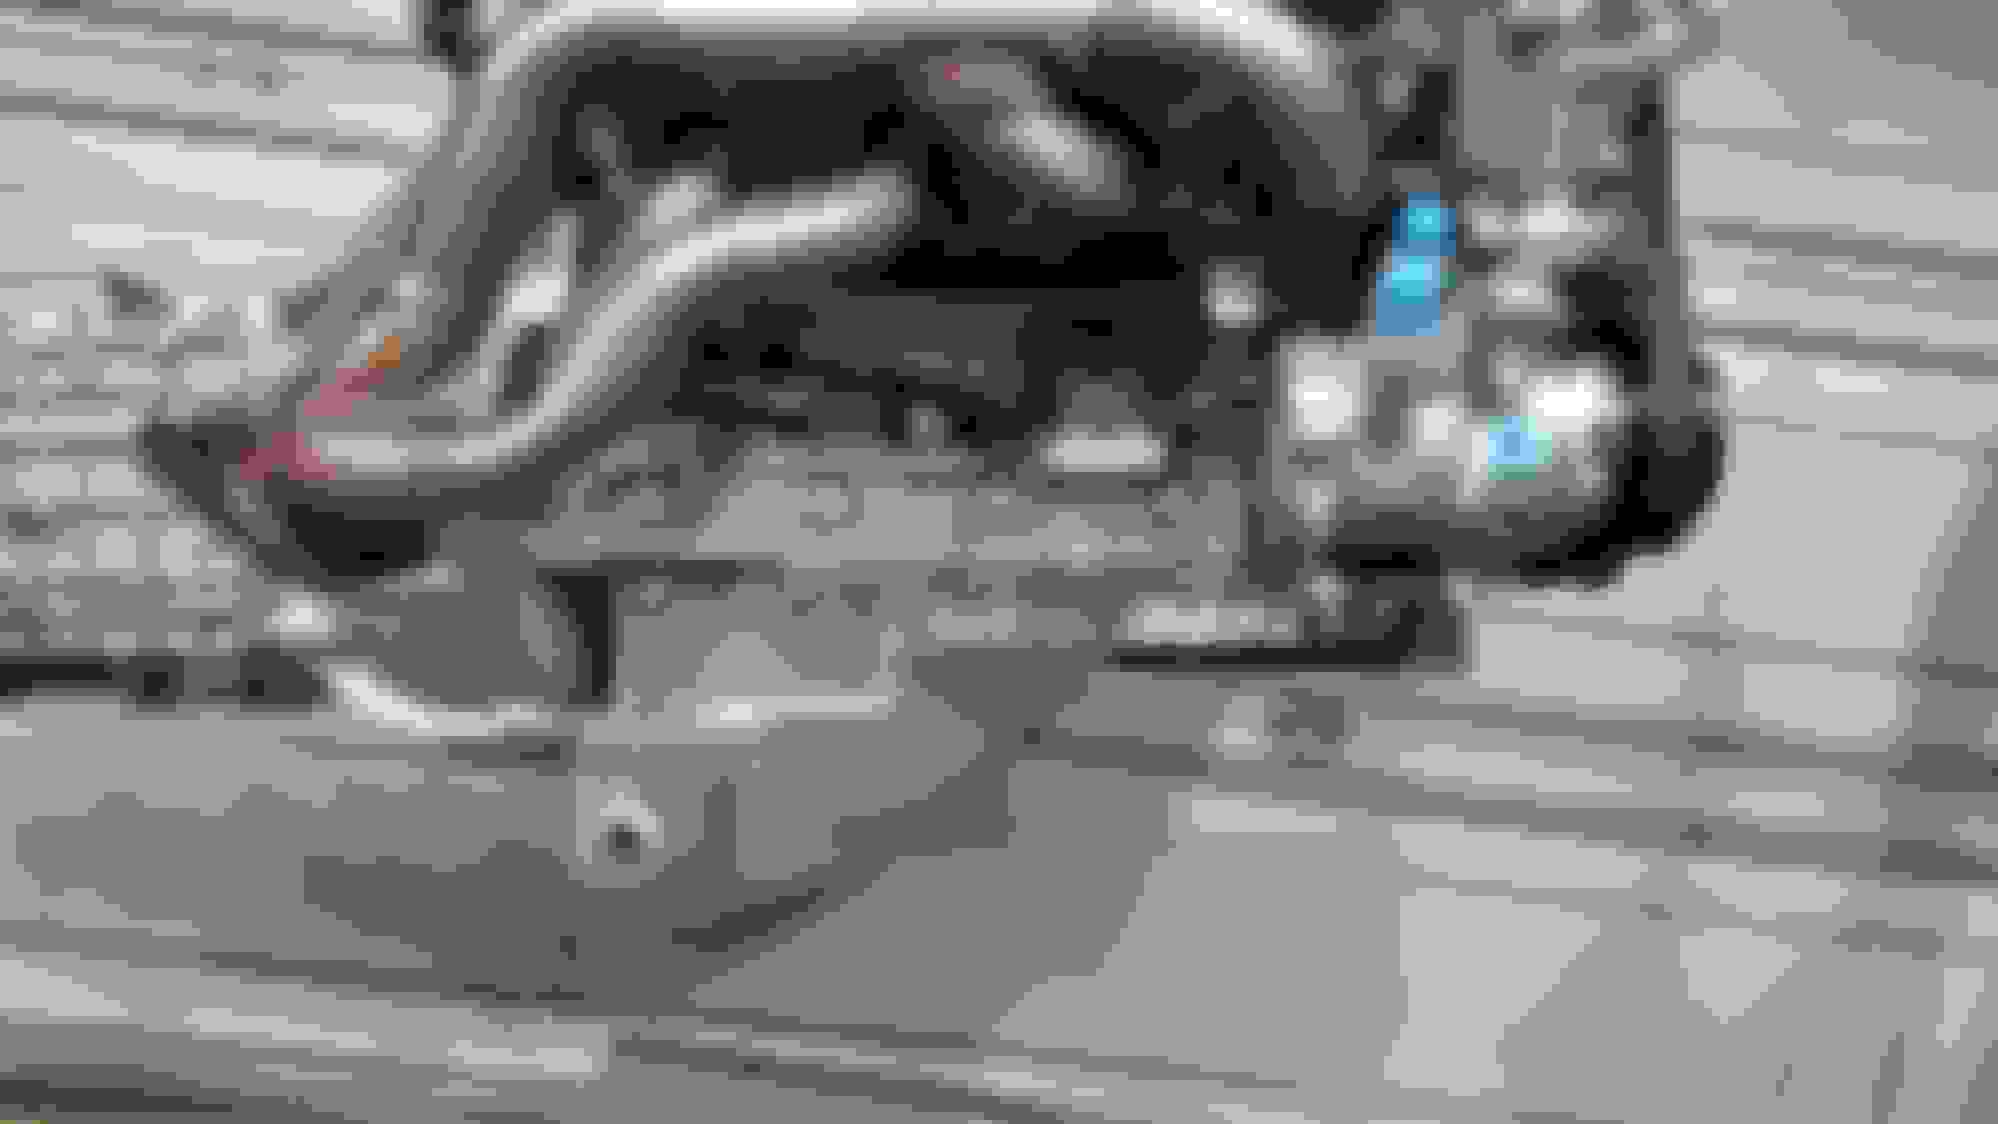
But as I was pretty much expecting.... The oil filter ain't gonna play ball.
I found out that the 15+ engines have different oil passageways ways cut into the block than the previous models. I'll need an oil filter relocation adapter plate. FRPP is the only one making one at this early point. It isn't available yet at retailers but should be soon. Part # M-6881-M50A. So I'll be looking for that soon.
Now its time to fire up the ole brain and figure out some engine mounts. Back to a little fab work.
Hi Nicholas+, i am interested in the original fenders. I just bought a 54 F-100 and the front fenders are junk. Too much rust and are flopping in the wind. Also a big restoration project. How much for the fenders?
Thanks John. It worked out well. Gotta take the wins when they come.
Hey Fordman100, were not allowed to sell parts in threads like this. You'll have to look in the for sale section, or make your own add in the WTB section. I don't have anything for sale.
Nick, I fabbed mount tabs and put a piece across the top to further strengthen them.
I offset the engine 1" to the passenger side. Would that help the oil filter clearance issue, also you can go to a shorter Cadillac filter. That's what some of the Factory Five guys have done.
Hey Brent, I'll definitely be offsetting the engine. In the pic it is offset at least an inch to the passenger side. No real measurements yet . Just kicking around ideas. Pretty much just wanted to see if the pan was gojng to work. I was thinking about the shorter filter, but it still wouldn't work. Just too tight. The relocate won't be too bad. It will make oil changes easier in the end.
I'll ponder on the mounts a while because I like too. Pretty sure I have to chop up the tin man mounts though. At least the drivers side.
Nick, I used a Canton Racing oil filter mount. No problem with oil changes in this location. -10 AN lines from the remote adapter. I like the look and fit of your Moroso oil pan, and I may have to go that route to get the oil level sensor. When you find the FRPP remote adapter post a pic of the back side. I'll likely have to change mine out to the new design, but the -10 AN lines should still fit if it's only a gasket/O ring change.
 11-26-2015, 02:01 PM


 . Pretty sure I have to chop up the tin man mounts though. At least the drivers side.


