When you click on links to various merchants on this site and make a purchase, this can result in this site earning a commission. Affiliate programs and affiliations include, but are not limited to, the eBay Partner Network.
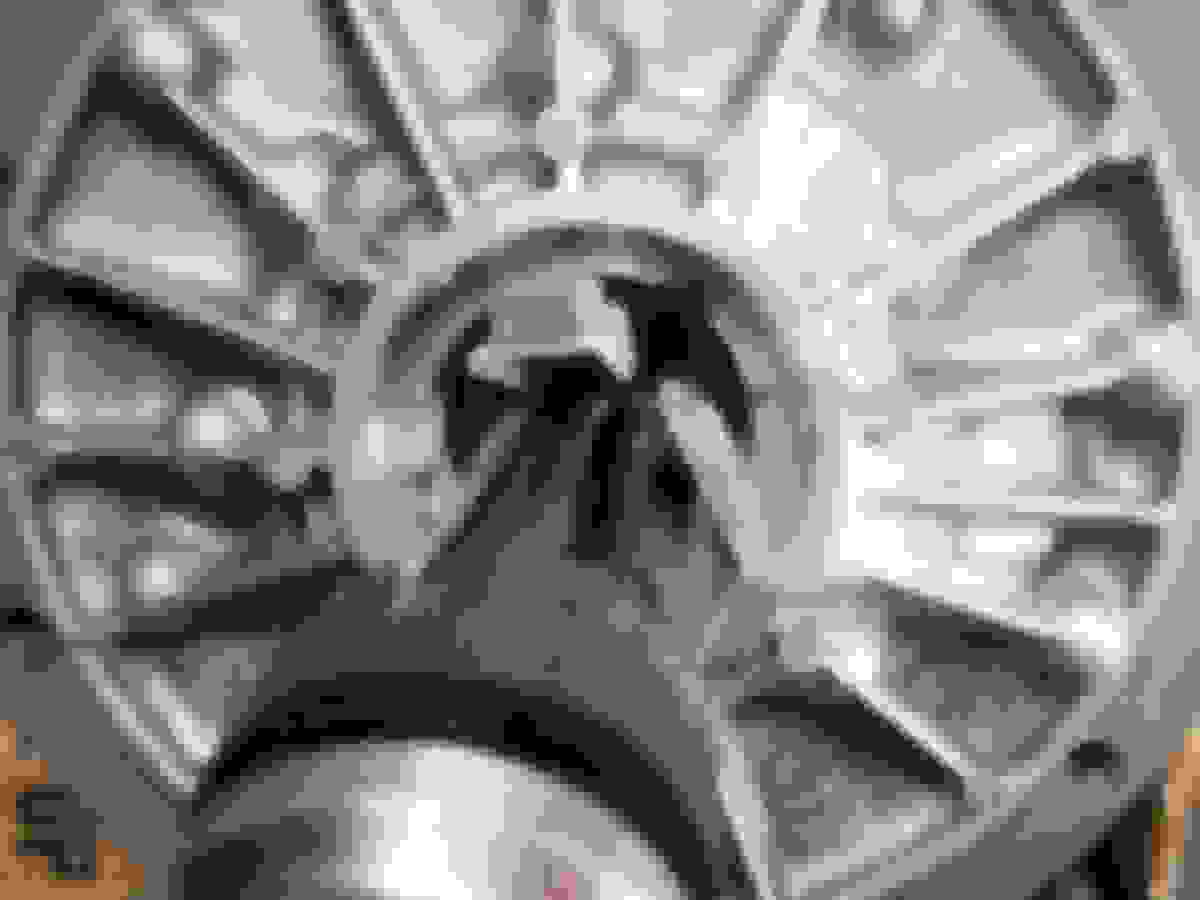
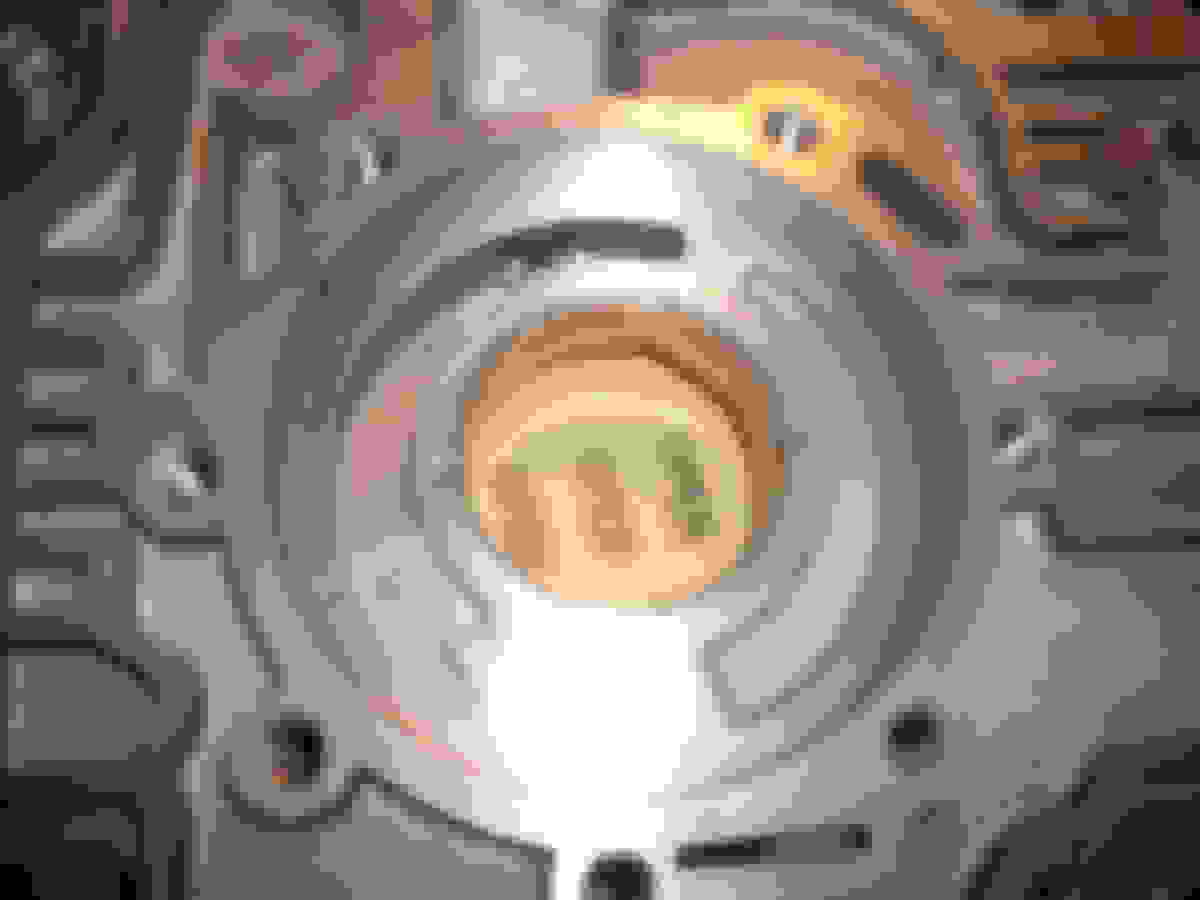
Bought this http://www.ebay.com/itm/E4OD-F5-89-97-REBUILT-PUMP-ASSEMBLY-TRANSMISSION-F5TP-NEW-GEARS-WARRANTY-FRONT-/251392814212?hash=item3a882dec84&vxp=mtr pump off ebay. Guy has 99.6% feedback so I assumed all would be good. Broke apart the pump to do the transgo mods and found this:
<a href="http://s23.photobucket.com/user/92ct-27gt/media/20150524_162123.jpg.html" target="_blank"><img src="http://i23.photobucket.com/albums/b396/92ct-27gt/20150524_162123.jpg" border="0" alt=" photo 20150524_162123.jpg"/></a>
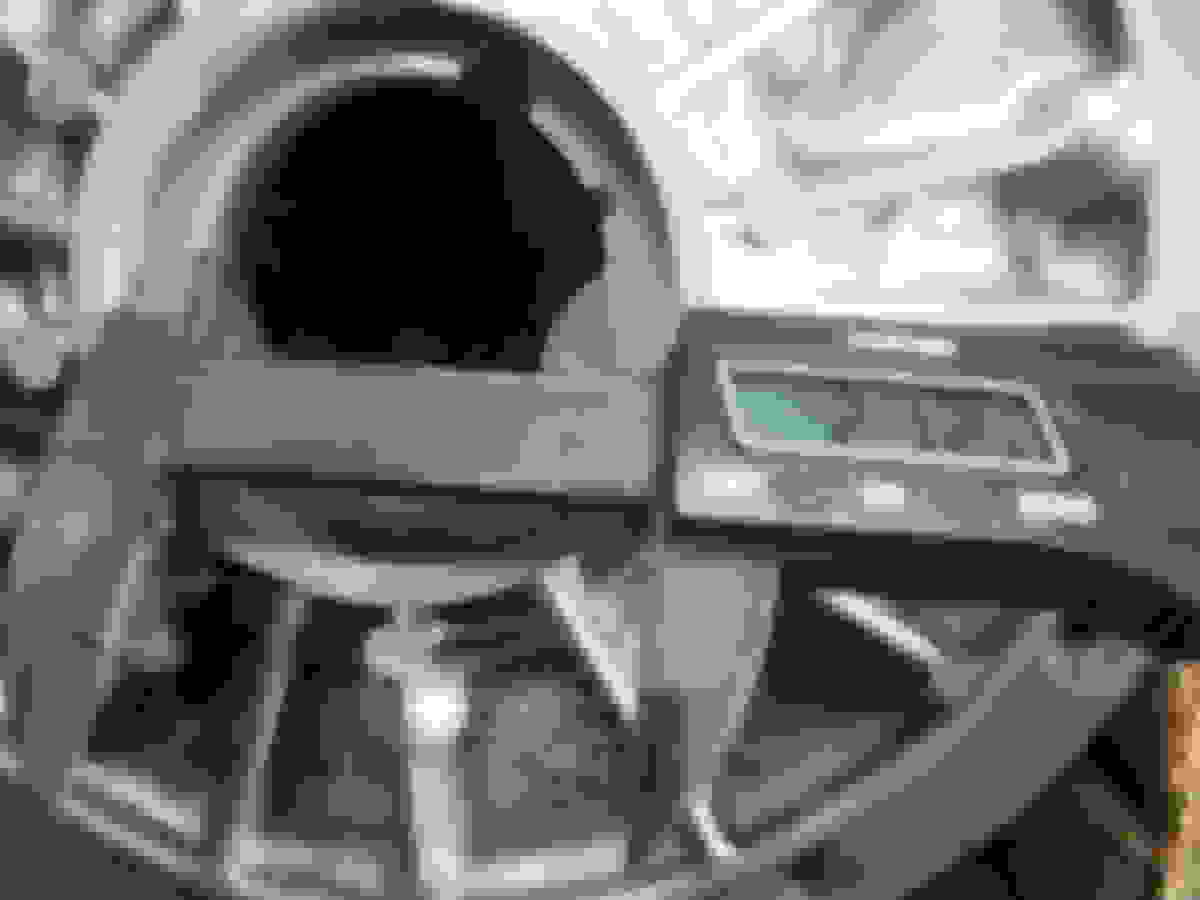
<a href="http://s23.photobucket.com/user/92ct-27gt/media/20150524_161938.jpg.html" target="_blank"><img src="http://i23.photobucket.com/albums/b396/92ct-27gt/20150524_161938.jpg" border="0" alt=" photo 20150524_161938.jpg"/></a>
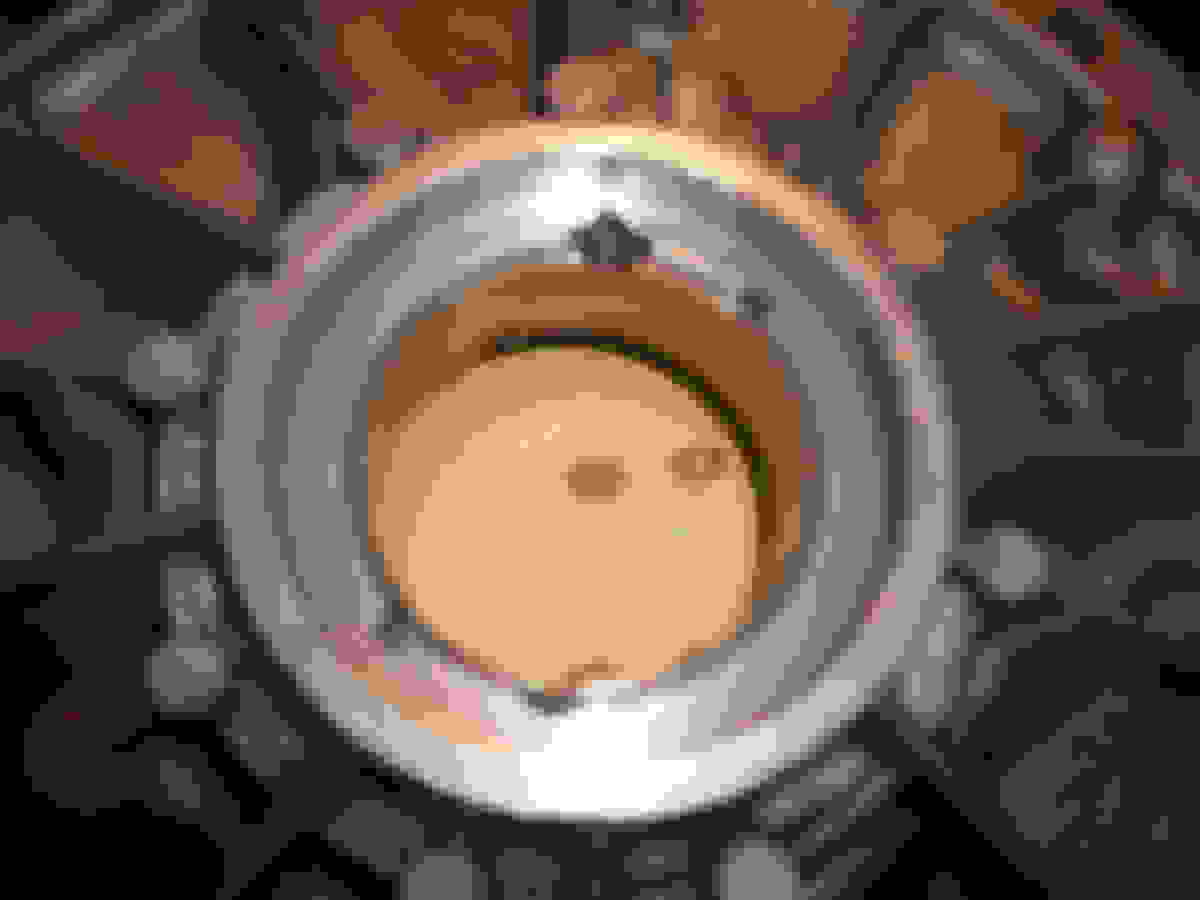
<a href="http://s23.photobucket.com/user/92ct-27gt/media/20150524_162230.jpg.html" target="_blank"><img src="http://i23.photobucket.com/albums/b396/92ct-27gt/20150524_162230.jpg" border="0" alt=" photo 20150524_162230.jpg"/></a>
Assuming this is installed wrong?
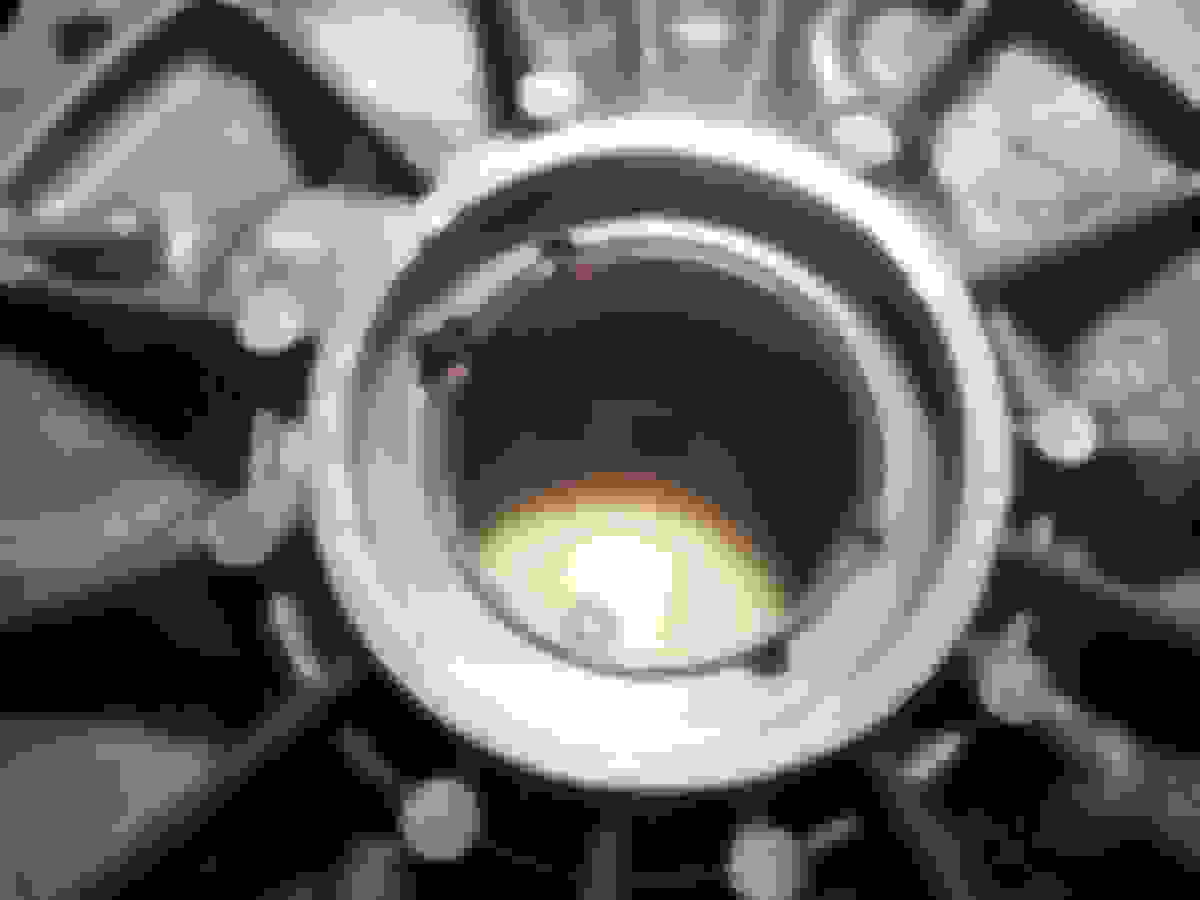
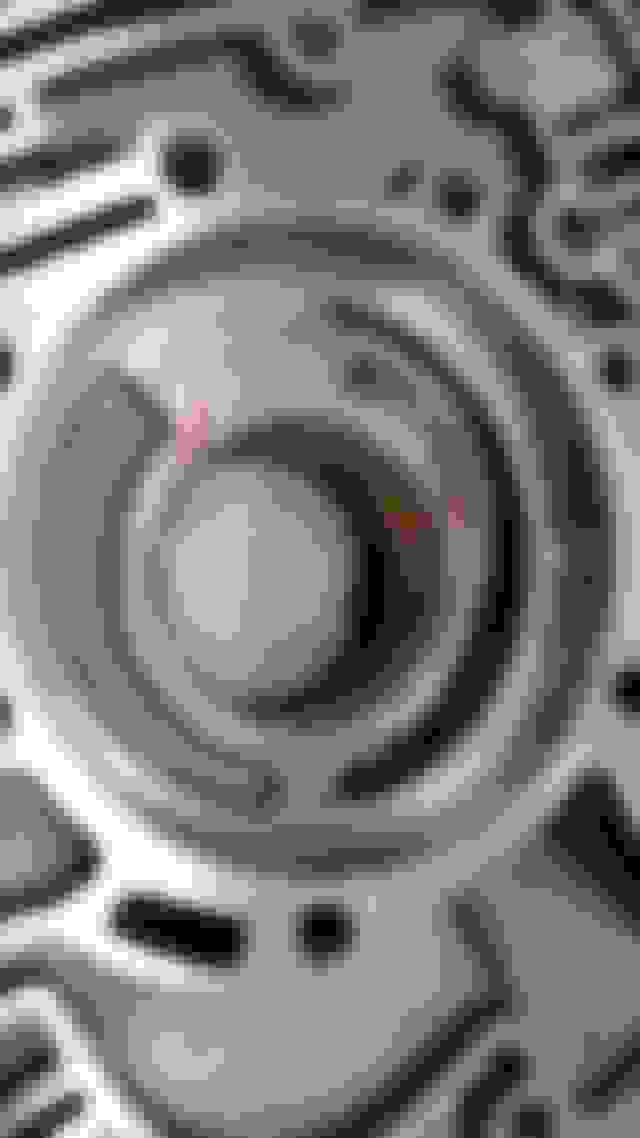
I am not one to jump to conclusions, but I assume the notch on the front is supposed to line up with the hole and the notch on the back is supposed to be positioned as shown in the instructions below:
<a href="http://s23.photobucket.com/user/92ct-27gt/media/Bushing%20Installation.png.html" target="_blank"><img src="http://i23.photobucket.com/albums/b396/92ct-27gt/Bushing%20Installation.png" border="0" alt=" photo Bushing Installation.png"/></a>
This really sucks because I was planning on getting the transmission back in this weekend.
First red flag was the F18p casing, but at least the stator support was the correct version. Still have to check to make sure its non-PWM.
I will probably demand from the seller a 50% refund and delivery of a new pump or bushing with 2-3 day shipping so it arrives next weekend.
Now about the bushings, typically bushings are reamed after install. What are your experiences with bushings for these pumps, is reaming necessary, and who makes the best one?
EDIT: It gets worse. Went to test the TCC valve and could barely move it and it sure as hell didn't spring back into position. After I got it out, i found quite bit of rust inside the bore. I am very disappointed in this seller right now and will keep you updated on how this plays out.
thats just how the one i had installed in log truck (when i bought the truck) was and it walked forward.it won't last like that.
the best bushing you can use is the one provided with superiors K062 kit. http://www.superior-transmission.com...Page.cfm?ID=58
http://www.ebay.com/itm/SUPERIOR-E4OD-PUMP-CORRECTION-PACKAGE-K062-/111661995207?_trksid=p2054897.l4275
still a very good one to use is provided in a kit on ebay here;
http://www.ebay.com/itm/Ford-4x4-E4OD-E40D-Transmission-Front-Pump-seal-Kit-/250749656030?_trksid=p2054897.l4275
both come with slots built in for the drain back hole.superior takes it one step further with knurls on the back to help it from spinning.
after you hone the bushing bore to 2.123 - 2.125 you need to make a new stake pocket to avoid staking on the bushing seam.make two more on the opposite side to help keep it from walking (awesome tip i found in an older tci mod chart!) lastly,you press the bushing in place as shown in your instructions and your good to go.
here is how i found to remedy the aftermarket bushings (and it's not just with the supplied superior brand either.so pay attention!)
i got looking at yet another kit.this is or was (not sure it's still around?) by TCI. but you don't need to buy anything! just follow their wisdom.
so they not only found a great method as to not use the stake point by making your own but in also making stake points on the other side to boot.how can beat having a properly honed out bushing bore so the converter slides in easy when it's placed in,then on top of this,so that the bushing can never slide forward blocking the drain back hole and causing your pump to press out the fluid all over the street? it's perfect so here is what you do to make this a true "superior" kit!
now you can see i took the proper steps here (i deserved pulling the trans over and over for not reading and applying what i read.don't be like me! lol.) to hone the pump for the bushing and you can see here now where i enlarged the hole to 5/16 as well...yeah that really opens her up!
listen! now notice!!! i did not stake on the bushing seam.notice i made my own stake pocket right next to the seam/oem stake pocket and staked here instead.keeping two stake points in the front.lower left = oem stake point & aftermarket bushing seam line up.
lower right = self made stake point (all it takes is a little drill bit,drilling at a little angle to make a pocket.don't get carried away.it just helps insure bushing can't spin is all.
now apply this same wisdom to the other side.the rear, so that the bushing can't walk forward! it's so simplistic.yet genius! listen! lift the two gears up and out and insure you place them back in the same way! listen! if you bought a used pump like i did.the seller may have split the pump to inspect the gears.do NOT trust that they are inserted correctly! (ask me how i know! trans pull # i can't remember lol! look it up if you need to!)
now get out the brake kleen/carb cleaner and spray,spray,spray and then spray clean some more.no metal shavings/filings to be left.
this right here is the key to success on installing the superior k062 kit........and i ought to know. it took me 5 trans pulls to finally get it all right.with this info you'll only need 1 pull and install.
don't forget at least these for the job;
new converter bolts.
new pump seal kit.one sold on ebay comes with whole kit with a spare pump bushing,pump gasket,and o-ring and the updated viton seal.
new pump bolt washers.
new stator shaft bushing.
be sure to research what else you may need on hand to complete the job to cut down on down time with the truck.
good luck.
Thanks very much. So was I correct that the bushing is not correctly oriented? I didn't see that mentioned anywhere in your response.
I will be requesting a new pump from the seller. I can replace a bushing, but the rust in the TCC valve bore is not something I am gonna chance on fixing. Trying to remove rust from a precision machined bore without the appropriate size reamer is a lost cause.
oh yeah,your right for sure.it's installed off.the slot and the lube groove need to be spun around.it's vital to have oriented properly.this is why it wont last.good catch!
yeah,it doesn't sound like a good pump.the little bit of ware under where the gears goes on yours is'nt what you should expect on a reman pump either (least it looks like ware.the dark spot.either way,that burnt atf spot should have been cleaned up on a reman.)
Good catch. I was so frustrated with the incorrect bushing orientation and rusted TCC valve bore I didn't even notice that wear. Yet another problem to show the seller.
Another thing I noticed while tipping the transmission on its end to remove the front pump was a lot of fluid draining out the end of the transfer case housing. I am assuming the transfer case fluid is separate and i will need to refill the transfer case before starting her up? I did not see a seal on the shaft coming out of the transfer case. Is this correct?
EDIT: Nvm, think I found out the issue. There was a seal, but for the yoke on the driveshaft that goes into it, so without the drive shaft in there, when I tipped the transmission on end, a lot of the fluid leaked out. I am assuming my logic is correct here?
Transfer case has a seal on it's input shaft, so yeah it has it's own fluid supply but uses the same type as the transmission (Mercon). Takes 2 quarts if I remember right.
Yes you're correct, no driveshaft in place and the fluid leaks out the tail end of the transfer case if tipped up. It has its own seal on the input shaft too. Dixie has it right, 2 qts fill capacity.
Thank you all for your help. Very much appreciate it. Truck is back on the road thanks to the thorough instructions by FORDF250HDXLT. The guy who rebuilt my pump rebuilt it wrong TWICE by the time it was all said and done. He went by the ATSG guide and the bushing orientation was very unclear.
After this experience, I think he knows how to build them correctly. To his credit, he gave me a full refund and I just rebuilt the pump myself.
967.5 Rebuilt E40D Tugger TC Front Seal Walks Out Oil Spews into Bell: 3X Test Drives Failed
1. Trans Cooler basic Rubber Hose Fittings without CheckBall,
could the Omission of the CheckBall in the Trans Cooler Line cause the Front Seal to Walkout leaking Drainback into the Bell?
3. Current Rebuild Attempt: Teflon Bushing & Blue Seal with Gray RTV
Previous failed attempt resulting Bushing Walkout was with a Presumed Good Rebuilt E40D with Black OEM Seal that was not instlaled with any Gray RTV or Threadlock. If you do not use Gray RTV or Threadlock to install the Front Seal, will it Walkout?
Bushing Orientation & Stakes are verified Known Good in all previous attempts resulting Seal Walkout failure.
4. Current Rebuild Attempt: HD Torque Converter:
The condition of Front Bushing Walkout Drainback spewing into Bell occured with a Known Good TC on Level of 4x TC Nut Bolts with NO TC Spacer Shims to the Flywheel with E40D First Test Run at 55MPH in 3rd or OD 460 Engine RPM was High, maybe 4000-5000RPM when first Front Seal Walkout Spewed Drainback into the Bell.
Review:
Bushing Walkout occured on a known good TC with known good TC Spacing "none", with a newly rebuilt E40D without any RTV or Threadlock on the Black OEM Front Seal & with a verified known good Front Bushing Orientation & Stakes.
Review Speculation:
1. The TC has failed at a High Engine RPM of 4000-5000 and the TC Pressure is Pushing the Front Seal Walkout to 1/2" spewing ATF into the Bell. Install the New TC.
2. The TC has failed and is "Off Kilter" wobbling the bushing out.
3. The Front Seal MUST be installed with Gray RTV or it will Walkout? I doubt RTV is the contingency of a Front Seal in a Transmission but could be.
4. The Checkball inside the E40D Rear Trans Cooler Fitting is Required or Pressure will Walkout the Front Seal?
Last edited by psyientist; 06-06-2023 at 10:23 AM.
That's good that's strange. Known: "It would be strange for so much pressure to be behind the Front Seal as to Walkout the seal". This known fact, concludes that 1. There is not supposed to be that much Oil Pressure behind the Front Seal... 2. The Front Seal does not typically require the Gray RTV to hold it's place
If/Then:
Then TC may be wobbling the Seal Out... Install new TC.
The Flywheel may be off kilter wobbling the TC & consequently the Front Seal to Walkout.
The problem may be "Rigid Physics Problem" not a "Hydraulic Oil Pressure Problem"
Good to know:
I can be more confident in the Valve Body Tugger Upgrade and place my gamble on the TC
Last edited by psyientist; 06-06-2023 at 11:17 AM.

 05-24-2015, 07:20 PM