Installed a scavenged tube bumper... with some modifications - MANY PICS
#1
 04-20-2015, 11:42 PM


Installed a scavenged tube bumper... with some modifications - MANY PICS
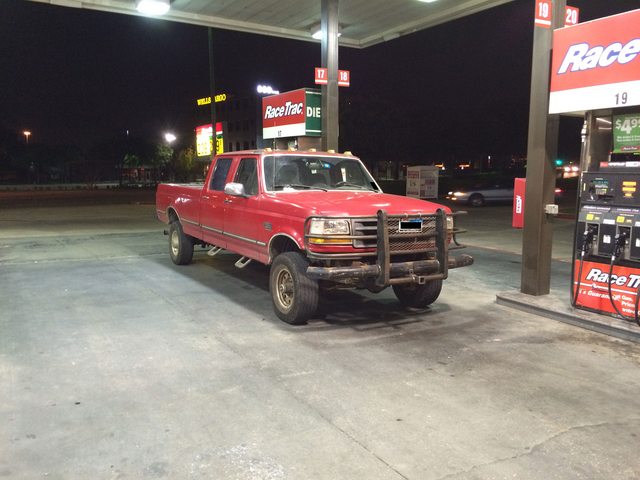
Thought some here might want to see it. I'm sure this will have been child's play for some.
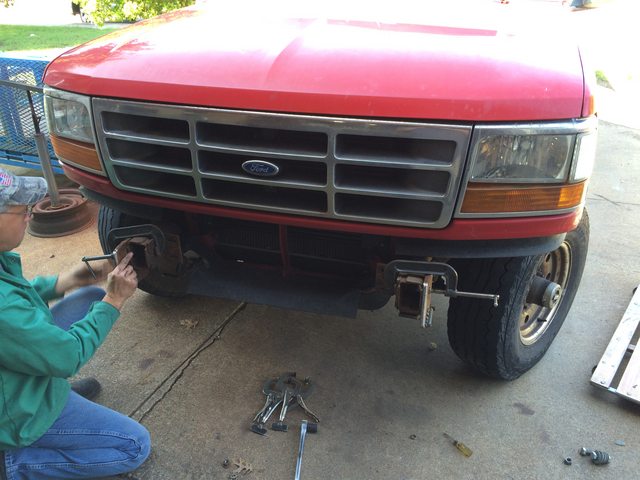
Last year, I spotted this truck in the junkyards sporting a commercial rear bumper replacement with a hay spike welded to it, plus a homemade front bumper complete with the fence from the prior owner's yard.
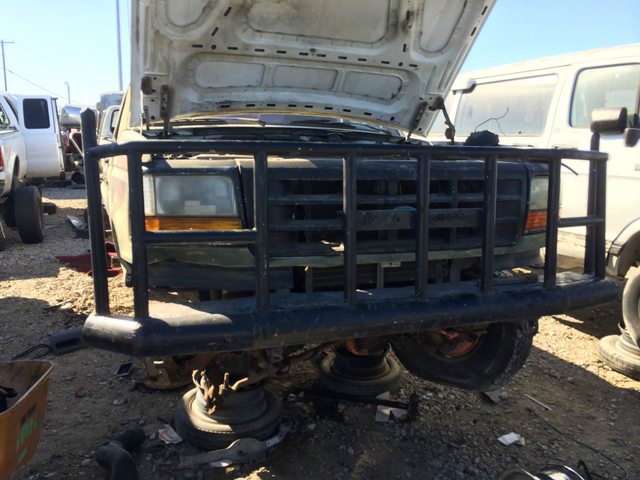
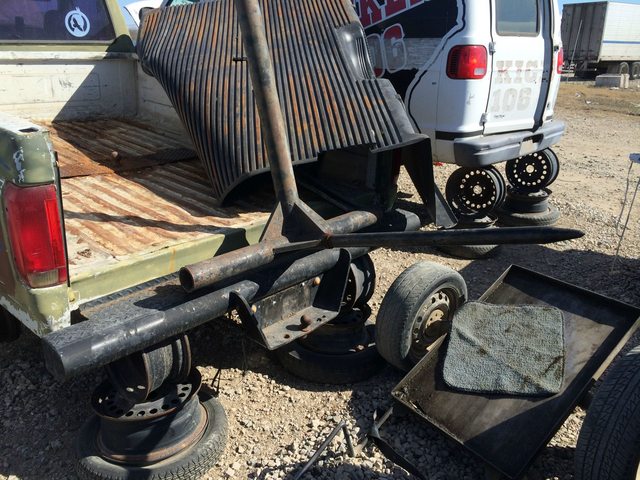
I immediately removed both and took off with them on the junkyard's half-price sale day. I removed the hay spike and cleaned up the rear bumper then installed it on my truck. Worked out well.
I took the front bumper to a fabricator acquaintance and he removed the fail fence.
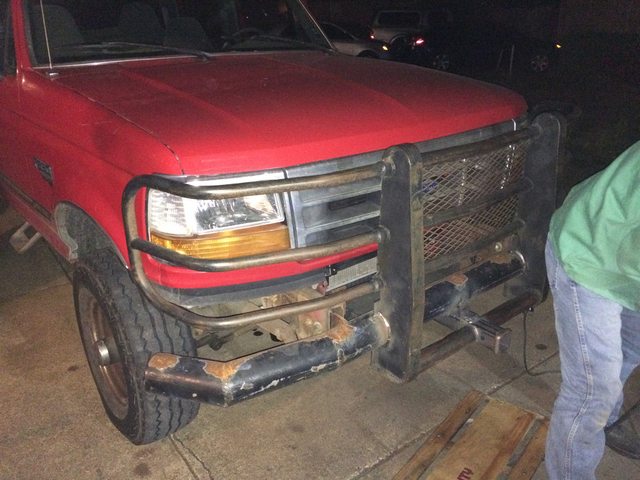
We then both got busy with other matters and had to let the project sit for a few months (hence the surface rust). Recently he reminded me he had it and we started back up. The plan was to mate the extremely well built and sturdy grille guard I already had on my truck to the heavy duty tube bumper and add a 2" receiver hitch.
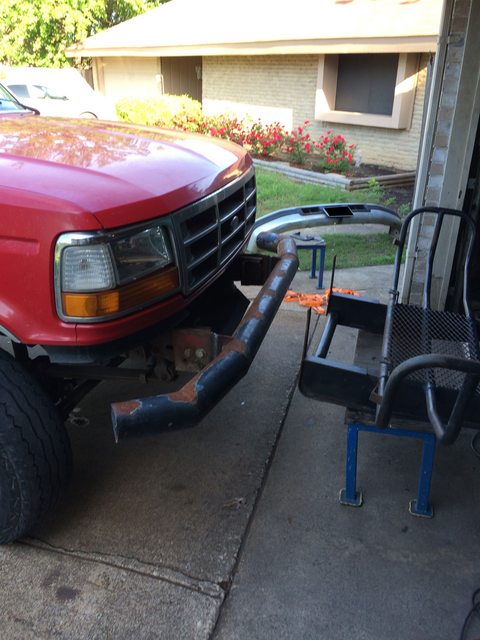
Today was the day we had to get the major work done. We removed the old stock bumper and guard then start fitting up the 1/2" thick (!) mount plates that had been cut off the tube bumper.
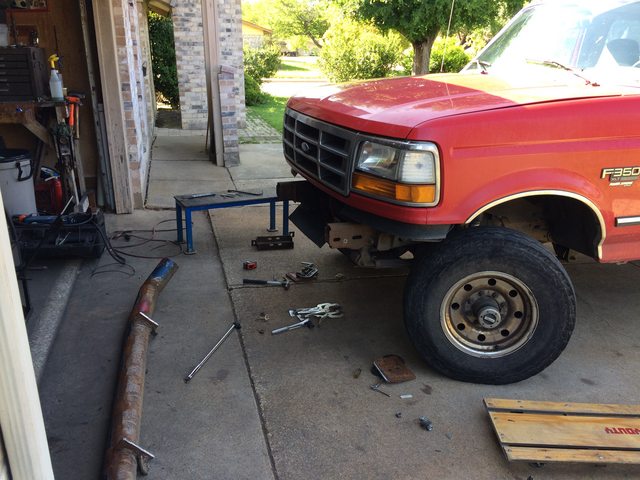
Once the mount plates are fitted, the tube was welded back to the plates.
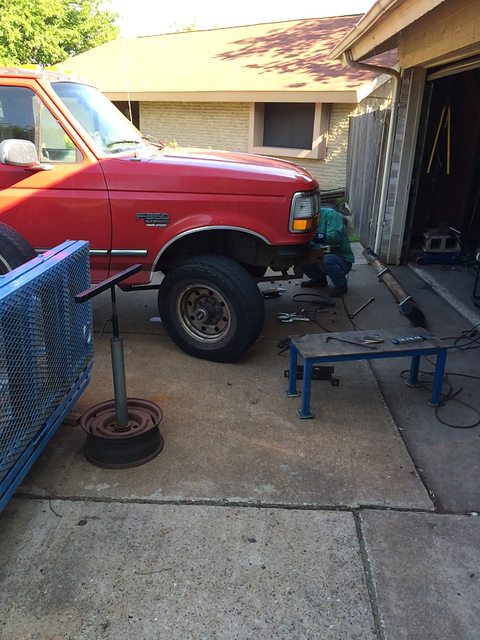
The tube being fully welded back on, the old grille guard was brought up and 'offered' to the truck (in the British sense - I'm really a Jaguar guy when it comes to cars) to start working on welding that to the bumper.
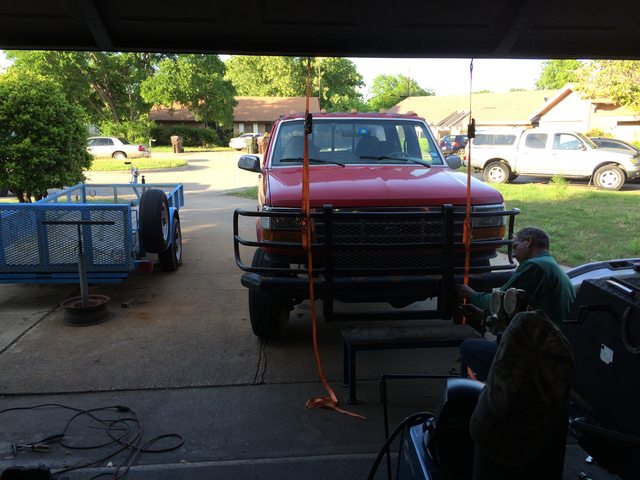
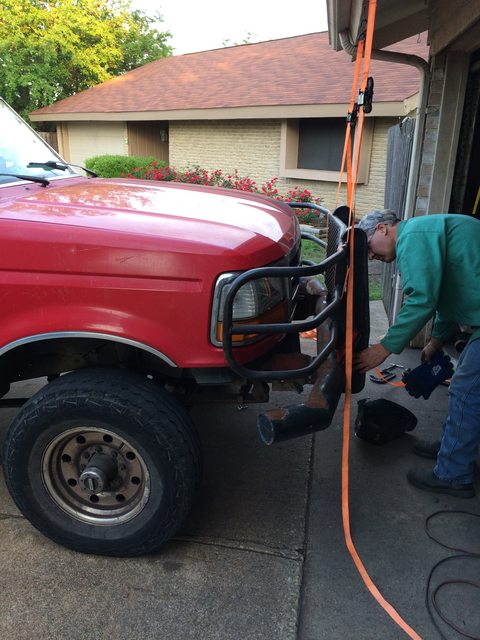
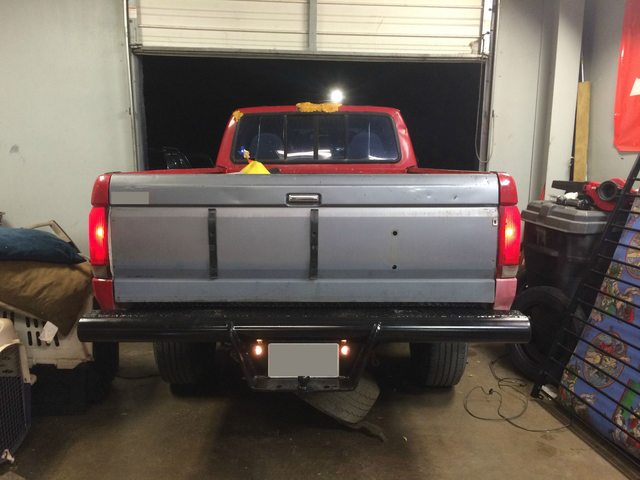
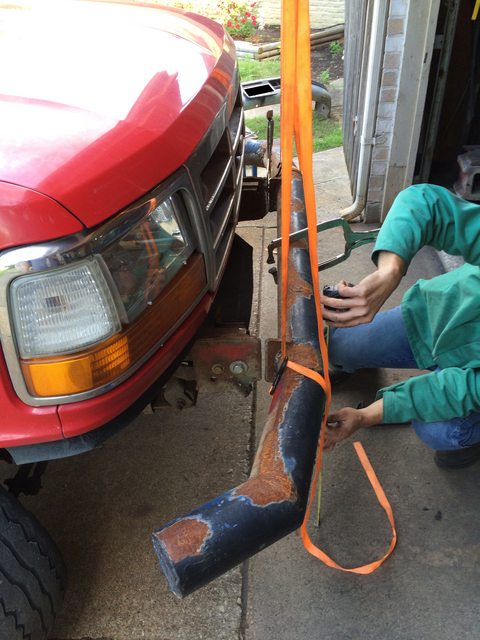
Next, the hitch receiver was integrated into the 'new' bumper assembly.
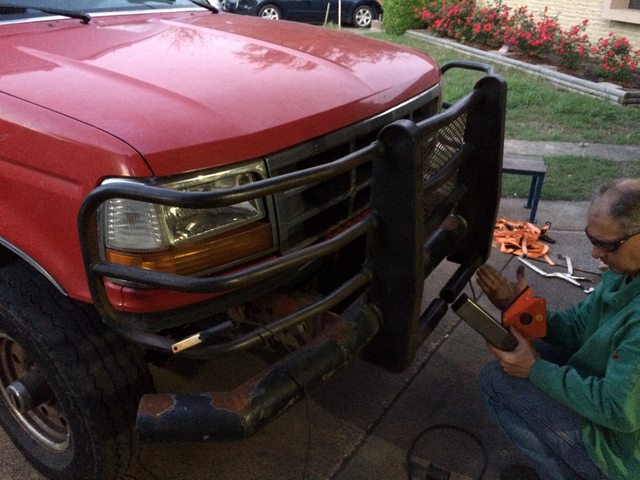
And the end result for now.
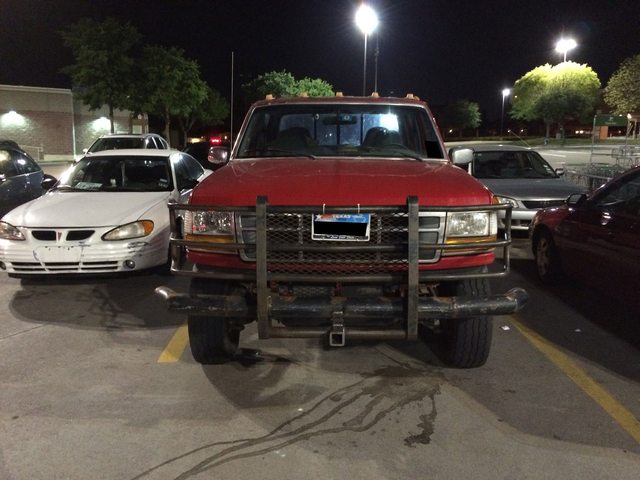
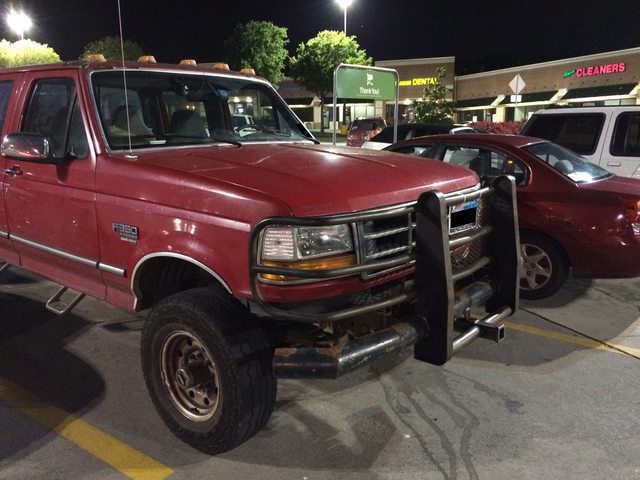
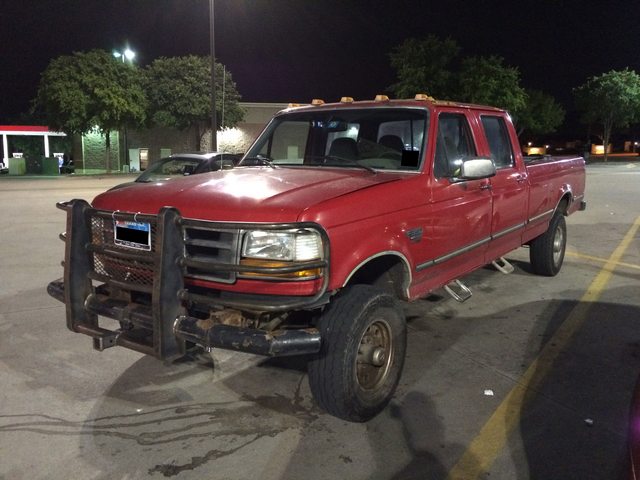
More still needs to be done - the bumper needs to be 'decked' with some diamond plate to fill in the empty space between the tube and the body of the truck, but that will have to be another day. (After I go get some diamond plate and work out how I want the deck/filler plate to look; also have to figure out how I want the under bumper skid plate/rock shields to work.) I need to get a weld-on license plate bracket, too - I kind of forgot to get one.
Last year, I spotted this truck in the junkyards sporting a commercial rear bumper replacement with a hay spike welded to it, plus a homemade front bumper complete with the fence from the prior owner's yard.
I immediately removed both and took off with them on the junkyard's half-price sale day. I removed the hay spike and cleaned up the rear bumper then installed it on my truck. Worked out well.
I took the front bumper to a fabricator acquaintance and he removed the fail fence.
We then both got busy with other matters and had to let the project sit for a few months (hence the surface rust). Recently he reminded me he had it and we started back up. The plan was to mate the extremely well built and sturdy grille guard I already had on my truck to the heavy duty tube bumper and add a 2" receiver hitch.
Today was the day we had to get the major work done. We removed the old stock bumper and guard then start fitting up the 1/2" thick (!) mount plates that had been cut off the tube bumper.
Once the mount plates are fitted, the tube was welded back to the plates.
The tube being fully welded back on, the old grille guard was brought up and 'offered' to the truck (in the British sense - I'm really a Jaguar guy when it comes to cars) to start working on welding that to the bumper.
Next, the hitch receiver was integrated into the 'new' bumper assembly.
And the end result for now.
More still needs to be done - the bumper needs to be 'decked' with some diamond plate to fill in the empty space between the tube and the body of the truck, but that will have to be another day. (After I go get some diamond plate and work out how I want the deck/filler plate to look; also have to figure out how I want the under bumper skid plate/rock shields to work.) I need to get a weld-on license plate bracket, too - I kind of forgot to get one.
#4
04-21-2015, 12:53 AM
Senior User
Join Date: Mar 2015
Location: North Carolina-Foothills
Posts: 326
Likes: 0
Received 0 Likes
on
0 Posts
Have to admit I was digging/ the hay spear as well. Not really practical cause I have two tractors for that kinda stuff. But still, part me wants a hay spear on the truck now..lol.
#5
04-21-2015, 07:23 AM
Your tube is lower than the typical 'ranch hand' style. Typically, the 'decking' is flat, hugs the body line and is flush with the top of the tube. Having it lower might let your decking look more like some of the modern designs.
I'm subscribing to see how to address this.
Another plus...With the main tube higher in its typical location, a lot of the spring shackle (in my case, the RSK bracket) and things are really visually exposed. Looks unfinished.
I'm subscribing to see how to address this.
Another plus...With the main tube higher in its typical location, a lot of the spring shackle (in my case, the RSK bracket) and things are really visually exposed. Looks unfinished.
#6
04-21-2015, 03:44 PM
#7
04-22-2015, 01:23 PM
Postmaster
We haul round bales of hay in the truck bed to the pasture late in the season. A bed spear could be handy for that.
Trending Topics
#8
04-23-2015, 07:15 AM
#10
04-24-2015, 11:11 PM
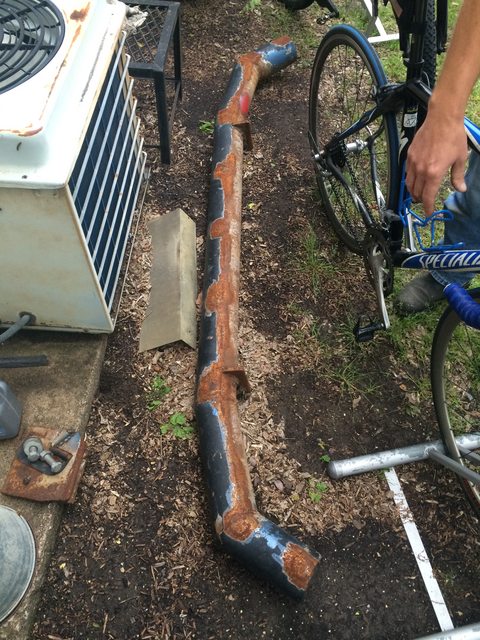
Here's the hay spike by itself. I have one of the pivots I cut off the bumper on the top arm in the loop used to winch the thing back instead of on its proper eyelet down on the crossbar. (Pic is clickable.)
#11
04-25-2015, 07:02 AM
Fleet Owner
It was on a pivot. You (apparently) backed up to the hay bale with the spike lowered to be near parallel to the ground then once you speared the hay you used a winch or come-along connected to the loops on the other arm to raise the spear to near vertical and then drove away. There was evidence of an anchor point for a come-along or winch in the bed.
Here's the hay spike by itself. I have one of the pivots I cut off the bumper on the top arm in the loop used to winch the thing back instead of on its proper eyelet down on the crossbar. (Pic is clickable.)
[/URL]
Here's the hay spike by itself. I have one of the pivots I cut off the bumper on the top arm in the loop used to winch the thing back instead of on its proper eyelet down on the crossbar. (Pic is clickable.)
[/URL]
Ok, that makes more sense now. When you said it was welded, I thought it was rigid
#12
04-25-2015, 10:42 PM

Thread
Thread Starter
Forum
Replies
Last Post
Hyperactive460
1973 - 1979 F-100 & Larger F-Series Trucks
7
03-20-2016 10:01 AM
JosieGallows
1987 - 1996 F150 & Larger F-Series Trucks
32
01-28-2016 08:43 AM