On Board Air is finally done
#1
 03-21-2015, 04:25 PM

On Board Air is finally done
I spent the earlier part of today plumbing the pump, routing hose, and plumbing the tank. I didn't get my manifold yet so I can't finish it until next weekend. I've got some pics though. I'll try and remember to edit the first post when I get done so all the pics are in one post.
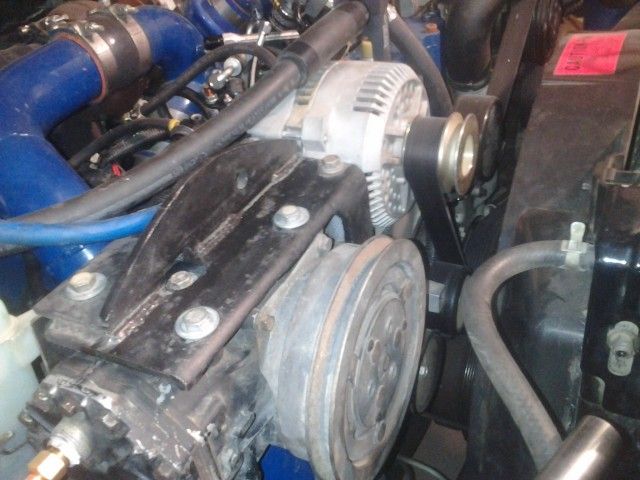
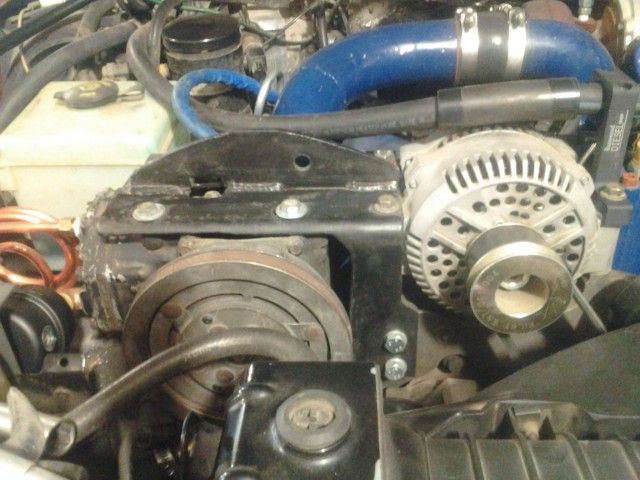
First is just the mounting of the york. I've had that mount done for quite a while, but another pic or two belongs in this thread.
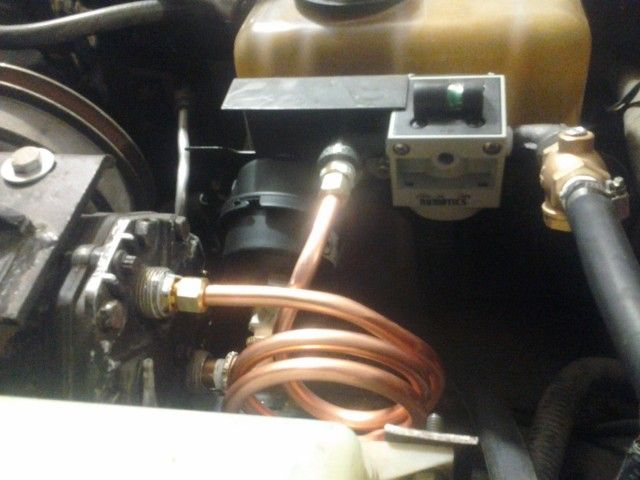
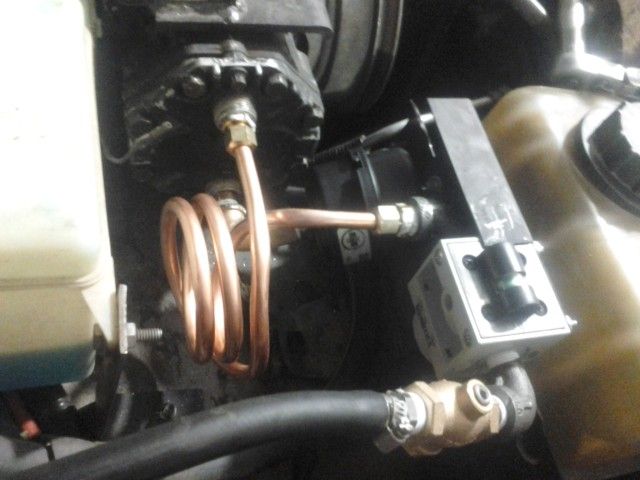
Next is the plumbing off the york. I drilled and tapped the york fittings to 3/8 npt as those fittings are expensive if you buy new ones. Worked fine. I installed the intake filter on a 90 off the pump. I used 3 feet of coiled 3/8 copper line on the outlet to cool the air before it hits the coalescing filter. I can easily remove the canister on the bottom of that filter to empty it. Off that filter I have a check valve, then the hose runs around the firewall to the other side, where the manifold will be. I just used 3/8 rubber air hose and barbed fittings. The manifold will have a barbed fitting with 3/8 hose to connect it with the air tank, a pressure switch, blow off valve, connection for the inside gauge, and a gauge on it.
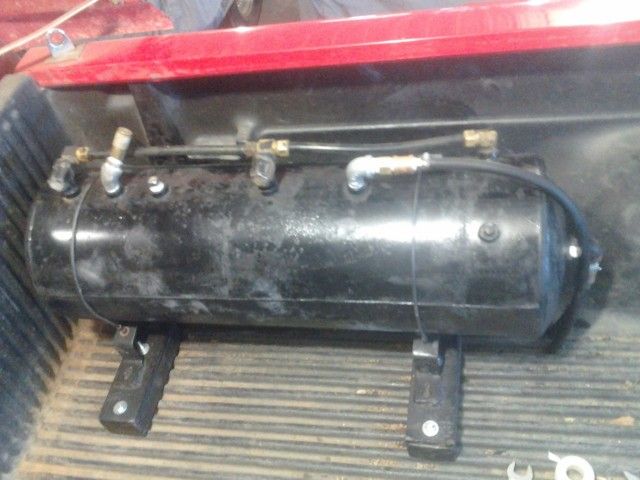
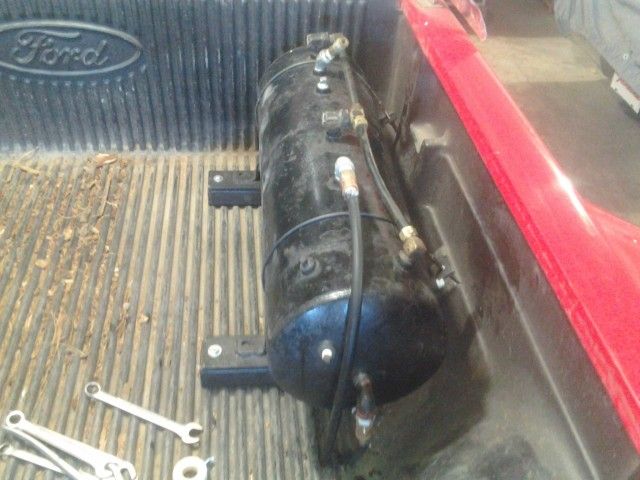
Last for now is the tank. It's a 3 part tank, joined with hose on the top as you can see. It has 3 holes on the bottom so I put 2 drains in and 1 blow off valve. I ran hose out the back of it for the intake. The hose on the top will run to the front bumper. It's all done besides some paint touchup, I didn't get real fussy there...
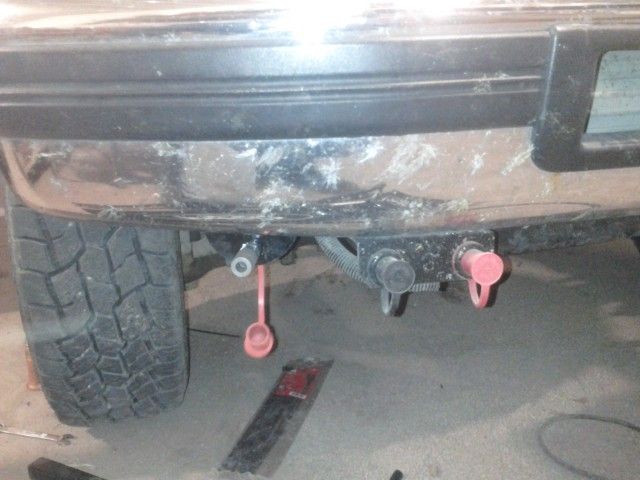
Here's the front bumper air hookup. I used holes that were already in the bumper and just bolted some flat iron on and extended it down. Welded a coupler in it and attached things. The rubber cover is an extra I had for the remote battery terminals, fits perfect.
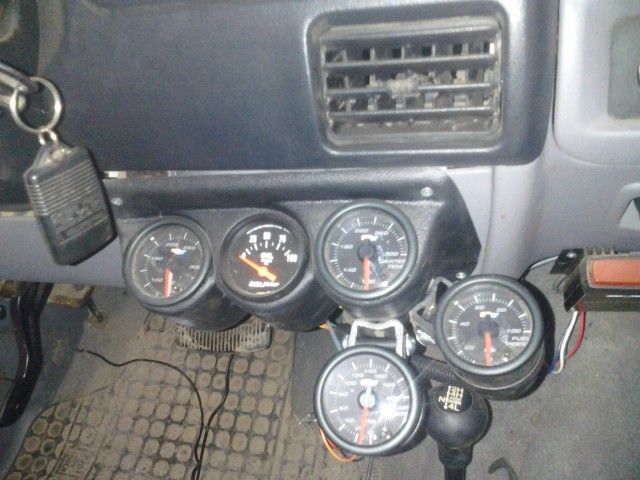
Gauge on the inside is done. Wires aren't hooked up in this picture, but are now. It's kind of a cluster down there, but there is plenty of room to get to the 4x4 shifter if needed. It's not as close as the picture looks. There is a good 3 inches of clearance above the shifter. I just don't have anywhere else to go with gauges for now. I'm putting a little flush mount switch in that's not here yet.
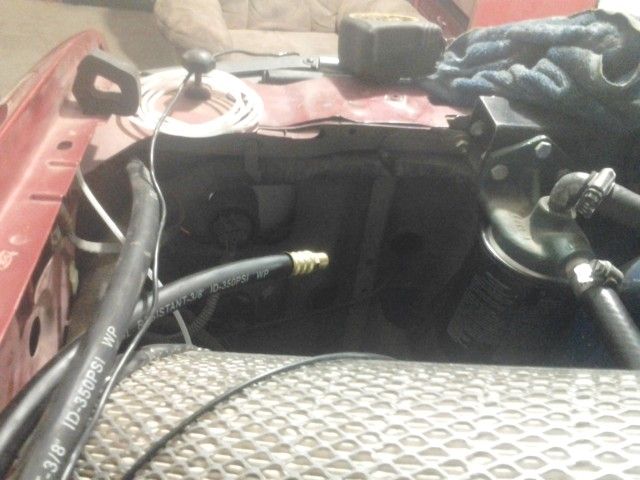
Here's an exciting picture. That's where the manifold will be.
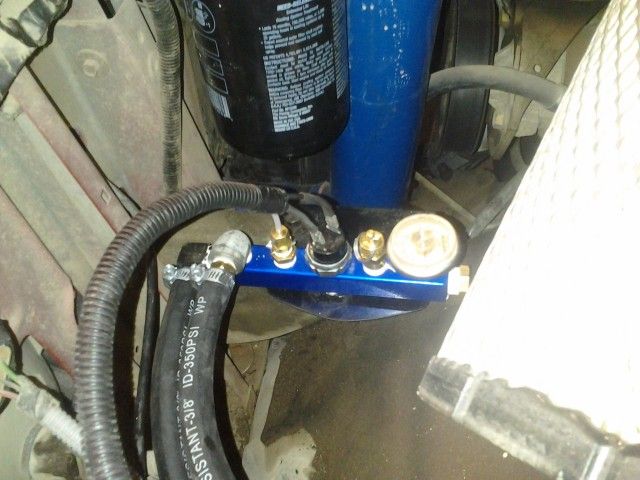
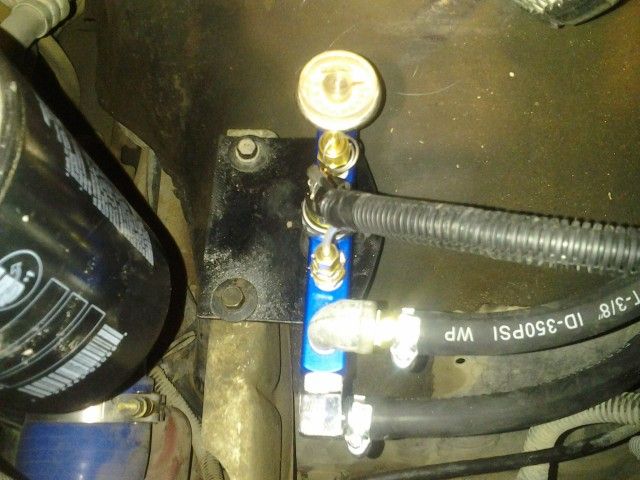
OK, I got the manifold mounted and plumbed. It has the inlet on the side, and the top 5 outlets are 1 line to the tank, pressure gauge, line to inside pressure gauge, pop off valve, and pressure switch. I mounted it where the battery tray mounted on the drivers side. Worked out pretty good.
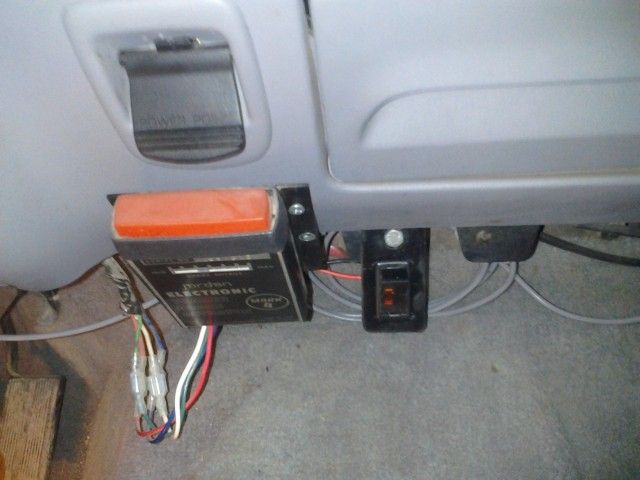
Here is the switch in the cab. I kept it out of the way.
Everythings done except putting the belt on and oil in it. Test tomorrow.
I'll try and remember to edit the first post when I get done so all the pics are in one post. First is just the mounting of the york. I've had that mount done for quite a while, but another pic or two belongs in this thread.


Next is the plumbing off the york. I drilled and tapped the york fittings to 3/8 npt as those fittings are expensive if you buy new ones. Worked fine. I installed the intake filter on a 90 off the pump. I used 3 feet of coiled 3/8 copper line on the outlet to cool the air before it hits the coalescing filter. I can easily remove the canister on the bottom of that filter to empty it. Off that filter I have a check valve, then the hose runs around the firewall to the other side, where the manifold will be. I just used 3/8 rubber air hose and barbed fittings. The manifold will have a barbed fitting with 3/8 hose to connect it with the air tank, a pressure switch, blow off valve, connection for the inside gauge, and a gauge on it.


Last for now is the tank. It's a 3 part tank, joined with hose on the top as you can see. It has 3 holes on the bottom so I put 2 drains in and 1 blow off valve. I ran hose out the back of it for the intake. The hose on the top will run to the front bumper. It's all done besides some paint touchup, I didn't get real fussy there...


Here's the front bumper air hookup. I used holes that were already in the bumper and just bolted some flat iron on and extended it down. Welded a coupler in it and attached things. The rubber cover is an extra I had for the remote battery terminals, fits perfect.

Gauge on the inside is done. Wires aren't hooked up in this picture, but are now. It's kind of a cluster down there, but there is plenty of room to get to the 4x4 shifter if needed. It's not as close as the picture looks. There is a good 3 inches of clearance above the shifter. I just don't have anywhere else to go with gauges for now. I'm putting a little flush mount switch in that's not here yet.

Here's an exciting picture. That's where the manifold will be.

OK, I got the manifold mounted and plumbed. It has the inlet on the side, and the top 5 outlets are 1 line to the tank, pressure gauge, line to inside pressure gauge, pop off valve, and pressure switch. I mounted it where the battery tray mounted on the drivers side. Worked out pretty good.


Here is the switch in the cab. I kept it out of the way.

Everythings done except putting the belt on and oil in it. Test tomorrow.


#5
03-22-2015, 05:21 AM
#7
03-22-2015, 01:17 PM
Trending Topics
#10
03-22-2015, 04:12 PM
I guess I'm not positive on the cfm, but I'll use it at the race track, and a little bit for work. No air ride on my truck, just a stiff ride. There will be more times I'll use it too, now that its there, I know I can use it. Basically just copying the Jeep and other guys setups for offroading.
I'm going to edit the first post with a couple more pictures.
I'm going to edit the first post with a couple more pictures.
#11
03-22-2015, 08:40 PM
Fleet Owner
#13
03-23-2015, 12:06 AM
#15
03-24-2015, 05:24 AM