48-50 gauge cluster customization
#31
 02-25-2015, 09:16 PM


#32
07-07-2015, 08:06 PM

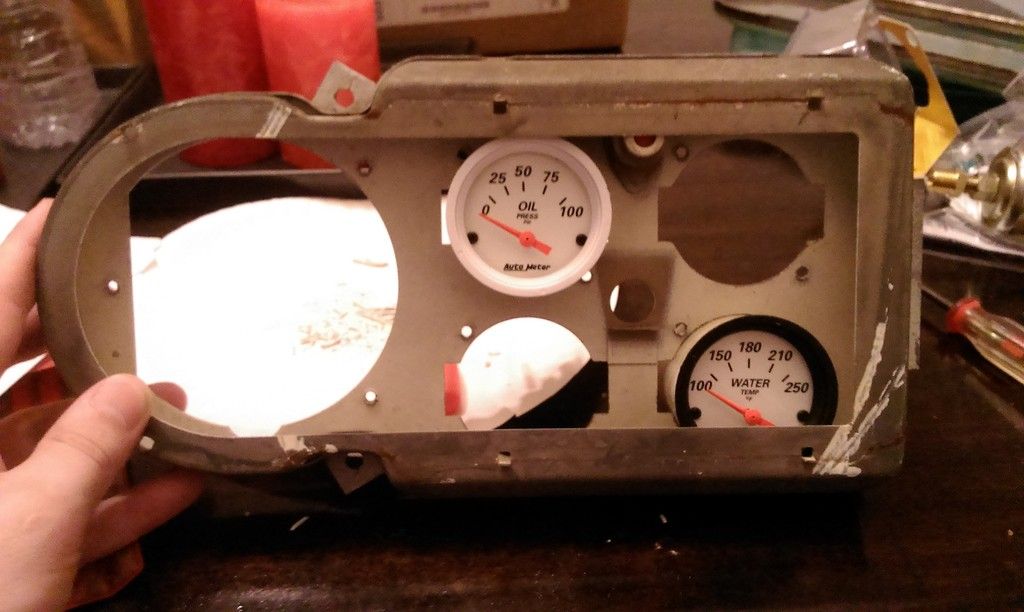
Ok so a little progress on this project. I got an oil pressure gauge and fit it into the gauge cluster. I think i want to adjust the size of the openings slightly smaller. They also dont seem to be 100% concentric with the placement of the gauge faces, so i'm gonna have to play with that a bit. I wonder if maybe I could use the CMM at school. That would give me a very precise spacing for the pattern. I think this will be it for a little while longer on this project. I want to save my money so I can get the motor built when I get home in august.


#33
12-29-2015, 06:54 PM
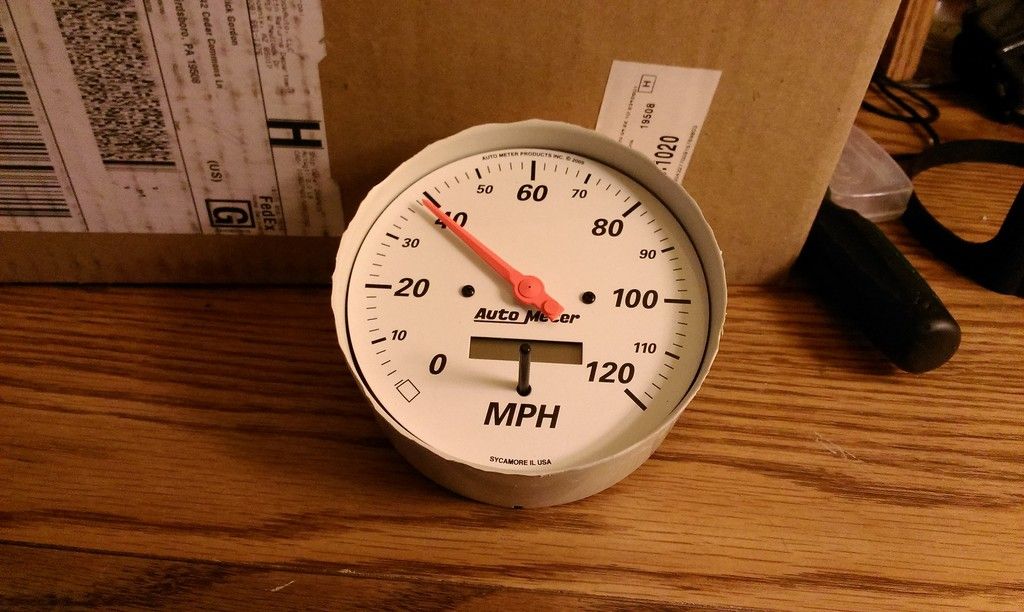
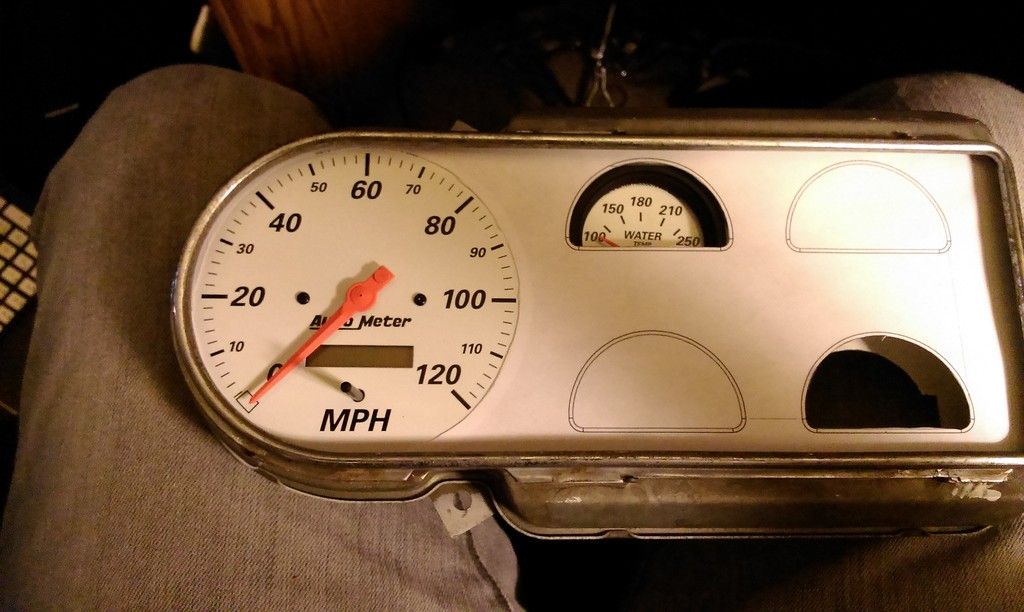
So i got my speedometer for Christmas. This is going to require more than just filing to get it to fit into the cluster. This style autometer gauge was only available in either 3 3/8 or 5 in. The stock one was 4 in, so I thought the 5 would look better since the 3 3/8 would be a little small. This is kind of giving me a problem now.
Here is the speedometer with the clear plastic cover lens and chrome bezel removed.
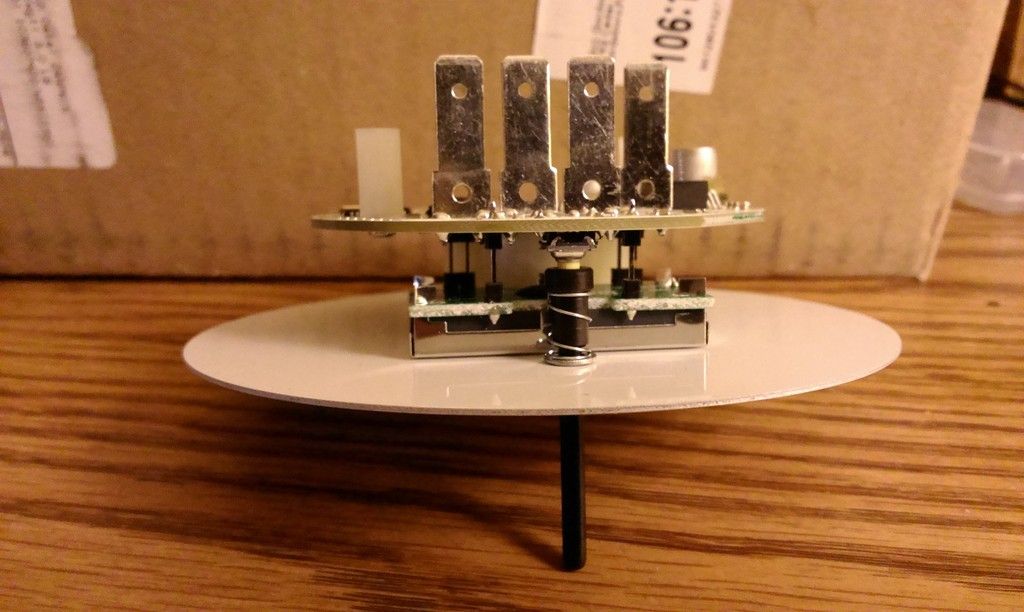
Here are a couple pictures of the innards of the speedometer.
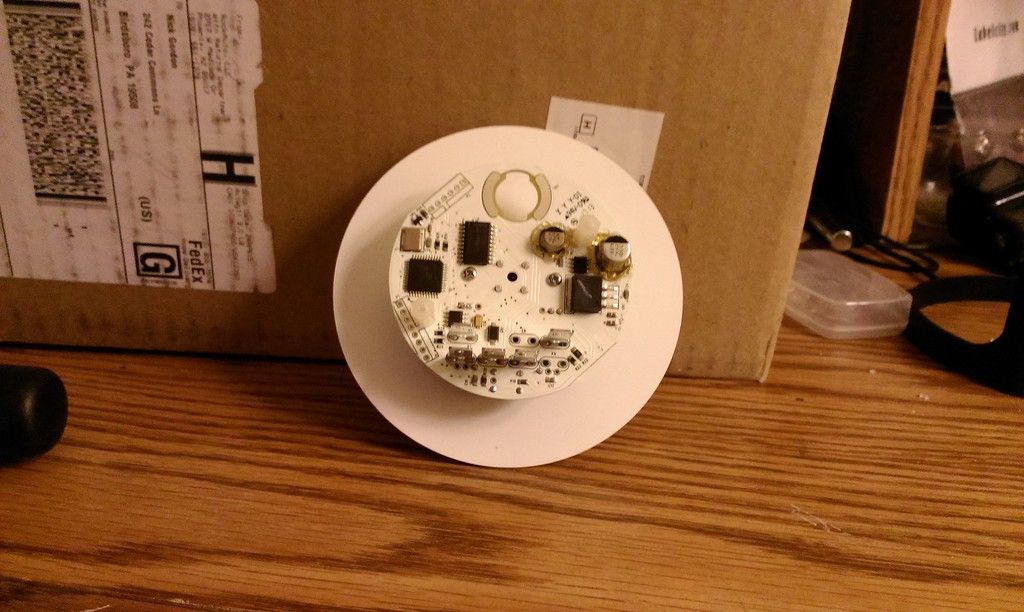
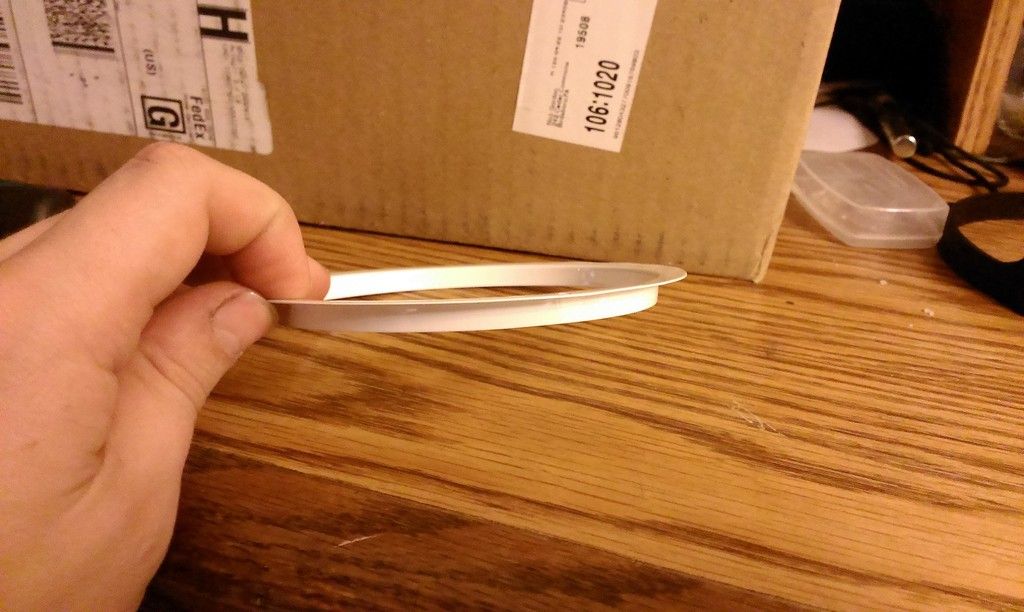
This is the inside trim ring that i painted black on the other gauges. This one was centered by the chrome trim ring, so I will need to add little bumpers or something to the inside of the gauges housing to get it centered.
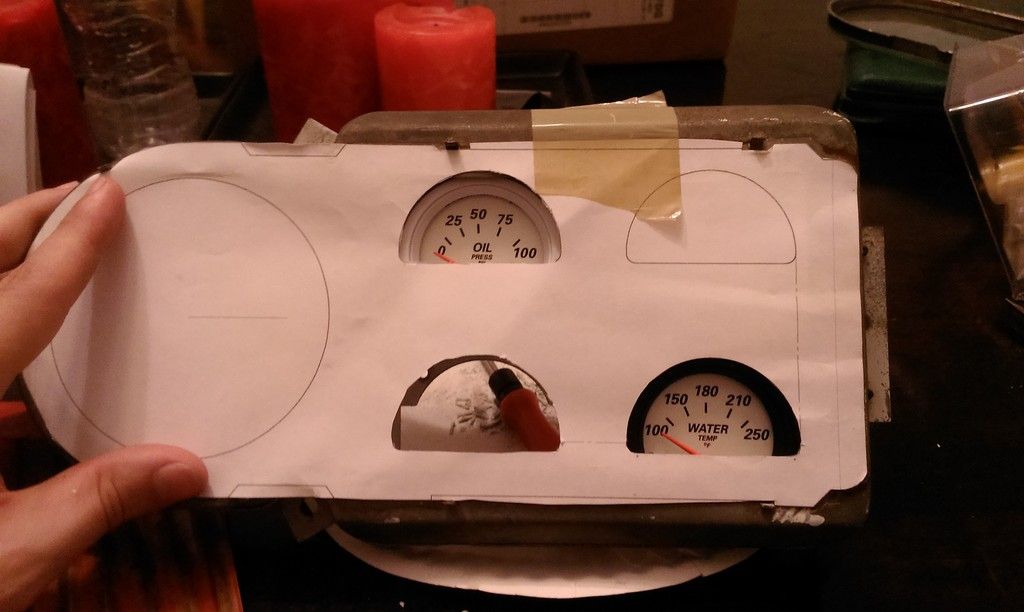
This is the original opening for the speedometer. The next picture will show you how much i will need to cut out to get the gauge to fit.
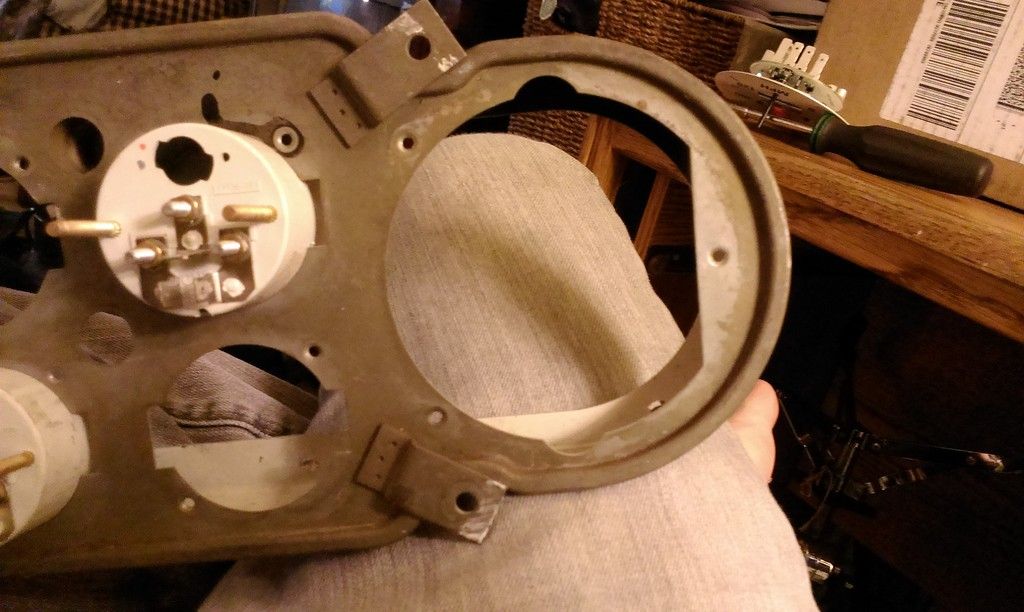
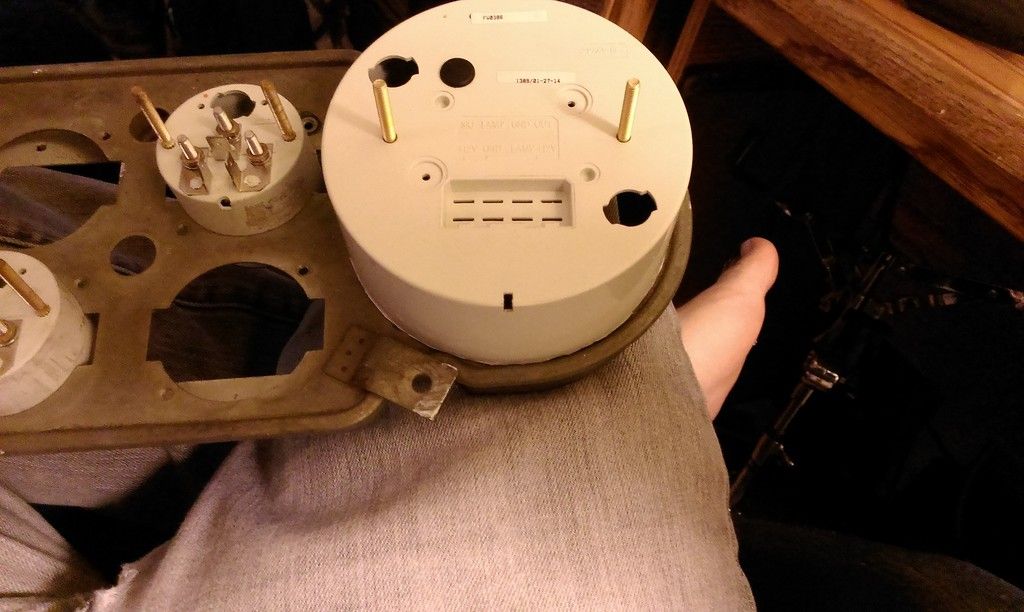
The problem that I have hit now is that the outside diameter of the tick marks on the speedometer is almost exactly the same as the inside diameter of the gauge cluster trim. You can see this in the last picture. Because of this, I'm not sure if I will be able to use the black trim ring like I did for the other gauges. It also looks a little big in the gauge cluster. This was a lot more expensive than the other gauges, so I think I'm kinda stuck with this and will have a make it work. I am also going to have to figure out what to do with the button on the speedometer. I am thinking of attempting to drill a hole in the gauge cluster glass. I will make a template of it before attempting to drill it, just in case I break the glass.

#34
12-29-2015, 07:13 PM
I know its a bit larger than you had planned but I think it will end up looking great.
Here is an article about drilling some holes in thick glass, perhaps the same technique will work for the thin cluster glass.
I think if you do like this says and submerse the whole thing in a pan of water and take your time with the right tip in a dremel tool you should be able to poke a hole. I've used diamond tips in a dremel tool to poke holes in rocks using a similar process. Here's the link;
Bluedots: How To Install In THICK Glass Lenses
Bobby
#35
12-29-2015, 07:45 PM

Senior User
Join Date: Jul 2003
Location: FL
Posts: 322
Likes: 0
Received 0 Likes
on
0 Posts
You could also use plexiglass. Find a piece the same thickness as your glass, use the glass as a template, and cut to fit. Then you can drill the hole and be certain it is in the correct spot (not much room for error). Then you can turn around and use the plexi as a template to drill the glass. Small, very fine grit, diamond grinding stone might work for this...
...and if you break the glass, you have a replacement already.
...and if you break the glass, you have a replacement already.
#36
12-29-2015, 08:45 PM


guages
I decided to change the appearance of the cluster by rounding off the flat end. It was really easy by taking a nibbler and cutting out the excess metal. I made a pattern of the round end and traced that on the dash and then made a parallel line about 1/4" to the inside and that was the line that I cut on. With a small cresent wrench I bent down the extra material and that was that. I made a ring out of 1" flat Iron and tappered it from the top to the bottom of the cluster. That way when the cluster is in the dash and the edges of the ring are flush with the dash, the face of the cluster is slanted inward from top to bottom. I'm thinking that way the sun won't reflect off of the glass on the guages. I welded a couple of tabs on the back of the ring so when the group is in the dash I can tighten the cluster to the dash from behind. In the picture it looks like the gap at the top of the guages is narrower than at the bottom but it isn't. Because of the depth of the top compared to the depth at the bottom it looks that way.Now that I have a CNC mill I might machine something out like the Air Filter that I made a couple of years ago. The filter was my first project and it took about 8 months of part time planing and lay out before I started to machine it. A lot of trial and error because I had never run a mill let alone a CNC. All of the cuts had to be laid out and then I put a pencil in the machine instead of a cutter and worked on paper rather than metal. It actually worked out rather well. There should be a picture of the filter as well as the cluster. Making these parts took time but isn't really hard.
#38
12-30-2015, 11:17 AM
You could also use plexiglass. Find a piece the same thickness as your glass, use the glass as a template, and cut to fit. Then you can drill the hole and be certain it is in the correct spot (not much room for error). Then you can turn around and use the plexi as a template to drill the glass. Small, very fine grit, diamond grinding stone might work for this...
...and if you break the glass, you have a replacement already.
...and if you break the glass, you have a replacement already.
#39
12-30-2015, 11:18 AM
#41
12-30-2015, 03:33 PM
When I was building my gauges I used the original glass but I need some black plastic as a surround for the gauges. I went to a local plastics store and told the guys what I was after, they let me dig through their box of drops and gave me some plastic for free.
I'm not sure what type, Lexan, polycarbonate, or what, but the price was right.
The gauge cluster I have used has a clock with a stem to reset it. I didn't feel like drilling the hole in the glass so I just set the time on the clock to 12:05 (that way its always bear time)
Bobby
I'm not sure what type, Lexan, polycarbonate, or what, but the price was right.
The gauge cluster I have used has a clock with a stem to reset it. I didn't feel like drilling the hole in the glass so I just set the time on the clock to 12:05 (that way its always bear time)
Bobby
#42
12-30-2015, 04:13 PM
#43
12-30-2015, 04:18 PM
When I was building my gauges I used the original glass but I need some black plastic as a surround for the gauges. I went to a local plastics store and told the guys what I was after, they let me dig through their box of drops and gave me some plastic for free.
I'm not sure what type, Lexan, polycarbonate, or what, but the price was right.
The gauge cluster I have used has a clock with a stem to reset it. I didn't feel like drilling the hole in the glass so I just set the time on the clock to 12:05 (that way its always bear time)
Bobby
I'm not sure what type, Lexan, polycarbonate, or what, but the price was right.
The gauge cluster I have used has a clock with a stem to reset it. I didn't feel like drilling the hole in the glass so I just set the time on the clock to 12:05 (that way its always bear time)
Bobby
#44
12-30-2015, 04:19 PM
I decided to change the appearance of the cluster by rounding off the flat end. It was really easy by taking a nibbler and cutting out the excess metal. I made a pattern of the round end and traced that on the dash and then made a parallel line about 1/4" to the inside and that was the line that I cut on. With a small cresent wrench I bent down the extra material and that was that. I made a ring out of 1" flat Iron and tappered it from the top to the bottom of the cluster. That way when the cluster is in the dash and the edges of the ring are flush with the dash, the face of the cluster is slanted inward from top to bottom. I'm thinking that way the sun won't reflect off of the glass on the guages. I welded a couple of tabs on the back of the ring so when the group is in the dash I can tighten the cluster to the dash from behind. In the picture it looks like the gap at the top of the guages is narrower than at the bottom but it isn't. Because of the depth of the top compared to the depth at the bottom it looks that way.Now that I have a CNC mill I might machine something out like the Air Filter that I made a couple of years ago. The filter was my first project and it took about 8 months of part time planing and lay out before I started to machine it. A lot of trial and error because I had never run a mill let alone a CNC. All of the cuts had to be laid out and then I put a pencil in the machine instead of a cutter and worked on paper rather than metal. It actually worked out rather well. There should be a picture of the filter as well as the cluster. Making these parts took time but isn't really hard.
#45
12-30-2015, 09:43 PM
So i got my speedometer for Christmas. This is going to require more than just filing to get it to fit into the cluster. This style autometer gauge was only available in either 3 3/8 or 5 in. The stock one was 4 in, so I thought the 5 would look better since the 3 3/8 would be a little small. This is kind of giving me a problem now.
Here is the speedometer with the clear plastic cover lens and chrome bezel removed.
Here are a couple pictures of the innards of the speedometer.
This is the inside trim ring that i painted black on the other gauges. This one was centered by the chrome trim ring, so I will need to add little bumpers or something to the inside of the gauges housing to get it centered.
This is the original opening for the speedometer. The next picture will show you how much i will need to cut out to get the gauge to fit.
The problem that I have hit now is that the outside diameter of the tick marks on the speedometer is almost exactly the same as the inside diameter of the gauge cluster trim. You can see this in the last picture. Because of this, I'm not sure if I will be able to use the black trim ring like I did for the other gauges. It also looks a little big in the gauge cluster. This was a lot more expensive than the other gauges, so I think I'm kinda stuck with this and will have a make it work. I am also going to have to figure out what to do with the button on the speedometer. I am thinking of attempting to drill a hole in the gauge cluster glass. I will make a template of it before attempting to drill it, just in case I break the glass.