'86 F250 Progress
#1
 01-29-2015, 07:22 AM

Join Date: Sep 2014
Location: Jackson, Wyoming
Posts: 153
Likes: 0
Received 0 Likes
on
0 Posts
'86 F250 Progress
It's been a couple months since I posted on here but my truck is finally on the road. I wanted to make a thread to show everything I have done and the things I have yet to do.
I bought the truck back in September for $1000. To date I have put about $2500 in it.
460 with a T19 4 speed, Borg Warner 13-45 transfer case. Sterling 10.25" rear axle and a Dana 44 front axle. 3.55/3.54 gears.
ENGINE:
Edelbrock Performer 750cfm 1407 Carburetor
Fel Pro Valve Cover Gasket
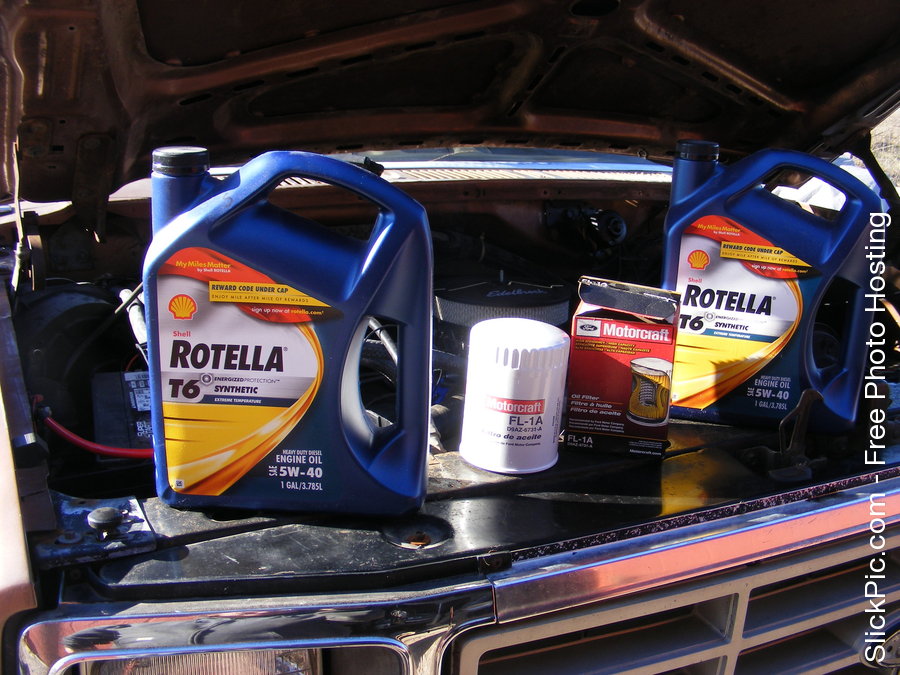
Rotella T6 Synthetic 5w40 Motor Oil Gallon (2)
Motorcraft Oil Filter
Oregon Choke Cable
Edelbrock 10" Air Cleaner
QuickCar Racing Products Battery Cable Kit
Motorcraft Starter Solenoid
Wix Fuel Filter
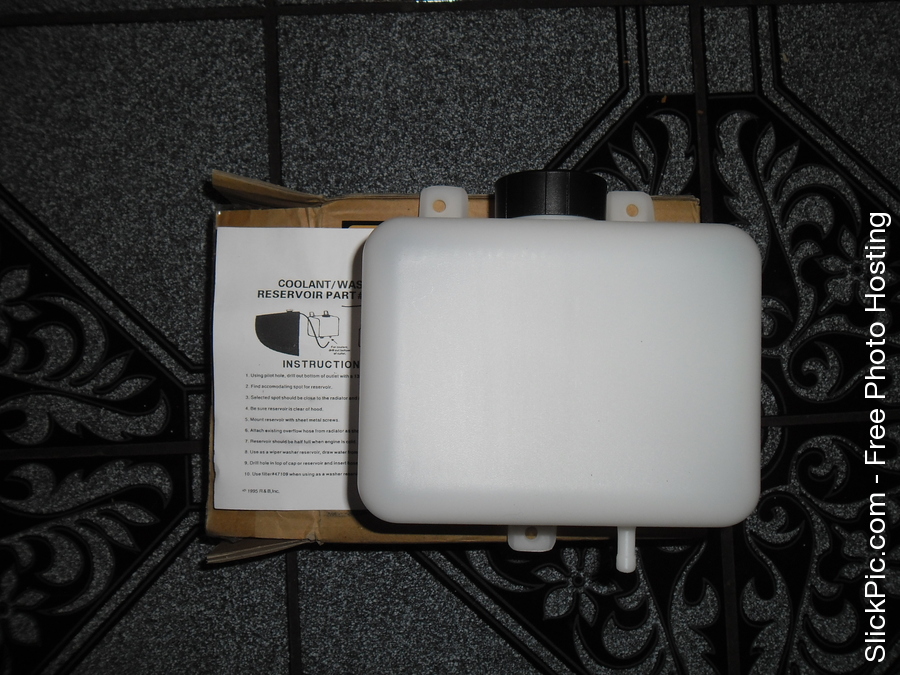
Dorman DOR-603-001 Overflow Tank
Motorcraft 192* Thermostat
Mr. Gasket Water Neck
Gates Upper & Lower Radiator Hoses
Autozone Remanufactured Power Steering Pumo
Autozone High Pressure Power Steering Line
Gates Alternator Belt
Gates Power Steering Belts (2)
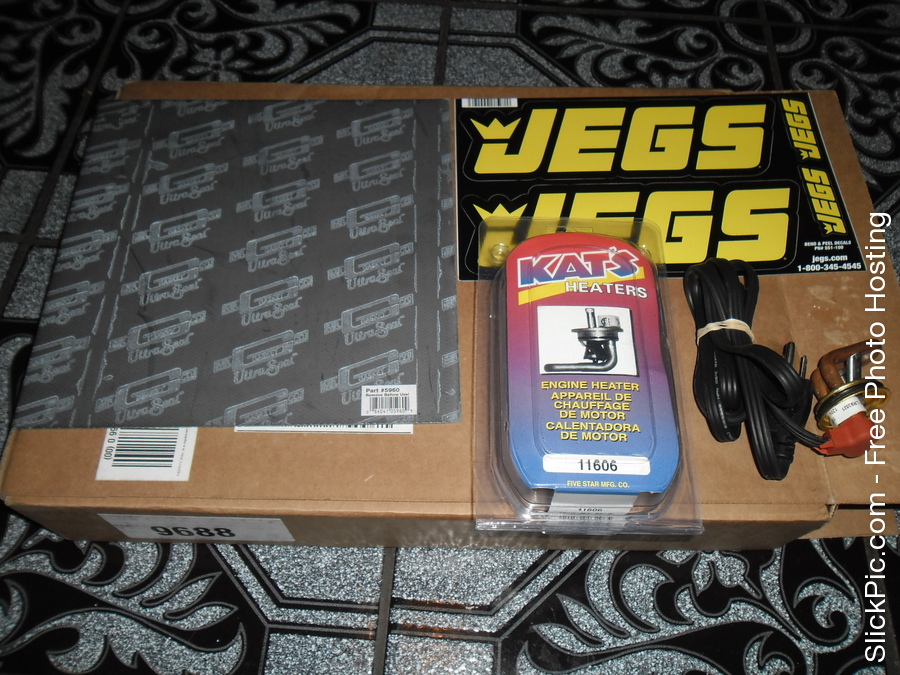
Mr. Gasket 5960 Ultra Seal Exhaust Gasket Material
HVAC:
Gates Heater Core Hoses
Spectra Heater Core
Duralast Blower Motor Resistor JA1518
VDO Blower Motor PM215
VDO Blower Motor Wheel BW9334
REAR AXLE:
Fel Pro Rear Diff Gasket
Permatex Ultra Grey RTV
Valvoline/Full Synthetic Gear Oil SAE 75W-140 (4 Quarts)
FRONT AXLE:
Valvoline Gear Oil 80w-90 (2 Quarts)
ELECTRONICS/SWITCHES:
A1 Cardone Wiper Motor Line: A1 #40-290
Duralast Wiper Switch SW1112
Duralast Turn Signal Switch With Tilt SW1109
Dorman Parking Light Sockets 85872
Duralast Headlight Dimmer Switch UDS418
Duralast Ignition Switch
Motorcraft Ignition Lock Cylinder & Key
Duralast High Beam Switch
BRAKES:
Brakewear Front Brake Hoses 77311
Brakewear Rear Brake Hose 77612
Duralast Gold Front Brake Pads DG120
Duralast Rear Brake Shoes 357
Napa Rear Wheel Cylinders UP 9026 & UP 9025
Napa Rear Brake Hardware Kit UP 2223
NAPA Brake Booster & Master Cylinder
TRANSMISSION/TRANSFER CASE:
Castrol/Transmax ATF Full Synthetic (4 Quarts)
Valvoline/High Performance Gear Oil SAE 80W-90 (4 Quarts)
I have taken pics along the way of everything start to finish. I will add those to this thread now section by section. There are quite a few.
I bought the truck back in September for $1000. To date I have put about $2500 in it.
460 with a T19 4 speed, Borg Warner 13-45 transfer case. Sterling 10.25" rear axle and a Dana 44 front axle. 3.55/3.54 gears.
ENGINE:
Edelbrock Performer 750cfm 1407 Carburetor
Fel Pro Valve Cover Gasket
Rotella T6 Synthetic 5w40 Motor Oil Gallon (2)
Motorcraft Oil Filter
Oregon Choke Cable
Edelbrock 10" Air Cleaner
QuickCar Racing Products Battery Cable Kit
Motorcraft Starter Solenoid
Wix Fuel Filter
Dorman DOR-603-001 Overflow Tank
Motorcraft 192* Thermostat
Mr. Gasket Water Neck
Gates Upper & Lower Radiator Hoses
Autozone Remanufactured Power Steering Pumo
Autozone High Pressure Power Steering Line
Gates Alternator Belt
Gates Power Steering Belts (2)
Mr. Gasket 5960 Ultra Seal Exhaust Gasket Material
HVAC:
Gates Heater Core Hoses
Spectra Heater Core
Duralast Blower Motor Resistor JA1518
VDO Blower Motor PM215
VDO Blower Motor Wheel BW9334
REAR AXLE:
Fel Pro Rear Diff Gasket
Permatex Ultra Grey RTV
Valvoline/Full Synthetic Gear Oil SAE 75W-140 (4 Quarts)
FRONT AXLE:
Valvoline Gear Oil 80w-90 (2 Quarts)
ELECTRONICS/SWITCHES:
A1 Cardone Wiper Motor Line: A1 #40-290
Duralast Wiper Switch SW1112
Duralast Turn Signal Switch With Tilt SW1109
Dorman Parking Light Sockets 85872
Duralast Headlight Dimmer Switch UDS418
Duralast Ignition Switch
Motorcraft Ignition Lock Cylinder & Key
Duralast High Beam Switch
BRAKES:
Brakewear Front Brake Hoses 77311
Brakewear Rear Brake Hose 77612
Duralast Gold Front Brake Pads DG120
Duralast Rear Brake Shoes 357
Napa Rear Wheel Cylinders UP 9026 & UP 9025
Napa Rear Brake Hardware Kit UP 2223
NAPA Brake Booster & Master Cylinder
TRANSMISSION/TRANSFER CASE:
Castrol/Transmax ATF Full Synthetic (4 Quarts)
Valvoline/High Performance Gear Oil SAE 80W-90 (4 Quarts)
I have taken pics along the way of everything start to finish. I will add those to this thread now section by section. There are quite a few.
#2
01-29-2015, 08:19 AM
Join Date: Sep 2014
Location: Jackson, Wyoming
Posts: 153
Likes: 0
Received 0 Likes
on
0 Posts
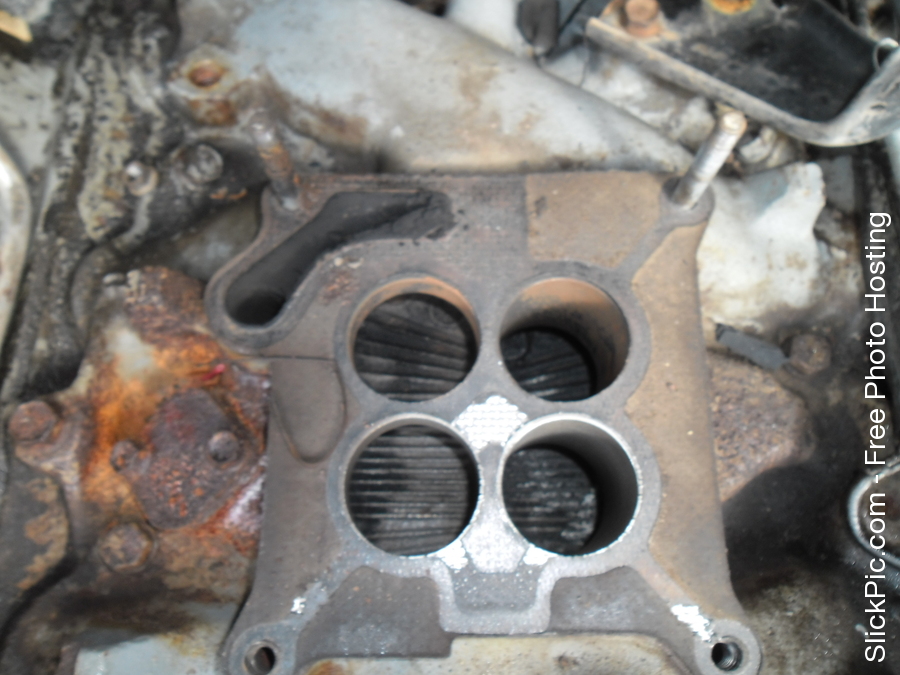
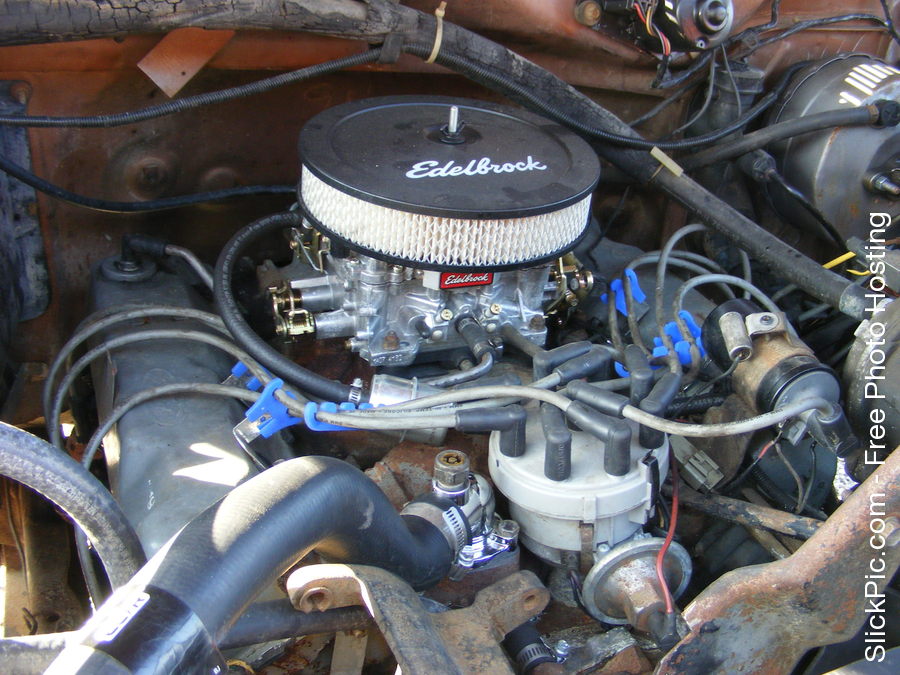
First thing I did was start on the engine. I tried to rebuild the Carter AFB 9755S. Which didn't turn out so well. I bought new metering rods and springs along with a complete rebuild kit.
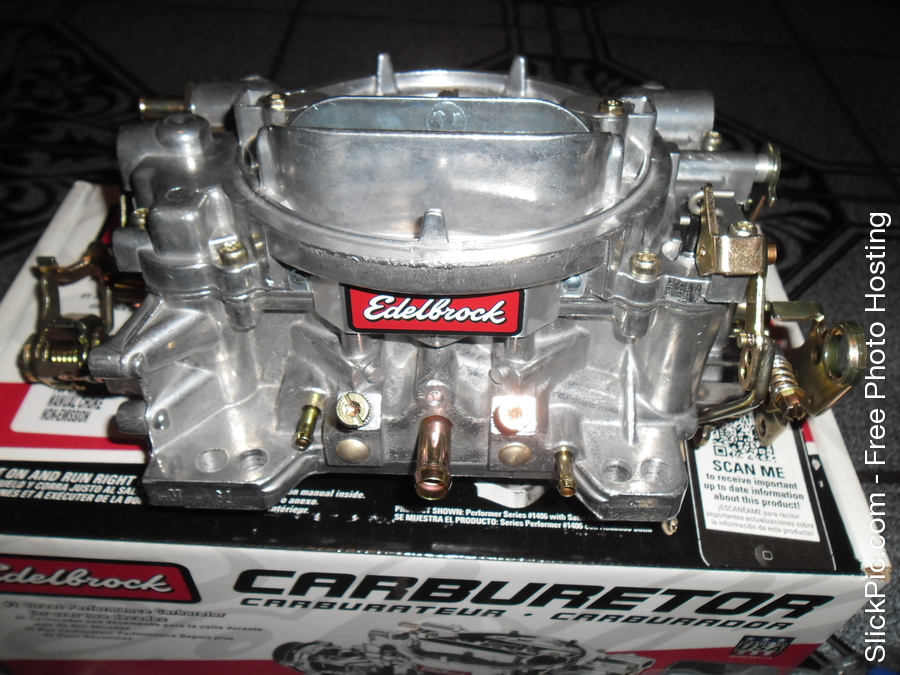
When that didn't pan out I bought an Edelbrock 1407 750cfm manual choke from Speedway.
The Carter AFB.
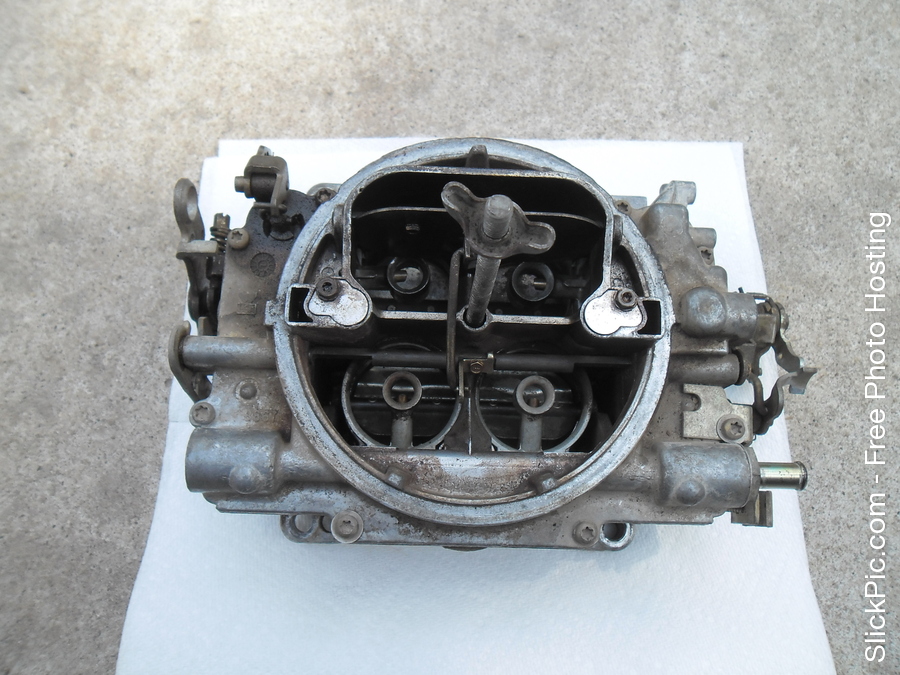
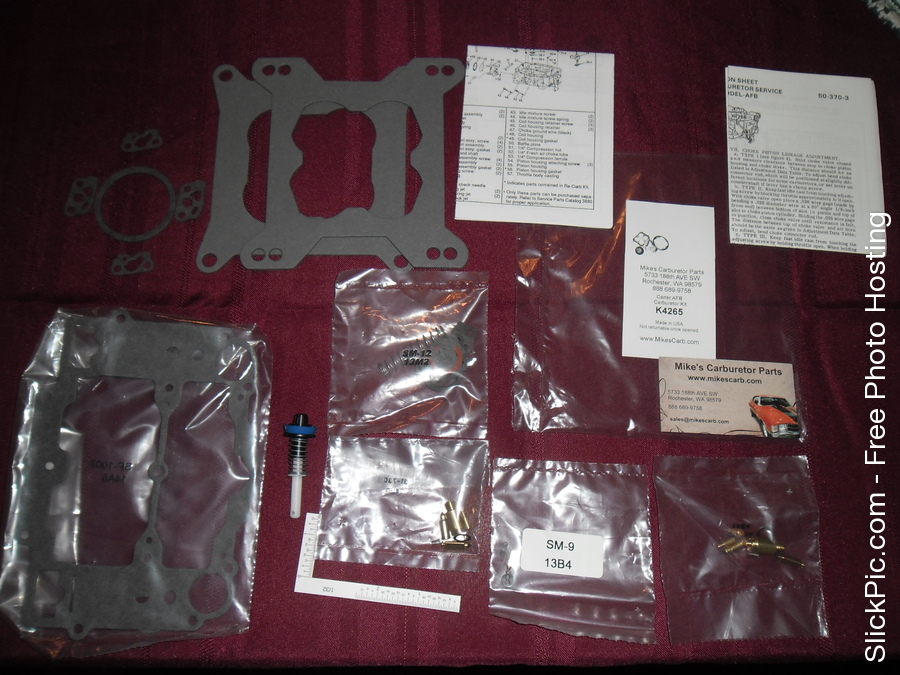
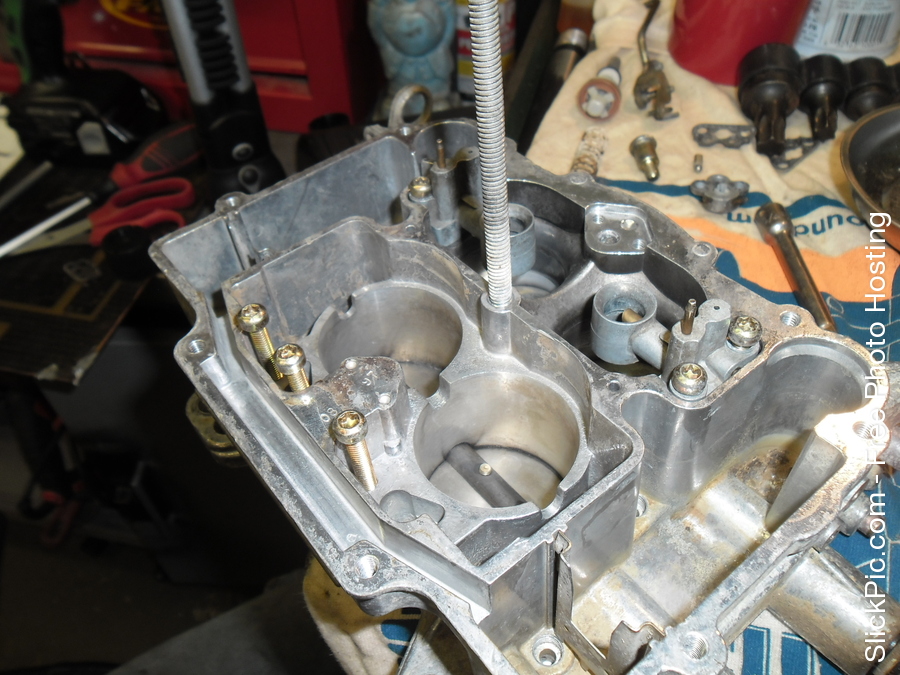
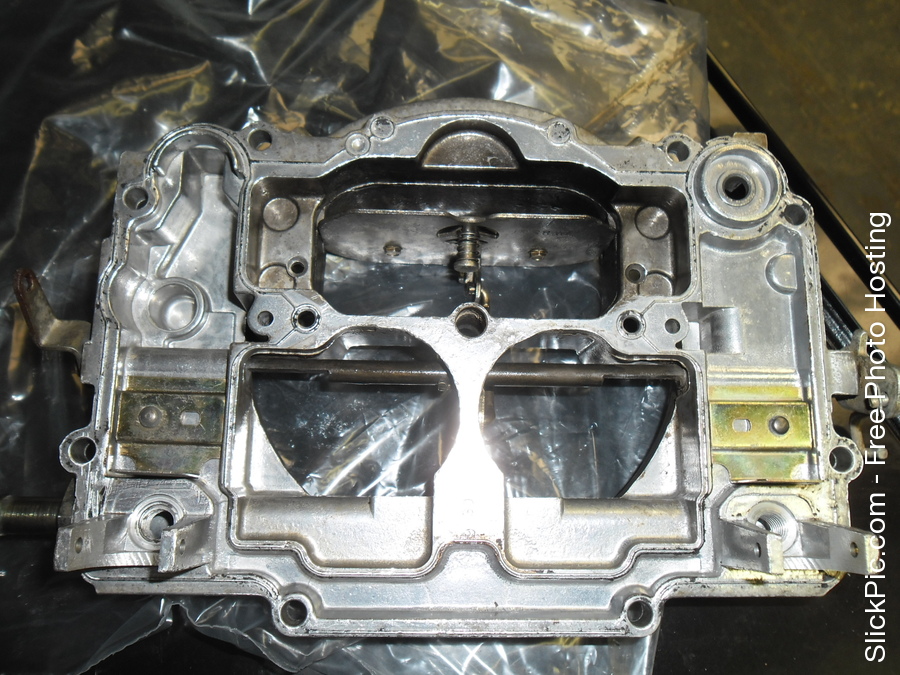
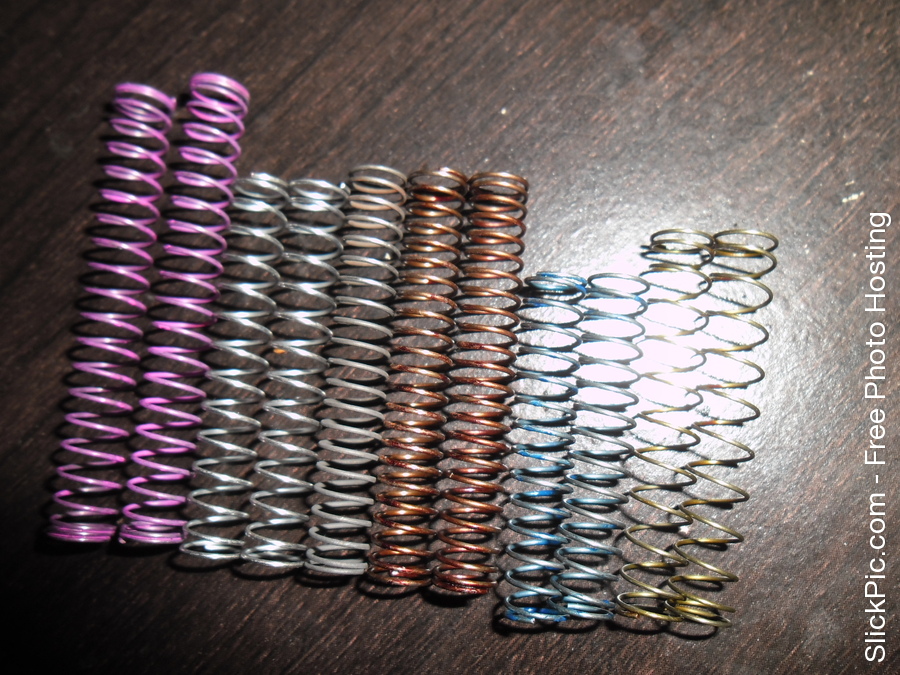
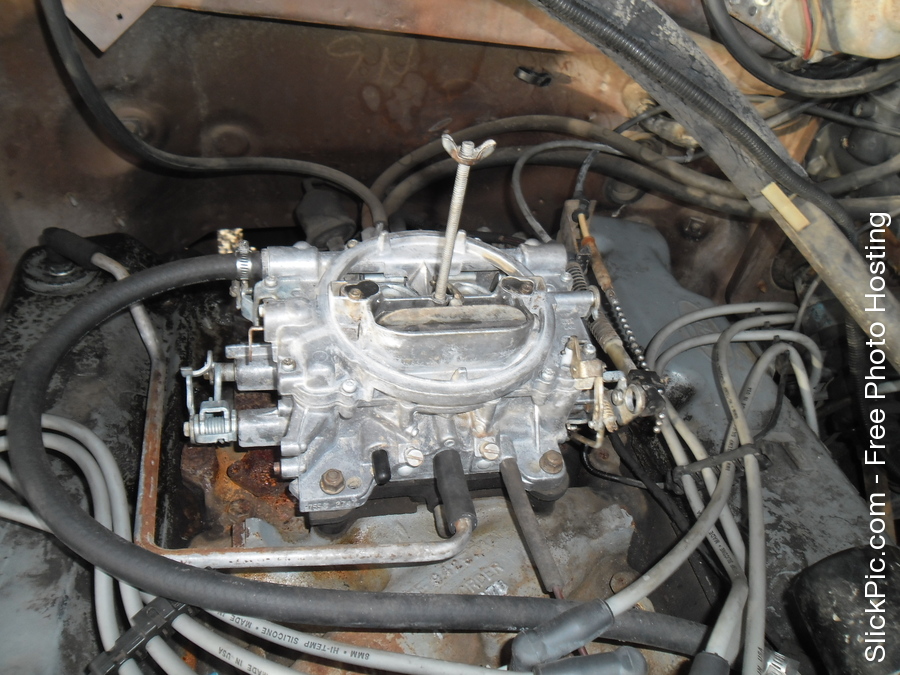
I cleaned it out, rebuilt it with new gaskets and such and it ran better. But it still had crap in it evidently so I just ordered a new carb to be done with it.
The Edelbrock 750cfm carburetor. Manual choke.
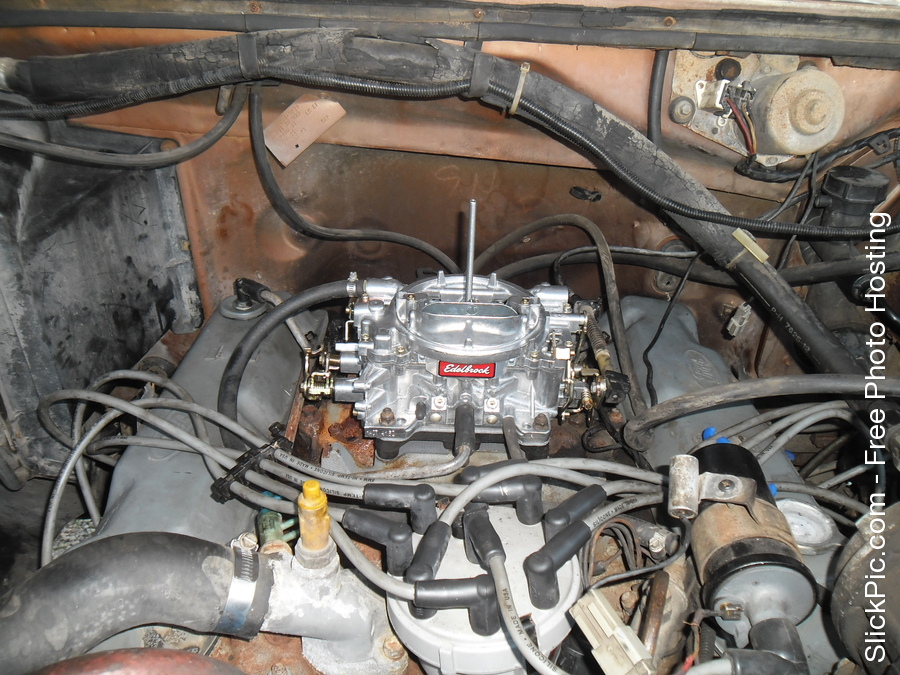
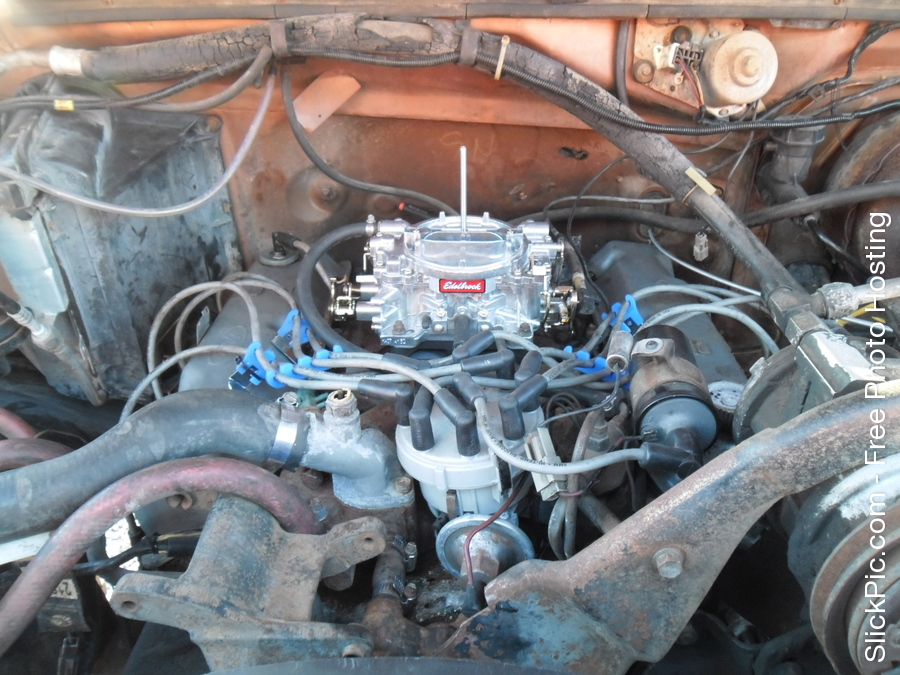
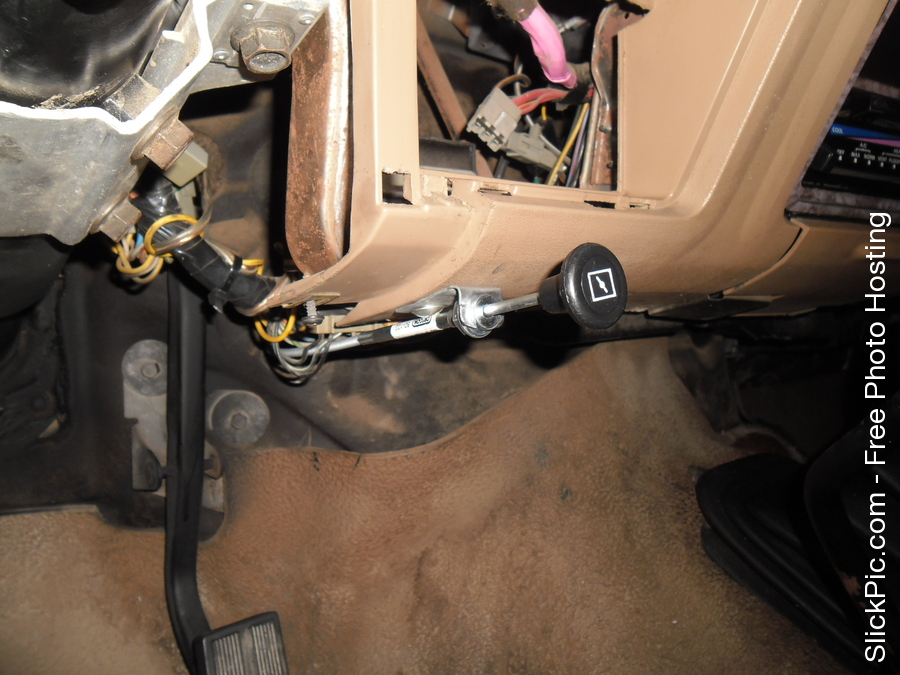
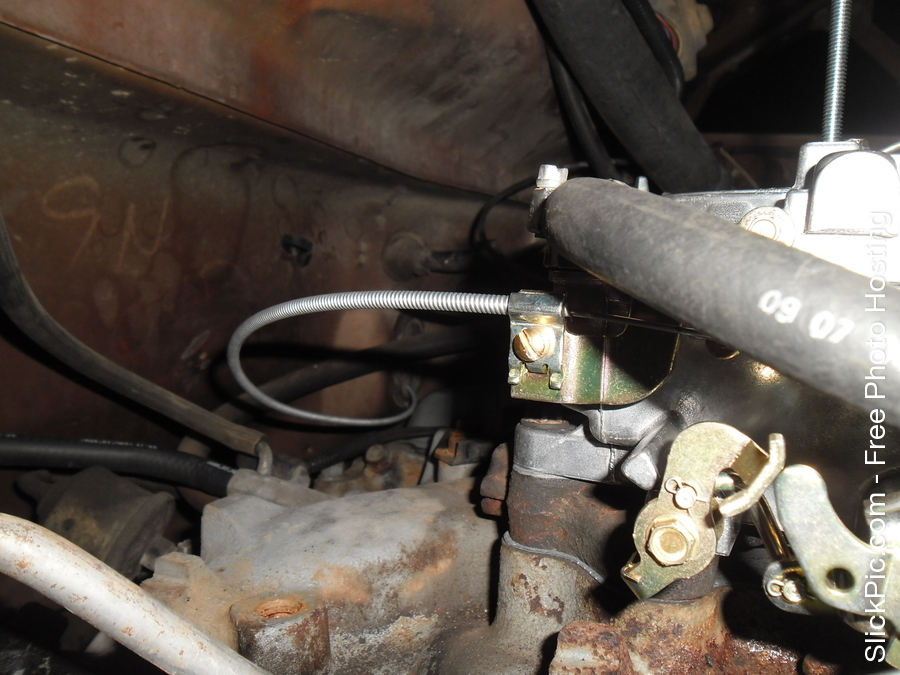
Choke cable routed and installed.
The EGR system was deleted on this truck prior to me purchasing it which I appreciated.
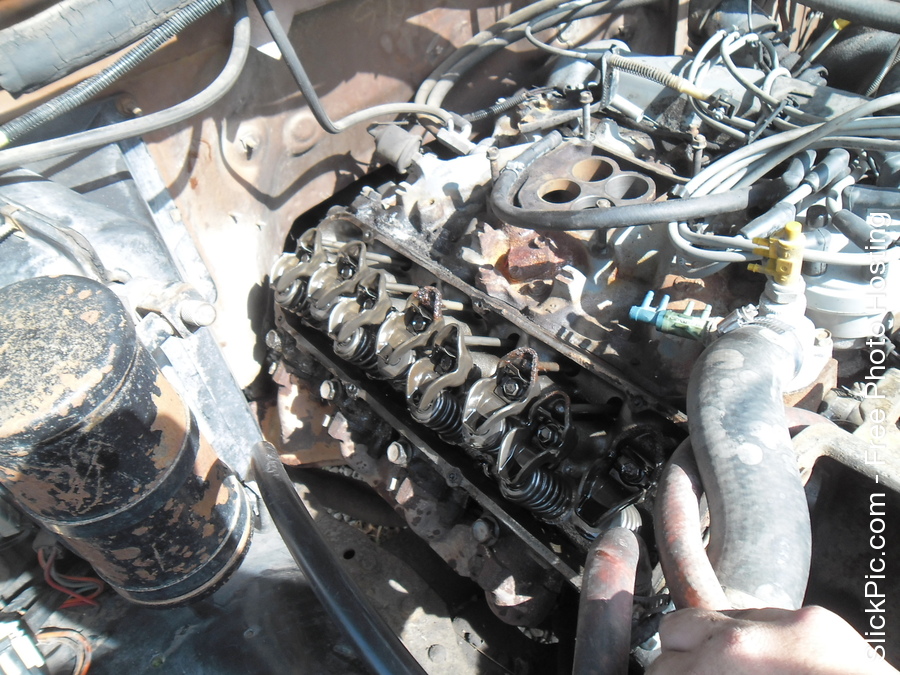
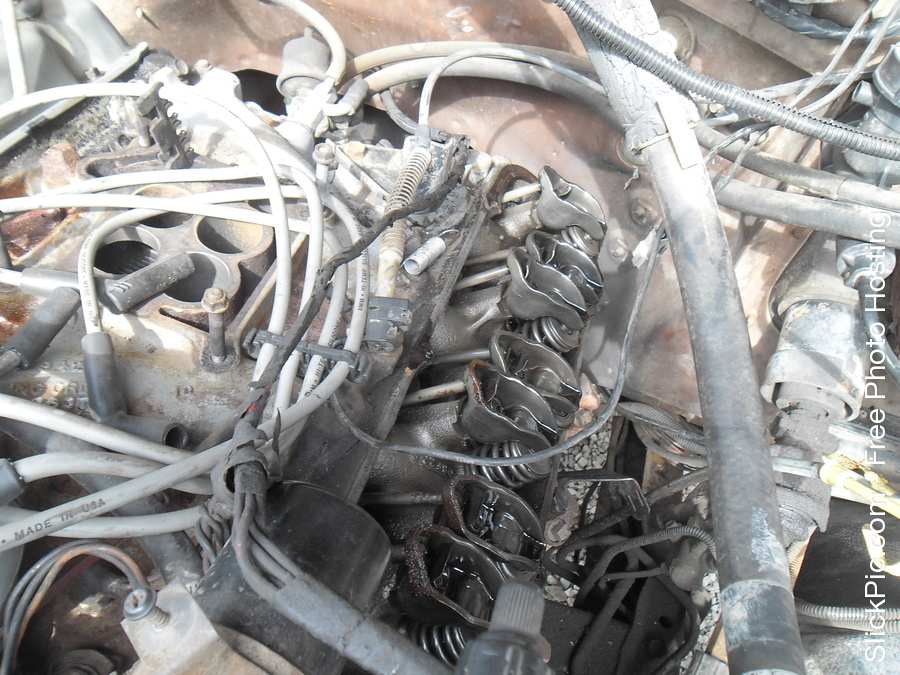
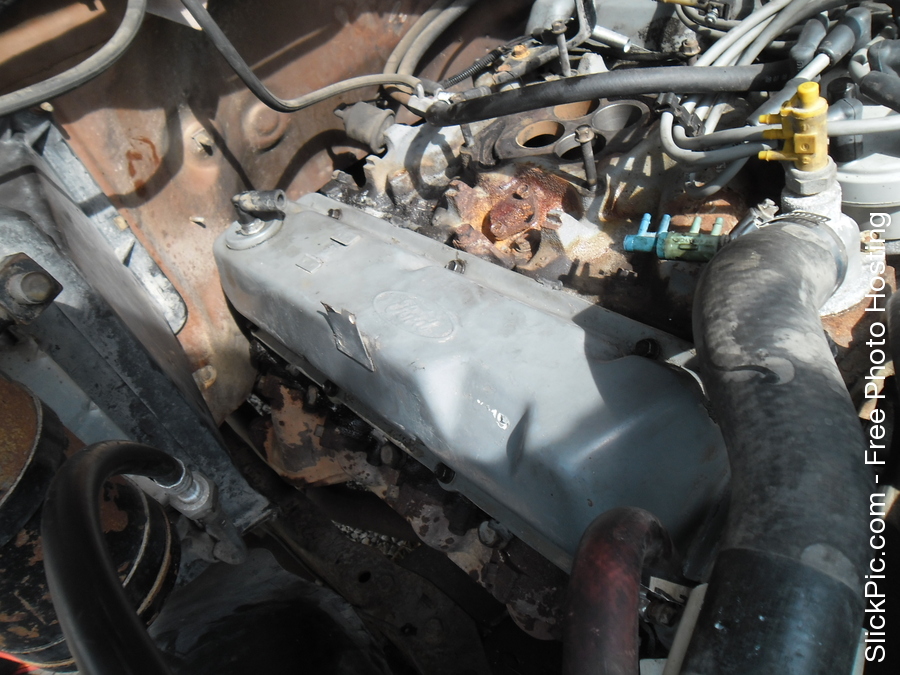
I also installed Fel Pro rubber valve cover gaskets. It had cork gaskets on it prior which I'm not a fan of.
They were leaking significantly.


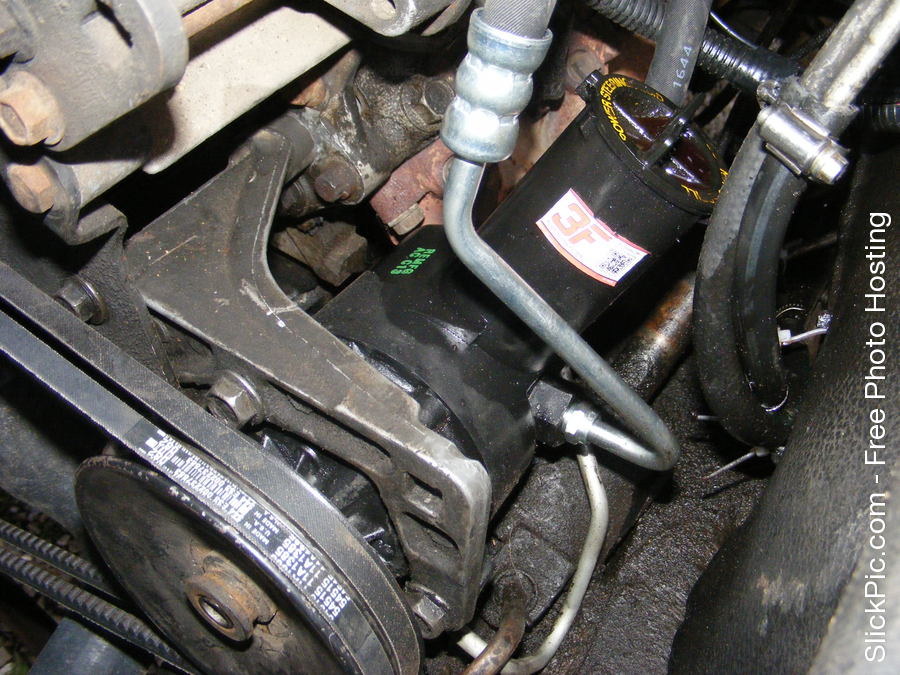
Then I tackled the power steering pump which the one on it leaked horribly.
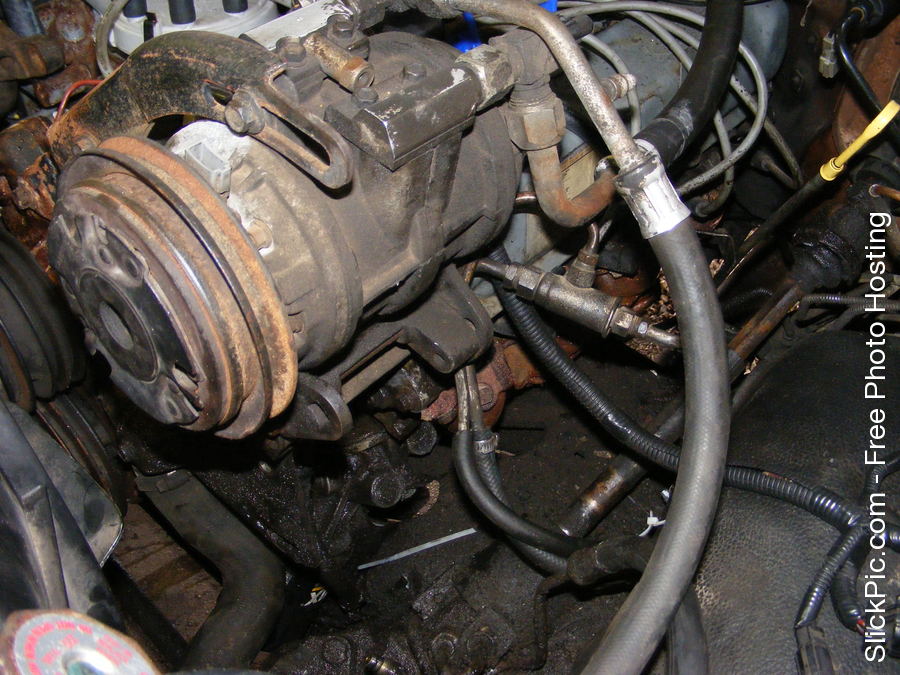
New belts and new high pressure line. This pump is surprisingly quiet.
Changed the oil & oil filter.
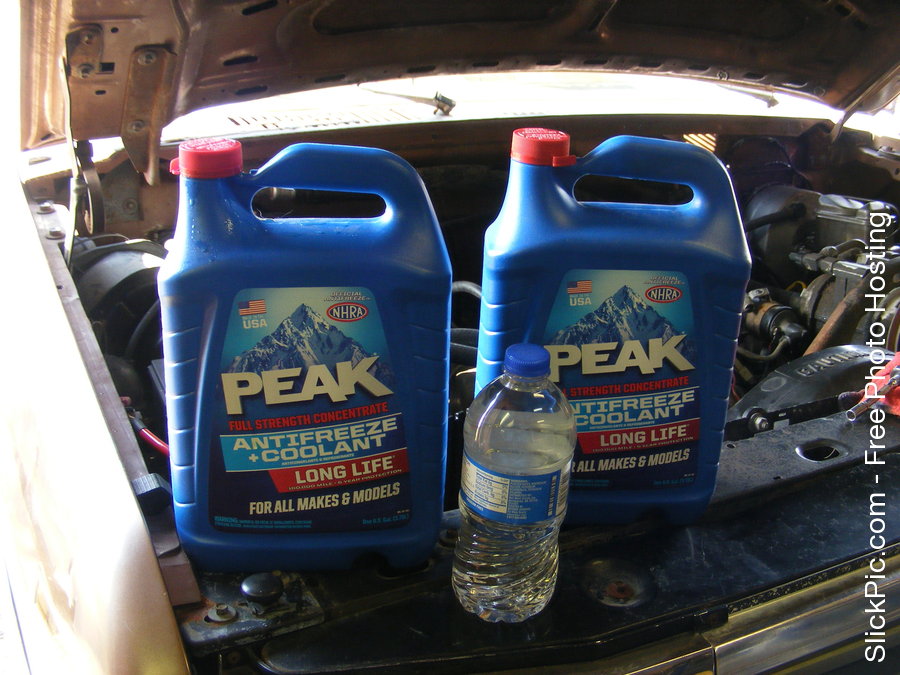
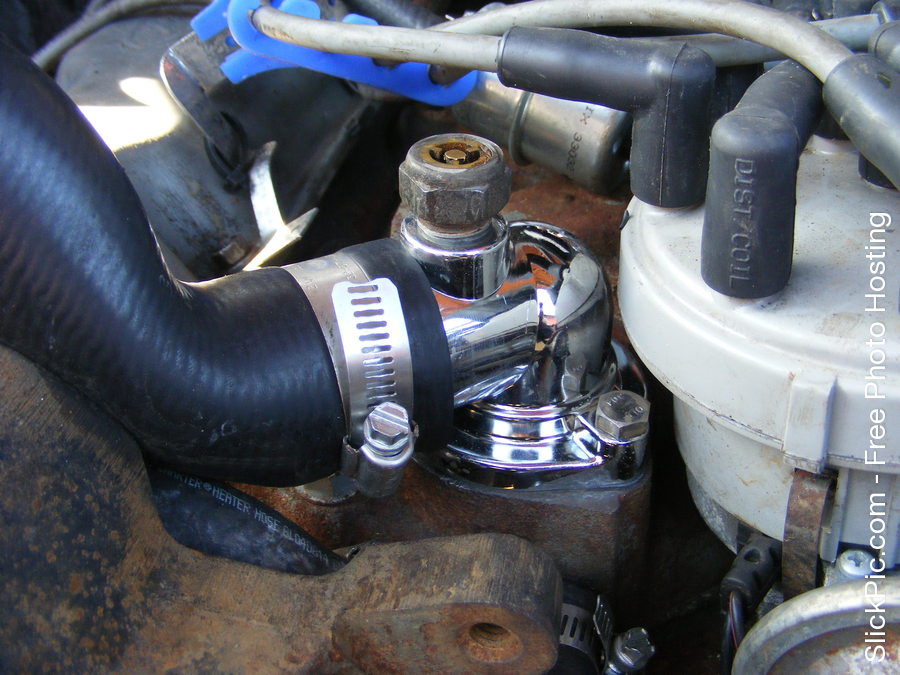
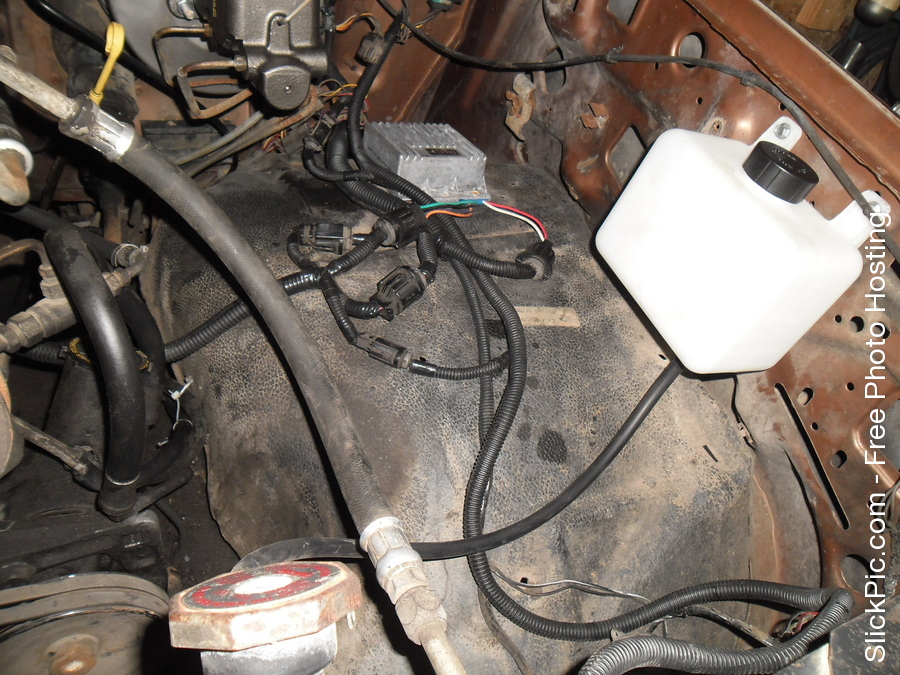
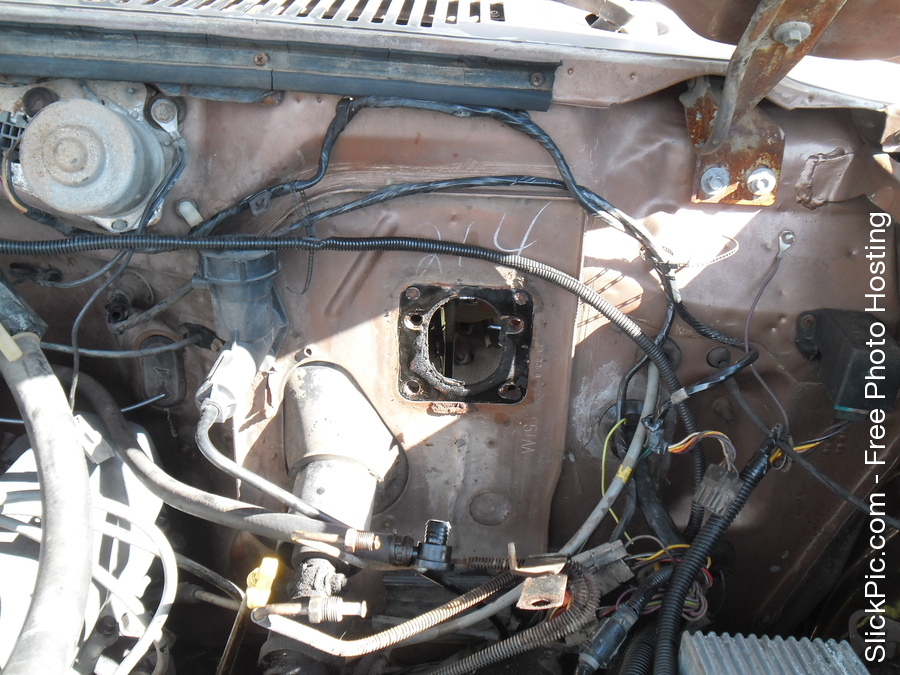
Replaced the upper and lower radiator hoses, along with the short hose going from the water pump to the intake manifold. I used a Mr Gasket water neck because the old water neck was corroded and didn't want to seal correctly. Also installed an overflow tank.


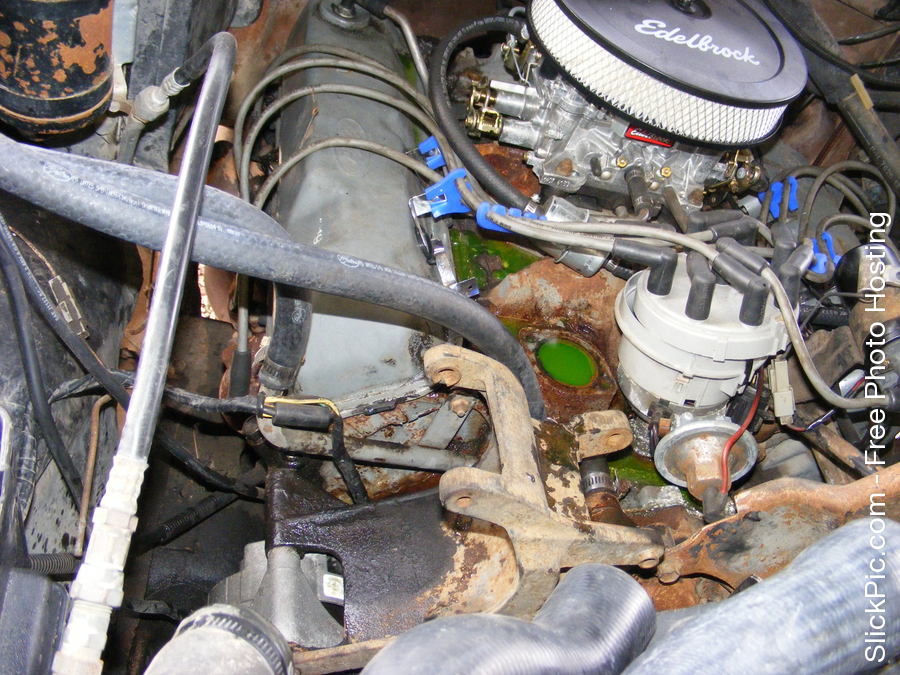
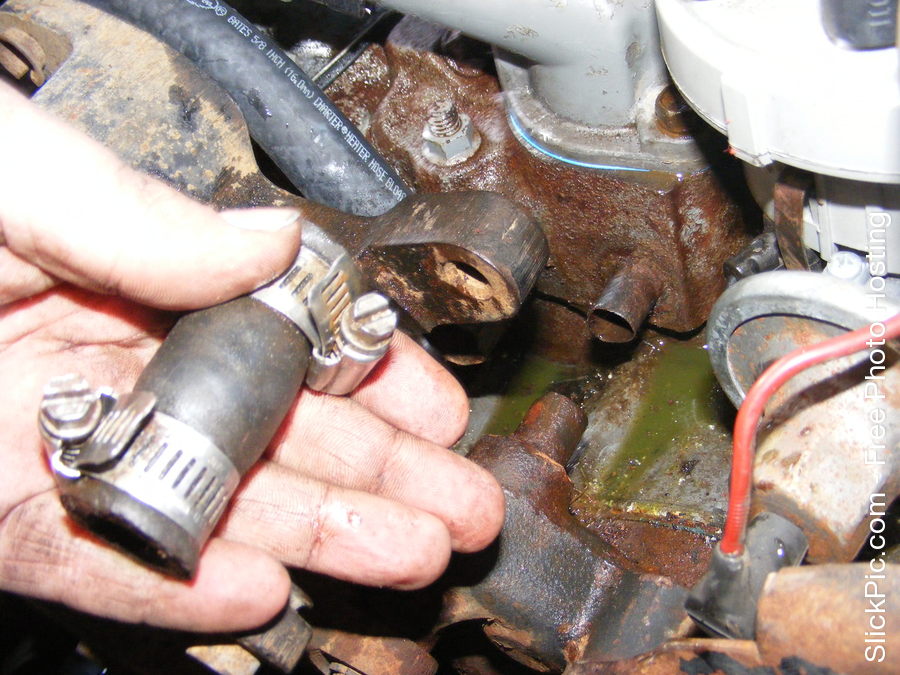
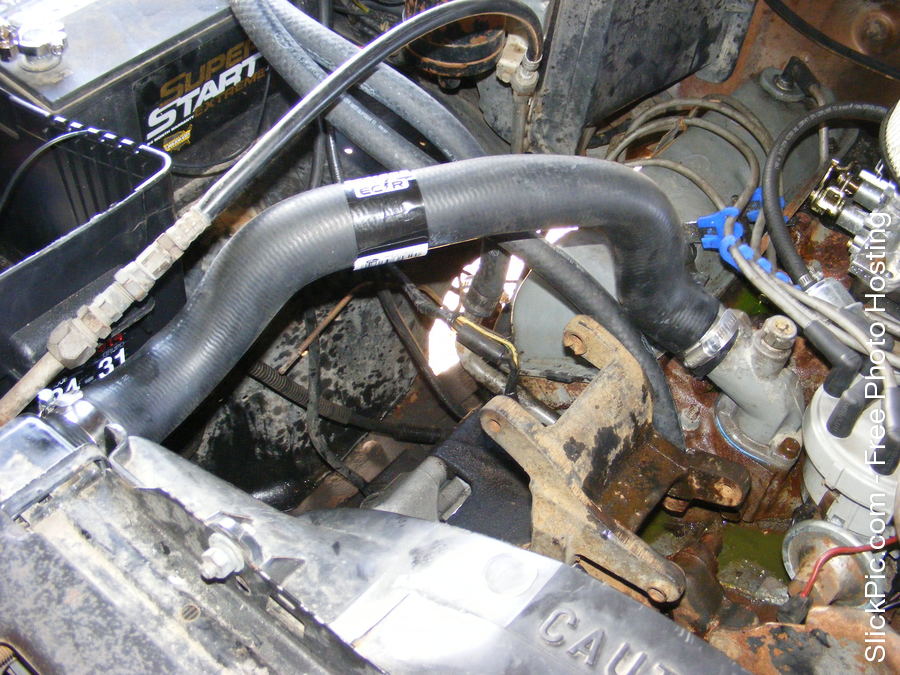
It wound up leaking as you can see.
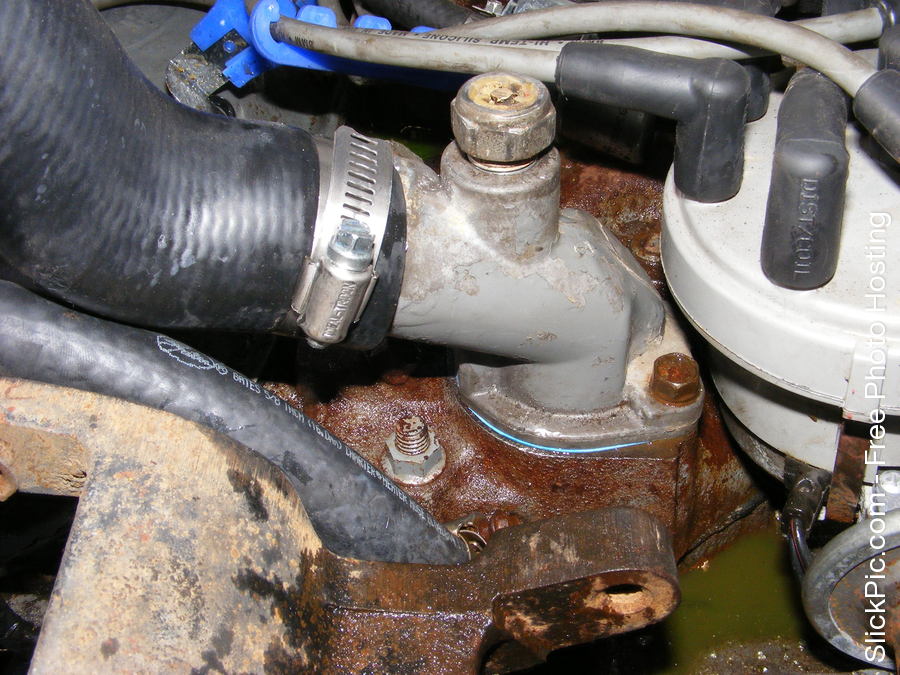
So I used the Mr. Gasket water neck.
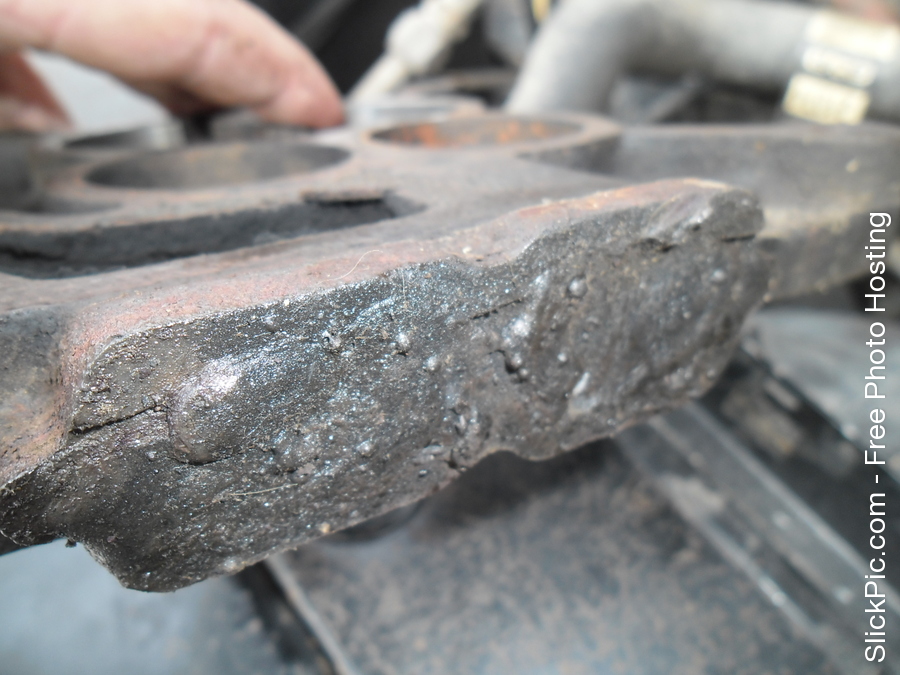
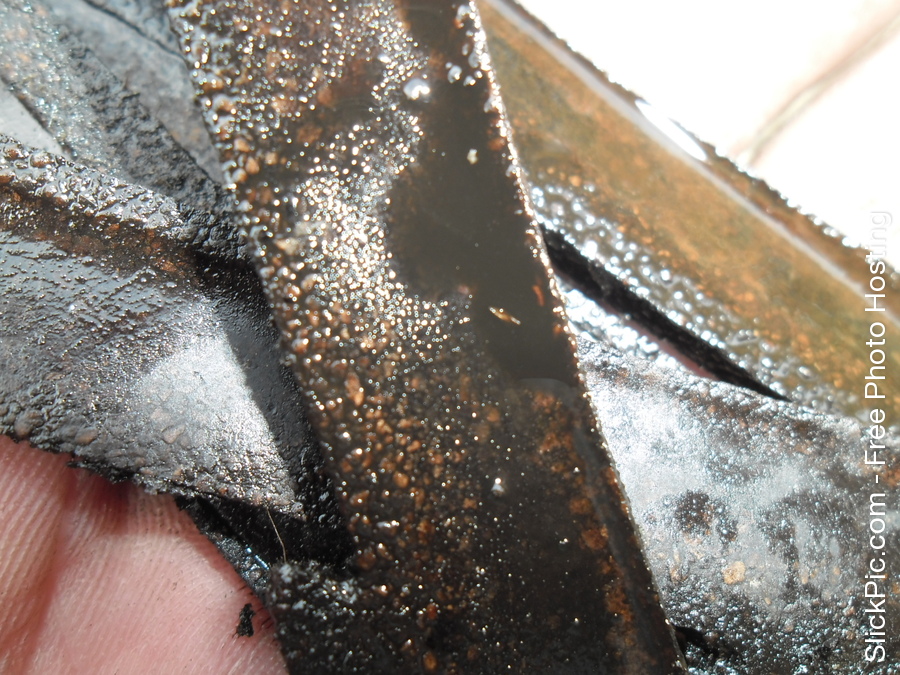
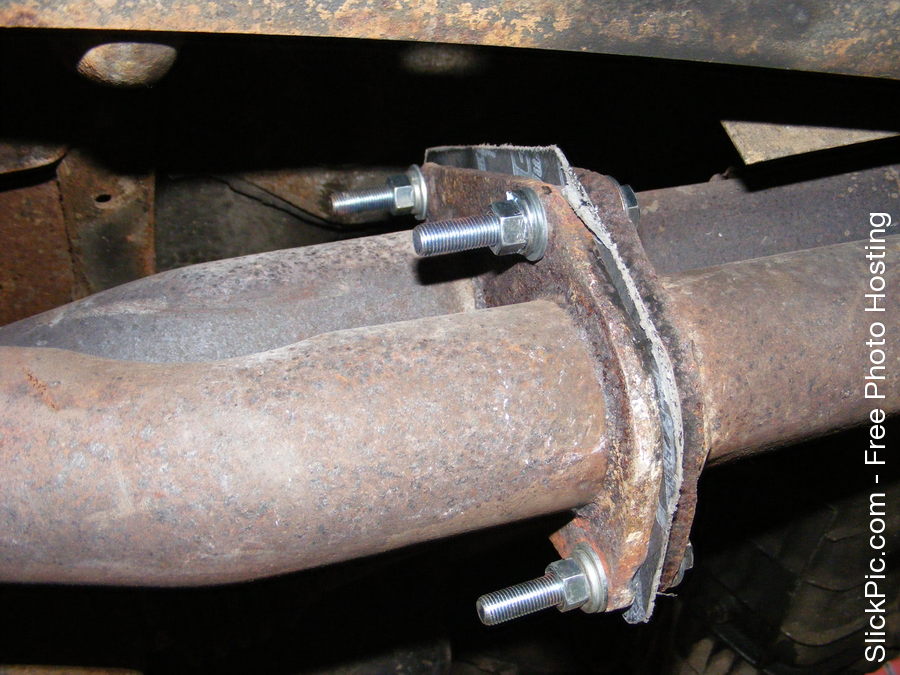
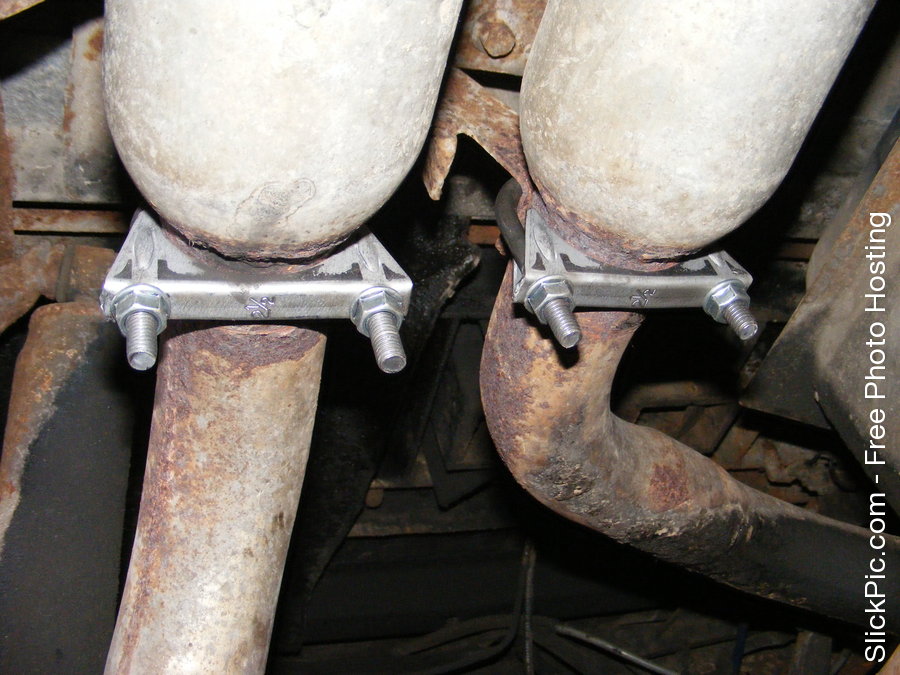
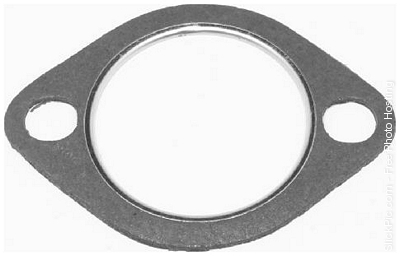
I made and installed a gasket for the exhaust because I could not find the one I needed for sale anywhere. Along with new clamps which are used to hang the exhaust.
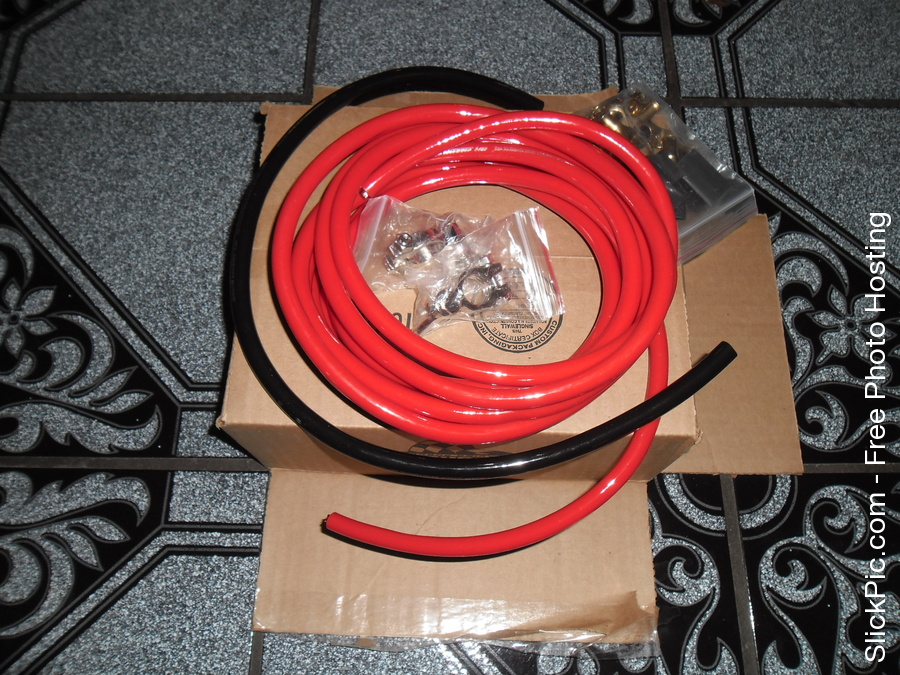
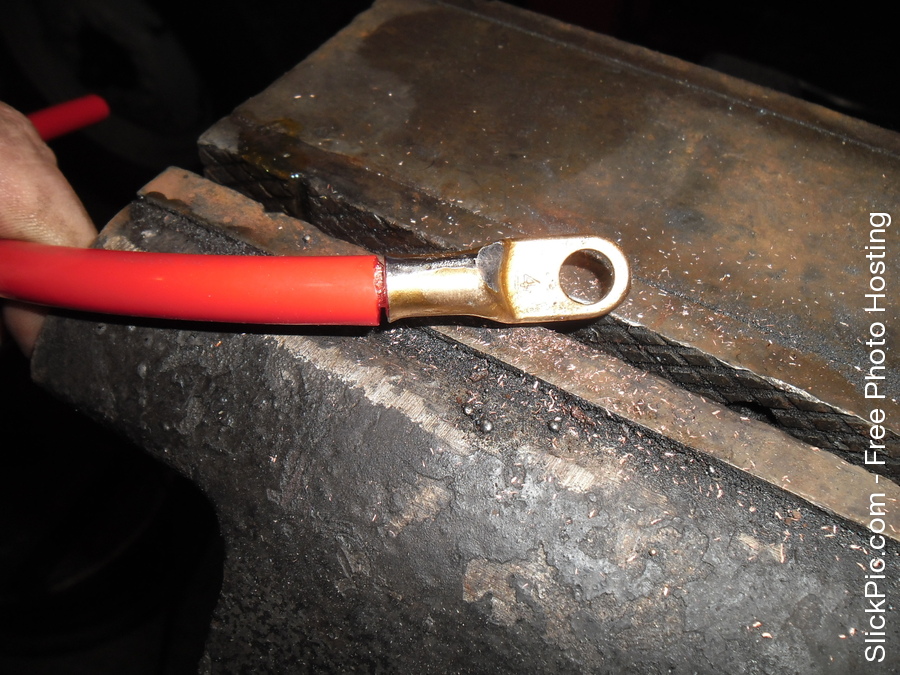
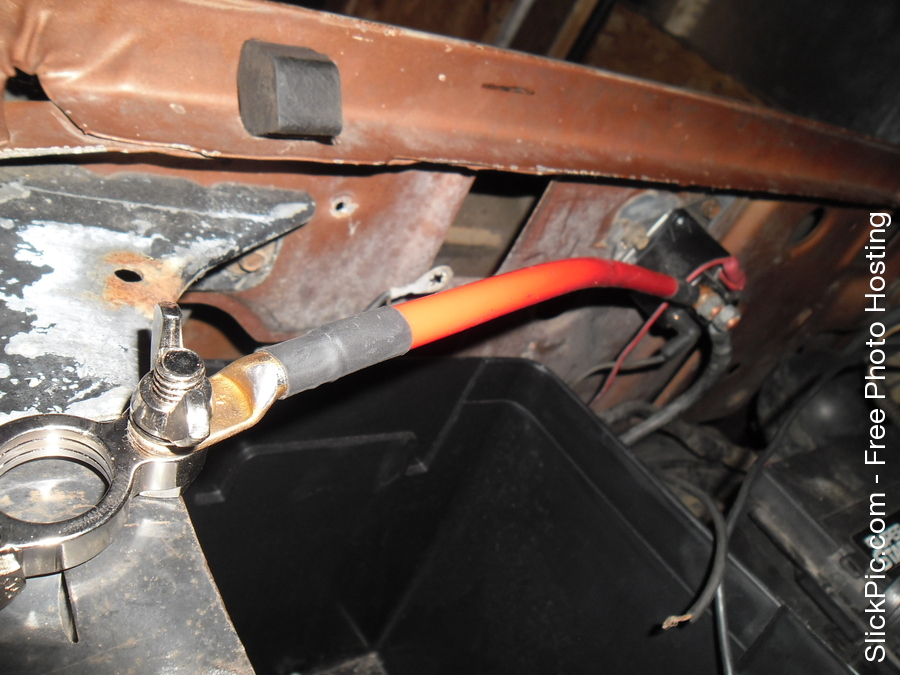
I used QuickCar race wires battery cable kit and installed a new starter solenoid. I soldered the ends for the connectors. No crimping.
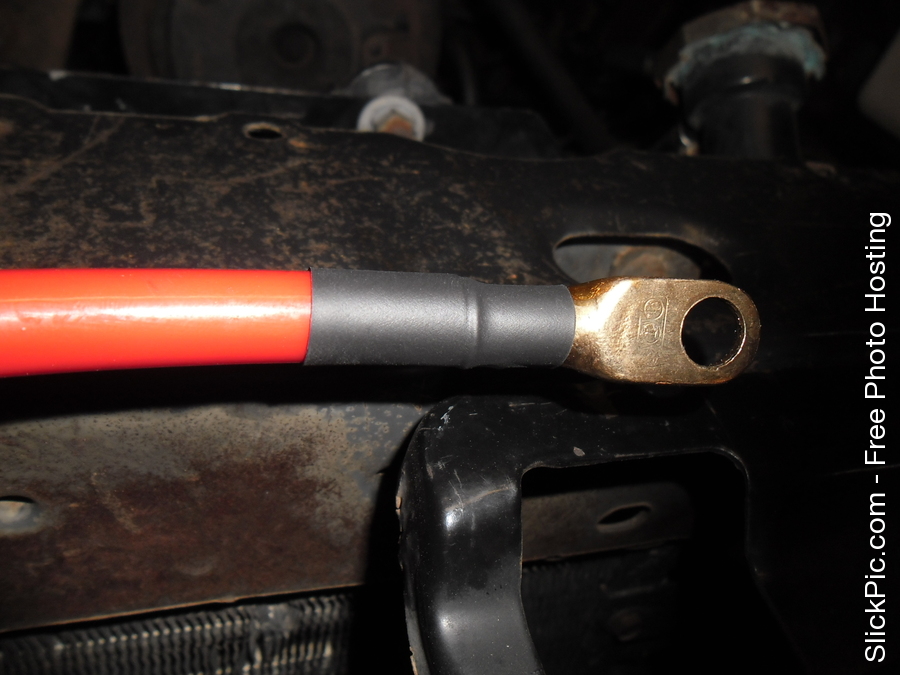
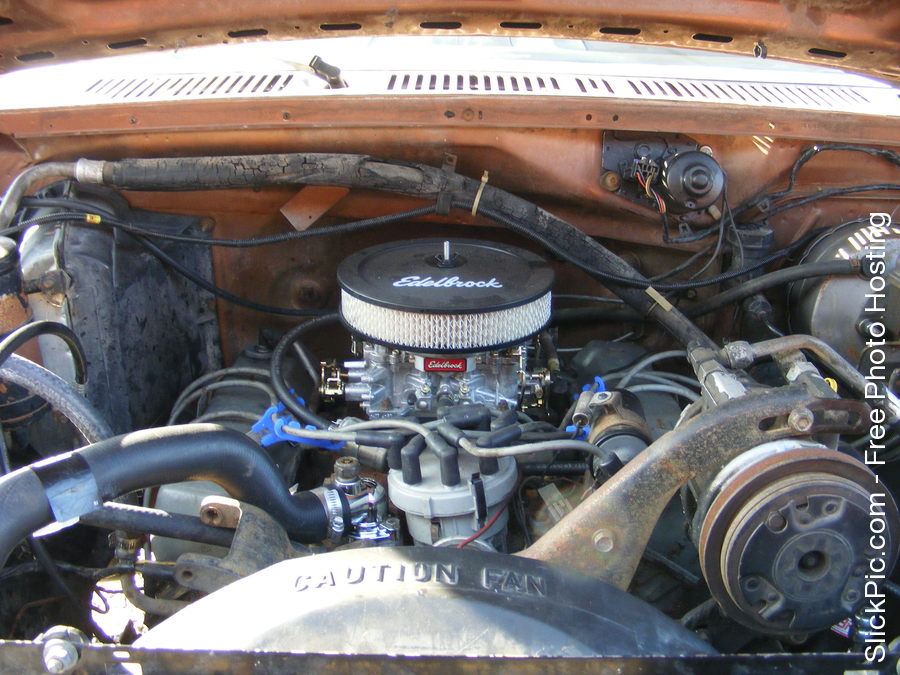
Turned out ok, runs pretty well. A little cleaner looking as well. Still needs some cleaning done but I can deal with it when I get the time.
When that didn't pan out I bought an Edelbrock 1407 750cfm manual choke from Speedway.
The Carter AFB.
I cleaned it out, rebuilt it with new gaskets and such and it ran better. But it still had crap in it evidently so I just ordered a new carb to be done with it.
The Edelbrock 750cfm carburetor. Manual choke.
Choke cable routed and installed.
The EGR system was deleted on this truck prior to me purchasing it which I appreciated.
I also installed Fel Pro rubber valve cover gaskets. It had cork gaskets on it prior which I'm not a fan of.
They were leaking significantly.
Then I tackled the power steering pump which the one on it leaked horribly.
New belts and new high pressure line. This pump is surprisingly quiet.
Changed the oil & oil filter.
Replaced the upper and lower radiator hoses, along with the short hose going from the water pump to the intake manifold. I used a Mr Gasket water neck because the old water neck was corroded and didn't want to seal correctly. Also installed an overflow tank.
It wound up leaking as you can see.
So I used the Mr. Gasket water neck.
I made and installed a gasket for the exhaust because I could not find the one I needed for sale anywhere. Along with new clamps which are used to hang the exhaust.
I used QuickCar race wires battery cable kit and installed a new starter solenoid. I soldered the ends for the connectors. No crimping.
Turned out ok, runs pretty well. A little cleaner looking as well. Still needs some cleaning done but I can deal with it when I get the time.
#3
01-29-2015, 08:35 AM
Join Date: Sep 2014
Location: Jackson, Wyoming
Posts: 153
Likes: 0
Received 0 Likes
on
0 Posts
As for the HVAC...
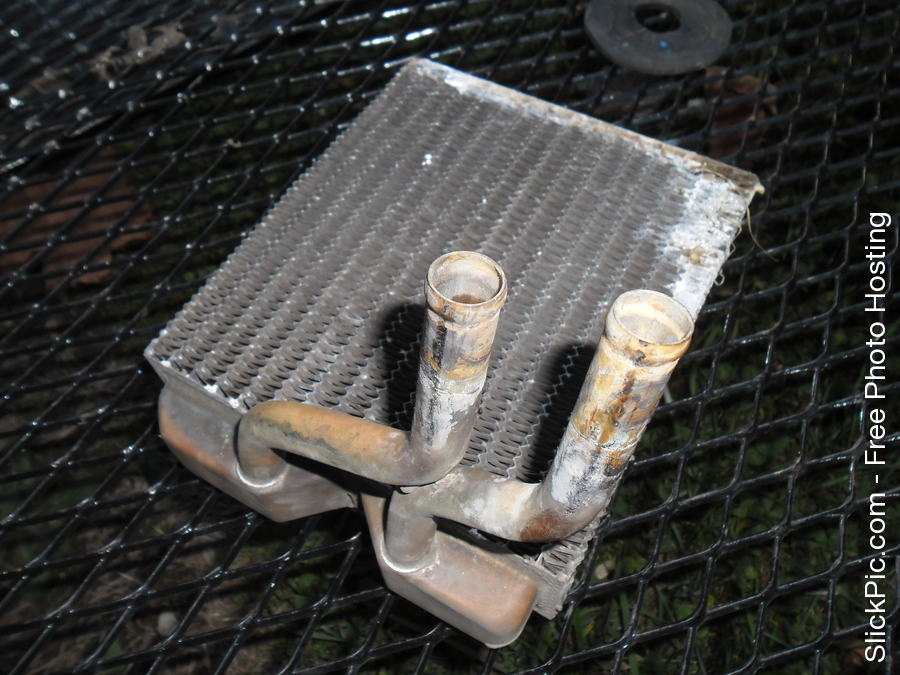
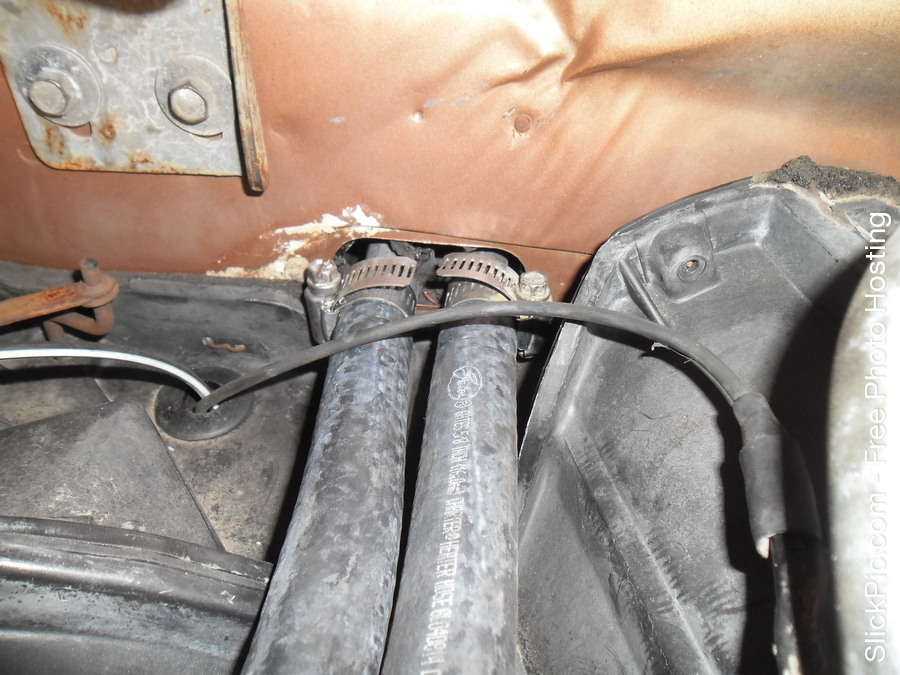
I pulled this heater core out. Which I quickly found out why the previous owner looped the hoses. This thing clearly had a leak.
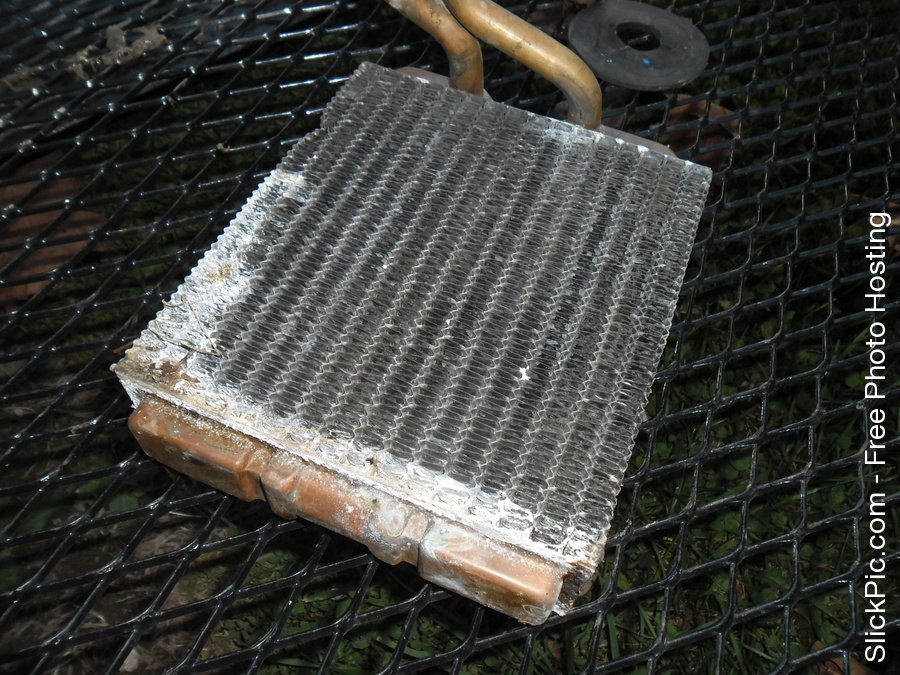
The new heater core.
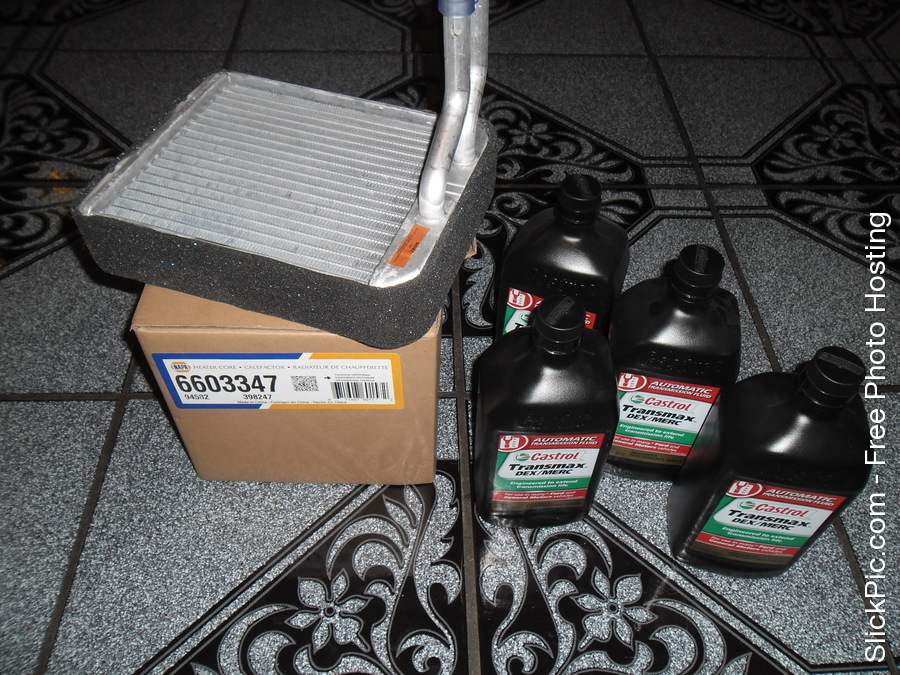
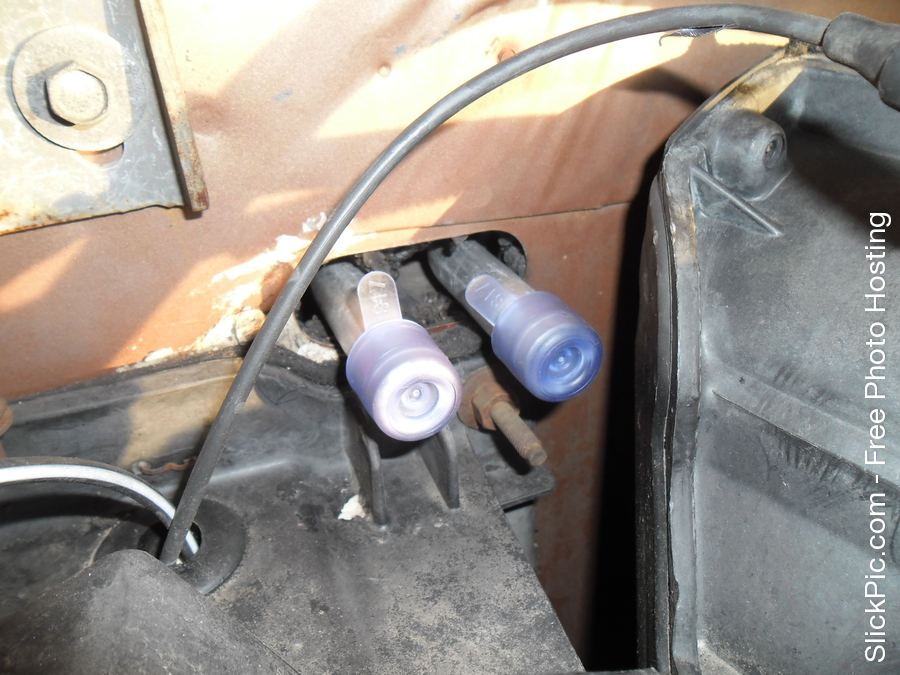
New heater core hoses.

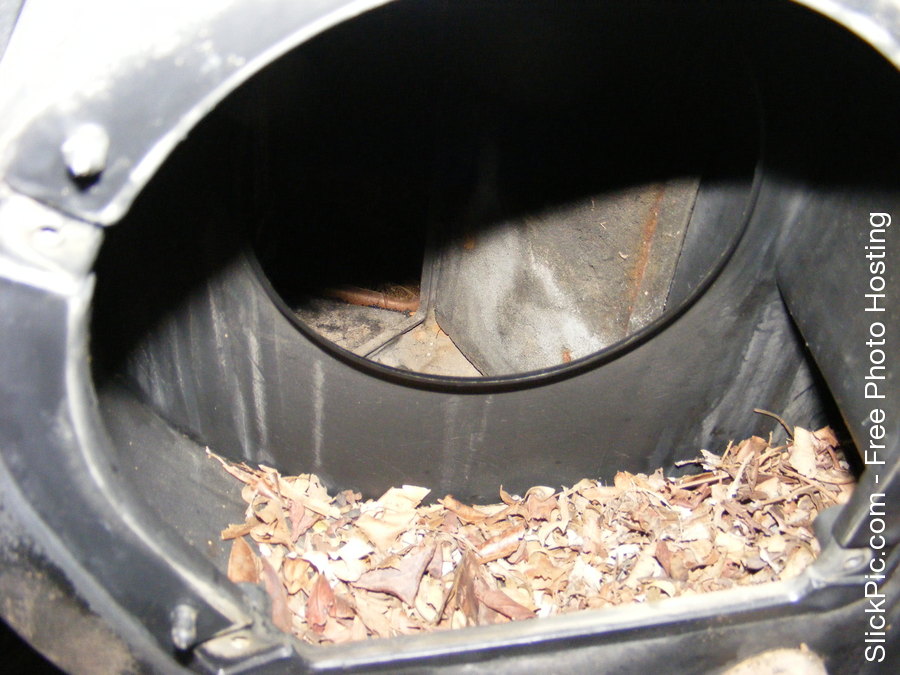
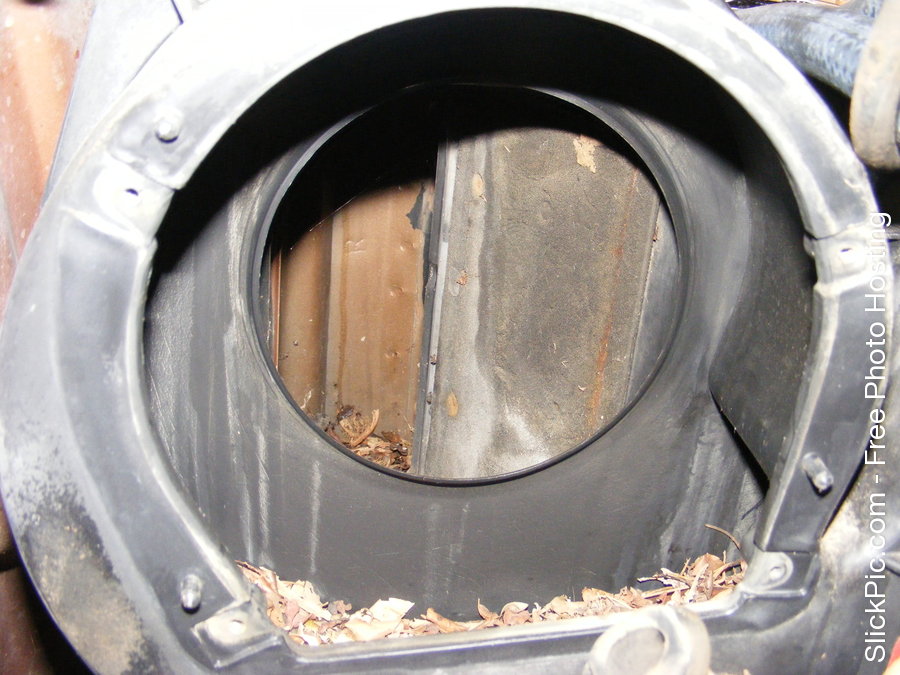
I removed the blower motor and quickly found out why the resistor was bad. it had leaves in it and the blower motor box was full of leaves.
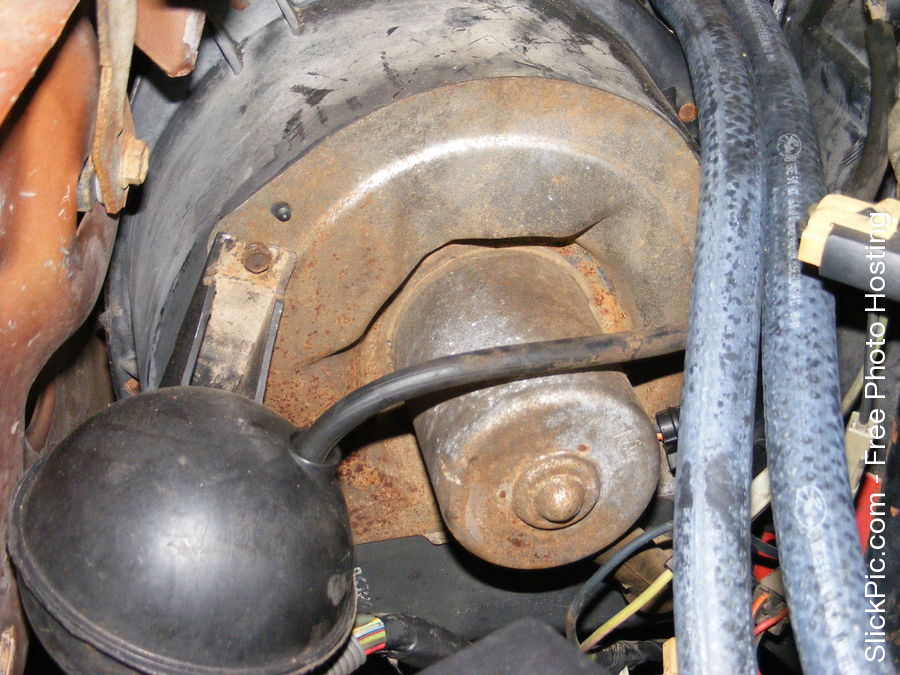
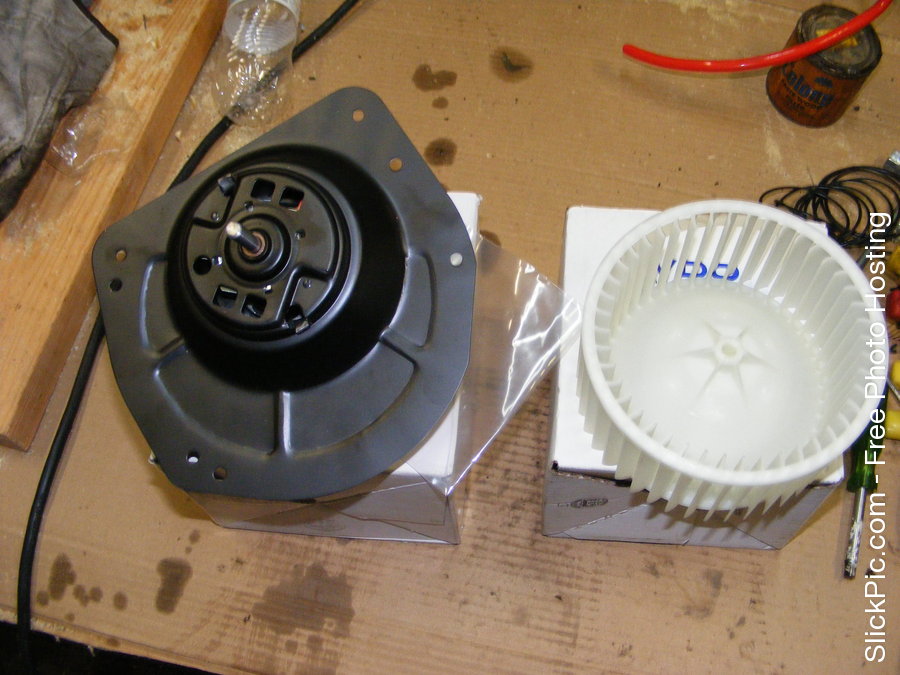
New blower motor and blower motor wheel.
I will snap a pic of the blower motor and resistor installed soon.
I pulled this heater core out. Which I quickly found out why the previous owner looped the hoses. This thing clearly had a leak.
The new heater core.
New heater core hoses.
I removed the blower motor and quickly found out why the resistor was bad. it had leaves in it and the blower motor box was full of leaves.
New blower motor and blower motor wheel.
I will snap a pic of the blower motor and resistor installed soon.
#4
01-29-2015, 01:32 PM
Logistics Pro
#5
01-29-2015, 08:15 PM


Your waterpump is missing the heater pipe extension that bolts to the front of the passenger head and clears that huge cast iron bracket.
I like the way the Fel-Pro rubber VC gaskets use the little tabs to hold themselves in place.
There is no single gasket at the exhaust head pipe flange.
Walker services this with 31512. (I have bought a lot of them)
Stainless bolts and lots of antisieze help down there.
I'm glad you got a quiet power steering pump.
I hated the puking, clacking, squealing C2's I used to have to deal with.
Congratulations on all your progress!
#6
01-30-2015, 05:59 AM

Lead Driver
#7
01-30-2015, 06:19 AM
Join Date: Sep 2014
Location: Jackson, Wyoming
Posts: 153
Likes: 0
Received 0 Likes
on
0 Posts
Unfortunately the valve covers are warped a little so I had to put more torque on the bolts than hand tight but not much. When it warms up I will probably find a set of valve covers I like. And it's nice to know I can reuse the gaskets!
Trending Topics
#8
01-30-2015, 06:51 AM
Join Date: Sep 2014
Location: Jackson, Wyoming
Posts: 153
Likes: 0
Received 0 Likes
on
0 Posts
Your waterpump is missing the heater pipe extension that bolts to the front of the passenger head and clears that huge cast iron bracket.
I like the way the Fel-Pro rubber VC gaskets use the little tabs to hold themselves in place.
There is no single gasket at the exhaust head pipe flange.
Walker services this with 31512. (I have bought a lot of them)
Stainless bolts and lots of antisieze help down there.
I'm glad you got a quiet power steering pump.
I hated the puking, clacking, squealing C2's I used to have to deal with.
Congratulations on all your progress!
I like the way the Fel-Pro rubber VC gaskets use the little tabs to hold themselves in place.
There is no single gasket at the exhaust head pipe flange.
Walker services this with 31512. (I have bought a lot of them)
Stainless bolts and lots of antisieze help down there.
I'm glad you got a quiet power steering pump.
I hated the puking, clacking, squealing C2's I used to have to deal with.
Congratulations on all your progress!
Thank you!
I noticed I was missing that piece from looking at other peoples 460's on here. It's one of those things I keep forgetting to get at the salvage yard. I was really glad to see the tabs on the valve cover gaskets. It made it so much easier than I thought it was going to be.
The exhaust on my truck is odd. The pipe running from both the manifolds joins at one flange but stays true duals. There is also a Ford oval stamped near the flange and the exhaust hasn't been modified up stream of that flange.
It's at that flange where the front section meets the rear section that I had to make a gasket for. I couldn't find it anywhere. I wish I had taken a few pics while I had the rear section removed.
My C2 pump likes to squeal the belts early of a morning even with proper belt deflection.
 But other than that it operates quieter than my last pump.
 Thank you and I have a lot more for all the other things I have done to date but not enough time to post them until maybe later today.
#9
01-31-2015, 05:17 PM
Join Date: Sep 2014
Location: Jackson, Wyoming
Posts: 153
Likes: 0
Received 0 Likes
on
0 Posts
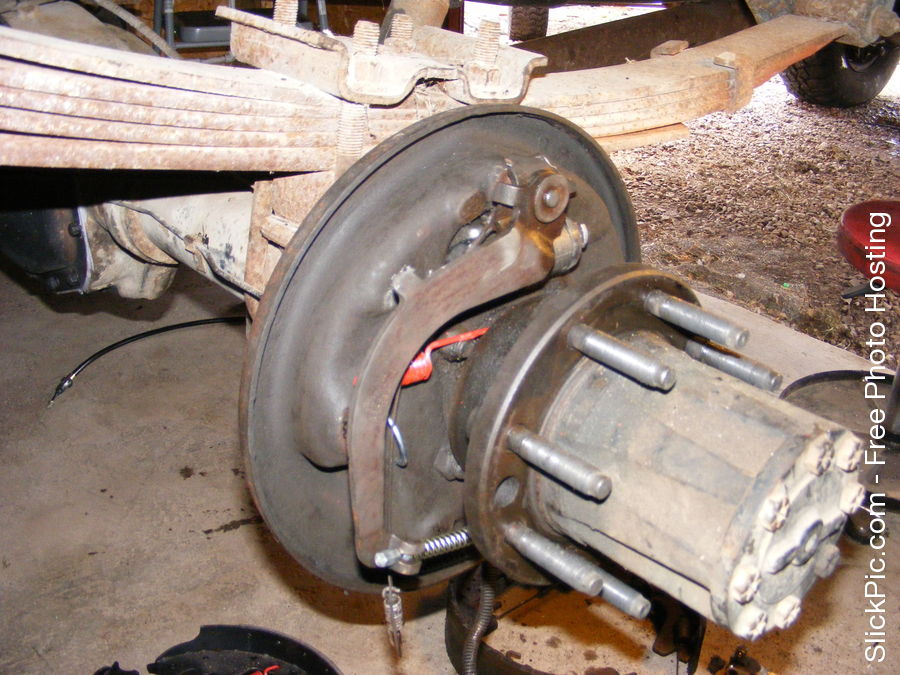
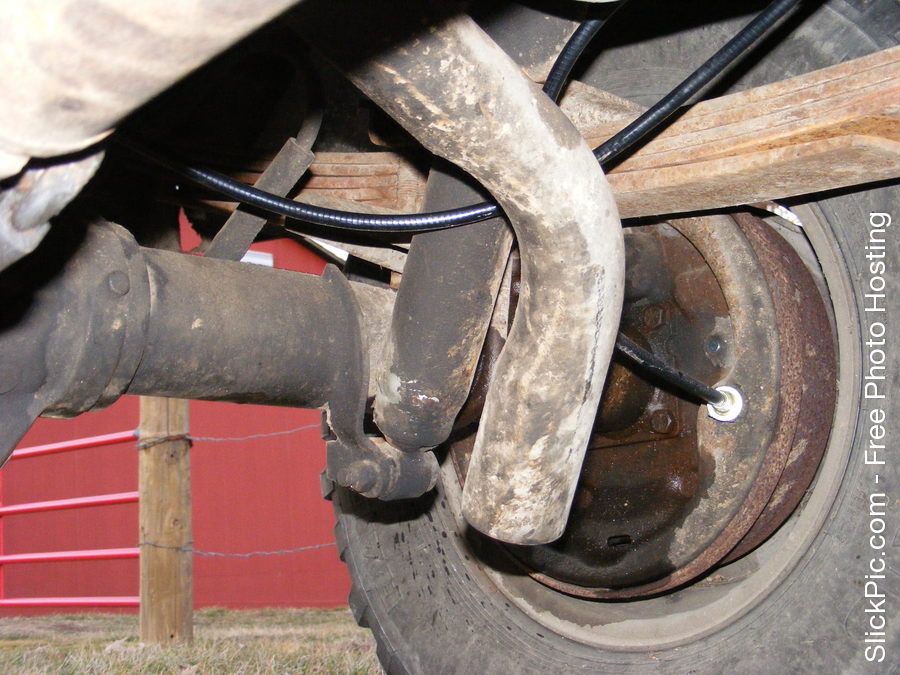
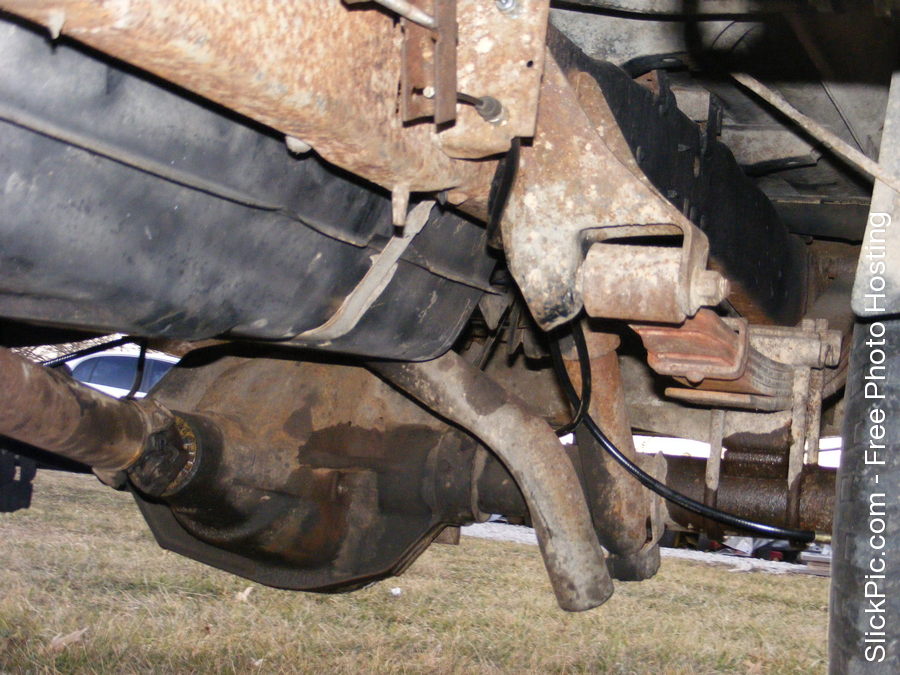
Brakes...
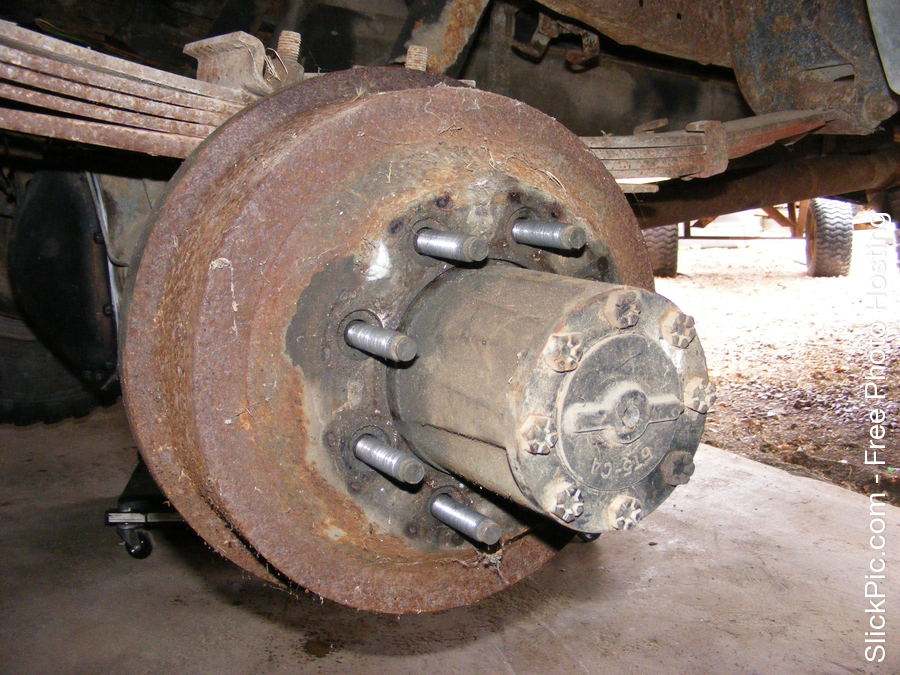
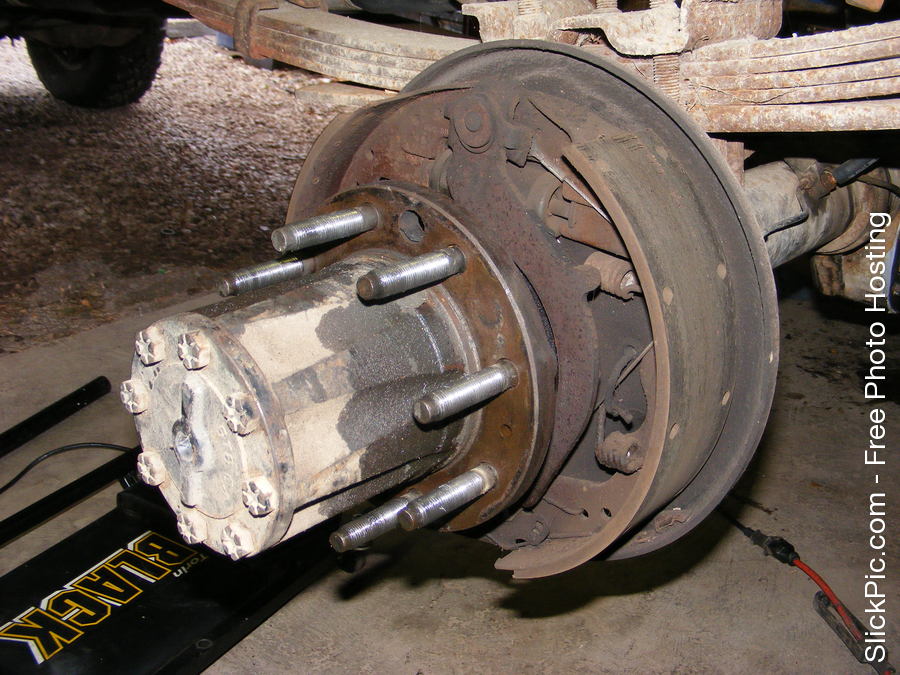
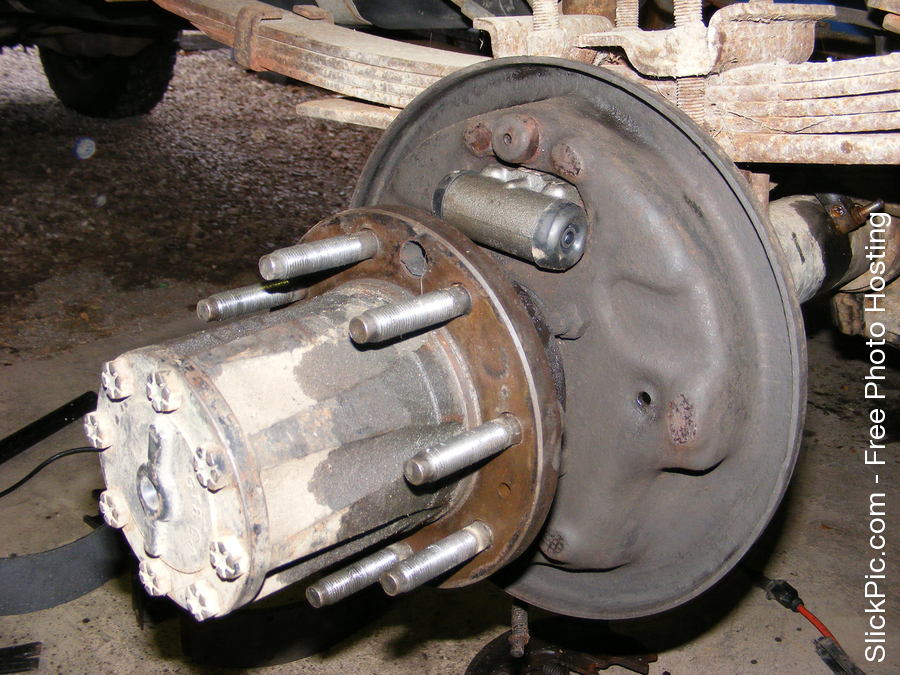
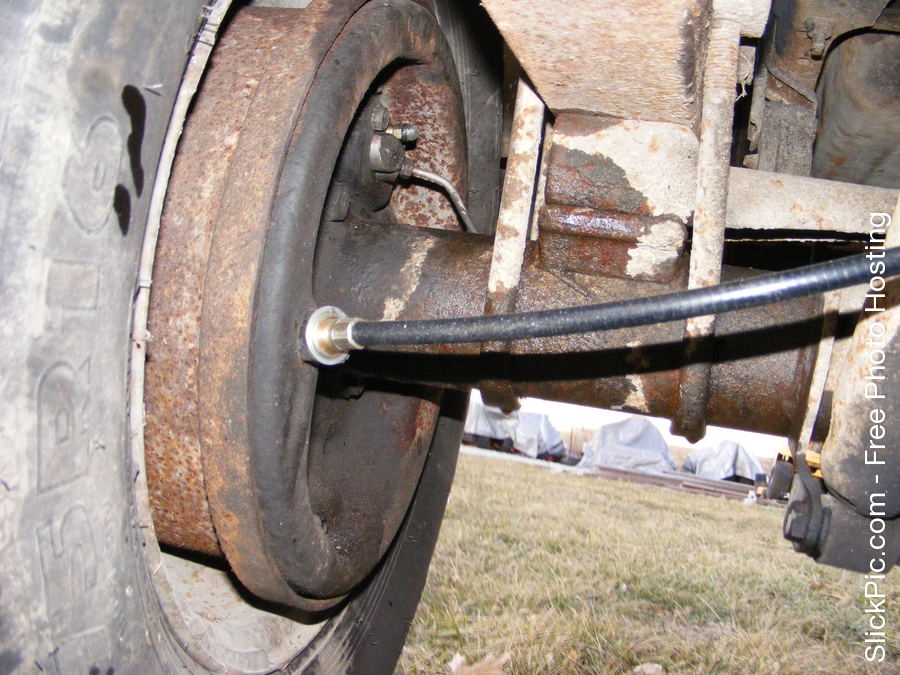
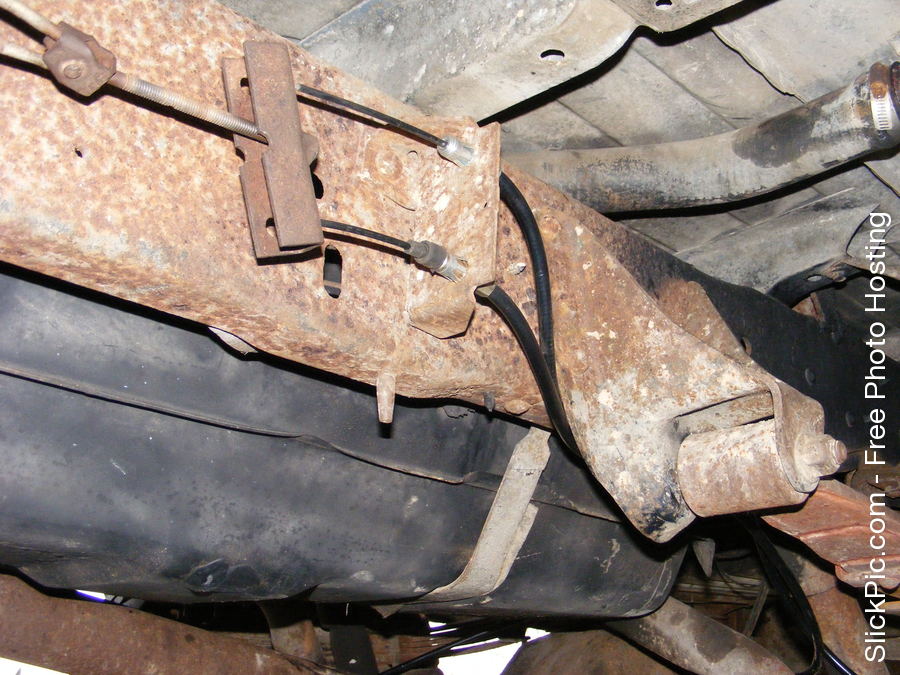
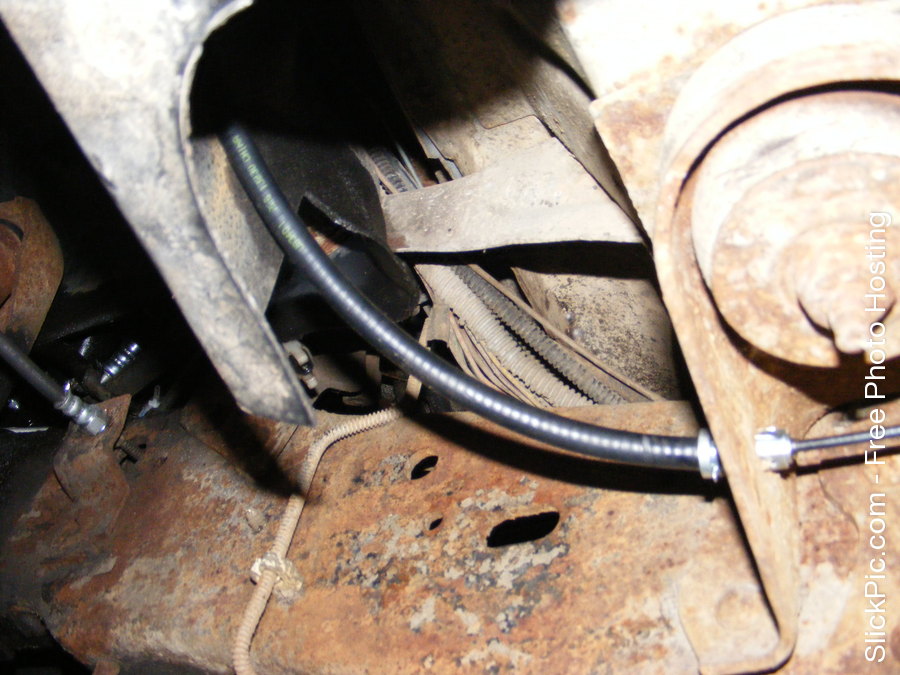
Process of doing the rear brakes. I installed new park brake cables, all three of them. New shoes, wheel cylinders and the hardware.
Passenger side had a wheel cylinder that was leaking badly. The driver side just started to leak.
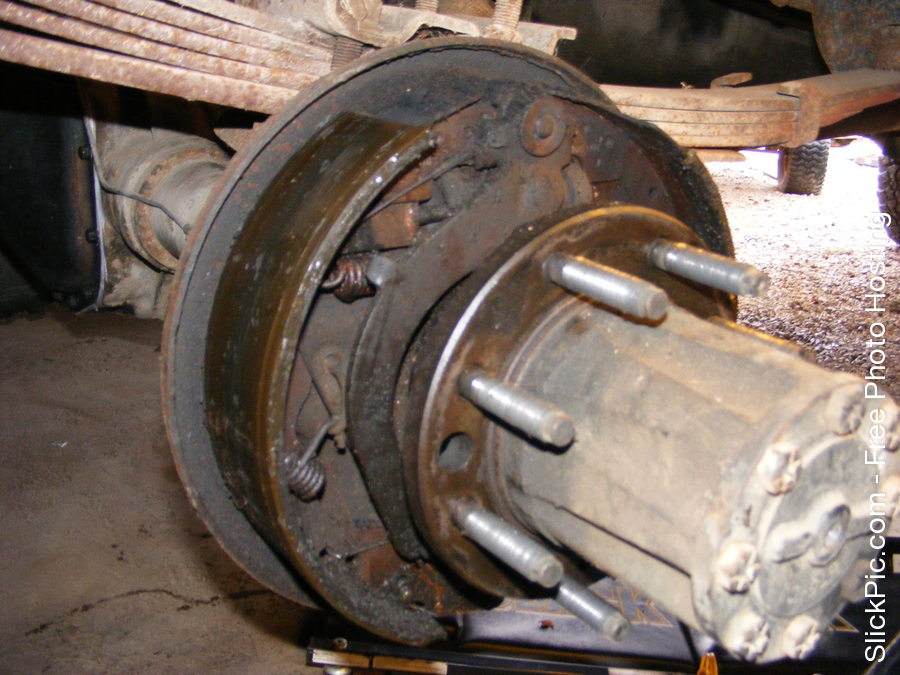
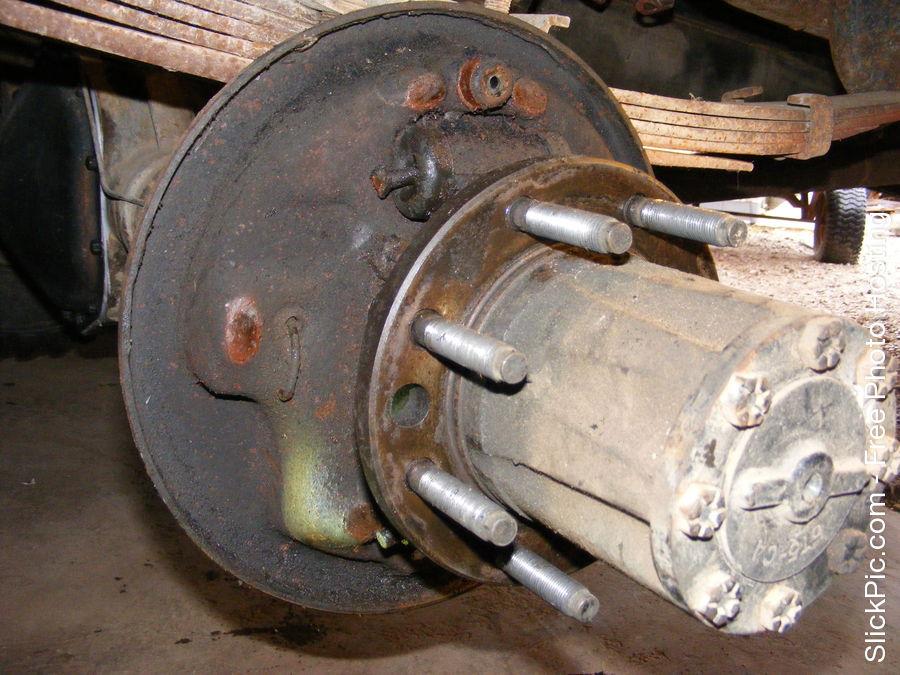
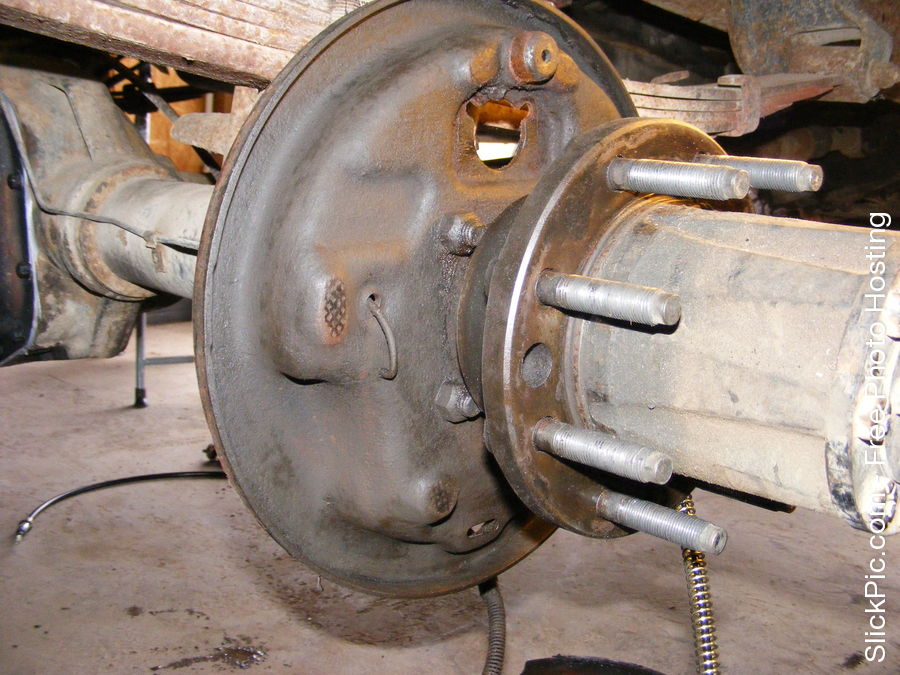
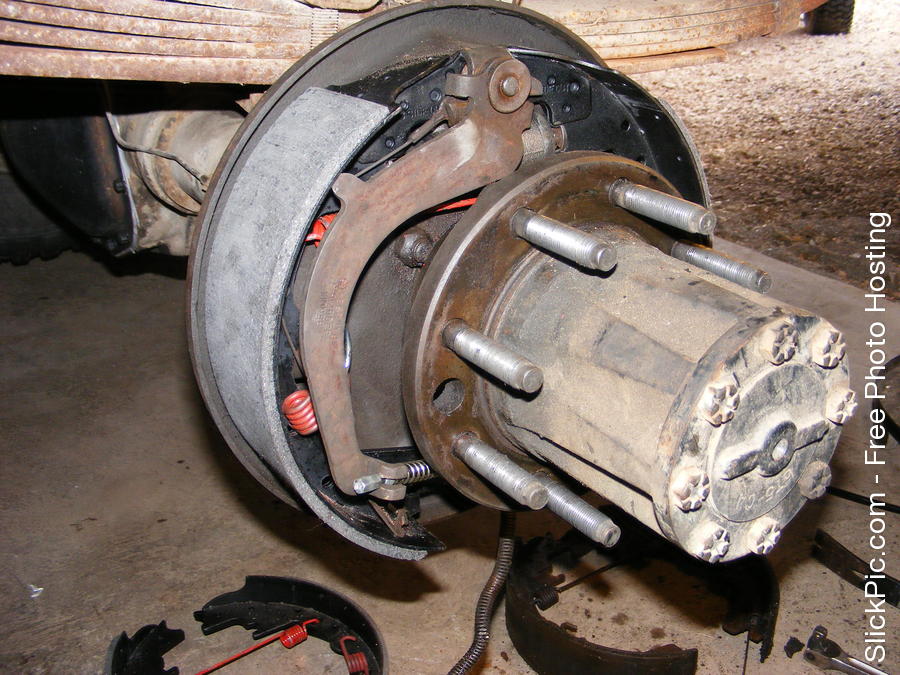
Driver side.

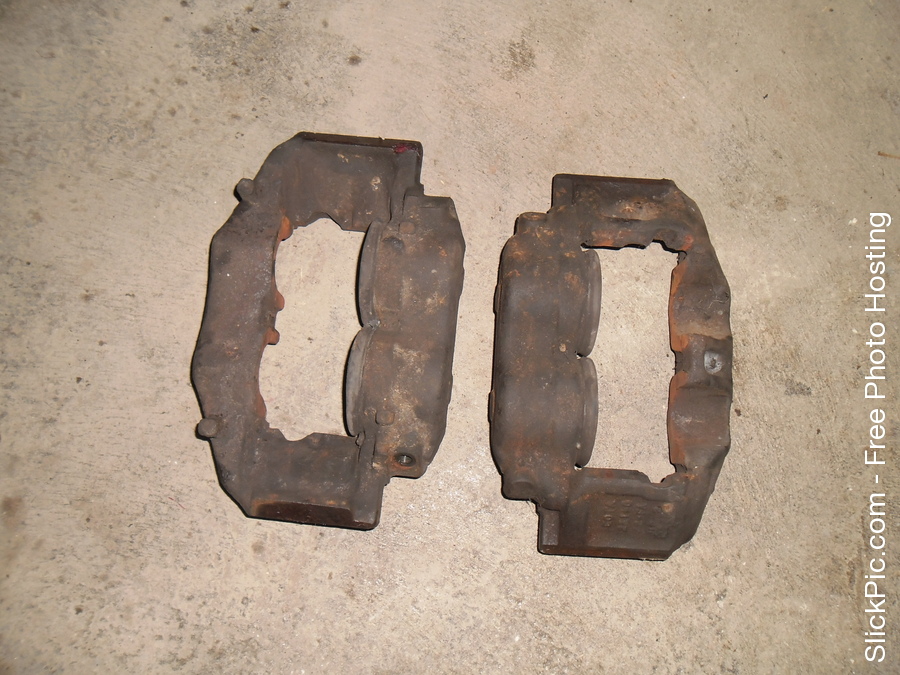
Now onto the front brakes. New calipers, pads and hoses.
I tried to get by with using the old calipers initially. But the bleeders broke off which I'm sure is no surprise to you all.
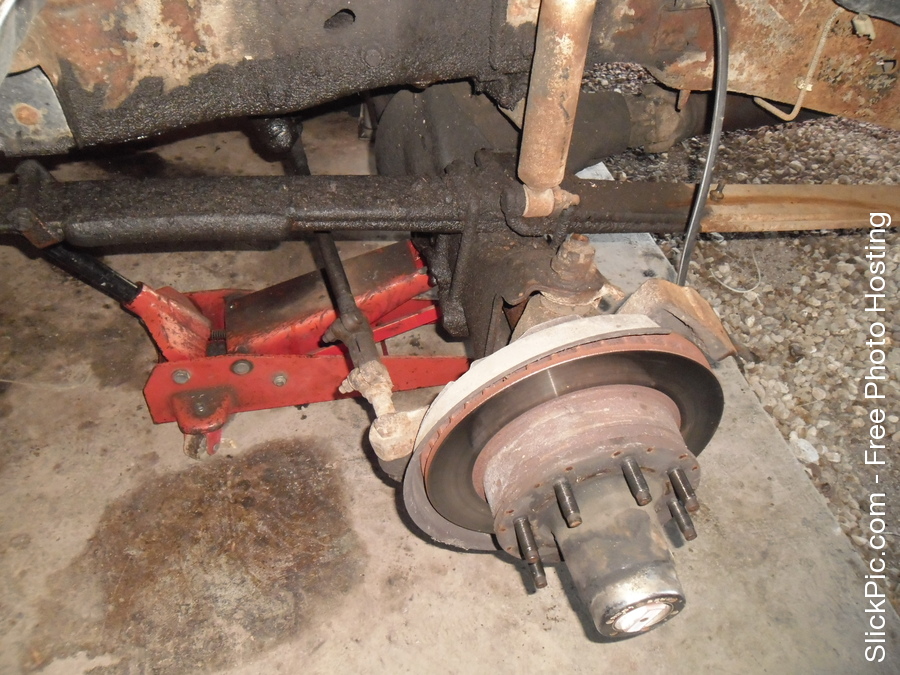
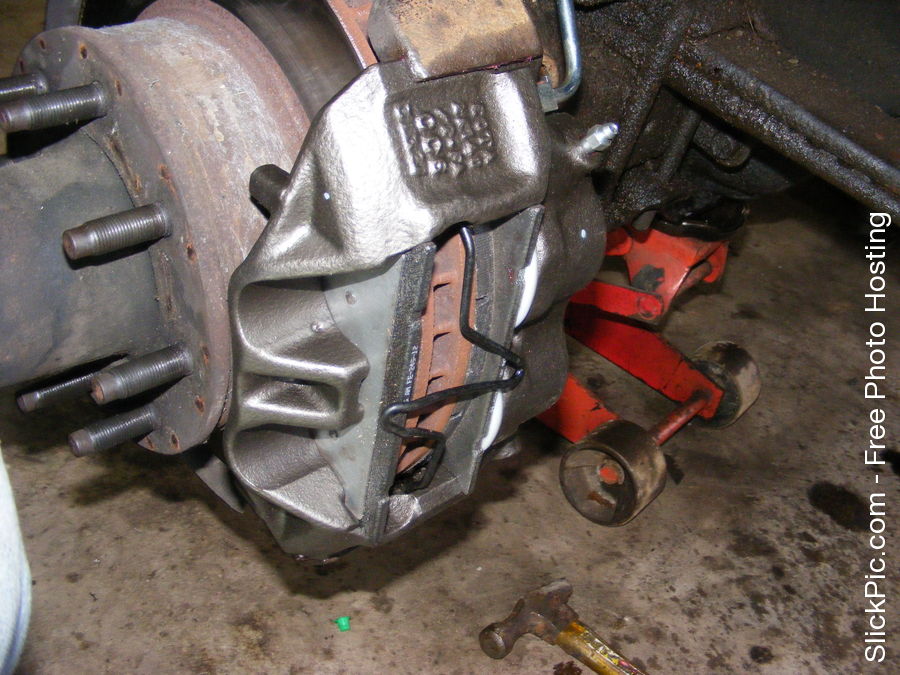
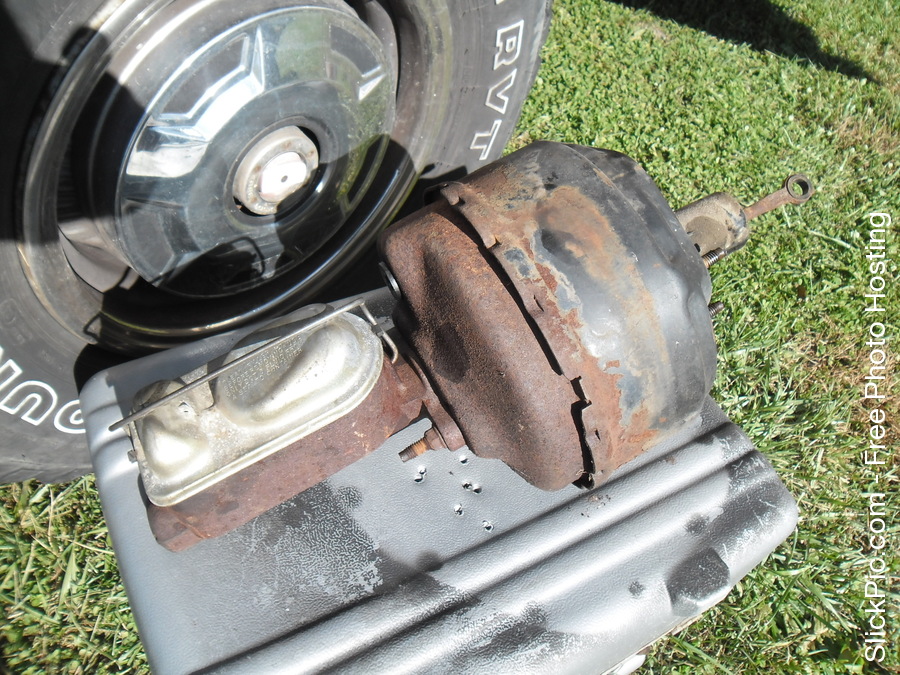
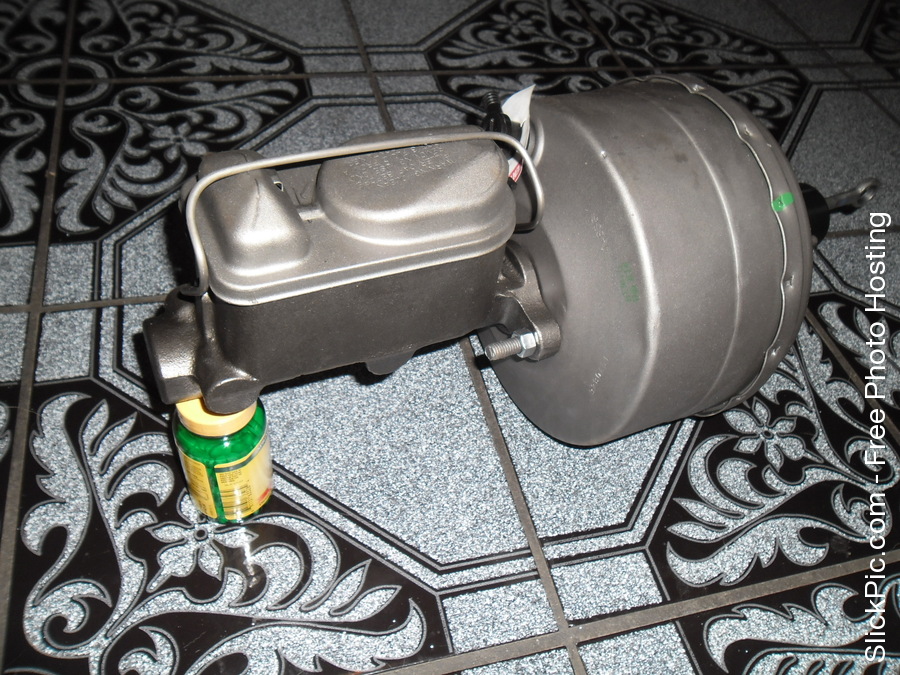
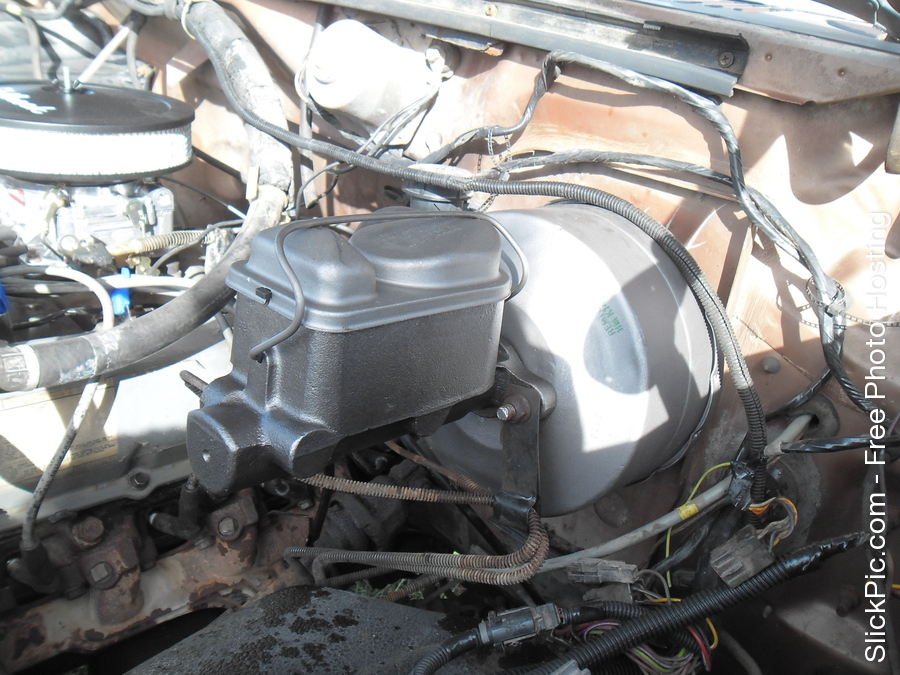
I also made it complete by replacing the master cylinder & brake booster. This thing stops nicely!
The park brake cables after installation.
Process of doing the rear brakes. I installed new park brake cables, all three of them. New shoes, wheel cylinders and the hardware.
Passenger side had a wheel cylinder that was leaking badly. The driver side just started to leak.
Driver side.
Now onto the front brakes. New calipers, pads and hoses.
I tried to get by with using the old calipers initially. But the bleeders broke off which I'm sure is no surprise to you all.
I also made it complete by replacing the master cylinder & brake booster. This thing stops nicely!
The park brake cables after installation.
#10
01-31-2015, 06:43 PM
I have the exhaust flange.
At least, I still have it on one side...
Because I was not smart enough to cut it off the muffler when I installed the giant school bus muffler I have now.
Pretty sure even the later EFI 460's use the same thing.
Anyway, that number gets you gaskets that fit, with a metal ring on the ID
Your braking system is set for another 29 years!
#11
01-31-2015, 07:52 PM
Join Date: Sep 2014
Location: Jackson, Wyoming
Posts: 153
Likes: 0
Received 0 Likes
on
0 Posts
#13
01-31-2015, 08:11 PM
Join Date: Sep 2014
Location: Jackson, Wyoming
Posts: 153
Likes: 0
Received 0 Likes
on
0 Posts
Oh ok. Well that was the confusion when I made the choice to fabricate the gasket. I'm glad I know now though!
Yeah, I kinda wanted to be able to stop this thing. Before the brake booster would hiss for as long as the brake pedal was pressed. And the rest of the brakes were pretty shot but luckily the drums and rotors were still good.
Yeah, I kinda wanted to be able to stop this thing. Before the brake booster would hiss for as long as the brake pedal was pressed. And the rest of the brakes were pretty shot but luckily the drums and rotors were still good.
#15
01-31-2015, 08:33 PM
Join Date: Sep 2014
Location: Jackson, Wyoming
Posts: 153
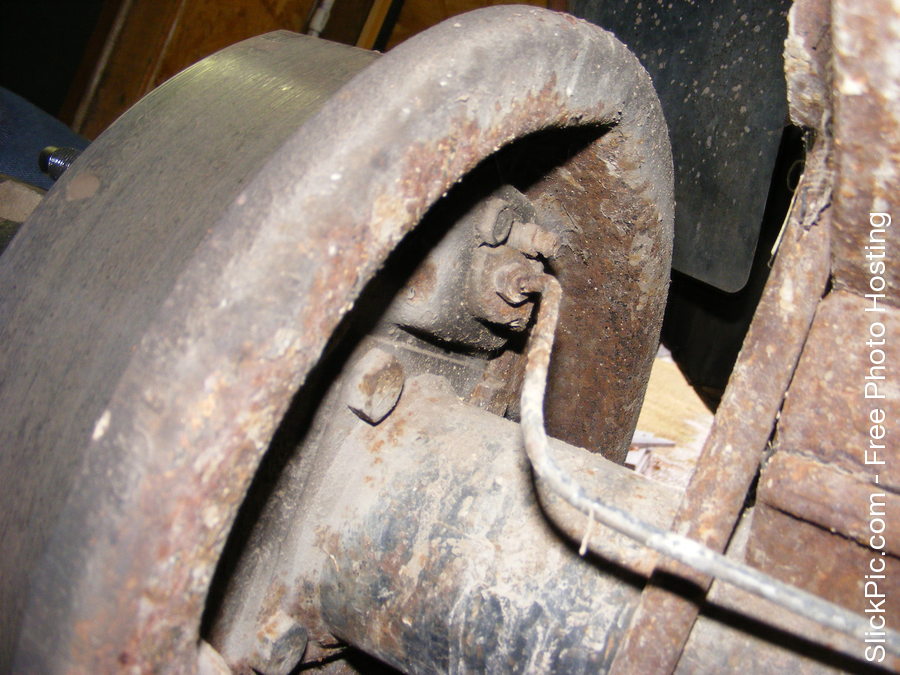
Likes: 0
Received 0 Likes
on
0 Posts
I thought I had an axle seal out at first but once I got down to the wheel cylinder I knew what the deal was. I did think I was going to have to go into the pinion on the 10.25. But luckily the yoke nut was just loose. I tightened it to 150ftlbs as I recall and luckily it doesn't leak. I read on here a bit before I messed with it.