292 Starter
#1
 01-18-2015, 09:47 PM

292 Starter
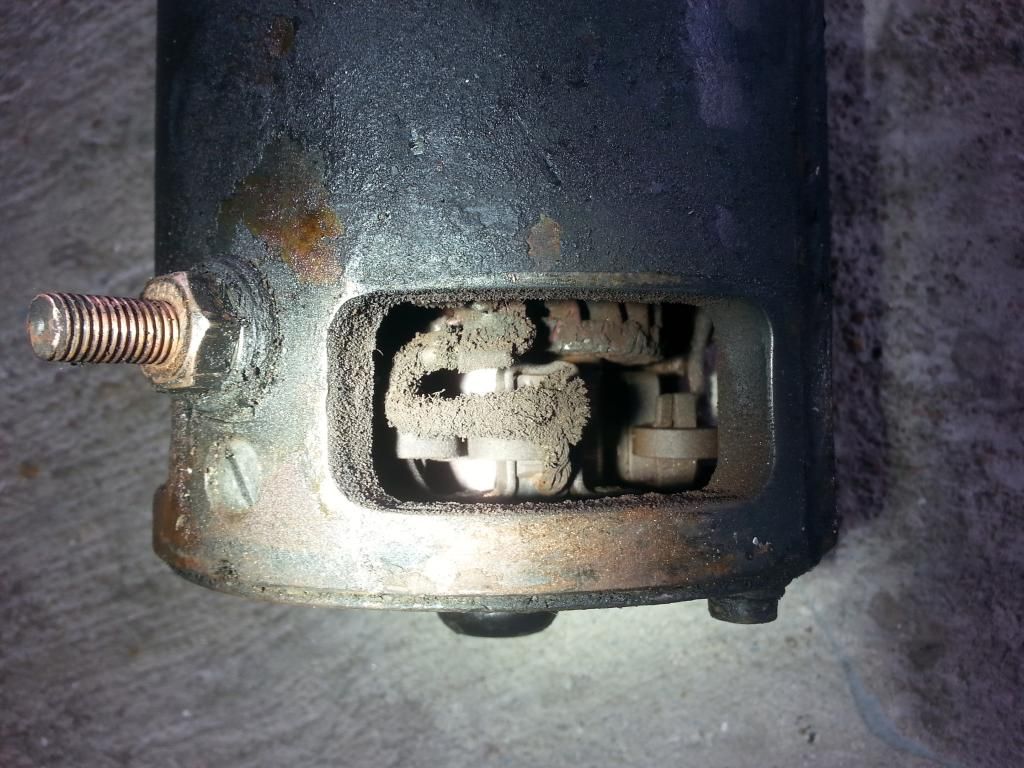
The battery stud on the starter, how does that attach internally to the starter?
I am looking at the exploded view of the starter and its hard to tell.
Mine appears to be loose after I installed new battery cable but Macs has the repair kit for the stud discontinued for the moment but I don't know if it could be reattached internally or if its supposed to be loose. The starter on my '59 Ford 641 Workmaster tractor has the same starter and that stud was not loose.
If someone can help on this I would greatly appreciate it.
#3
01-31-2015, 08:55 PM
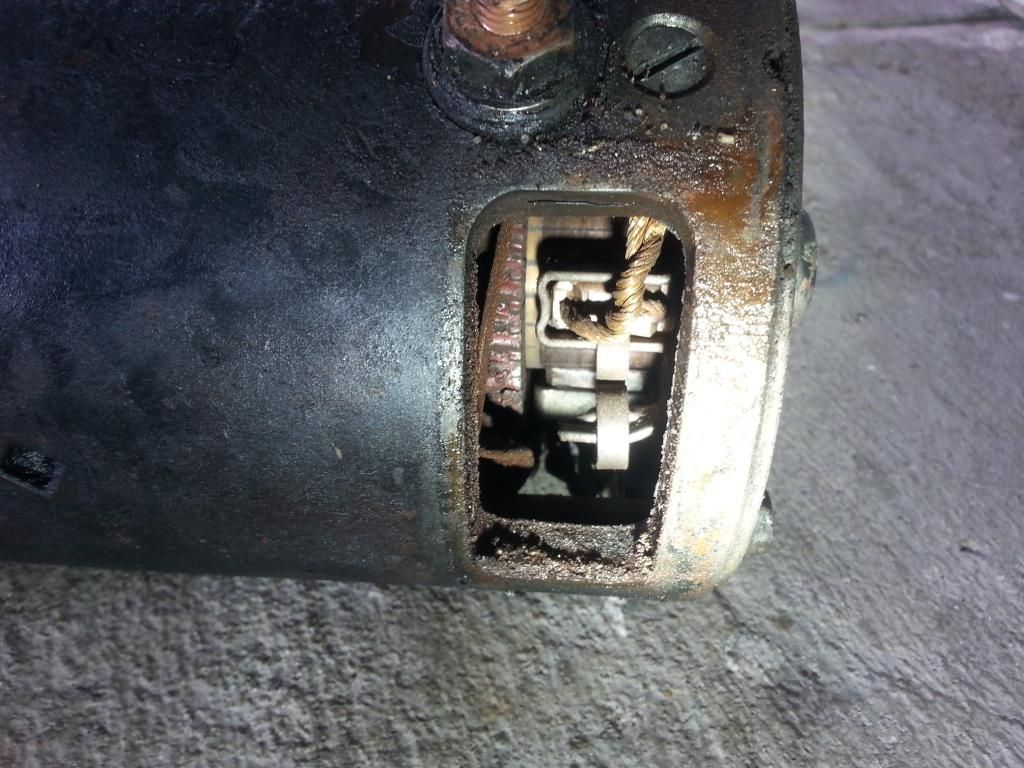
Hmm so I wonder why the stud is loose on my starter and I wonder if that could be causing the starter to draw more amps than it should resulting in a slow crank.
I snugged up the battery cable but I can swing the cable with the stud twisting.
I hope it holds off rain tomorrow long enough for me to pull the starter as I will be dropping it off at Finch's Monday during lunch to have it tested and rebuilt to oem specifications.
I snugged up the battery cable but I can swing the cable with the stud twisting.
I hope it holds off rain tomorrow long enough for me to pull the starter as I will be dropping it off at Finch's Monday during lunch to have it tested and rebuilt to oem specifications.
#4
01-31-2015, 09:12 PM
#5
01-31-2015, 09:23 PM
I am not, I bought some of the parts for the starter, new front and rear bushings, brushes, four springs. So if they cant get the stuff I will provide mine for them to rebuild. the Generator I might try doing myself and just follow the shop manual I have. The starter the thing is the bendix for me and the whole soldering of the brushes on.
#6
01-31-2015, 09:28 PM
Yep. Just do a complete rebuild and you'll be good. A commercial outfit may just install new brushes and a coat of paint. Armatures can be turned (commutator) on a lathe, with generators they have to undercut the mica insulators too. But a whole new armature is only $20 or $30. A propane torch should solder fine I'm thinking. Just do it right, do it once, and it will be like new.
#7
01-31-2015, 09:33 PM
Yep. Just do a complete rebuild and you'll be good. A commercial outfit may just install new brushes and a coat of paint. Armatures can be turned (commutator) on a lathe, with generators they have to undercut the mica insulators too. But a whole new armature is only $20 or $30. What I'm getting at is do it right, do it once.
Correct, I got a complete generator rebuild kit from Dennis, it only cost me $35 it came with a Japanese made front and rear bearing, the brushes, and an armature. the armature it came with is a NOS Ford Armature which already had the rear bearing pressed onto and I didn't pull too hard to try to remove it. Only thing on this armature is where the brushes ride there are some nicks and dings in it from shelf wear. I have been told that shouldn't cause a problem as the brushes will just ride over the tiny dings.
What I hope for is that Finch can blast the case and leave it bare so I can spray the starter with Eastwoods Underhood black and apply my decal to it.
Trending Topics
#9
02-01-2015, 01:33 PM
I got the starter off today, took a good hour almost as I never pulled one of these starters before, found out I had to turn the steering wheel slightly to the left and pull the starter down but above the draglink and it came right out.
Below is a few photos, this is a rebuilt starter I think as the bendix says "Rebuilt" stamped in ink on it, but the car has sat since Jan-Feb 1986 when the original owner passed away. the armature is covered in carbon but the brushes don't look too worn down but the armature where the brushes ride at has a bunch of scratches in it, now I don't know if this is normal but every motor Ive taken apart the brushes never really scratched the surface just polished it up.
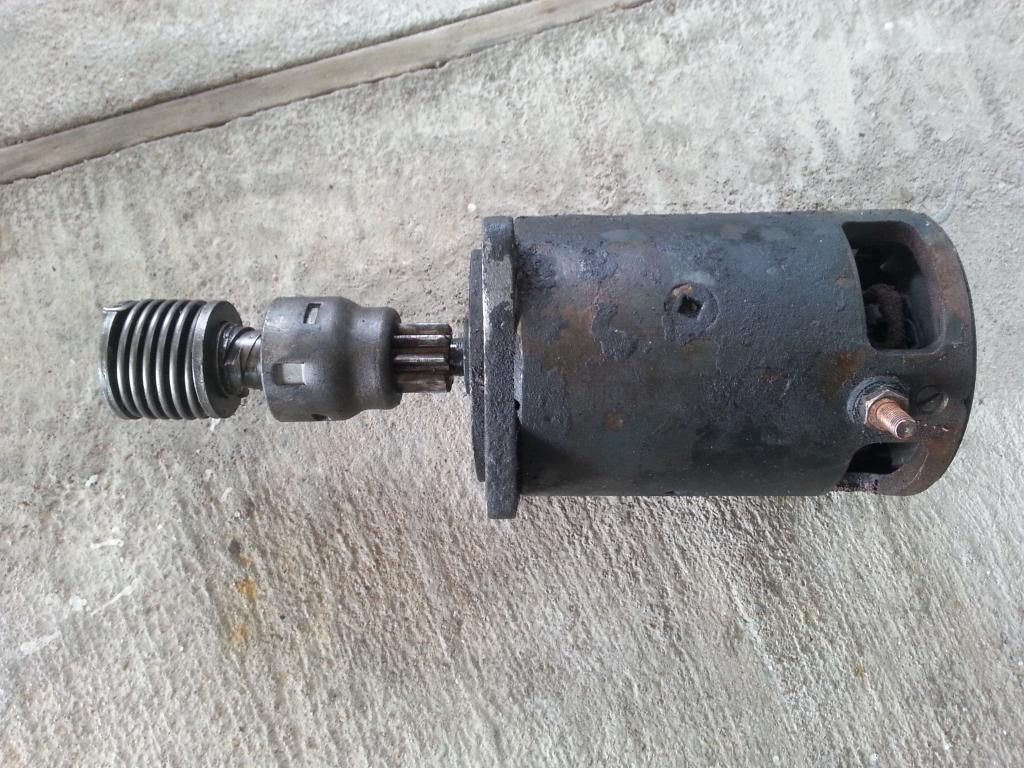
Below is a few photos, this is a rebuilt starter I think as the bendix says "Rebuilt" stamped in ink on it, but the car has sat since Jan-Feb 1986 when the original owner passed away. the armature is covered in carbon but the brushes don't look too worn down but the armature where the brushes ride at has a bunch of scratches in it, now I don't know if this is normal but every motor Ive taken apart the brushes never really scratched the surface just polished it up.


#11
02-01-2015, 08:28 PM
Correct, 292 V8. Orignal 4bbl engine but later 2bbl manifold with a 2bbl autolite carb is currently on the engine. I got the original intake and carb that came off the car that will be reinstalled once I get the engine running. I took the band off after I got it out. I didn't want to send the band with the starter to the rebuild shop on Monday so I took it off to clean it up myself and keep it here.
Only thing that was missing was the starter to bellhousing seal which I got one when I bought the starter parts. I will be installing that when the starter goes back in.
Only thing that was missing was the starter to bellhousing seal which I got one when I bought the starter parts. I will be installing that when the starter goes back in.
#13
02-02-2015, 12:21 PM
I took the starter in today, Finch tested it and came back right away and said the starter is bad that it was grinding inside and that the inside was oil soaked. Not sure if that happened from me using MMO in the cylinders when I was trying to break the engine loose and it came out of the cylinders and got on the starter.
But he told me that he has these starters custom built using 6v field coils as the 12v field coils are junk as he put it that the 6v coils have thicker coils and will spin the engine over faster being supplied with 12v compared to the stock 12v field coils for this setup. He also told me that these he gets for $50 a piece build vs building mine which would be more.
So he told me tomorrow it should be ready as they will reuse my old bendix as its an older well built one vs the Chinese replacements that you get now. He also will be taking that starter loose to oil the bushings up and give it a once over as well as swap out the small stainless steel nut for a larger brass one. Looks like I will be set, just need to clean the starter up and shoot it with some black paint and apply my starter decal. Just need to do some reading and find out if the band is supposed to be painted black or left bare metal.
#15
02-02-2015, 12:30 PM
Yep I was a little concerned about using 6v field coils on a 12v system but after thinking about it I don't see why it would matter considering our old Ford 641 Workmaster tractor is a 6v system that was converted to 12v and it works just fine using the original 6v battery cables and as far as I know 6v starter.
Thing I am not sure about right now though is if the starter was glossy black like the valve covers or was it a low gloss matte black like the underhood components should be.