ECU Capacitor Replacement Question
#61
 04-05-2015, 06:44 PM


Hi,
I am using NAPA Belden Premium Plus plug wires.
They seem high quality and long lasting.
Run your engine at night and maybe even bring a spray bottle (like windex) to create a mist.
Look for arcing.
Personally, I would change any comonent on the secondary (high tension) side that shows signs of wear.
My father was an electronics engineer doing work for NASA/Air Force and contractors such as Raytheon and Norden.
Recquisitioned components were of the highest quality.
Overstock that I was using for repairs in the '90's showed nearly 40% were not functional.
Fresh caps from Newark were all good, if not Mil/Aerospace Spec.
#62
04-05-2015, 08:00 PM


ArdWrknTrk: I just went out and looked at the wires and there was a little rubber on the surface of a spark plug wire abraded? or from arcing on one wire where it touches another. Do you have a recommendation for wires? And I am now looking up 5.8L spark plug wire routing. And OK, I will ask how do you know?
Torky2: I am not now getting and there are not any stored DTC codes. However I could have sworn that the dash light was flashing 3-4 but I was told that my EEC-IV does not flash dash two digit codes, only three digit codes. So last month I threw a part at the truck in the form of a new EGR sensor, but I need to learn to clean the EGR valve to further investigate that possibility. The miss starts at 1500 rpm. But I can make it happen at any rpm (e.g., 2500 - 3000) if I accelerate hard or pull a load up a hill. Only increasing rpm by turning OD off or downshifting will eliminate or reduce it when it is happening.
And Happy Easter to All!
But you can mess with stuff like that, see the results and how it affects your original problem, and then try figure out from that if you are one the right track or not.
That's what I did with the IAC. I made a block off gasket and took it out of the picture completely. I then rigged up a old lawnmower cable with a small chain to give me fast idle in the cold weather. And then I also had to open the butterfly up to get a good idle, and that's when I found out about the voltage window of the TPS for idle, and modified it a little bit. After all that I could tell I was not getting anywhere, and the idle system was not the problem.
I did find out the coolant temp sensor is a very important one, it won't hardly run at all without it. The way it acted it almost seemed like it was running lean. What I was going to do next before I accidentally fixed it was get the engine warm, and look of what the value of the coolant temp would be at around 190 degrees F, and substitute a resistor in place of the sensor and see what it did with that.
#63
04-05-2015, 09:31 PM
OK guys, before I probably write my Conanski Apology thread and end all the other stubs of threads which I started on the stumbling miss issue, I need to know:
1. What Spark Plug Wires do you recommend?
I have no problem buying Motorcraft if that is what I should buy.
2. Does anyone have a Spark Plug Wire Routing Diagram?
Conanski way back when told me to watch for arcing at night. (Just as ArdWrkTrk did again today.) I didn't see any. But in deference to Tork2's insistance I inspected my spark plug wires earlier today. And guess what? There is definite sign of detiorated rubber on a wire which was touching another wire before the loom separator on the driver's side. I separated the two by routing it on top of the oil fill cap. But the wire routing, even on the passenger side, appears confused to me. Anyway after rerouting that one wire the miss is reduced considerably and drivability is noticably improved. Another guy who looked at it said your wires need to be replaced not just rerouted. So, I am buying wires tomorrow morning. What should I buy? And also for the life of me I cannot find a 5.8L routing diagram. Can anyone point me to one?
Thanks for all your help.
#64
04-05-2015, 09:35 PM

#65
04-05-2015, 09:56 PM
Capacitors definitely go bad on the shelf, NOS is not your friend here. IF you go to the trouble of replacement use fresh stock, good quality. They will need "reforming" periodically to keep them serviceable sitting on the shelf. Nobody does this. This is why you need to buy new ones.
If it helps, think of capacitors as similar to a rechargeable battery. They perform best with a full charge, and not sitting discharged for long periods of time. Sometimes they leak!
In the same way, a simple visual inspection of capacitors is next to useless.
If they are visibly leaking, of course it is true they are always bad. The component may still work, even. Not for long. But the converse is not also true. Capacitors usually (mostly) fail without visible leakage. 20 years is well beyond the rated design life. If the board is controlling anything important (or expensive) sharpen your pencil and weigh the time and expense of a .40c capacitor replacement. At the very least test the originals for ESR.
#66
04-06-2015, 07:47 AM
I know he was working in R&D/refurb there around that time.
They might also come from his work at Hamar Laser.
I don't know, and unfortunately dad doesn't remember much anymore.
#68
04-06-2015, 01:55 PM
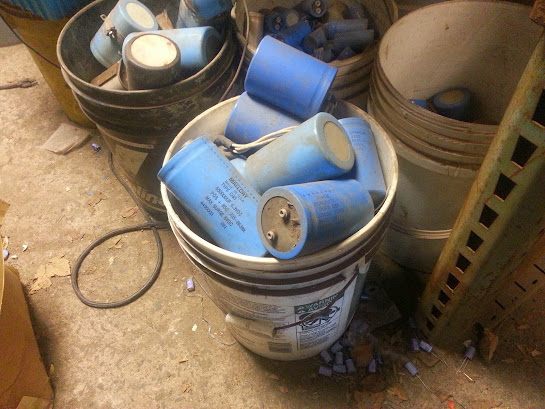
Those caps are likely removed from service in the cauterizing circuit of ultrasonic surgical scalples produced by Cooper/Pfizer.
I know he was working in R&D/refurb there around that time.
They might also come from his work at Hamar Laser.
I don't know, and unfortunately dad doesn't remember much anymore.
I know he was working in R&D/refurb there around that time.
They might also come from his work at Hamar Laser.
I don't know, and unfortunately dad doesn't remember much anymore.
#69
04-07-2015, 12:09 AM

As an example of what NOT to do, don't route #2 next to # 1, and # 3 next to #2, and #4 next to #3, all laid out real pretty and parallel so they look like highway lanes dropping off one by one at each intersection (sparkplug).
They should look like they are all changing lanes every which way in a real mish-mosh. That minimizes the length that any particular plug wire runs along any other particular plug wire.
Keep switching the players, don't let them get chummy.
#70
04-09-2015, 04:26 PM
Update: OK, guys, Conanski and others suggested that I look for possible arcing between plug wires. So at night I ran the engine and didn't see any arcing. So I replaced my EGR sensor and it didn't fix it (I don't think it needed replacement). I replaced my frame rail fuel filter (it really needed it) and my in-tank fuel pump (it needed that too). Nothing helped.
So, I pulled my PCM and opened it up to look for leaking/bulging of the three (now 20-year old) capacitors which notoriously fail in my Bronco's EEC-IV PCM and the capacitors looked good, so I didn't replace them (although I will eventually).
After early morning Easter resurrection services (man those Presbyterians can sing!) at my mother in laws (because I had nothing to do) I was looking closely at the spark plug wires and I could see and feel roughness on the wire rubber where one wire was crossing over another wire. So I separated that wire from crossing over the other by stretching it over the valve cover plastic oil fill cap.
And the miss instantly was reduced.
Since then I installed a 9mm Ford Racing Spark Plug Wire Set* (from Summit Racing for $43) and two sets of Ford Racing Wire Separators ($14 ea. for plastic! but they look and work good), and guess what?
I HAVE NO MORE MISS OR HESITATION OR STUMBLING WHATSO-FRIGGIN'- EVER !!!
Let me repeat that for emphasis:
I HAVE NO MORE MISS OR HESITATION OR STUMBLING WHATSO-FRIGGIN'- EVER !!!
Finally, if you do this make, sure that you get a copy of your SPARK PLUG WIRE ROUTING DIAGRAM and follow it!!! Because of the firing order, certain wires have to run cross-ways to others (not parallel) so follow the routing diagram to a "T" and make sure you use wire separators (generics are half the price at Pep Boys) to keep the routed wires in place.
Just two cents from a guy who assumed it was the PCM and was about to replace it.
And finally, there is no substitute for pulling your PCM if you want to know its number. And if you can, photocopy or photograph the bar code and numbers on the exterior of the PCM. Otherwise, you are just guessing.
And one more thing, I attribute this all to the Easter Morning services. So go to church.
* The 9mm Ford Racing Spark Plug Wire set is really nice. Not only are the wires bigger than stock, but each wire for a specified engine is already fabricated in the correct length for that numbered cylinder (no need for you to cut and fabricate) and check this out: EACH WIRE IS NUMBERED ALONG ITS LENGTH WITH THE NUMBER OF THE CYLINDER IT GOES TO !!! (Even I couldn't screw this up.)
Ford Racing Spark Plug Wire Sets M-12259-C301 9MM wires
http://www.summitracing.com/parts/fm...c301/overview/
Proform Ford Racing Licensed Spark Plug Wire Dividers 302-637
http://www.summitracing.com/parts/pro-302-637/overview/
MSD Spark Guard Dielectric Grease 8804 (didn't end up using it, the boots has a light grease already.)
#71
09-17-2015, 01:51 PM
Hey comtb, Franklin2, Tedster9,and ArdWrknTrk: Hope you all have been doing well. If you electrical gurus get a chance, would you take a look at my recent posts in the following thread?
https://www.ford-trucks.com/forums/1...de-34-a-2.html
Bottom line is that the vehicle starts easily with the SPOUT jumper removed.
So does this mean what I think it means?
https://www.ford-trucks.com/forums/1...de-34-a-2.html
Bottom line is that the vehicle starts easily with the SPOUT jumper removed.
So does this mean what I think it means?
#72
09-17-2015, 05:00 PM
Hey comtb, Franklin2, Tedster9,and ArdWrknTrk:
https://www.ford-trucks.com/forums/1...de-34-a-2.html
Bottom line is that the vehicle starts easily with the SPOUT jumper removed.
So does this mean what I think it means?
https://www.ford-trucks.com/forums/1...de-34-a-2.html
Bottom line is that the vehicle starts easily with the SPOUT jumper removed.
So does this mean what I think it means?
#73
09-17-2015, 05:26 PM
c-o-m-p-u-t-e-r
c-a-p-a-c-i-t-o-r-s
Dang, I have had those capacitors sitting on the case of my desktop computer since we talked about them earlier in the year. You guys don't get how bad at soldering I am. So I need suggestions for a pinpoint quick heat, conductor type or air/heat type of iron/gun to do this right. I make up for a lack of skill by using good tools.
I was dissuaded from buying the Chinese made combination SMT / air heat soldering station which I had thought about buying earlier by a Chinese guy on the forum.thinkpads.com because he said that combination tools are always weaker than a stand alone tool.
So what should I get to install these capacitors?
#74
09-17-2015, 05:33 PM
They are discrete components with axial leads.
Just use any 25-40W soldering iron and be quick about it.
Weller and Ungar *were* good brands.
These are not SMD'S, you are not going to do it with hot air nor do you need any kind of 'station'
If you can't do it just bring the board to a TV repair shop or something.
Just use any 25-40W soldering iron and be quick about it.
Weller and Ungar *were* good brands.
These are not SMD'S, you are not going to do it with hot air nor do you need any kind of 'station'
If you can't do it just bring the board to a TV repair shop or something.