When you click on links to various merchants on this site and make a purchase, this can result in this site earning a commission. Affiliate programs and affiliations include, but are not limited to, the eBay Partner Network.
Yeah, I had several of the same problems Victor. I took my pulley to a shop that rebuilds alternators and electric things and they had one that worked. You can also go to a decent parts store and have them fish around for a pulley that will meet your needs. I took a couple of pictures of what I have going on mine. I don't think I have the original water pump (someone can let me know) so yours might be slightly different. I ended up having to use washers etc for spacers to make everything match up. Take and look
I ended up getting a different alt altogether because of the problems I had mentioned in my initial thread.
I believe this is the size belt. If I remember right the 25 or 30 indicates the length. I took a piece of rope to measure around the pulleys to get a ballpark number. Mine ended up being right in between 2 sizes...
But before I can worry more about wiring the truck I am struggling with my pulley/bracket problem. So the 5/8 pulley that came with the kit did not fit the belt. I had to order the 3/4" pulley to work with my current belt. Now the pulley arrived today but its a different diameter than the previous one which would have worked perfect with my current belt (3 1/16" wide but 5/8") new pulley is (2 7/16" in diameter 3/4"). Now the belt is to big to work with the 3/4" pulley.
sere0501: You used the same kit as I did, did you have to buy a new belt and if so where did you purchase it and what size did you go with.
I am really finding this kit more complicated than advertised. Getting frustrated!
I may need to modify the bracket even more!!
Victor
Such is the lot of a old vehicle enthusiast. Expect complications, rejoice on the rare occasions if/when everything works/fits the first go around.
I've been keeping up with this thread to hopefully gets some good tips. I am about to do a 12V conversion on my 51' F6, parts should be delivered at the end of the week. I ordered a conversion kit from Vintage Auto Garage. I'm not too electrical savvy, but it seemed to have just about everything I need. Description off website is below. I measured my belt and ordered the 3/4" alternator pulley. I also ordered a Pertronix Ignitor to eliminate the points. My truck has the 254 ci Flathead in it. Hopefully I'm not about to open a Pandora's box with this project.
"Included in conversion kit. 12 volt 63 amp or optional 100 amp alternator with 5/8" pulley, flathead V8 bracket that mounts the alternator in the same position as the original generator. Ignition Coil, Headlight Relay, Horn Relay, Oil Gas Temp Gauge Regulator (allows use of original 6v gauge sending units), Start Solenoid, DA plug and 10 AWG alternator to battery connection wire. Set of Instructions.
I purchased the same kit except its for a Flathead 6 and I bought the 100 AMP Alternator. I will continue to update this thread as I progress. I wish I could work on it everyday but I have a full time job, 7 year old daughter and a small dog. On top of that I try to buy and sell as many antiques as I can to fund my sickness: fixing my old truck!!!
I've been keeping up with this thread to hopefully gets some good tips. I am about to do a 12V conversion on my 51' F6, parts should be delivered at the end of the week. I ordered a conversion kit from Vintage Auto Garage. I'm not too electrical savvy, but it seemed to have just about everything I need. Description off website is below. I measured my belt and ordered the 3/4" alternator pulley. I also ordered a Pertronix Ignitor to eliminate the points. My truck has the 254 ci Flathead in it. Hopefully I'm not about to open a Pandora's box with this project.
"Included in conversion kit. 12 volt 63 amp or optional 100 amp alternator with 5/8" pulley, flathead V8 bracket that mounts the alternator in the same position as the original generator. Ignition Coil, Headlight Relay, Horn Relay, Oil Gas Temp Gauge Regulator (allows use of original 6v gauge sending units), Start Solenoid, DA plug and 10 AWG alternator to battery connection wire. Set of Instructions.
"
It's not as bad as it seems, mainly because of this site. I would still be scratching my head if it wasn't for this forum. These guys are great! If you run into issues just ask some questions. Follow along here, and the thread I mentioned before since we all have the same kit (however the process is the same either way). There's a few other threads as well that will help if you search enough. Good luck to the both of you, and keep us up to date.
This pic has me confused. Is the cable coming from the right coming from a bolt on the engine block or BH, or the battery? The ground from the battery should go to the block, and be a good sized cable. From there, 12 gauge wires to the frame and cab would be adequate (for 12v). The starter is the only big load.
The cable coming from the right is a cable that ties in with the ground located on the block.
My basic set up is: 12 volt negative ground battery post cable to the block, from the block (same bolt ) cable goes down to the frame, from the frame to the cab.
All 1 GA cable! The guy at Napa said all I needed was 4 GA cable since that was the standard for 12 volts. I said I have a little money to burn so lets go big.
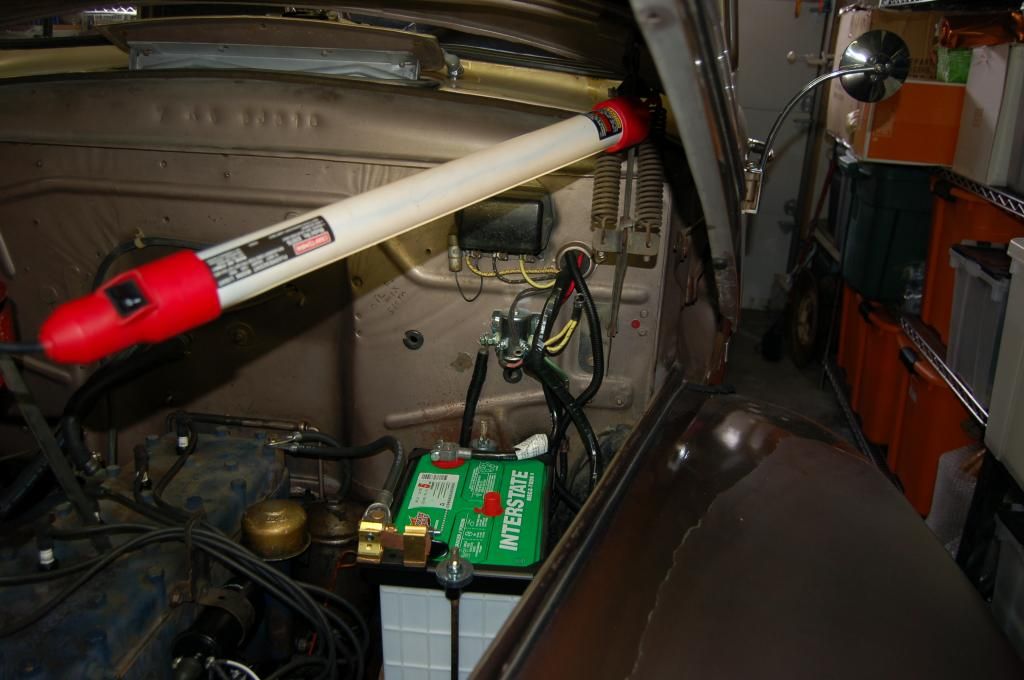
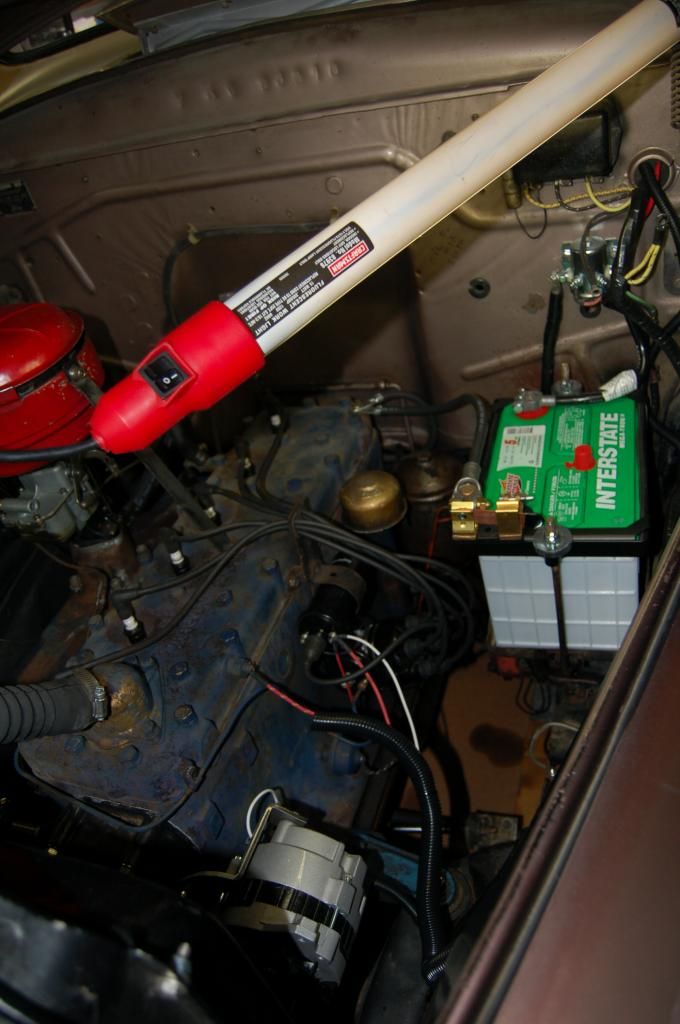
Well after several weekends and hours I finally completed wiering most of the main harness, mounted the alternator, installed the rebuilt dizzy, new battery, and breakers.
I love the way the truck cranks, boy its so much faster/stronger. My only problem is it WILL NOT START!!!!!! I am freakin FRUSTRATED! I got spark, gas just no start. All I get is a back fire once in a while out the carb! I am 1000% sure its all wired correctly.
Man I guess I am just going to have to tow it to a shop and hope for the best! I just hope its not something major with the motor. (The rest I just beyond my abilities) Here is a couple of pics of what I have accomplished!
Ignore the Volt Reg since I am not using it. The harness I purchased with a copy of the original, I thought I would just hook up the wires to it instead of taping them back!
Vegas, I hate to say this, as I've done it too, but check if your plugs are connected in the right order, or the distributor is 180 out on the timing. I've done both and it seems like it should work, but confounds the best of us.
 01-06-2015, 10:13 PM