1953 F100 (R)
#31
 02-20-2015, 03:00 PM

Join Date: Nov 2014
Location: Netherlands
Posts: 55
Likes: 0
Received 0 Likes
on
0 Posts
#32
02-20-2015, 10:04 PM
Posting Guru
Join Date: Dec 2008
Location: Waleska, GA
Posts: 2,352
Likes: 0
Received 0 Likes
on
0 Posts
#33
02-21-2015, 08:33 AM
Fleet Mechanic
#34
03-27-2015, 06:25 PM
Join Date: Nov 2014
Location: Netherlands
Posts: 55
Likes: 0
Received 0 Likes
on
0 Posts
Haven't told u guys about my tank clean project Saw and read some things about electrolysis. So I searched further and decided that I was going to give it a shot:
Hooked up the negative to the tank and positive to the bar in the water/soda solution, and let the proces work for about 24 hours. After 1 day results!:

After the first day, stil alot of rust in it but already some spots began to get clean.


Was thinking how it can be done faster, cause HE! were people and we want things done faster. Asked my boss and he suggested the battery charger from the workshop, I grabbed it and put it together again with fresh water and a little more soda (2,2 kg) made some new anodes (iron bars) and switched it all on. Average of 3 amp :
:

After 2 hours:

About 1 bar 0,75 day:

Last bar:

My mouth fell open when I emptied the tank:

But still I had some tricks in my sleeve to do to make it more clean. First I put it in a cementturner (don't know the word) and put some small rocks with some water in it. Made it water tight (as best as I could) and let it turn for about 45 min:

The I washed it with tank cleaner and deruster, and it came out beautifull!:


But the tank infront of a heater to make sure it was dry, in that time (60min) the tank began to rust again so I made the tank coat mixer quick and put it in and turned it for about 25-35 min, My arm were so tired but I wasn't able to see the tank until it was fully dryed (6 days).
Result!:

Slapped some paint on it, not smooth or something just to let it shine again:


Fuel tank READY! CHECK.
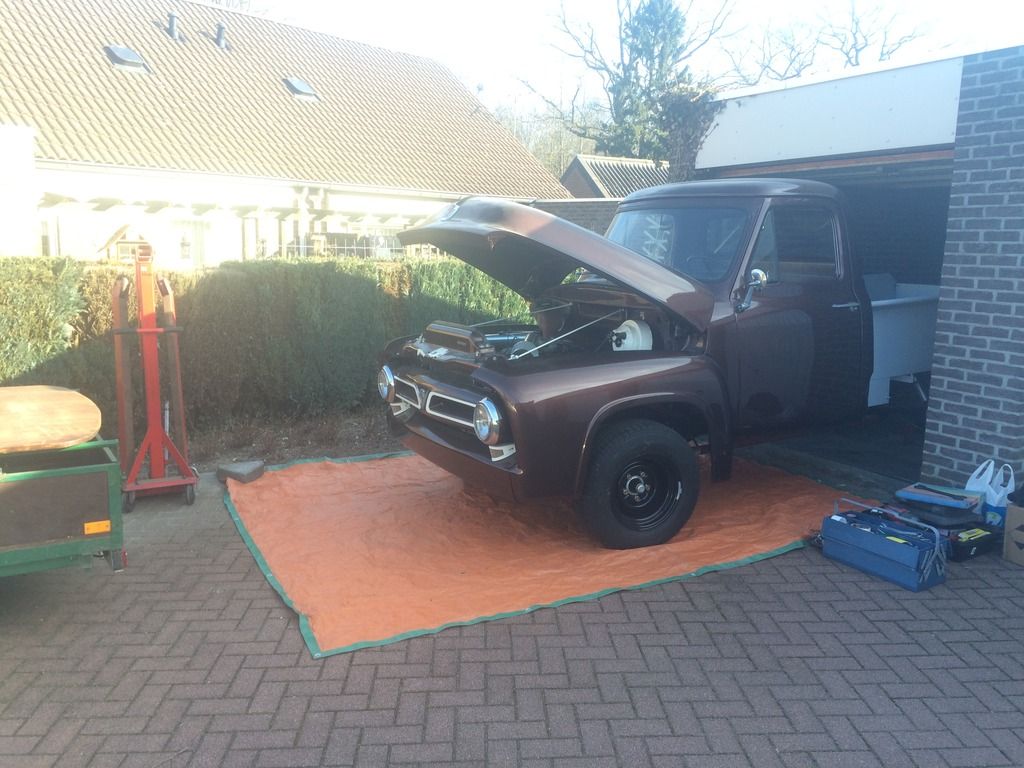
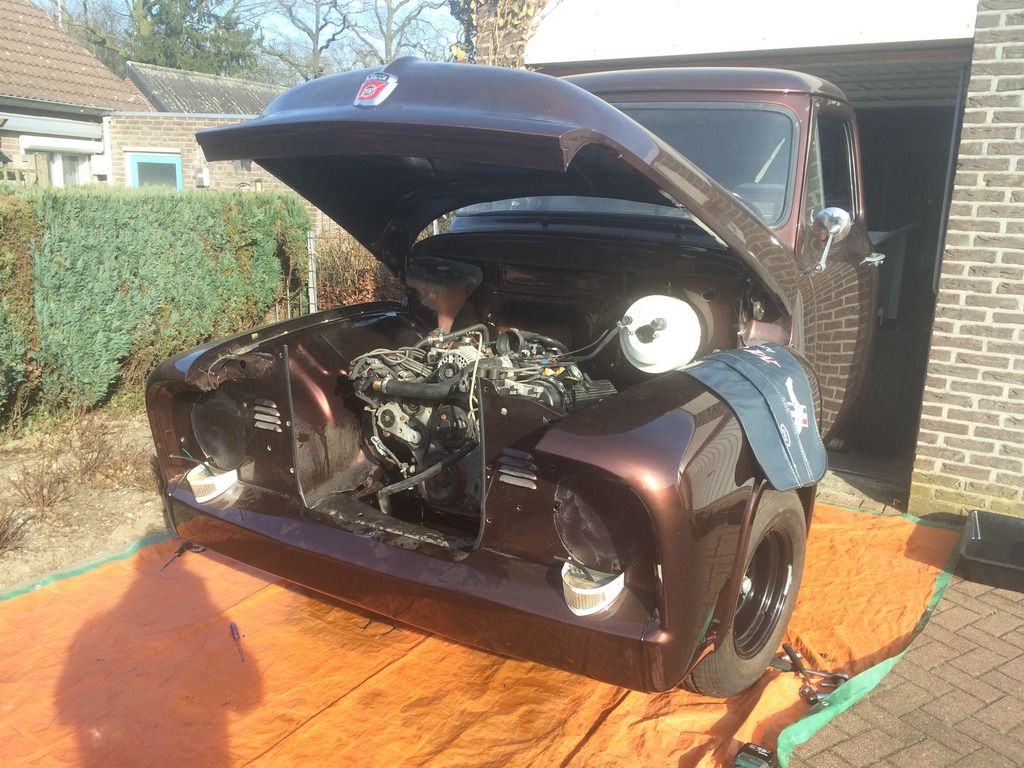
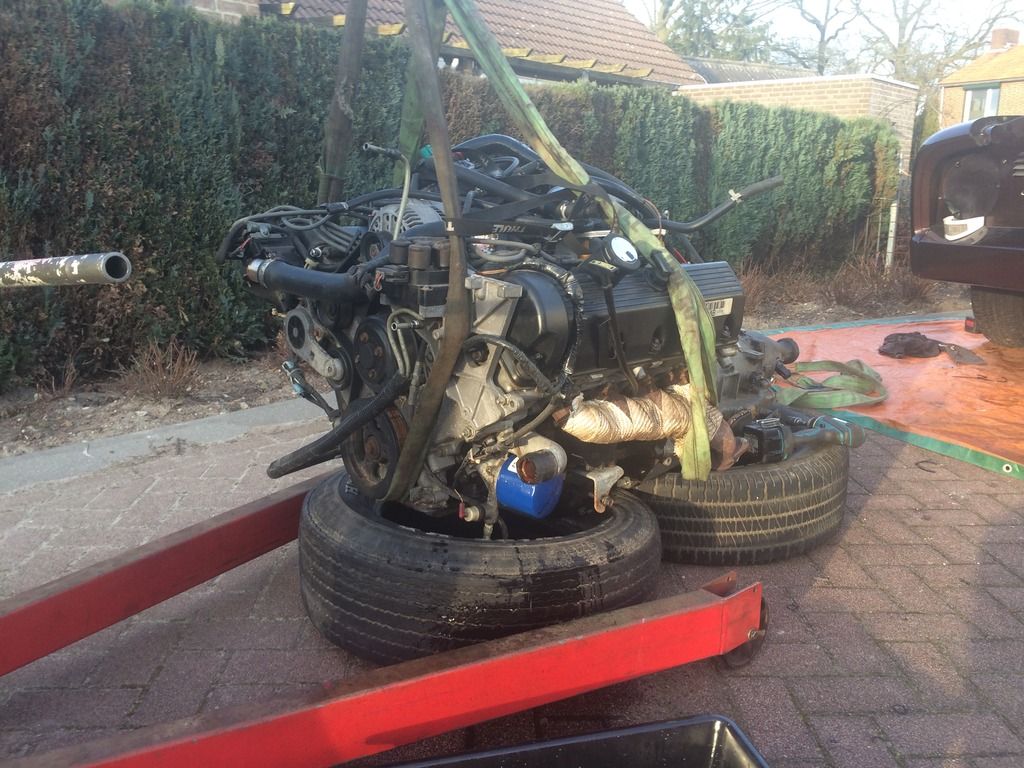
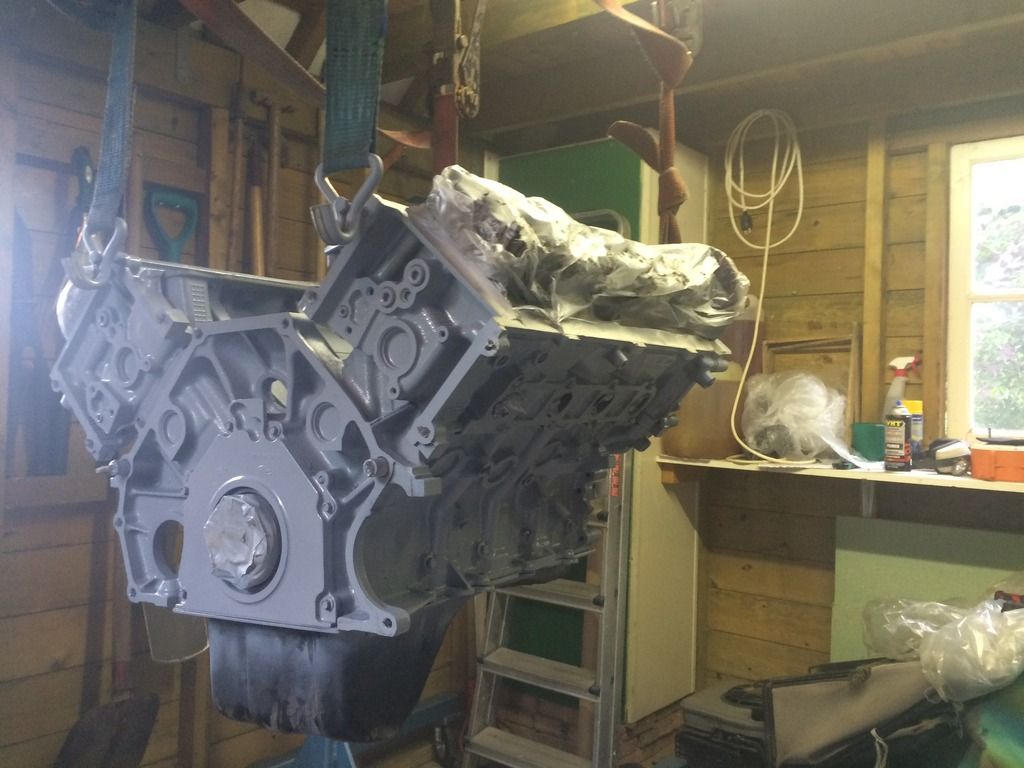
Next thing was engine removal:
Very sunny that day, and a mate was helping me that day. :
Now I'm making a strong stand to hang the engine in it so I can paint it nicely and make it all nice again. Check the bearings I think and do a compression test.
More will come.
Thx
Saw and read some things about electrolysis. So I searched further and decided that I was going to give it a shot:Hooked up the negative to the tank and positive to the bar in the water/soda solution, and let the proces work for about 24 hours. After 1 day results!:

After the first day, stil alot of rust in it but already some spots began to get clean.


Was thinking how it can be done faster, cause HE! were people and we want things done faster. Asked my boss and he suggested the battery charger from the workshop, I grabbed it and put it together again with fresh water and a little more soda (2,2 kg) made some new anodes (iron bars) and switched it all on. Average of 3 amp
:
After 2 hours:

About 1 bar 0,75 day:

Last bar:

My mouth fell open when I emptied the tank:

But still I had some tricks in my sleeve to do to make it more clean. First I put it in a cementturner (don't know the word) and put some small rocks with some water in it. Made it water tight (as best as I could) and let it turn for about 45 min:

The I washed it with tank cleaner and deruster, and it came out beautifull!:


But the tank infront of a heater to make sure it was dry, in that time (60min) the tank began to rust again so I made the tank coat mixer quick and put it in and turned it for about 25-35 min, My arm were so tired but I wasn't able to see the tank until it was fully dryed (6 days).
Result!:

Slapped some paint on it, not smooth or something just to let it shine again:


Fuel tank READY! CHECK.
Next thing was engine removal:
Very sunny that day, and a mate was helping me that day. :


Now I'm making a strong stand to hang the engine in it so I can paint it nicely and make it all nice again. Check the bearings I think and do a compression test.
More will come.
Thx

#36
05-18-2015, 02:43 PM
Join Date: Nov 2014
Location: Netherlands
Posts: 55
Likes: 0
Received 0 Likes
on
0 Posts
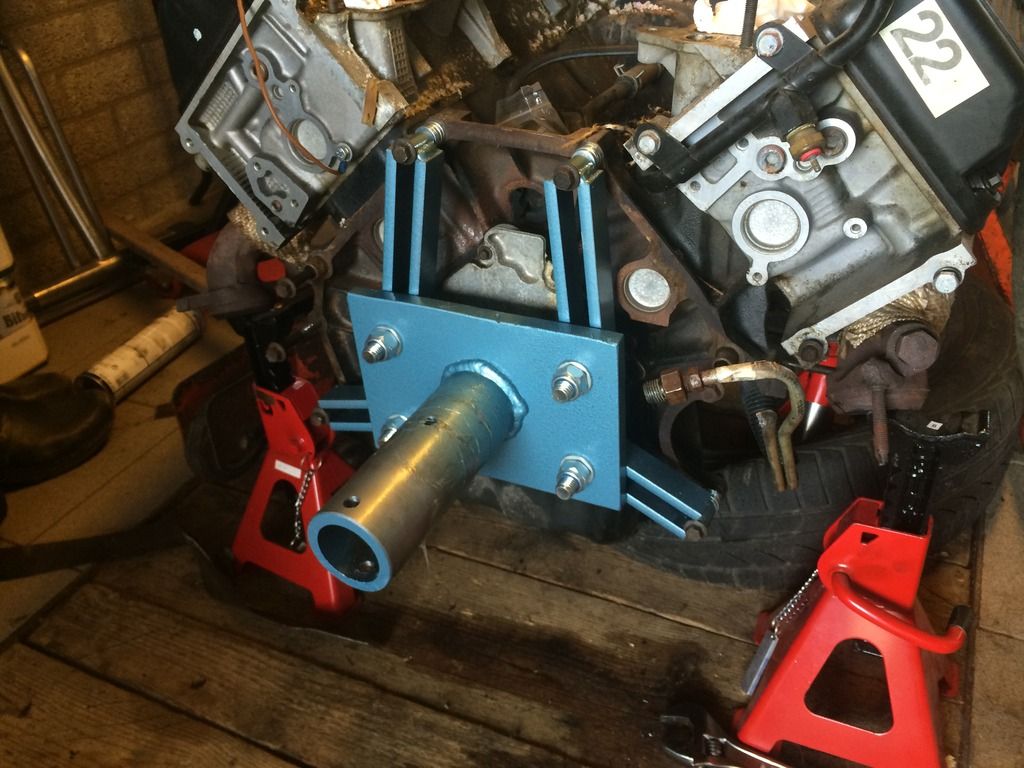
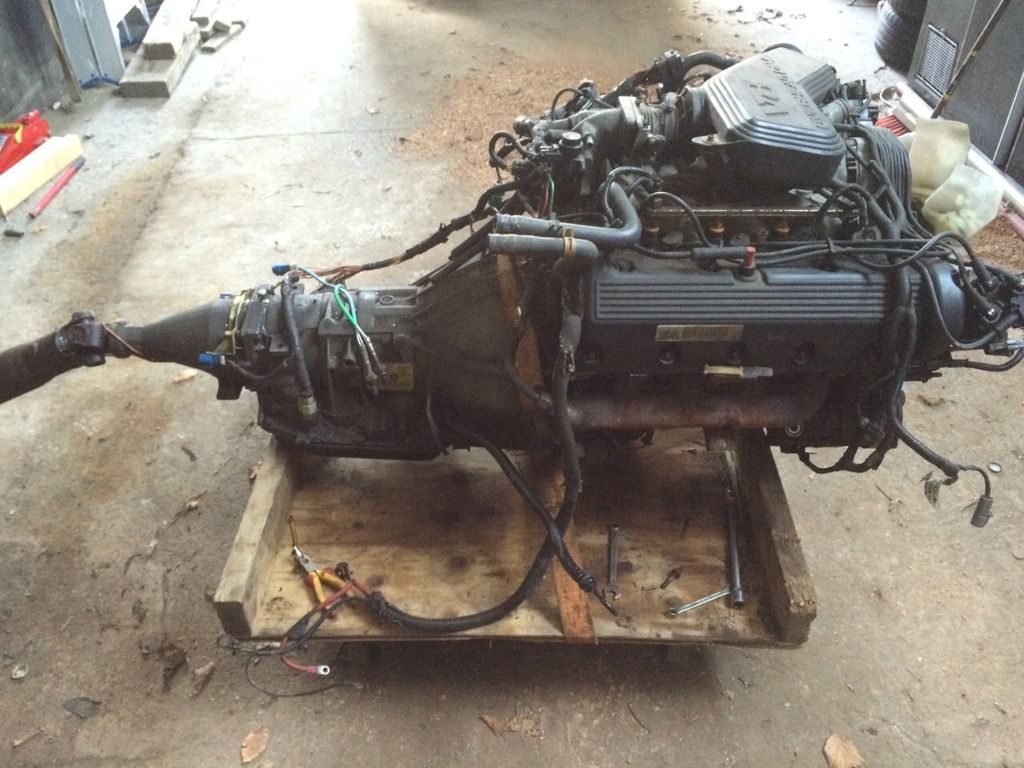
Hi people, been a while since I posted some thing up here but have some nice things comming up for you guys. As you already know I pulled the engine to make it nice and shine again. I guy called me and asked me if I was interested in another engine, exactly the same as I have know included same gearbox, and also with the original wiring harnes and ECU running. So I said yeah give me a number. Guy said if you come this weekend you can have it for 250 euro's. Grabbed car and trailer and when't his way. Engine is not in great shape but it runs and that's a kind of sign most of the sensors etc work. So its a great donor engine.
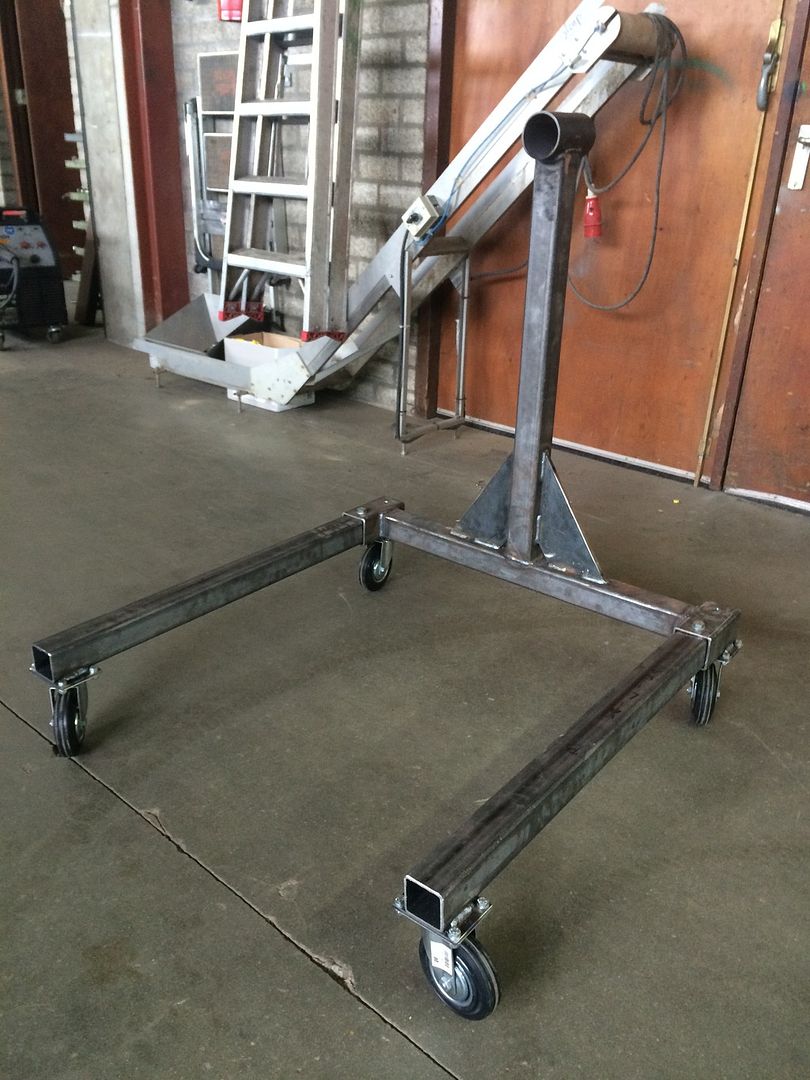
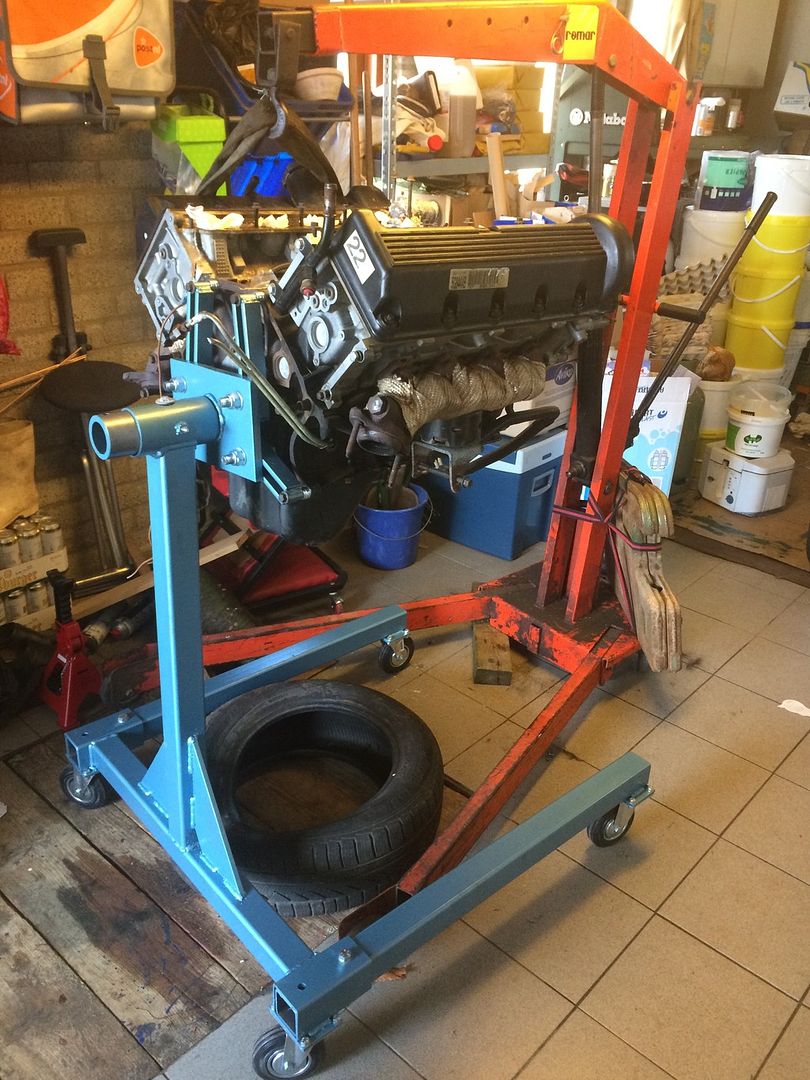
Also made a cart to hang my engine on while i'm working on it. Yeah you can buy them straight out of the shop but I found them a bit illy.
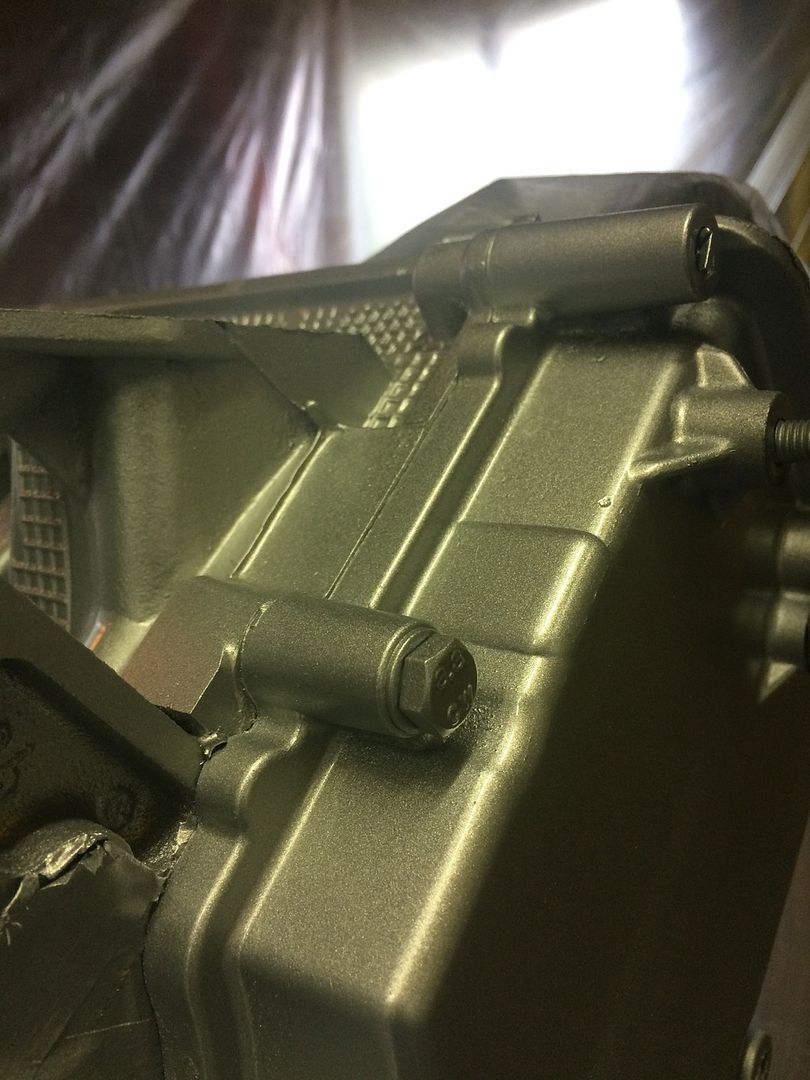
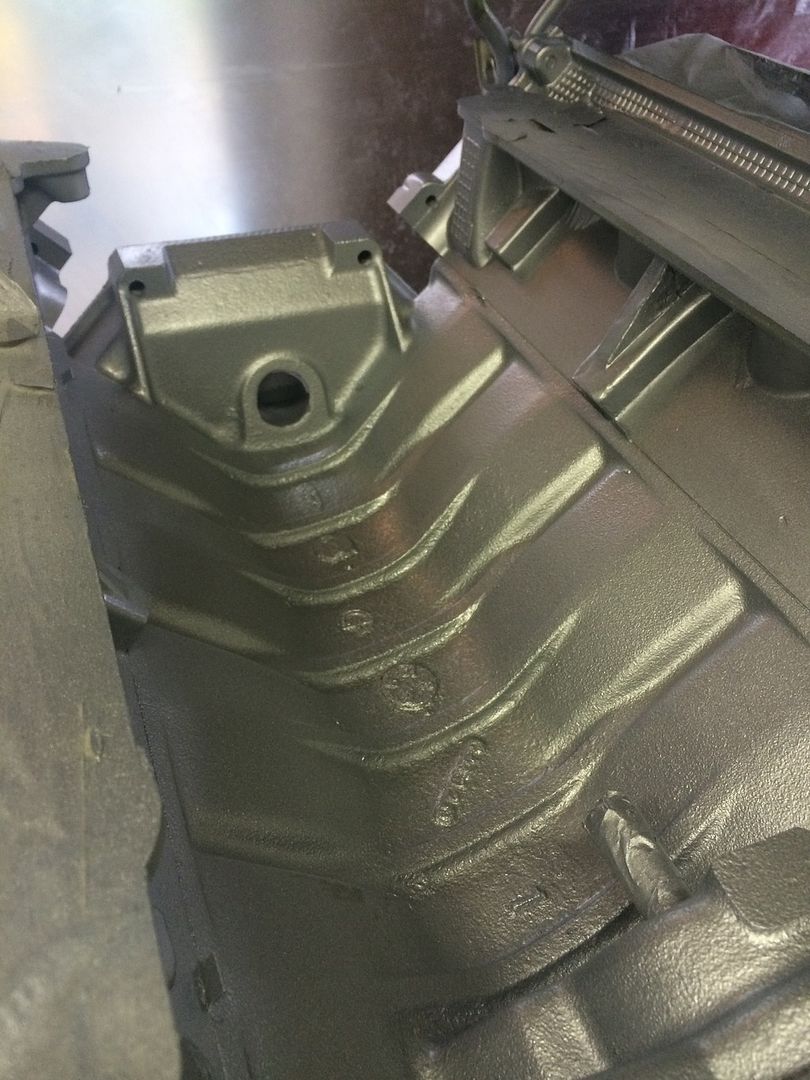
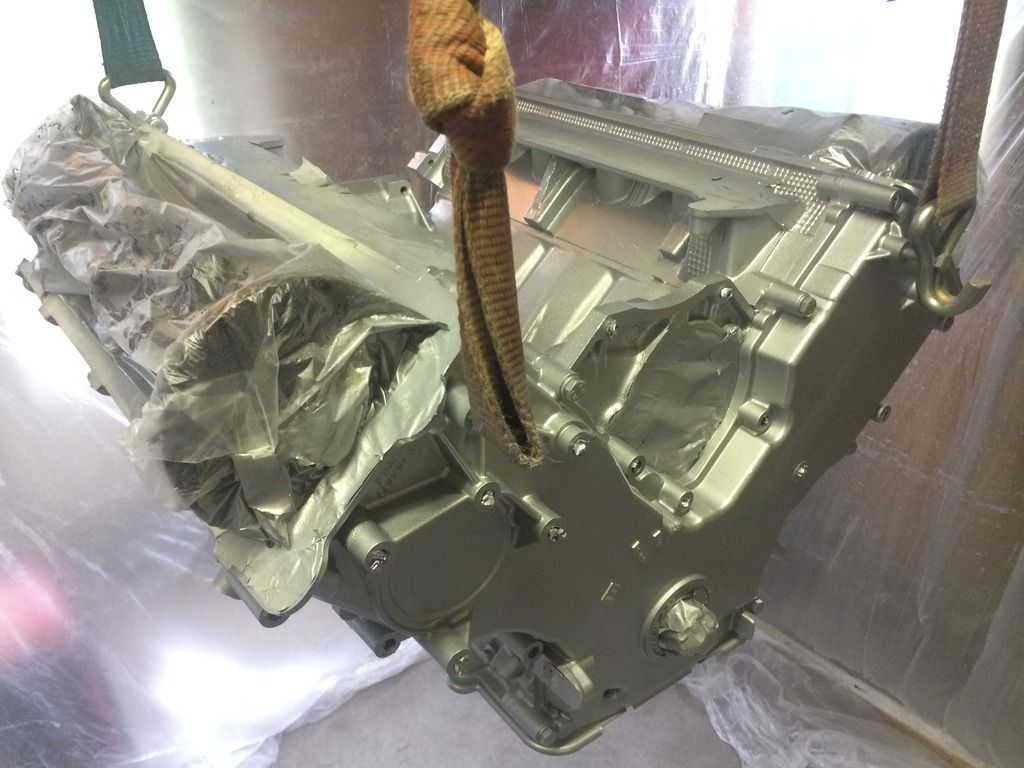
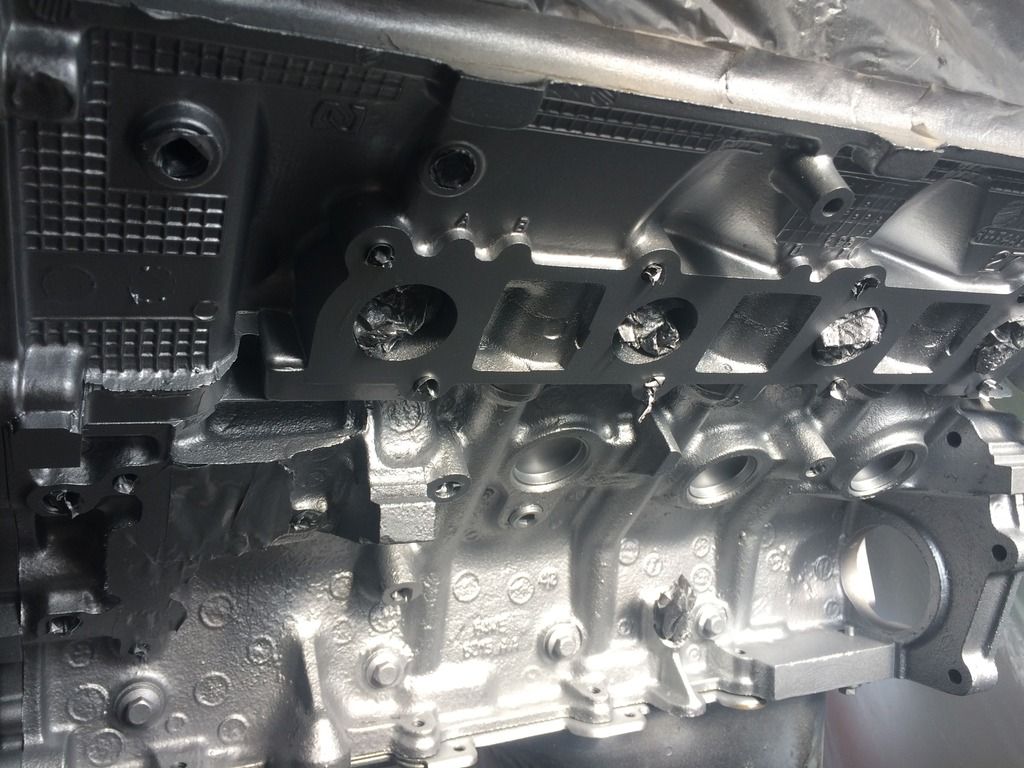
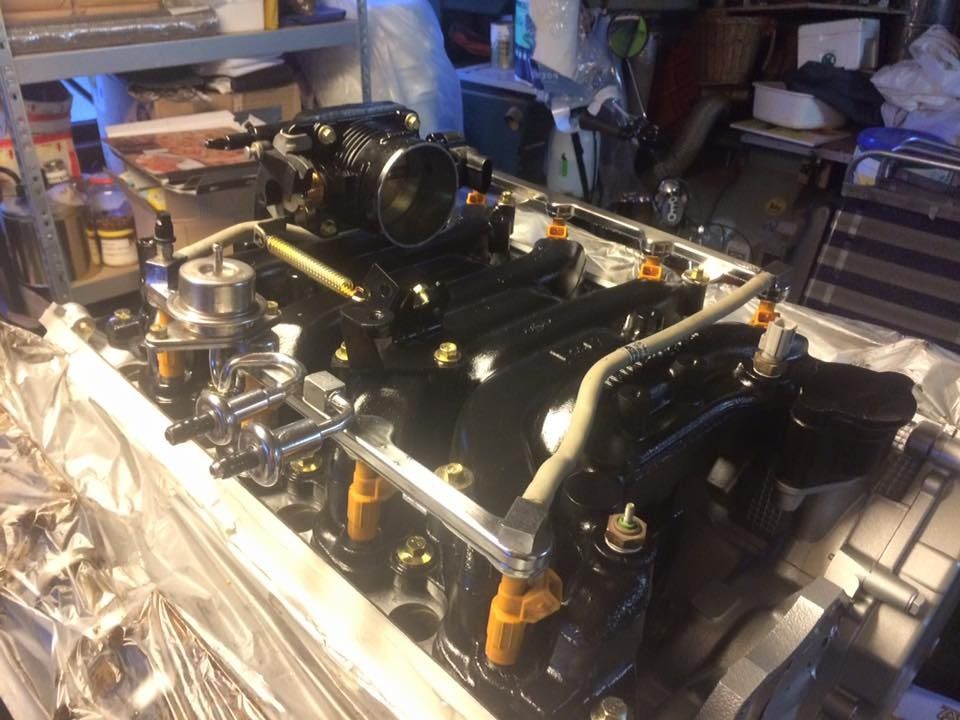
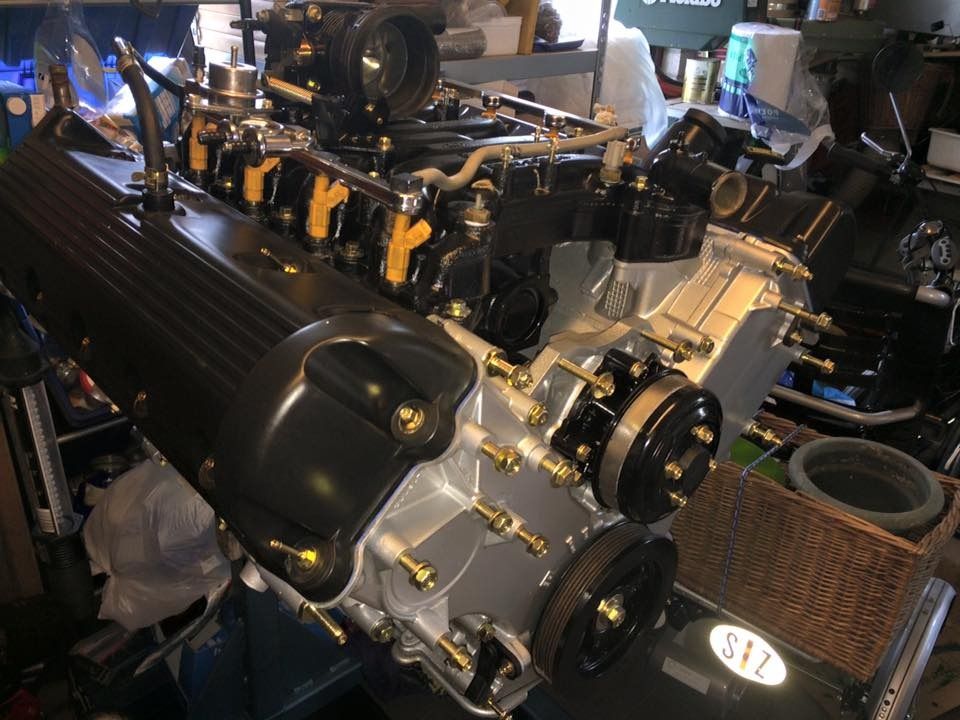
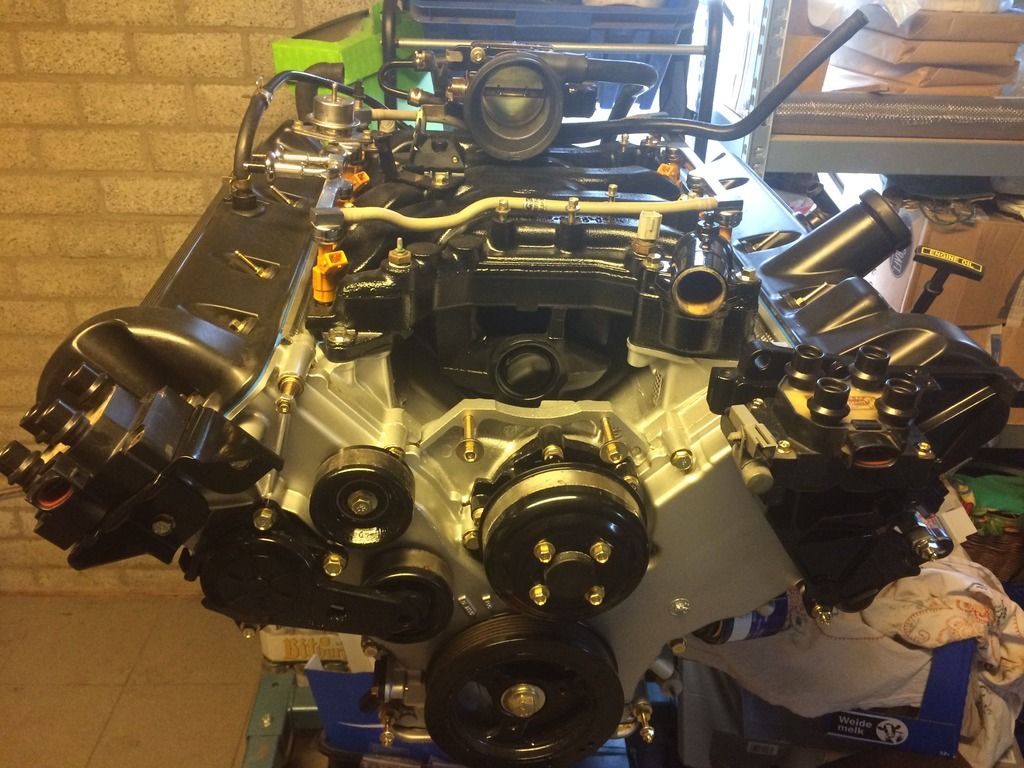
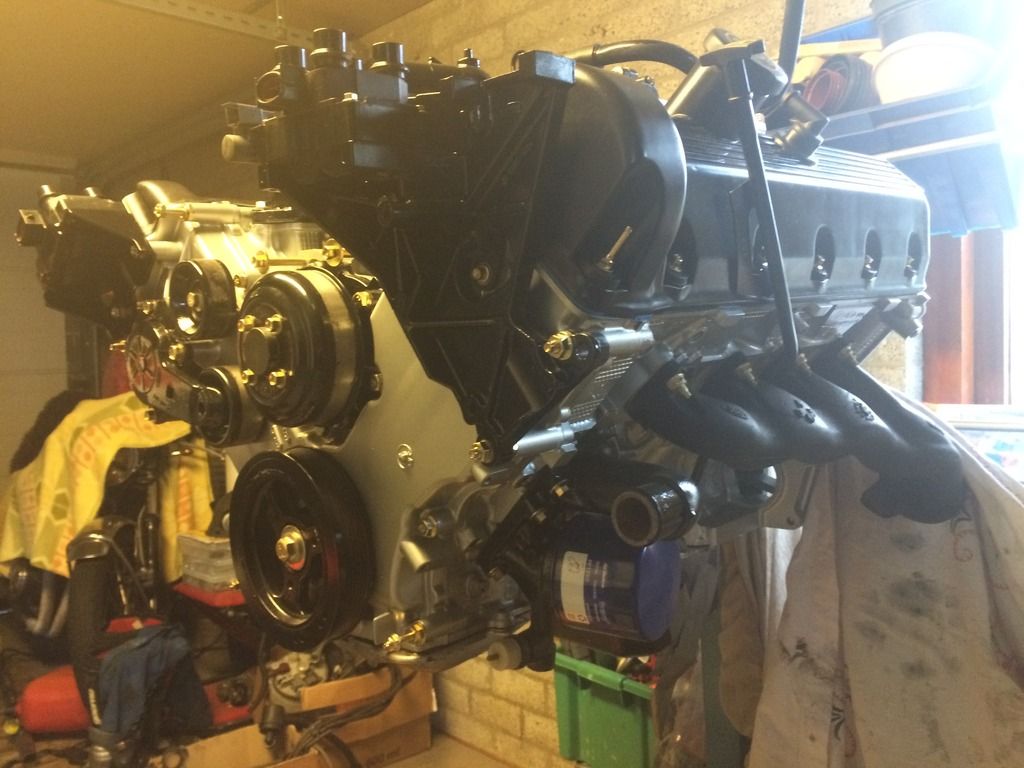
Started painting the engine past weekend en also finished it. Colors are:
Engine metalic silver
Valve covers remain black
Intake Black
Pullies all Black
Headers Black
Oil pan Black.
Some of the pieces on top silver, like thermostat housing. etc.
Tranmission also metallic silver with black oilpan.
All bolts get redone in yellow/gold color.
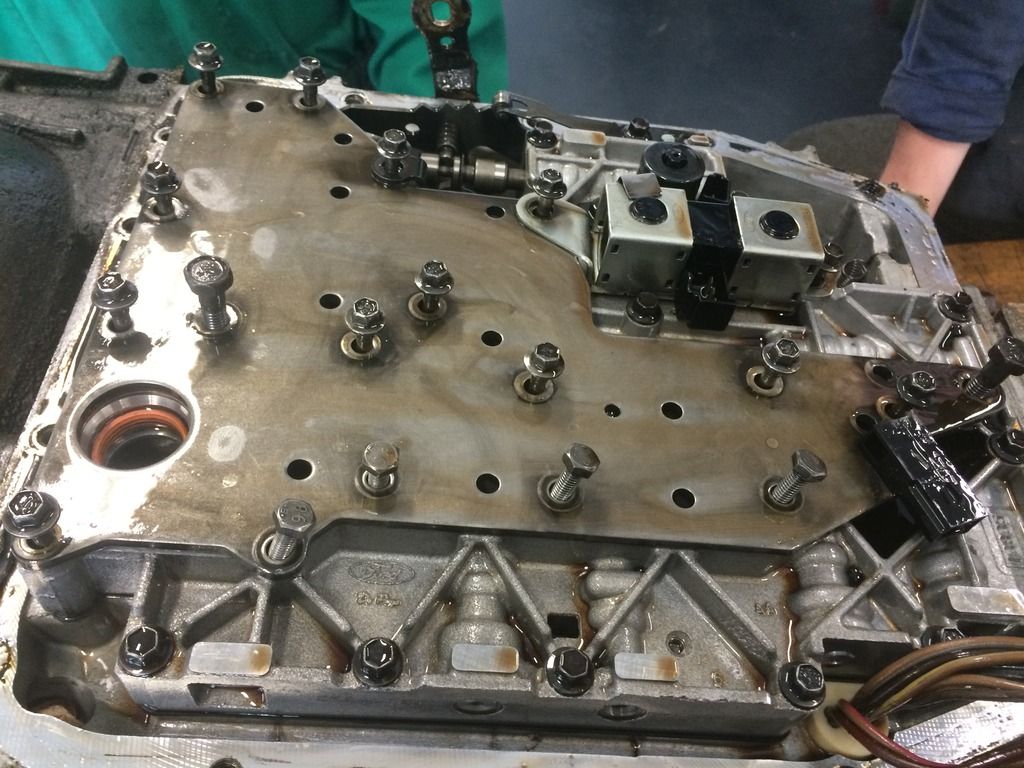
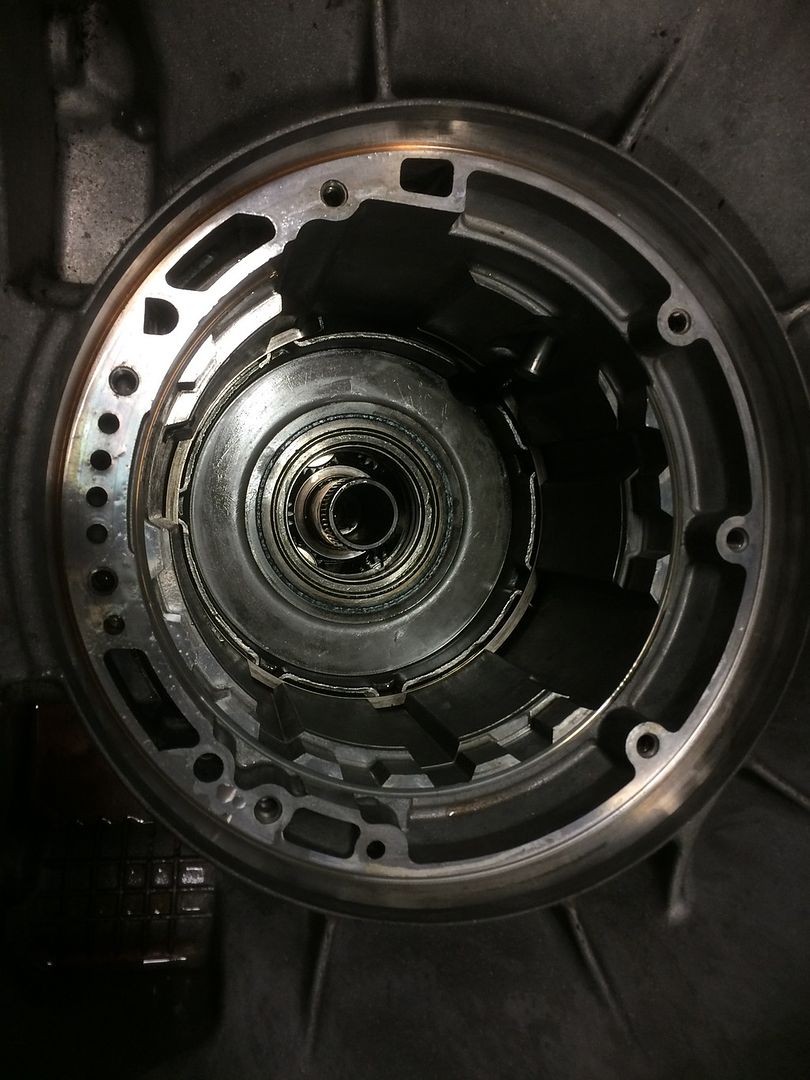
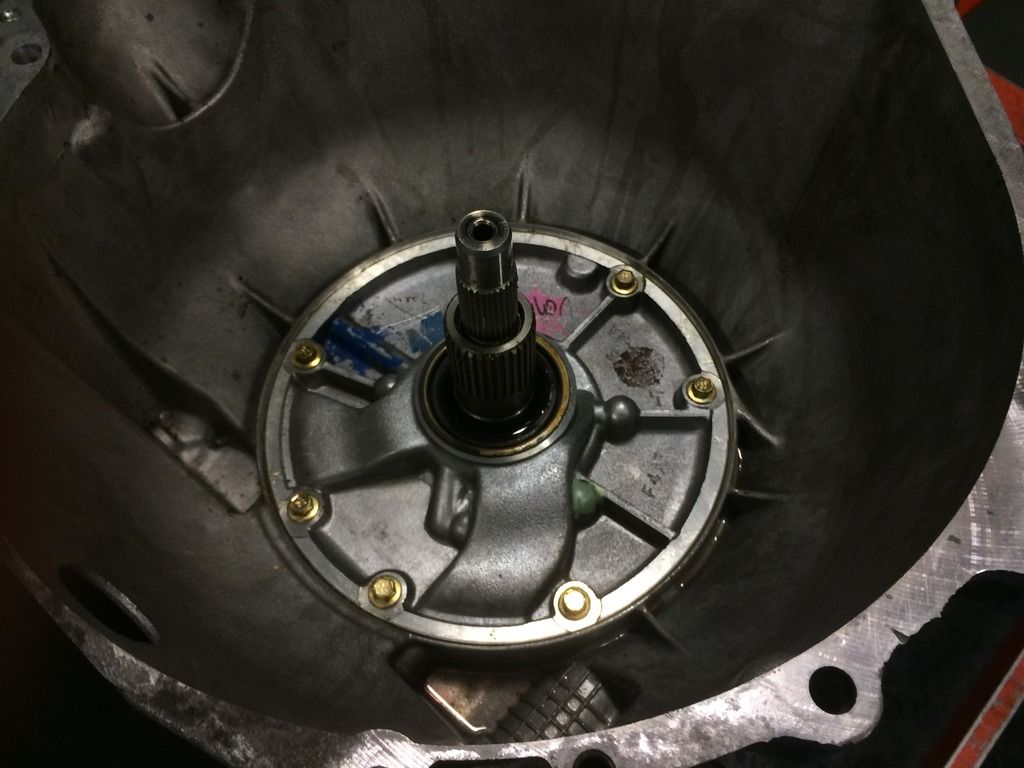
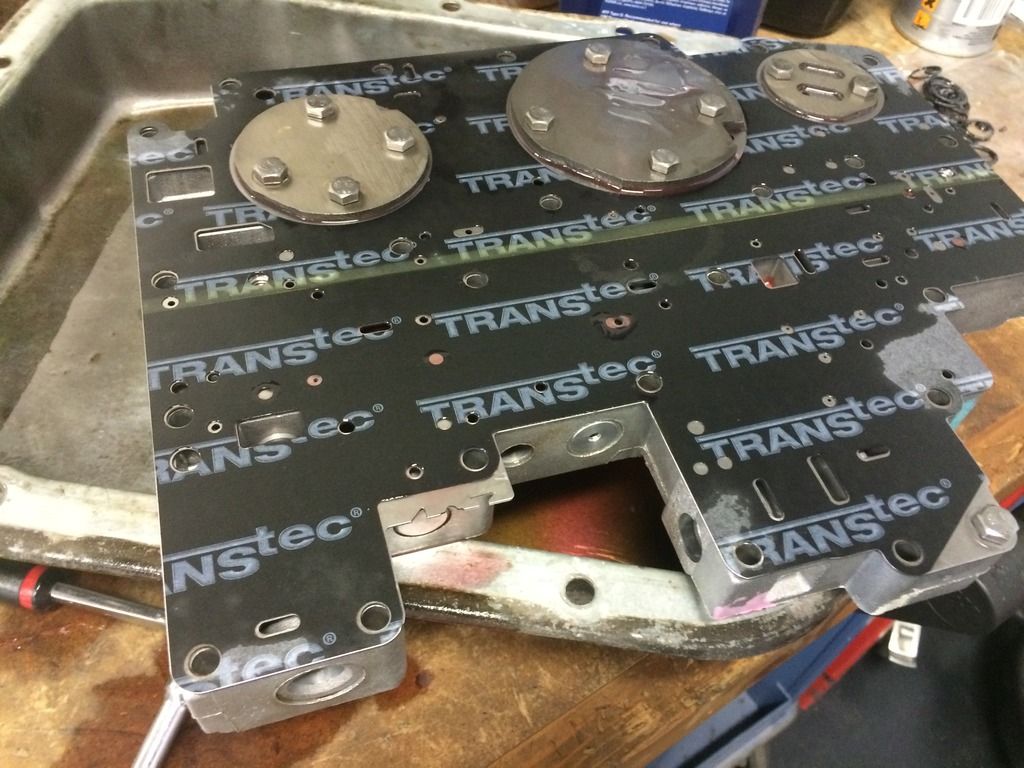
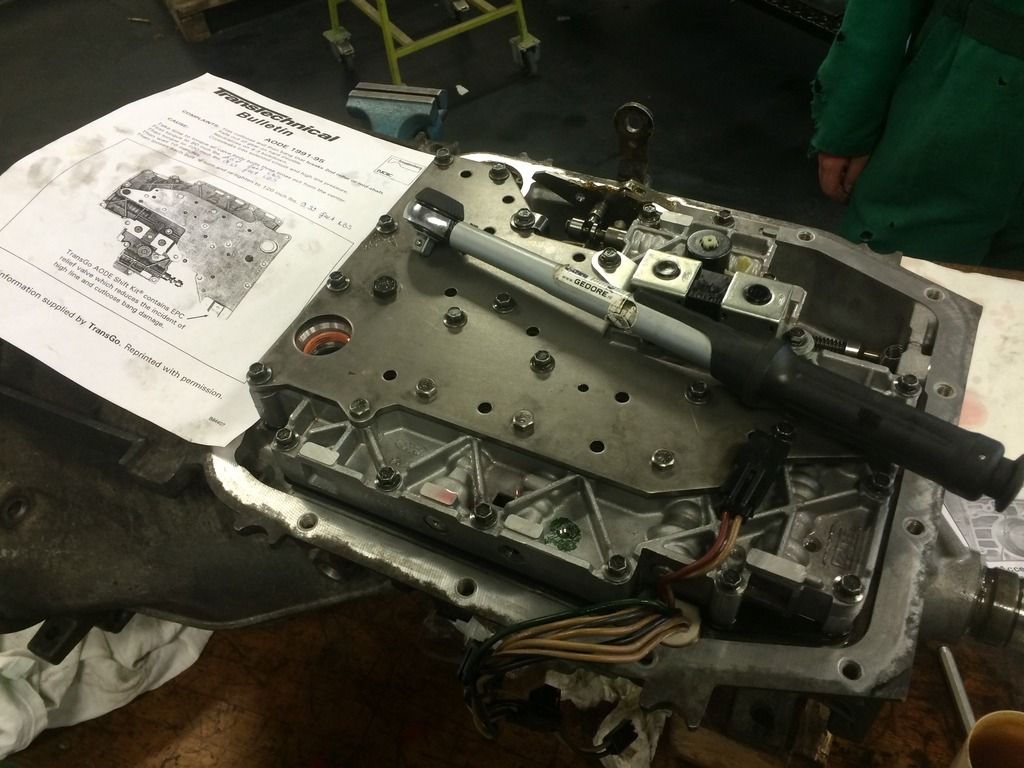
Also started rebuilding my tranny my self on school as a project.
@work:
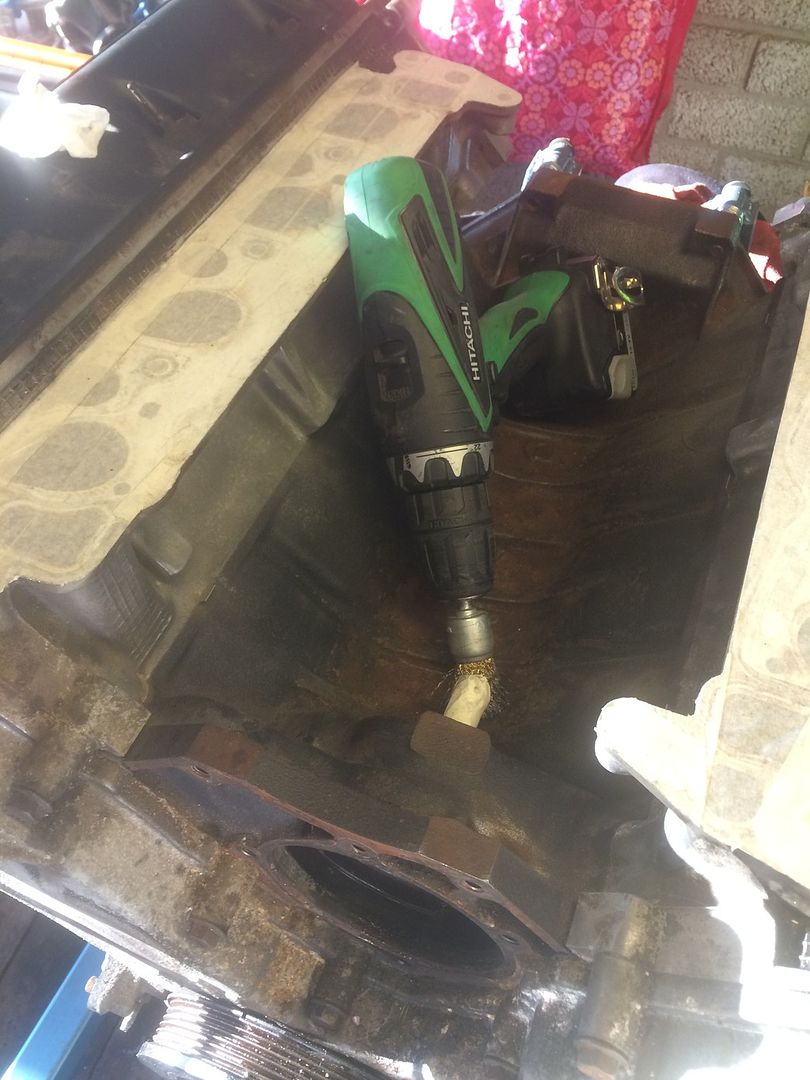
Shaving the engine with a wire brush:

Ready for primer:
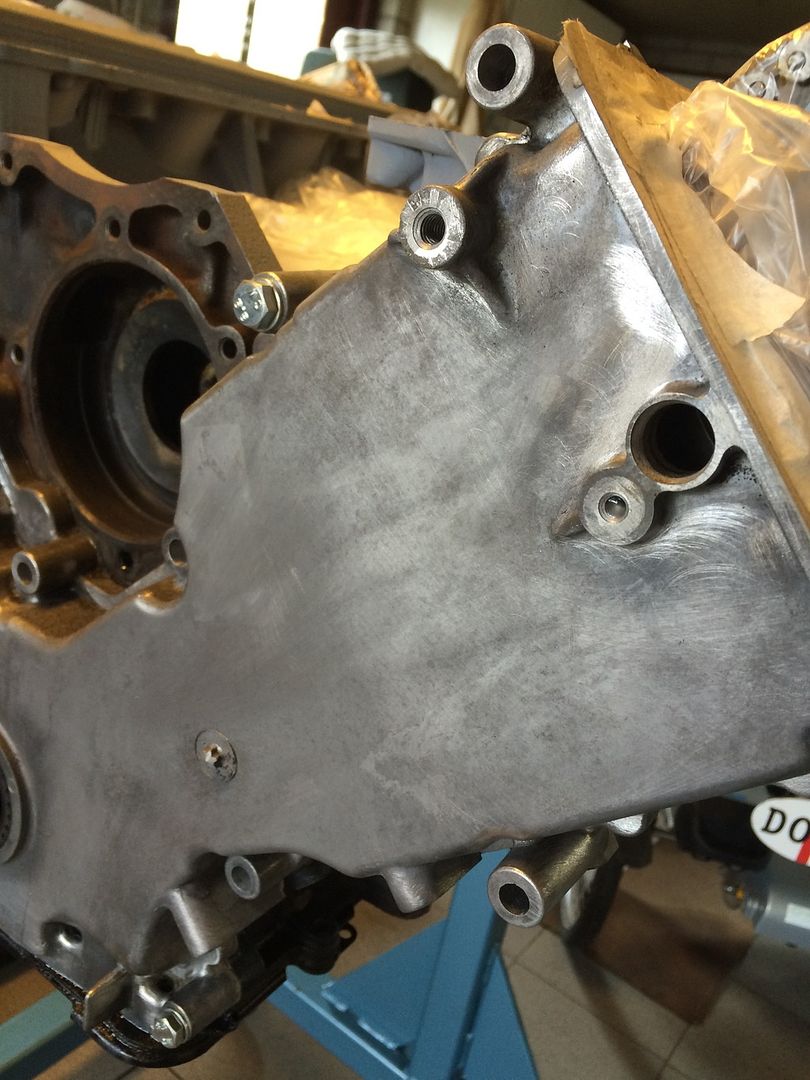
Color:
Parts engine:
Rebuilding transmission:
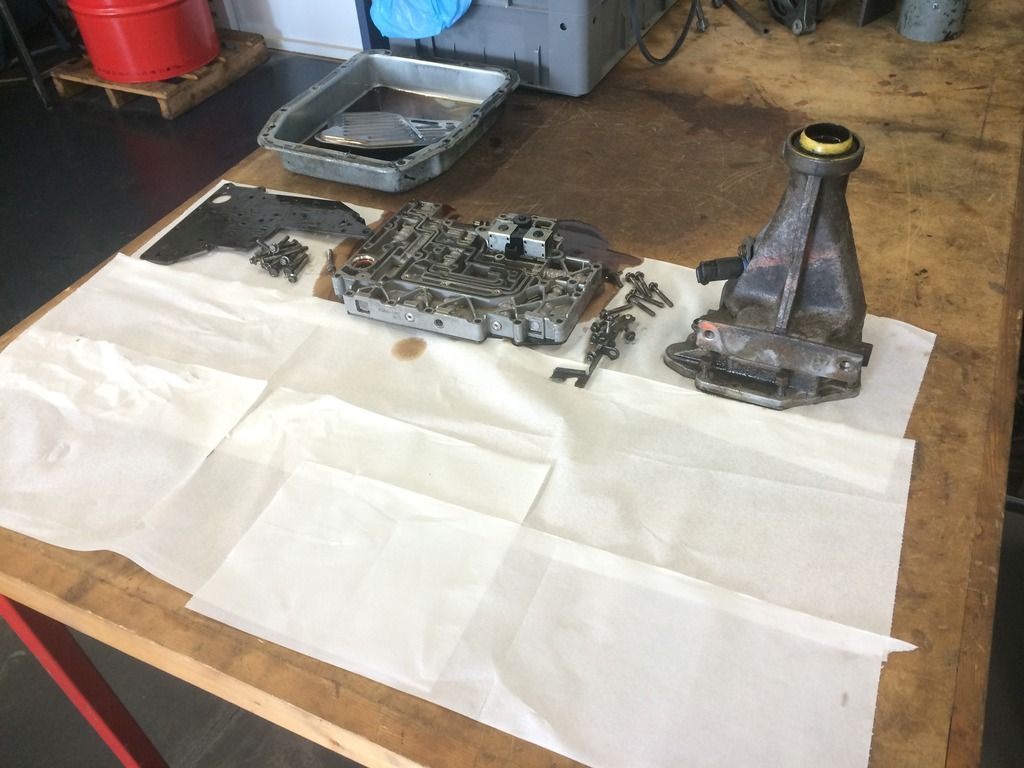
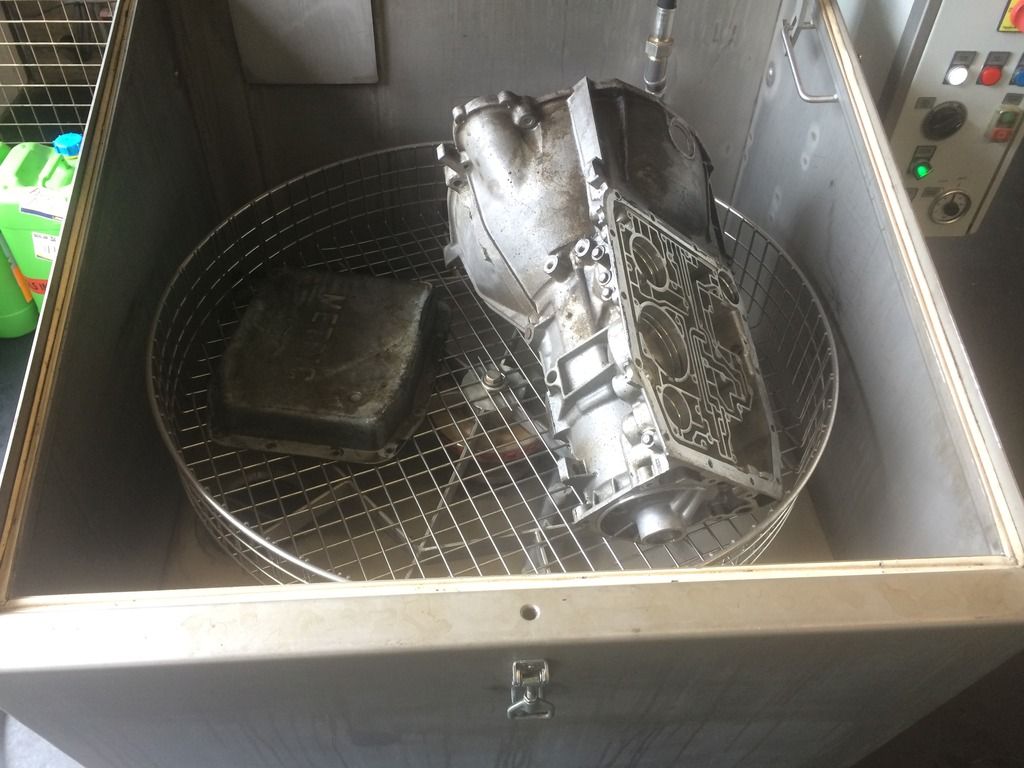
Washing the shell:
That was it. starting this week with intake and making things ready for sandblasting.
Also made a cart to hang my engine on while i'm working on it. Yeah you can buy them straight out of the shop but I found them a bit illy.
Started painting the engine past weekend en also finished it. Colors are:
Engine metalic silver
Valve covers remain black
Intake Black
Pullies all Black
Headers Black
Oil pan Black.
Some of the pieces on top silver, like thermostat housing. etc.
Tranmission also metallic silver with black oilpan.
All bolts get redone in yellow/gold color.
Also started rebuilding my tranny my self on school as a project.
@work:


Shaving the engine with a wire brush:


Ready for primer:


Color:


Parts engine:

Rebuilding transmission:


Washing the shell:

That was it. starting this week with intake and making things ready for sandblasting.
#37
06-15-2015, 01:01 PM
Join Date: Nov 2014
Location: Netherlands
Posts: 55
Likes: 0
Received 0 Likes
on
0 Posts
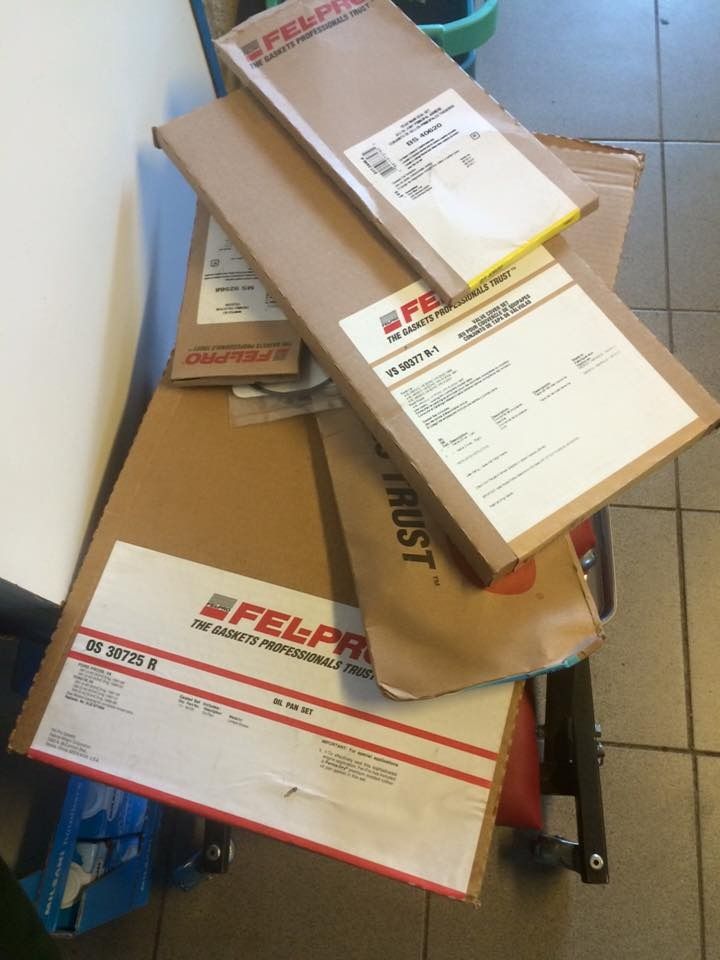
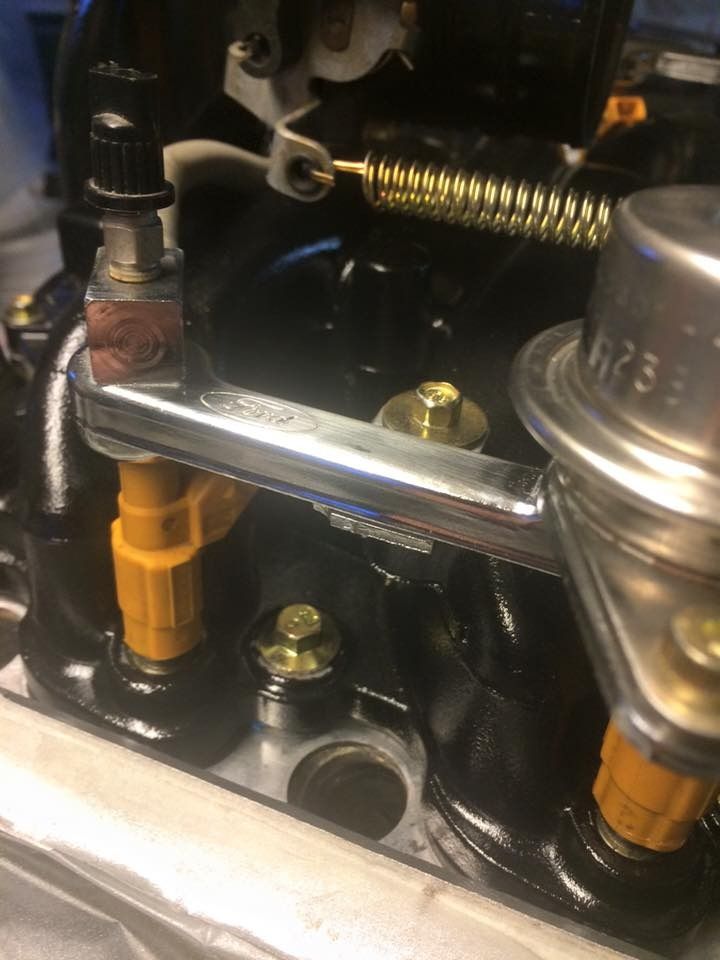
Couple days back I did my last work to the engine, cause school and other kinda important things. Engine looks STUNNIN if I may self. Orderd some gaskets to make it hold oil and ***** again .
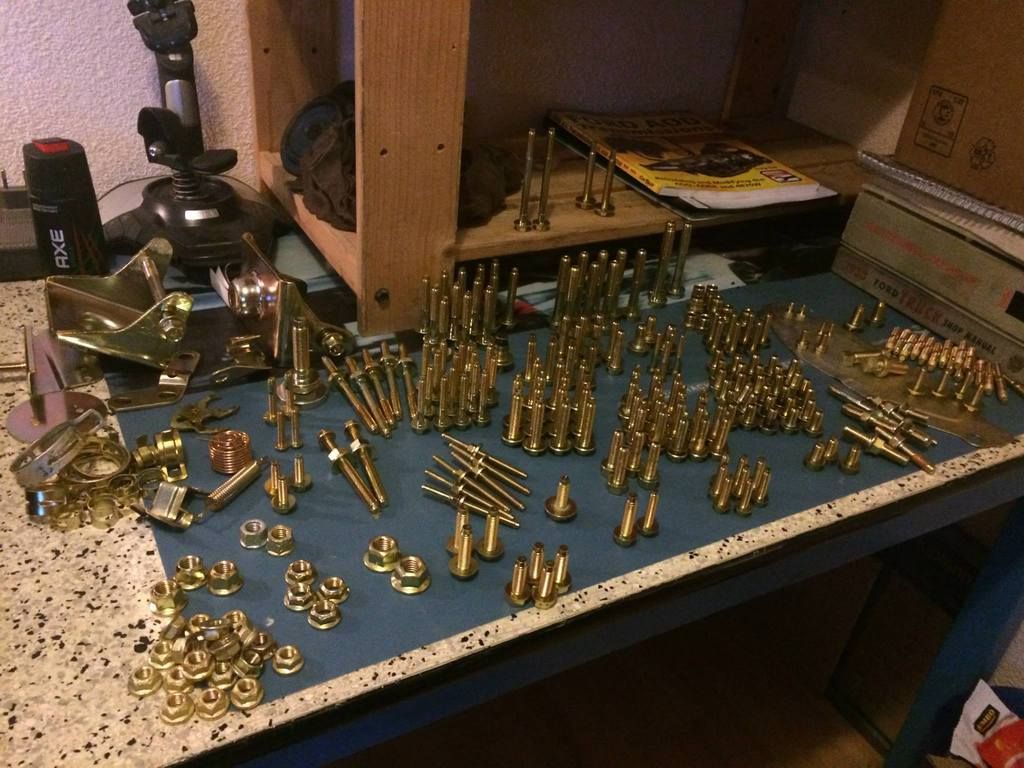
Brought the bolts and some brackets to a customer of my work they galvenize the bolts and give it a gold shine.
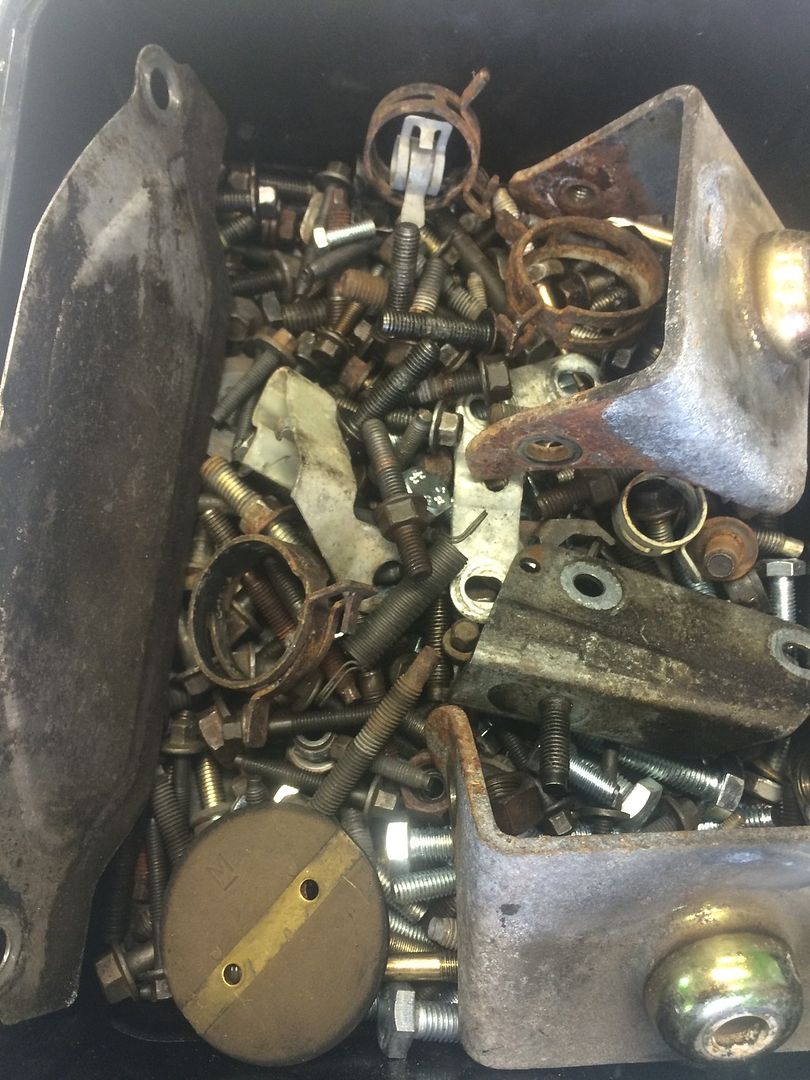
Like new again!
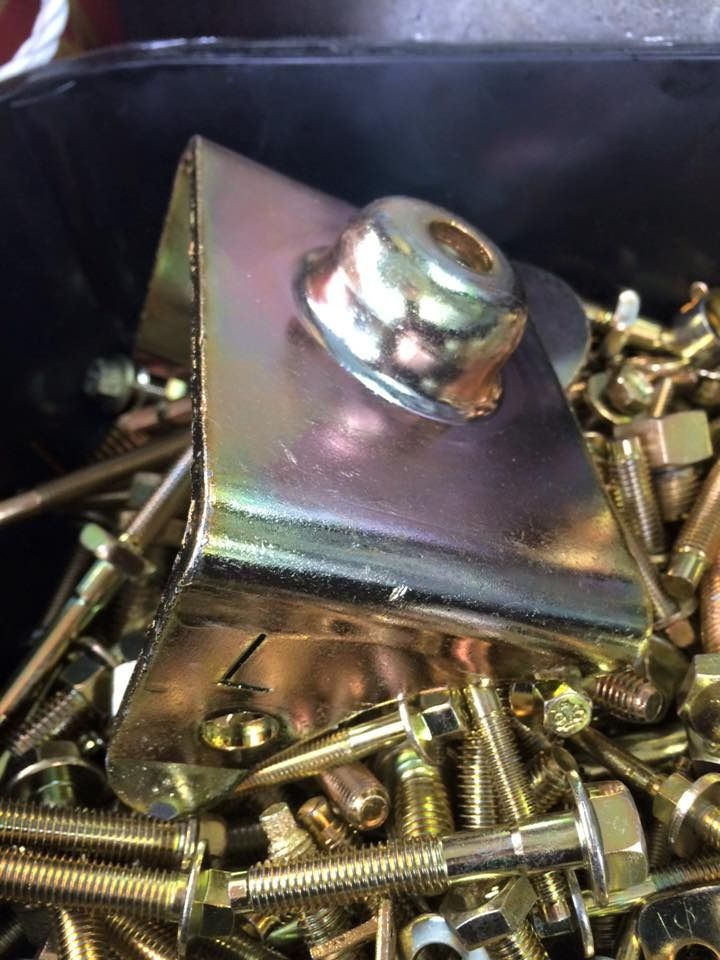
Sorted every thing and put them back in bags:

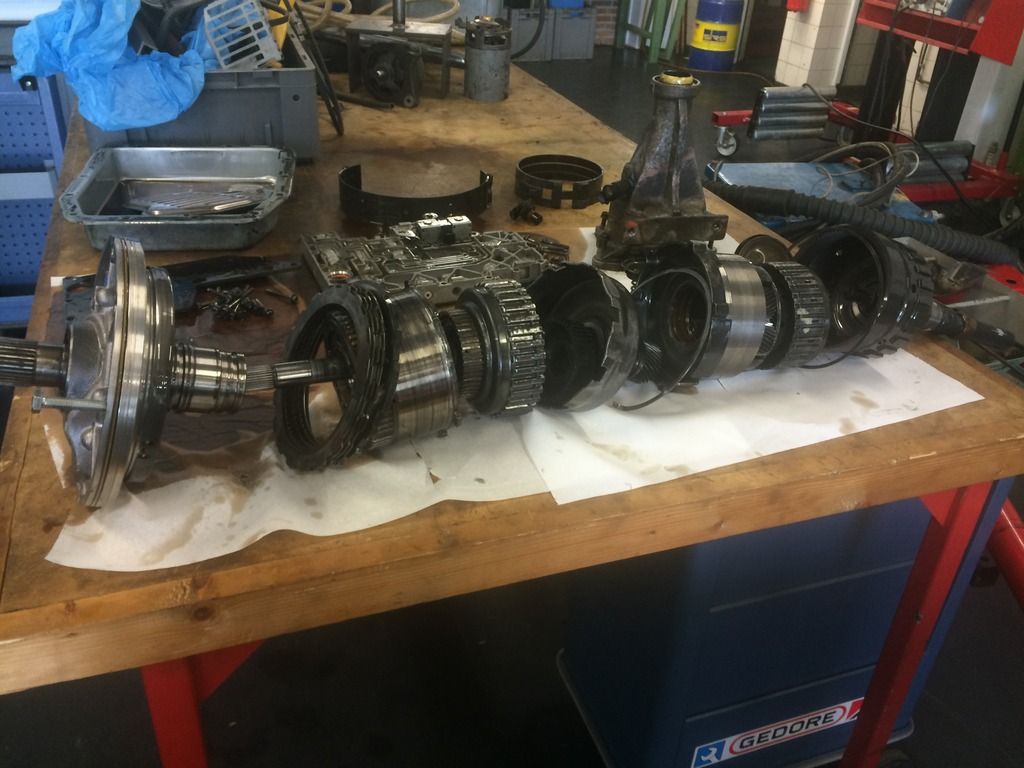
Finished all bushings in the AODE transmission, tomorrow I will starting to put it together at school. Hope I finish it.
Thx
.
Brought the bolts and some brackets to a customer of my work they galvenize the bolts and give it a gold shine.

Like new again!

Sorted every thing and put them back in bags:


Finished all bushings in the AODE transmission, tomorrow I will starting to put it together at school. Hope I finish it.
Thx
#38
06-15-2015, 02:49 PM

You are doing a great job and its comming together really good.
I just want to give you a heads up......
When electro zinc plating parts, make sure that you dont zinc plate parts made of high strength steels like grade 5 or 7 and up bolts or things made out of spring steel. without treat the parts against hydrogen embrittlement. it needs to be done after the zinc plating and before the chromating (yellow) step,
The hydrogen embrittlement treatment is (if i remember correct) 180 degrees celcius for atleast 4 hours and afterwards the cromating.
Not doing so may (most probably) result in the bolts snap of by them self och under light load for some time.......
Dont want to scare you, just give you a heads up
#40
08-27-2015, 09:12 AM
Join Date: Nov 2014
Location: Netherlands
Posts: 55
Likes: 0
Received 0 Likes
on
0 Posts
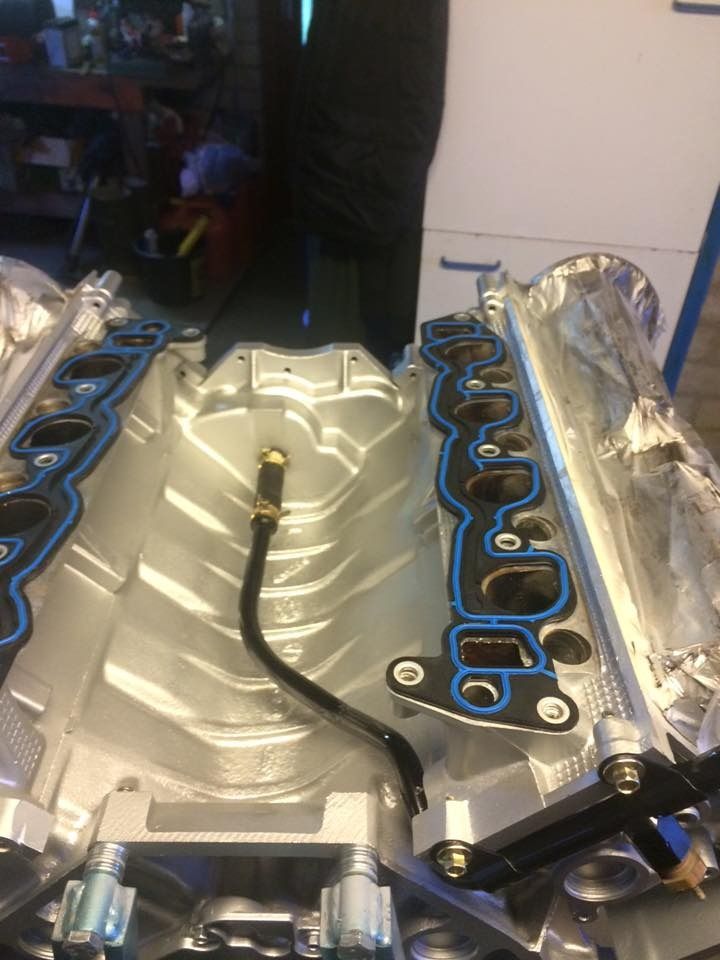
As said I put the transmission back to getter without any problems I thought!? . Off course after I put it to getter i gave it a nice paint job and screwed the refurbished bolts back in. Engine is also almost finished just need to put on the alternator and the plug wires (witch i'm thinking of replacing just for the looks).
Also made a radical disision that I'm gonna let the complete truck get a respray. Had a very hard time searching pinking a new color, but completely fell in love with Sheridan Blue. The painter has give me a visit to discuss some things and so he can have a better look at the truck to make a price. Frame gets a respray to so it all will be like knew!! Very stoked to get started on the frame! Gonna paint that my self.
Put some new rings on the shaft from the oil pump, and greased it in good so the rings will stick better to the center when I lined the up in the middle:
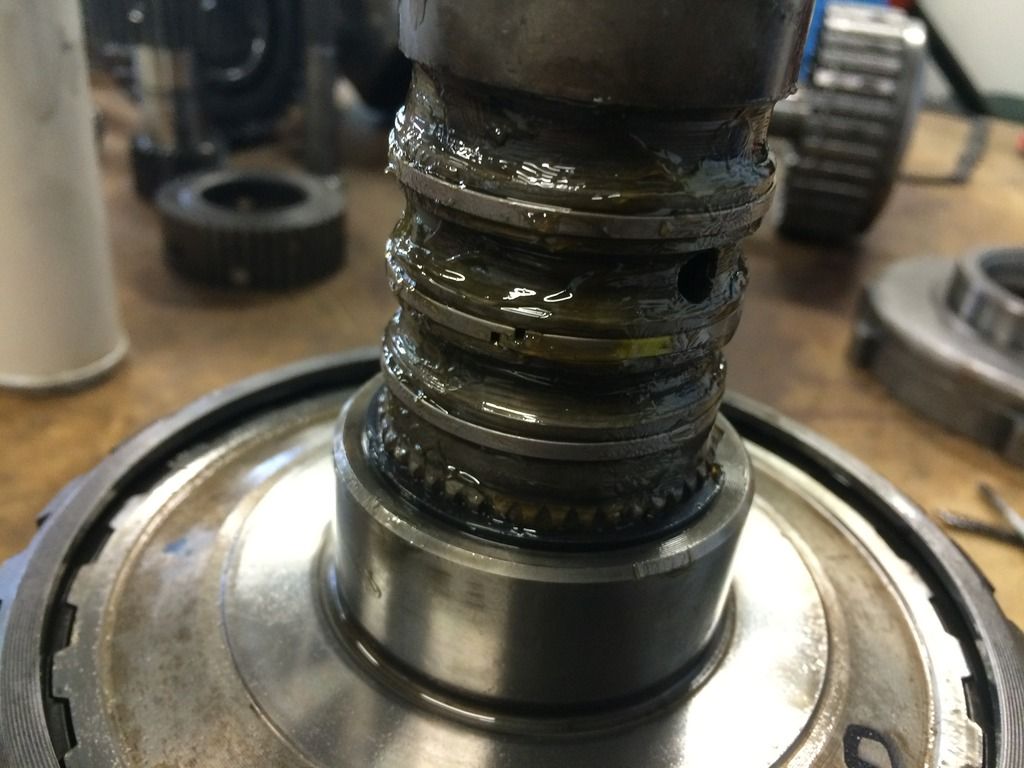
Nearly everything back in it:
New gaskets everywhere:

After I wire brushed the complete housing to a nice and smooth surface I prepped and painted it. Looks need in my eyes!
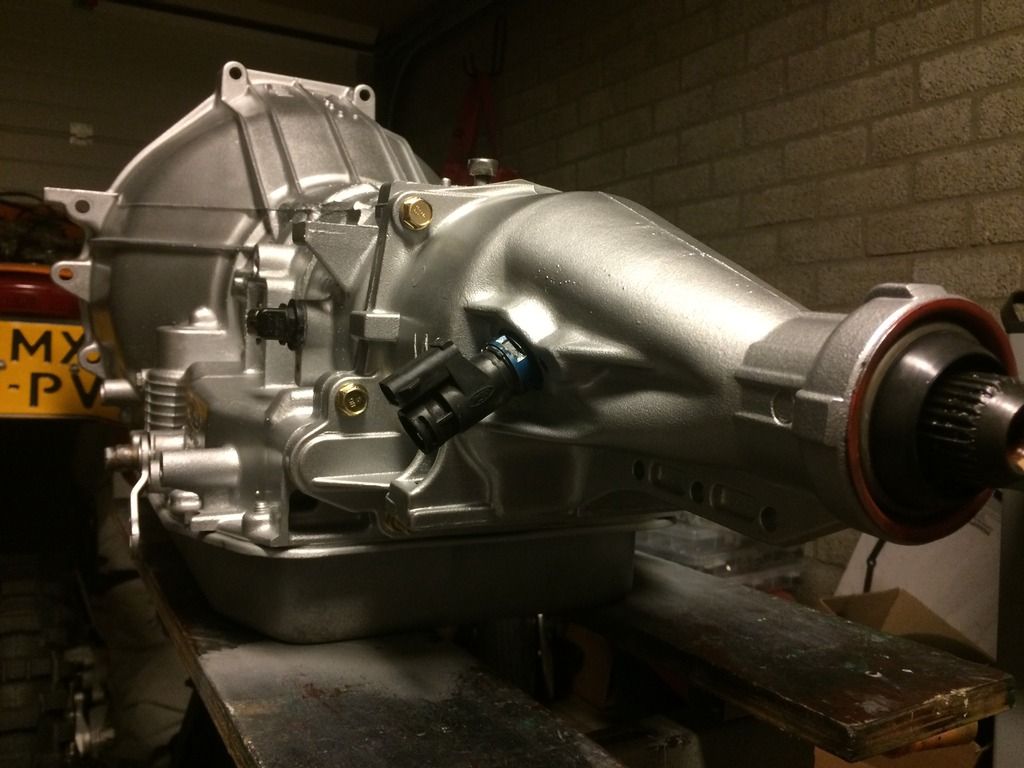
Also the pan has a paintjob, but it stays in my room until the tranny is in the frame. So that it will not get damaged.
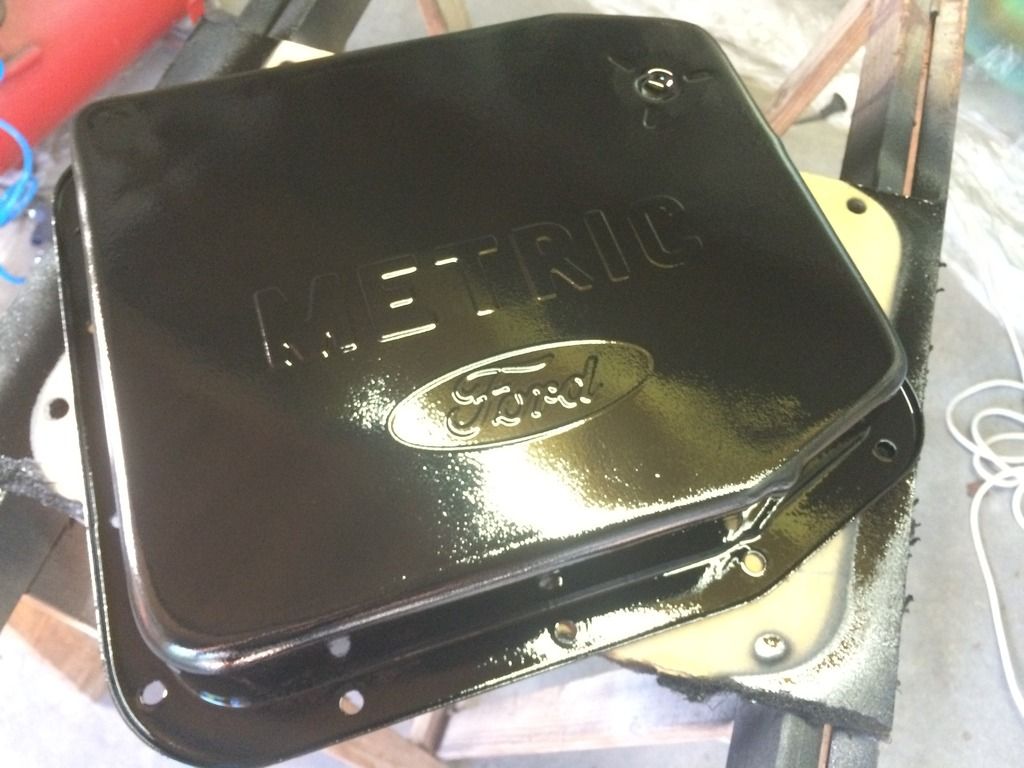
Very pleased with the progress until so far!
. Off course after I put it to getter i gave it a nice paint job and screwed the refurbished bolts back in. Engine is also almost finished just need to put on the alternator and the plug wires (witch i'm thinking of replacing just for the looks). Also made a radical disision that I'm gonna let the complete truck get a respray. Had a very hard time searching pinking a new color, but completely fell in love with Sheridan Blue. The painter has give me a visit to discuss some things and so he can have a better look at the truck to make a price. Frame gets a respray to so it all will be like knew!! Very stoked to get started on the frame! Gonna paint that my self.
Put some new rings on the shaft from the oil pump, and greased it in good so the rings will stick better to the center when I lined the up in the middle:

Nearly everything back in it:


New gaskets everywhere:


After I wire brushed the complete housing to a nice and smooth surface I prepped and painted it. Looks need in my eyes!

Also the pan has a paintjob, but it stays in my room until the tranny is in the frame. So that it will not get damaged.


Very pleased with the progress until so far!

Thread
Thread Starter
Forum
Replies
Last Post
Ol School 79
1973 - 1979 F-100 & Larger F-Series Trucks
85
03-26-2017 03:34 AM
masonf150
1973 - 1979 F-100 & Larger F-Series Trucks
22
10-15-2015 03:38 AM
jmadsen
1948 - 1956 F1, F100 & Larger F-Series Trucks
31
04-28-2013 10:43 PM
gearheadstik
1973 - 1979 F-100 & Larger F-Series Trucks
12
03-22-2009 07:34 PM

