
'78 Crew 4x4 - Cummins Swap Begins - Build Thread
#361
 08-26-2015, 09:50 AM


#362
08-26-2015, 10:24 AM

#363
10-15-2015, 08:31 PM
Got a few things done the last few weekends. Permanently removed the side tank and associated fuel lines. Now I have room for my air tank for onboard air. The install of that is a little farther down the priority list though.
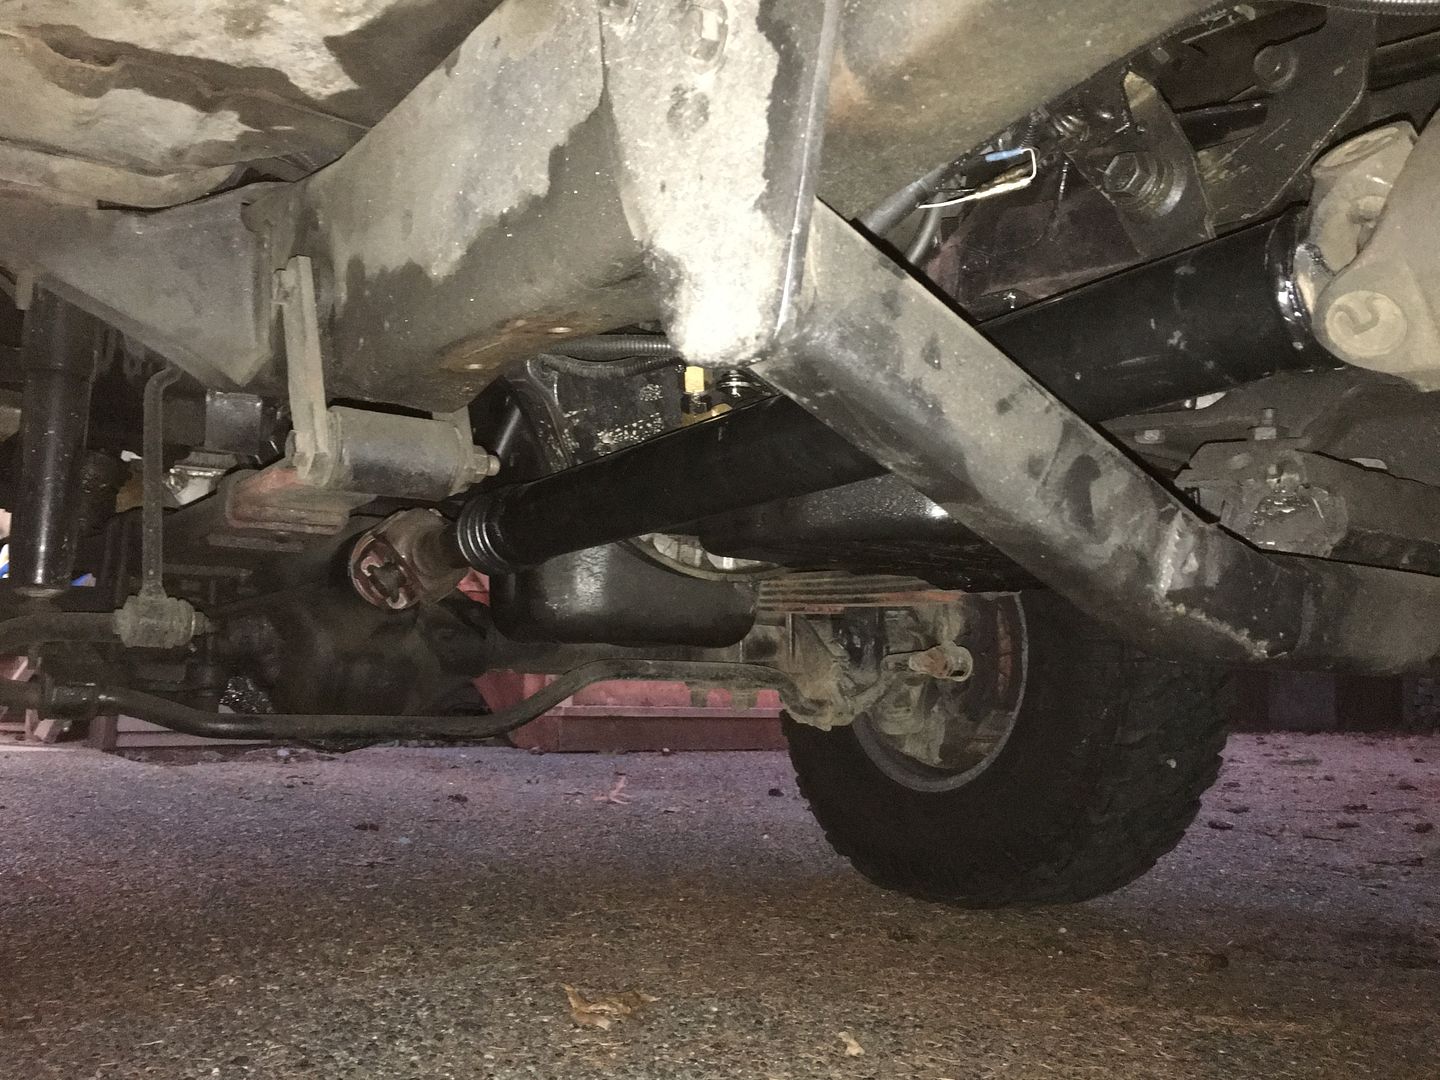
The main reason I did that was to enable the movement of the carrier bearing to the drivers side a bit. Before my driveline angles were off which brought on a shudder during takeoff. So I moved the carrier bearing over and down about 3/4". Now no shudder
Took the crew over to my buddy's shop and we installed some plates in the cab so I can run shoulder belts in the rear. I cut a hole for 6" speakers about 10" from the floor which provided access to get the plate in place. Now I just need to get some seatbelts.
Took the front seats out. The drivers side padding was too worn and very uncomfortable. I've had a set of front seats out of a '98 Dodge in the garage for 3 months waiting to go in. They guy that did the restomod on my truck back in the early 2000's made a seat frame for the current seats to sit on. So just had to modify it a bit for the Dodge seats to fit.
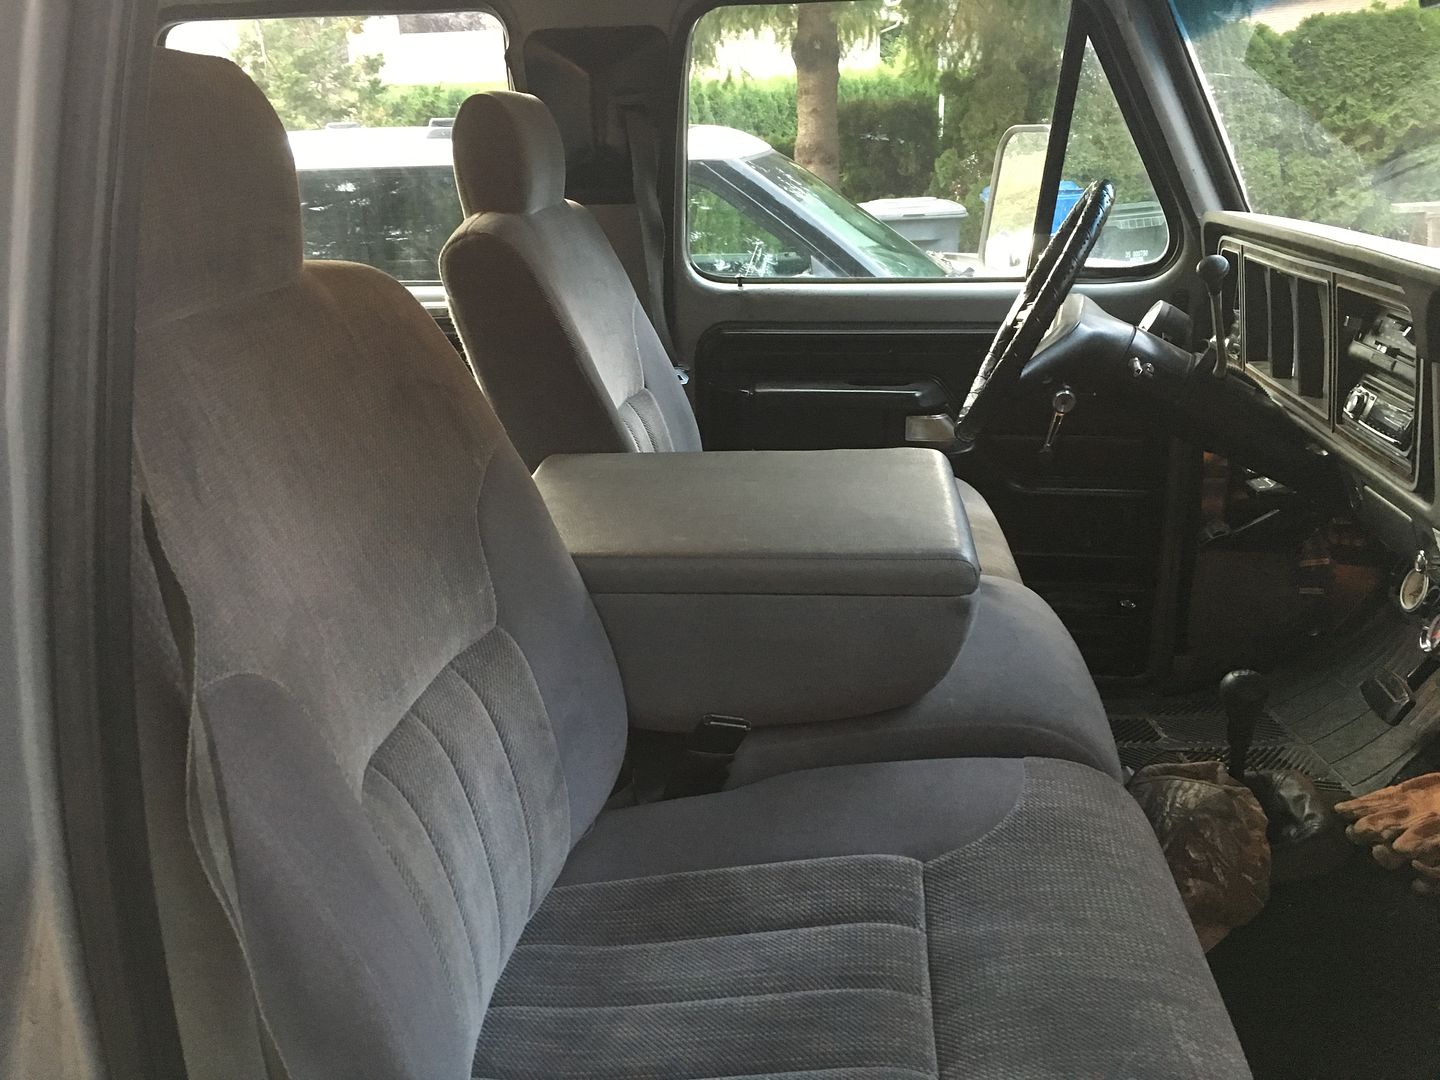
MUCH BETTER now and the larger center console is great!!
Next on the list is side steps. Going to try and get something mocked up tomorrow. It's nice working 4-10's and having Friday's off
The main reason I did that was to enable the movement of the carrier bearing to the drivers side a bit. Before my driveline angles were off which brought on a shudder during takeoff. So I moved the carrier bearing over and down about 3/4". Now no shudder
Took the crew over to my buddy's shop and we installed some plates in the cab so I can run shoulder belts in the rear. I cut a hole for 6" speakers about 10" from the floor which provided access to get the plate in place. Now I just need to get some seatbelts.

Took the front seats out. The drivers side padding was too worn and very uncomfortable. I've had a set of front seats out of a '98 Dodge in the garage for 3 months waiting to go in. They guy that did the restomod on my truck back in the early 2000's made a seat frame for the current seats to sit on. So just had to modify it a bit for the Dodge seats to fit.

MUCH BETTER now and the larger center console is great!!
Next on the list is side steps. Going to try and get something mocked up tomorrow. It's nice working 4-10's and having Friday's off
#364
10-15-2015, 08:40 PM
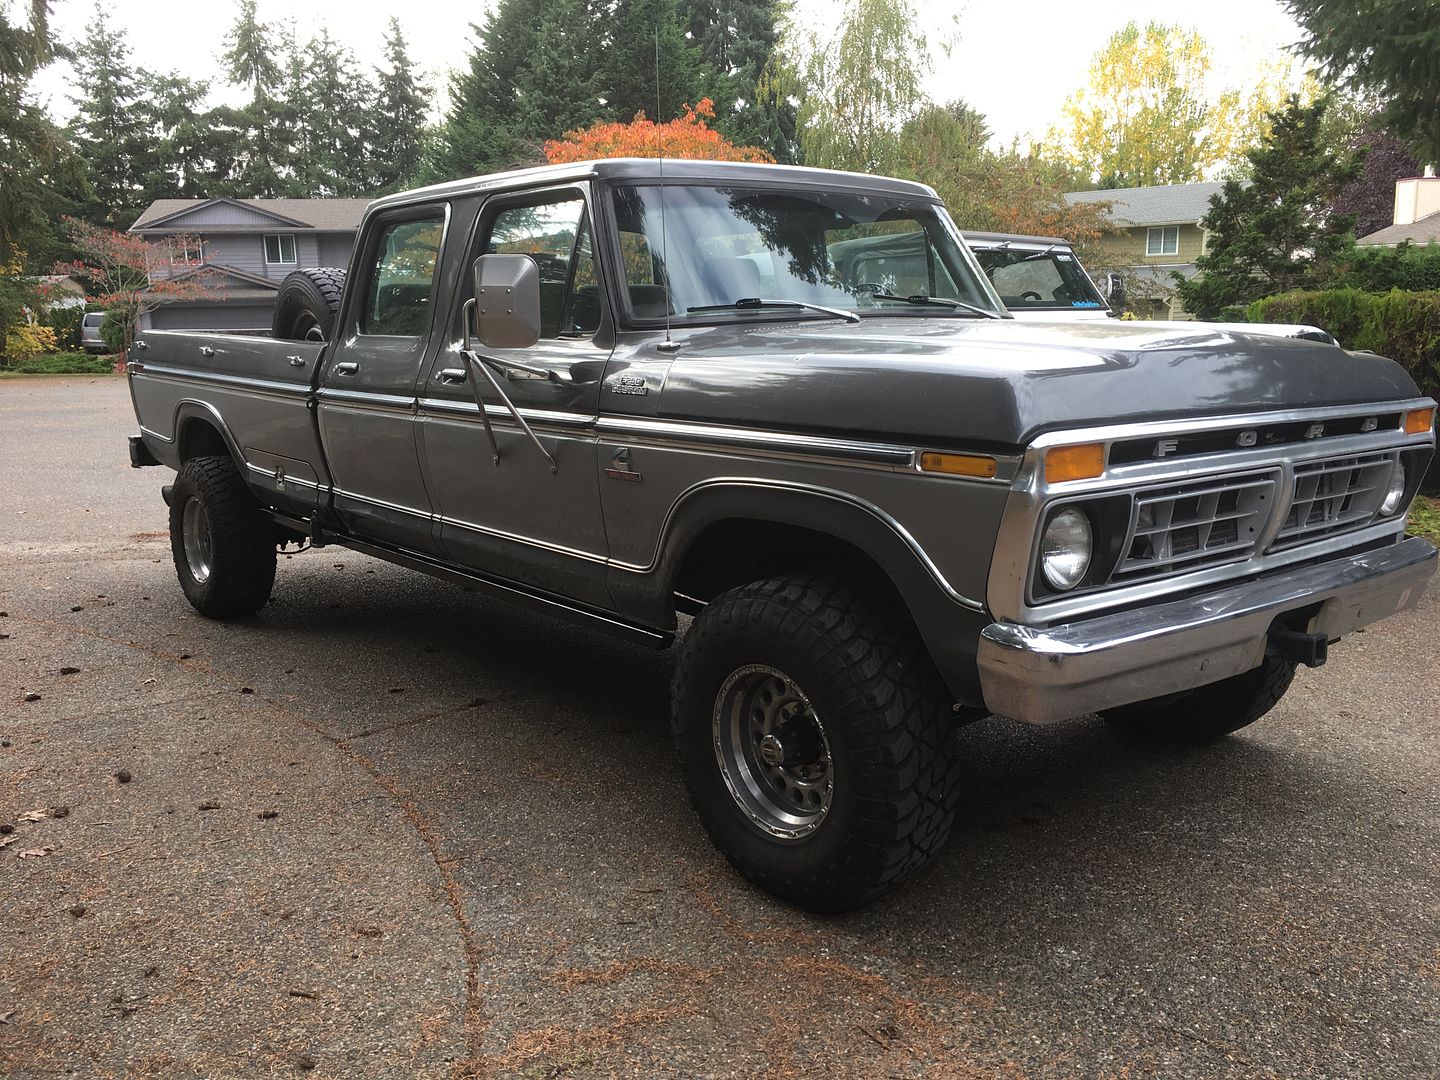
Oh, and I forgot one more thing. Took the truck over to another buddy's shop and switched out the front gears. Changed from the 4.10's to 3.54's. Then had a driveline made up and installed. It's a complete truck now............
And here's an updated pic of the truck with the different wheels & 285/75-16's


And here's an updated pic of the truck with the different wheels & 285/75-16's

#365
10-16-2015, 01:06 AM
More Turbo
Nice seats! Same as the ones in my '97 Dodge. If you want to add seat heaters, you can get them here: Accessories - Interior - SEAT HEATER - ROSTRA - DUAL ELEMENT
#366
10-16-2015, 10:47 AM

#368
10-19-2015, 08:32 AM
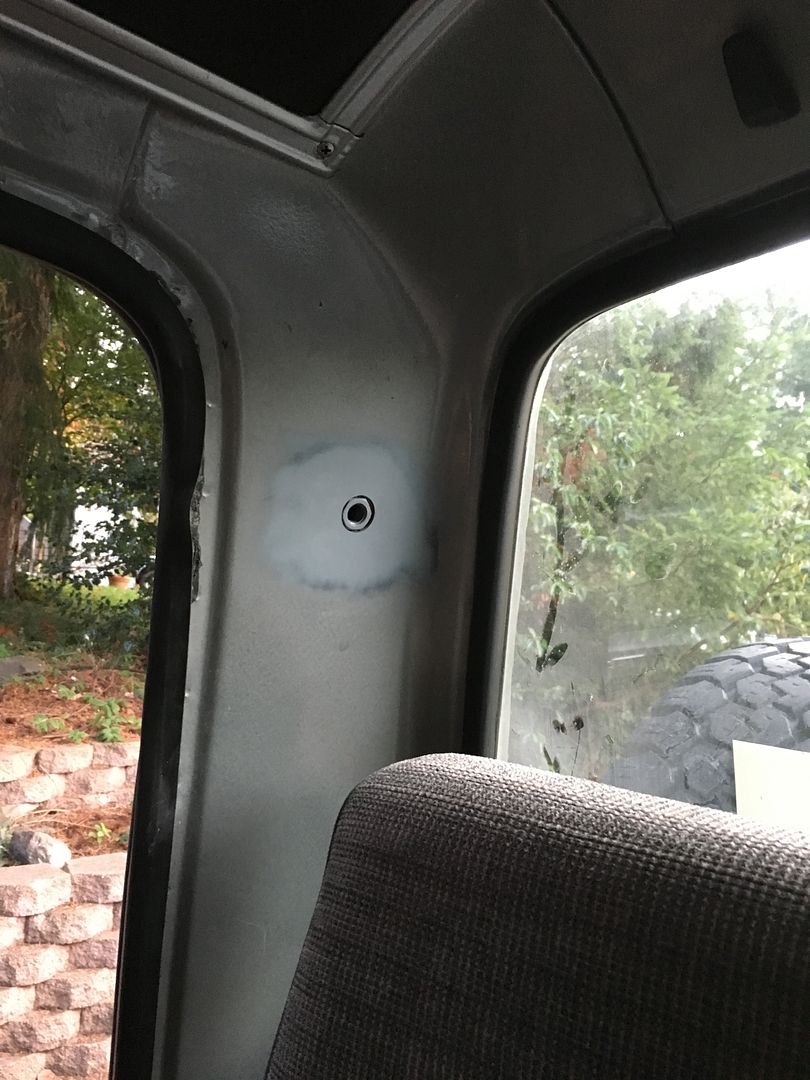
No before pics of the plate, sorry.
But it's about a 3" x 3" piece of 1/8" plate with a 1/2"-13 nut welded in the middle of it. Drilled one large center hole in the cab for the nut to fit into and then (4) 1/4" holes near the corners of the reinforcing plate. Plug welded those 4 holes.
There's lot of opinions on how large the reinforcing plate should be.
#369
10-19-2015, 08:38 AM
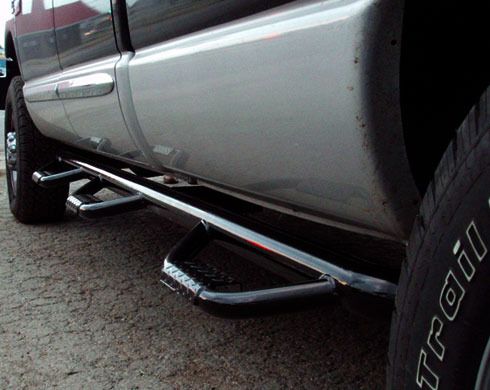
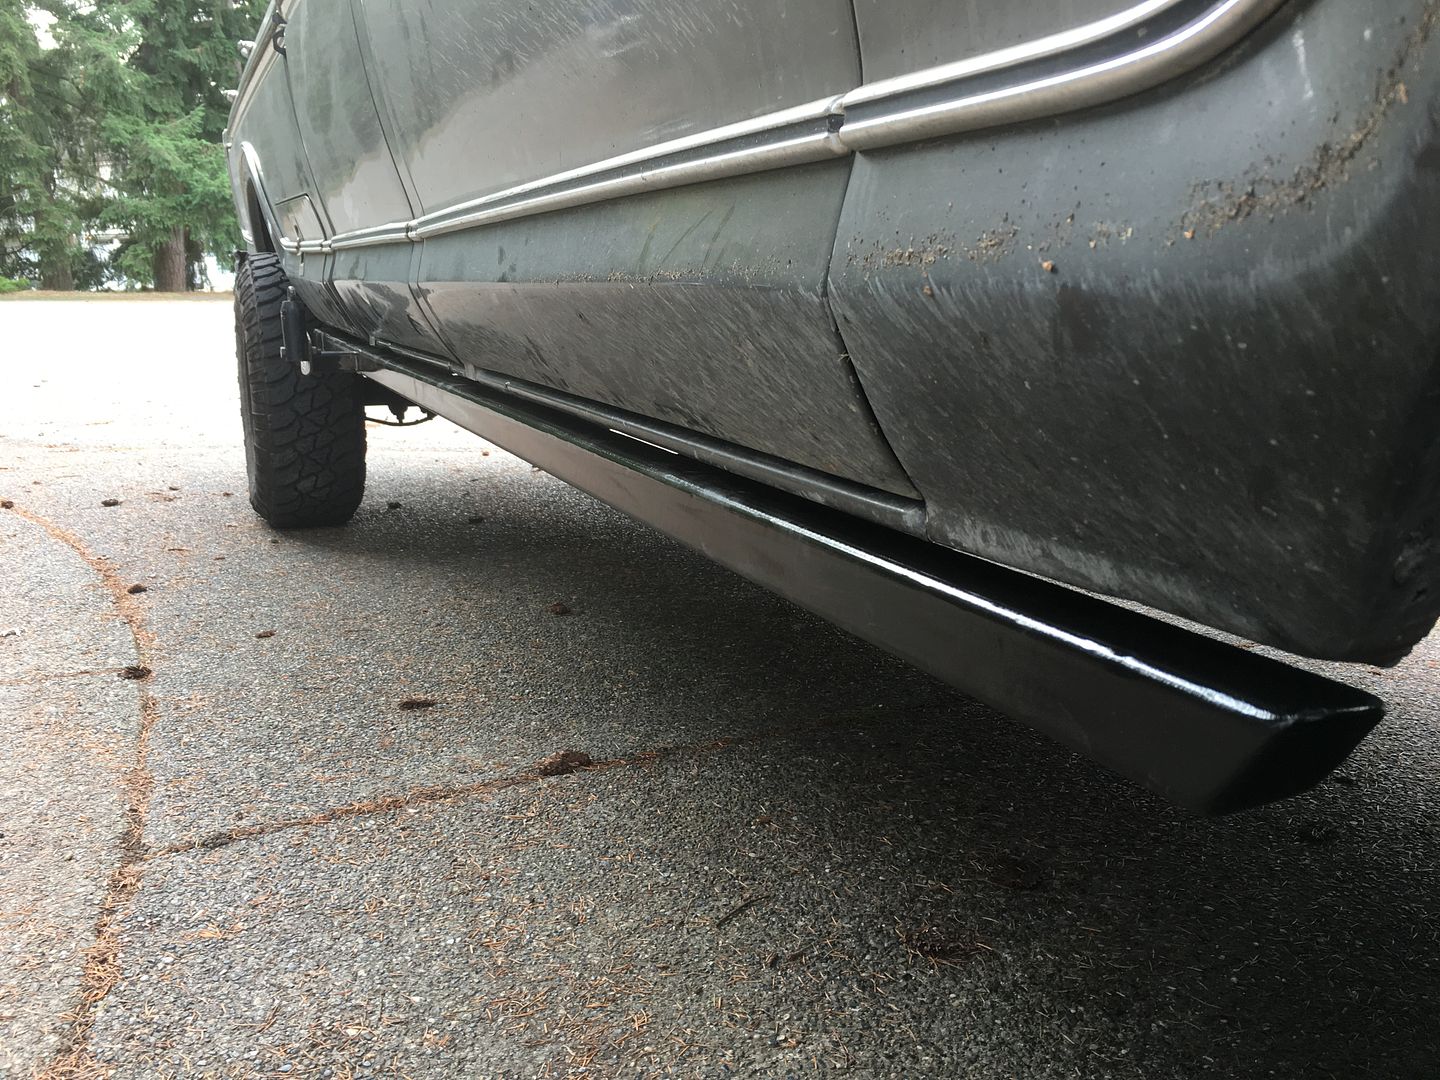
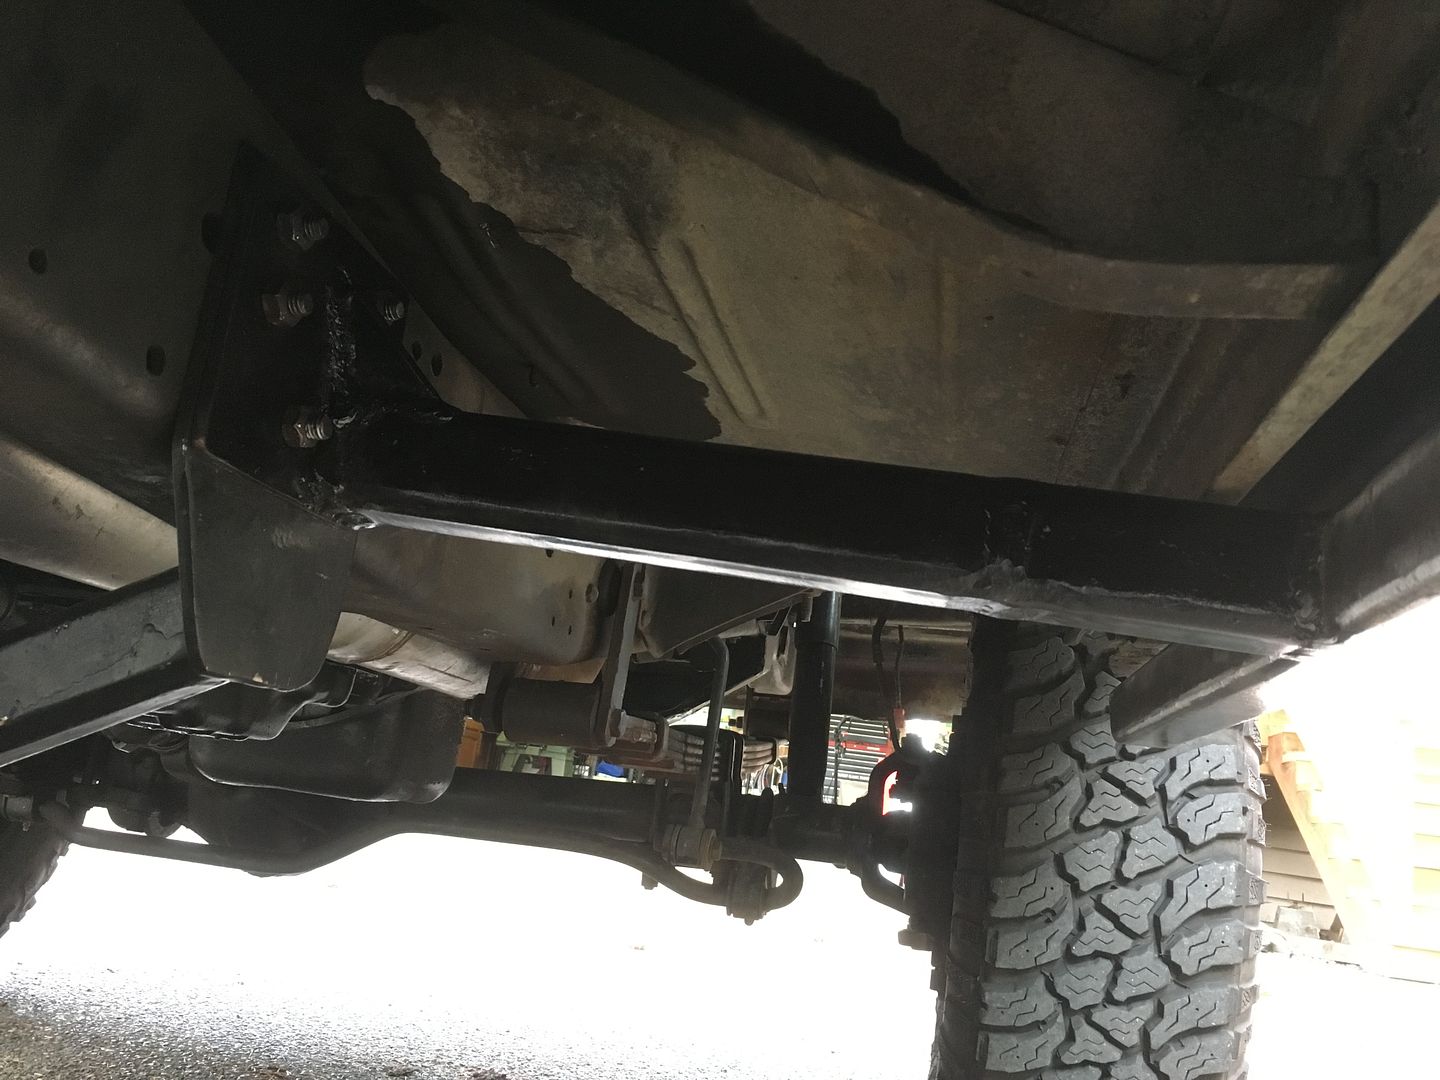
Started on the side steps this weekend. I don't really like the normal aluminum steps you can buy, and not really impressed with bolting them to the sheetmetal.
I really wanted something like this:
So I began with 2"x2" square tubing (I like square better), made some mounts to near the front and back. The problem was that the bar would run right in front of my camper tie downs. So I incorporated the camper tie down in to the step.
I still have some brackets to make and attach, plug the ends and of course fab the steps. Just got the passenger side started for now, will hopefully finish it up this weekend.
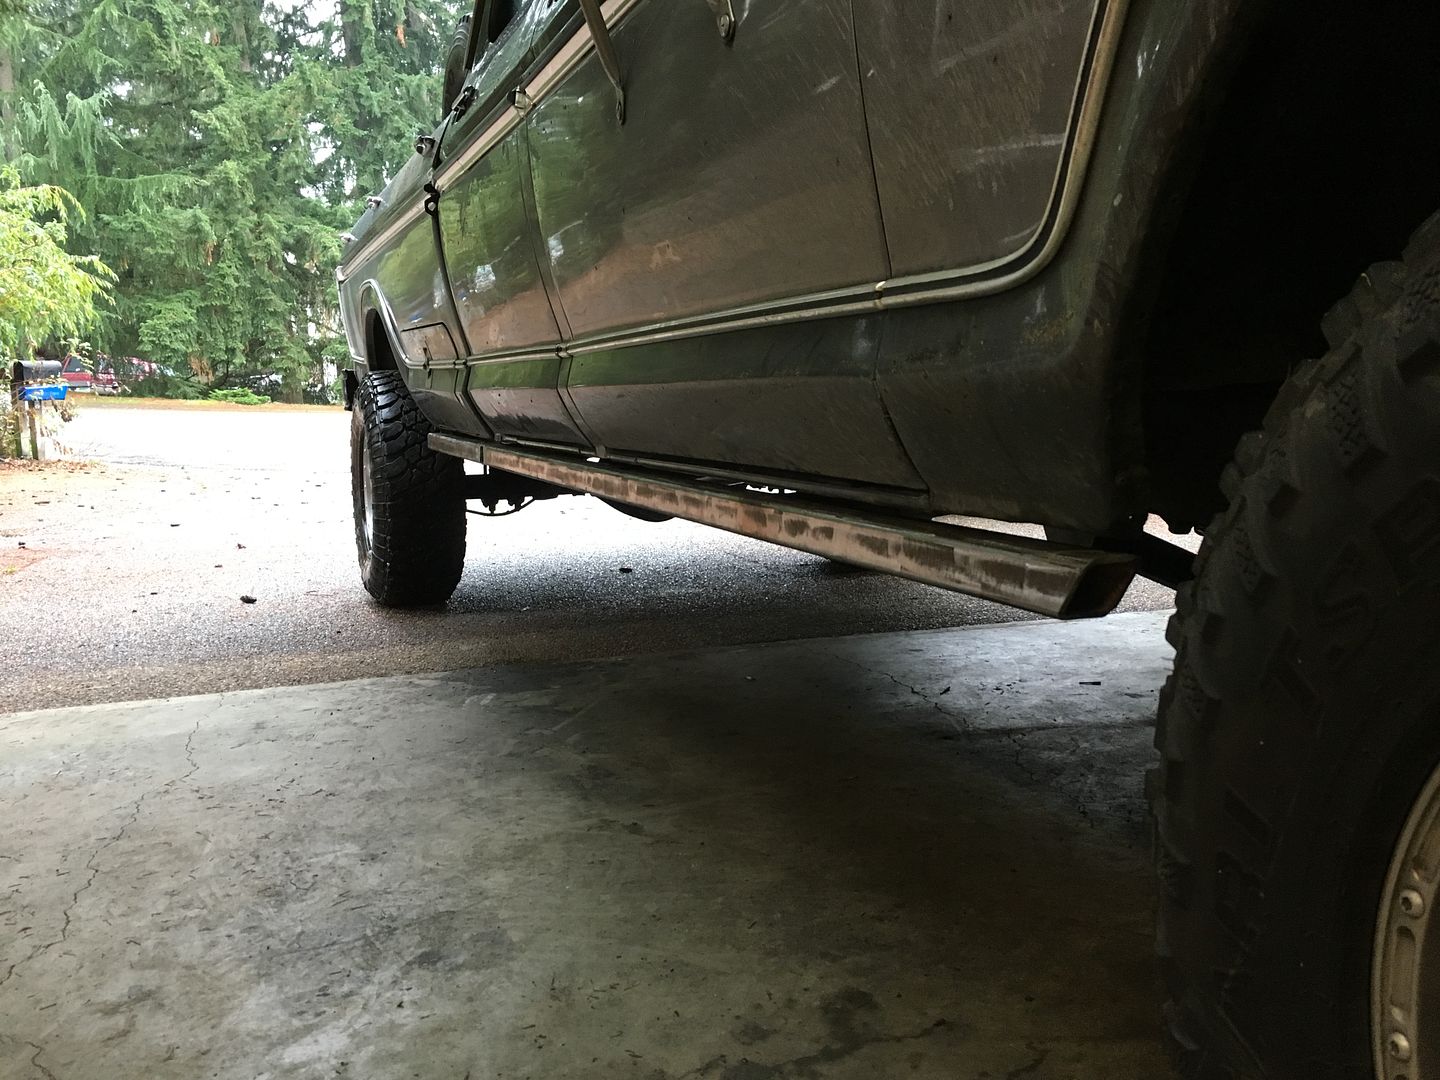
That square hole about 1/2 way down is where I stick the camper tie down into and pin it behind the step bar.
I really wanted something like this:

So I began with 2"x2" square tubing (I like square better), made some mounts to near the front and back. The problem was that the bar would run right in front of my camper tie downs. So I incorporated the camper tie down in to the step.
I still have some brackets to make and attach, plug the ends and of course fab the steps. Just got the passenger side started for now, will hopefully finish it up this weekend.

That square hole about 1/2 way down is where I stick the camper tie down into and pin it behind the step bar.
#370
10-24-2015, 09:47 AM
Worked on the step rail & camper tie down more yesterday. Now all that's left is to make the steps.
Camper tie down. It's sitting exactly where it was before. With the bracing I added, it's pretty stout
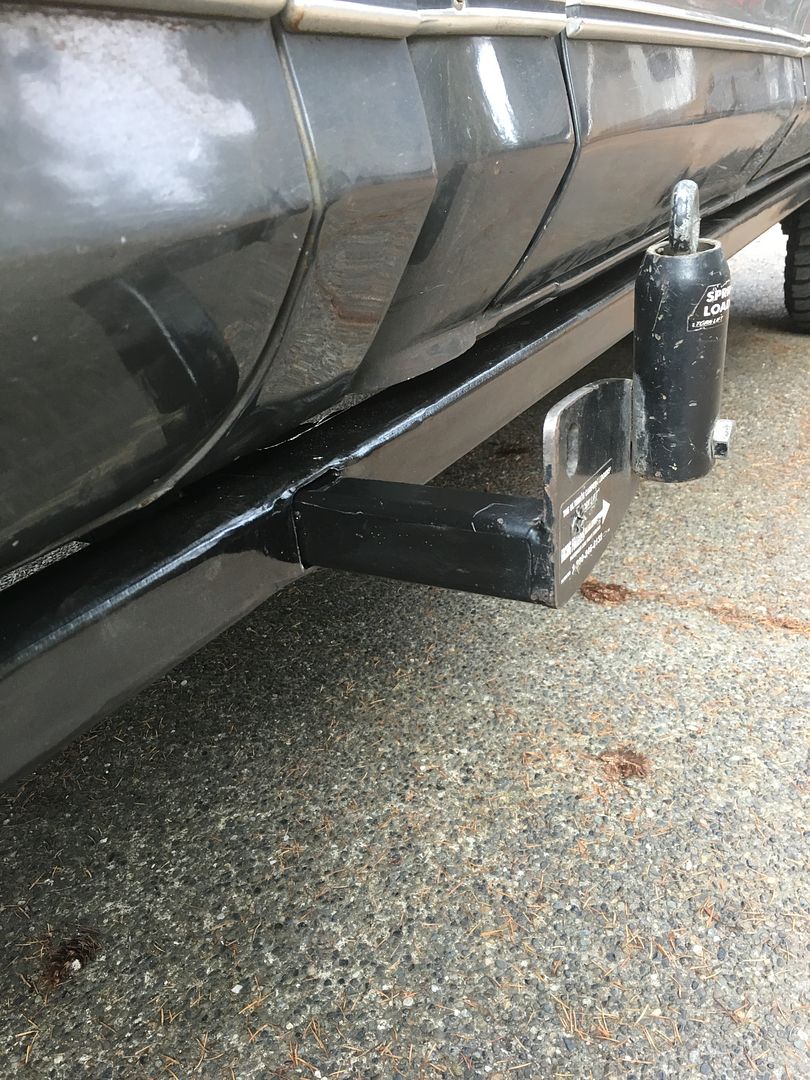
Rear mounts. The one in the rear bolts to the fwd spring hanger.
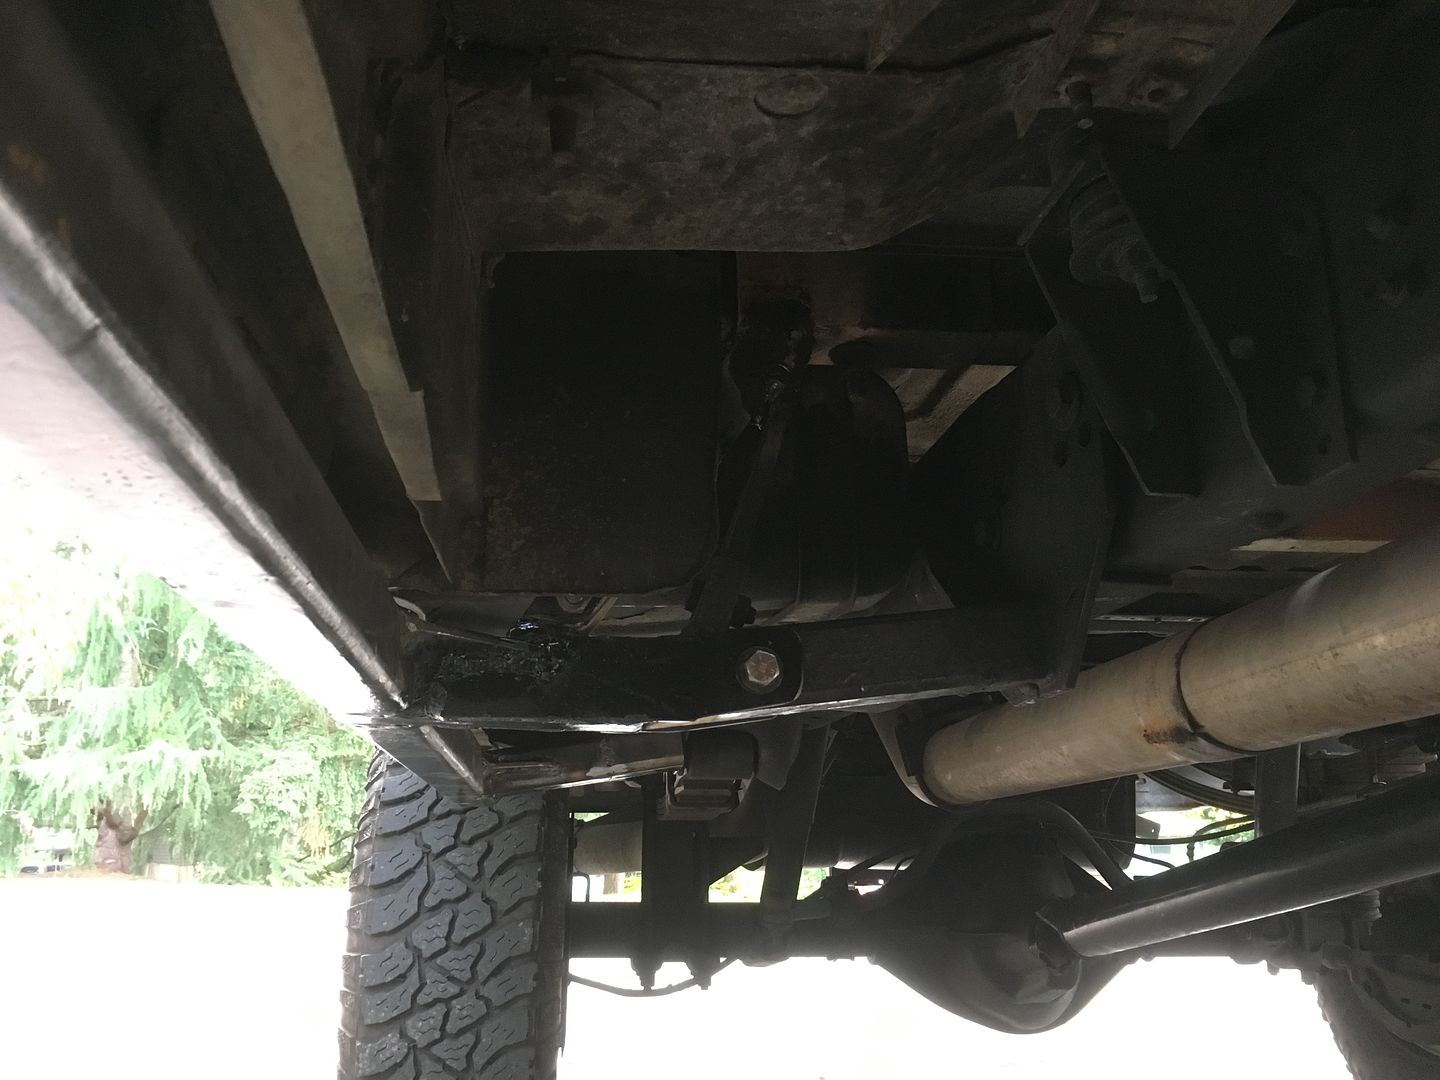
I do have one possible flaw......I had someone bring up a question about the body/bed hitting the bar if I take it offroad. I don't take it wheeling, but there are times when the body will flex. I have about an inch of gap between the step & body, so I need to see if it hits or not. This is why I'm not a professional fabricator


Camper tie down. It's sitting exactly where it was before. With the bracing I added, it's pretty stout

Rear mounts. The one in the rear bolts to the fwd spring hanger.


I do have one possible flaw......I had someone bring up a question about the body/bed hitting the bar if I take it offroad. I don't take it wheeling, but there are times when the body will flex. I have about an inch of gap between the step & body, so I need to see if it hits or not. This is why I'm not a professional fabricator
#371
10-25-2015, 01:04 PM
Logistics Pro
I do have one possible flaw......I had someone bring up a question about the body/bed hitting the bar if I take it offroad. I don't take it wheeling, but there are times when the body will flex. I have about an inch of gap between the step & body, so I need to see if it hits or not. This is why I'm not a professional fabricator
#372
10-25-2015, 01:14 PM

More Turbo
These old frames will flex (twist) from side to side. There is not a whole lot of cross member strength to keep them from flexing like this compared to newer trucks. Boxing the frame will not help this issue. Boxing the frame will only help from flexing front to back, which the frame should not do a whole lot of anyway.
#373
10-29-2015, 08:32 PM
Logistics Pro
These old frames will flex (twist) from side to side. There is not a whole lot of cross member strength to keep them from flexing like this compared to newer trucks. Boxing the frame will not help this issue. Boxing the frame will only help from flexing front to back, which the frame should not do a whole lot of anyway.
#374
11-25-2015, 01:28 PM
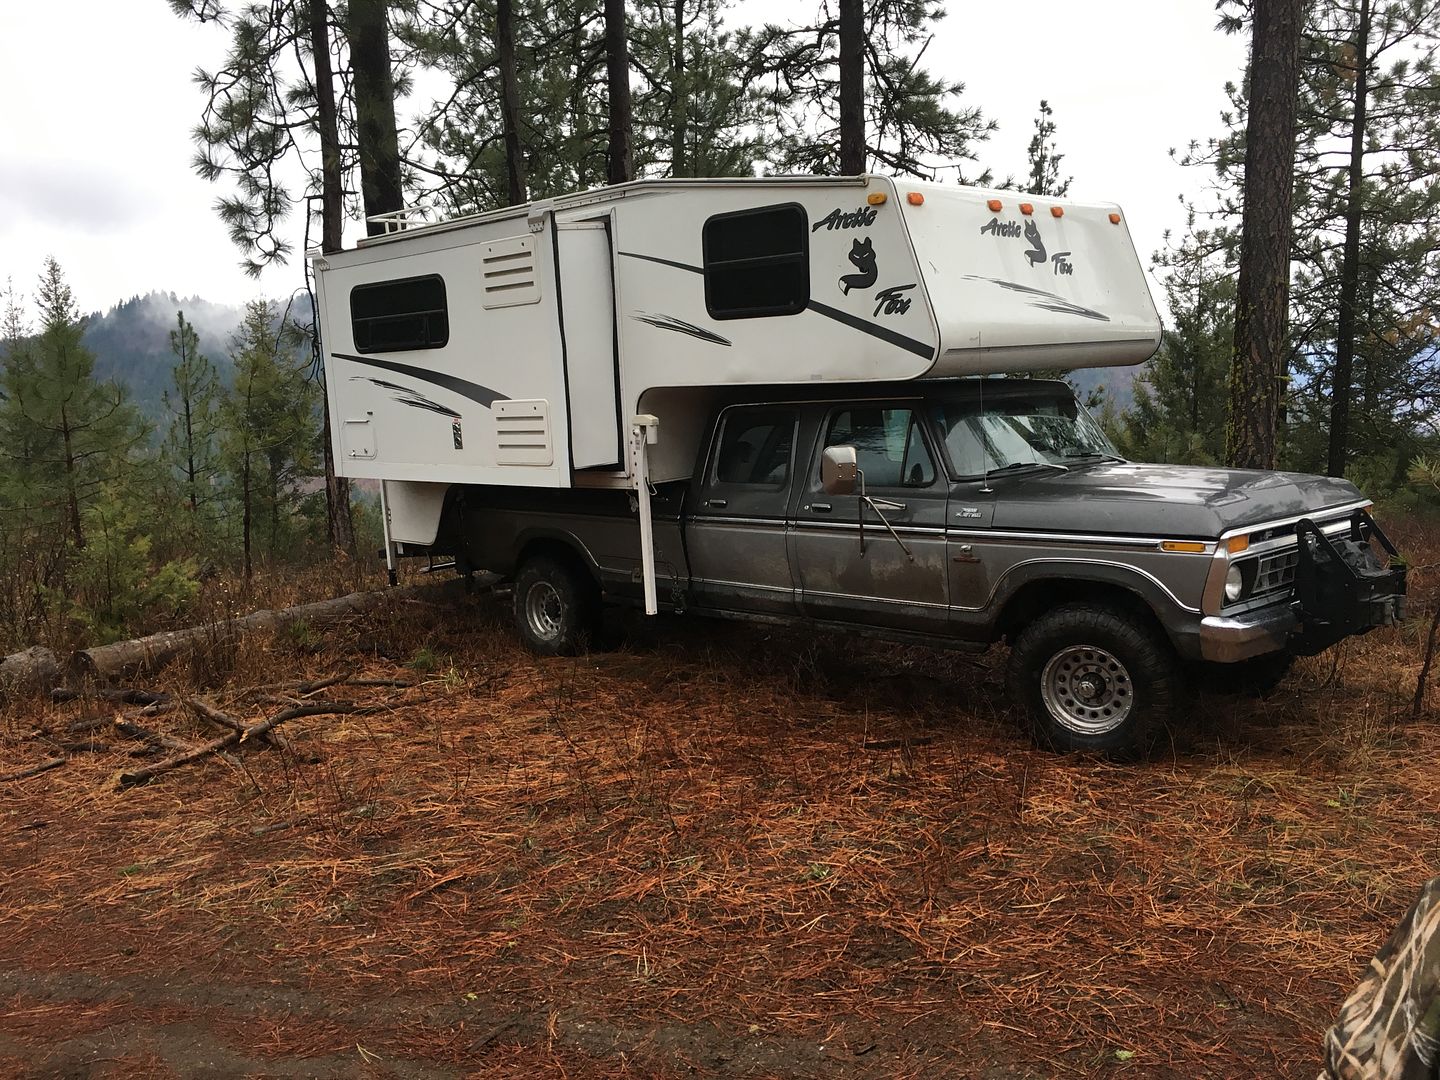
I took the rig on a couple hunting trips. Had the camper with the Bronco on the trailer. Hauled it pretty damn good up the passes. Flexed a little coming up the road to our Elk camp due to the humps in the road. The step bar doesn't look like it hit at any point, so I think I'm safe.
It may hit if I take if offroad.....but that won't happen.
Here's a pic of when I arrived at Elk camp:

Also added a Warn grille guard and winch. The brush guard is for a '78/'79 so the hoops are too high for the '73-'77's. I think I'm going to switch the earlier grille out for a '78/'79 in the future so I'll bolt on the hoops when that happens. Plus the later grille will give me extra room for another trans cooler and A/C condenser.

#375
11-25-2015, 09:27 PM
Cargo Master