351w cylinder head removal
#1
 11-10-2014, 08:29 PM


Join Date: Jun 2014
Location: Denton, TX
Posts: 446
Likes: 0
Received 0 Likes
on
0 Posts
351w cylinder head removal
1982 351w. I have removed all the head bolts and the head absolutely will not move.
I tapped lightly with a hammer, tried getting a screwdriver in to pry it up and had no luck.
I also tried to thread a bolt into the holes on the end to give me some leverage to pull up and the head will not budge at all.
Is there something I am missing?
I tapped lightly with a hammer, tried getting a screwdriver in to pry it up and had no luck.
I also tried to thread a bolt into the holes on the end to give me some leverage to pull up and the head will not budge at all.
Is there something I am missing?

#3
11-10-2014, 09:27 PM
Join Date: Jun 2014
Location: Denton, TX
Posts: 446
Likes: 0
Received 0 Likes
on
0 Posts
Which corner? I couldn't really find a spot that a pry bar would fit.
I am pretty sure everything is disconnected. I took the intake and exhaust manifolds off, took alternator, etc off.
I took the head bolts out.
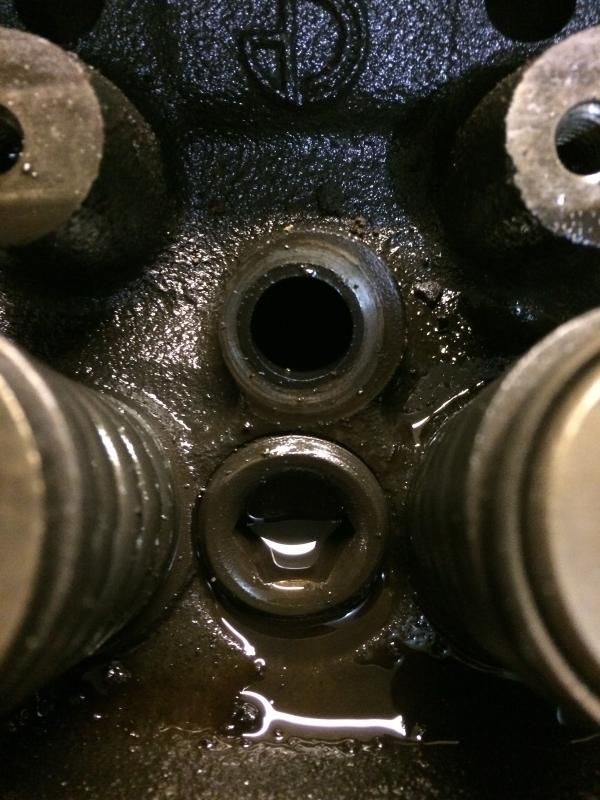
The only thing that could possibly be holding the head on are some set screws located in between the valves on the head (pictured below). Do I need to figure out a way to remove those? I did not have to do anything like that with the other cylinder heads I have worked with.
I am pretty sure everything is disconnected. I took the intake and exhaust manifolds off, took alternator, etc off.
I took the head bolts out.
The only thing that could possibly be holding the head on are some set screws located in between the valves on the head (pictured below). Do I need to figure out a way to remove those? I did not have to do anything like that with the other cylinder heads I have worked with.


#4
11-10-2014, 10:00 PM
Posting Guru
Join Date: Jan 2014
Location: Where the Army sends me
Posts: 1,083
Likes: 0
Received 0 Likes
on
0 Posts
Which corner? I couldn't really find a spot that a pry bar would fit.
I am pretty sure everything is disconnected. I took the intake and exhaust manifolds off, took alternator, etc off.
I took the head bolts out.
The only thing that could possibly be holding the head on are some set screws located in between the valves on the head (pictured below). Do I need to figure out a way to remove those? I did not have to do anything like that with the other cylinder heads I have worked with.
Try to slowly and carefully work on the corner near the end of the valley. You see the curve where the intake seals? It should be flush with the deck/head mating surface. Also, you could try a putty knife and hammer to seperate the two. I had to jimmy a transmission case that way.
#5
11-10-2014, 10:17 PM
Join Date: Jun 2014
Location: Denton, TX
Posts: 446
Likes: 0
Received 0 Likes
on
0 Posts
#6
11-10-2014, 11:24 PM
Logistics Pro
#7
11-10-2014, 11:33 PM
Trending Topics
#9
11-11-2014, 08:25 PM
Join Date: Jun 2014
Location: Denton, TX
Posts: 446
Likes: 0
Received 0 Likes
on
0 Posts
I was able to finally get them both off this evening using the cherry picker and a pry bar.
It was very difficult. At one point the cherry picker lifted the entire engine and stand off the ground.
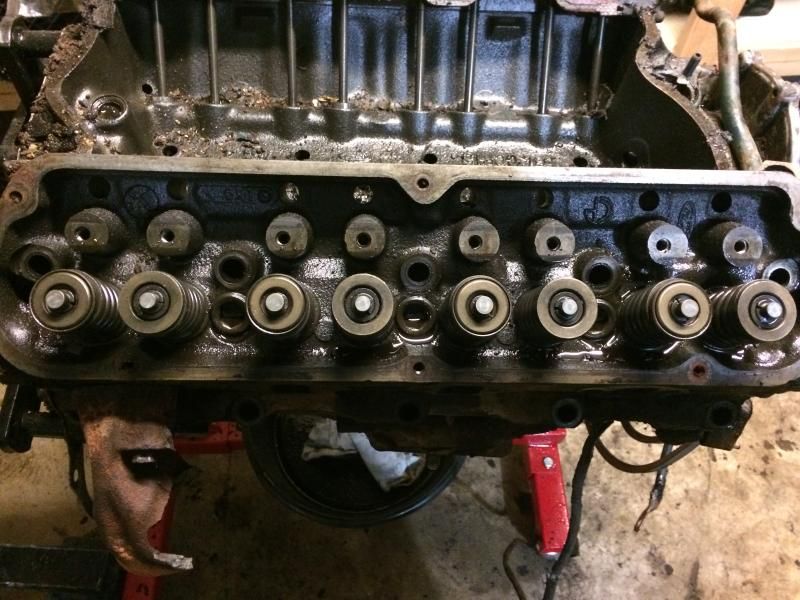
There was all sorts of gasket maker on it. Would it have come from the factory this way? Everything looks like its in really good shape. The engine has 90,000 miles on it but I am wondering if someone has been in there to do some work already.
It was very difficult. At one point the cherry picker lifted the entire engine and stand off the ground.
There was all sorts of gasket maker on it. Would it have come from the factory this way? Everything looks like its in really good shape. The engine has 90,000 miles on it but I am wondering if someone has been in there to do some work already.
#10
11-11-2014, 08:51 PM
Posting Guru
Join Date: Jan 2014
Location: Where the Army sends me
Posts: 1,083
Likes: 0
Received 0 Likes
on
0 Posts
I was able to finally get them both off this evening using the cherry picker and a pry bar.
It was very difficult. At one point the cherry picker lifted the entire engine and stand off the ground.
There was all sorts of gasket maker on it. Would it have come from the factory this way? Everything looks like its in really good shape. The engine has 90,000 miles on it but I am wondering if someone has been in there to do some work already.
#11
11-11-2014, 09:36 PM
Join Date: Jun 2014
Location: Denton, TX
Posts: 446
Likes: 0
Received 0 Likes
on
0 Posts
#12
11-11-2014, 10:10 PM
#13
11-11-2014, 10:15 PM
#14
11-12-2014, 06:00 AM
Posting Guru
Join Date: Jan 2014
Location: Where the Army sends me
Posts: 1,083
Likes: 0
Received 0 Likes
on
0 Posts
I was referring to using the putty knife to merely break the seal. You'd still need to pry it off afterward.
#15
11-12-2014, 08:06 AM
Yeah, man! Especially on the coolant passages, what easier and better way of blocking coolant flow than that? 
https://www.ford-trucks.com/forums/7...ssageways.html
https://www.ford-trucks.com/forums/7...ssageways.html