Long block questions for a first time engine builder

  #46  
Old 12-15-2014, 03:32 PM
78F150TX's Avatar
78F150TX
78F150TX is offline
Senior User
Thread Starter
Join Date: Jul 2012
Location: Denver, Co
Posts: 129
Likes: 0
Received 1 Like on 1 Post
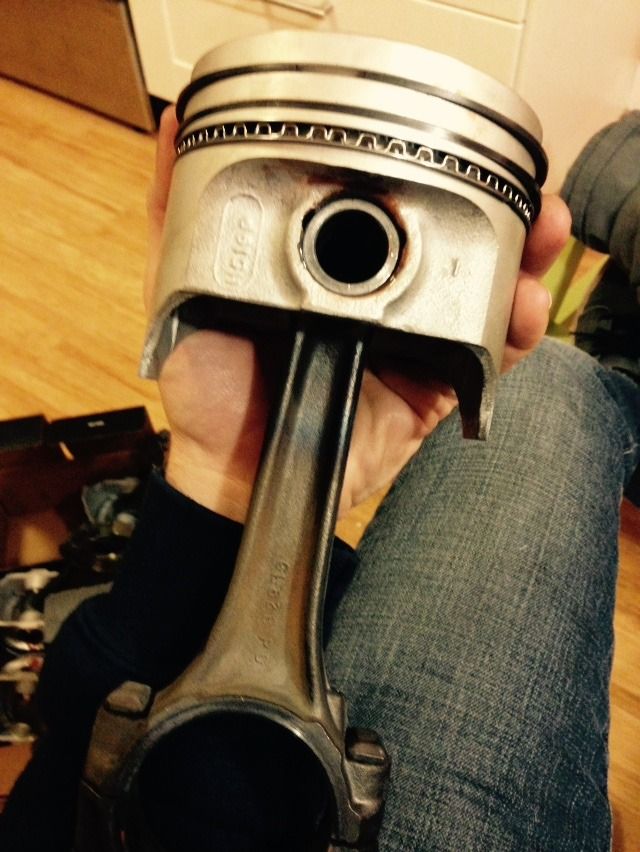
Question for the experienced. My Piston heads arrived today. I'm replacing the rod bearings and main bearings as well. i'm going to drop off the rods and new PistonHeads to be pressed. How important is it for me to keep the rods matched up with their previous cylinders? Critical, not important at all, or just a best practice?
 
  #47  
Old 12-15-2014, 06:31 PM
trozei's Avatar
trozei
trozei is offline
Postmaster
Join Date: Nov 2012
Location: Langley, BC
Posts: 2,806
Likes: 0
Received 8 Likes on 8 Posts
Originally Posted by 78F150TX
Question for the experienced. My Piston heads arrived today. I'm replacing the rod bearings and main bearings as well. i'm going to drop off the rods and new PistonHeads to be pressed. How important is it for me to keep the rods matched up with their previous cylinders? Critical, not important at all, or just a best practice?
Each rod is numbered 1-6 and they also have an arrow indicating which direction to face it. You should keep them together, but confirm that yours are numbered and you won't have to worry about it too much.
 
  #48  
Old 12-15-2014, 08:01 PM
78F150TX's Avatar
78F150TX
78F150TX is offline
Senior User
Thread Starter
Join Date: Jul 2012
Location: Denver, Co
Posts: 129
Likes: 0
Received 1 Like on 1 Post
Originally Posted by trozei
Each rod is numbered 1-6 and they also have an arrow indicating which direction to face it. You should keep them together, but confirm that yours are numbered and you won't have to worry about it too much.
I'll admit that the rods are a bit dirty but I do not see that each is numbered outside of a common part number. As much as I can tell these are the original rods. There is a raised button on each rod. The buttons all face what would be the front of the engine so I am going to use that as my arrow and then I guess I will number punch all of them.

Thanks once again for the help.
 
  #49  
Old 12-15-2014, 08:08 PM
trozei's Avatar
trozei
trozei is offline
Postmaster
Join Date: Nov 2012
Location: Langley, BC
Posts: 2,806
Likes: 0
Received 8 Likes on 8 Posts
Originally Posted by 78F150TX
I'll admit that the rods are a bit dirty but I do not see that each is numbered outside of a common part number. As much as I can tell these are the original rods. There is a raised button on each rod. The buttons all face what would be the front of the engine so I am going to use that as my arrow and then I guess I will number punch all of them.

Thanks once again for the help.
Do not number punch anything. Look on the side where the cap meets the rod. You'll see a number.
 
  #50  
Old 12-15-2014, 09:52 PM
78F150TX's Avatar
78F150TX
78F150TX is offline
Senior User
Thread Starter
Join Date: Jul 2012
Location: Denver, Co
Posts: 129
Likes: 0
Received 1 Like on 1 Post
Originally Posted by trozei
Do not number punch anything. Look on the side where the cap meets the rod. You'll see a number.
Trozei with the Save! Thanks! Right where you said to look. A couple are pretty tough to read but I should be able to match them all up after I get them back from the machine shop.
 
  #51  
Old 12-15-2014, 10:55 PM
trozei's Avatar
trozei
trozei is offline
Postmaster
Join Date: Nov 2012
Location: Langley, BC
Posts: 2,806
Likes: 0
Received 8 Likes on 8 Posts
Originally Posted by 78F150TX
Trozei with the Save! Thanks! Right where you said to look. A couple are pretty tough to read but I should be able to match them all up after I get them back from the machine shop.
I should've been more clear the first time. I remember my first time looking. I didn't find the numbers either.
 
  #52  
Old 12-17-2014, 08:25 PM
78F150TX's Avatar
78F150TX
78F150TX is offline
Senior User
Thread Starter
Join Date: Jul 2012
Location: Denver, Co
Posts: 129
Likes: 0
Received 1 Like on 1 Post
Well it's finally time to start putting her back together again. PistonHeads are pressed on the rods, rings are installed, I've got the bearings, now I hope I have my bearings and get the job done right.

 
  #53  
Old 12-18-2014, 04:09 PM
PatinaTruck's Avatar
PatinaTruck
PatinaTruck is offline
Freshman User
Join Date: Sep 2014
Location: Steamboat Springs
Posts: 36
Likes: 0
Received 0 Likes on 0 Posts
Hey Man. Enjoying your Thread. This may be an obvious question, but is the engine block still in the truck? Meaning, did you pull the rods out while the block was still in the truck?

Im trying to envision that, but am having some difficulty.

Craig
 
  #54  
Old 12-18-2014, 04:42 PM
78F150TX's Avatar
78F150TX
78F150TX is offline
Senior User
Thread Starter
Join Date: Jul 2012
Location: Denver, Co
Posts: 129
Likes: 0
Received 1 Like on 1 Post
Originally Posted by PatinaTruck
Hey Man. Enjoying your Thread. This may be an obvious question, but is the engine block still in the truck? Meaning, did you pull the rods out while the block was still in the truck? Im trying to envision that, but am having some difficulty. Craig
Thanks Patina. It's been an adventure and learning process. Hopefully people are getting some chuckles out of it and some other folks learning from it.

The engine is still in the truck. I will try and take a picture later today to post. I was originally chasing an exhaust leak and one thing led to another and here I am.

I downloaded a shop manual for the truck, which has been a big help. It's pretty straightforward. You remove the radiator, raise the engine an inch and insert blocks at the motor mounts. Then you can drop the oil pan and get at the underside.

With the help of good people like Trozei and Frenchtownflyer I am making my way through the rest. As good as the manual has been, the resources of FTE have been a bigger help.
 
  #55  
Old 01-06-2015, 10:25 AM
78F150TX's Avatar
78F150TX
78F150TX is offline
Senior User
Thread Starter
Join Date: Jul 2012
Location: Denver, Co
Posts: 129
Likes: 0
Received 1 Like on 1 Post
Looking for some tips and tricks again. I want to prime my engine and I have read about using a spare distributor shaft in a drill as a tool. I don't have one. I went to the junkyard and they want to charge me $40 for just the shaft. That sounded a bit steep, so I'm looking for some other options.
I'll go back and bite the bullet if that is the only or best option. Thanks.
 
  #56  
Old 01-06-2015, 12:12 PM
ctubutis's Avatar
ctubutis
ctubutis is offline
Moderator
Join Date: Nov 2007
Location: Denver Metro Area, CO
Posts: 22,405
Received 72 Likes on 56 Posts
I've used these before for this purpose:

 
  #57  
Old 01-06-2015, 01:52 PM
78F150TX's Avatar
78F150TX
78F150TX is offline
Senior User
Thread Starter
Join Date: Jul 2012
Location: Denver, Co
Posts: 129
Likes: 0
Received 1 Like on 1 Post
Thanks Ctubutis. I have one but don't know if it's long enough to reach. I'll check it out when I get home. Appreciate the help.
 
  #58  
Old 01-06-2015, 01:58 PM
1986F150six's Avatar
1986F150six
1986F150six is offline
Lead Driver
Join Date: Jul 2009
Location: Sheffield, AL
Posts: 6,477
Likes: 0
Received 15 Likes on 14 Posts
Rep given!

Originally Posted by ctubutis
I've used these before for this purpose:


That is good, Chris!
 
  #59  
Old 01-06-2015, 02:14 PM
ctubutis's Avatar
ctubutis
ctubutis is offline
Moderator
Join Date: Nov 2007
Location: Denver Metro Area, CO
Posts: 22,405
Received 72 Likes on 56 Posts
It is just a quarter-inch-drive "speed wrench" and can be elongated by merely adding extensions.

I suggest using some duct tape to help secure the pieces together, especially to keep the socket on the end from falling into the engine should it become unattached for some reason.

Thanks, guys.
 
  #60  
Old 01-06-2015, 04:03 PM
78F150TX's Avatar
78F150TX
78F150TX is offline
Senior User
Thread Starter
Join Date: Jul 2012
Location: Denver, Co
Posts: 129
Likes: 0
Received 1 Like on 1 Post
Originally Posted by ctubutis
It is just a quarter-inch-drive "speed wrench" and can be elongated by merely adding extensions. I suggest using some duct tape to help secure the pieces together, especially to keep the socket on the end from falling into the engine should it become unattached for some reason. Thanks, guys.
Thanks Ctubutis, but now I might be confused. Will the 1/4 drive engage the pump directly? or do I need to install a socket with the correct size head? Thanks for the assist.
 

Thread Tools
Search this Thread
Quick Reply: Long block questions for a first time engine builder


All times are GMT -5. The time now is 11:53 AM.