Bye Bye Front Drums
#1
 10-05-2014, 02:58 PM

Bye Bye Front Drums
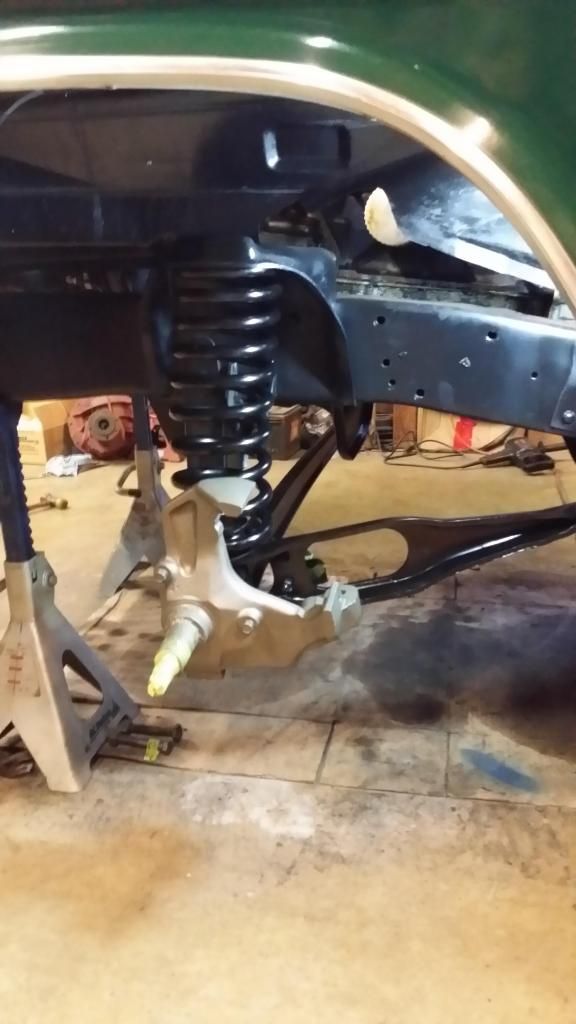
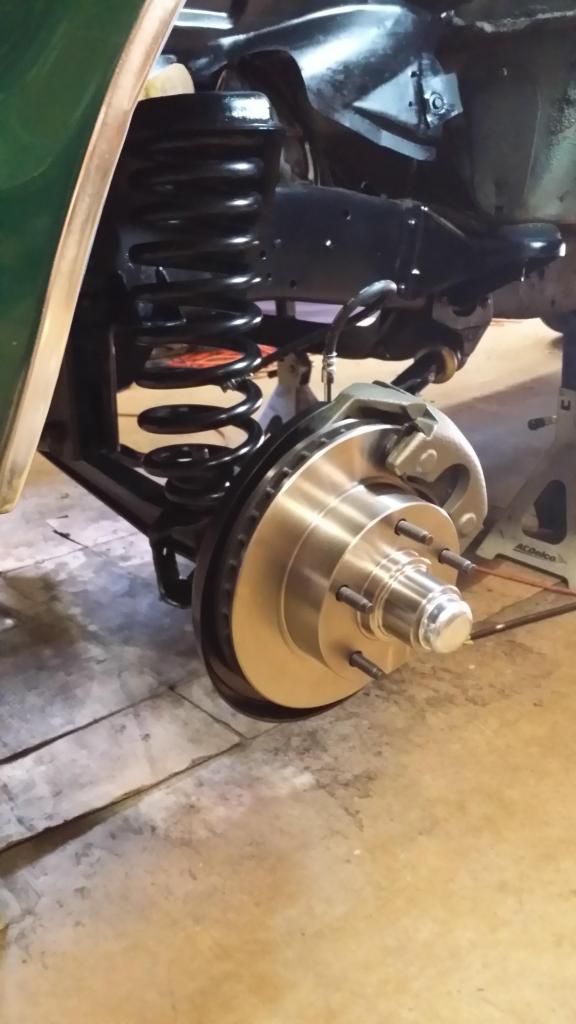
Here's some of this weekends progress. Getting close to having all the front suspension and discs installed, from a '77 F-100, into my '69 F-100 Ranger.
After that, it's on to installing a '78 F-150 Saginaw power steering gear box, a Ford C-2 power steering pump and brackets that came off an '82 pickup with a 300, and then install a tilt steering column from a '78 F-150.
I'm going to give the new Moog CC808 progressive front coil springs some time to settle before I install the front sway bar from a '78 F-250 Camper Special.


#3
10-05-2014, 03:21 PM
Post Fiend

#4
10-05-2014, 03:22 PM
Senior User
Join Date: Nov 2013
Location: Saint Ann
Posts: 217
Likes: 0
Received 0 Likes
on
0 Posts
#5
10-05-2014, 04:05 PM
Yeah, I grabbed the hard line-to-flexible line frame brackets off the '77 when I got the rest of the suspension parts to do this conversion.
#6
10-05-2014, 04:16 PM
Logistics Pro
#7
10-05-2014, 10:07 PM


Trending Topics
#8
10-06-2014, 12:29 PM


#13
10-06-2014, 05:53 PM
#14
10-06-2014, 05:53 PM
Thanks, Bobby.
This is what I started out with on the '77 wrecking yard donor parts I bought during the summer a year ago. --It's actually cleaner in this photo than when I got home with it. I had pressure washed it before I took this photo.

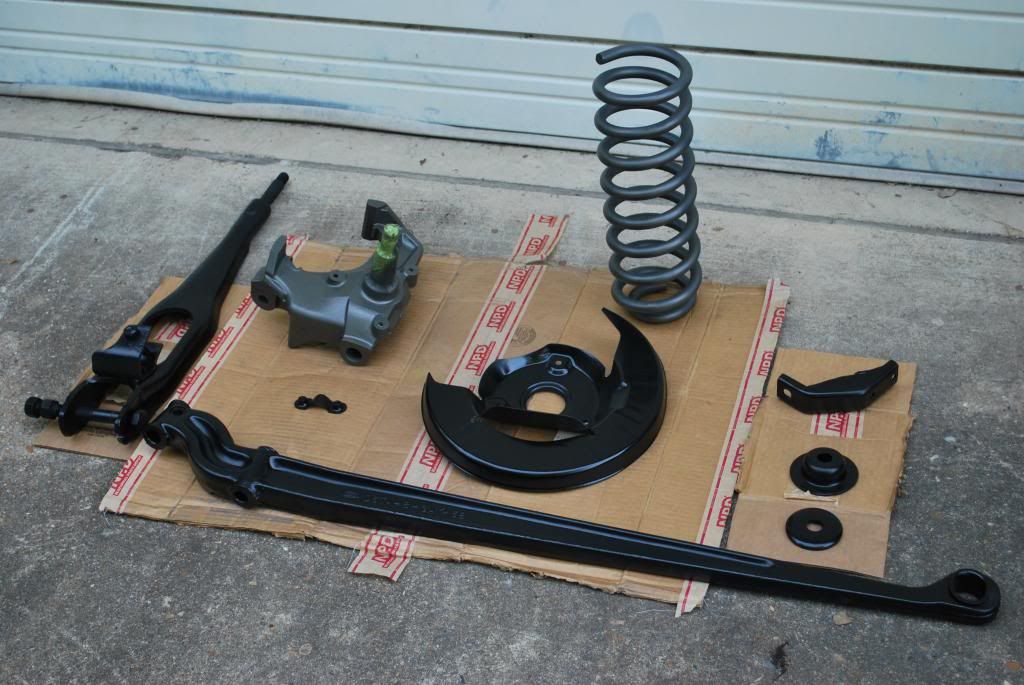
Some of the suspension components after liberal doses of Castrol Super Clean, wire brushing and then a trip through the bead blast cabinet and then 2 coats of primer and 4 top coats of paint.
I checked with alignment and auto repair shops around my area but, no one had the reamer to do the kingpin bushings --I guess kingpin installations are a lost or dying art. I called an engine machine shop (CMS Racing Engines) in a neighboring town and told them what I had and asked if they had a reamer to ream the kingpin bushings. The owner said he had three. I asked how much would it cost for them to ream the bushings, the owner (who doesn't even know me) said I was welcome to borrow what he had. I picked the reamers up last Friday, after I got off work, came home and hand reamed the bushings. I used the piloted-reamer to start the first pass so that both bushings would be inline and straight, relative to each other. The piloted-reamer was just slightly undersized, compared to the kingpin diameter.
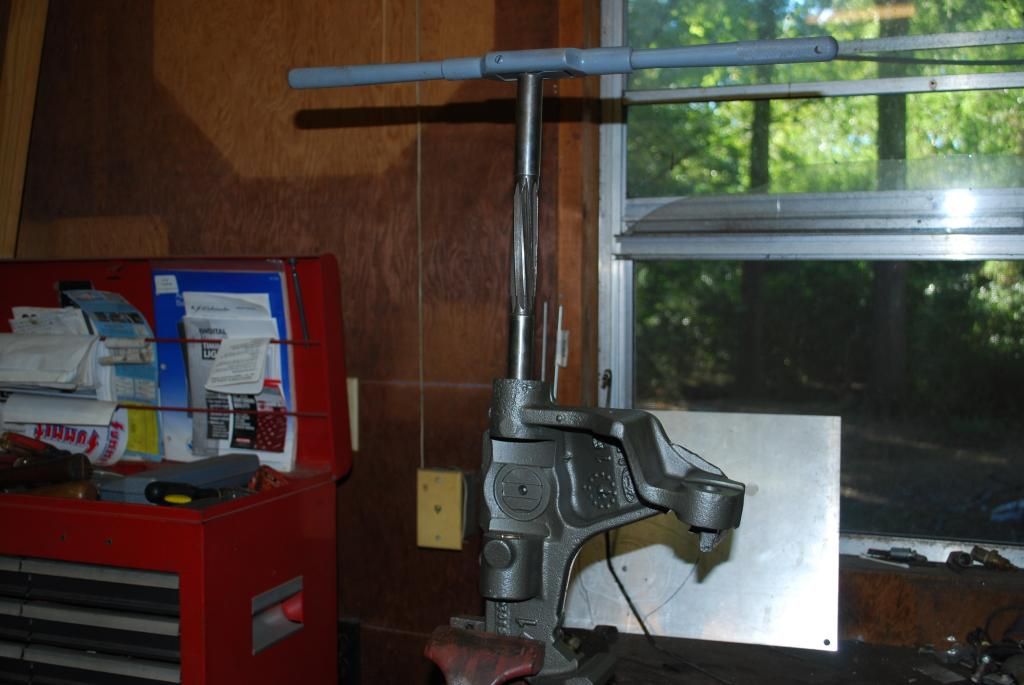
Piloted-reamer just passing through the 2nd, lower, bushing (after this photo, I changed the spindle to a horizontal position and ran the piloted-reamer on through).
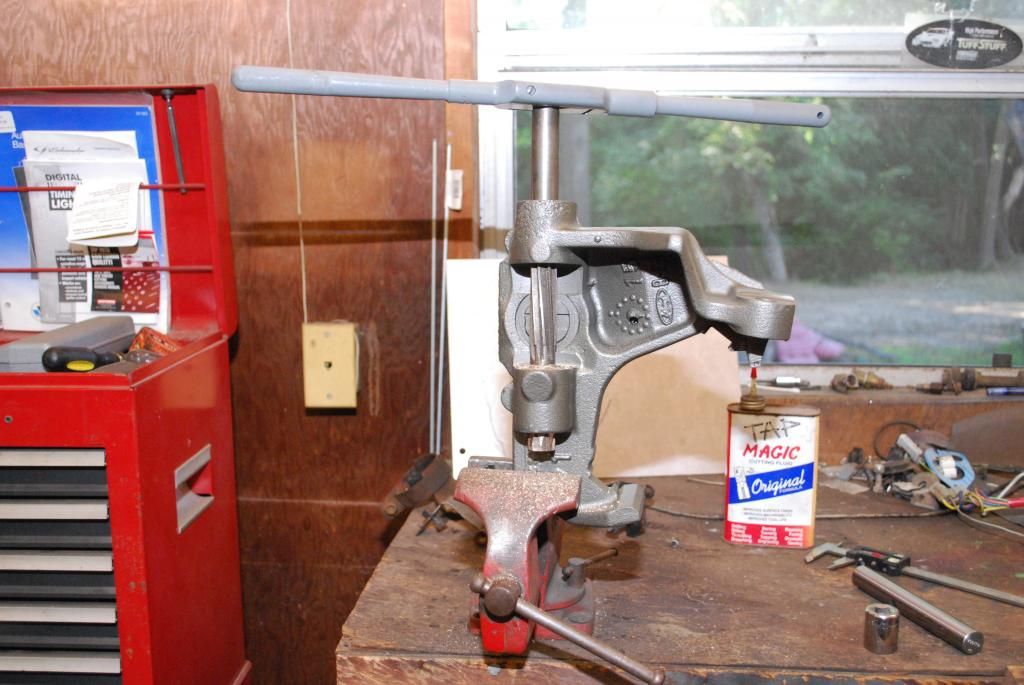
One of the other borrowed reamers was an adjustable one that I set to make the final pass through the bushings with. I've never dealt with kingpins before so, this was definitely a learning experience.
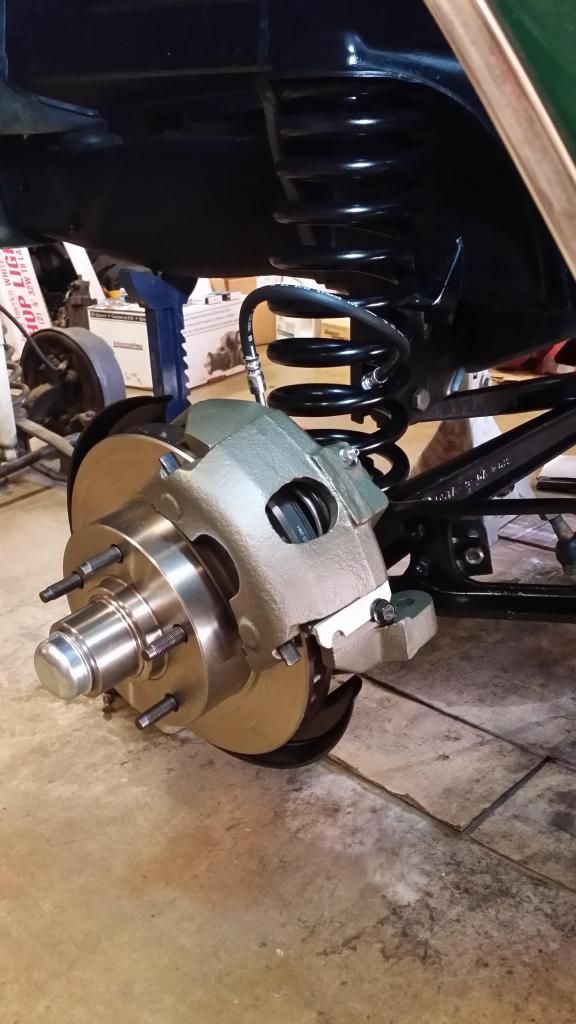
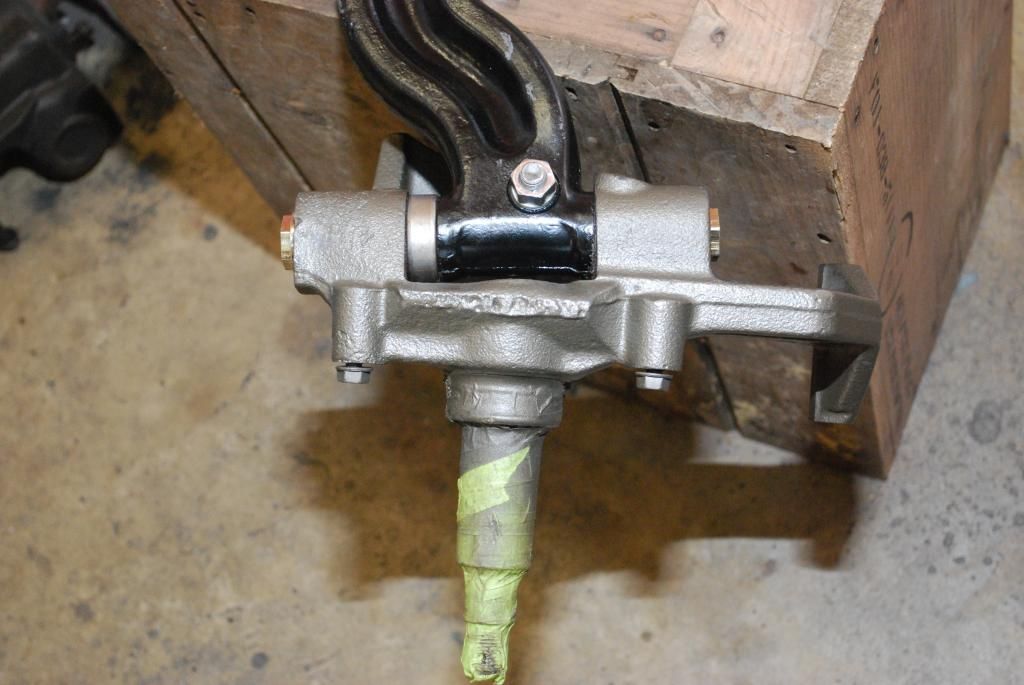
The left side assembled, everything nice and tight and the spindle rotates smoothly with no slack.
This is what I started out with on the '77 wrecking yard donor parts I bought during the summer a year ago. --It's actually cleaner in this photo than when I got home with it. I had pressure washed it before I took this photo.

Some of the suspension components after liberal doses of Castrol Super Clean, wire brushing and then a trip through the bead blast cabinet and then 2 coats of primer and 4 top coats of paint.

I checked with alignment and auto repair shops around my area but, no one had the reamer to do the kingpin bushings --I guess kingpin installations are a lost or dying art. I called an engine machine shop (CMS Racing Engines) in a neighboring town and told them what I had and asked if they had a reamer to ream the kingpin bushings. The owner said he had three. I asked how much would it cost for them to ream the bushings, the owner (who doesn't even know me) said I was welcome to borrow what he had. I picked the reamers up last Friday, after I got off work, came home and hand reamed the bushings. I used the piloted-reamer to start the first pass so that both bushings would be inline and straight, relative to each other. The piloted-reamer was just slightly undersized, compared to the kingpin diameter.

Piloted-reamer just passing through the 2nd, lower, bushing (after this photo, I changed the spindle to a horizontal position and ran the piloted-reamer on through).

One of the other borrowed reamers was an adjustable one that I set to make the final pass through the bushings with. I've never dealt with kingpins before so, this was definitely a learning experience.
The left side assembled, everything nice and tight and the spindle rotates smoothly with no slack.

#15
10-06-2014, 06:19 PM
Thanks, Bobby.
This is what I started out with on the '77 wrecking yard donor parts I bought during the summer a year ago. --It's actually cleaner in this photo than when I got home with it. I had pressure washed it before I took this photo.
Some of the suspension components after liberal doses of Castrol Super Clean, wire brushing and then a trip through the bead blast cabinet and then 2 coats of primer and 4 top coats of paint.
I checked with alignment and auto repair shops around my area but, no one had the reamer to do the kingpin bushings --I guess kingpin installations are a lost or dying art. I called an engine machine shop (CMS Racing Engines) in a neighboring town and told them what I had and asked if they had a reamer to ream the kingpin bushings. The owner said he had three. I asked how much would it cost for them to ream the bushings, the owner (who doesn't even know me) said I was welcome to borrow what he had. I picked the reamers up last Friday, after I got off work, came home and hand reamed the bushings. I used the piloted-reamer to start the first pass so that both bushings would be inline and straight, relative to each other. The piloted-reamer was just slightly undersized, compared to the kingpin diameter.
Piloted-reamer just passing through the 2nd, lower, bushing (after this photo, I changed the spindle to a horizontal position and ran the piloted-reamer on through).
One of the other borrowed reamers was an adjustable one that I set to make the final pass through the bushings with. I've never dealt with kingpins before so, this was definitely a learning experience.
The left side assembled, everything nice and tight and the spindle rotates smoothly with no slack.
I had mine done at an engine shop with a wrist pin hone.