Rear Frame Repaint and Suspension Rebuild
#1
 08-16-2014, 05:05 PM

Rear Frame Repaint and Suspension Rebuild
I've been promising these pictures for a while so here it goes.
I started out just replacing the bed and a new rear fuel tank while I was at it. But when I got the bed off I discovered I had bigger problems.


The shock hangers were bad too.

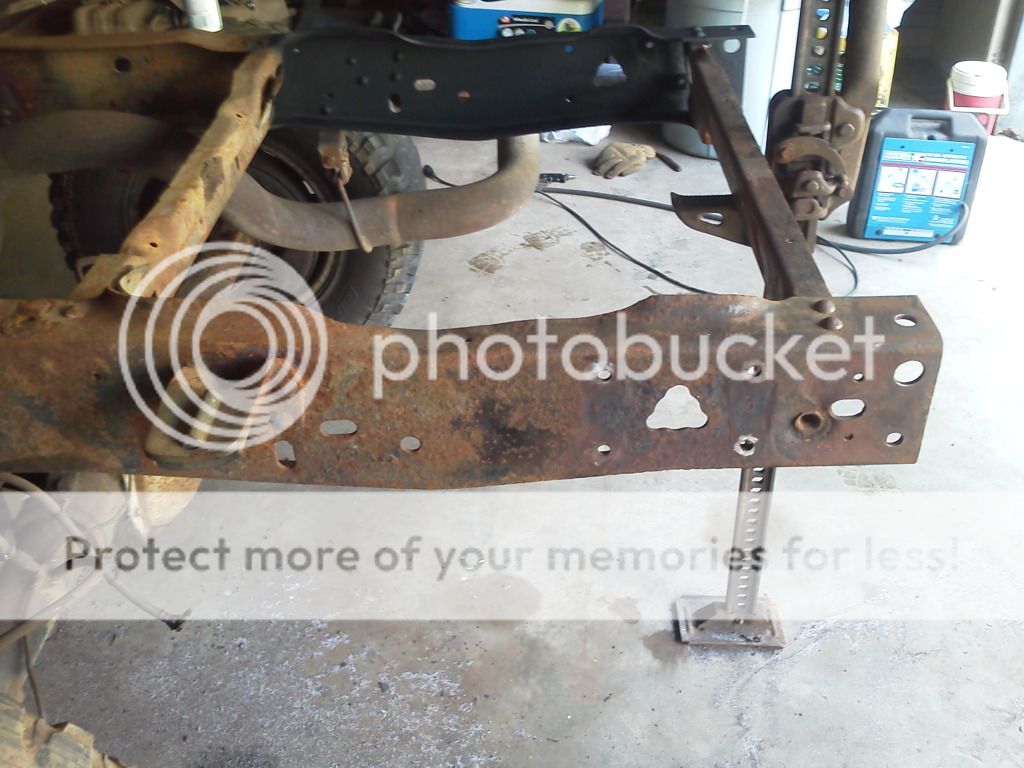
So I decided to replace these bad hangers and also put new bushings in the spring eyes and new rear shocks. When I went to press the old bushings out, I found this:

So now I needed new leaf springs too. Now every single bolt was so rusted that they either snapped off or had to be torched off. I had to drop the front tank to have room to deal with the front eyebolt. The straps were rusted so bad that they just busted when I tried to loosen them so I need new straps too. Once the tanks were out. I found the rear brake line was rusted extremely bad and ready to spring a leak. So I'll be putting a new brake line in too while I have all this room.
The frame was also extemely rusty.

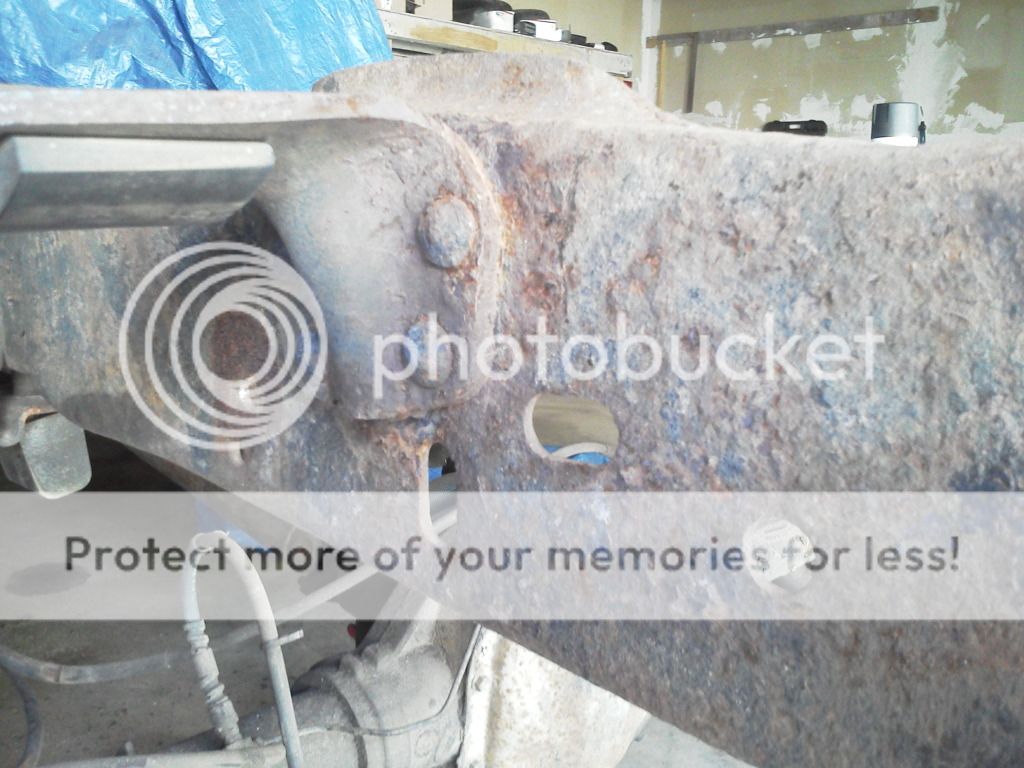
Thats not even the worst spot. The worst spot was the frame rail and cross member next to the front fuel tank. Apparently I didn't get any pictures of that.
I started out just replacing the bed and a new rear fuel tank while I was at it. But when I got the bed off I discovered I had bigger problems.


The shock hangers were bad too.

So I decided to replace these bad hangers and also put new bushings in the spring eyes and new rear shocks. When I went to press the old bushings out, I found this:

So now I needed new leaf springs too. Now every single bolt was so rusted that they either snapped off or had to be torched off. I had to drop the front tank to have room to deal with the front eyebolt. The straps were rusted so bad that they just busted when I tried to loosen them so I need new straps too. Once the tanks were out. I found the rear brake line was rusted extremely bad and ready to spring a leak. So I'll be putting a new brake line in too while I have all this room.
The frame was also extemely rusty.


Thats not even the worst spot. The worst spot was the frame rail and cross member next to the front fuel tank. Apparently I didn't get any pictures of that.
#2
08-16-2014, 05:24 PM
I wire-wheeled everything that a I could and sand blasted where I couldn't get the wheel to prep for rustoluem rust reformer.


Soory those pictures were kinda dark. It was about midnight when I took them and my phone has a crappy camera.
I made sure to clean these dirt traps out really well. All four where completly plugged with mud, sand, and rust. I know it is supposed to drain out, but it just doesn't work.

With all this rust I was suprised to find some patches of pristine steel just like it left the factory. It was hiding under this gooey rubbery stuff that keeps the frame from rubbing the fuel tanks.

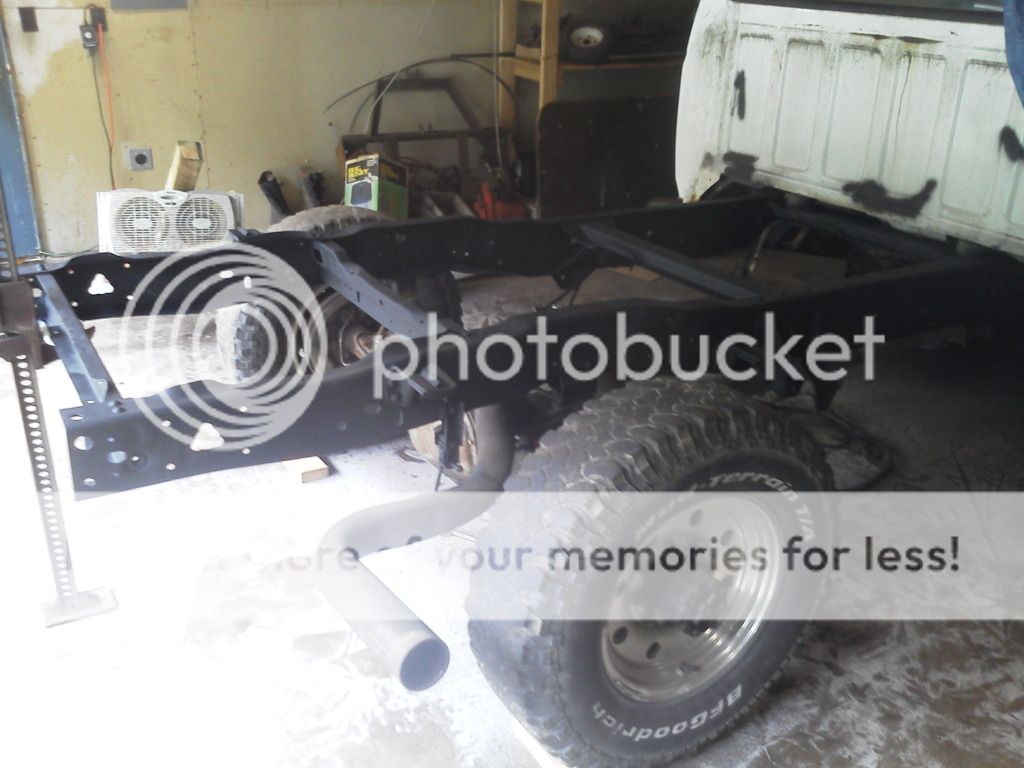
At last I was ready to put a coat of the rust reformer on.

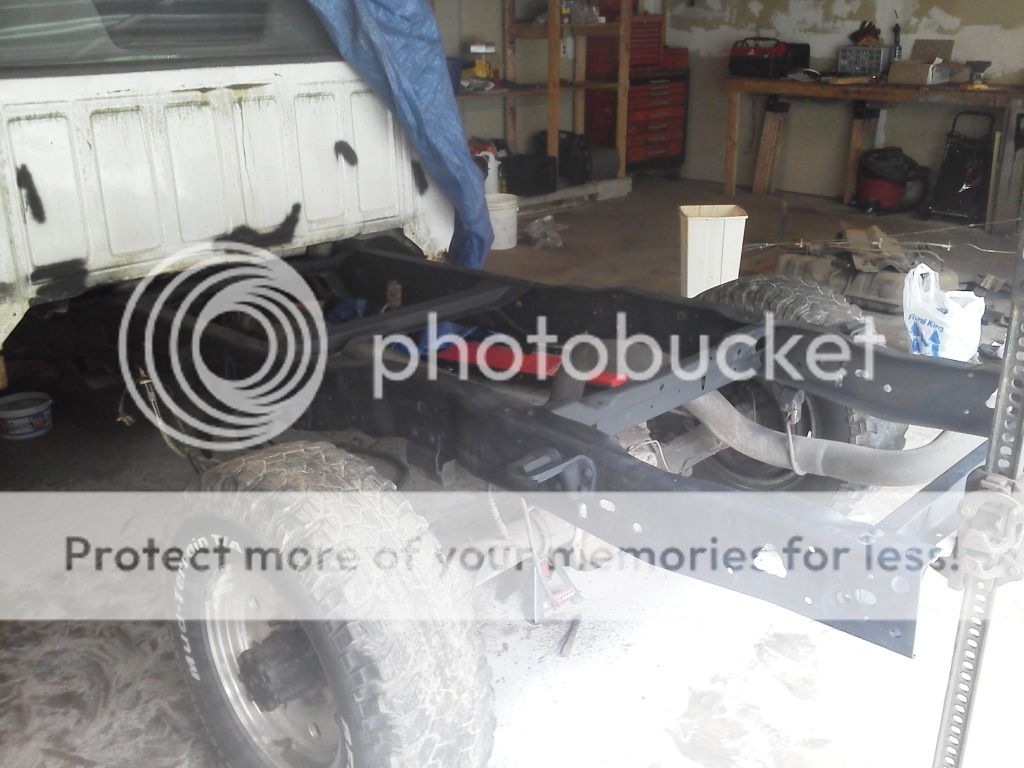
Hopefully tomorrow after church I'll have time to put the top coat on before the family get together. I still have a lot work to do and parts to buy. Its gotta be done before my son is born in ~14 weeks!


Soory those pictures were kinda dark. It was about midnight when I took them and my phone has a crappy camera.
I made sure to clean these dirt traps out really well. All four where completly plugged with mud, sand, and rust. I know it is supposed to drain out, but it just doesn't work.

With all this rust I was suprised to find some patches of pristine steel just like it left the factory. It was hiding under this gooey rubbery stuff that keeps the frame from rubbing the fuel tanks.

At last I was ready to put a coat of the rust reformer on.


Hopefully tomorrow after church I'll have time to put the top coat on before the family get together. I still have a lot work to do and parts to buy. Its gotta be done before my son is born in ~14 weeks!

#4
08-16-2014, 09:19 PM
Lead Driver
Join Date: Dec 2005
Location: Chino Valley, Arizona
Posts: 9,281
Received 3,678 Likes
on
1,133 Posts
#7
08-17-2014, 10:30 AM
Hotshot
Trending Topics
#8
08-18-2014, 01:14 PM
It appears the reust reformer is doing its job. I removed ALL the flakey stuff. I even used a hammer and chisel to knock rust layers loose. For the top coat(s) I'm just going to use implement paint. I figure this is a work truck so no point in buyer anything fancy. Plus if its good enough for a tractor it ought to be good enough for an old truck frame.
You and me both!
#10
08-19-2014, 11:20 AM
#11
08-19-2014, 12:59 PM
Postmaster
Join Date: May 2011
Location: Rockford IL
Posts: 2,622
Likes: 0
Received 0 Likes
on
0 Posts
Lookin' good Phil!I wish I had taken the time to do all of this when I had the bed off. It was just soooo much time tho. lol
What would you recommend or what have you used?
I know you've done extensive restoration work with great results.

What would you recommend or what have you used?
I know you've done extensive restoration work with great results.
#13
08-19-2014, 08:20 PM
Fleet Owner
POR15(2 coats)
Chassis black or tractor black(2 coats)
The results speak for themselves
before

After


#14
08-20-2014, 06:51 AM
Post Fiend
Looks good Phil! Keep up the good work and keep those pictures coming.
I know the whole paint and frame protection thing has been beat to death, and Brad, those results do looks good, but what I really want to know is what each different approach looks like after 5 years of use. I know I can slap 4 coast of paint onto something and it will look great when it's done, but what I want to know is how it will hold up over time. I don't want to do all that work just to make it look good, you know? I want to know what will provide the best lasting protection.
I know the whole paint and frame protection thing has been beat to death, and Brad, those results do looks good, but what I really want to know is what each different approach looks like after 5 years of use. I know I can slap 4 coast of paint onto something and it will look great when it's done, but what I want to know is how it will hold up over time. I don't want to do all that work just to make it look good, you know? I want to know what will provide the best lasting protection.
#15
08-20-2014, 08:43 AM
Postmaster
Join Date: May 2011
Location: Rockford IL
Posts: 2,622
Likes: 0
Received 0 Likes
on
0 Posts
I wish I could sandblast everything. Mom would kill me if I did that in the driveway or yard...not sure if they'd care at my apartment complex.

Same with what Nate said. I'd love it if somebody would do the same prep on both halves of a frame, but coat it with different products. Then take pictures a few years down the road. lol