1948 - 1956 F1, F100 & Larger F-Series Trucks Discuss the Fat Fendered and Classic Ford Trucks

Well, it's almost time. 51 F1

Thread Tools
 
Search this Thread
 
  #61  
Old 11-17-2014, 03:38 PM
mustangmike6996's Avatar
mustangmike6996
mustangmike6996 is offline
Elder User
Thread Starter
Join Date: Jun 2013
Location: Metro Detroit-MI
Posts: 949
Likes: 0
Received 0 Likes on 0 Posts
Yea the more I think about it the more I don't want to do an irreversible mod.

Next question:

My bed/box sides have the old carriage bolts rusted in the panels. What is the best way to removed them?

Angle grinder with a disc, heat, penetrating oil and some love from a hammer?
 
  #62  
Old 11-17-2014, 03:59 PM
schoo's Avatar
schoo
schoo is offline
Logistics Pro
Join Date: Mar 2012
Location: placer county usa?
Posts: 4,332
Received 13 Likes on 12 Posts
Originally Posted by mustangmike6996
Yea the more I think about it the more I don't want to do an irreversible mod.

Next question:

My bed/box sides have the old carriage bolts rusted in the panels. What is the best way to removed them?

Angle grinder with a disc, heat, penetrating oil and some love from a hammer?
yes all the above plus sawsall and nut splitter
 
  #63  
Old 11-17-2014, 04:02 PM
mustangmike6996's Avatar
mustangmike6996
mustangmike6996 is offline
Elder User
Thread Starter
Join Date: Jun 2013
Location: Metro Detroit-MI
Posts: 949
Likes: 0
Received 0 Likes on 0 Posts
There isn't enough to sawzall... maybe 1/4" sticking out past the bedside. Sawzall was probably initially used lol.

Hmmm maybe I can use my spotweld cutting bit on the back side of the heads and get them that way. I just don't want to trash the bedsides in the process.
 
  #64  
Old 11-17-2014, 04:28 PM
schoo's Avatar
schoo
schoo is offline
Logistics Pro
Join Date: Mar 2012
Location: placer county usa?
Posts: 4,332
Received 13 Likes on 12 Posts
Originally Posted by mustangmike6996
There isn't enough to sawzall... maybe 1/4" sticking out past the bedside. Sawzall was probably initially used lol.

Hmmm maybe I can use my spotweld cutting bit on the back side of the heads and get them that way. I just don't want to trash the bedsides in the process.
I try to save my spot weld bits unless HF I use HF drill bits and what ever to be nice to the parts I need and just what ever it takes to the bolts nuts to clean them off
 
  #65  
Old 11-18-2014, 10:44 AM
AXracer's Avatar
AXracer
AXracer is offline
Hotshot
Join Date: Oct 2004
Location: Durham NC
Posts: 15,844
Received 53 Likes on 34 Posts
Note that the "carriage bolts" in the bed sides for the fenders are not carriage bolts at all or rusted in, they were spot welded (3 each) from the factory. Be careful removing them as it's easy to tear the bed side. Do an advanced search on keywords "fender bolt removal" here to find the popular/successful removal methods. Advanced search can be found by clicking the search v tab in the blue band under the FTE logo above. select advanced search in the drop down menu. Be sure to put the keyword phrase in quotes or you'll get hit on every post that contains any of the words: FENDER, BOLT OR REMOVAL in it. Also check the 48-56 forum as the search location.
 
  #66  
Old 11-18-2014, 01:38 PM
dmack91's Avatar
dmack91
dmack91 is offline
Elder User
Join Date: Feb 2012
Location: Central Oregon
Posts: 948
Likes: 0
Received 0 Likes on 0 Posts
I used an air hammer/chisel bit to remove mine. Just hook under the edge and carefully work them out. The three spot welds pop fairly easily.
 
  #67  
Old 11-18-2014, 01:57 PM
ryans88gt's Avatar
ryans88gt
ryans88gt is offline
Senior User
Join Date: Oct 2013
Posts: 386
Likes: 0
Received 0 Likes on 0 Posts
Originally Posted by mustangmike6996
For all of the naysayers... 08 crown Vic IFS. Full Mock up is a few days away.


You gunna narrow this? I took 2.75" out of mine so it would fit the frame rails.
 
  #68  
Old 11-18-2014, 04:40 PM
mustangmike6996's Avatar
mustangmike6996
mustangmike6996 is offline
Elder User
Thread Starter
Join Date: Jun 2013
Location: Metro Detroit-MI
Posts: 949
Likes: 0
Received 0 Likes on 0 Posts
I had a suspicion that they were spot welded but theres enough rust to make them look rusted in. The reason I said carriage bolts was because I saw replacements that were carriage style. I will work the grinder, air hammer, and spot weld drill bit I have.

Also, yes, I will be narrowing the CV IFS probably in a week or so. Im backed up with work and another project car at the moment so the truck has taken the back burner for a while. Just trying to get all my ducks in a row to hit the ground running.
 
  #69  
Old 11-18-2014, 05:35 PM
ALBUQ F-1's Avatar
ALBUQ F-1
ALBUQ F-1 is offline
Fleet Owner
Join Date: Jul 2004
Location: NM
Posts: 26,800
Received 607 Likes on 377 Posts
It's a lot faster to drill out the bolt/stud part with the washer left in place. Then put new studs (bolts with heads cut off) in and weld flush.
 
  #70  
Old 11-18-2014, 05:37 PM
mustangmike6996's Avatar
mustangmike6996
mustangmike6996 is offline
Elder User
Thread Starter
Join Date: Jun 2013
Location: Metro Detroit-MI
Posts: 949
Likes: 0
Received 0 Likes on 0 Posts
Originally Posted by ALBUQ F-1
It's a lot faster to drill out the bolt/stud part with the washer left in place. Then put new studs (bolts with heads cut off) in and weld flush.

That is pretty much what I am planning on doing. Drill the back side of the head and grind off the remaining head or pop it off with a chisel if needed.
 
  #71  
Old 11-26-2014, 02:24 PM
mustangmike6996's Avatar
mustangmike6996
mustangmike6996 is offline
Elder User
Thread Starter
Join Date: Jun 2013
Location: Metro Detroit-MI
Posts: 949
Likes: 0
Received 0 Likes on 0 Posts
Well, since I had to get more brake line for my 69 Fastback I doubled the order and got some fore my truck as well.

I have been temporarily set back due to my basement flooding and some career interviews so that put the Mustang on hold and the truck also on hold.

Ill get back on the horse and ride into battle (of fabrication) as soon as I can.
 
  #72  
Old 11-26-2014, 02:32 PM
ALBUQ F-1's Avatar
ALBUQ F-1
ALBUQ F-1 is offline
Fleet Owner
Join Date: Jul 2004
Location: NM
Posts: 26,800
Received 607 Likes on 377 Posts
Originally Posted by mustangmike6996
That is pretty much what I am planning on doing. Drill the back side of the head and grind off the remaining head or pop it off with a chisel if needed.
I was saying, leave the head on there, drill thru the stud in the center, put in a new stud and weld it flush with the head.
 
  #73  
Old 12-01-2014, 05:12 PM
mustangmike6996's Avatar
mustangmike6996
mustangmike6996 is offline
Elder User
Thread Starter
Join Date: Jun 2013
Location: Metro Detroit-MI
Posts: 949
Likes: 0
Received 0 Likes on 0 Posts
Originally Posted by ALBUQ F-1
I was saying, leave the head on there, drill thru the stud in the center, put in a new stud and weld it flush with the head.

What is the benefit of doing that as opposed to removing the whole fastener and welding in a new fastener? It seems like it would be better around the weaker areas of the bed side but require more drilling.
 
  #74  
Old 12-16-2014, 08:59 AM
mustangmike6996's Avatar
mustangmike6996
mustangmike6996 is offline
Elder User
Thread Starter
Join Date: Jun 2013
Location: Metro Detroit-MI
Posts: 949
Likes: 0
Received 0 Likes on 0 Posts
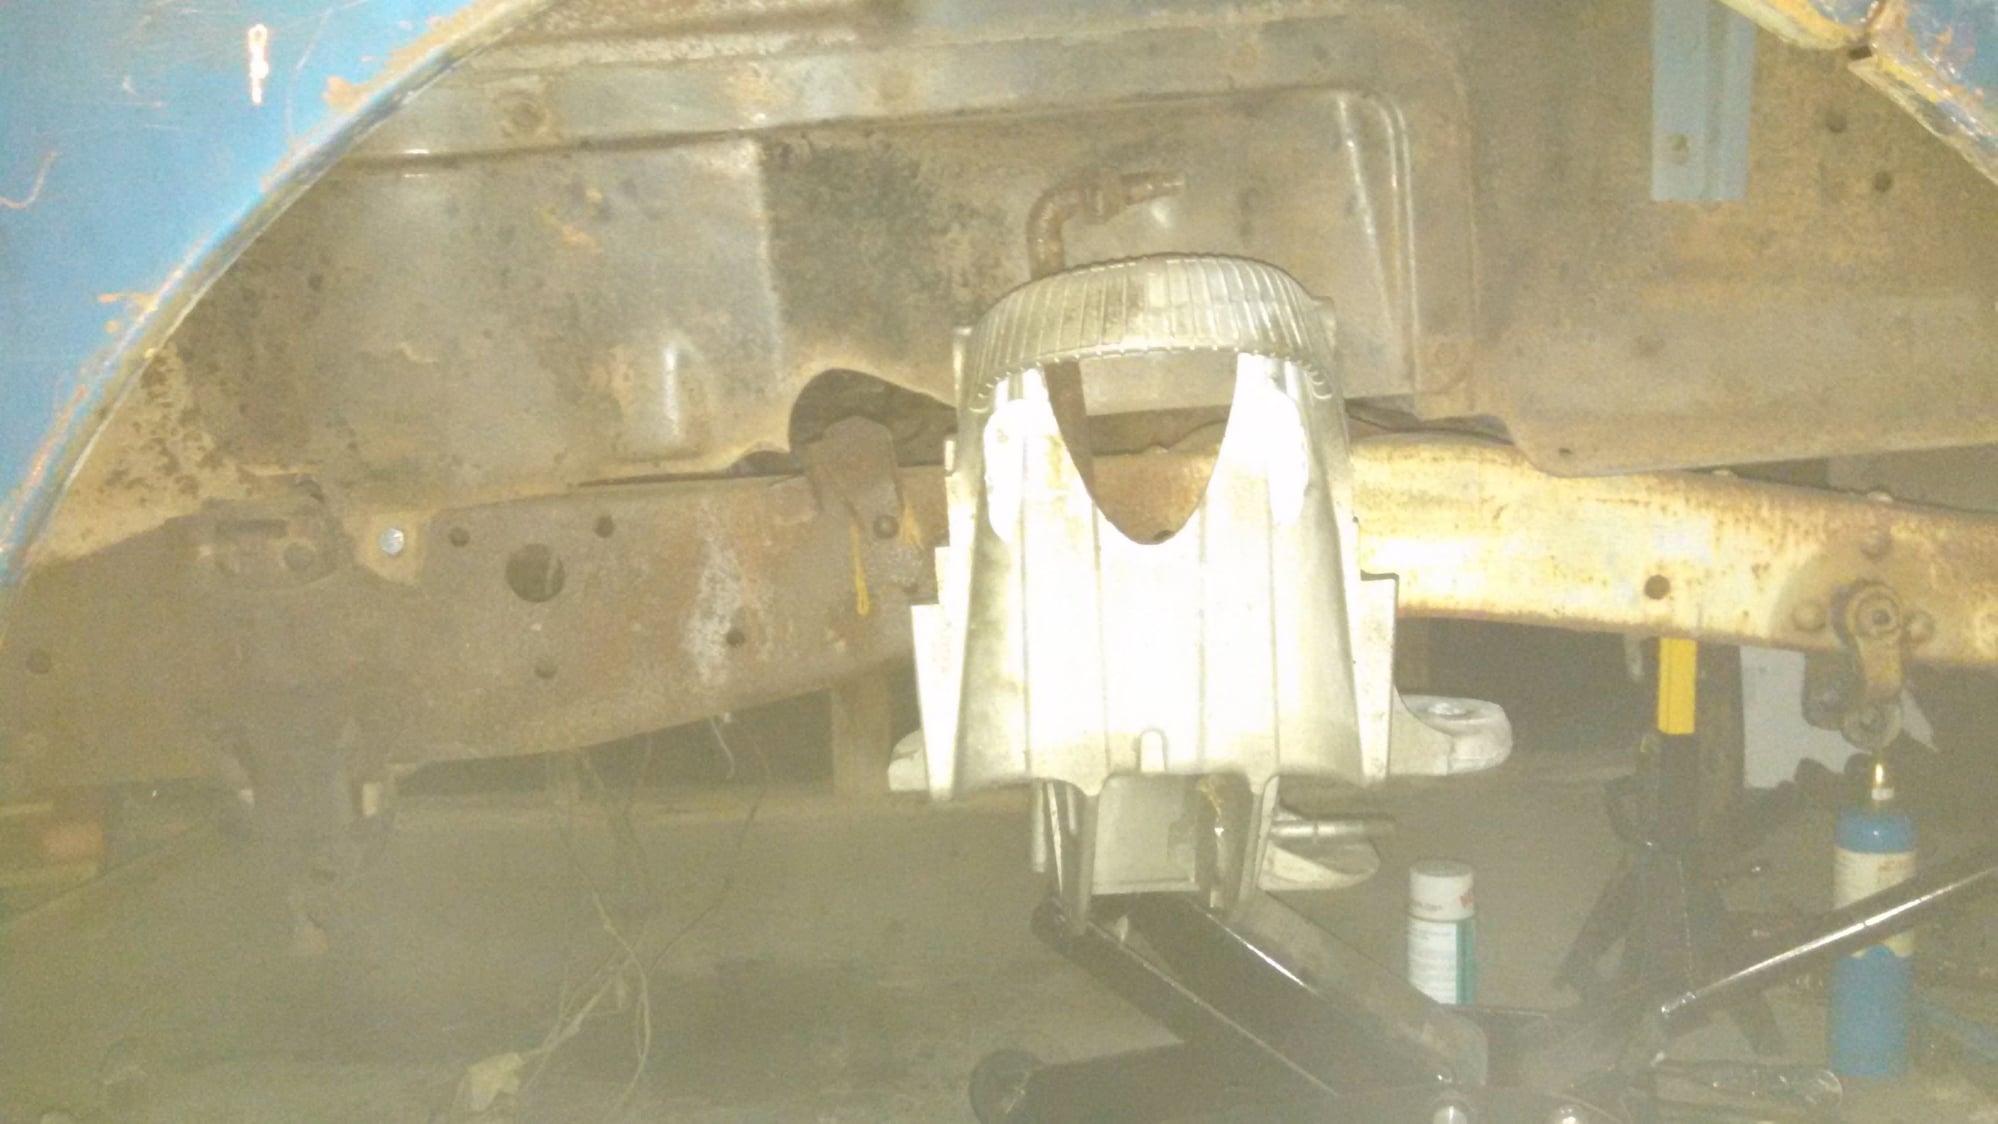
I currently have the truck sitting as seen in the pictures above, what do you all recommend for cradle placement?

Does anyone who has done the CV swap have real world dimensions as a starting point to center the wheel in the fender?

just trying to collect as much data as possible proir to cutting/welding etc.
 
  #75  
Old 12-22-2014, 06:32 AM
mustangmike6996's Avatar
mustangmike6996
mustangmike6996 is offline
Elder User
Thread Starter
Join Date: Jun 2013
Location: Metro Detroit-MI
Posts: 949
Likes: 0
Received 0 Likes on 0 Posts
I started on the rear fender bolts and got the pass rear fender all done and ready, its mocked up on the bed. I started back on the front end for the CV swap. I have to grind out the rivets for the stock spring mounts. I might tackle narrowing the cradle this week if all goes well.


Quick Reply: Well, it's almost time. 51 F1


All times are GMT -5. The time now is 09:52 AM.