
The Carnage Has Begun
#1
 08-05-2014, 07:22 PM

The Carnage Has Begun
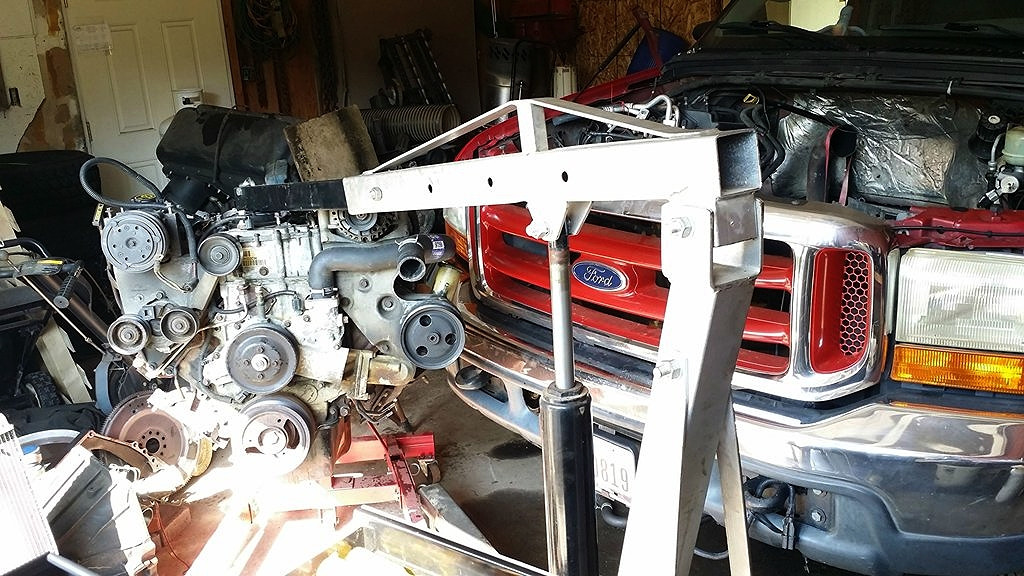
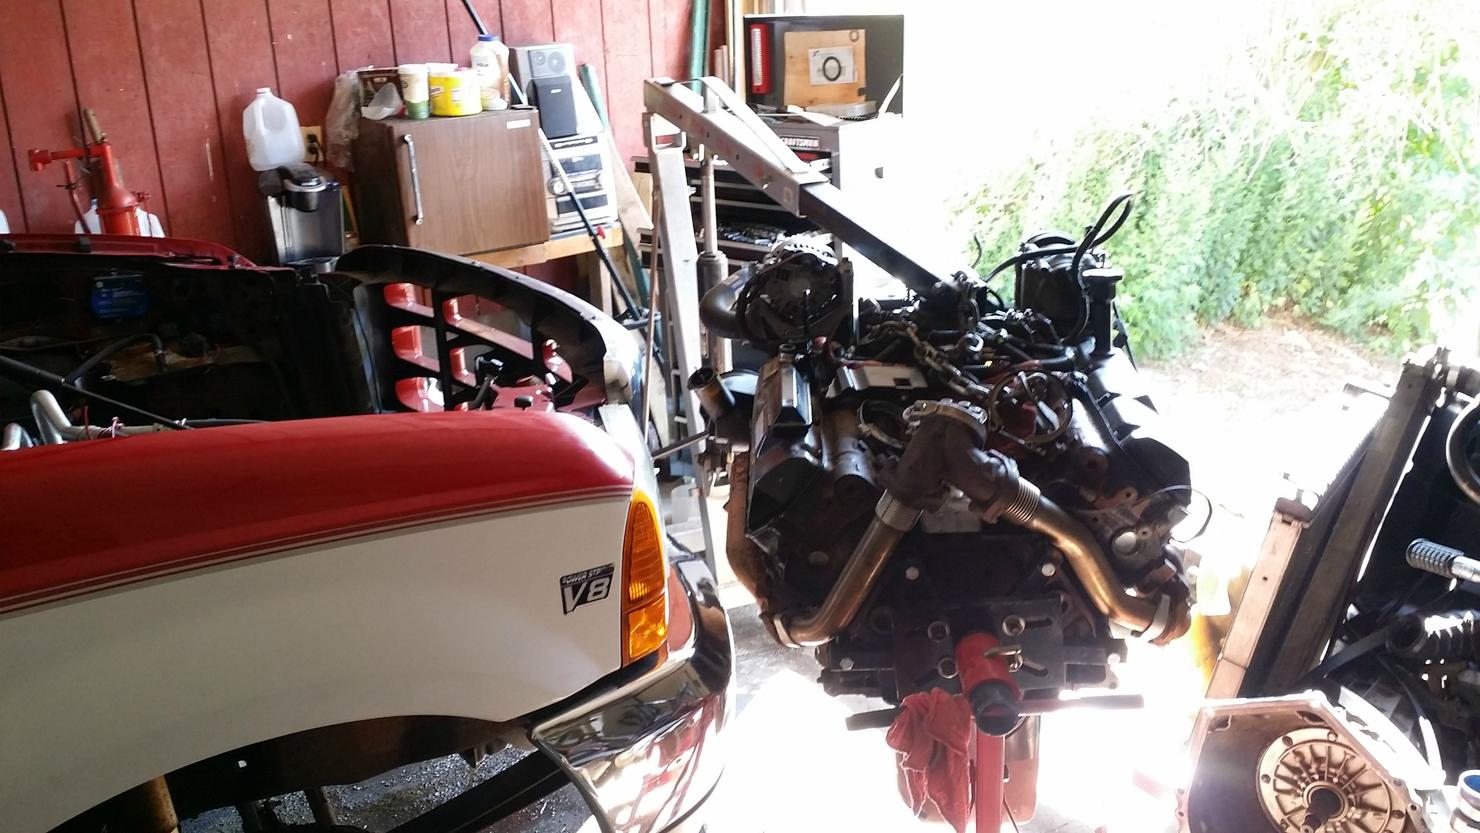
Well, the knocking engine is out and on the stand. Tomorrow morning the pan comes off and I'll see how bad the bearing(s) is/are. Still have to find a decent micrometer somewhere to check the bearing journals. Here are toady's truck **** images. Engine pulls are boring, so only three pics of it; more to follow tomorrow . . .

#2
08-05-2014, 07:59 PM
Elder User
Join Date: Mar 2012
Location: Quaker Hill
Posts: 534
Likes: 0
Received 0 Likes
on
0 Posts

#4
08-05-2014, 08:09 PM
But pics of an engine pull are boring, unless there's a connecting rod sticking out somewhere or something like that. Besides, nobody wants to see pics of my boots sticking out from under a truck 
One thing happened that wasn't so boring. I smacked the end of my air ratchet against the frame and the fitting broke off. The end of the hose whipping around whacked me in the forehead, lol.
One thing happened that wasn't so boring. I smacked the end of my air ratchet against the frame and the fitting broke off. The end of the hose whipping around whacked me in the forehead, lol.
#6
08-05-2014, 08:15 PM
#7
08-05-2014, 08:19 PM
Trending Topics
#8
08-05-2014, 09:42 PM
Postmaster
Fleabay, you can get onesy twosey or whole sets on the cheap.
If fortune truly favors the bold..
Harbor Freight does sell 0-1, 1-2, and i think 2-3 mics.
Inch pounds and foot pounds are one thing...
A couple to three percent variance when im playing down in the tenths... naw... mitutoyo, starrett, b&s...
You might want to peek at some gauge blocks too... like big parallels. Use them to quick check the decks and heads for variance. If you cant find any gaps using a light then you should be fine. If there is enough for light to shine under the gauge block... consider having them trued.
Getting ahead of myself.
Measuring the small bores for the lifters is pretty easy with a set of telescoping i.d. mics. They look like a T made of tubular metal. To use them, unlock and colapse to "load" them..lock.. place in the bore. Unlock. Find the point of highest resistance moving the contact points back and forth just slightly and lock again. Very gently retract the mic and measure between the contact points with appropriate o.d. micrometer.
Taps to clean out all the different sized threaded holes on both block and heads.
Drawing a blank on any other stuff right off hand...
Anxious to see the progress!
#9
08-05-2014, 09:43 PM
Postmaster
Fleabay, you can get onesy twosey or whole sets on the cheap.
If fortune truly favors the bold..
Harbor Freight does sell 0-1, 1-2, and i think 2-3 mics.
Inch pounds and foot pounds are one thing...
A couple to three percent variance when im playing down in the tenths... naw... mitutoyo, starrett, b&s...
You might want to peek at some gauge blocks too... like big parallels. Use them to quick check the decks and heads for variance. If you cant find any gaps using a light then you should be fine. If there is enough for light to shine under the gauge block... consider having them trued.
Getting ahead of myself.
Measuring the small bores for the lifters is pretty easy with a set of telescoping i.d. mics. They look like a T made of tubular metal. To use them, unlock and colapse to "load" them..lock.. place in the bore. Unlock. Find the point of highest resistance moving the contact points back and forth just slightly and lock again. Very gently retract the mic and measure between the contact points with appropriate o.d. micrometer.
Taps to clean out all the different sized threaded holes on both block and heads.
Drawing a blank on any other stuff right off hand...
Anxious to see the progress!
If fortune truly favors the bold..
Harbor Freight does sell 0-1, 1-2, and i think 2-3 mics.
Inch pounds and foot pounds are one thing...
A couple to three percent variance when im playing down in the tenths... naw... mitutoyo, starrett, b&s...
You might want to peek at some gauge blocks too... like big parallels. Use them to quick check the decks and heads for variance. If you cant find any gaps using a light then you should be fine. If there is enough for light to shine under the gauge block... consider having them trued.
Getting ahead of myself.
Measuring the small bores for the lifters is pretty easy with a set of telescoping i.d. mics. They look like a T made of tubular metal. To use them, unlock and colapse to "load" them..lock.. place in the bore. Unlock. Find the point of highest resistance moving the contact points back and forth just slightly and lock again. Very gently retract the mic and measure between the contact points with appropriate o.d. micrometer.
Taps to clean out all the different sized threaded holes on both block and heads.
Drawing a blank on any other stuff right off hand...
Anxious to see the progress!
#10
08-05-2014, 09:54 PM

Fleabay, you can get onesy twosey or whole sets on the cheap.
If fortune truly favors the bold..
Harbor Freight does sell 0-1, 1-2, and i think 2-3 mics.
Inch pounds and foot pounds are one thing...
A couple to three percent variance when im playing down in the tenths... naw... mitutoyo, starrett, b&s...
You might want to peek at some gauge blocks too... like big parallels. Use them to quick check the decks and heads for variance. If you cant find any gaps using a light then you should be fine. If there is enough for light to shine under the gauge block... consider having them trued.
Getting ahead of myself.
Measuring the small bores for the lifters is pretty easy with a set of telescoping i.d. mics. They look like a T made of tubular metal. To use them, unlock and colapse to "load" them..lock.. place in the bore. Unlock. Find the point of highest resistance moving the contact points back and forth just slightly and lock again. Very gently retract the mic and measure between the contact points with appropriate o.d. micrometer.
Taps to clean out all the different sized threaded holes on both block and heads.
Drawing a blank on any other stuff right off hand...
Copious beer.
Anxious to see the progress!
Would Plastigage be useful in this case?
#11
08-05-2014, 10:44 PM


#12
08-05-2014, 11:34 PM

I noticed you kept the AC compressor on the engine. Certainly nice not to have to tie it all off to the side, but you'll have to have the system drawn down and charged again right?
I'm learning here - so pulling the hood and leaving the grill in place is possible with an engine hoist that has enough throw, I take it. I had not seen an engine pull yet where the grill was in place. Looks like all the coolers came out though?
That's a nice looking engine compartment.
I'm learning here - so pulling the hood and leaving the grill in place is possible with an engine hoist that has enough throw, I take it. I had not seen an engine pull yet where the grill was in place. Looks like all the coolers came out though?
That's a nice looking engine compartment.
#13
08-06-2014, 05:43 AM
I'm learning here - so pulling the hood and leaving the grill in place is possible with an engine hoist that has enough throw, I take it. I had not seen an engine pull yet where the grill was in place. Looks like all the coolers came out though?
That's a nice looking engine compartment.