Lets do it again! 1951 Ford F1 LT1 supercharged, 4L80E, EFI, jag IFS, etc..


#152
 02-17-2015, 09:50 AM
#153
02-23-2015, 09:12 PM
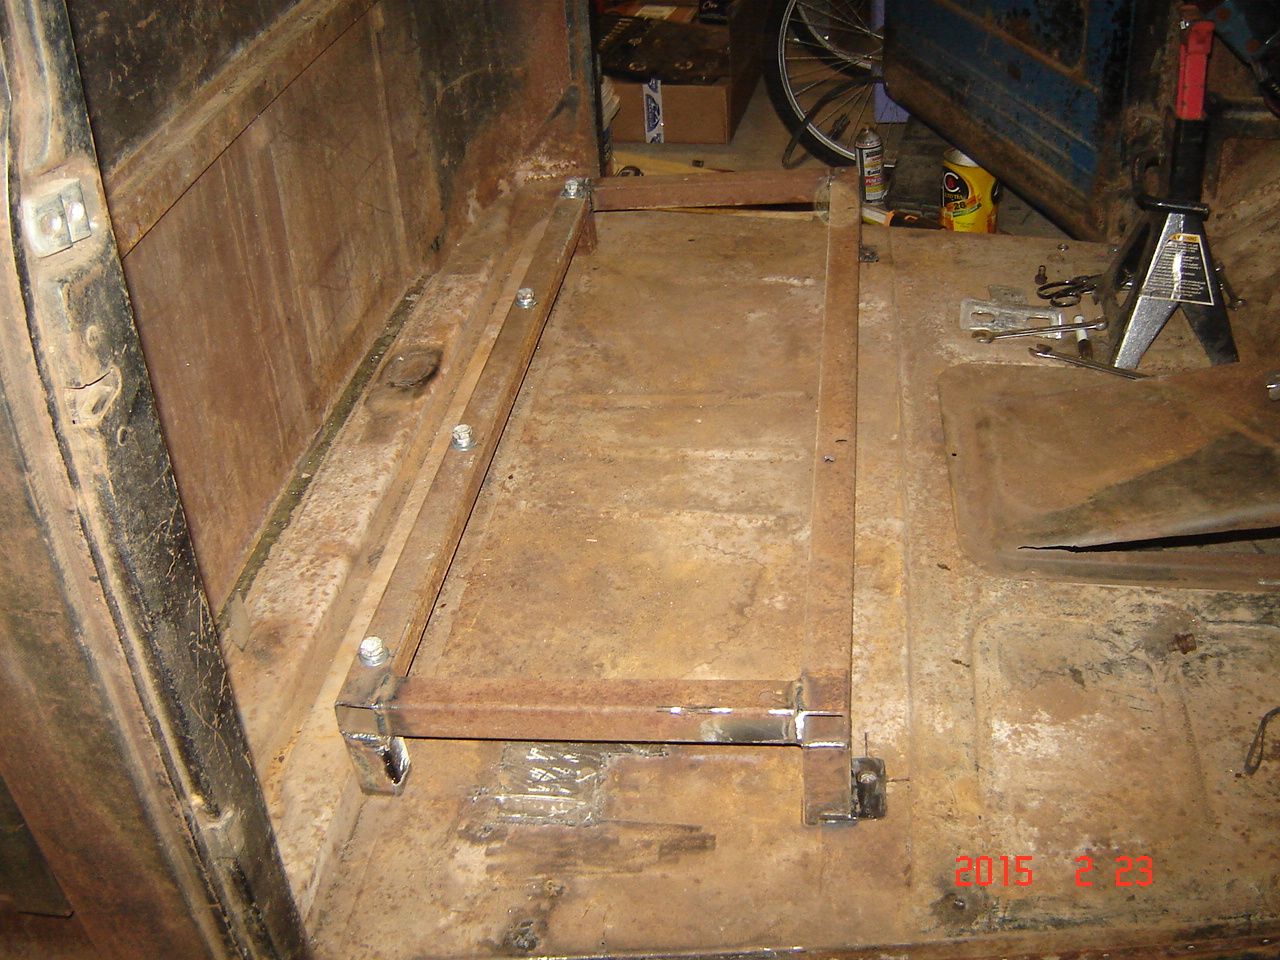
Well the weather actually wasnt bad yesterday and got above freezing! Small miracle but I will take it. Trudged through the snow and dug out some scrap 1 1/4" square tubing and whipped up a mount for the dakota seat. It will mount to the factory seat mounting holes.
Also got my gauges today, one less item to get.

Seat goes back in tomorrow for final position check, then back to redo the steering column.

Also got my gauges today, one less item to get.

Seat goes back in tomorrow for final position check, then back to redo the steering column.
#154
02-24-2015, 12:03 AM

Lead Driver

I'm not meaning to sound critical of your work, but I'm just learning to weld. It looks like the square tubing you welded is rusty. I thought the metal had to be bare for the weld to work properly. Did I misunderstand something?
#156
02-24-2015, 07:49 AM
Even new steel has to have the ends ground clean to remove the mill scale, dont just go buy some tubing and weld it without cleaning it up.
No extra floor reinforcement, the factory seat mounting points go into the floor supports under the cab.
#157
02-24-2015, 04:39 PM
Finished up the seat mount today, worked great. If you are considering a dakota seat here is some info. If anyone wants dimensions let me know and I will get them.
Dakota split bench seat is really two buckets seats with the console mounted in the middle. There is no frame holding them together, they are bolted together but not rigidly so the setup is pretty flimsy when out of the truck.
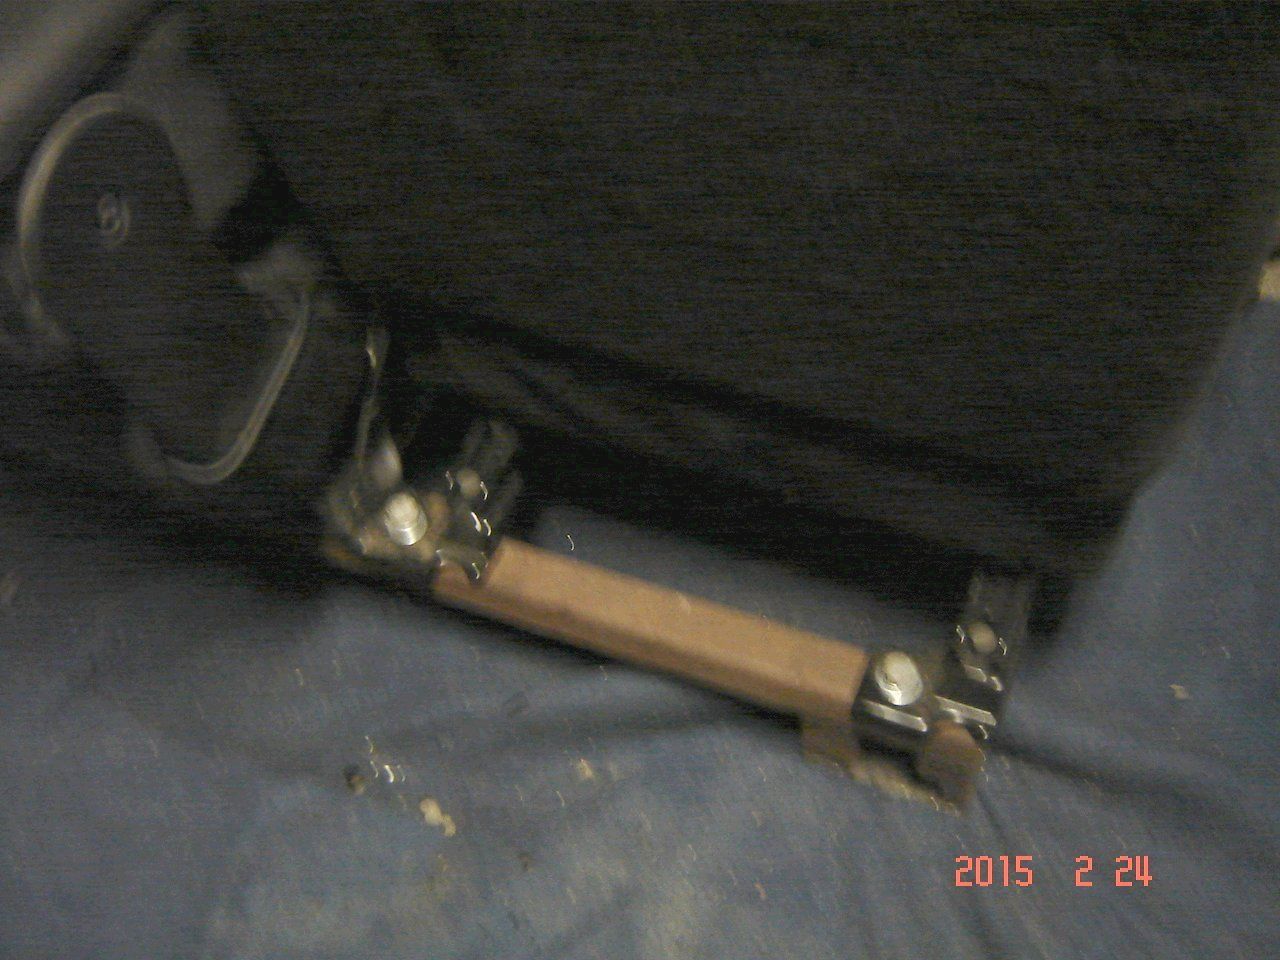
There are 4 rear mounting points for the seats and seat belts. I used 1/2" bolts that go through the seat, through the 1 1/4" tube, and thread into nuts that are welded on the bottom of the tube. Sorry for the blurry pic, this is one side.
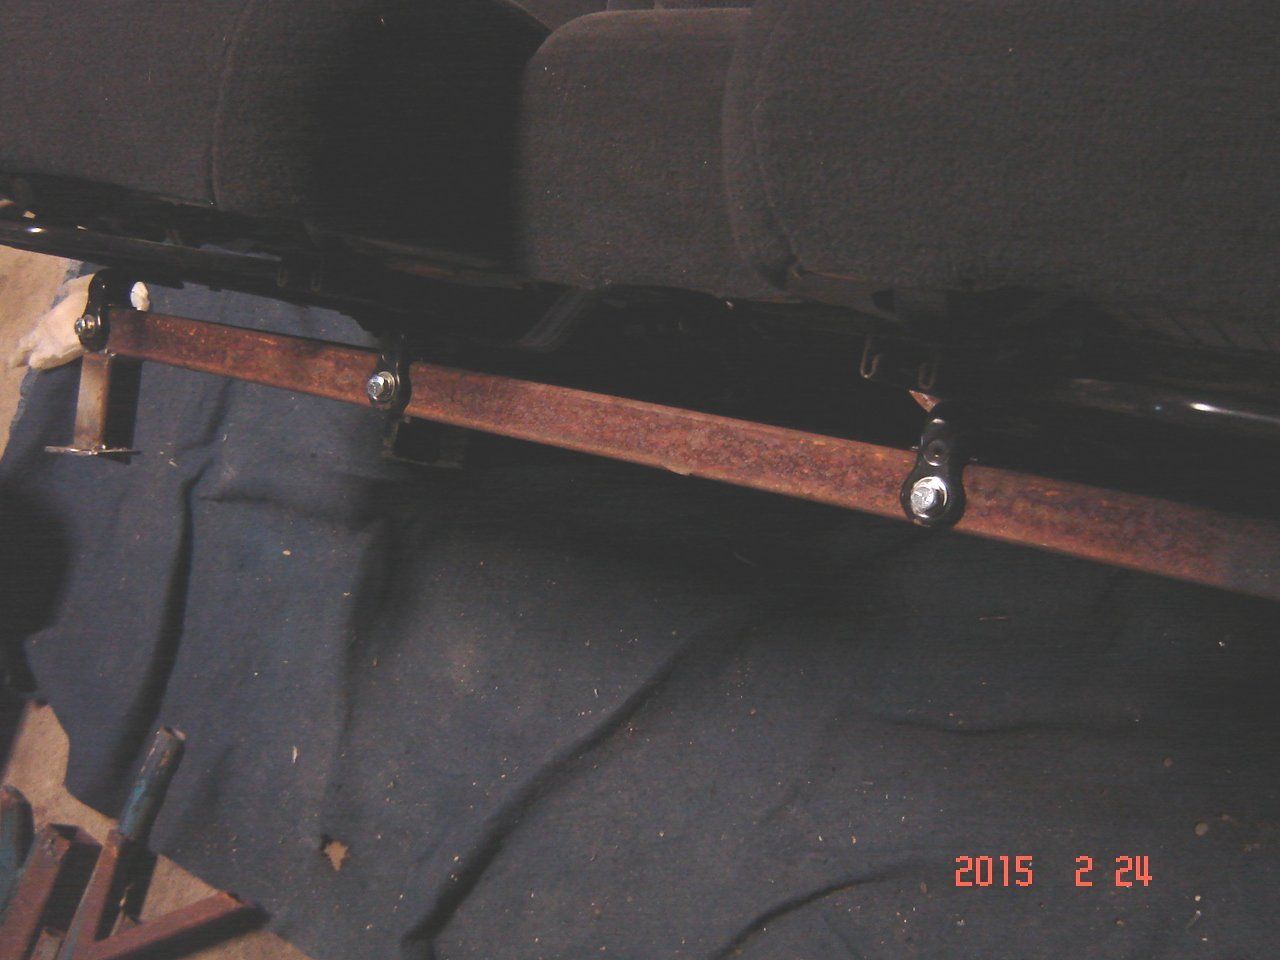
Front of the seat bolts in with four bolts, I drilled and tapped (4) 3/8" x 16 holes into the 1 1/4" tubing.
Square tube was used for feet and then 1/8" steel plate for the pads which bolt to the factory bench seat locations.
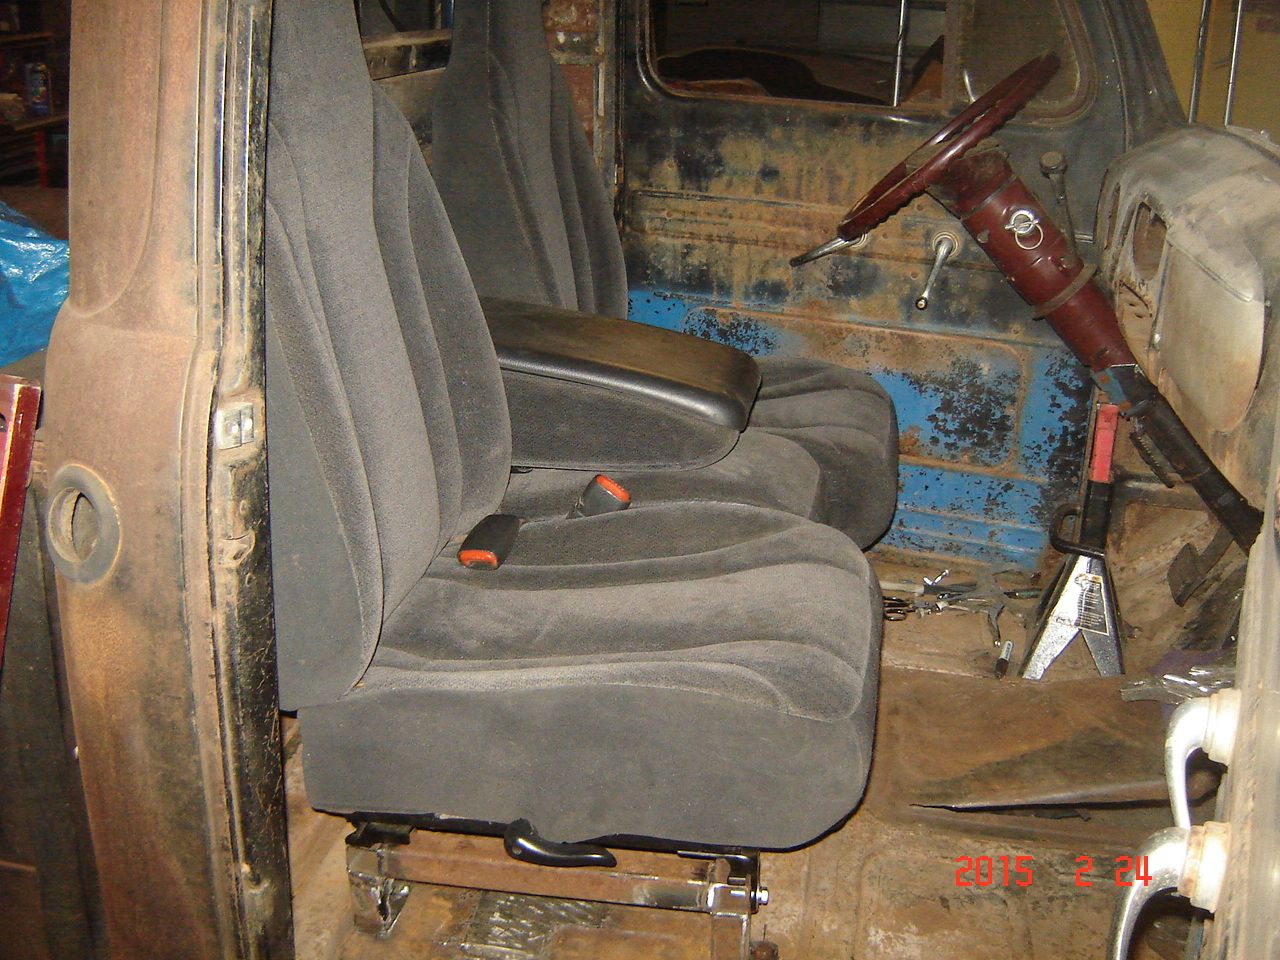
The front feet are longer than the rear to put a little angle in the seat. I cant remember the numbers but I can get dimensions if anyone wants them.
The sides of the mount will get covered with carpet when I do the interior, I am going to keep the front open so I can store stuff under the seat if needed.
Dakota split bench seat is really two buckets seats with the console mounted in the middle. There is no frame holding them together, they are bolted together but not rigidly so the setup is pretty flimsy when out of the truck.
There are 4 rear mounting points for the seats and seat belts. I used 1/2" bolts that go through the seat, through the 1 1/4" tube, and thread into nuts that are welded on the bottom of the tube. Sorry for the blurry pic, this is one side.

Front of the seat bolts in with four bolts, I drilled and tapped (4) 3/8" x 16 holes into the 1 1/4" tubing.

Square tube was used for feet and then 1/8" steel plate for the pads which bolt to the factory bench seat locations.

The front feet are longer than the rear to put a little angle in the seat. I cant remember the numbers but I can get dimensions if anyone wants them.
The sides of the mount will get covered with carpet when I do the interior, I am going to keep the front open so I can store stuff under the seat if needed.
#159
02-25-2015, 02:33 PM


#160
03-01-2015, 10:30 PM
Dash work starts..
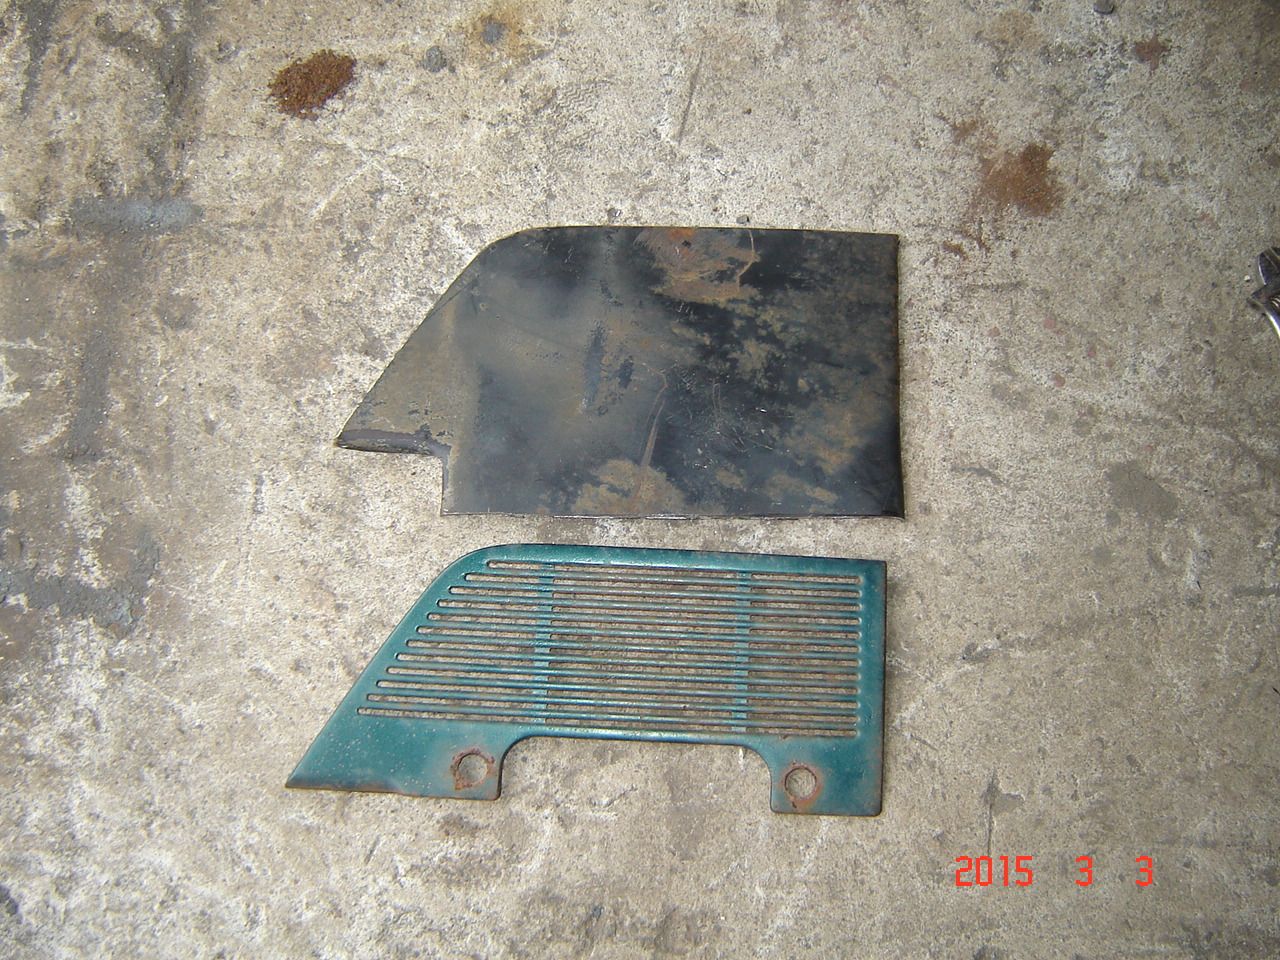
Snowed all day today and still going but by 3pm I was so stir crazy stuck in the house I had to get out and do something.
My dash had a hole cut in it for the radio that looked like it was cut with an axe, total butchery. had to fill the hole to start over.
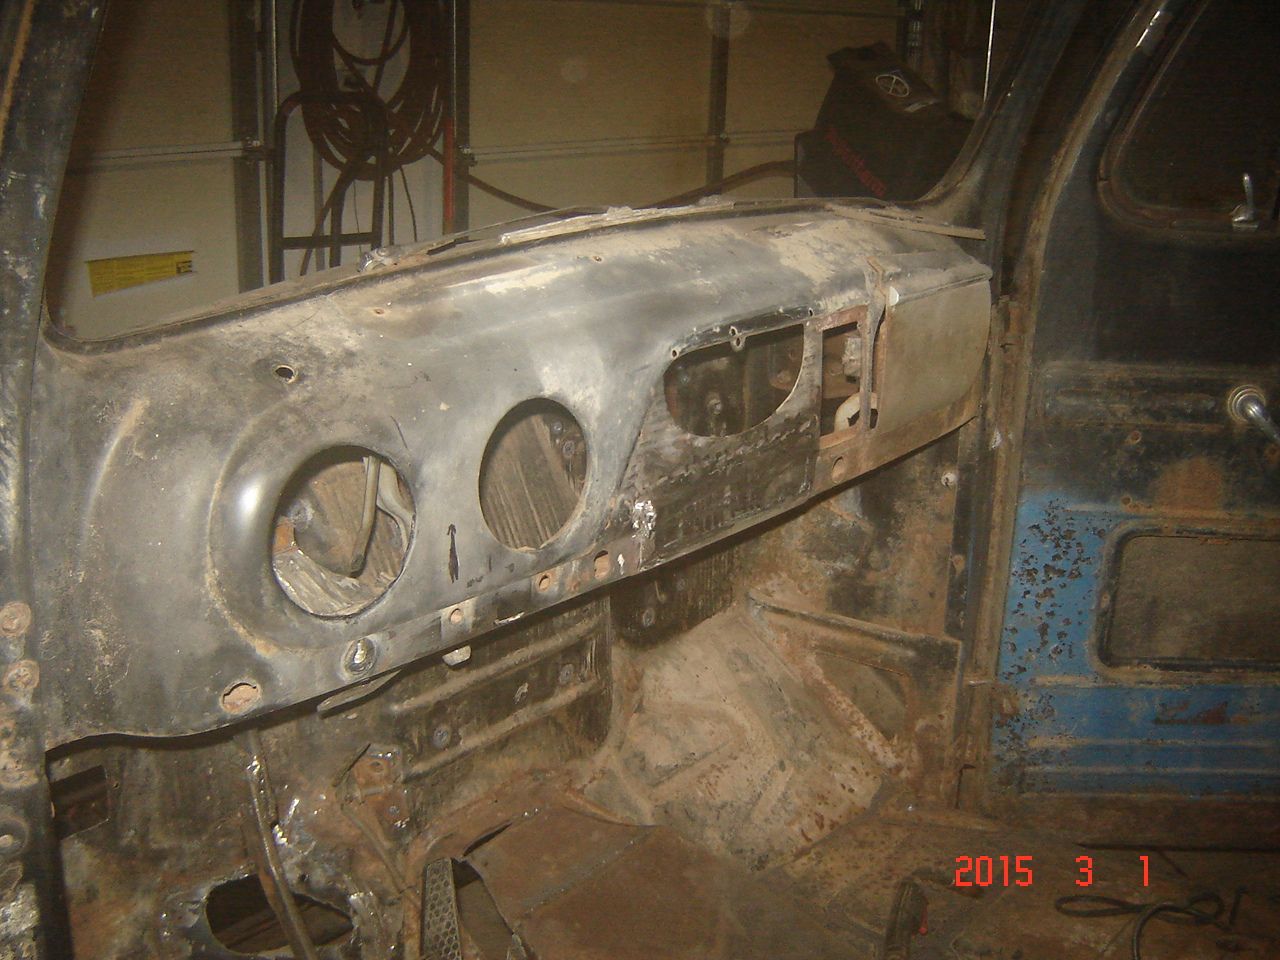
Filled the speaker hole as well, not going to mount a speaker there.
More tomorrow, I work outside until I cant feel my feet!
Snowed all day today and still going but by 3pm I was so stir crazy stuck in the house I had to get out and do something.
My dash had a hole cut in it for the radio that looked like it was cut with an axe, total butchery. had to fill the hole to start over.

Filled the speaker hole as well, not going to mount a speaker there.

More tomorrow, I work outside until I cant feel my feet!
#161
03-03-2015, 01:13 PM
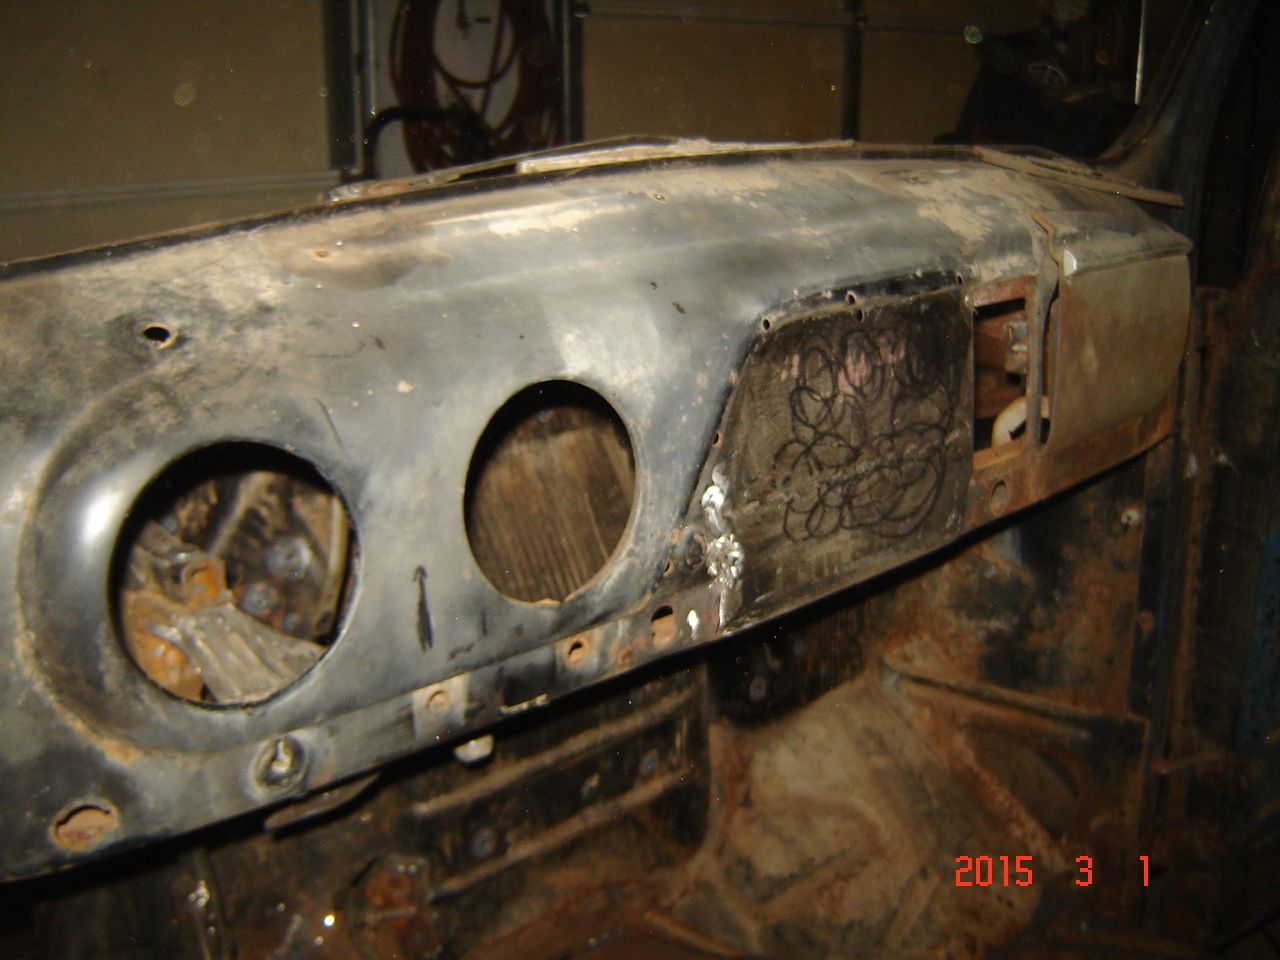
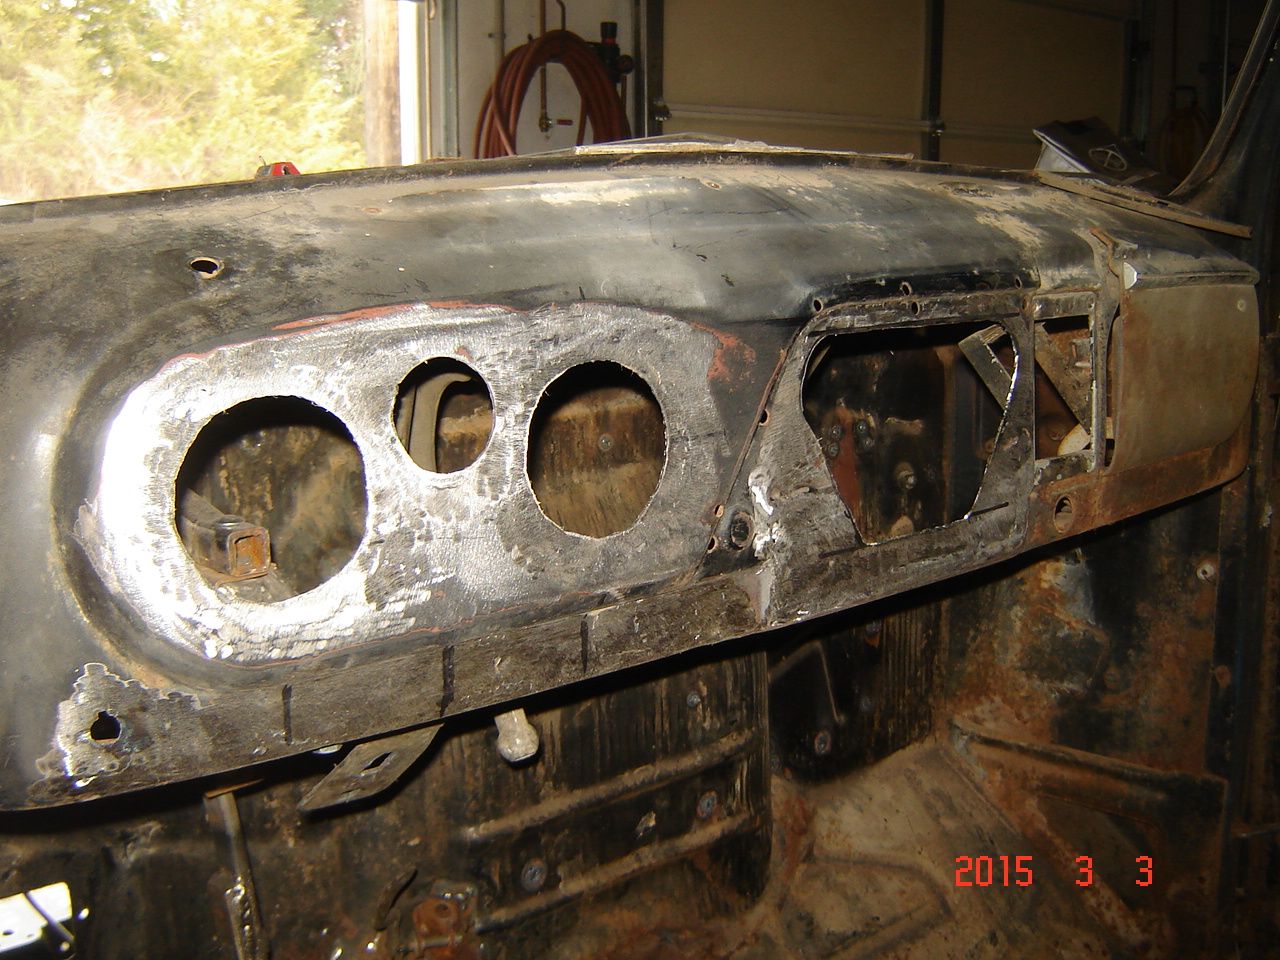
Got some more dash work done.
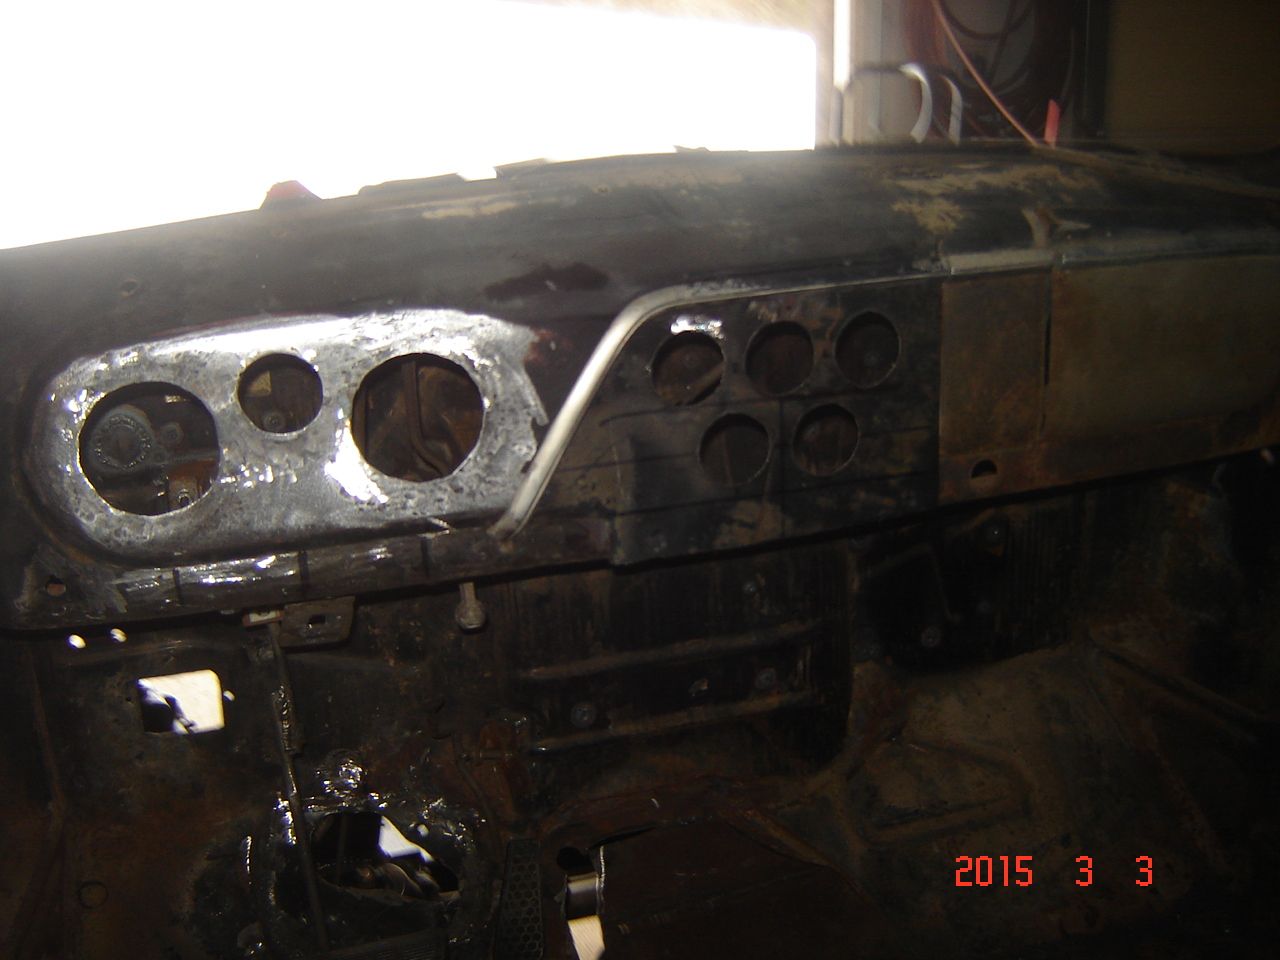
Welded in rings to make the gauge holes smaller for the new speedo and tach and that left enough room for one of the smaller gauges.
Also filled all the switch holes and ignition switch hole since they will not be needed, modified the far left hole for a GM headlight switch.
Test fit
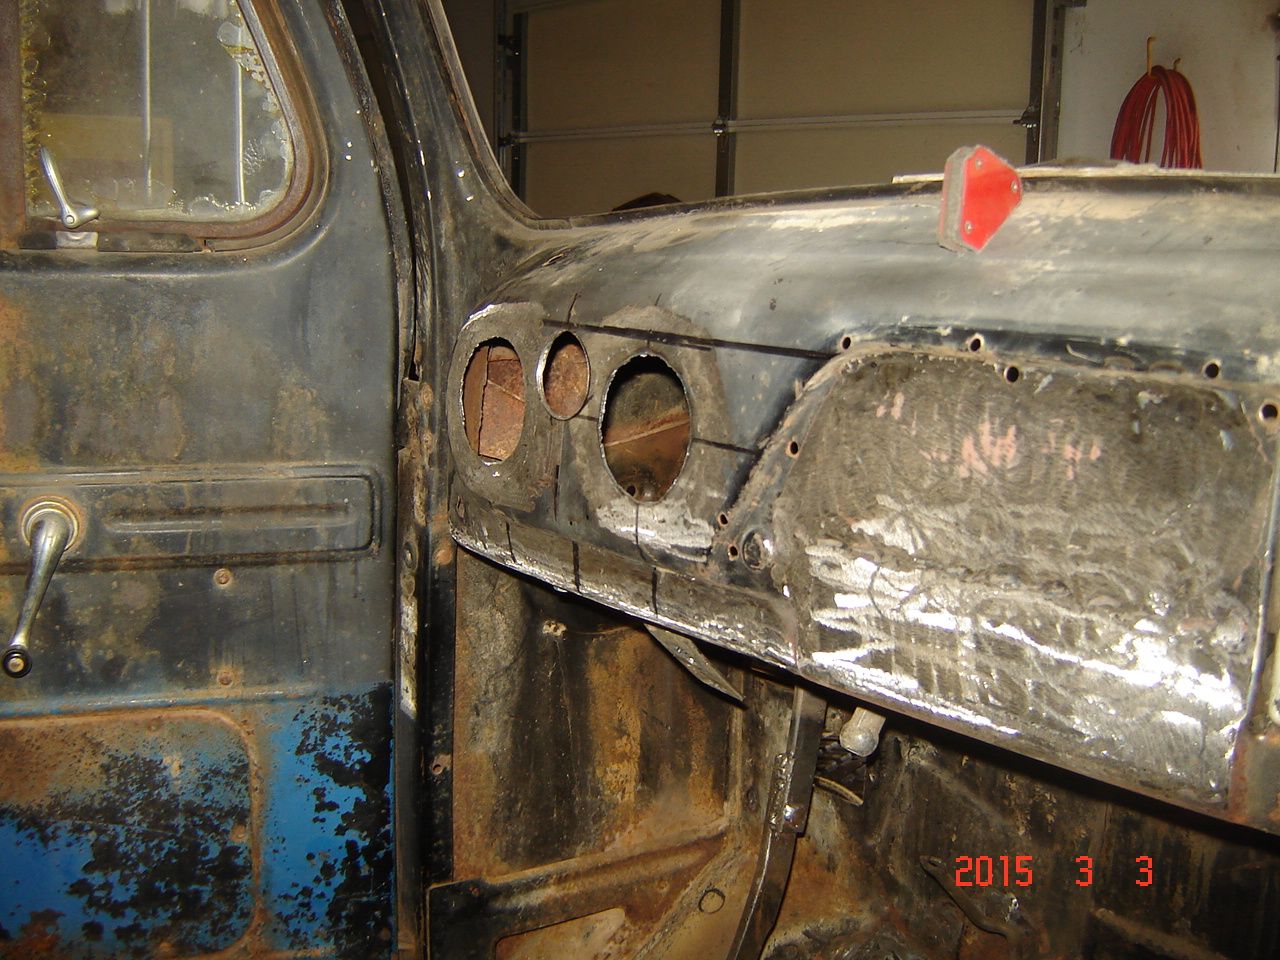
Since I am not putting a speaker in the dash and am moving the stereo I made up a plate to replace the speaker grille for the rest of the gauges.
Cut the dash opening
Test fit
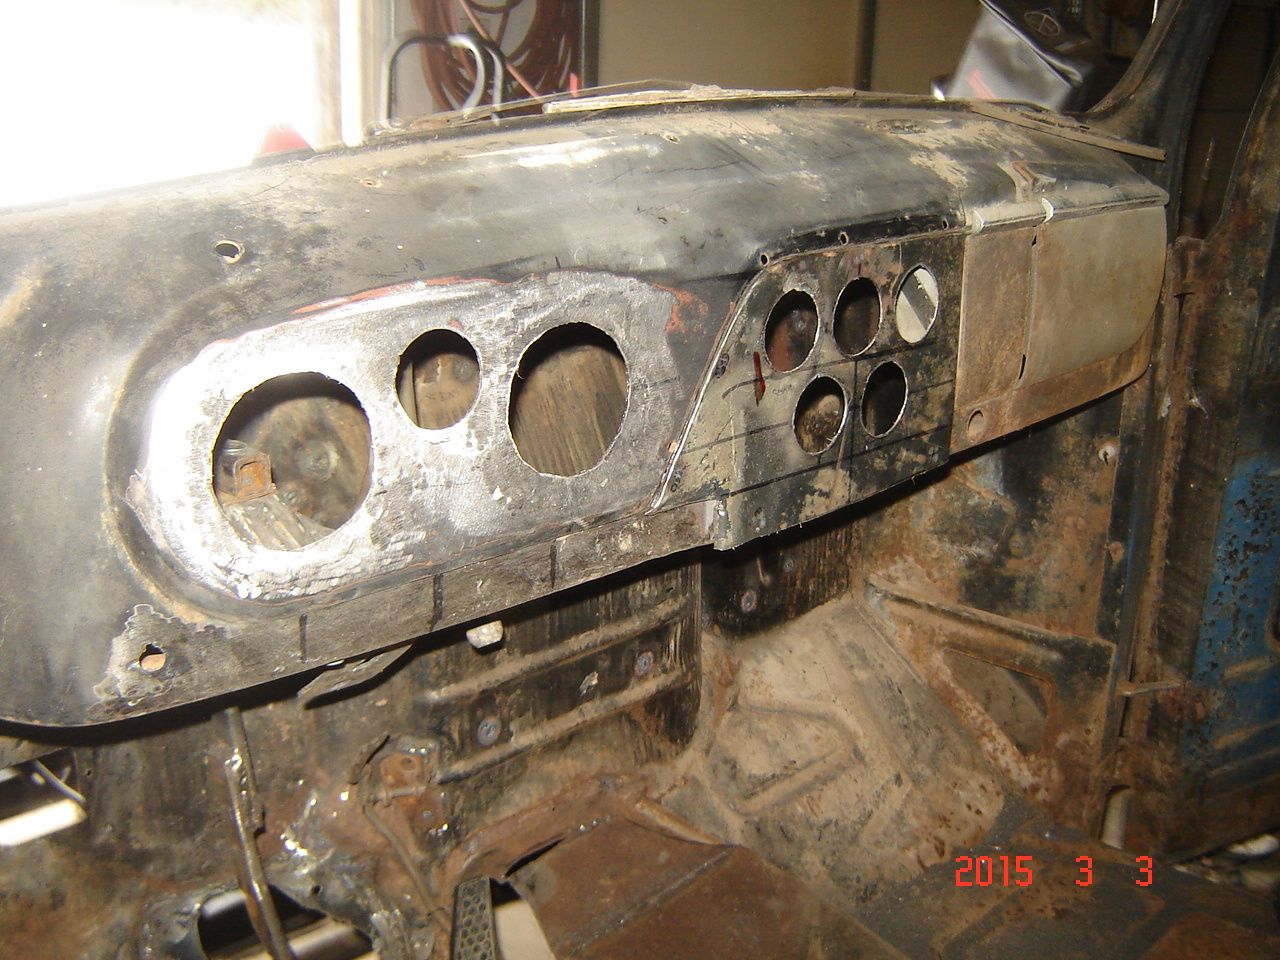
Test fit with the trim. Nothing is bolted in, just set in place for the picture. I have studs welded on the back of the gauge plate so it bolts in the same place as the speaker grille. Just have to weld a lip on the bottom of the plate, forgot to leave enough metal at the bottom to roll over under the dash.
Welded in rings to make the gauge holes smaller for the new speedo and tach and that left enough room for one of the smaller gauges.
Also filled all the switch holes and ignition switch hole since they will not be needed, modified the far left hole for a GM headlight switch.

Test fit

Since I am not putting a speaker in the dash and am moving the stereo I made up a plate to replace the speaker grille for the rest of the gauges.

Cut the dash opening

Test fit

Test fit with the trim. Nothing is bolted in, just set in place for the picture. I have studs welded on the back of the gauge plate so it bolts in the same place as the speaker grille. Just have to weld a lip on the bottom of the plate, forgot to leave enough metal at the bottom to roll over under the dash.

#162
03-03-2015, 06:19 PM
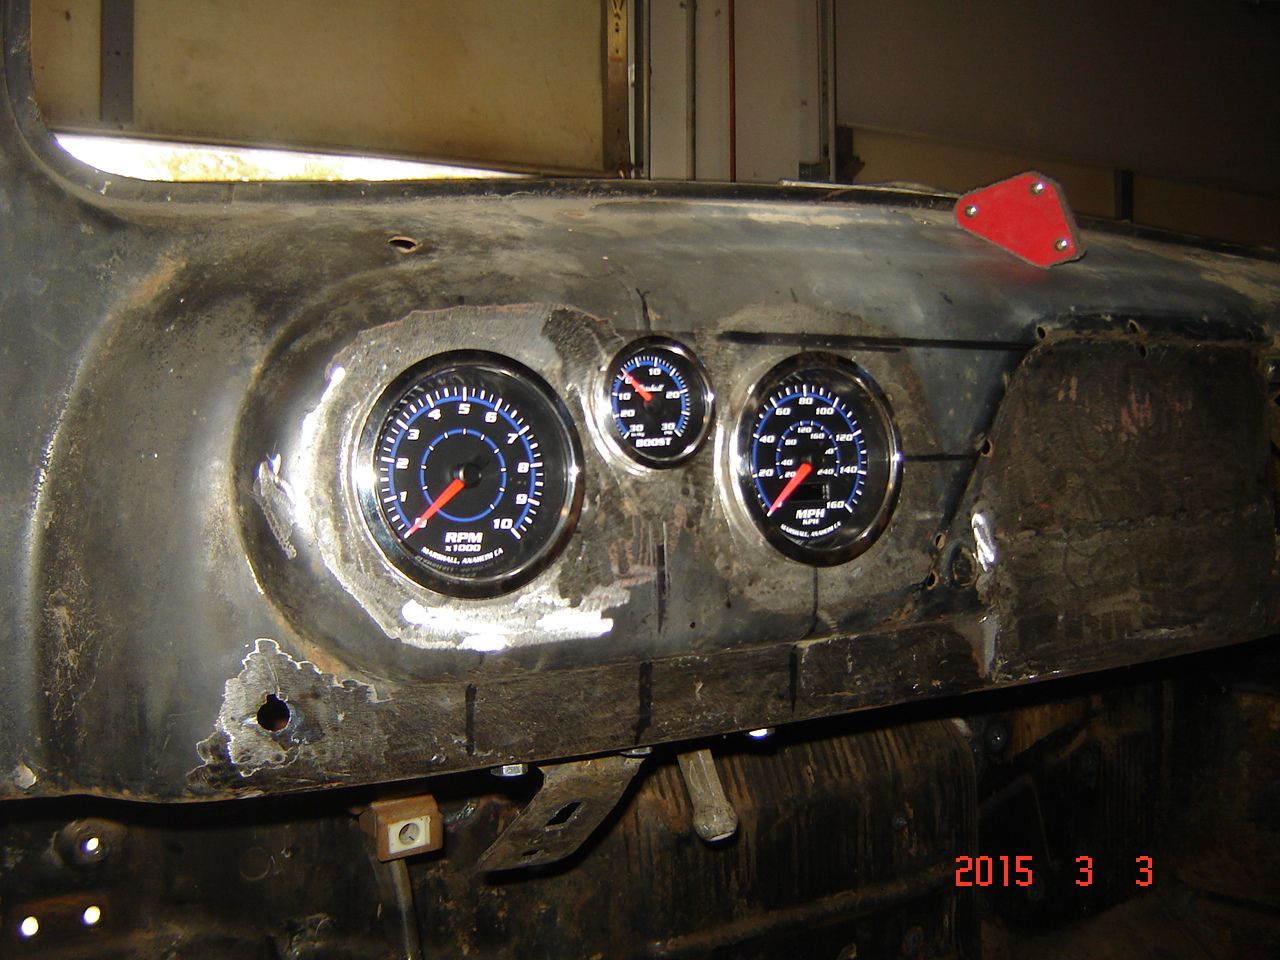
After looking at the pics I didnt like the bottom of the gauge plate covering the lower dash, so I cut off the bottom inch or so and rolled the bottom so it is now basically the same size as a speaker grille. Now the very lower part of the dash is visible so I can keep the two tone style paint on the dash like factory. Didnt have the camera with me, just ran out to get it done before it got too late today. When inspiration hits gotta get it done! Pics another day 
#163
03-03-2015, 06:49 PM
Senior User
Join Date: Sep 2014
Location: Raleigh, NC
Posts: 97
Likes: 0
Received 0 Likes
on
0 Posts
Thanks.
#164
03-03-2015, 07:24 PM

The pump you want to use is Airtex PN 3270 which is for a 1995 chevy caprice with the V8 (LT1). It puts out 80-90 psi and is regulated down to 45 psi which is needed for the MPFI, the TBI pump only puts out around 15 psi.
Ignore that external fuel pump, that is a secondary pump I need because of the supercharger. Normally the in tank pump is all that is needed.
The pump is a direct swap other than the pump outlet size is 5/16" vs 3/8" on the TBI, so you have to lube the 5/16" hose to get it to slide over the 3/8" stub on the sending unit...or clamp down the 3/8" hose enough to seal to the 5/16" stub on the pump.
Rock auto has the pump for around $35.
#165
03-04-2015, 01:39 PM
Senior User
Join Date: Sep 2014
Location: Raleigh, NC
Posts: 97
Likes: 0
Received 0 Likes
on
0 Posts
Thanks! I just ordered the the tank kit with straps, sending unit assembly, and tank. I also got the pump you referecned and bought a EFI regulator and guage. For my 4.6 3v I need a contant 40PSI.
I'm following your progress, thanks for all the posting you do. Very helpfull.
Gary
I'm following your progress, thanks for all the posting you do. Very helpfull.
Gary

