1949 F4 V8 to Mercedes diesel build thread
#166
 12-28-2015, 09:37 PM

CBeav, Thanks for the reply. The drivelines between the two transmissions and rear axle are not straight. The Brownie is offset to the drivers side about 1 1/2" for PTO shaft clearance and a little lower than the 4 speed. The output yoke of the Brownie is several inches above the pinion yoke on the rear axle. My concern is that the yokes all have to be parallel to one another for the joints to work properly. I have the rear yoke of the 4 speed and the front yoke of the Brownie at 3 degrees so they are parallel but, the pinion is at about 3 3/4 degrees. That gives me about a 3/4 degree difference out of parallel between the rear yoke of the Brownie and the pinion. I am checking the angle with a protractor for a combination square. I think 3/4 degree difference on the rear driveline will be close enough as I'm sure the pinion angle may change slightly with the truck loaded. I hope this made sense.
Thanks again, Mark
Thanks again, Mark
#167
12-29-2015, 02:47 PM
*grinning* I just re-read what I typed (came down with a sore tooth Sunday and I've been taking Vicodin until the dentist shows up tomorrow) Apparently my mind was a little fuzzy. ;-) I was trying to be supportive. 3/4 - 1 degree from parallel is acceptable between devices. Minimum of 1 degree offset required to ensure joint life. You've got that covered. Now I'm going to tape my fingers together until I get off the meds. LOL
#169
01-01-2016, 04:36 PM
I have the fuel supply and return lines run. Here are some photos.

This is the fuel return line connected to bulkhead fitting thru the floor of the cab. I will change this hose when I get some more fittings for the Aeroquip braided stainless hose.
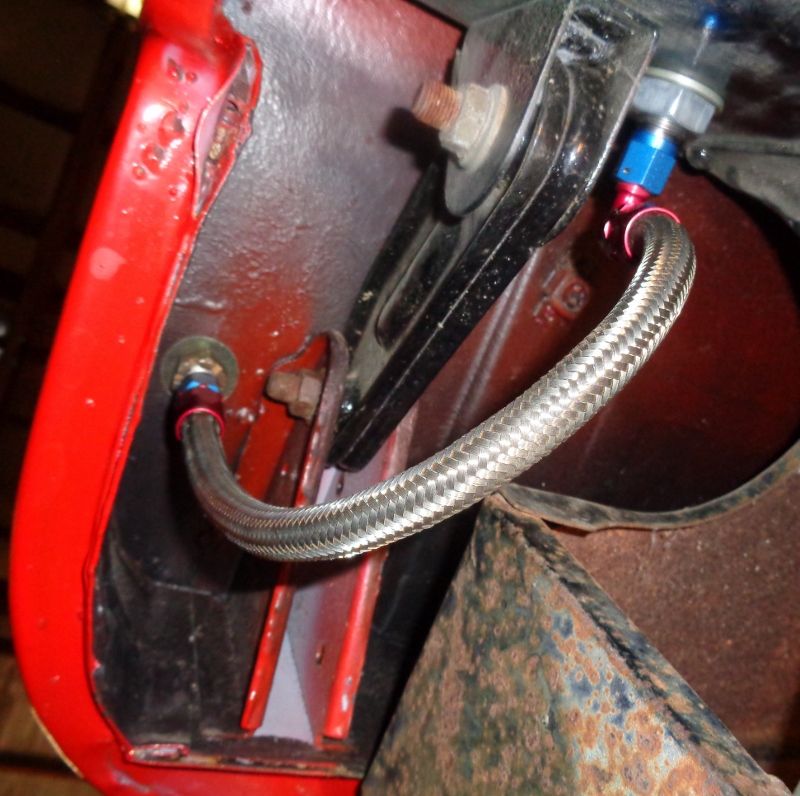
This is the return line thru the bottom of the cab floor and connected to another bulkhead fitting thru the frame.
The upper line is the return line and the bulkhead fitting. The lower line is the fuel supply coming from the filter behind the cab.

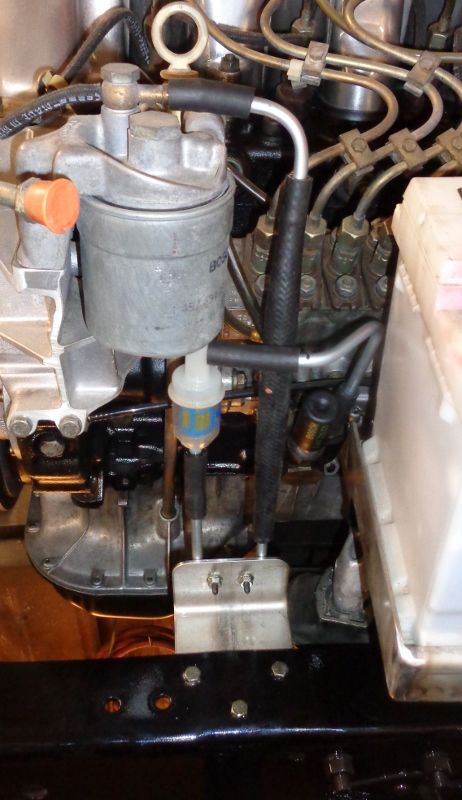
This is the filter and plumbing.

This is the fuel return line connected to bulkhead fitting thru the floor of the cab. I will change this hose when I get some more fittings for the Aeroquip braided stainless hose.

This is the return line thru the bottom of the cab floor and connected to another bulkhead fitting thru the frame.

The upper line is the return line and the bulkhead fitting. The lower line is the fuel supply coming from the filter behind the cab.

This is the filter and plumbing.
#170
01-01-2016, 04:45 PM
Here are some more photos.
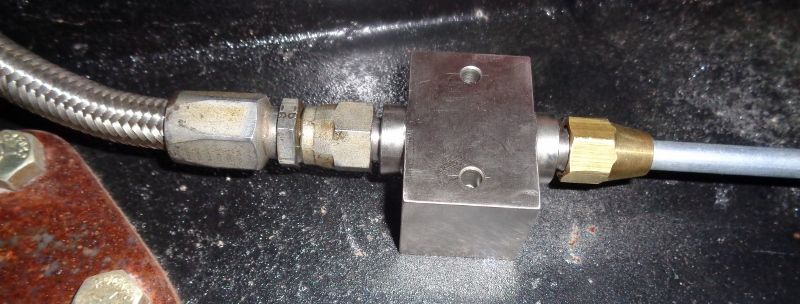
This is a fitting block to connect the Aeroquip hose to 5/16" flare hard line. I have to change the hose end when I get some more of them.
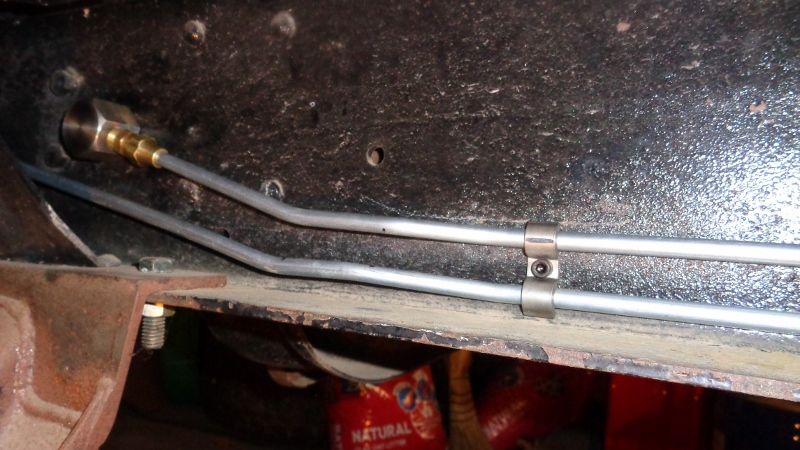
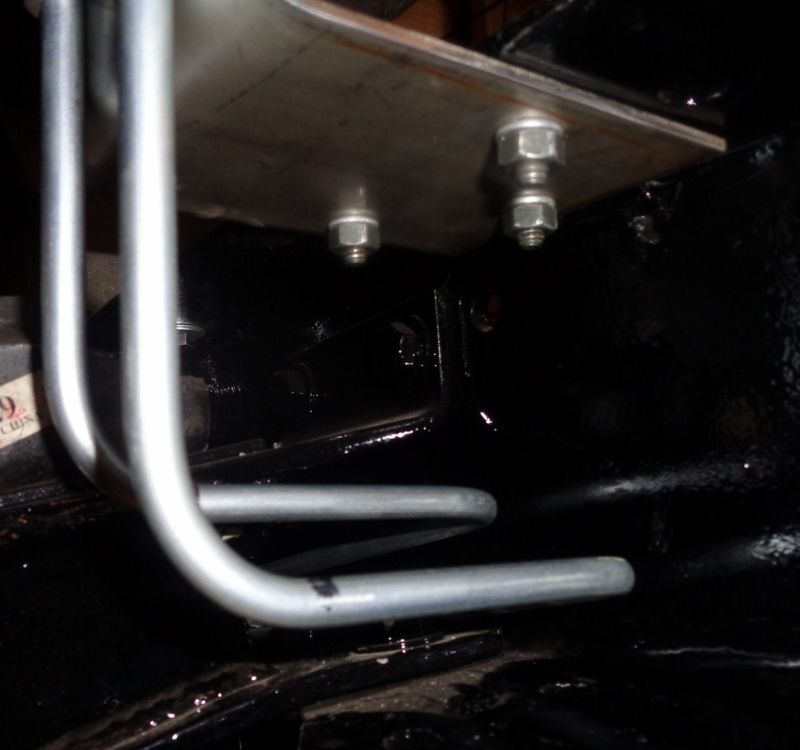
This is the supply line (lower) and the return line (upper) clamped to the inside of the frame under the steering box.
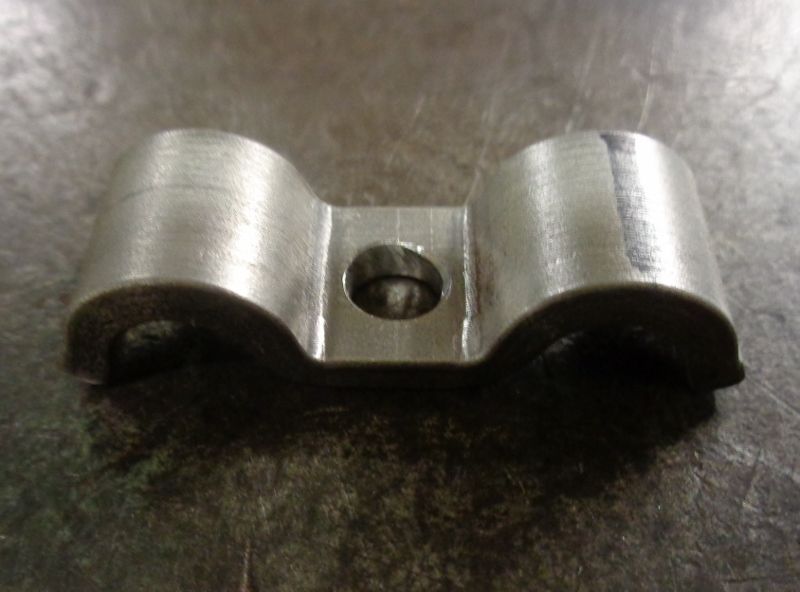
This is one of the clamps I made for the lines.
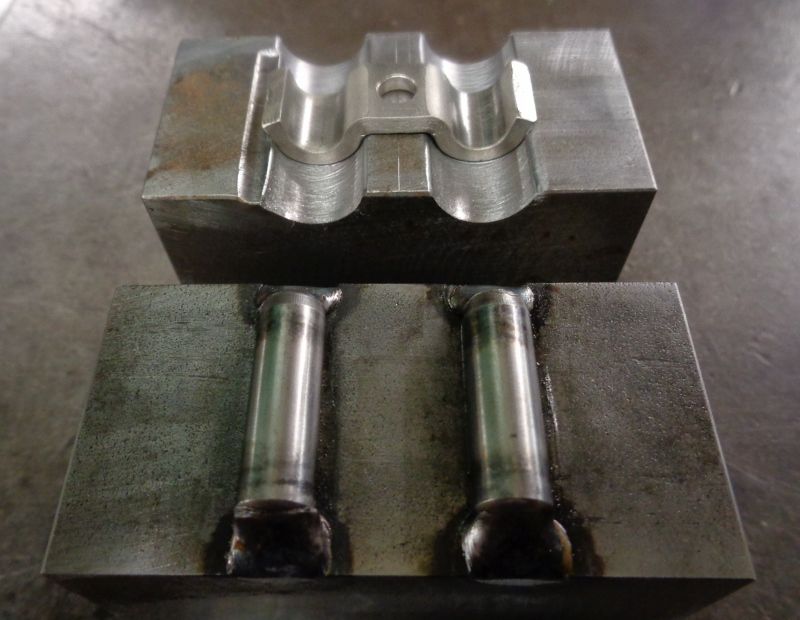
This is the die I used in my hydraulic press to make the clamps.

This is a fitting block to connect the Aeroquip hose to 5/16" flare hard line. I have to change the hose end when I get some more of them.

This is the supply line (lower) and the return line (upper) clamped to the inside of the frame under the steering box.

This is one of the clamps I made for the lines.

This is the die I used in my hydraulic press to make the clamps.
#171
01-01-2016, 04:54 PM
One more time.
Here are the lines connected to the filter on the engine.
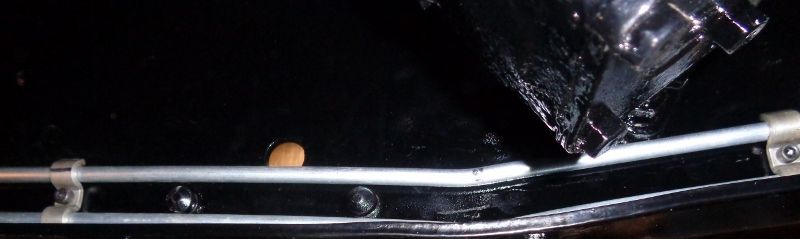
This is the under side of the bracket in the photo above as the lines come thru the motor mount crossmember. I used 5/16" steel line from a 25' coil to make the lines. The tube straightener worked really well. I still have to paint the rear filter bracket and add hose clamps to the connections on the engine.
Thanks for looking, Mark


#176
01-30-2016, 07:00 PM
I received my Aeroquip hose ends and fuel hose clamps from Summit this week. I replaced the temporary hose end on one hose and made up a stainless braid hose for the return line inside the cab. I installed all the hose clamps on engine fuel lines. Today I removed the tank, insulated the cab behind it in reinstalled the tank permanently. I tightened all the fuel line fittings and changed the two fuel filters. I put about 2 1/2 gallons of diesel in the tank, bled the rear filter and pumped fuel to the engine with the priming pump. So far no leaks. I'm getting closer to being able to start it.
#177
02-01-2016, 09:34 PM
ITS ALIVE! I started the diesel tonight for the first time since removing it from my car 3 years ago. I was surprised and pleased how easily and quickly it started. It runs smooth so the flywheel balance is good. The starter is smooth and quiet so the engagement is good there too. The Ford 390 starter has plenty of power to turn the diesel. I'm a happy camper .
.
.
#179
02-01-2016, 09:51 PM
Posting Guru
Join Date: Sep 2011
Location: Clitherall, MN.
Posts: 1,409
Likes: 0
Received 0 Likes
on
0 Posts

