When you click on links to various merchants on this site and make a purchase, this can result in this site earning a commission. Affiliate programs and affiliations include, but are not limited to, the eBay Partner Network.
Nice photos! I would bet, since your other gauges are working, that your temp sending unit is bad. Mine was.
Just don't make the mistake I did and replace it without first draining some of your coolant, or you'll get a coolant geyser when you do. Or, as someone suggested, do it with the engine totally cold and do the swap really quickly.
I would have had a hard time doing it quickly, as the unit screws into the top of the intake manifold, between your distributor and carb. The vacuum line that goes to your oil cap crosses over the top of it. I had a hard time getting my big mitts in there and being able to see what I was doing.
Took it for a run yesterday and found a pin hole leak in the gas line in the short span from where it goes from the floor board to the frame. I replaced all of the metal line. I should have done the rubber sections too.
I also have a leaky master cylinder. Fluid seeps from the very front part of the cover. I cleaned all of the crusty rust from the cover and the top of the reservoir but after today's drive, it is still seeping, just not as much. Just did a search for this problem. I think that I will try and sand the top of the MC casting to give it a flatter surface. And then maybe a shim under the contact points of the cap.
My son wants to take it out so badly. But I keep telling him that I need to get most of the little bugs out of it first. I am starting to wonder if that is possible.
Don't know an amount, except to say I had to put about 1.5 gallons back in. Mine was warm, so expansion pressure was also an issue. You need it to be below the level of the top of the intake manifold, which is somewhere not too far below the level of the tops of the tubes.
Ultimately, the quick change is probably the simplest solution, if a little messy. Just have your hose on-hand to wash away whatever spills. I was way too slow because I hadn't thought the problem through and was totally surprised when coolant came bursting out of the top of my engine.
My son wants to take it out so badly. But I keep telling him that I need to get most of the little bugs out of it first. I am starting to wonder if that is possible.
It probably isn't possible to get most of the little things. Just be sure you get the big ones - safety issues - like a fuel line leaking inside your cab. If the engine runs, the brakes work, and you have seatbelts... take the boy for a spin!
It probably isn't possible to get most of the little things. Just be sure you get the big ones - safety issues - like a fuel line leaking inside your cab. If the engine runs, the brakes work, and you have seatbelts... take the boy for a spin!
Seat belts!!!! I knew that I forgot something.
Today, I took the truck and his spare car key and swapped vehicles in the parking lot and then waited for the phone call asking the location of the truck keys.
Awesome thread! Nice work, truck is looking great!
Originally Posted by D & D
Things completed in the past couple of days.
Steering column painted re-wired and installed
E-brake assembly is in. I still need to order a set of cables from the rear drums to the center connection point.
Fresh air ducts are in - Should have installed the driver's side before the e-brake assembly. I had to remove the two firewall bolts and loosen up the under dash bolt of the e-brake to get juuuuust enough room to slip it in there.
Gas tank
Glove box - I tapped the radio power wire and ran a wire into the glove box for future radio upgrade. Still need to come up with a decent speaker mounting option.
Seat
New door seals
Doors are on but need some adjustment to have them fit correctly.
Does anyone know from the pictures below, what the bracket just behind the steering shaft is for? The hole in the firewall in the center of the picture, I can't figure out if anything should be running through there.
If I remember right, from my teardown, that is a guide for the brake lines. they sit inside of it, to guide them down to the frame.
Originally Posted by D & D
Yep. There had been about 5 gallons sitting in the tank all along. Transferred it to my fire starting can and put some fresh fuel in.
Removed the passenger side window crank mechanism since I couldn't raise the window. Cleaned it up, greased it up and it is now working fine. Almost lost a finger putting it back in the door. Let my grip relax for a second and it started coming down.
Put the passenger side fender on as well. Dropped the ratchet down the pillar and spent 1/2 hour trying to get it out. I still have to figure out how the lower fender bolt connects to the underside. I see the bolt hole in the fender, but there is nothing to run the bolt into.
On the bottom of the rocker, there should be a bracket, that holds a nut, for the fender to bolt on to. Here is a pic from mine, I had to re-create the one on the drivers side:
Seat belts are in. It feels very strange not having a shoulder belt. I figured I only have a few weeks to drive the truck so I washed up and put the stock lap belts back in. It's legal for now and they will be replaced with retractable 3 point belts later.
Ignition switch took a dump. The boy was driving and when he went to restart it, it took him a while to get the key to turn. I tried for a while too and decided to use my spare switch. I should have known this was coming. The key is very worn and doesn't have a lot of shape to it. I figure the inside of the switch would be worn just as bad.
Troubleshot the dome light - it's the light switch. When I turn the **** all the way to the left, it does not turn on. If I put a little pressure on it, it will work occasionally. I messed with the little metal contact that connects D1(yellow/green wire) to D2(black/blue wire), but can't get the light to turn on consistently. All of the other functions of the switch work well. It will be replaced at a later date.
AM Radio was not powering up either. There is power to the black wire, but when I opened the top cover to check it out, I decided that it's an accident waiting to happen. I removed the in line fuse and put it back together and reinstalled it in the dash. I spliced into the power wire and ran power over to the glove box for an aftermarket radio install. Once I figure out how to mount the speakers, I will tackle that project.
I am done working on it for the rest of the year, and will drive it for the next few weeks, take it bow hunting a few times, and then button her up for the winter.
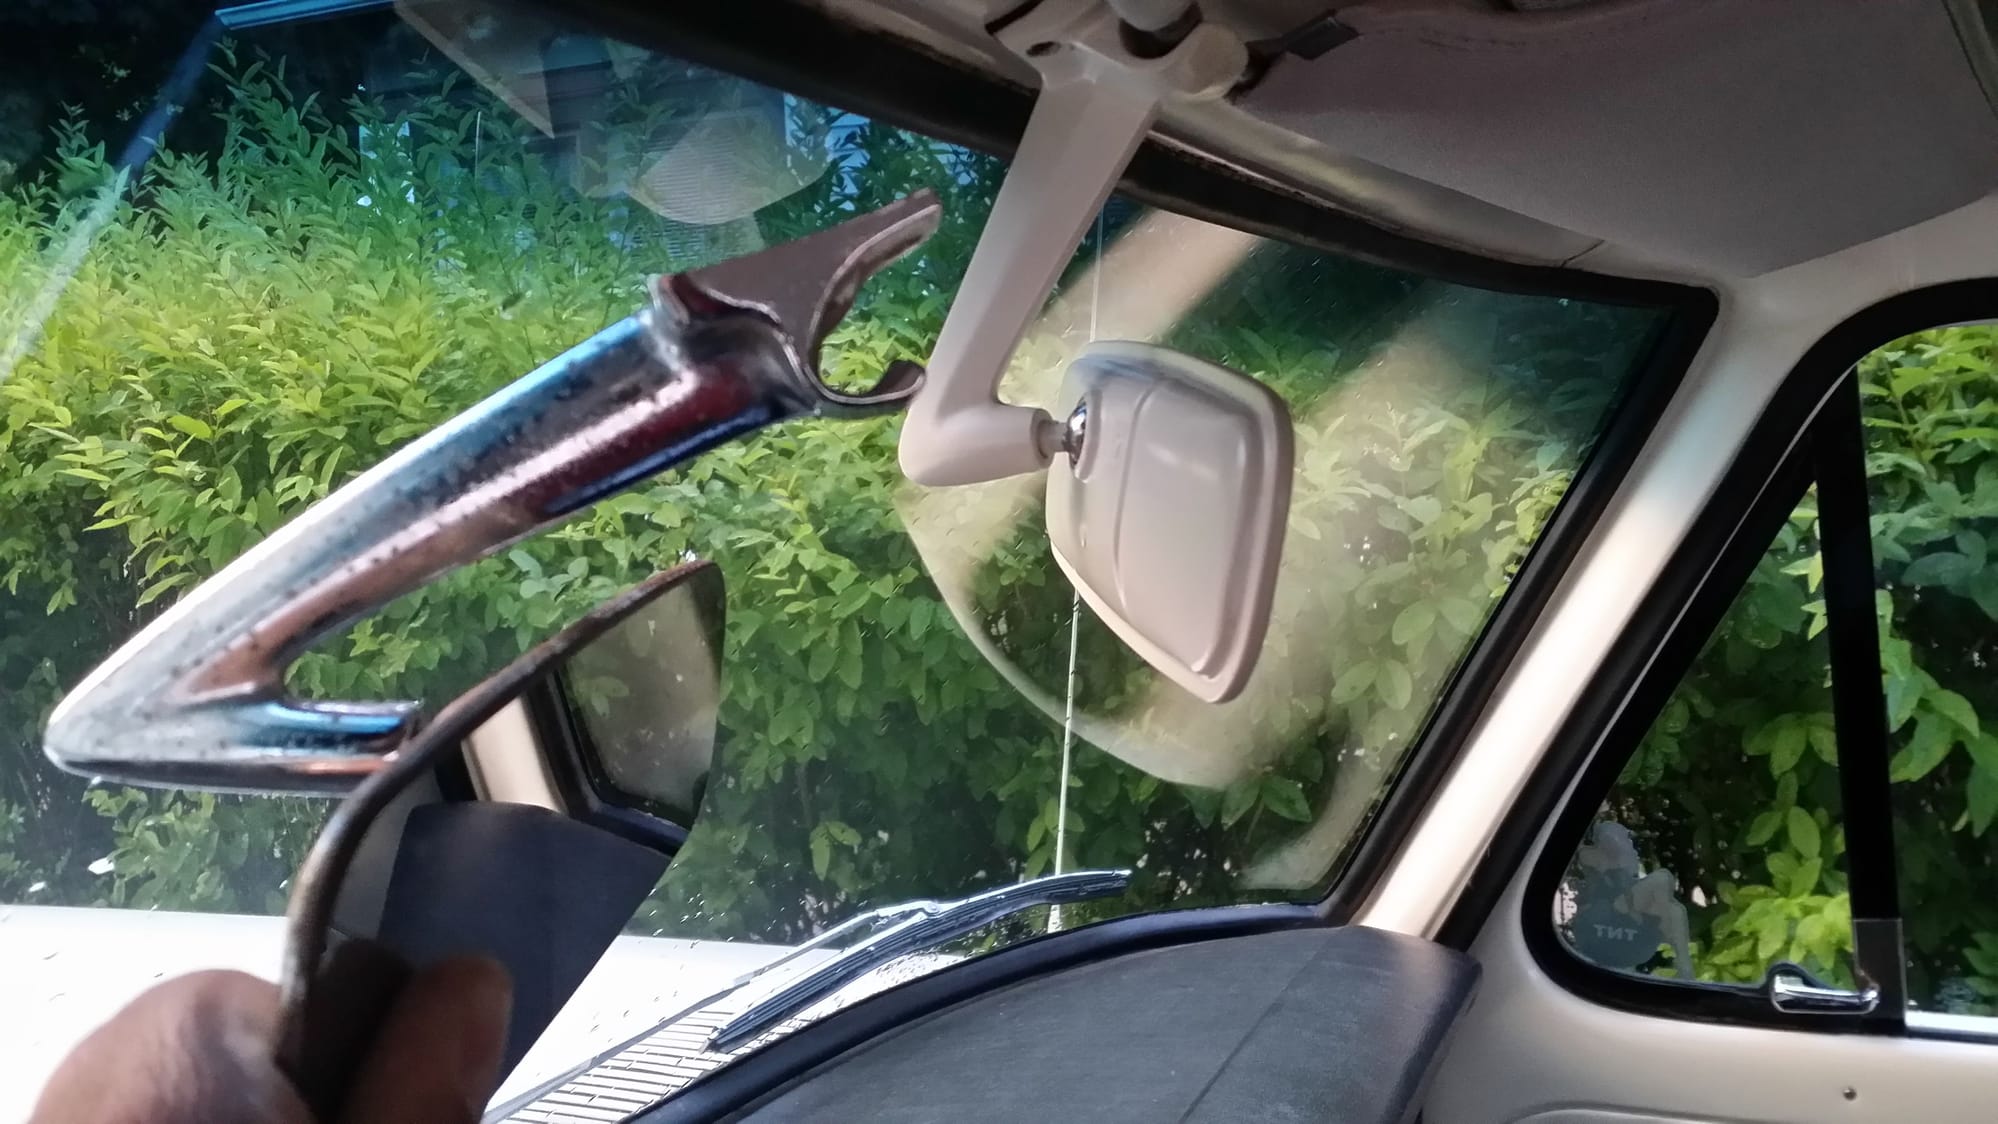
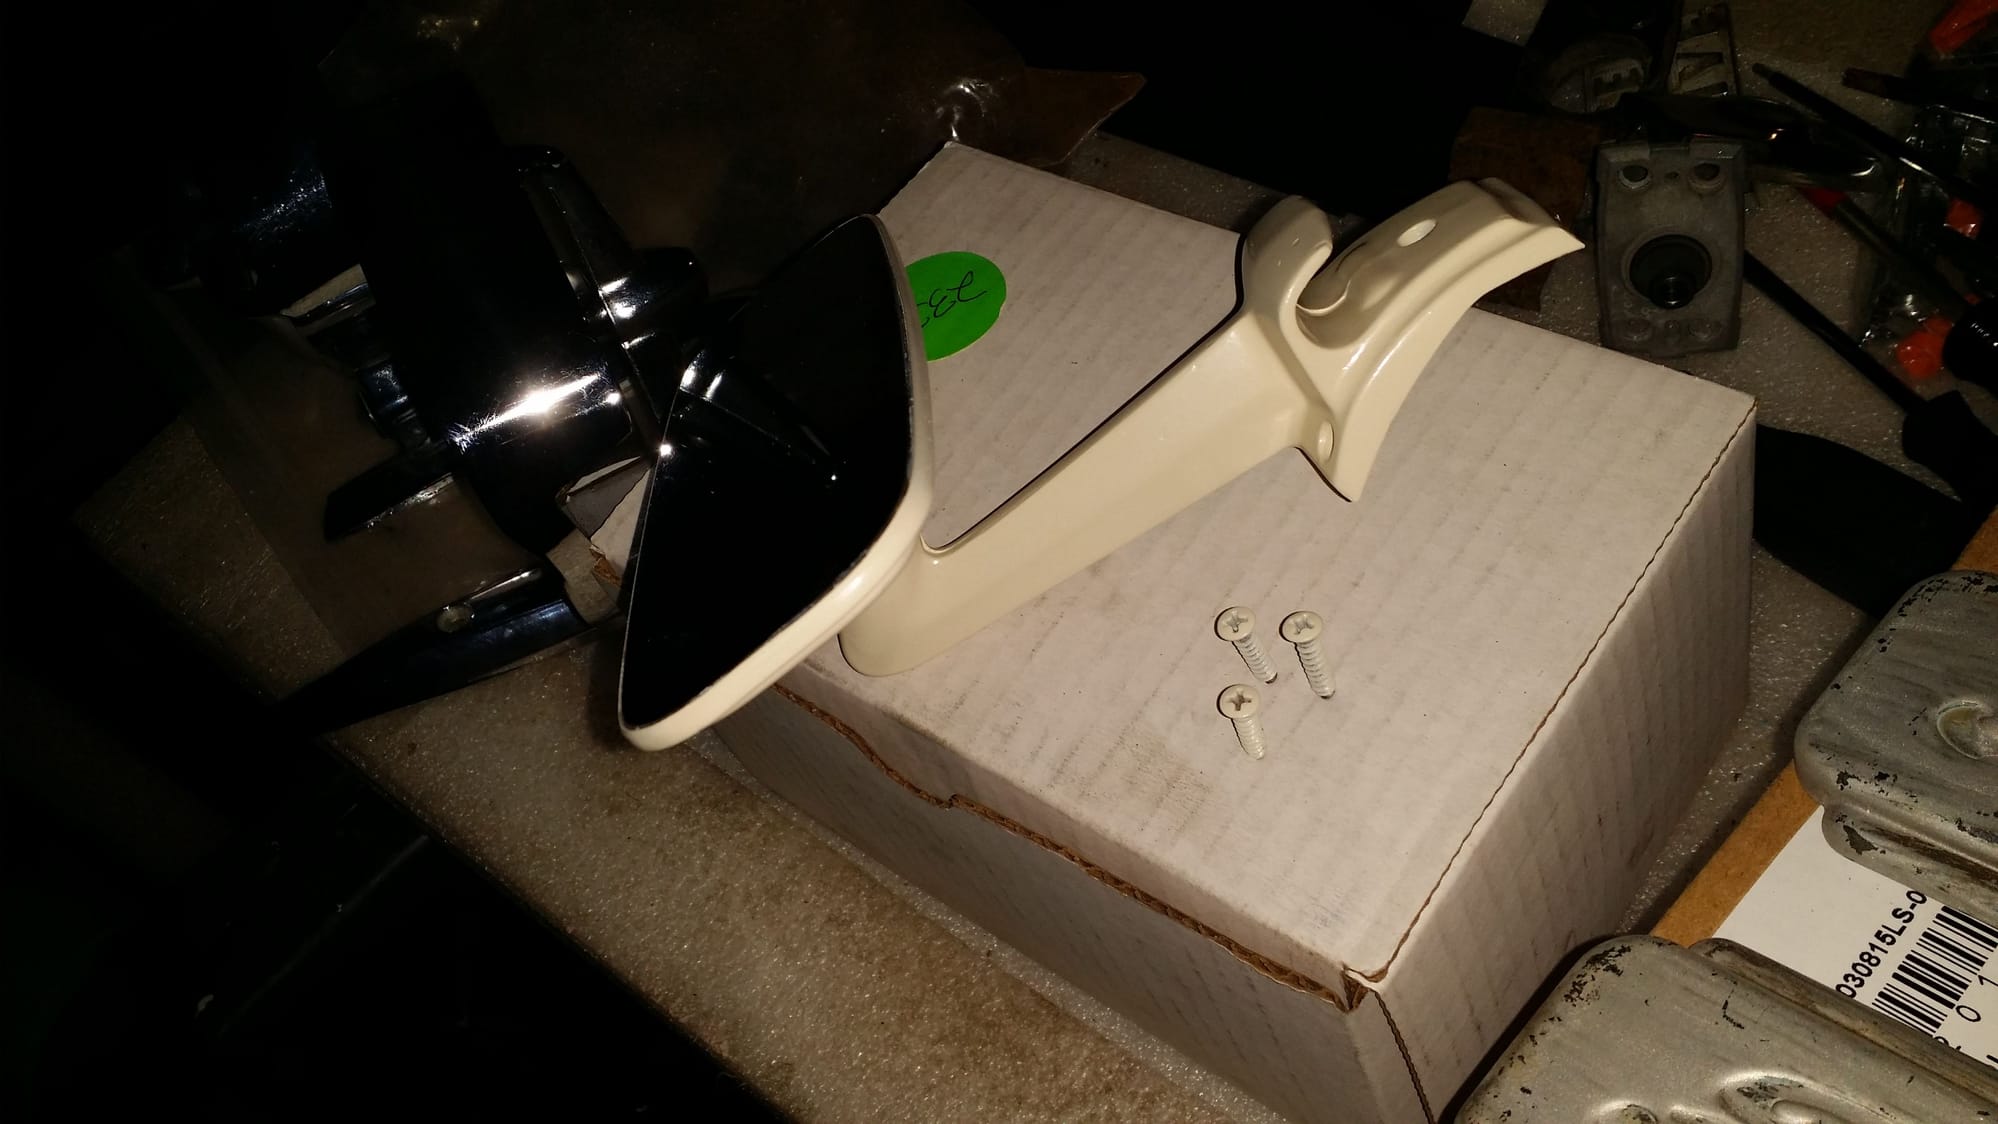
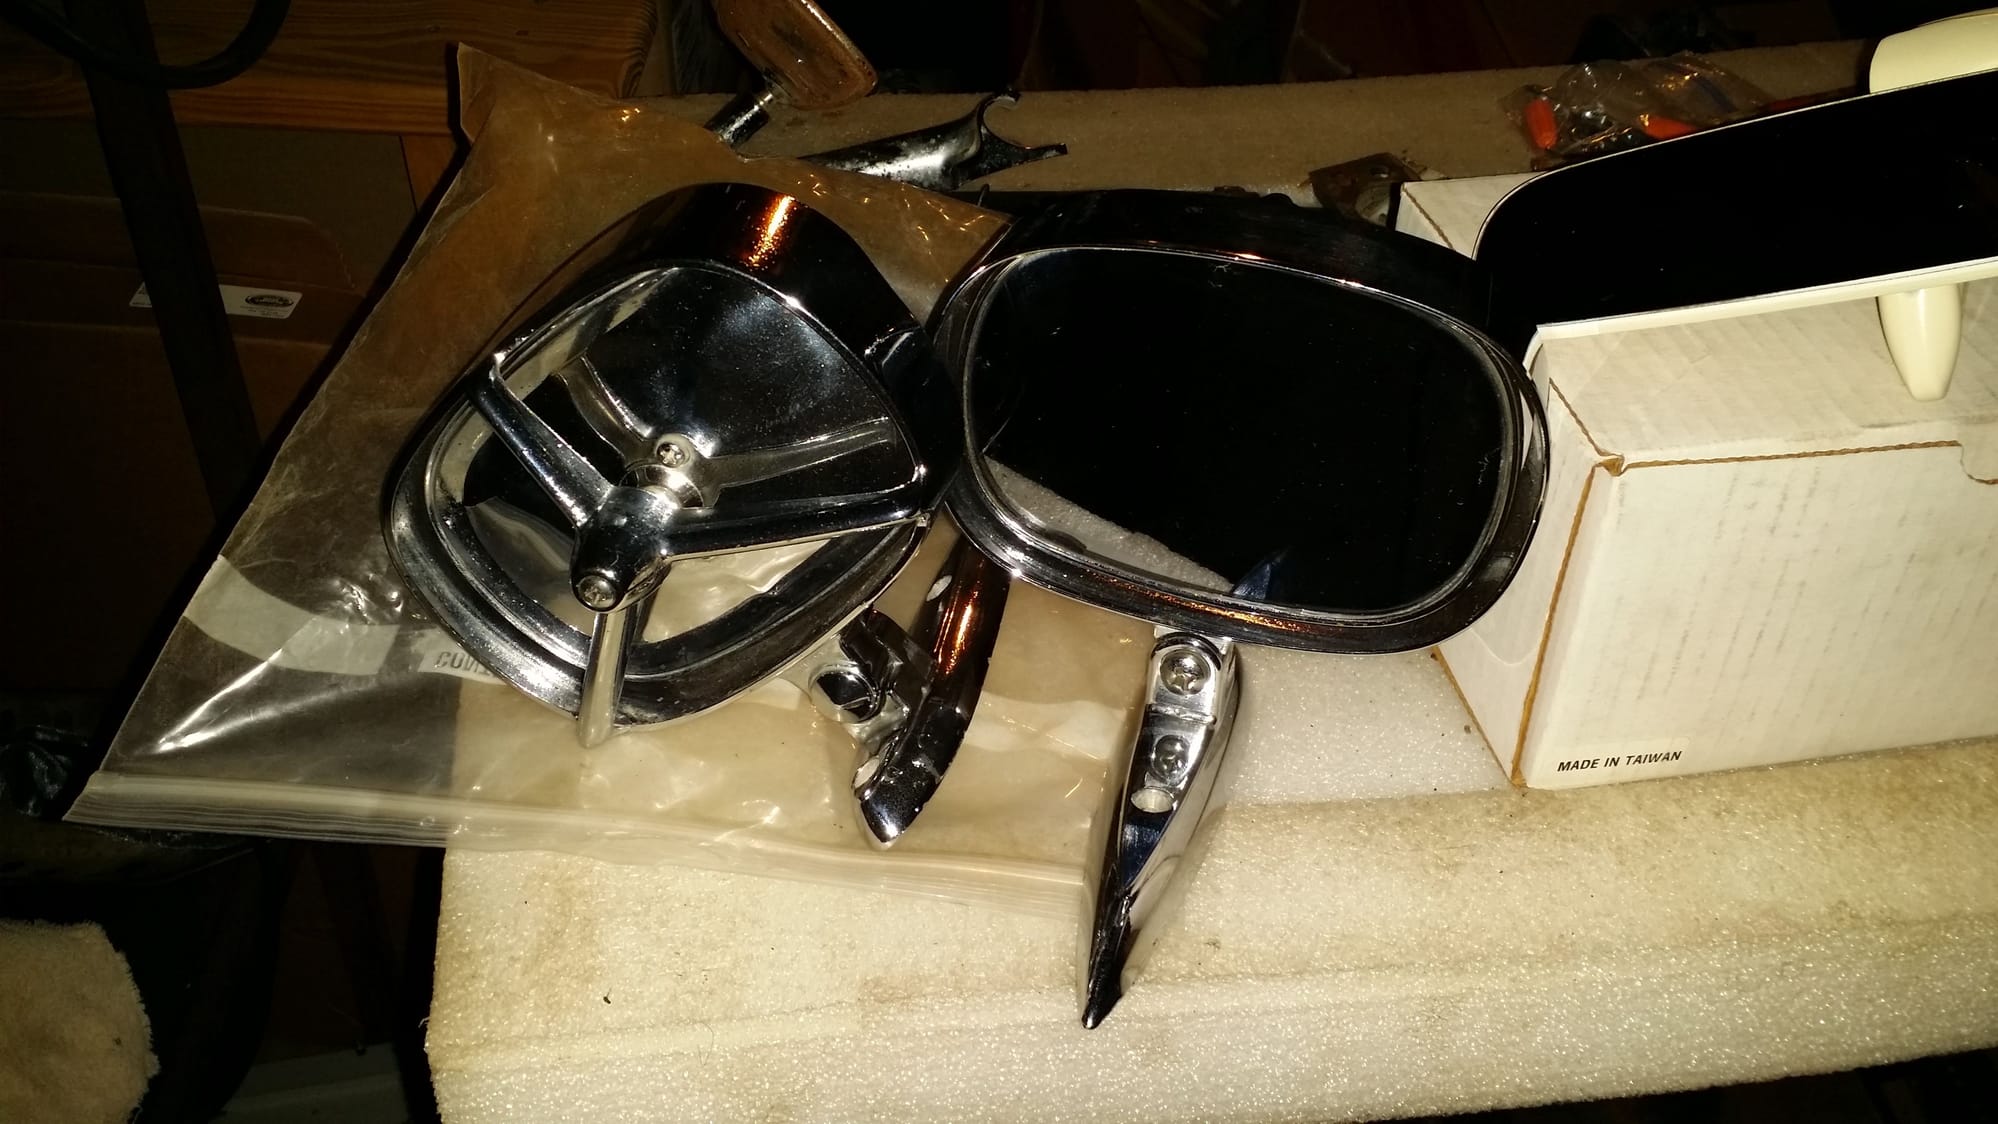
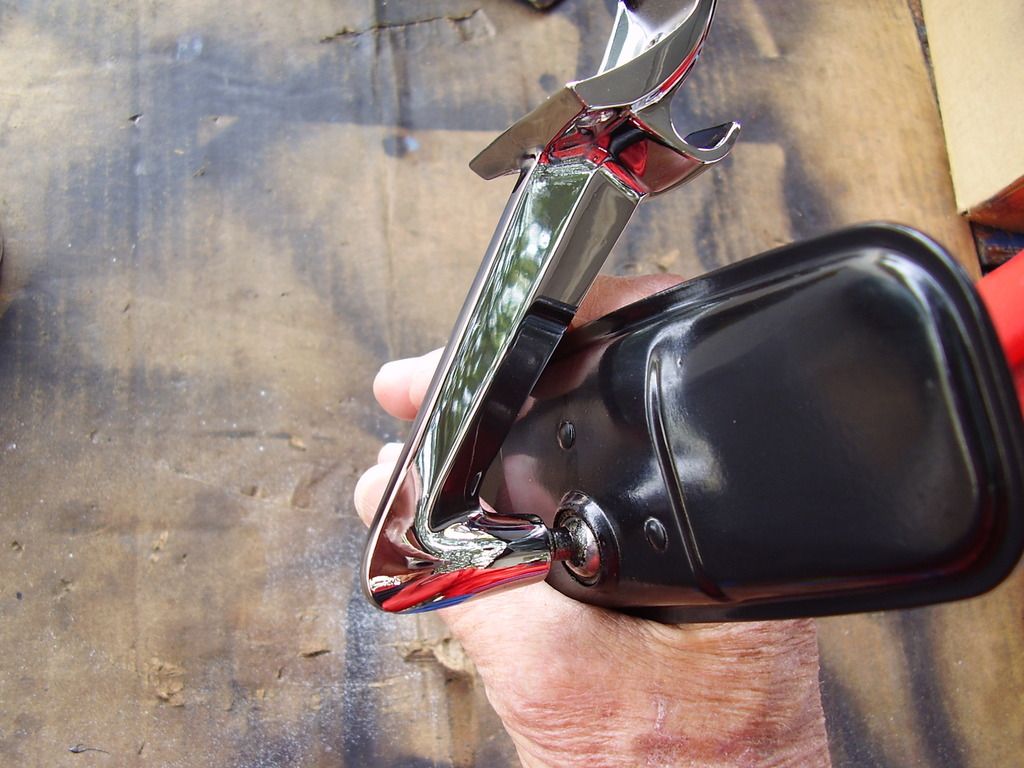
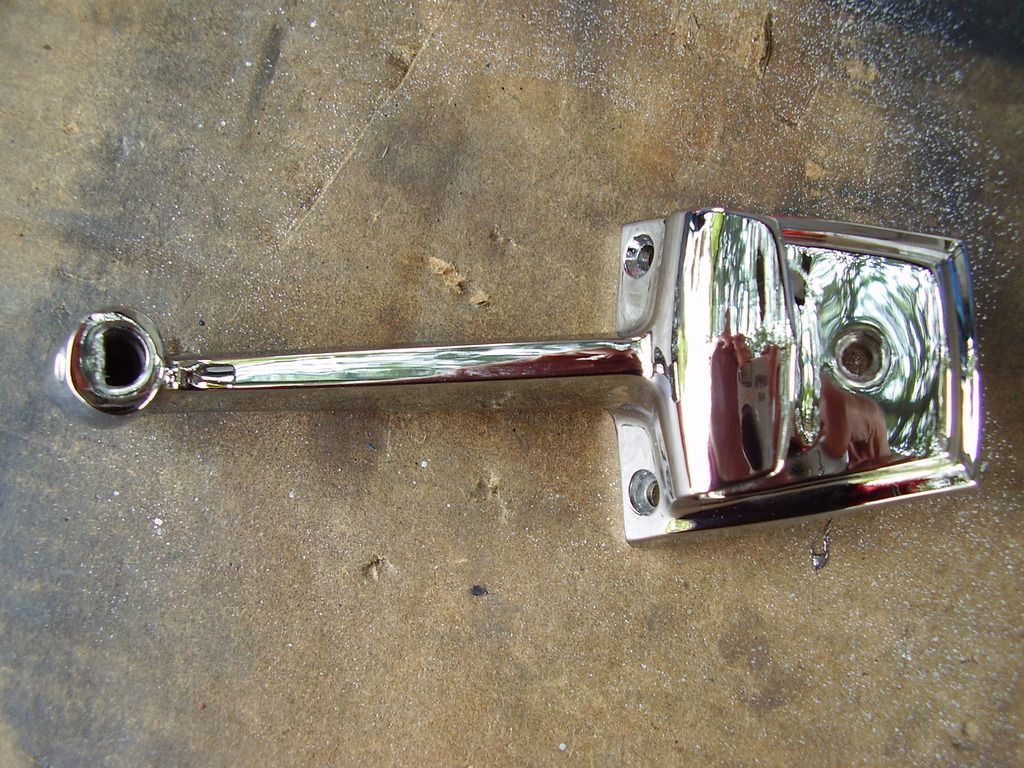
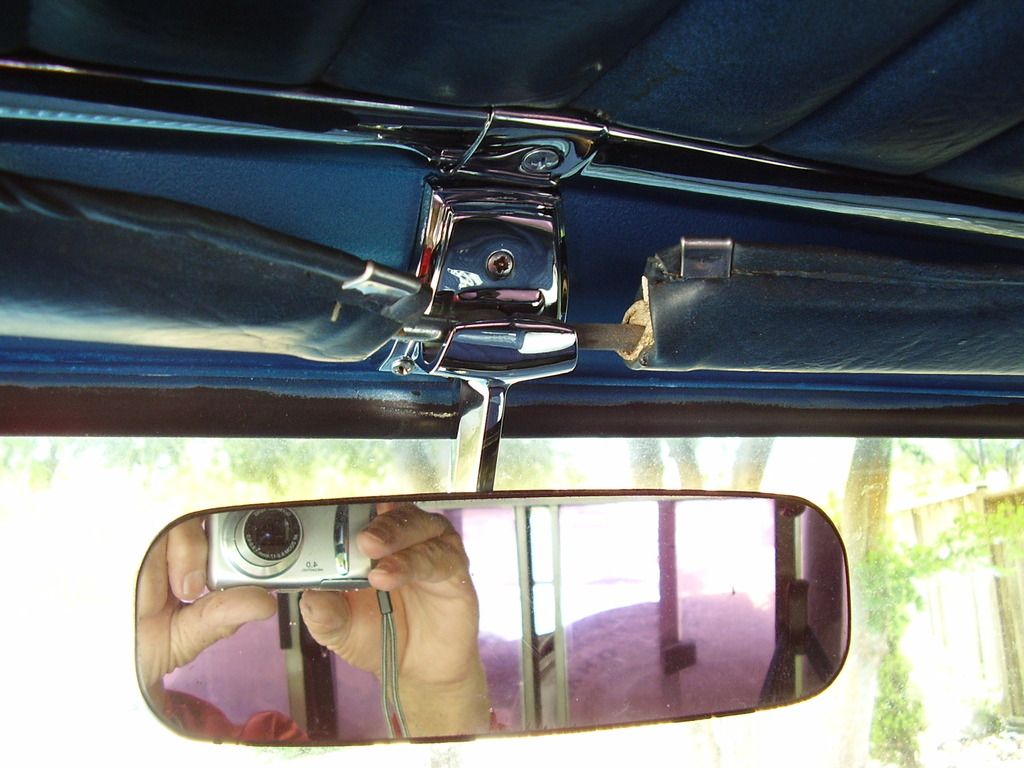
Picked up these parts today at the annual Iola swap meet. The rear view mirror is from a 67, but I like it better than the stick on type. Came home, scuffed it up, primed and painted. Ready for install tomorrow.
The door mirrors are Yankee aftermarket. Not perfect, but better shape than the rest of the exterior. I have seen the round ones, but never the rectangle ones. I think the mount is JUST long enough to cover up the existing holes on the driver door.
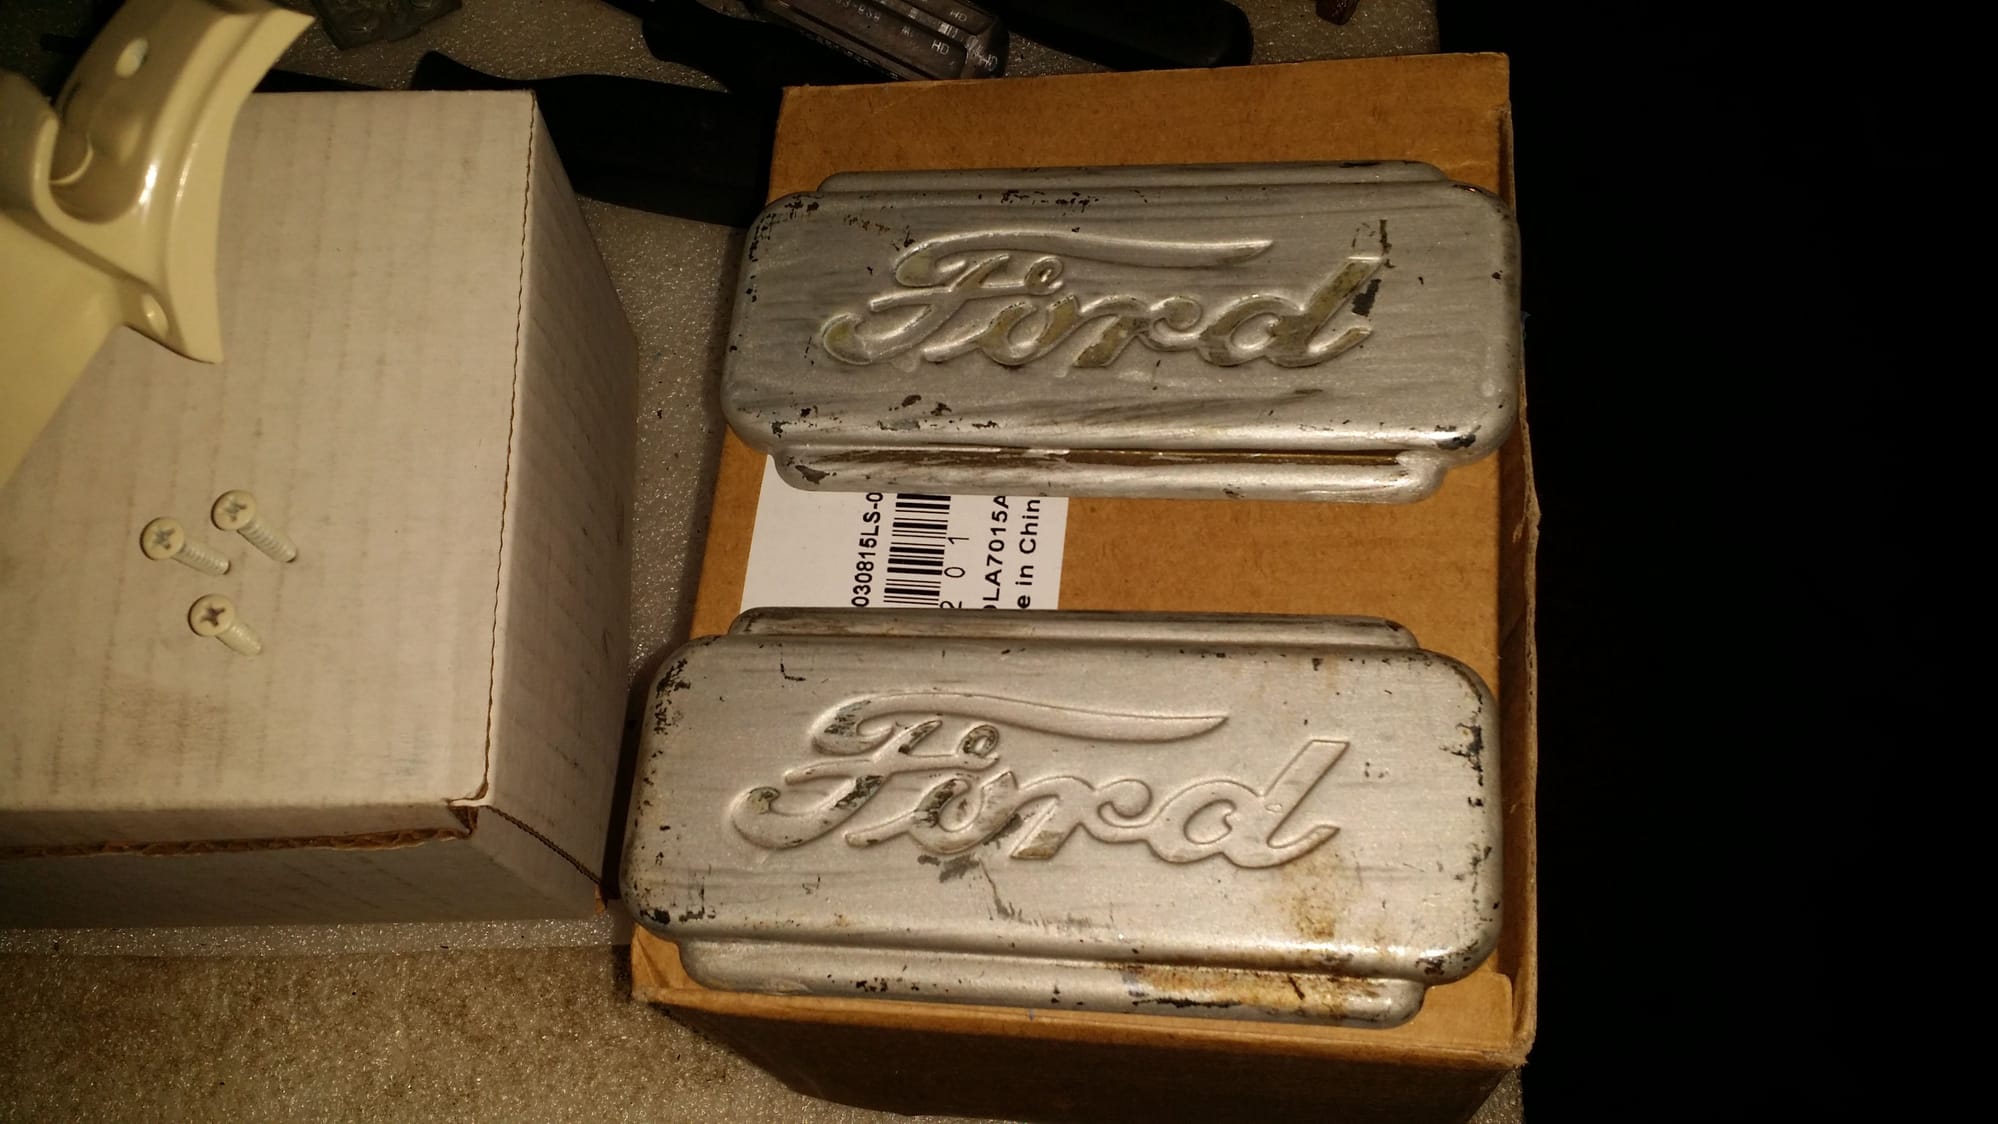
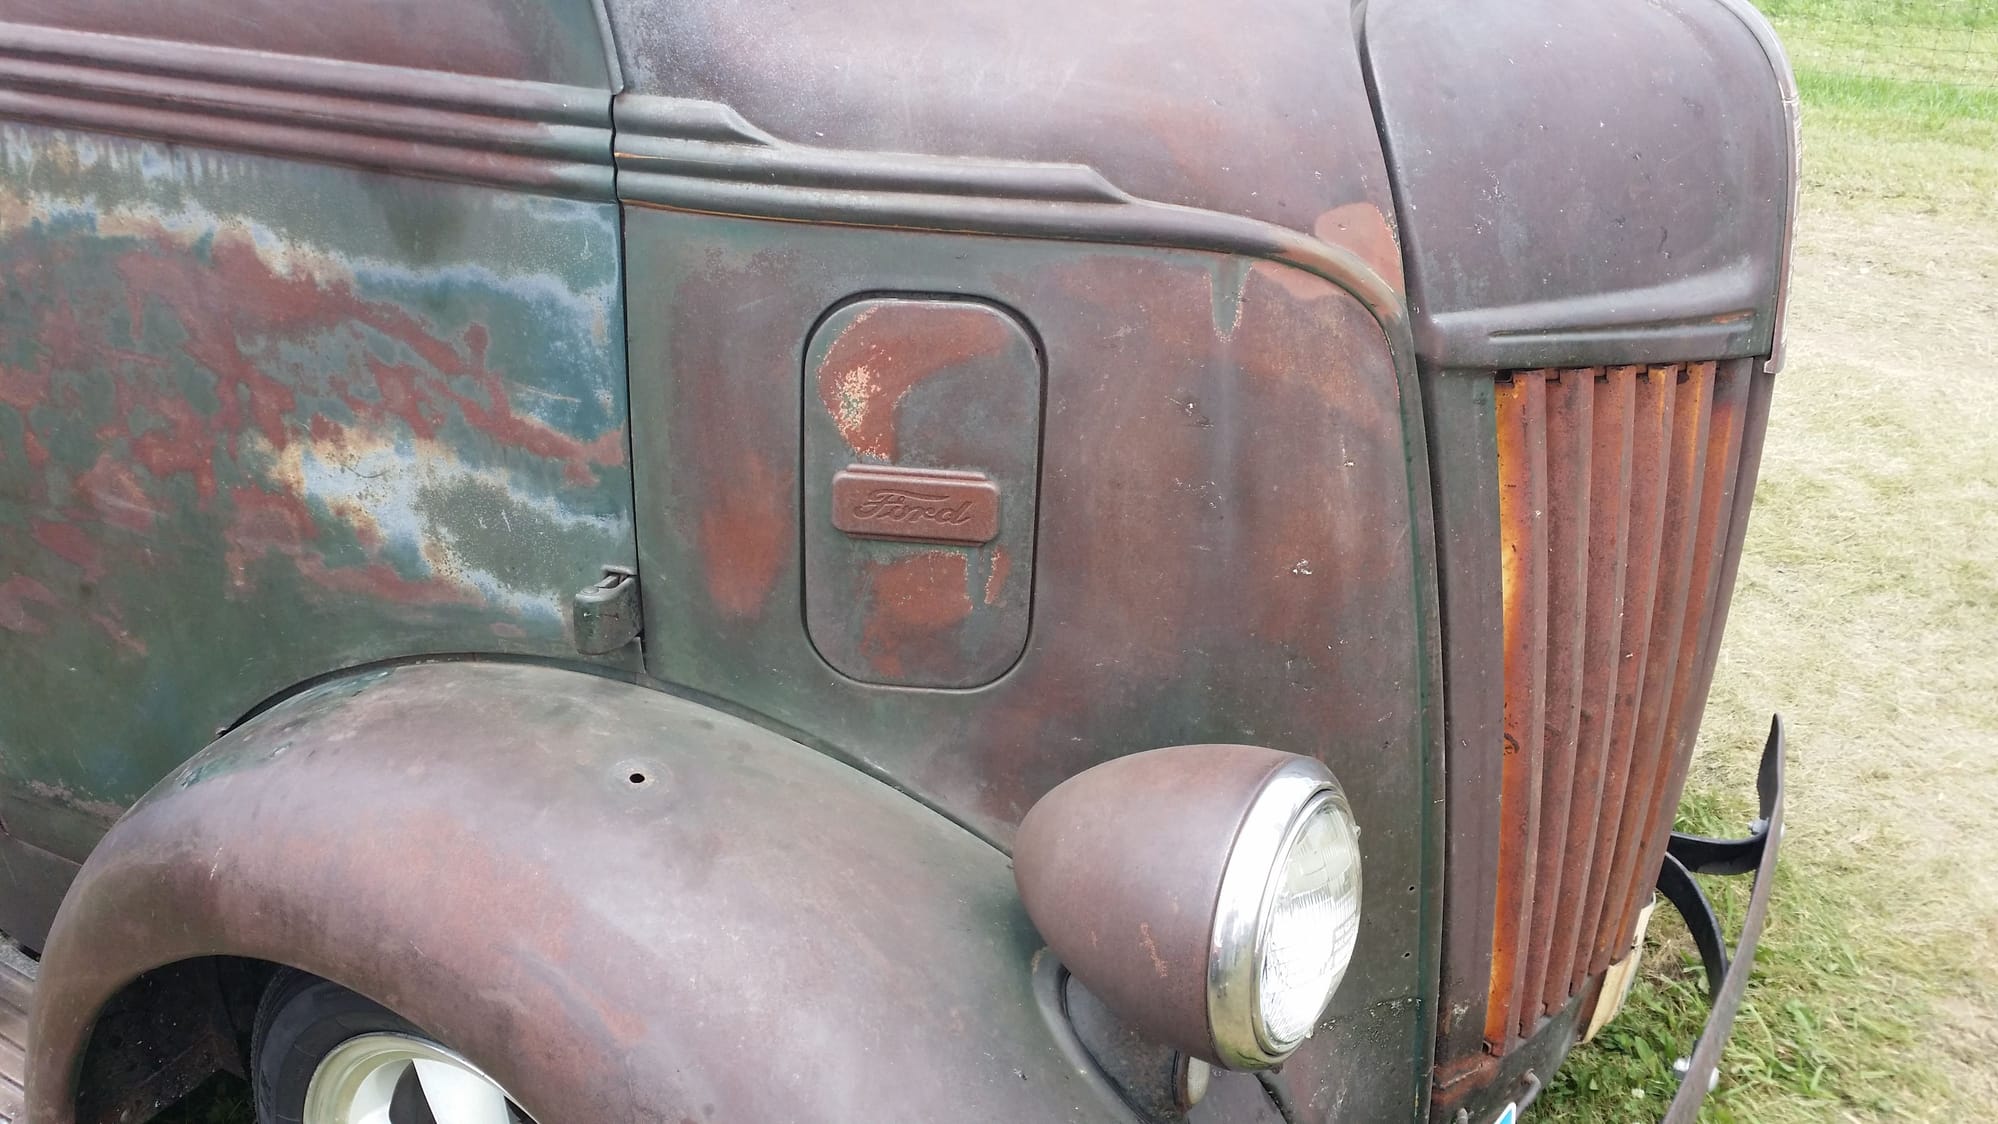
Since I found the parts I was looking for, I started looking for something different and found the little FORD panels. The guy said that they were the hood trim for a 1940 pick up. And then I saw the 1947 Ford cabover vent emblems on one of the trucks there.
</td></tr></tbody></table> </td> </tr> <tr><td class="alt1" id="td_post_15495274"> Ah yes I picked up a 67 mirror a few yrs ago just got it chromed a few months ago.
The shop only does show chrome it turned out nice..
Orich
&
</td> </tr> </tbody></table>
<table class="tborder" id="post15495494" align="center" border="0" cellpadding="6" cellspacing="1" width="100%"> <tbody><tr><td class="thead"> #3 07-12-2015, 07:17 AM
</td> </tr> <tr><td class="alt2" style="padding:0px"> <table border="0" cellpadding="0" cellspacing="6" width="100%"><tbody><tr><td class="alt2"></td><td nowrap="nowrap"> D & D
Senior User
</td><td width="100%">
</td><td nowrap="nowrap" valign="top"> Join Date: Sep 2009
Location: Central Wisconsin
Posts: 276
</td></tr></tbody></table> </td> </tr> <tr><td class="alt1" id="td_post_15495494"> That chrome is pretty nice.
I have a feeling that the way I am going with adding a lot of little things, eventually I am going to want to paint the truck and chrome a lot of things.
What did that bracket cost to have chromed?
</td> </tr> </tbody></table>
<table class="tborder" id="post15495659" align="center" border="0" cellpadding="6" cellspacing="1" width="100%"> <tbody><tr><td class="thead"> #4 07-12-2015, 09:09 AM
</td> </tr> <tr><td class="alt2" style="padding:0px"> <table border="0" cellpadding="0" cellspacing="6" width="100%"><tbody><tr><td class="alt2"></td><td nowrap="nowrap"> orich
Postmaster
</td><td width="100%">
</td><td nowrap="nowrap" valign="top"> Join Date: Aug 2003
Location: San Jose ca.
Posts: 4,082
</td></tr></tbody></table> </td> </tr> <tr><td class="alt1" id="td_post_15495659"> The cost, Way more then, I thought it would have normally but wanted it back in a short time.
Plus I did not strip the paint. So cost more and the shop was back logged stuff waiting to be chromed. It took almost a month for the head liner trim. And did not want to wait that long again. So they did it with in a week but I paid dearly for it. But it's done!
The guy who normally if the cast metal had just retired which added to the back log that needed plating.
I saw a 67 mirror bracket on ebay go for just under a $100 bucks and it even had a dent in it. Well mine cost over that but with out a dent.
I was told soft cast metals cost more maybe.
I may or may not buy the sun visors chrome mounting brackets as I've seen them for like $39. a piece but they are nos or aftermarket
Orich
My headliner metal trim was $250 and another place want $350..
I stripped all the paint and wet sanded it with 800grit so they didn't have to do it.
I'm not trying built a show truck but just a nice clean looking one.
And can't take the money with when the time comes so I'll **** it away on my truck as it gives me something to do.
Orich
__________________
1971 F250 4wd Nv4500-5spd O/D 416cid owned since 1978. Toured Vietnam 1968-70 15 months 512th Trans Co. Driver of the Iron Butterfly Gun
</td> </tr> </tbody></table>
<table class="tborder" id="post15495771" align="center" border="0" cellpadding="6" cellspacing="1" width="100%"> <tbody><tr><td class="thead"> #5 07-12-2015, 10:30 AM
</td> </tr> <tr><td class="alt2" style="padding:0px"> <table border="0" cellpadding="0" cellspacing="6" width="100%"><tbody><tr><td class="alt2"></td><td nowrap="nowrap"> D & D
Senior User
</td><td width="100%">
</td><td nowrap="nowrap" valign="top"> Join Date: Sep 2009
Location: Central Wisconsin
Posts: 276
I saw a 67 mirror bracket on ebay go for just under a $100 bucks and it even had a dent in it. Well mine cost over that but with out a dent.
I was told soft cast metals cost more maybe.
</td></tr></tbody></table> </td> </tr> <tr><td class="alt1" id="td_post_15497045"> [QUOTE=D & D;15495771] Quote:
<table border="0" cellpadding="6" cellspacing="0" width="100%"><tbody><tr><td class="alt2" style="border:1px inset"> Originally Posted by orich
I saw a 67 mirror bracket on ebay go for just under a $100 bucks and it even had a dent in it. Well mine cost over that but with out a dent.
I was told soft cast metals cost more maybe.
/QUOTE]
So $2 was a good deal?
</td></tr></tbody></table>
Ah sorry forgot to add it was for a chrome 67 The starting bid was $49
Sold for 97.50 plus $18 shipping from Canada.
But I was told the early mustang was the same or maybe looks the same.
I paid like $8 bucks at PnP when, I bought mine.
</td></tr></tbody></table> </td> </tr> <tr><td class="alt1" id="td_post_15497381"> I wasn't 100% sure that my mirror was a 67 so I bought another that looked close to it. ($2 too) Part # shows it for a 64-66 Mustang. They are not the same. Its a little longer and the angle is different where it attaches above the windshield. I will take a side by side pic tomorrow.
</td></tr></tbody></table> </td> </tr> <tr><td class="alt1" id="td_post_15497435"> Quote:
<table border="0" cellpadding="6" cellspacing="0" width="100%"><tbody><tr><td class="alt2" style="border:1px inset"> Originally Posted by D & D I wasn't 100% sure that my mirror was a 67 so I bought another that looked close to it. ($2 too) Part # shows it for a 64-66 Mustang. They are not the same. Its a little longer and the angle is different where it attaches above the windshield. I will take a side by side pic tomorrow.
</td></tr></tbody></table>
I also spotted a early chrome mustang one on ebay for like $20 bucks about a week after got mine back from the chrome shop.
Gees sure looked a like in the ebay photos.
But didn't know if the screws would line up or fit under the headliner trim.
Thanks yet like to see profile of it..
Orich
The F100 has a pretty steep windshield angle, which makes the bracket shorter on both the vertical and horizontal pieces. The mounting portion with the holes is not cupped for the Mustang bracket. You could make it work in the truck if you had a wedge spacer to close the gap, but the angles don't look good. The mirrors themselves seem to be identical and have the same set screw measurements.
__________________
68 F100 4x4
What's it got in it? 390 FE - NP435 - And a lot of Blood, Sweat, Tears, and Elbow Grease.
</td></tr></tbody></table> </td> </tr> <tr><td class="alt1" id="td_post_15499418"> Ah yeah, I see a little work with a sanding drum to reshape to fix may do it.
But the real deal is nicer..
Ps, I have seen two people bust their windshields trying to remove the glue on oem one's..
Plus they sit to low for me being 6.1"
Orich
__________________
1971 F250 4wd Nv4500-5spd O/D 416cid owned since 1978. Toured Vietnam 1968-70 15 months 512th Trans Co. Driver of the Iron Butterfly Gun
</td> </tr> </tbody></table>
<table class="tborder" id="post15509781" align="center" border="0" cellpadding="6" cellspacing="1" width="100%"> <tbody><tr><td class="thead"> #11 Today, 07:53 AM
</td> </tr> <tr><td class="alt2" style="padding:0px"> <table border="0" cellpadding="0" cellspacing="6" width="100%"><tbody><tr><td class="alt2"></td><td nowrap="nowrap"> D & D
Senior User
</td><td width="100%">
</td><td nowrap="nowrap" valign="top"> Join Date: Sep 2009
Location: Central Wisconsin
Posts: 276
</td></tr></tbody></table> </td> </tr> <tr><td class="alt1" id="td_post_15509781"> I found a coolant temp sensor at the swap meet too. I dug out the heater control valve and heater hose that has been sitting around for 2 years and figure, I may as well do it all now and only drain the coolant 1 time.
Top off the radiator, leave the cap off, let it run and wait. Top hose finally gets hot, and I can now turn the Heat OFF in the cab. The wife will be happy about that since now we don't have to have all vents and windows open and her hair will stay all nice and purdy.
I keep watching my temp gauge and nothing. Oh well. Maybe the sensor is bad. While it's running, I may as well adjust the idle. Just as I reach in, a big burp of air and some coolant comes out of the radiator hits the fan and slaps me in the face. Grab the paper towels off of the seat, check the gauge and it is now reading good. SWEEEEEET. All gauges......check.
Troubleshoot the horn too and find that the ring on the back side of the steering wheel is loose, so the brush hits it sometimes, but most times it doesn't. The 3 screw holes are stripped a little so I cut a short piece of a zip tie and drop them into each screw hole. Tighten them all up, which now tightens the back ring. Sweeeeet....I got my horn now too.
Take it for a little drive, and keep testing the horn (sounds like a cow giving it's last death moan) and am happy. Get home, try it one more time and the relay just clicks. I got a spare horn sitting in the garage, but I think that I am going to hit the JY and find that 90's Cadillac 4 horn set up. Tomorrow is another day.
__________________
68 F100 4x4
What's it got in it? 390 FE - NP435 - And a lot of Blood, Sweat, Tears, and Elbow Grease.
</td> </tr> </tbody></table>
<table class="tborder" id="post15509909" align="center" border="0" cellpadding="6" cellspacing="1" width="100%"><tbody><tr><td class="thead"> #12 Today, 09:03 AM
</td> </tr> <tr><td class="alt2" style="padding:0px"> <table border="0" cellpadding="0" cellspacing="6" width="100%"><tbody><tr><td class="alt2"></td><td nowrap="nowrap"> orich
Postmaster
</td><td width="100%">
</td><td nowrap="nowrap" valign="top"> Join Date: Aug 2003
Location: San Jose ca.
Posts: 4,082
</td></tr></tbody></table> </td> </tr> <tr><td class="alt1" id="td_post_15509909"> Heads up!
While your refilling your coolant so you don't have burp out the air from the coolant that goes all over making a mess, Just remove the heater hose at the intake and when coolant just start come out the the manifold heater hose nipple the block is now pretty much air free.
No burping is now needed.
Or drill a 1/16 hole in the thermostat with the hole placed at 12 0:clock will let about 95% of air out
Then theirs a later 90's ford size of 52mm size thermostat that has the hole already in it although it is a little smaller you need to use RTV to affix it into the 54mm oe 360/390 ford housing
Orich
__________________
1971 F250 4wd Nv4500-5spd O/D 416cid owned since 1978. Toured Vietnam 1968-70 15 months 512th Trans Co. Driver of the Iron Butterfly Gun
Here is my next project. I am going to make and mount an aftermarket radio & storage shelf. The radio hole will fit most aftermarket 7 1/4" radios and the storage shelf will be 8" x 2 1/4" by 2 1/2 " deep which will fit a couple of cell phones laying down. There is more than enough space even with the shift lever in 1st or 3rd. I will utilize the existing column collar bolt and center dash support bolt. I still have some figuring to do, but It's mostly set to go. Not sure if I want to use sheet metal to be able to weld or use up some aluminum sheets that I have plenty of.
I am also going to Trozei it up a little to complete the look.
Had to cut some kerfs so that I could round the corners.
The dolly was a pretty good match for the curve.
All shaped and welded up. I had to remove the center support bolt, the right side bolt for the column, loosen the left side bolt and also loosen the 4 bolts for the pedal assembly.
Holes all laid out and cut. I was going to fold about 1/4" of the openings back to make a nice smooth opening but the whole piece started to twist. I ended up cutting everything out.
A little bit of bondo because I have a redneck brake press (pipe clamps, 2x4, and table saw top) and had to work the metal a little. Ok. A lot. Couple coats of primer and a couple coats of Wimbledon white. I also made the box/storage insert out of some 3/32 cardboard. 5/8" staples from the inside out worked perfect to hold the box together. A lot of test fitting of the radio inserts was needed but it will slide in nicely. The last thing I have to do before mounting is to paint the storage box.
 09-25-2014, 11:30 AM


 07-12-2015, 11:46 PM
  </td><td nowrap="nowrap"> orich


 </td></tr></tbody></table>


 </td><td nowrap="nowrap"> D & D


 </td> </tr> </tbody></table>

 Today, 09:03 AM