When you click on links to various merchants on this site and make a purchase, this can result in this site earning a commission. Affiliate programs and affiliations include, but are not limited to, the eBay Partner Network.
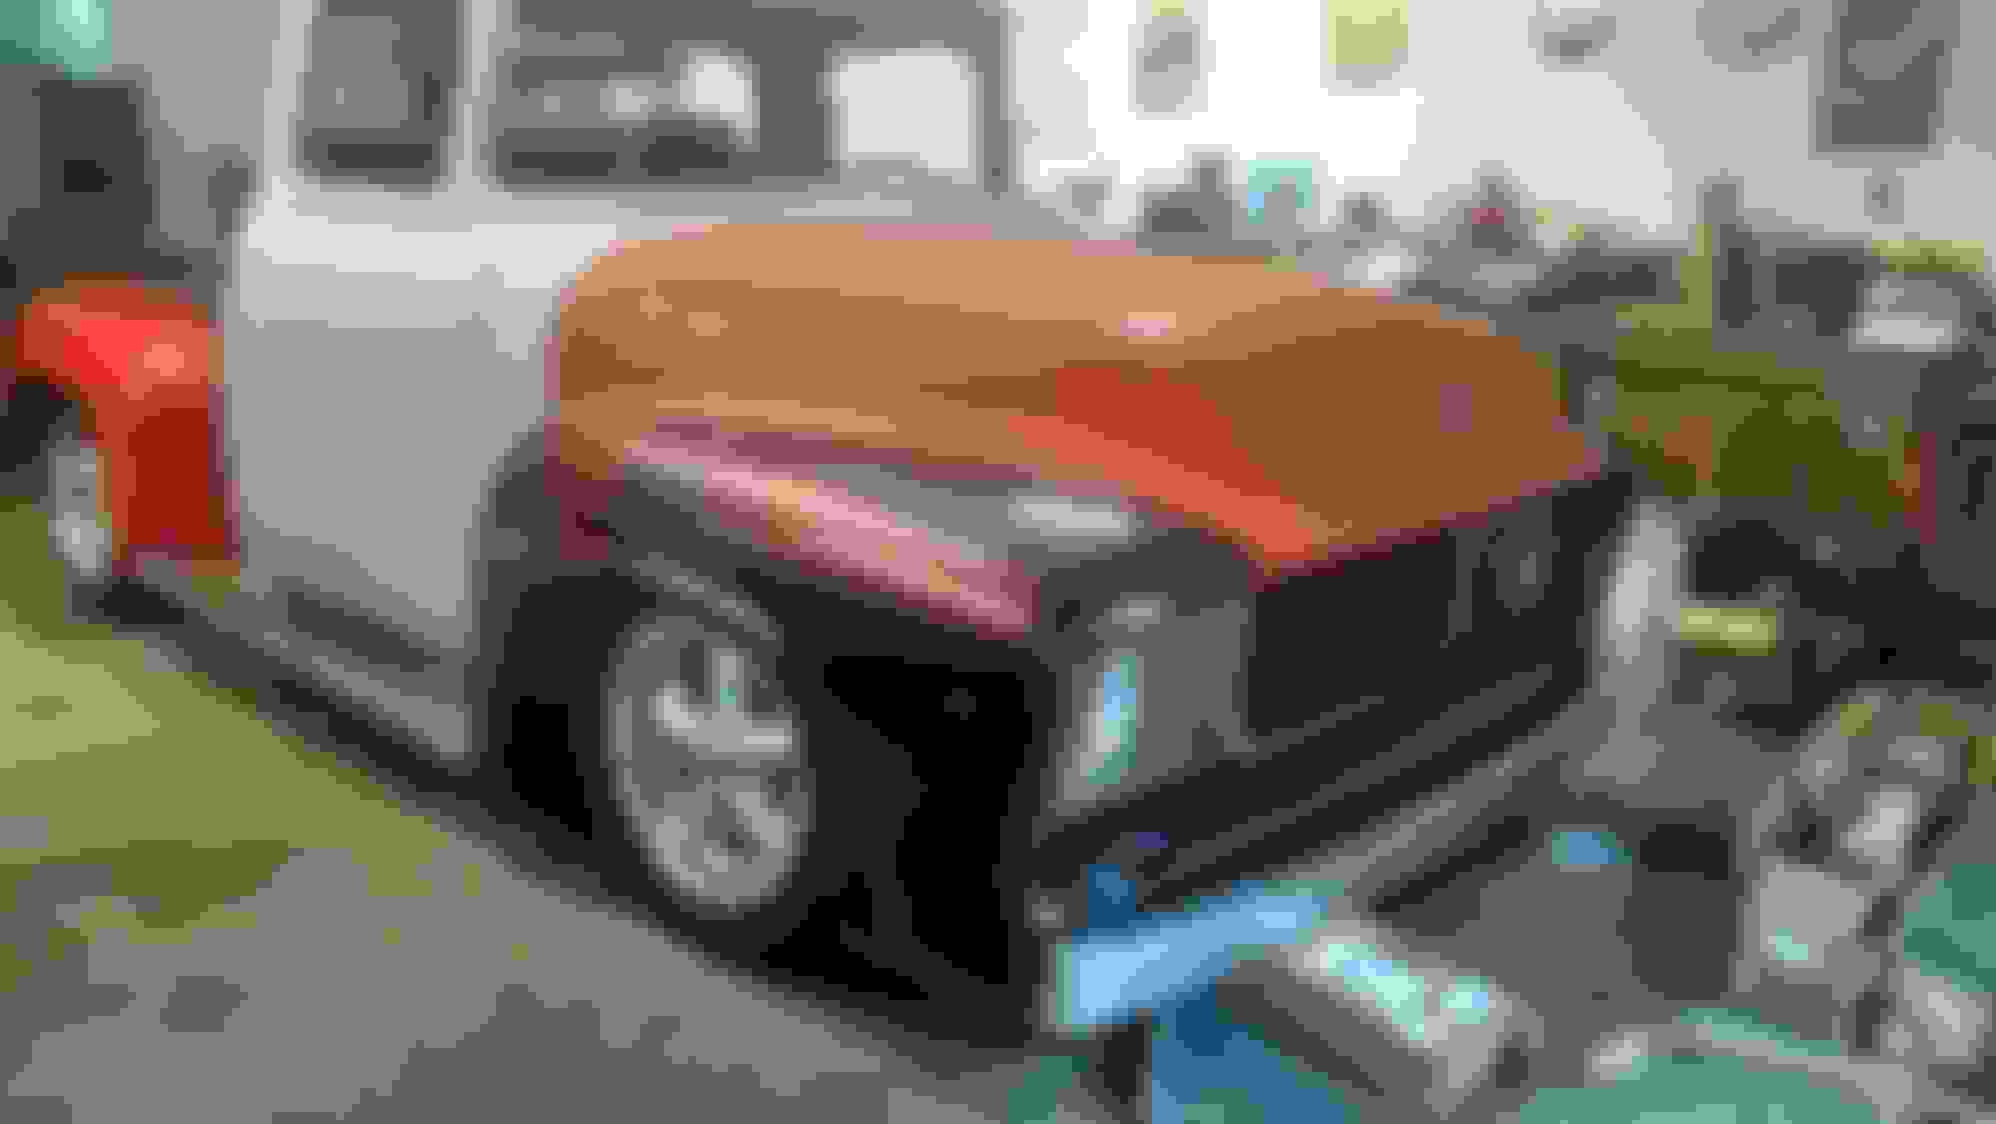
I wanted to tuck the front bumper up close to the gravel pan. Since the frame horns were already cut off by previous owner it was just a matter of figuring out the angle and how close I could get it.
After lots of careful measuring I made openings in the new gravel pan and used a pair of rear bumper brackets to mount the front bumper.
After making many patterns the bumper ends were cut, rounded over and filed.
Using painters tape the gap was set between bumper and gravel pan. This will be ground back and gap set once all the front sheet metal is aligned for the last time.
Installed the hood tilt kit this past weekend. Functions well but I am having a problem with the the repo Blue Oval hood. No matter what I adjust I can not get the hood and fenders to mount flush. The arc of the hood appears to be off by as much as 1/4 inch. I can get the rear corner of the hood and front corners lined up properly but the edge of the hood is high in the middle. There are no adjustment rods with a tilt kit so I am at a loss. I also checked fender alignment with a stock hood and it is good.
Anyone ever have a similar problem and how did you correct it?
Motor was stroked to 347 c.i. Ford racing crank, girdle, h-beam rods, Kieth Black pistons, Trick Flow heads, Crane cam, ARP fastners, Canton 7 qt oil pan, balanced and blue printed.
New valve covers and seals, painted and ready to go back in.
Hi BCT222. Very nice truck! You are really doing it the right way. I have started on my 1952 Ford pickup project and have a lot of body work to do yet. I just purchased a 2003 Mercury Grand Marquis front suspension for it. I had the Ford 351 Cleveland engine completely rebuilt so now I have to figure how to modify the front frame rails (which have already been modified before to fit a Thunderbird front suspension) to work with the new suspension. I will try to post some pictures shortly. Best of luck with your project. Paul52
Thanks, Paul52.
Been away on business so a little update. I found a 56 hood at the Carlisle All Truck Nationals. It is in very good condition with no rust what so ever. Still has factory primer on underside. It even came off a fire truck!
Bed comes off this weekend to go to sand blasting and primer. I also bought a c notch kit so I can get the rear down another inch or two.
OK , I have not posted recently as there is not much going on. I am stuck waiting for the paint shop . I decided to lower the truck a few inches in the back and bought a few c notches . I quickly discovered my springs were too long so I ordered a set of 10" in order to get more adjustability out of the shocks. After installing and setting ride height I realized the drive shaft was too close to the frame cross member. Not wanting to take a chance I notch the cross member. OK, should be ready to notch the frame rails now , right? Wrong, the rear differential would hit the bed if the suspension bottom out. I decided against raising the bed floor so I guess I can live with the rear ride height. While I was at it I relocated the panhard bar for more clearance.
Tacked in place , notch is offset as I am using a Ranger 8.8 rear.
Relocated panhard bar to front of the differential for more clearance. Ignore the rear brake lines. They are off the shelf pre-sized. They ended up being 1" too short. I'll replace later with custom fit lines.
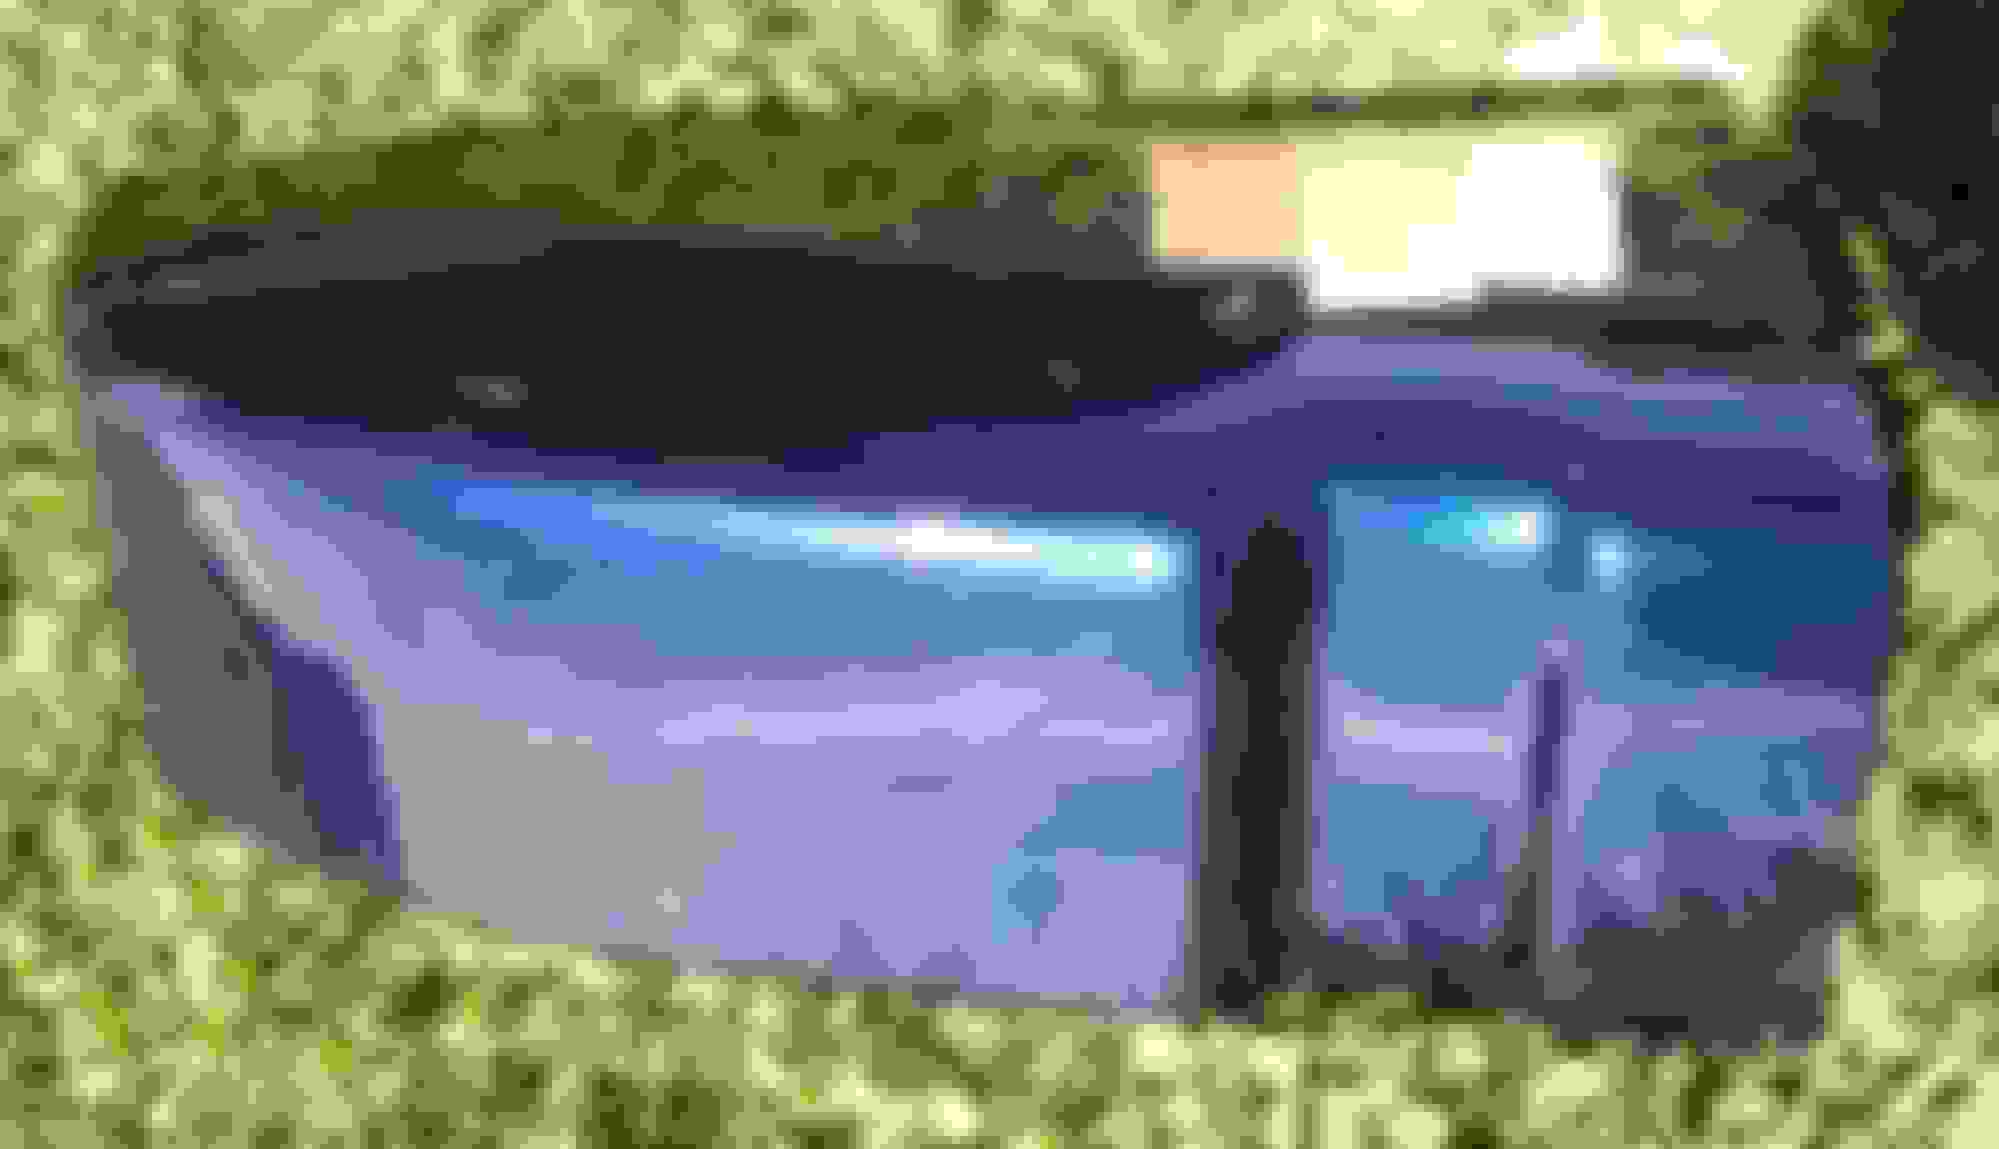
I found this test spray panel with my final two paint choices.
One is Lexus Indigo Pearl . The other is Ford Kona Blue.
Which one would you choose, the one on the left or the one on the right. Ignore the leather samples, I was trying to choose interior color.
I found this test spray panel with my final two paint choices.
One is Lexus Indigo Pearl . The other is Ford Kona Blue.
Which one would you choose, the one on the left or the one on the right. Ignore the leather samples, I was trying to choose interior color.
Just so you know, we are all seeing slightly different colors since you took the picture and the camera color corrected, and then all of our monitors are going to have another degree of color correction, meaning we will not see exactly what you are seeing in front of you. That being said, I'm digging the one on the right, but, they're really close and it's your truck so don't do it just 'cause I said so. Honestly, I'm sure you'll end up loving it no matter which one you pick. Great build thread, by the way.
Ok, so anyone that has been following my build thread knows I have been fighting hood to fender gap problems ever since I bought an aftermarket hood. The arc of the hood seemed to be off compared to the arc of the fenders. It was so bad that after screwing around trying to fix the hood for a month I bought an OEM hood and ditched the re - pop.The original was much closer to the fender contour but still a little off. I just figured it was as close as I could get it and I would have to work the fenders to fit. I took the fenders and had them sand blasted and was in for a bit of a surprise. Both fenders had damage and rust holes that were puddied over.
I decided I had to get reproduction fenders even though I had bad luck with the hood. I got a pair at Fall Carlisle from Midwest Early Ford after looking at three different pairs. I bought the hood from them originally and they were nice enough to discount the fenders because of the issues I had. I installed the fenders with no problems and I'll be damned, they fit nice.
I guess it is hit or miss with after market sheet metal. I think you can get decent stuff if you can't find good OEM stuff, just make sure to look it over. Now that the front end is to together and to my liking, it is off for final body work and paint........... finally!!!!!!
And you were not kidding when you said similar, same year, differential, tank fuel lines, suspension etc.
I can see there is more experience pushing this build through and excited to see it as you have tackled a lot more of the restoration I now have another build to use along the way of mine.

 06-28-2014, 11:47 AM