1980 - 1986 Bullnose F100, F150 & Larger F-Series Trucks Discuss the Early Eighties Bullnose Ford Truck

My first Ford pickup....

Thread Tools
 
Search this Thread
 
  #331  
Old 04-13-2015, 12:06 AM
Trackerrrr's Avatar
Trackerrrr
Trackerrrr is offline
Senior User
Thread Starter
Join Date: May 2014
Location: Lake Elsinore
Posts: 376
Received 1 Like on 1 Post
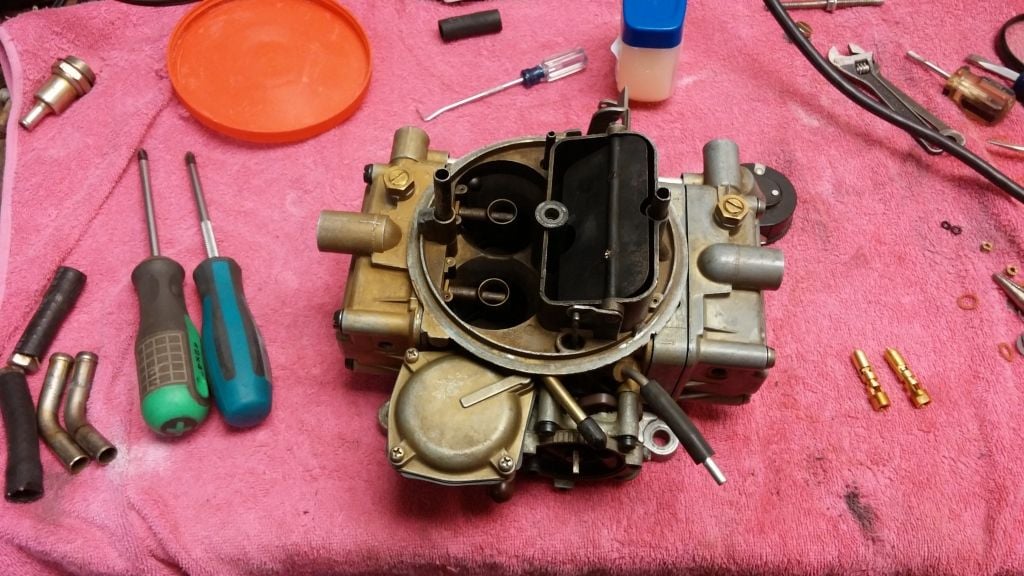
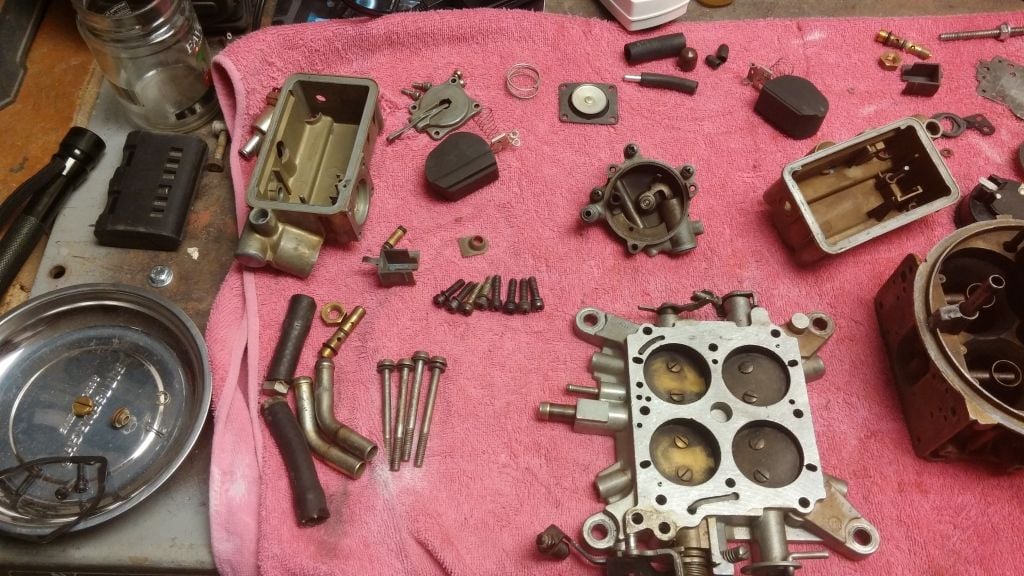
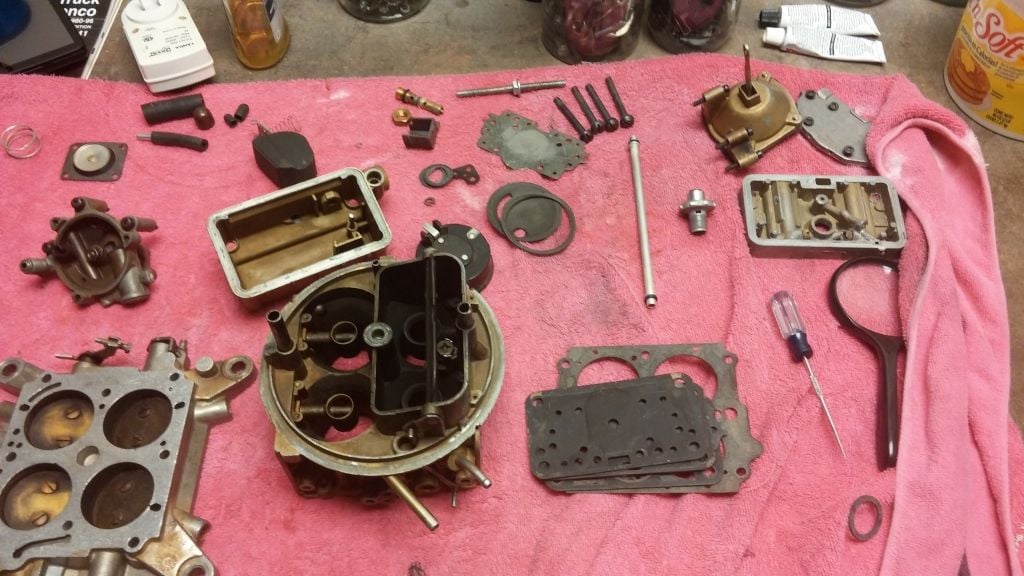
Time for a carb rebuild. Came back from a quick trip to Oklahoma and the truck decided to leak gas all over the place when I fired it up...


  #332  
Old 04-13-2015, 06:34 AM
Gary Lewis's Avatar
Gary Lewis
Gary Lewis is offline
Posting Legend
Join Date: Jul 2010
Location: Northeast, OK
Posts: 32,866
Likes: 0
Received 26 Likes on 24 Posts
You got the same welcome to owning a Holley that I did. And, you probably know this stuff, but check that the bowls and center casting are flat by using a straightedge. Then use only the re-usable gaskets for the bowls, metering blocks, and bowl screws.

And make certain that you lube the o-ring on the transfer tube, liberally.
 
  #333  
Old 04-16-2015, 02:12 AM
Trackerrrr's Avatar
Trackerrrr
Trackerrrr is offline
Senior User
Thread Starter
Join Date: May 2014
Location: Lake Elsinore
Posts: 376
Received 1 Like on 1 Post
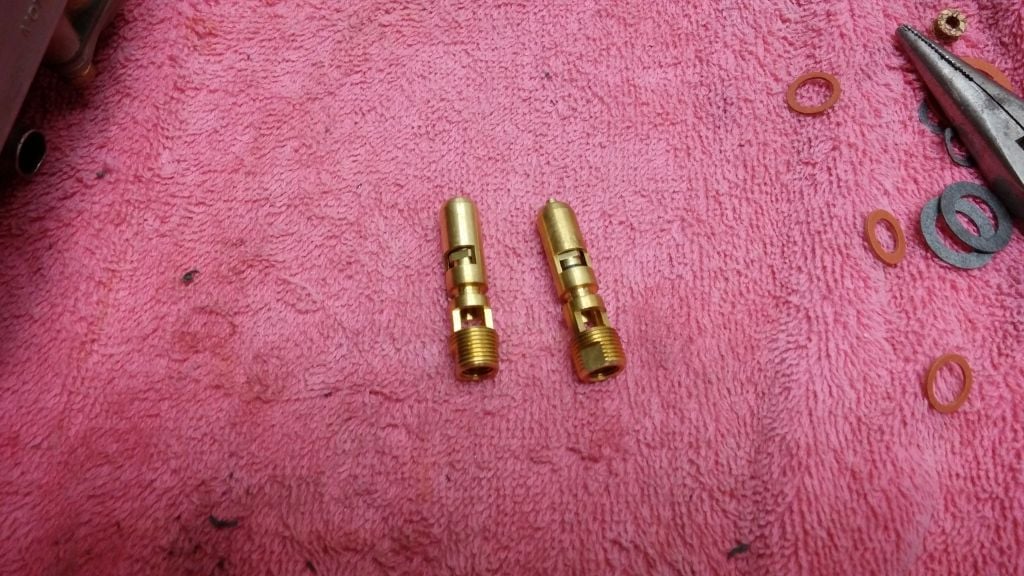
Got the carb back together but the needle valves that came with the kit were not correct. The new ones were too short and different style than mine.


  #334  
Old 04-16-2015, 06:51 AM
Gary Lewis's Avatar
Gary Lewis
Gary Lewis is offline
Posting Legend
Join Date: Jul 2010
Location: Northeast, OK
Posts: 32,866
Likes: 0
Received 26 Likes on 24 Posts
That's a bummer. I can't tell in the pic that they are too short, but I'll take your word for it.
 
  #335  
Old 04-16-2015, 10:07 AM
85lebaront2's Avatar
85lebaront2
85lebaront2 is offline
Old School Hot Rodder

Join Date: Feb 2006
Location: Exmore, VA
Posts: 6,471
Received 6 Likes on 6 Posts
They are not too short, they are the correct Holley ones, yous had the old GP-Sorensen, guaranteed to strip your float bowl ones. You use the nut and screw as in your last picture, the nut adjusts the position for setting the level, screw goes last to lock it. With the bowl off the carb, and held upside down, turn the needle in until the top of the float is parallel to the top of the bowl. Then install the seal washer and screw and snug it.
 
  #336  
Old 04-16-2015, 11:00 AM
ArdWrknTrk's Avatar
ArdWrknTrk
ArdWrknTrk is offline
pedant

Join Date: Jan 2008
Location: EXTREME southwest CT
Posts: 23,576
Received 15 Likes on 15 Posts
Genuine 3-1346 Holley kit is always best for those carbs.

Bill is 100 percent correct on crap aftermarket rebuilds.

What power valve are they coming with now, 6.5?
 
  #337  
Old 04-16-2015, 01:09 PM
Trackerrrr's Avatar
Trackerrrr
Trackerrrr is offline
Senior User
Thread Starter
Join Date: May 2014
Location: Lake Elsinore
Posts: 376
Received 1 Like on 1 Post
Originally Posted by 85lebaront2
They are not too short, they are the correct Holley ones, yous had the old GP-Sorensen, guaranteed to strip your float bowl ones. You use the nut and screw as in your last picture, the nut adjusts the position for setting the level, screw goes last to lock it. With the bowl off the carb, and held upside down, turn the needle in until the top of the float is parallel to the top of the bowl. Then install the seal washer and screw and snug it.
I did that. The needle valves that came in the kit were too short. I screwed them into the bowls and the tops of the valves were almost flush with the top of the threads before they would touch the floats (held upside down). The threads are not stripped out either. They were physically about 1/4" shorter than the old ones too. Believe me I was aggravated. Only other thing I can think of is incorrect floats maybe?
 
  #338  
Old 04-16-2015, 01:13 PM
Trackerrrr's Avatar
Trackerrrr
Trackerrrr is offline
Senior User
Thread Starter
Join Date: May 2014
Location: Lake Elsinore
Posts: 376
Received 1 Like on 1 Post
Originally Posted by ArdWrknTrk
Genuine 3-1346 Holley kit is always best for those carbs.

Bill is 100 percent correct on crap aftermarket rebuilds.

What power valve are they coming with now, 6.5?

I have no idea. I used the NAPA rebuild kit and the new two stage power valve didn't have a number inked on it that I could see. Neither did the old one. I'm using a Holley kit next time thou. Funny thing is, that kit (3-1346) doesn't show up on the Holley tech library carb numerical listing but I know it exists. AND, if you look at the instructions for that kit, it shows the same needle valve I have now in my carb in the float adjustment section. But the replacement needle valves are not the same.
 
  #339  
Old 04-16-2015, 05:27 PM
Trackerrrr's Avatar
Trackerrrr
Trackerrrr is offline
Senior User
Thread Starter
Join Date: May 2014
Location: Lake Elsinore
Posts: 376
Received 1 Like on 1 Post
Got the carb back on the truck and started priming the bowls with my neighbor. We see gas start dripping quickly from the accelerator pump gasket. Upon closer inspection we see the pump cover is bowed. Pulled the carb back off, pulled the pump cover off and got out the sandpaper, WD40, and a piece of flat marble and start making the cover flat again. Took about five minutes with 120 and 400 grit paper but we got the cover fixed. Put it back on the carb, carb back on the truck, and primed the bowls, no leaks! Hit the key and truck fired right up with a stable idle. Reset the timing to 10 BTDC.

One thing I did change is moved the distributor vacuum from manifold to ported and the truck idles right at 556 rpm now in Drive. The power pickup is very smooth and the truck seems to like this change a lot. Didn't touch the idle screws at all during the rebuild and manifold vac is right at 18-19" Hg. So I consider this a success.
 
  #340  
Old 04-16-2015, 05:28 PM
Trackerrrr's Avatar
Trackerrrr
Trackerrrr is offline
Senior User
Thread Starter
Join Date: May 2014
Location: Lake Elsinore
Posts: 376
Received 1 Like on 1 Post
I have to give kudos to my neighbor Frank again for his help. It's nice to have a set of extra eyes on when doing this stuff.
 
  #341  
Old 04-16-2015, 09:31 PM
85lebaront2's Avatar
85lebaront2
85lebaront2 is offline
Old School Hot Rodder

Join Date: Feb 2006
Location: Exmore, VA
Posts: 6,471
Received 6 Likes on 6 Posts
Originally Posted by Trackerrrr
I did that. The needle valves that came in the kit were too short. I screwed them into the bowls and the tops of the valves were almost flush with the top of the threads before they would touch the floats (held upside down). The threads are not stripped out either. They were physically about 1/4" shorter than the old ones too. Believe me I was aggravated. Only other thing I can think of is incorrect floats maybe?
I suspect the tangs on the floats got bent or someone put the wrong floats in sometime in the past. The correct Holley needle and seat only comes in one length, but if the little tang got pushed down too far you would not get the adjustment.

On the pump cover, I don't want to tell you how many of those I have straightened on a bench vise with a BFH.
 
  #342  
Old 04-17-2015, 10:52 AM
ArdWrknTrk's Avatar
ArdWrknTrk
ArdWrknTrk is offline
pedant

Join Date: Jan 2008
Location: EXTREME southwest CT
Posts: 23,576
Received 15 Likes on 15 Posts
Holley is not making 2 stage power valves any more.
There is an addendum to the kit instructions if you visit the page on their site.

I don't know who supplies NAPA, but they are obviously not getting parts from Holley, or you got some really old stock.
 
  #343  
Old 04-17-2015, 12:06 PM
Gary Lewis's Avatar
Gary Lewis
Gary Lewis is offline
Posting Legend
Join Date: Jul 2010
Location: Northeast, OK
Posts: 32,866
Likes: 0
Received 26 Likes on 24 Posts
Congrats!
 
  #344  
Old 05-24-2015, 02:00 AM
Trackerrrr's Avatar
Trackerrrr
Trackerrrr is offline
Senior User
Thread Starter
Join Date: May 2014
Location: Lake Elsinore
Posts: 376
Received 1 Like on 1 Post
Installed the wiring harness thru the dash for my power window setup. All I had to do was remove the dash pad and remove the four screws holding the defrost vents to the firewall. I then snaked the harness behind the vents and down the sides by the doors. Now gotta drill the holes for the door harnesses, plug them in, and hook up power to the harness.
 
  #345  
Old 06-26-2015, 02:37 AM
Trackerrrr's Avatar
Trackerrrr
Trackerrrr is offline
Senior User
Thread Starter
Join Date: May 2014
Location: Lake Elsinore
Posts: 376
Received 1 Like on 1 Post
Just an update, haven't done much to the truck in the past month. I recently reacquired my old high school motorcycle (KZ200) and have been busy stripping and cleaning it. The Nevada DMV is requiring me to smog the truck because I managed to screw up the paperwork for the yearly odometer reading that exempts it from smogging. Duh. So now I have to find a AIR pump, bracket, and the associated hoses in the junkyard. Swell.


Quick Reply: My first Ford pickup....


All times are GMT -5. The time now is 05:47 AM.