
390 Crankshaft
#151
 01-18-2015, 01:51 PM

Postmaster
#153
01-18-2015, 04:38 PM
Elder User
Join Date: Jun 2012
Location: Florida
Posts: 850
Likes: 0
Received 0 Likes
on
0 Posts
The chassis dyno will lose 20 to 35% off of the eng dyno due to the drag from the tranny. The variance between those two numbers are type of tranny (auto or manual) converter slip, driveshaft weight, ring and pinion ratio, tire size, how the vehicle is mounted to the dyno, dyno manufacturer, and other things. It is useful for part-throttle tuning also.
Chassis Dyno Testing - Hot Rod Magazine
This article will expand on some of what I said. There was a CarCraft article a few years back where they used an A/F meter and a chassis dyno, along with driving loops, to tune from the engine dyno to the street, increasing mileage and drivability without losing full-throttle power
#154
02-10-2015, 10:07 AM

Join Date: May 2014
Location: Sunny Florida
Posts: 165
Likes: 0
Received 0 Likes
on
0 Posts
HI All,
I had some time to do some progress on the truck, yeah season is here in S. Florida and I have been busy with work.
I started to look at the release bar assembly, and here is what I found, it seems this part had a lot of abuse:
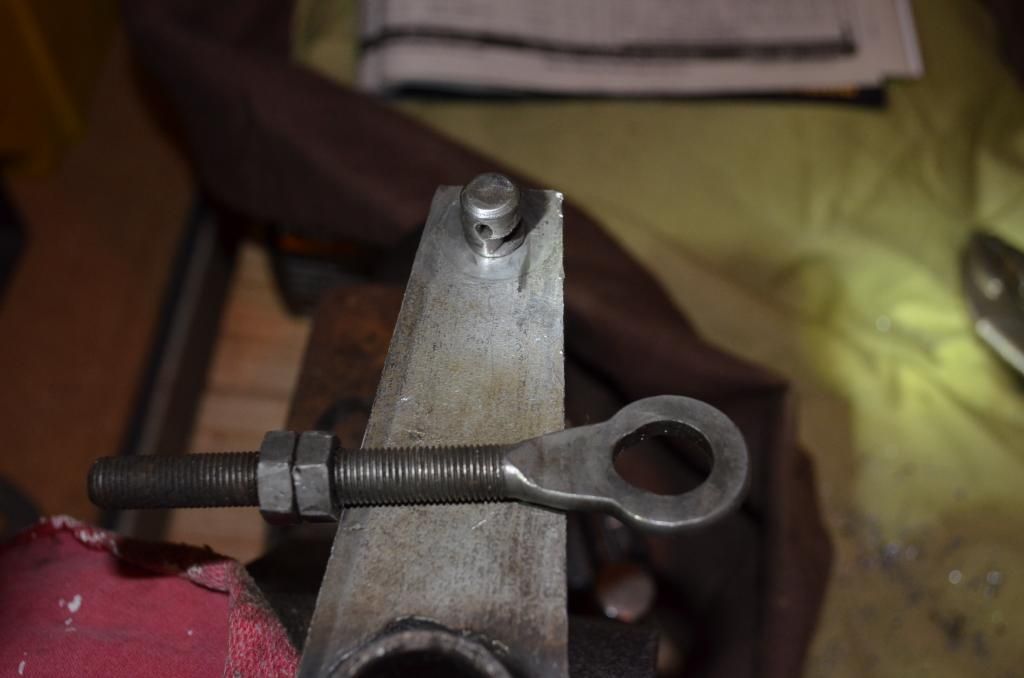
So I decided to put some weld on it and try to bring it to his original shape. The hole where the rod pedal goes was also bigger, the plastic bushing was totally disintegrated!.. And the pivot look the same as the one on the picture.
I will probably get an other clutch release rod because I am pretty sure this should have a nice round hole in it, right?
Also I was wondering if the plastic bushing, which I think they are junk, can be replace with the steel bushing from Hurst?
I had to order a new set of valve spring retainer for the cylinder heads, the good news is the bad seat was replaced, and now it hold the pressure test. So moving along I should receive the springs from Lunati this week.
One of my concern is the rocker assembly, I have the original non adjustable one, and I am thinking it is going to be tricky for me to figured the pushrod length and have the geometry as close as perfect.
Any input on this??
#155
02-10-2015, 09:44 PM
#156
02-23-2015, 11:20 AM
Join Date: May 2014
Location: Sunny Florida
Posts: 165
Likes: 0
Received 0 Likes
on
0 Posts
HI all,
time for a little update.
I receive my cylinder head, Danny was able to fix the bad seat, it hold pressure now. I also had to buy new set of spring, cup and retainer from Lunati to match the cam. Danny did a great job I guess, here are the number:
135 lbs @ 1.840
325 lbs @ 1.281
The only thing I understand from those number is the amount of lift equal to .559 which is what the cam is suppose to do, correct me if I am wrong!
So the head are installed, now I am waiting for my intake and my distributor (new steel gear).
Blue04.5, yes I have an adjustable pushrod, but it has on one side a ball and a cup on the other side! The FE use ball-ball so will it be accurate enough?
I am planning of asking Danny my machine guy to come and do it for me, I don't want to ruin all the good work and money invest already in that project.
In the mean time I had make the decision of stripping the frame to bare metal, I found a local dustless sandblasting, soda blasting, he is asking $350 just for the frame. I might shop around.
But yes I decided to do it right.
I used Eastwood spray can chassis black, and I can see some rust coming thru already, so now bare metal and epoxy it will be. I also plan of replacing the tie rod and all the brake, fuel and vent line with SS line.
A long way to go!
Thanks for watching
#157
02-24-2015, 12:46 AM
Elder User
Join Date: Jun 2012
Location: Florida
Posts: 850
Likes: 0
Received 0 Likes
on
0 Posts
HI all,
time for a little update... here are the number:
135 lbs @ 1.840
325 lbs @ 1.281
The only thing I understand from those number is the amount of lift equal to .559 which is what the cam is suppose to do, correct me if I am wrong!
Correct, that is how much pressure it takes to compress the spring to that height, these numbers are used to demonstrate the ability to control the valve as it opens and closes. You do not want the valve to bounce off the seat as it closes nor do you want it to loft the lifter off of the cam at max lift
Blue04.5, yes I have an adjustable pushrod, but it has on one side a ball and a cup on the other side! The FE use ball-ball so will it be accurate enough?
NO. FEs that have adj rockers use a "set screw" that has a ball that the cup end of the push rod rides in. FEs that have none-adj rockers like ours use ball-ball checker like most other engines
A long way to go!
Thanks for watching
Crane Cams 34772-16 Ductile Iron Rocker Arms Ford FE 352-428 V8 Adjusting 1.76
They also have a slightly different rocker ratio than non-adj rockers
#158
02-24-2015, 07:38 AM
Join Date: May 2014
Location: Sunny Florida
Posts: 165
Likes: 0
Received 0 Likes
on
0 Posts
Thanks Rockittsled for the precision.
That make sense concerning the valve and spring pressure.
Yeah concerning the rocker, I think they are a bit pricey, it will be a good choice if was trying to keep all original but in my case I am using the more modern technology as hydraulic roller lifter and cam. So if I had to spend money on the rocker assembly I will go with roller.
I was looking at the PRW, they have a roller kit a little over $500 on fleebay but I am not sure of the quality.
https://www.prw-usa.com/product/3339...ker-arm-system
Hardland Sharp would be a good choice but they are around $800 at Survival Motorsport.
Untitled 1
I might wait and get the proper one but now I am going to have to focus on the chassis, it is almost stripped and it sit on my drive way so it become the priority.
#159
02-24-2015, 12:59 PM
Elder User
Join Date: Jun 2012
Location: Florida
Posts: 850
Likes: 0
Received 0 Likes
on
0 Posts
#160
02-26-2015, 06:01 PM
Join Date: May 2014
Location: Sunny Florida
Posts: 165
Likes: 0
Received 0 Likes
on
0 Posts
So I asked Turbohunter about his rocker assembly and yes Rockittsled, he is using PRW but the stainless steel version, he also replace some part like the spacers if I am correct by some other.
Well I am going to stay with the original rocker for now.
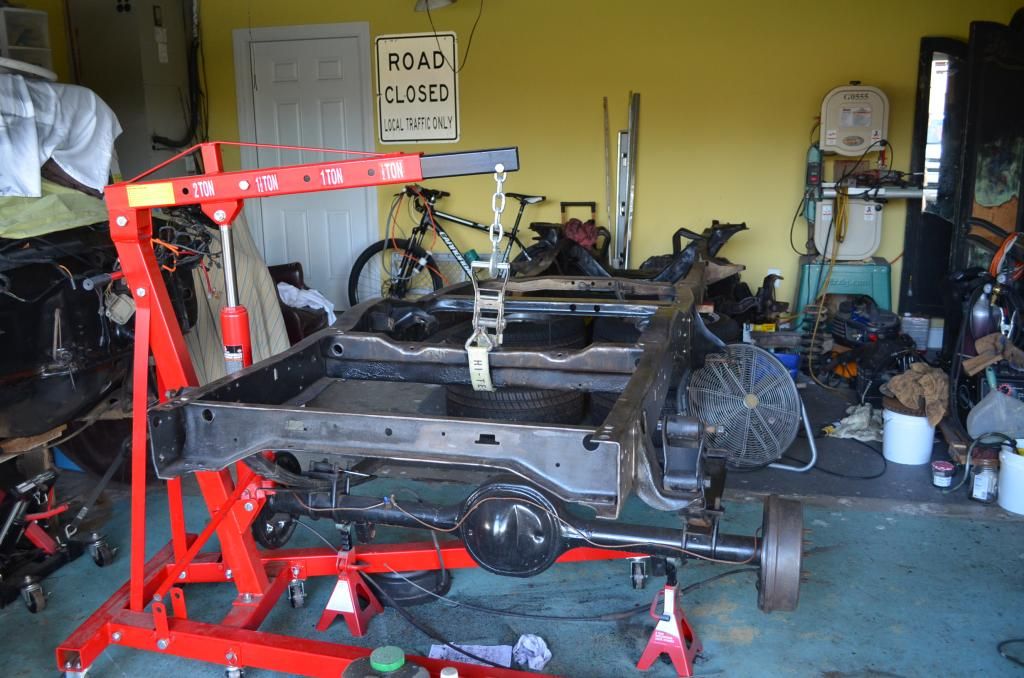
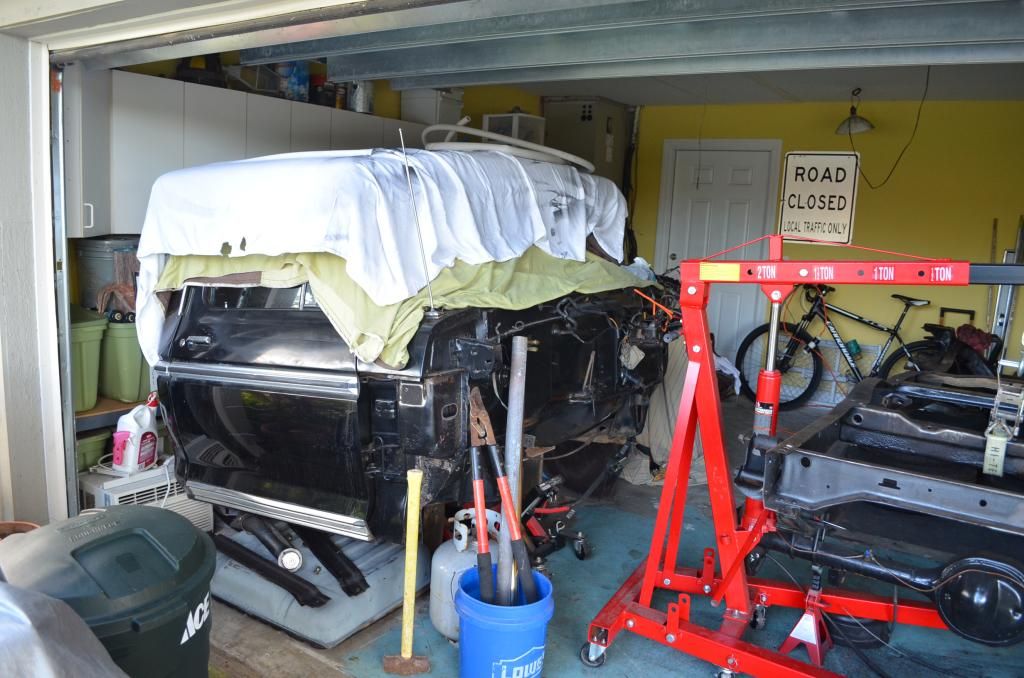
Concerning the progress on the truck, I got the chassis in the garage in time, I saw the "code violation" city car going back and forth looking at my driveway, house!...
I took the tie rod apart, I got a tool from Harbor freight who really help remove the stubborn one. it worked great! The tie rod was in really bad shape you could see the wear under the rubber.
Now I am taking apart the front brake, I am probably replace the brake rotor, is there a big improvement with the drilled slotted rotor?
http://www.summitracing.com/parts/bhi-05446-020
Picture coming soon.
Thanks for watching.
Cheers
Well I am going to stay with the original rocker for now.
Concerning the progress on the truck, I got the chassis in the garage in time, I saw the "code violation" city car going back and forth looking at my driveway, house!...
I took the tie rod apart, I got a tool from Harbor freight who really help remove the stubborn one. it worked great! The tie rod was in really bad shape you could see the wear under the rubber.
Now I am taking apart the front brake, I am probably replace the brake rotor, is there a big improvement with the drilled slotted rotor?
http://www.summitracing.com/parts/bhi-05446-020
Picture coming soon.
Thanks for watching.
Cheers
#161
03-11-2015, 07:19 AM
Join Date: May 2014
Location: Sunny Florida
Posts: 165
Likes: 0
Received 0 Likes
on
0 Posts
I think it is time for a little update.
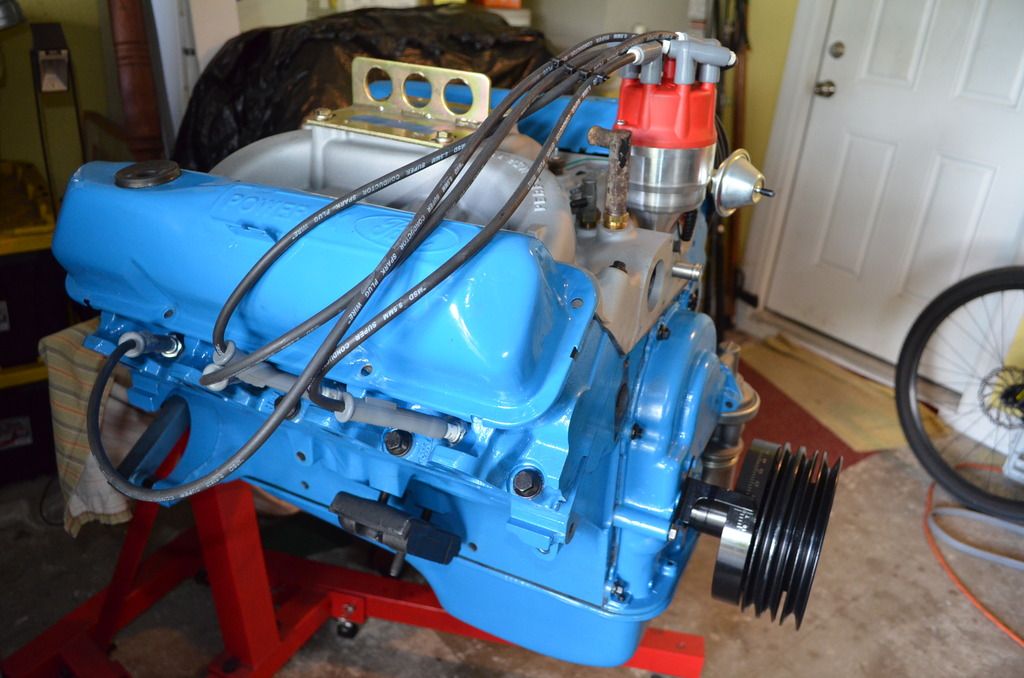
The engine is almost done, still need to measure the new pushrods, I am hoping to do that with my engine guy maybe this Friday. Last month of the season here in S. Florida, last straight line and then I will have more time to put into that build!
I will have the frame sandblast next month hopefully. I am cleaning more part, like the brake dust shield, caliper, I found a bad rusted piston with a bad seal, I am glad I went this far and rebuilding everything will make me more confident. It is good to have some HP but I want to have good brake. Talking about brake, I saw on Mike's truck the proportioning valve is attach to the chassis, but mine was really close to the brake booster, did they make two different version?
Here is mine:

And when looking at LMC, it looks like the proportioning valve is as the same place as Mike's truck, any thought?
The engine is almost done, still need to measure the new pushrods, I am hoping to do that with my engine guy maybe this Friday. Last month of the season here in S. Florida, last straight line and then I will have more time to put into that build!


I will have the frame sandblast next month hopefully. I am cleaning more part, like the brake dust shield, caliper, I found a bad rusted piston with a bad seal, I am glad I went this far and rebuilding everything will make me more confident. It is good to have some HP but I want to have good brake. Talking about brake, I saw on Mike's truck the proportioning valve is attach to the chassis, but mine was really close to the brake booster, did they make two different version?
Here is mine:

And when looking at LMC, it looks like the proportioning valve is as the same place as Mike's truck, any thought?
#162
01-25-2016, 11:00 AM
Join Date: May 2014
Location: Sunny Florida
Posts: 165
Likes: 0
Received 0 Likes
on
0 Posts
Hey guys, no I am not dead and I am still working on this F100 1974! 
So here is the update:
- Engine is done:
- I had someone who came with his dustless sandblast system to do the frame. It was like 90% humidity that day, and flash rust appear real quick! Since I had to wait a couple of day to have a dryer weather I decided to put some phosphoric acid.
The frame before paint:
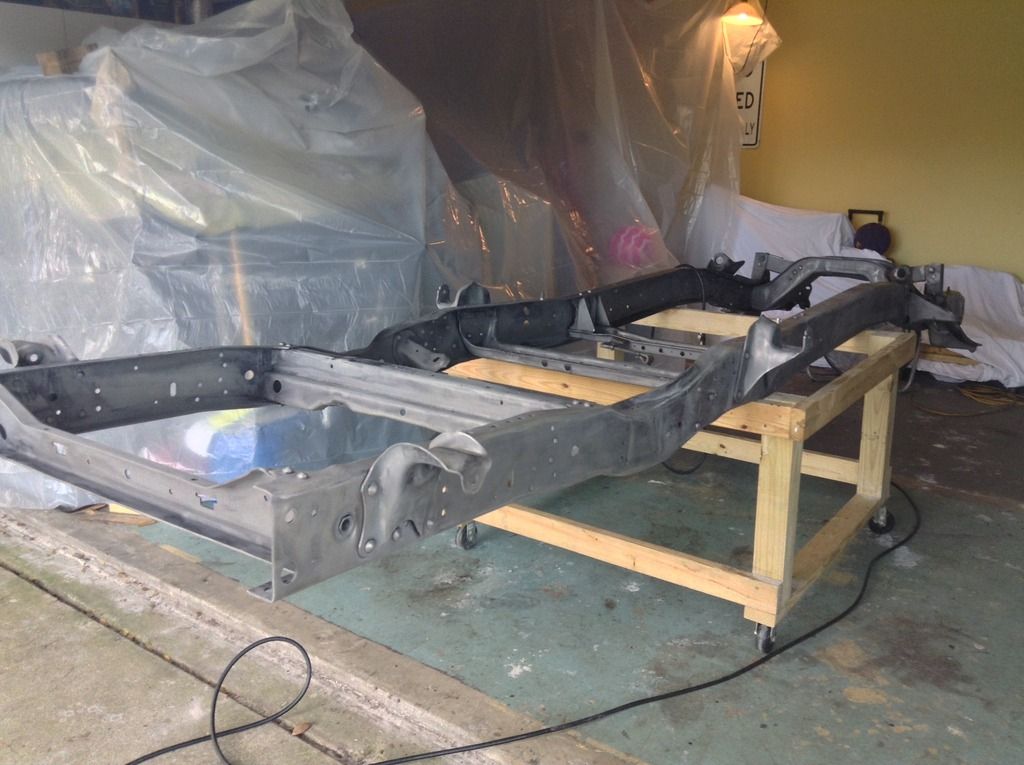
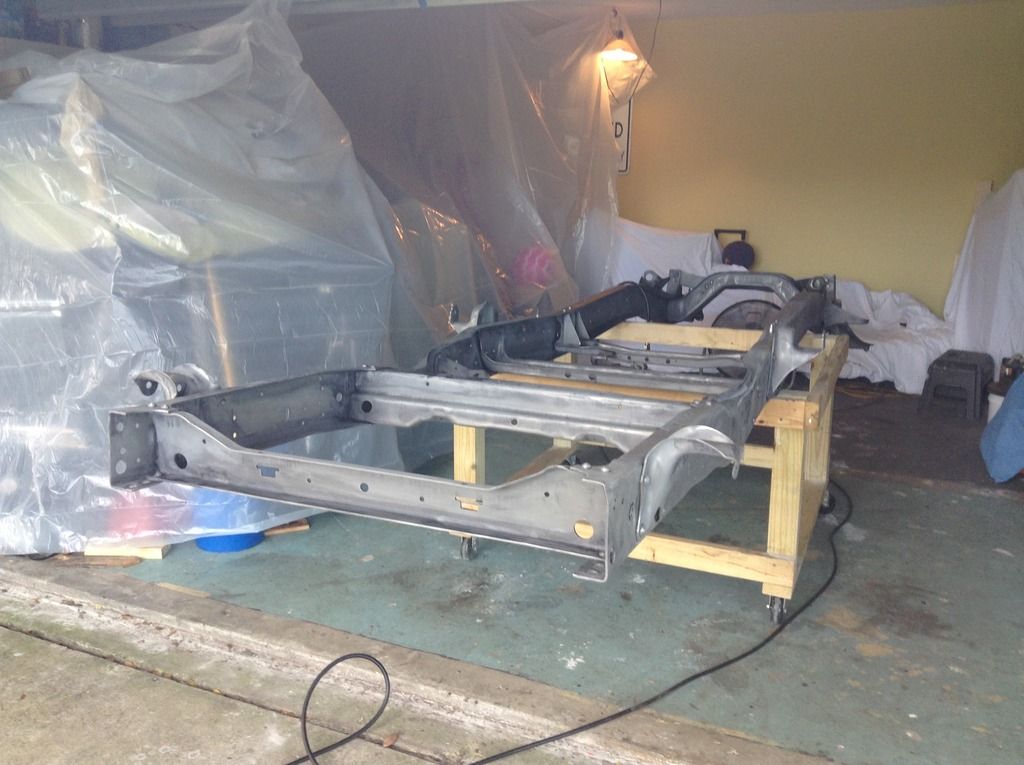
Then I cleaned and rubbed the entire frame with red scotchbrite, degreaser cleaner.
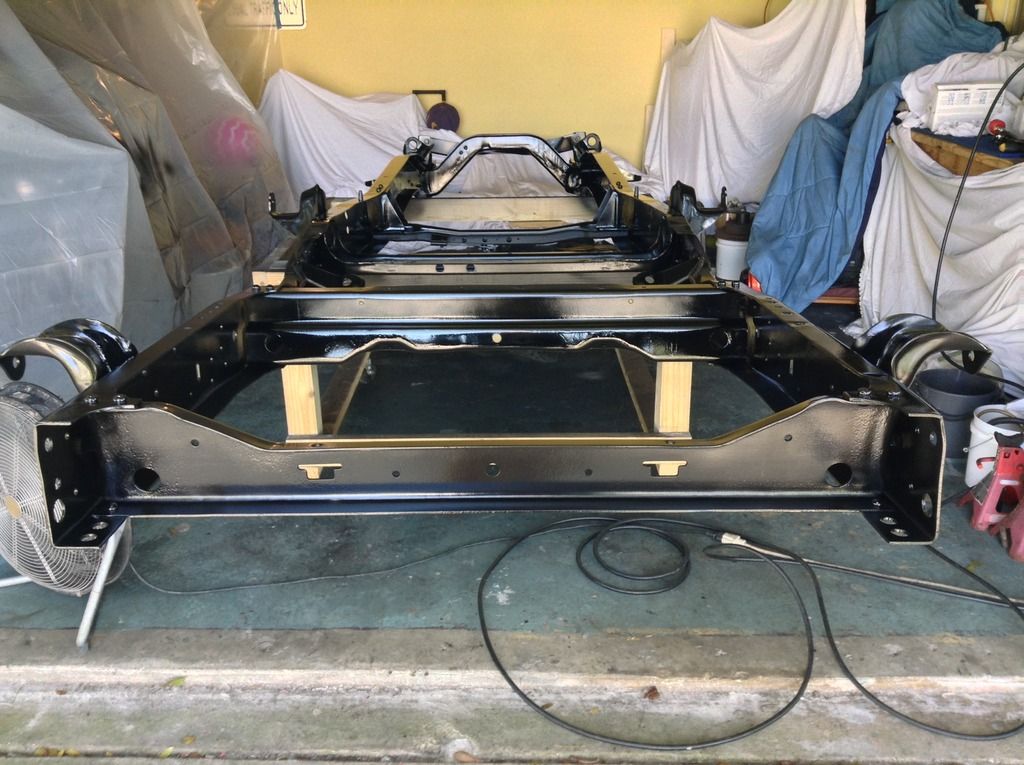
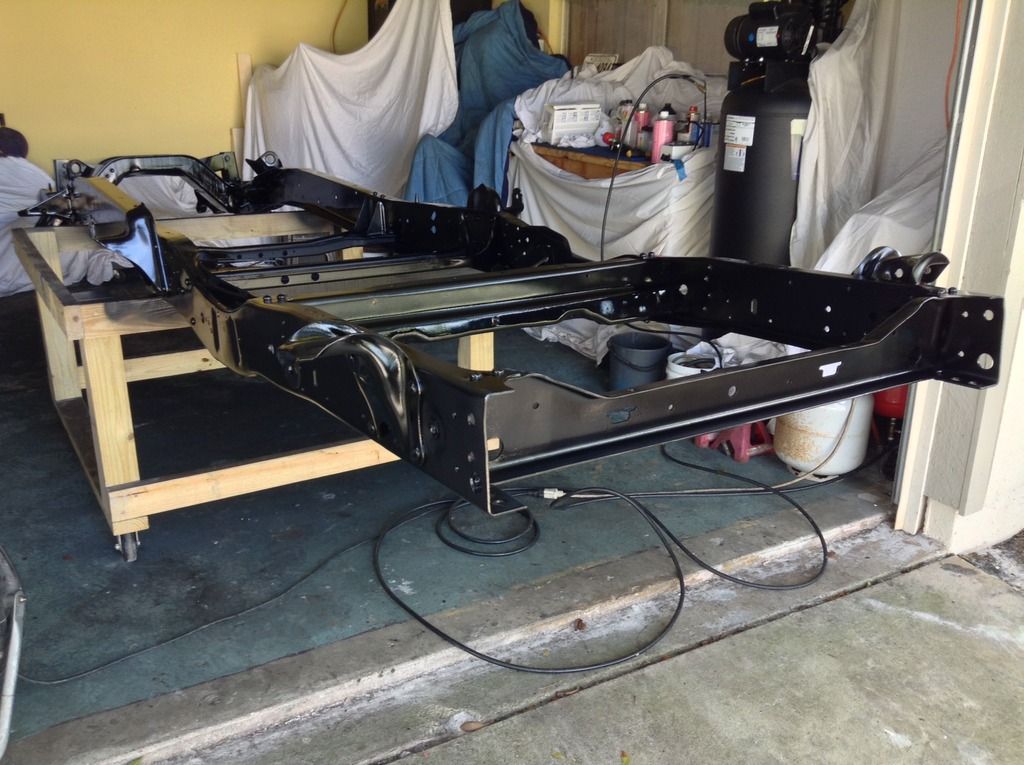
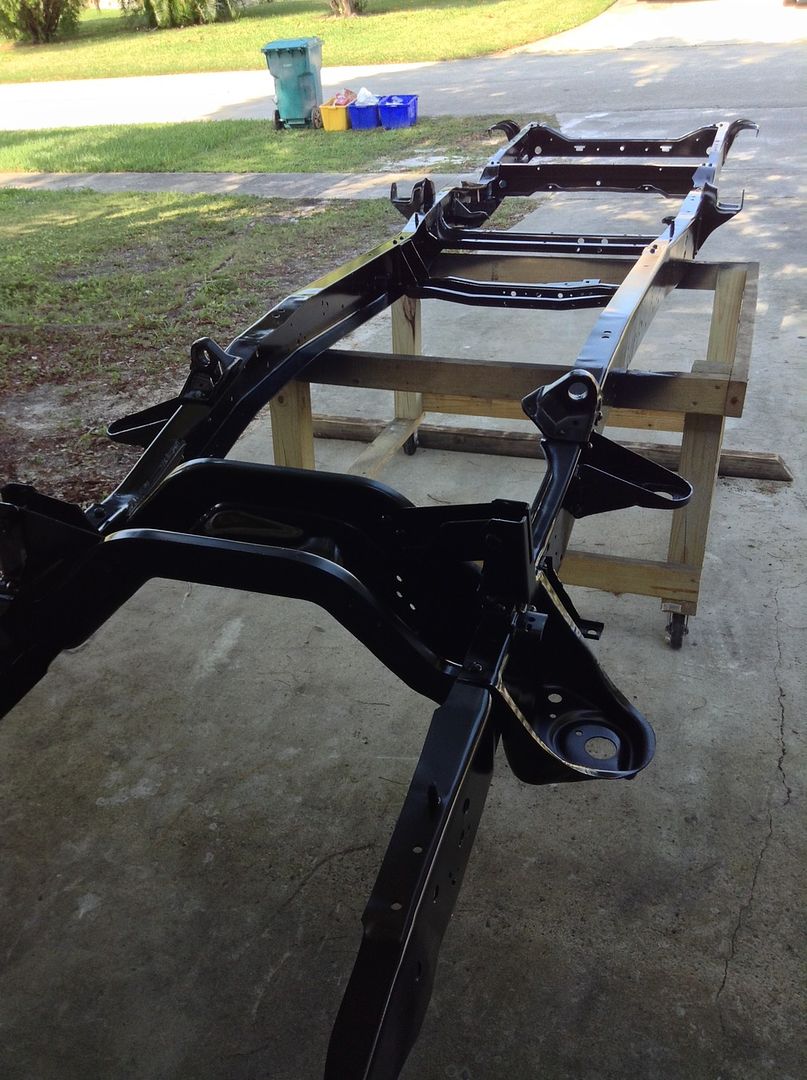
I applied 2 coat of epoxy sealer from House of Kolor and 2 coat of urethane black hotrod.
I am really pleased with the result!
- I bring the rear 9'' to a shop to do an inspection, I have new rotors and bearing coming this week, replaced all the bushing with polyurethane one on radius arm and I Beam. I thought it will take me a lot of time and hassles to put the I beam back on, but I had an excellent idea to use a heavy duty ratchet, I didn't take picture :/ sorry, but it really make it easy.
I also had the king pin bushing replaced, I didn't have to use any shims.
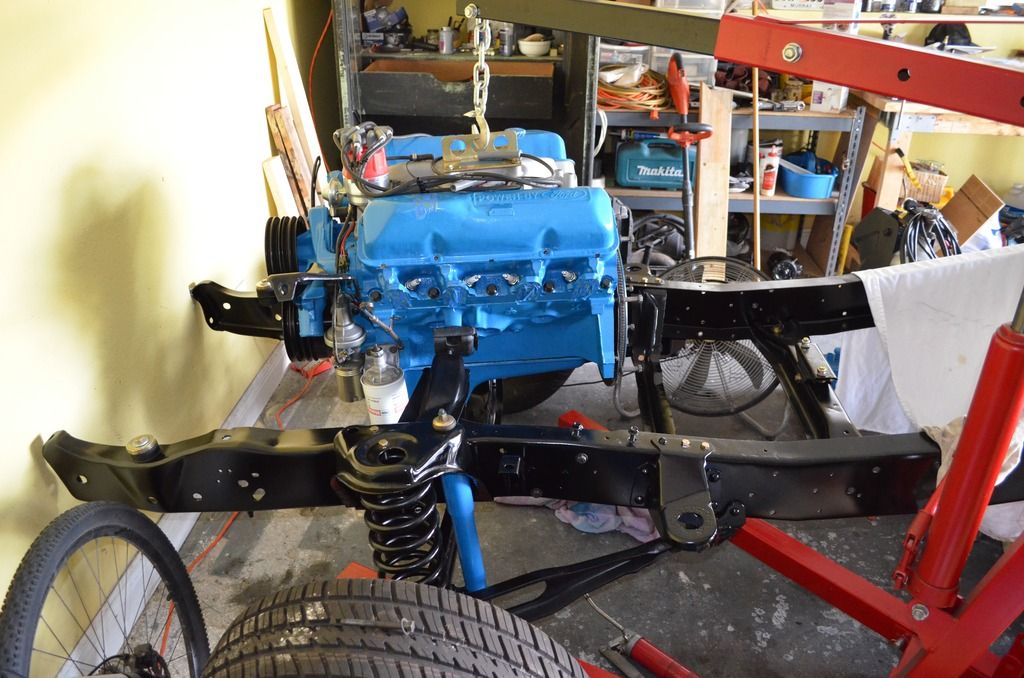
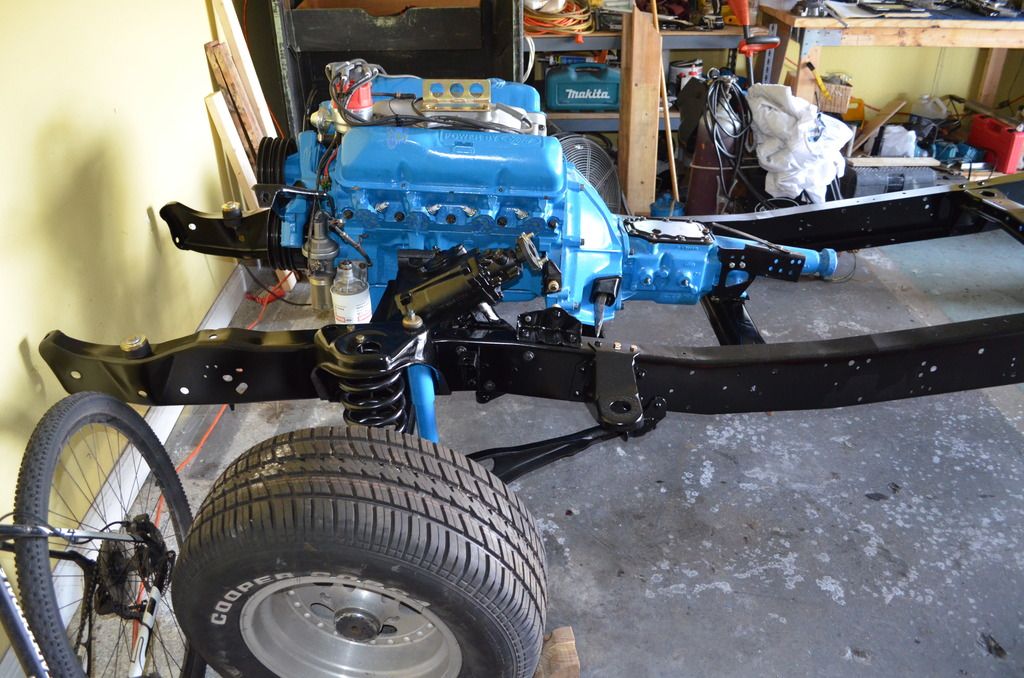
So now I started to reinstall all the other stuff, front shock, engine mount, etc...
I replaced all the old bolts and nuts with grade 8, I like the look.
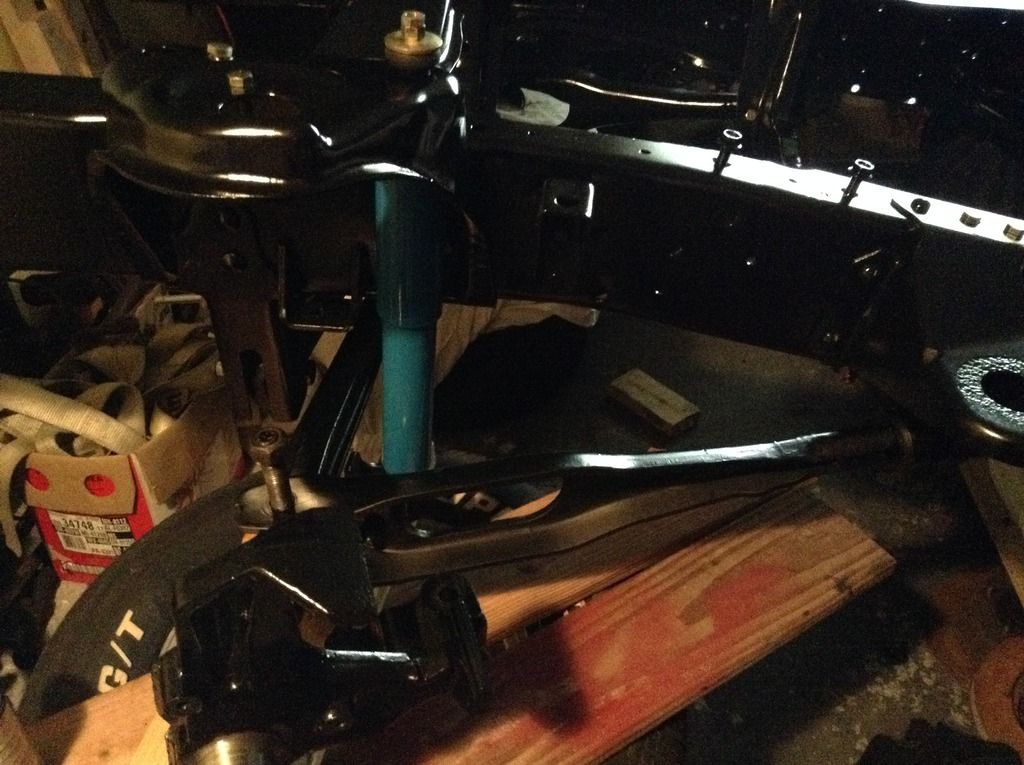
I am really looking forward to have a rolling chassis soon, then I will be able to reinstall the engine and transmission. That will be awesome!!!
More coming soon!
Cheers
So here is the update:
- Engine is done:

- I had someone who came with his dustless sandblast system to do the frame. It was like 90% humidity that day, and flash rust appear real quick! Since I had to wait a couple of day to have a dryer weather I decided to put some phosphoric acid.
The frame before paint:


Then I cleaned and rubbed the entire frame with red scotchbrite, degreaser cleaner.
I applied 2 coat of epoxy sealer from House of Kolor and 2 coat of urethane black hotrod.
I am really pleased with the result!


- I bring the rear 9'' to a shop to do an inspection, I have new rotors and bearing coming this week, replaced all the bushing with polyurethane one on radius arm and I Beam. I thought it will take me a lot of time and hassles to put the I beam back on, but I had an excellent idea to use a heavy duty ratchet, I didn't take picture :/ sorry, but it really make it easy.
I also had the king pin bushing replaced, I didn't have to use any shims.
So now I started to reinstall all the other stuff, front shock, engine mount, etc...
I replaced all the old bolts and nuts with grade 8, I like the look.

I am really looking forward to have a rolling chassis soon, then I will be able to reinstall the engine and transmission. That will be awesome!!!
More coming soon!
Cheers
#163
01-26-2016, 07:33 AM
Join Date: May 2014
Location: Sunny Florida
Posts: 165
Likes: 0
Received 0 Likes
on
0 Posts
More picture of the part being painted.
I applied Por 15 few month ago on those parts, I had to scrub with brown pad Scotchbrite, and apply 2 coat of HOK epoxy and 2 coat urethane.
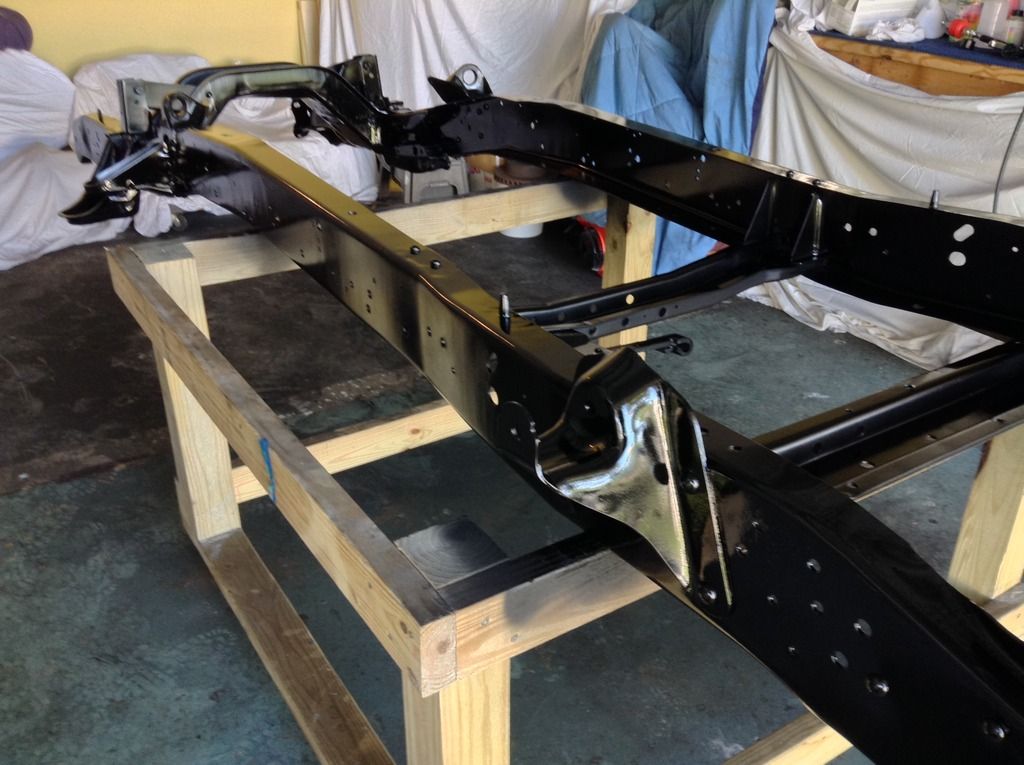
Painting the chassis with a spray gun was my first time! I use the 3M Acuspray gun with liner cup, it make cleaning a breeze, and the amount of cleaner you need to use is very minimal, this is so easy. And for the money the gun is great, as I said for my first paint job I am very pleased.
<a href="http://s1072.photobucket.com/user/laurentlesage/media/DSC_0639_zpspoqxnicb.jpg.html" target="_blank"><img src="http://i1072.photobucket.com/albums/w364/laurentlesage/DSC_0639_zpspoqxnicb.jpg" border="0" alt=" photo DSC_0639_zpspoqxnicb.jpg"/></a>
<a href="http://s1072.photobucket.com/user/laurentlesage/media/DSC_0640_zpswavb3yyq.jpg.html" target="_blank"><img src="http://i1072.photobucket.com/albums/w364/laurentlesage/DSC_0640_zpswavb3yyq.jpg" border="0" alt=" photo DSC_0640_zpswavb3yyq.jpg"/></a>
<a href="http://s1072.photobucket.com/user/laurentlesage/media/DSC_0638_zpsmqazfmed.jpg.html" target="_blank"><img src="http://i1072.photobucket.com/albums/w364/laurentlesage/DSC_0638_zpsmqazfmed.jpg" border="0" alt=" photo DSC_0638_zpsmqazfmed.jpg"/></a>
And better pictures of the chassis:
<a href="http://s1072.photobucket.com/user/laurentlesage/media/DSC_0644_zpskl1hcoub.jpg.html" target="_blank"><img src="http://i1072.photobucket.com/albums/w364/laurentlesage/DSC_0644_zpskl1hcoub.jpg" border="0" alt=" photo DSC_0644_zpskl1hcoub.jpg"/></a>
<a href="http://s1072.photobucket.com/user/laurentlesage/media/DSC_0642_zpsg5fcuczv.jpg.html" target="_blank"><img src="http://i1072.photobucket.com/albums/w364/laurentlesage/DSC_0642_zpsg5fcuczv.jpg" border="0" alt=" photo DSC_0642_zpsg5fcuczv.jpg"/></a>
<a href="http://s1072.photobucket.com/user/laurentlesage/media/DSC_0643_zpsdqh9c6eq.jpg.html" target="_blank"><img src="http://i1072.photobucket.com/albums/w364/laurentlesage/DSC_0643_zpsdqh9c6eq.jpg" border="0" alt=" photo DSC_0643_zpsdqh9c6eq.jpg"/></a>
Also I started to look at the small harness going to the back of the truck and realize that both retainer clip on this connector broke!!! Anyone know where I can find a replacement?
<a href="http://s1072.photobucket.com/user/laurentlesage/media/DSC_0641_zpsykzi6ktx.jpg.html" target="_blank"><img src="http://i1072.photobucket.com/albums/w364/laurentlesage/DSC_0641_zpsykzi6ktx.jpg" border="0" alt=" photo DSC_0641_zpsykzi6ktx.jpg"/></a>
I applied Por 15 few month ago on those parts, I had to scrub with brown pad Scotchbrite, and apply 2 coat of HOK epoxy and 2 coat urethane.
Painting the chassis with a spray gun was my first time! I use the 3M Acuspray gun with liner cup, it make cleaning a breeze, and the amount of cleaner you need to use is very minimal, this is so easy. And for the money the gun is great, as I said for my first paint job I am very pleased.
<a href="http://s1072.photobucket.com/user/laurentlesage/media/DSC_0639_zpspoqxnicb.jpg.html" target="_blank"><img src="http://i1072.photobucket.com/albums/w364/laurentlesage/DSC_0639_zpspoqxnicb.jpg" border="0" alt=" photo DSC_0639_zpspoqxnicb.jpg"/></a>
<a href="http://s1072.photobucket.com/user/laurentlesage/media/DSC_0640_zpswavb3yyq.jpg.html" target="_blank"><img src="http://i1072.photobucket.com/albums/w364/laurentlesage/DSC_0640_zpswavb3yyq.jpg" border="0" alt=" photo DSC_0640_zpswavb3yyq.jpg"/></a>
<a href="http://s1072.photobucket.com/user/laurentlesage/media/DSC_0638_zpsmqazfmed.jpg.html" target="_blank"><img src="http://i1072.photobucket.com/albums/w364/laurentlesage/DSC_0638_zpsmqazfmed.jpg" border="0" alt=" photo DSC_0638_zpsmqazfmed.jpg"/></a>
And better pictures of the chassis:
<a href="http://s1072.photobucket.com/user/laurentlesage/media/DSC_0644_zpskl1hcoub.jpg.html" target="_blank"><img src="http://i1072.photobucket.com/albums/w364/laurentlesage/DSC_0644_zpskl1hcoub.jpg" border="0" alt=" photo DSC_0644_zpskl1hcoub.jpg"/></a>
<a href="http://s1072.photobucket.com/user/laurentlesage/media/DSC_0642_zpsg5fcuczv.jpg.html" target="_blank"><img src="http://i1072.photobucket.com/albums/w364/laurentlesage/DSC_0642_zpsg5fcuczv.jpg" border="0" alt=" photo DSC_0642_zpsg5fcuczv.jpg"/></a>
<a href="http://s1072.photobucket.com/user/laurentlesage/media/DSC_0643_zpsdqh9c6eq.jpg.html" target="_blank"><img src="http://i1072.photobucket.com/albums/w364/laurentlesage/DSC_0643_zpsdqh9c6eq.jpg" border="0" alt=" photo DSC_0643_zpsdqh9c6eq.jpg"/></a>
Also I started to look at the small harness going to the back of the truck and realize that both retainer clip on this connector broke!!! Anyone know where I can find a replacement?
<a href="http://s1072.photobucket.com/user/laurentlesage/media/DSC_0641_zpsykzi6ktx.jpg.html" target="_blank"><img src="http://i1072.photobucket.com/albums/w364/laurentlesage/DSC_0641_zpsykzi6ktx.jpg" border="0" alt=" photo DSC_0641_zpsykzi6ktx.jpg"/></a>
#164
01-30-2016, 04:36 PM
Join Date: May 2014
Location: Sunny Florida
Posts: 165
Likes: 0
Received 0 Likes
on
0 Posts
Yesterday I got my Differential back from the shop, only one bearing needed to be replace, everything else is in good shape, glad to know that.
So I took it apart again clean it with wire brush, and did the process as the frame, 2 coats of HOK epoxy sealer followed be 2 coats of Urethane.
I also clean more part like steering pump, clutch equalizer, drum etc..


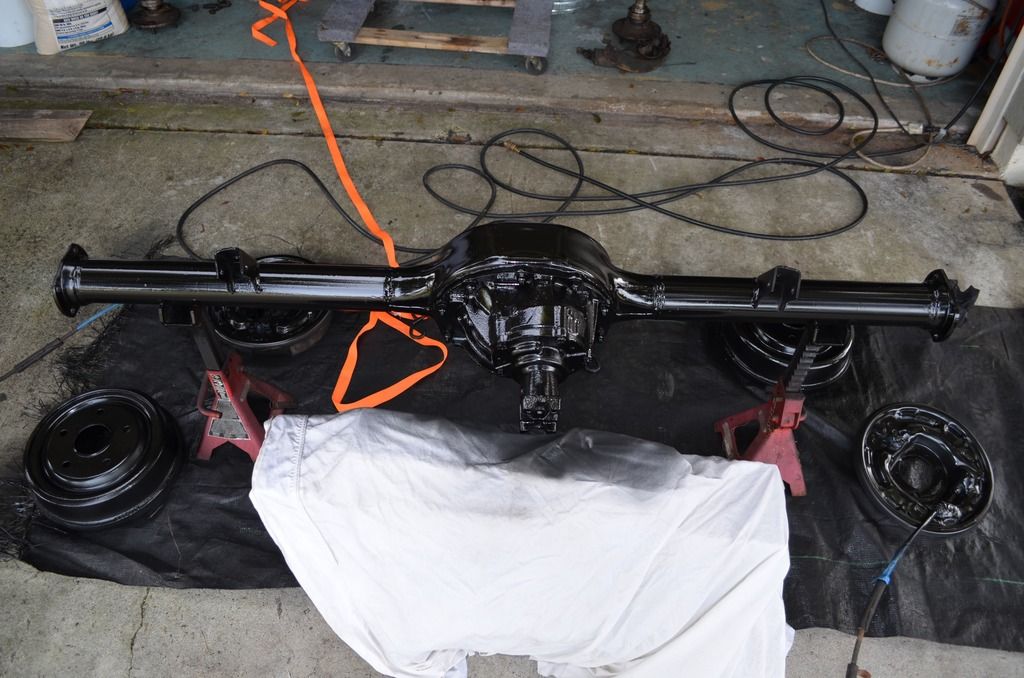
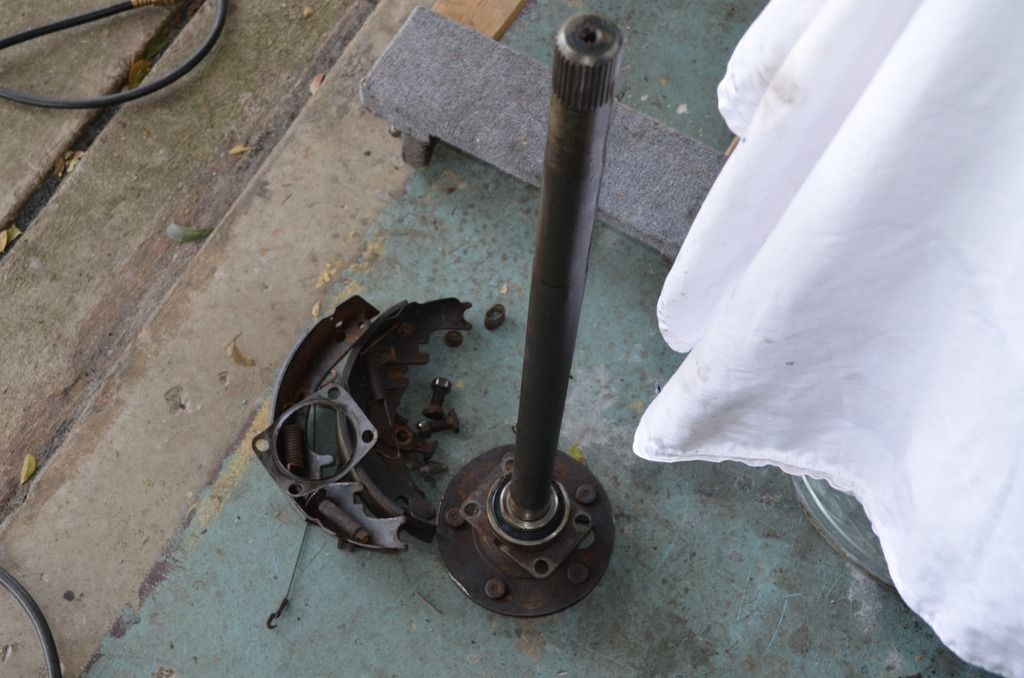
So I pent the morning cleaning and painting, and by the evening I was able to reinstall the axle on the on the leaf spring.
Thas was a good day!
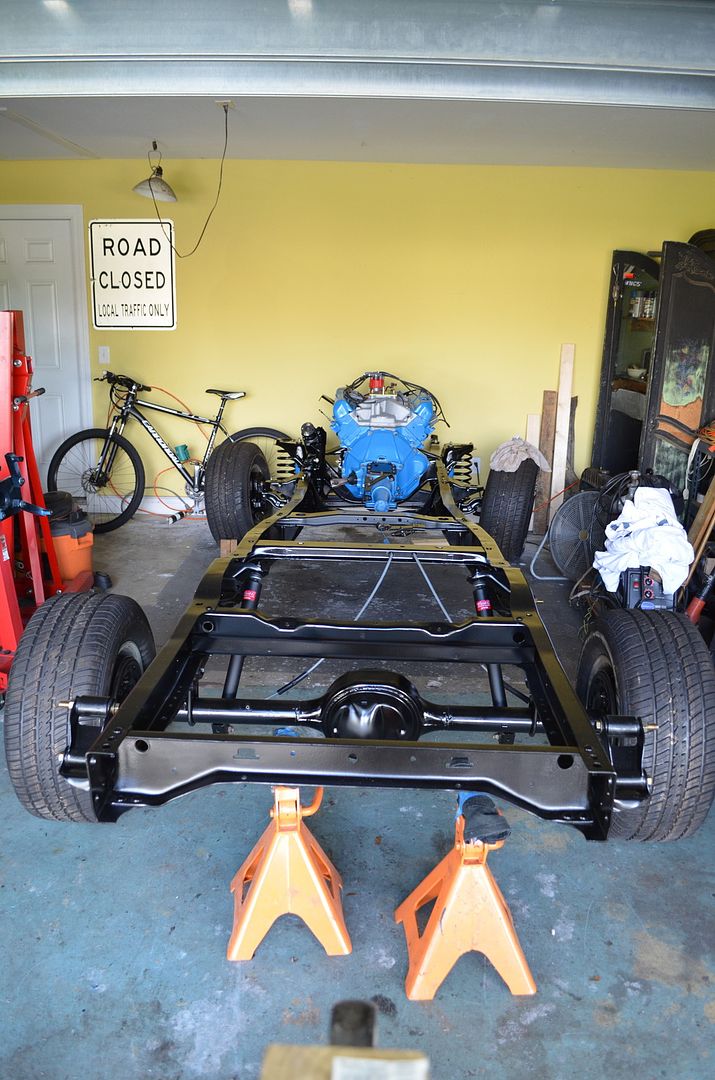
Today I reinstall the drum drum brake and axle, put the wheels back and finally got her sitting on 4 wheels.
Then I received my clutch disc, a Mcleod 260131, since everything else was ready, I install the disc, pressure plate, bellhouse, transmission and put it back on the truck, that was a really exciting moment
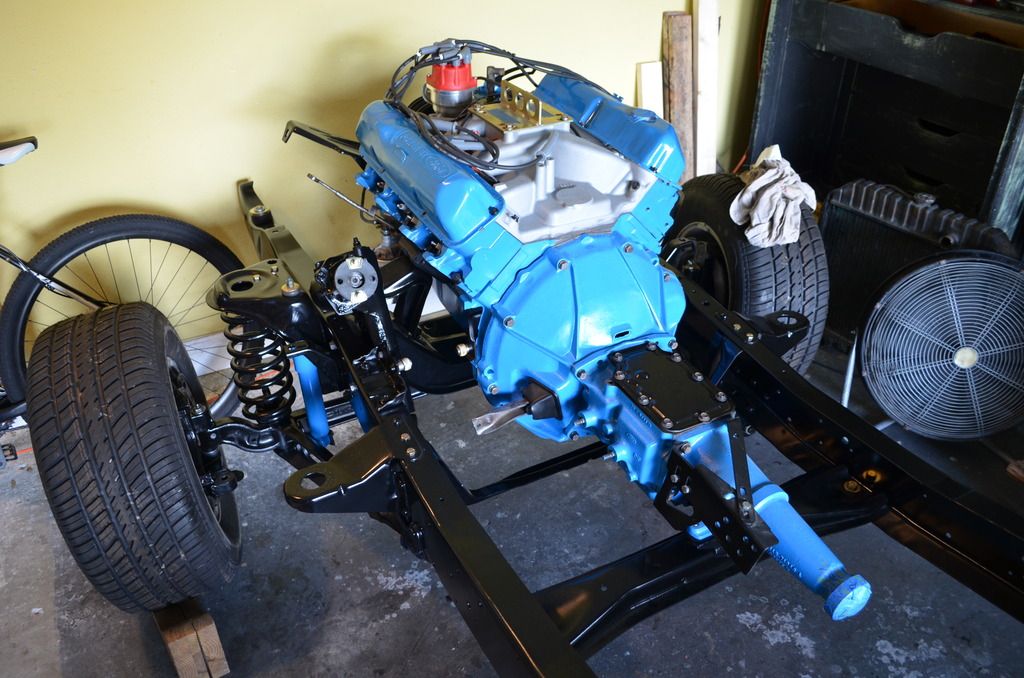
Next week I should receive the tie rod kit, looking forward.
So I took it apart again clean it with wire brush, and did the process as the frame, 2 coats of HOK epoxy sealer followed be 2 coats of Urethane.
I also clean more part like steering pump, clutch equalizer, drum etc..


So I pent the morning cleaning and painting, and by the evening I was able to reinstall the axle on the on the leaf spring.
Thas was a good day!
Today I reinstall the drum drum brake and axle, put the wheels back and finally got her sitting on 4 wheels.
Then I received my clutch disc, a Mcleod 260131, since everything else was ready, I install the disc, pressure plate, bellhouse, transmission and put it back on the truck, that was a really exciting moment


Next week I should receive the tie rod kit, looking forward.
#165
01-30-2016, 04:46 PM


