When you click on links to various merchants on this site and make a purchase, this can result in this site earning a commission. Affiliate programs and affiliations include, but are not limited to, the eBay Partner Network.
Skipping around a bit on the build here. I'm starting the process of building my dash bezel. I don't like the factory plastic one, I think it looks cheap. I also don't want to just slap a flat plate across the thing and drill gauge holes. Again, I want it to look like it could have come this way from the factory, so what I've decided to do is replicate the factory bezel out of aluminum... we'll see how it goes.
I have a huge sheet of aluminum just sitting around, so I cut out this rectangle.
These are the gauges I'm using. Dakota Digital VHX 6 gauge set. The layout will be fairly similar to how it's packaged, just different measurements.
Come on, that's a beautiful gauge!
Here is the markout of how they're going to sit.
Holes drilled
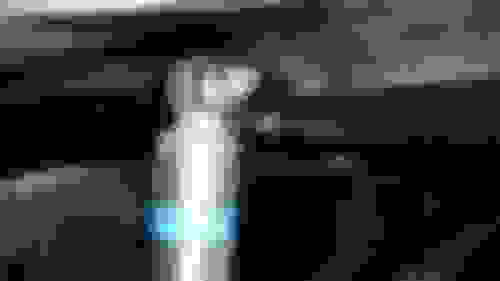
I had to bend the top 90� to mate up with the outer lip of the bezel. I have to wait to bend the bottom until I make the surround because I don't know what the angle will be yet.
I bought a stick of aluminum extrusion to form the framework of the bezel.
This is 6061 T6 aluminum. Obviously I don't need something as structural as this alloy for this project, but pretty much any time you buy an extrusion, it will just happen to be 6061 T6. The trouble with this alloy is the T6 heat treatment, which makes the alloy very strong, but also makes it very prone to cracking when formed, as it is formulated to resist bending. The only way to bend it is to anneal it to remove the heat treatment. You can send this to a metallurgist, or you can use a couple of tricks. One method is sooting the alloy with an oxy-acetalyne torch, then burning it off. The other is the method shown below. First, color the section you wish to bend with a sharpie.
Then hold a propane torch on the opposite side of the sharpie mark to heat the metal.
Continue to hold the torch under the metal (moving it around) until the sharpie burns off. Some genius figured out a while ago that a sharpie burns off at just the right temperature to anneal a T6 heat treatment. It's essentially the same concept behind a heat crayon that you can pick up at a welding shop.
Once the sharpie is burned off, and the metal is nice and shiny, it will bend like butter.
Using this process, you can see there is no cracking in the 6061. You can form pretty tight radii with this method if needed.
Checking the first two bends against the factory plastic piece. Once you are satisfied with the bends, make sure to quench the aluminum before it cools (i.e. dunk it in cold water).
All four sides bent. It's a little ****-eyed as you can see in the lower left, but that's just because I need to trim the overlap.
Still need to trim the ends, but there it is. Perfect match.
I saw the extrusion and thought to myself "oh boy, he's gonna try & bend that..." Good to see you have done your homework & know what you are doing. Extra props for the sharpie trick!!! I had not heard of that one before.
Oh and seeing your acorn table makes me miss mine. Is that a 48" x 48"? The smaller sizes (standard is 60" x 60" I believe) are harder to come across for sure.
Thanks, having an engineering background helps with my fab work for sure. I'm not sure the size of the table, but 48x48 sounds about right. It's not mine, it's in the mechanics shop at work. I wish I had one that nice.
On the rare occasion that you don't have a sharpie available, when the deflected flame form the torch has hints of orange in it behind the standard blue flame, your aluminum is plenty warm enough to be bent, but don't go any hotter or it will crack.
Couldn't agree more , I too always end up with T6 ! I learned the acetelyne trick recently . It's a great technique .
Fantastic build , like so many , I have the desire to build a Fummins . Such an awesome job you are doing there . Very impressive . Thank you for your well documented contribution .
Couldn't agree more , I too always end up with T6 ! I learned the acetelyne trick recently . It's a great technique .
Fantastic build , like so many , I have the desire to build a Fummins . Such an awesome job you are doing there . Very impressive . Thank you for your well documented contribution .
Thanks for the compliment! Anyone with the desire to build such a truck can certainly do so with the help of all the great folks on this forum.
Wow, been way too long. Sorry everybody. I know my adoring fans (ok, my truck's fans) were looking forward to watching me hack my way through the custom gauge bezel build, but I ran into a snag on that build and am going to put it aside for awhile. In the mean time, a fella's gotta move on. I'm going to finish up my shocks, working on the rear this time.
I like the idea that ChaseTruck shared with me about using a bar spanning the chassis rails as a mount point for the rear shocks, but my setup looks a bit different.
First, I got a piece if tube and a couple of pre-fab shock mounts.
The mounts I got have flat bottoms. I know I can get notched ends, but these are what I have.
To notch them for the cross tube, I did a quick sloppy weld to join them together...
Then I ground the weld flat. This will allow me to make a clean cut.
I scribed a hole the diameter of the tube, then center punched the middle to prepare for the hole saw.
After separating the two halves, a perfect fit.
Oh yeah, now I have to cut the tube to size.
Now for the tube mounts. I got a piece if 3/16 flat bar.
Then I started scribing the cut and bend lines. I originally intended to bend it in the press, but I ended up cutting and welding them together due to limitations of the angle I could bend.
Holes drilled for the tube to pass through.
Mocked up in place and ready to weld together.
Here are the individual components mocked up getting ready for final weld... after a test fit of course.
Fit up went great (sorry, forgot to take a mock up photo), so I welded the tube mounts on.
Quick radius on the corners.
And the shock mounts welded on.
Fully assembled and ready to install.
Now I just have to take care of these flimsy bent up lower mounts.
So I just cut 'em off and decided to start fresh.
Ground smooth and ready for new mounts. That's good for tonight, I'll get back on it tomorrow. From here at least I was able to take measurements to get my Bilstein 5125 shocks ordered.
[QUOTE=650;16105167]Wow. Your build is coming along sweet.
I was looking at your shocks and getting some ideas. Where did you get the upper shock mount bracket from?
Honestly I can't remember where those came from, some online 4x4 shop, but I've done bought a bunch of the same style mounts from Summit. They have tons.

 12-19-2015, 09:08 PM