55 F100/5.0 EFI build
#76
 10-26-2014, 11:36 PM


Doug hope your build is moving along as well as time allows. The winter season is around the corner and I sense a people will start to make some good progress on their builds with winter (me being one of them).
I got a few odds an ends tied up in the past few months as well. Will post as soon as I can.
I got a few odds an ends tied up in the past few months as well. Will post as soon as I can.
#77
10-27-2014, 12:08 AM
One of my next tasks was power steering lines.
Unfortunately the first set I purchased did not fit. I purchased the march performance p3211 for my rack from No Limit but I chosen the wrong ones.
I returned them and purchased the P3244 kit and it they worked perfect.
Wrong lines:
March Performance P3211 March Stainless Braided Power Steering Hose Kits - Free Shipping on All Orders @ JEGS
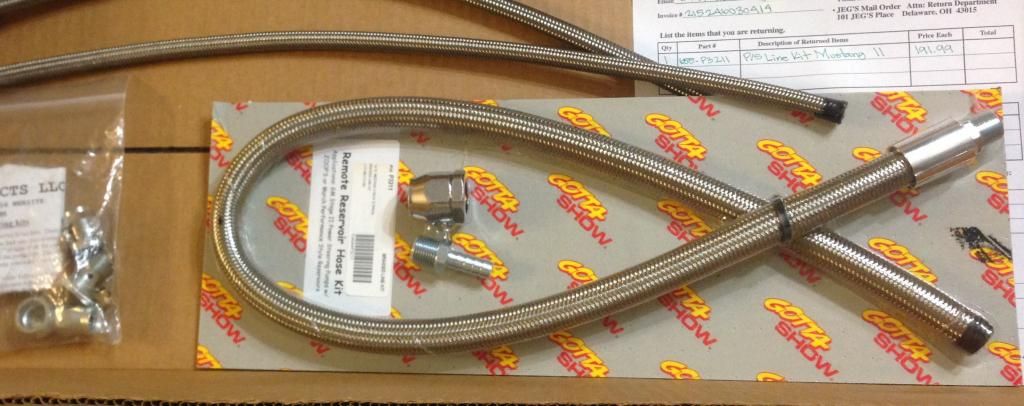
Correct lines
March Performance P3244 March Stainless Braided Power Steering Hose Kits - Free Shipping on All Orders @ JEGS
#78
10-27-2014, 12:12 AM
With all lines connected, I was able to mount the reservoir on the drivers side of the radiator and each line provided fit perfect. No trimming or modifying. I did have to install the banjo fitting for the pump which was a little challenging.
Here are the PS lines installed on the pump, nice clean look:
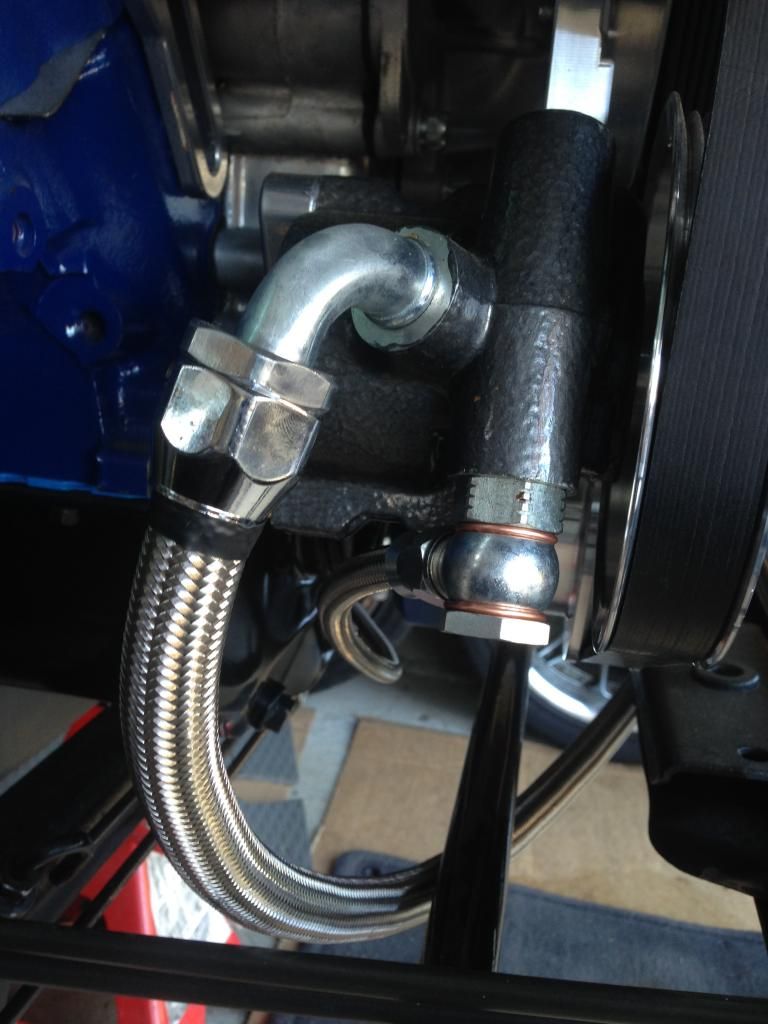
And from the reservoir:

Here are the PS lines installed on the pump, nice clean look:

And from the reservoir:

Last edited by SVT-F100; 10-27-2014 at 12:17 AM. Reason: add missing picture
#79
10-27-2014, 12:23 AM
And here is the Lokar kit I am using to connect from a CPP column shift to an AOD transmission.
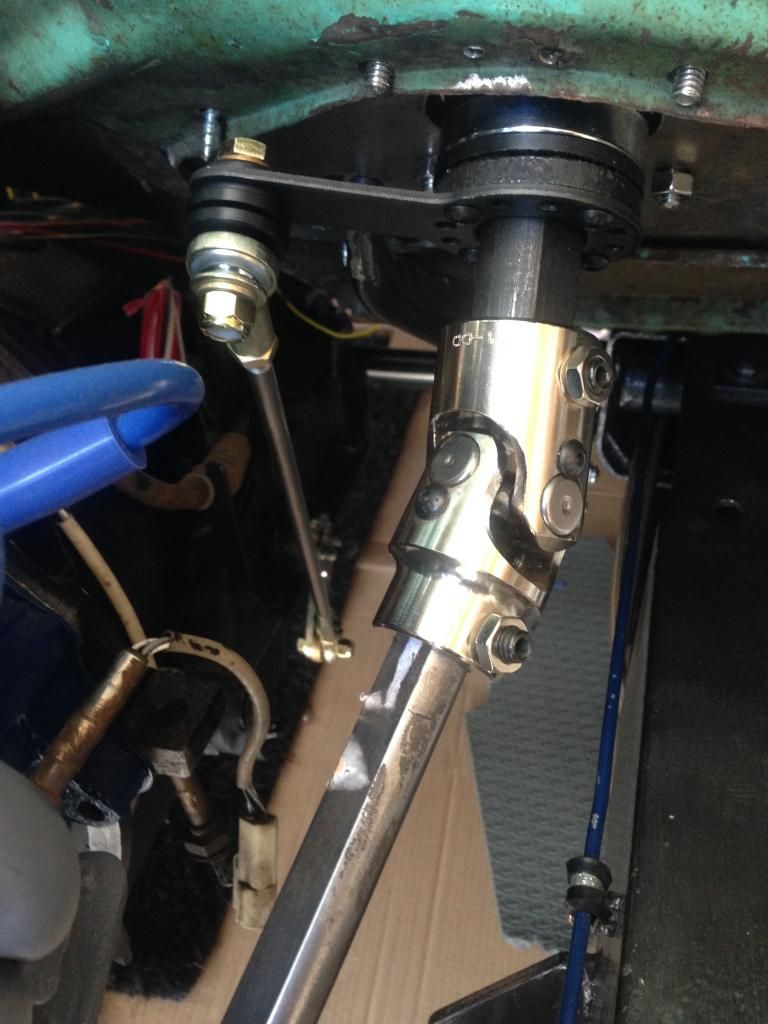
I had to pull out the original AOD linkage from the tranny but with this video below it was more than feasible. Luckily I had only poured tranny fluid in the converter so the tranny was still dry.


I had to pull out the original AOD linkage from the tranny but with this video below it was more than feasible. Luckily I had only poured tranny fluid in the converter so the tranny was still dry.
#80
10-27-2014, 12:40 AM
I also mounted my radiator overflow on the passenger side. I only needed to drill one hole into the side of the radiator flange. I used flexible see thru tubing to connect to the radiator.

The radiator fan came with plastice zip tie straps that did not fit very well. I removed them and mounted the fan with some nuts bolts from ACE while keeping the plastic washer in place.


The radiator fan came with plastice zip tie straps that did not fit very well. I removed them and mounted the fan with some nuts bolts from ACE while keeping the plastic washer in place.

#81
10-27-2014, 12:56 AM
I also figured out my intake. I cut the mustang BBK intake several inches and angled it down towards the louvres on the front wall so I can get some fresh air to the motor.
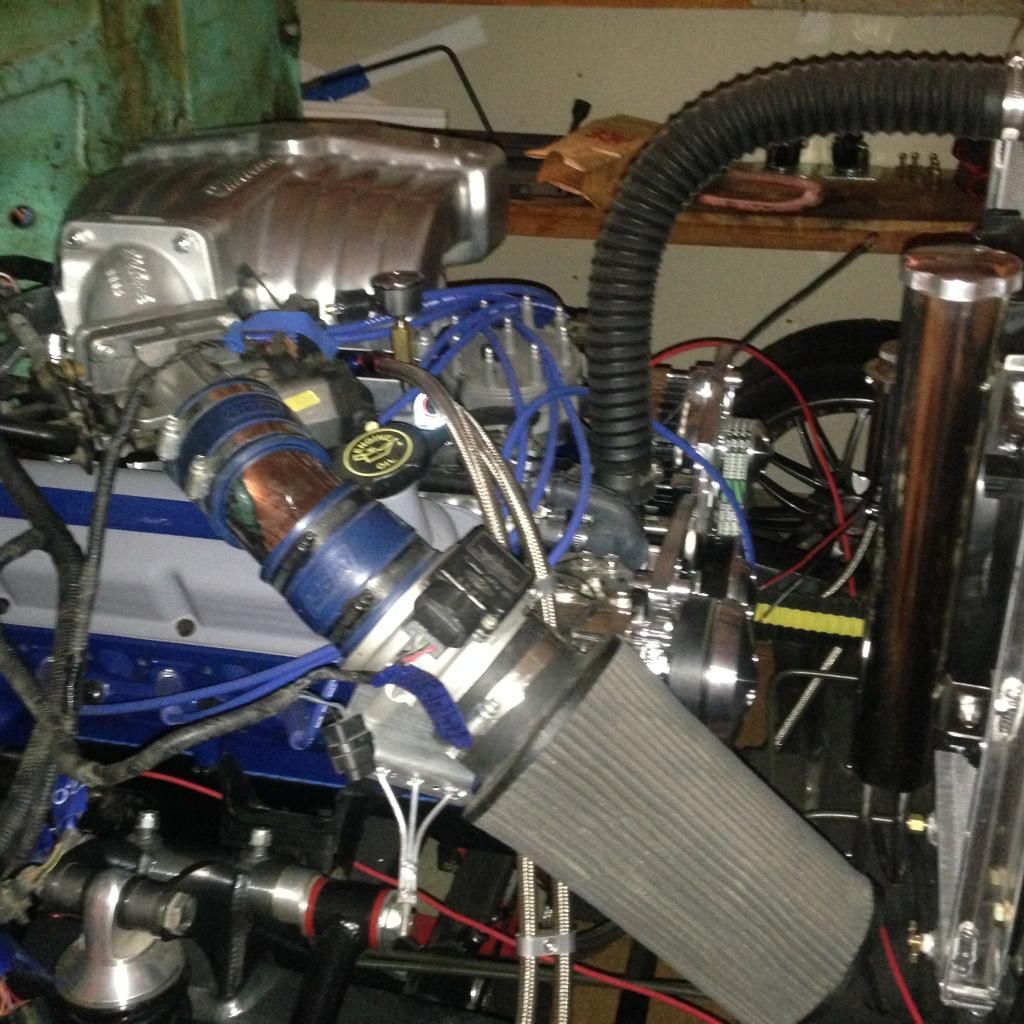
And to stabilize the MAF I made a mount that bolts on to the inner fender wall. This is what I started with

This is the first cut:

Finale product:
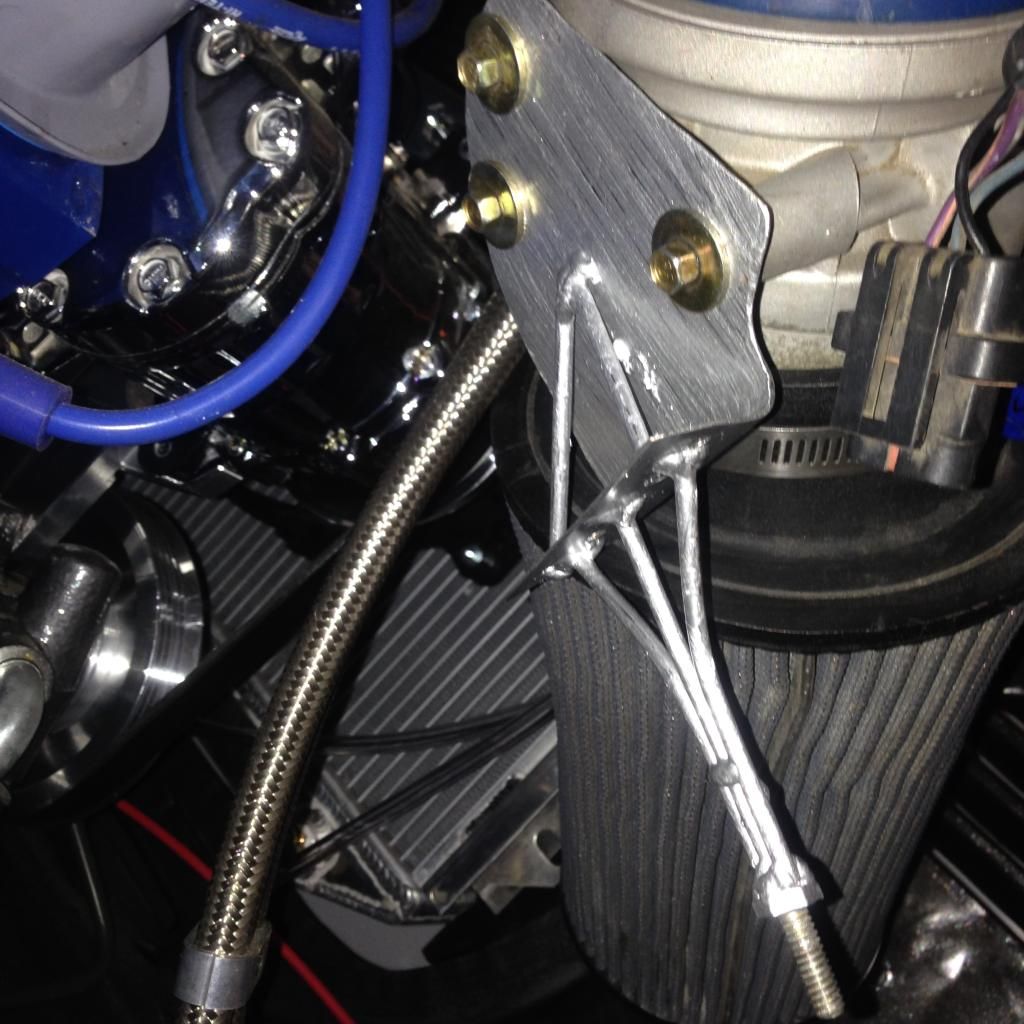
It bolts on to the inner fender to prevent the intake from bouncing around.

And to stabilize the MAF I made a mount that bolts on to the inner fender wall. This is what I started with

This is the first cut:

Finale product:

It bolts on to the inner fender to prevent the intake from bouncing around.
#82
10-27-2014, 01:30 AM
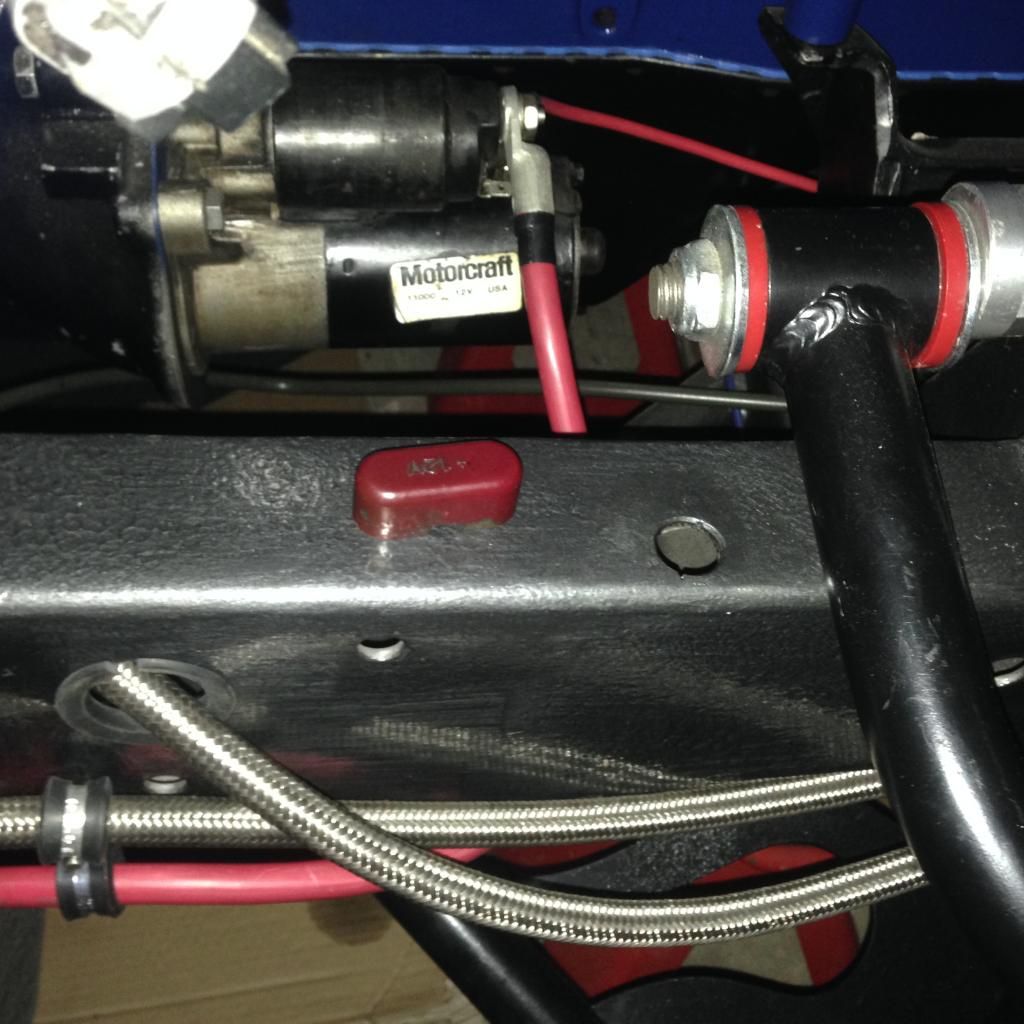
For electrical power I went with the rear frame mounted battery and a 1 gauge cable running down the frame.
Here is the link of how I came to my conclusion to connect the solenoid to the battery using my PMGR starter.
PMGR Solenoid and stand alone solenoids for 5.0
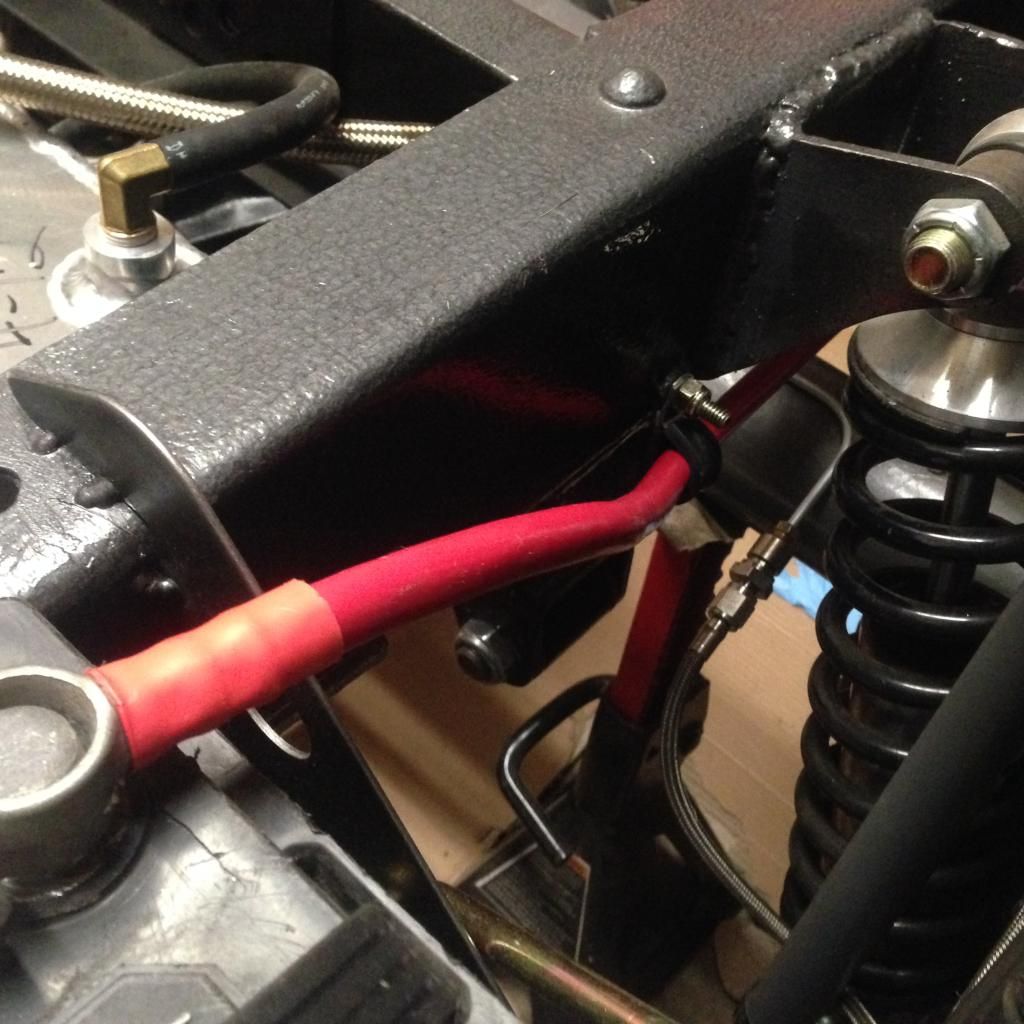

To terminate the line I used a solder pellet I purchased from Napa. I cut the cable trimmed the outer plastic layer, clamped the crimp in the vise, torched the ending melted the solder and then dipped the cable into the fitting and viola!
I will take better pictures for when I do the negative cable.

#83
10-27-2014, 08:16 PM
Posting Guru
Join Date: Apr 2013
Location: Rimrock AZ
Posts: 1,170
Likes: 0
Received 0 Likes
on
0 Posts

#84
11-22-2014, 10:43 AM

Z. Looking good bro. Keep on pushing and get that truck done finally...
I'm tearing down an extra frame and getting ready to put a new IFS and 4 link in. I grabbed a 2014 coyote motor and Trans to push her down the road.... I'm just trying to keep pace with you bro. Truck is looking good....
I'm tearing down an extra frame and getting ready to put a new IFS and 4 link in. I grabbed a 2014 coyote motor and Trans to push her down the road.... I'm just trying to keep pace with you bro. Truck is looking good....
#86
09-12-2017, 01:09 AM
WOW!!! October 2014 was the last post I have for my project...
I will start with letting every one know the project has been on hold for a few years (if you haven't noticed, lol). A new job, move across state, new house, new kid, etc etc will definitely take its toll.
None the less, I am still strapped for time and will check in as much as possible but for now an update is all I got.
Before the move to SCAL I was rushed to put the truck together for transportation. Shot long and hard to get the first start up on the engine before the move AND DID!
All went well, the engine sounds like a beast and was able to push it as a complete rolling 55 chassis as opposed to in parts.
The move concluded, new house, new job, new kid, and she sat right there for 18 months for work.
6 Months ago the work project concludes, things are getting better, not good, but better and I start tinkering again and bought a 67 mustang to hold me over till the 55 is done.
With the engine having run many times, no major leaks, I turned next to the throttle assembly. I originally tried to keep the original pedal but do to the placement of throttle body in relation to the carburetor I ended going with a floor mount lokar pedal. Lokar braided throttle cable with a small kit to connect to my throttle body. I also installed a new steering wheel and custom aluminum drive shaft from inland empire driveline.
FTE having these threads is great, perfect way to remember my build and be able to look back at each detail.
Next is bleeding brakes, checking fluids again, validating transmission linkages and seeing if it will go up and down the street.
video and photos to come, hopefully not in three years.
peace out FTE,

Thread
Thread Starter
Forum
Replies
Last Post
Hackster1
1967 - 1972 F-100 & Larger F-Series Trucks
77
02-15-2019 01:14 PM
f100today
1967 - 1972 F-100 & Larger F-Series Trucks
37
01-24-2017 10:22 AM
redlinemotorsportts
1967 - 1972 F-100 & Larger F-Series Trucks
22
01-13-2017 02:42 AM
oddfordjunkie
1973 - 1979 F-100 & Larger F-Series Trucks
72
02-23-2015 03:02 PM