55 F100/5.0 EFI build


#48
 03-24-2014, 11:34 PM


Fo sho man, a few beers and turning some wrenches is always a good time.
And carnut you are crazee I have seen your ride in your build threads. It is one sweet piece of machinery. I love the motor set up you went with as well as you can see I am headed right down that alley. A little more challenges since I pulled it out of t-bird but still along the same lines. I am going to have reach out to you in the near future. Right now my headaches are with the wiring... but I am getting there.
And carnut you are crazee I have seen your ride in your build threads. It is one sweet piece of machinery. I love the motor set up you went with as well as you can see I am headed right down that alley. A little more challenges since I pulled it out of t-bird but still along the same lines. I am going to have reach out to you in the near future. Right now my headaches are with the wiring...
but I am getting there.
#49
03-24-2014, 11:54 PM
I found a few more pictures to document some of my previous progress.
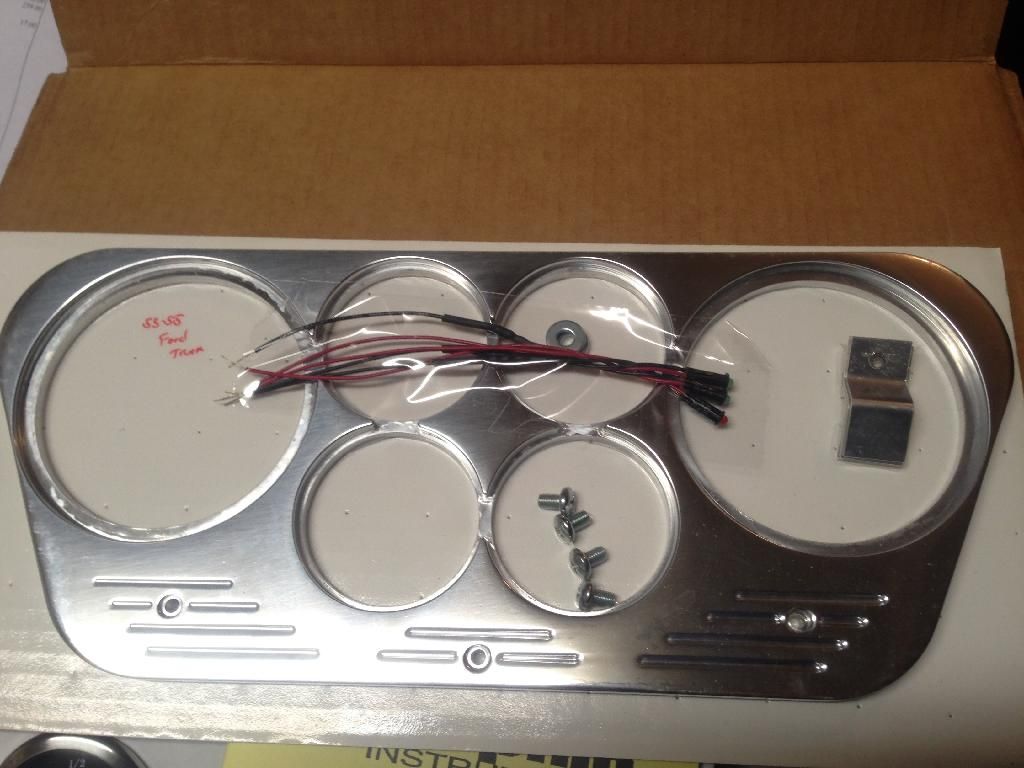
I decided to go with the Dolphin gauges, for the price and with the phone calls I made the customer service was pretty good (and I am big on that) and the products I had seen looked sweet.
I called them up, told them my tank style and speedo set up, what I was looking for. I ordered the Bezel, and gauges which obviously came with my fuel tank sender or as I call it the arm that tells you if you have any fuel.
Here are the pixs when arriving in the mail.

Now the bezel did not quite fit perfect, as I found many parts don't so I had to shave off about this much to make it all fit.
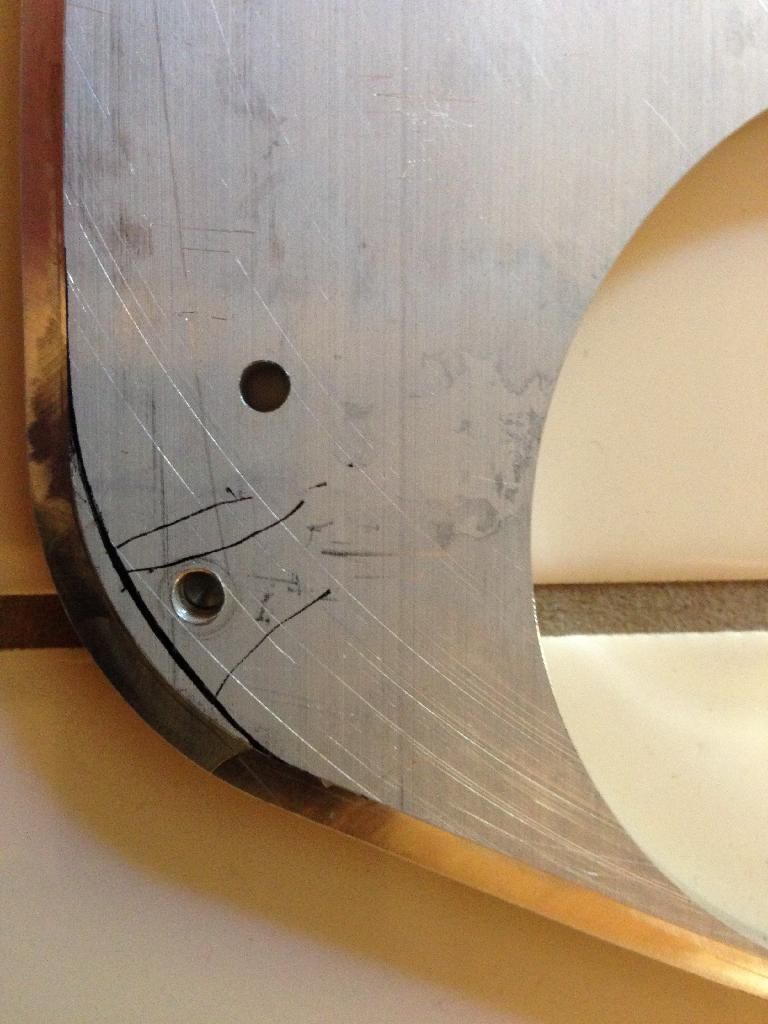
A little grinding, some filing and the test fit was successful!!!

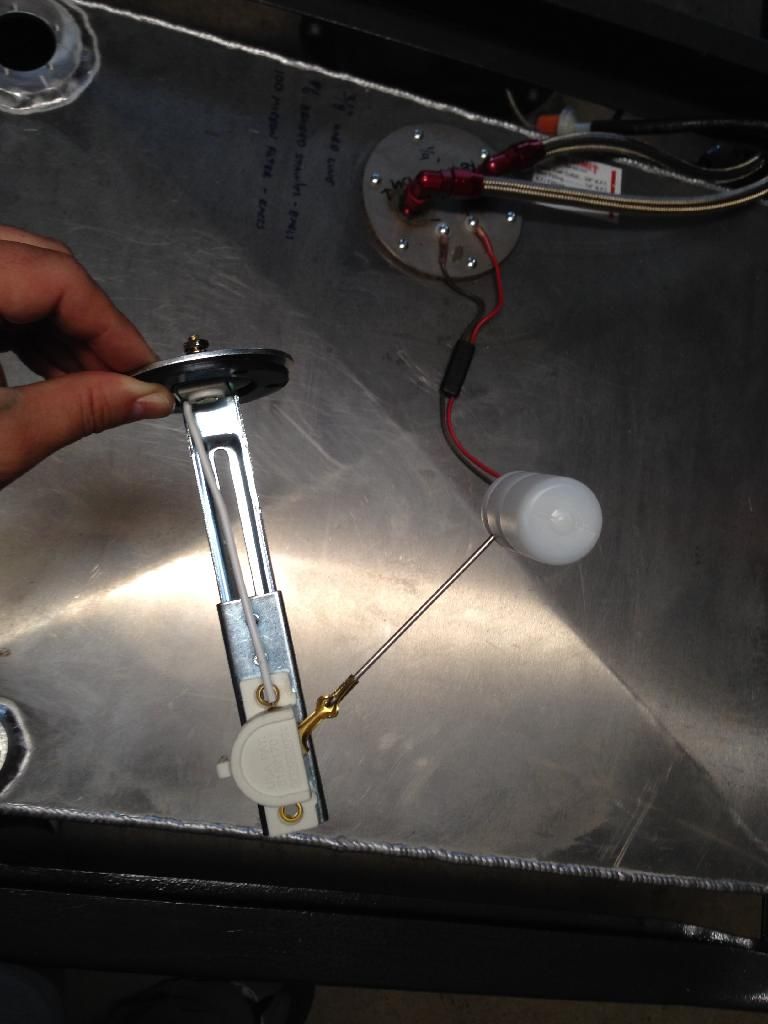
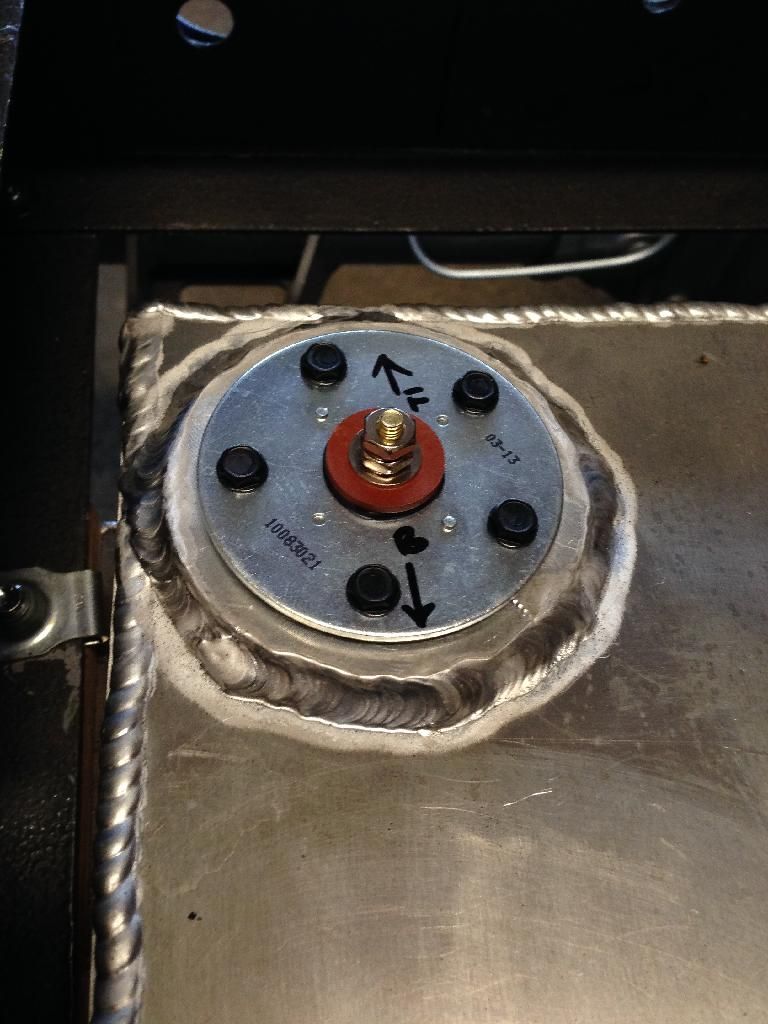
With the bezel and gauges fitting well and looking AWESOME!!! I went to remove the blue tape from the hole in my fuel tank and put the sender in.
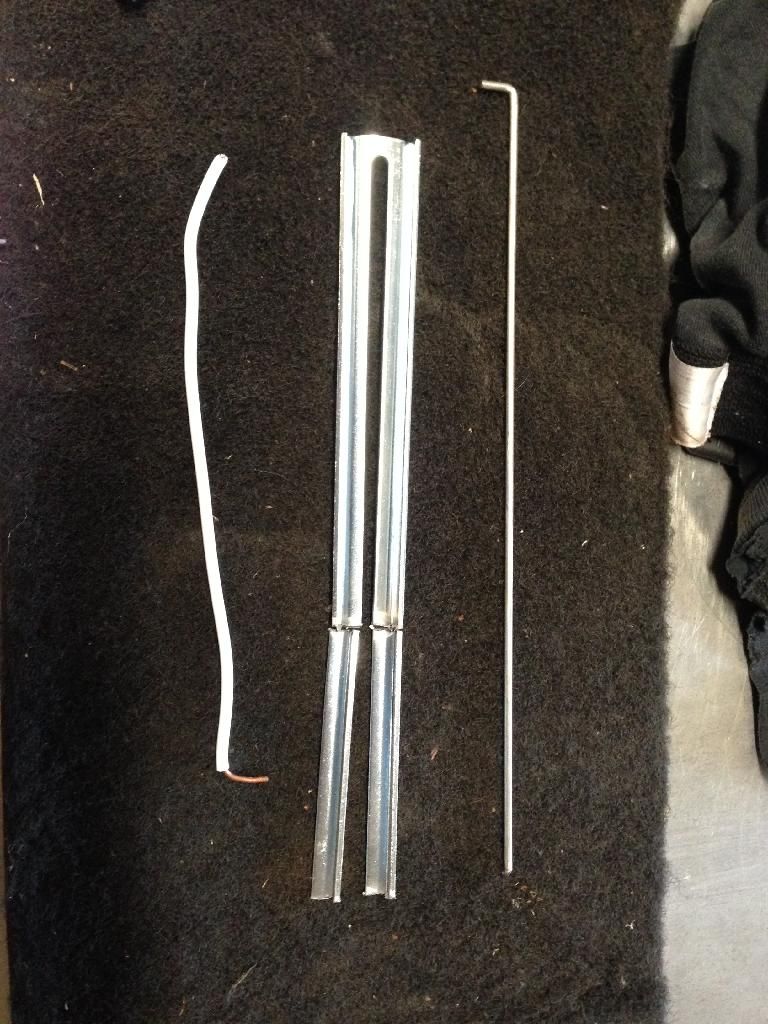
Since my tank is not that deep I had to modify and cut quite a bit but apparently that is normal.
Here is about how much I cut and the length when complete before installing.
And with the test fitting I made marks as the holes will only line up in one way.
Still many more pictures and project updates but that is all I got for today, peace out.
I decided to go with the Dolphin gauges, for the price and with the phone calls I made the customer service was pretty good (and I am big on that) and the products I had seen looked sweet.
I called them up, told them my tank style and speedo set up, what I was looking for. I ordered the Bezel, and gauges which obviously came with my fuel tank sender or as I call it the arm that tells you if you have any fuel.
Here are the pixs when arriving in the mail.


Now the bezel did not quite fit perfect, as I found many parts don't so I had to shave off about this much to make it all fit.

A little grinding, some filing and the test fit was successful!!!

With the bezel and gauges fitting well and looking AWESOME!!! I went to remove the blue tape from the hole in my fuel tank and put the sender in.
Since my tank is not that deep I had to modify and cut quite a bit but apparently that is normal.
Here is about how much I cut and the length when complete before installing.


And with the test fitting I made marks as the holes will only line up in one way.

Still many more pictures and project updates but that is all I got for today, peace out.
Last edited by SVT-F100; 03-27-2014 at 09:29 AM. Reason: fixed photobucket broken links
#50
03-25-2014, 08:09 PM
Senior User
Join Date: Sep 2013
Location: Florida
Posts: 477
Likes: 0
Received 0 Likes
on
0 Posts


#52
03-26-2014, 12:38 PM

#53
03-26-2014, 11:49 PM
Yeah I was actually surprised with the way the corner came out. I started with the hardest one so that way the others should go smoother, I hope.
Bjp, it definitely is a journey, and a great one at that. Enjoy it don't rush and let it happen. One step at a time. People ask when I'm going to be done and I always say I don't think about being done I just look for the next milestone.
Next milestone is getting the motor to fire!!!
Pssmith, glad it is helpful. There are a lot of pros here and sometimes it leaves wondering about detail like making the AN hose fittings on the braided lines. It is basic and boring to many but for me exactly what I need. This pix coming soon.
#54
03-27-2014, 12:29 AM
The last Goodguys show I seen a sweet fat fender f100 with a 5.0. Took a lot of pictures and got some motivation.
While at the show I also picked up a Champion radiator with an overflow. Initially I wanted to go with an original remake, but after pricing them and knowing I would also need a cooler for my AOD I opted to go with this one. It is a direct bold on and came with needed transmission cooler adapters at the bottom.

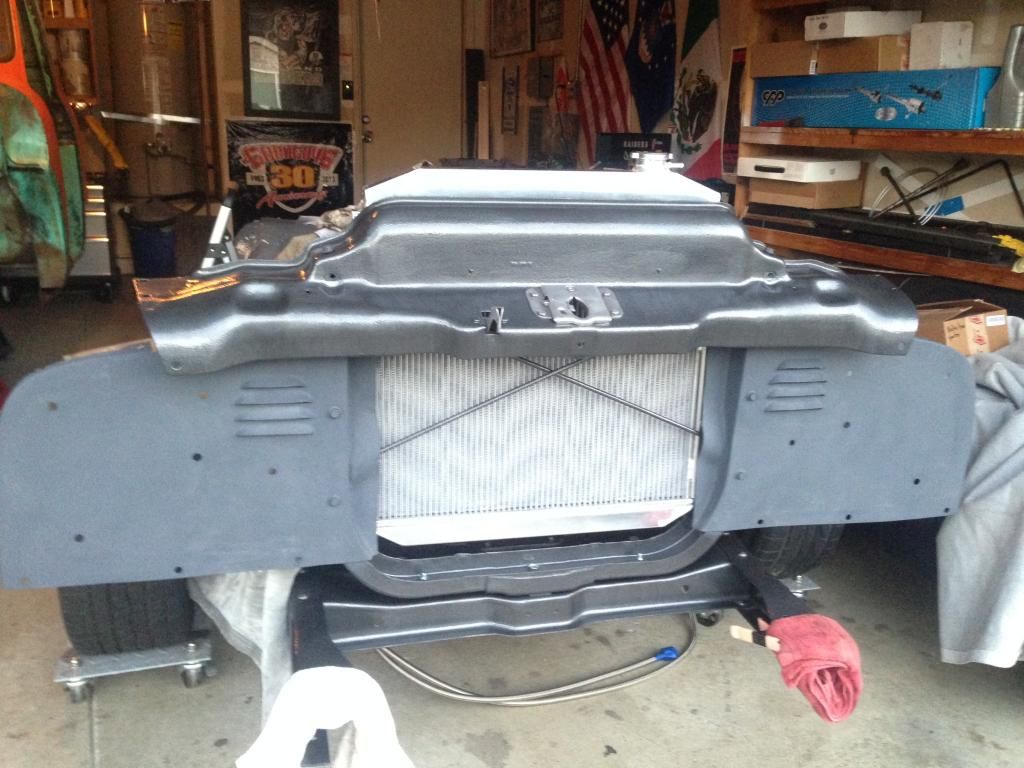


While at the show I also picked up a Champion radiator with an overflow. Initially I wanted to go with an original remake, but after pricing them and knowing I would also need a cooler for my AOD I opted to go with this one. It is a direct bold on and came with needed transmission cooler adapters at the bottom.


#55
03-27-2014, 12:40 AM
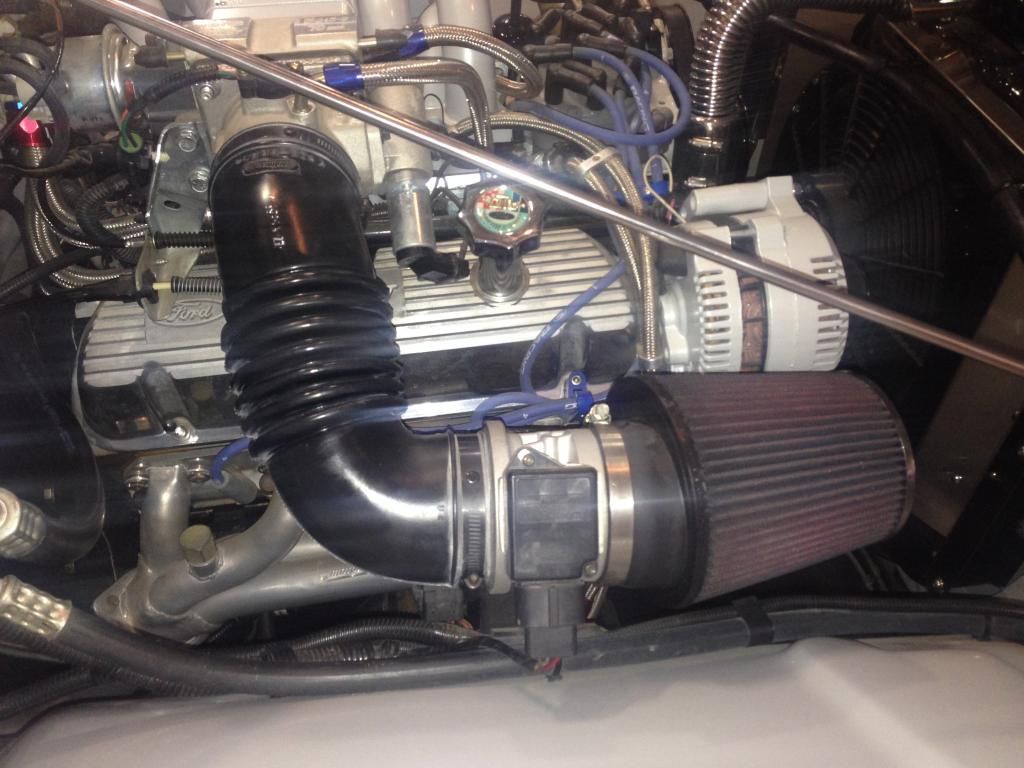
Being able to clean up the original radiator housing and reinstall with a sacramento vintage ford hardware kit, mounting the radiator and having the motor in place next job was to get the cab on with the inner fenders to determined where I would need to cut and how I would route the plumbing and electrical.
Here is a shot of the cab back on temporarily to focus on the rest of the motor.

More pictures on the plumbing later.
And the wheels are only temporary, got them cheap off CL only to have a rolling chassis. The goal is from the outside everything will look error correct minue a little lower. So it will probably be an older wheel with a white wall on it.
#56
03-27-2014, 01:13 AM
I ordered a couple of items from Jegs and felt like it was my birthday!!!
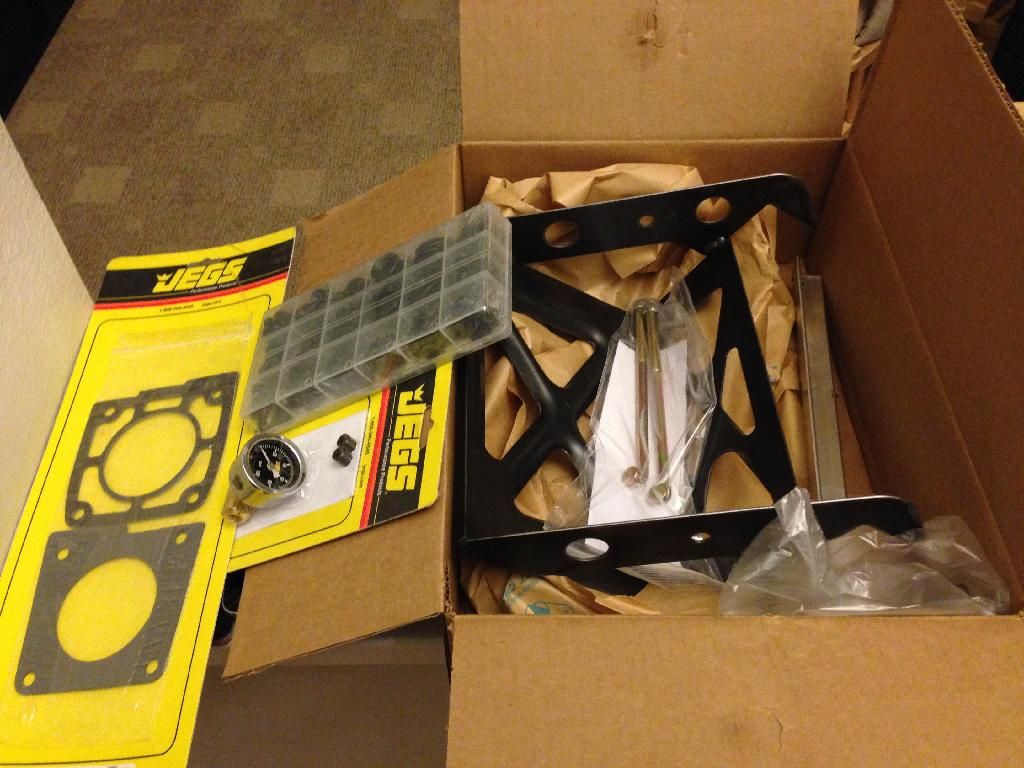

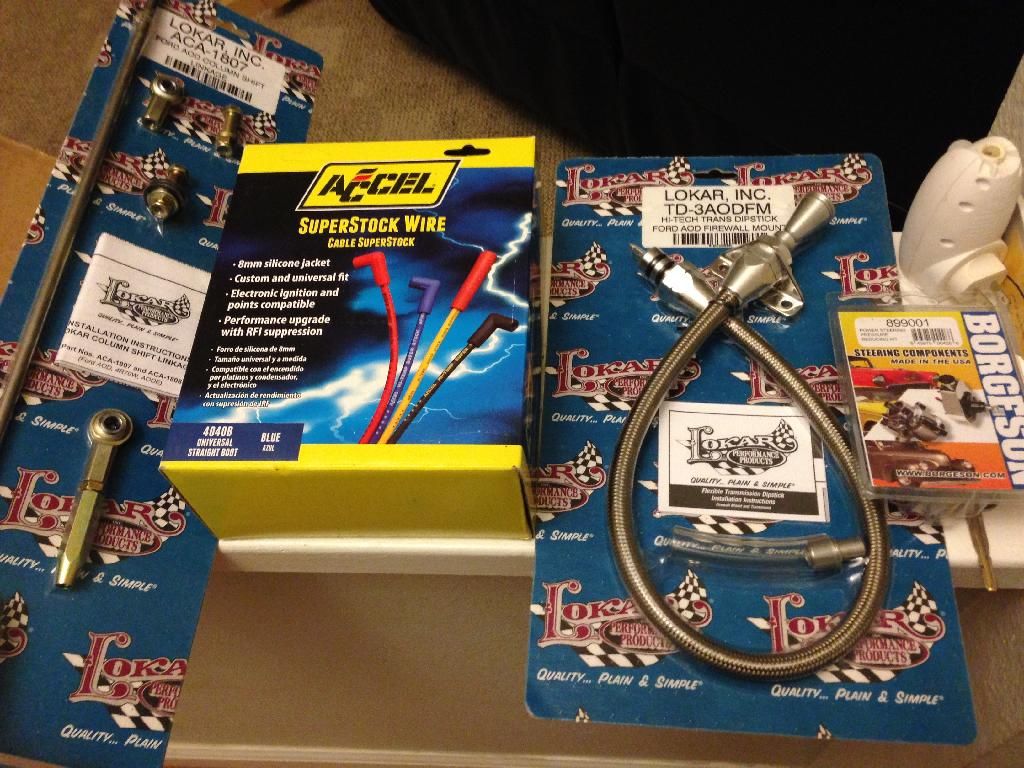
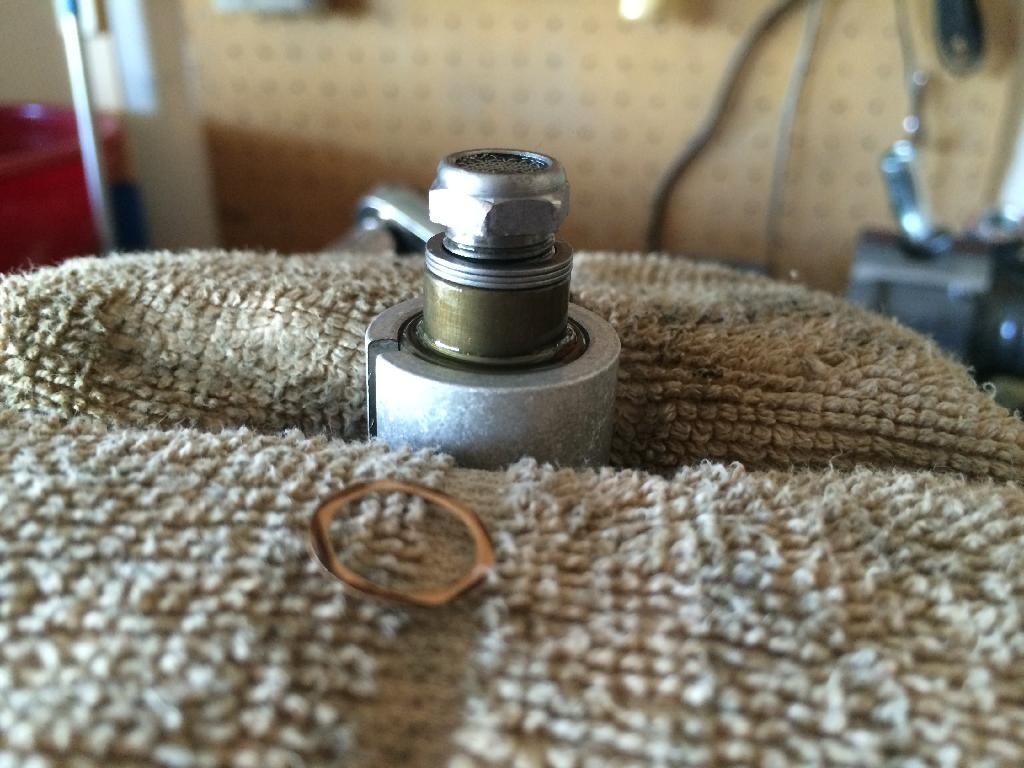
The first item I went to tackle was my borgeson pressure reducing kit. I learned that the pressure from a ford MII rack and pinion is designed to be at 1,000 psi and since the march front runner system uses a GM it is spitting out about 1,350 PSI which could make you turn a little too fast from what I here.
So this kit is supposed to fix that.
It was very simple and instructions were good too.
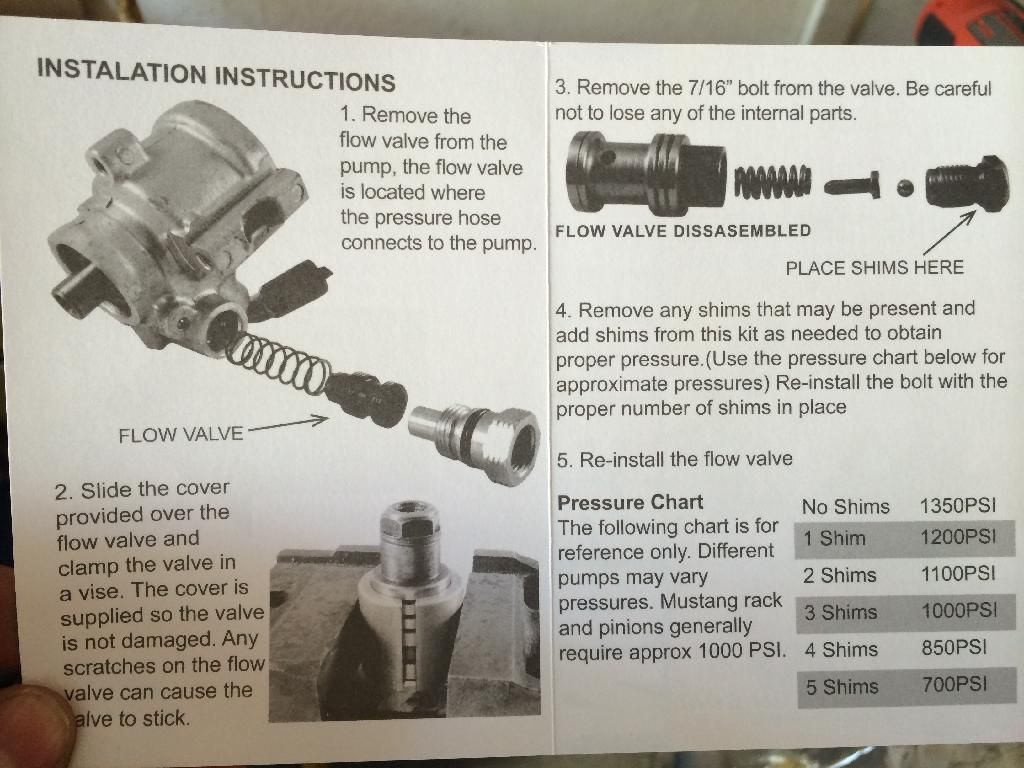
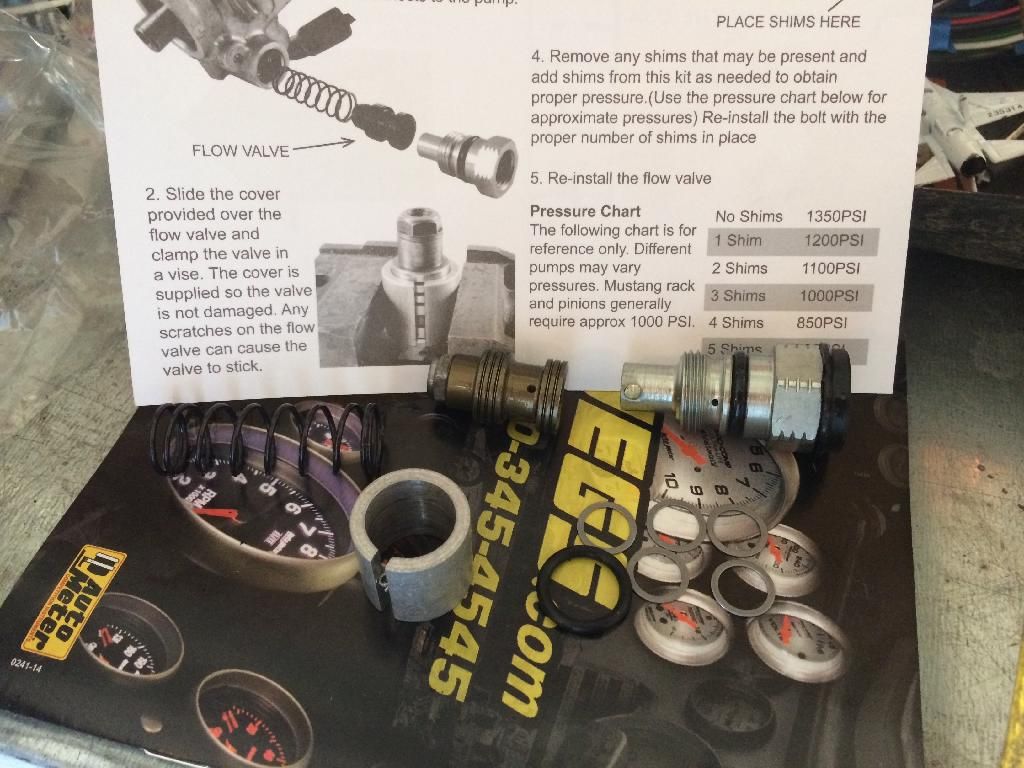
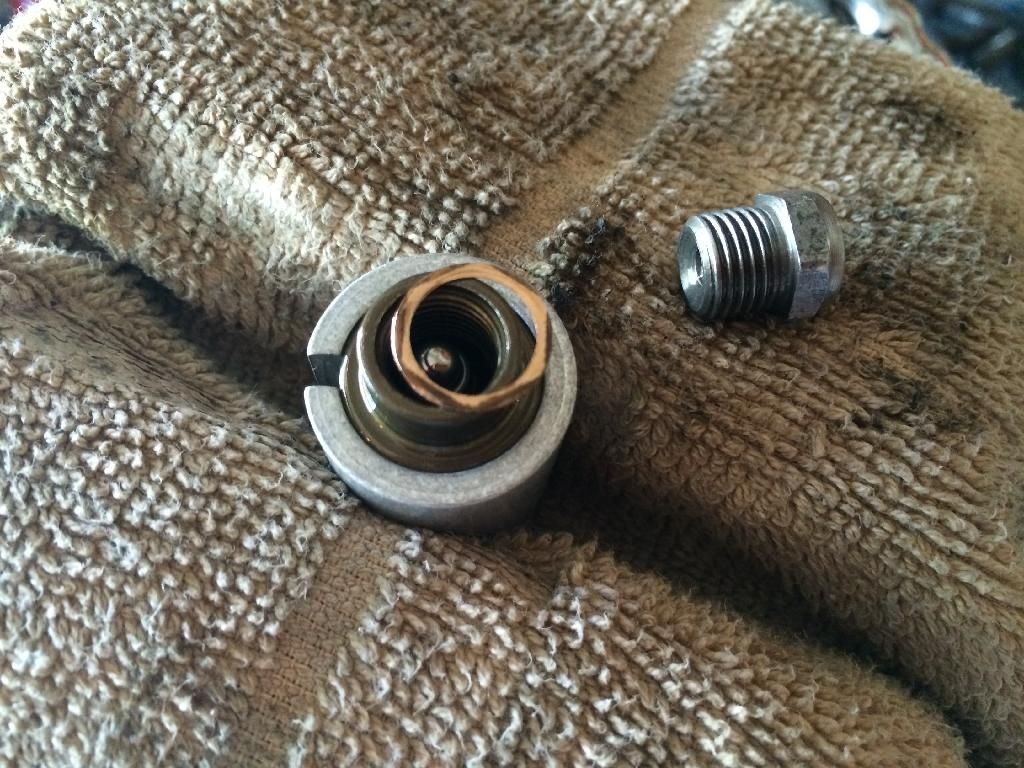
According to the chart shims should get me to about 1,000psi. I don't know how or why but it says it and I'm trying it and reassembled in reverse order.


The first item I went to tackle was my borgeson pressure reducing kit. I learned that the pressure from a ford MII rack and pinion is designed to be at 1,000 psi and since the march front runner system uses a GM it is spitting out about 1,350 PSI which could make you turn a little too fast from what I here.
So this kit is supposed to fix that.
It was very simple and instructions were good too.


According to the chart shims should get me to about 1,000psi. I don't know how or why but it says it and I'm trying it and reassembled in reverse order.

#57
03-27-2014, 01:24 AM
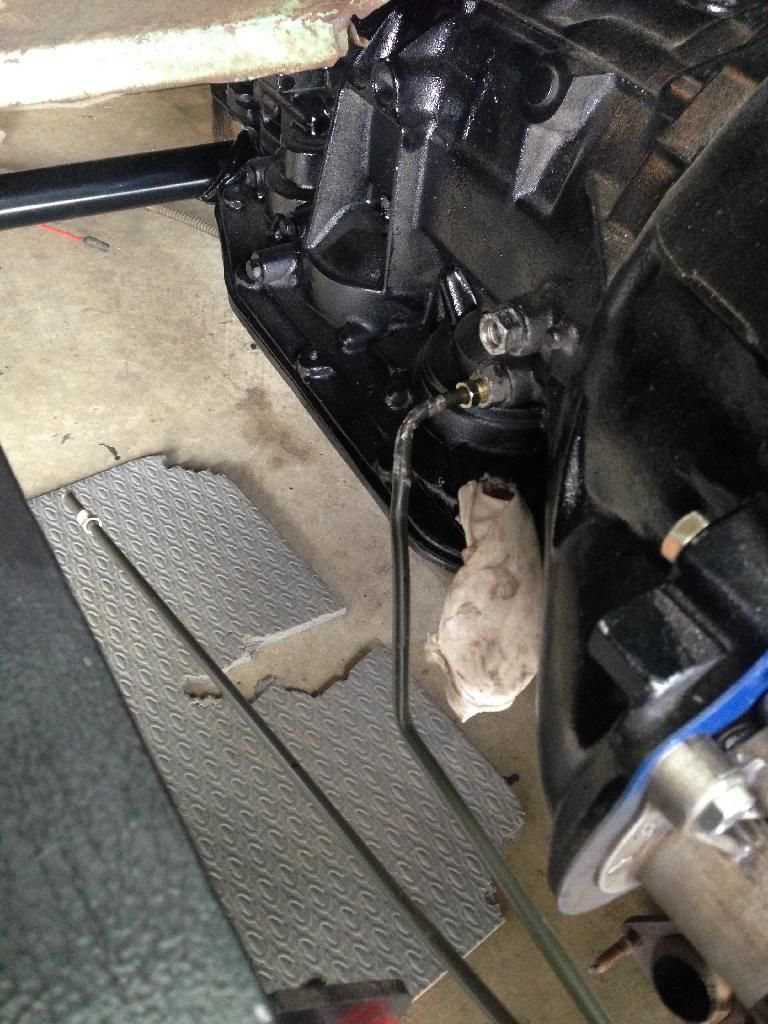
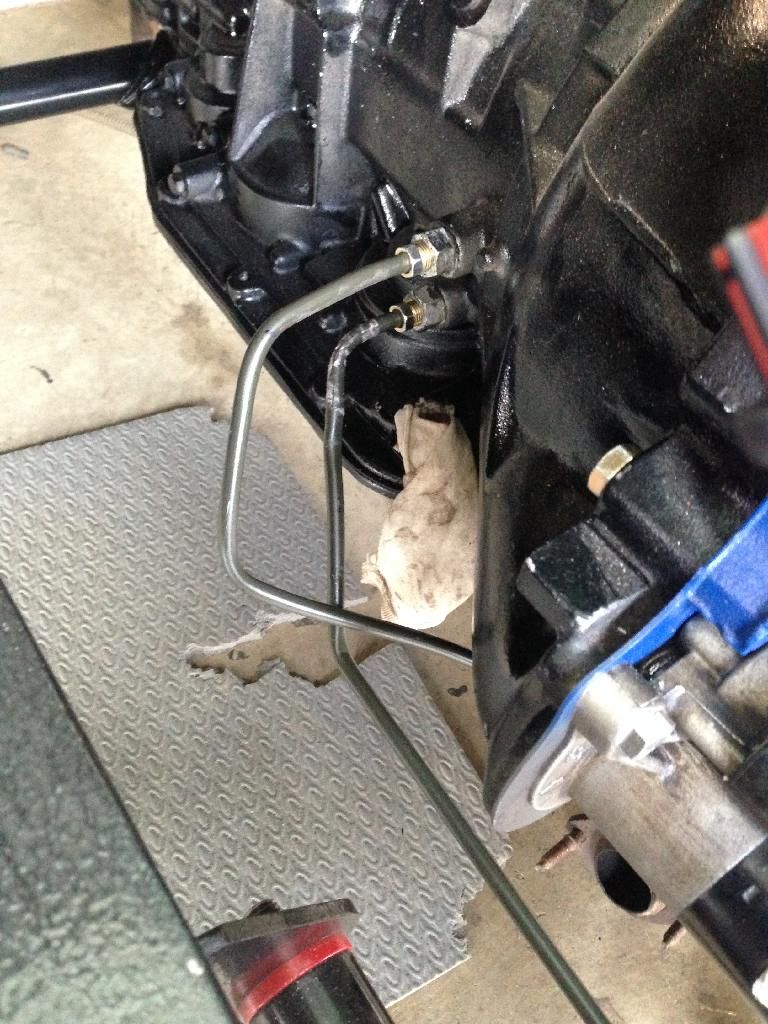
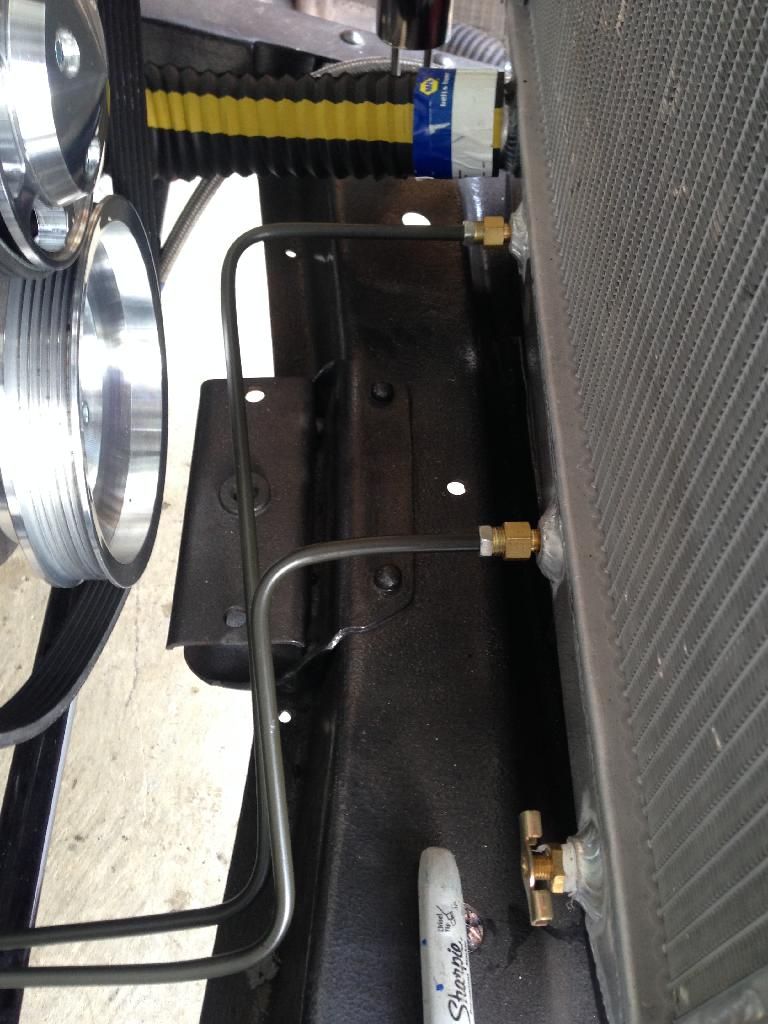
Next order of business was the transmission coolant lines. I was not sure what size I needed etc. so I found a bolt that fit the transmission and a bolt that fit the radiator, took them to my local napa and told them I needed two hard lines with this bolt on one side and this bolt on the other.
They gave me two pre flared straight lines I would need to bend and two adapters.

I was actually a little concerned about getting the right lines in the correct spot as I know there is a return and in line. But with a quick to champion they told me to not worry and use either one. The design of the lower radiator cooler is either or. It is separate from the motor and can run in either direction.


Last edited by SVT-F100; 03-30-2014 at 11:20 PM. Reason: added an extra pix
#58
03-27-2014, 01:31 AM
Next up was inner fenders. My original ones were pretty good. So I started with an under guesstimation of how much to cut and then trimmed the rest out till had a good fit. The first took about three trims and then I used it as template for the second inner fender. The second only took one cut....All cuts made with a cut off wheel and my dewalt angle grinder


Unfortunately I did not upload a picture of the final cuts. That is where I will continue next time.
#59
03-27-2014, 07:33 AM
Tuned
WOW, what great documentation! I am green with envy. I just don't ever see myself being able to afford the level of parts you are putting in your truck. I just learned yesterday that my radiator is too bad off to repair. That's $500-$700 I just don't have on a $50 a month budget for my "49 F-1. Not sure where to go from here. But again. Your work looks great and I am really enjoying following your journey!


