55 F100/5.0 EFI build
#1
 02-21-2014, 12:47 AM


55 F100/5.0 EFI build
What up FTE, long over due update... Been a wild three years and this build could not have come at a better time in my life. I am happy with my slow but sure progress and decided to call my build "In God I trust"... The perfect name for my life lessons.
I have more work to post but for now this was all I had time for.
 I want to say thanks to this site and many others that have helped me along the way. This is my first build, my skill is far from professional. Although I am not unfamiliar with tools as I spent 5 years working on Jet Engines in the USAF.
Truck is still far from done but have enough components complete where I am starting to see a possible speckle of light at then of the tunnel.
1955 F100
No Limit Fatbar 4-link rear, with coil overs
-97 Explorer 8.8” rear with disc brakes and 5x4.5” pattern (pick n pull)
No Limit Wide ride IFS
-standard spindles (2<sup>nd</sup> camaro spindle)
-coil overs
- late model t-bird rack and pinion
- 12” slotted drilled rotors with 5X4.5 pattern
No Limit 21 gallon aluminum rear fuel tank with in tank mounted pump
CPP 30” column shift, tilt steering
-non key with GM 4.25” wiring connector
Classic Car and Truck Brake, Steering and Suspension Parts
CPP joints and shaft
Disc Brake, Steering and Suspension Products for classic Chevy and Ford cars and trucks
No Limit bolt on brake kit with remote MC
CPP Adjustable proportioning valve
Classic Car and Truck Brake, Steering and Suspension Parts
5.0 HO From a 93 Thunderbird
-Stock bottom end
-Edelbrock Performer RPM Upper/Lower intake
-GT40 Heads
-TrickFlow Stage 1 Cam
-FelPro Valve Stem Seals
-Stronger Trickflow Valve Springs
-High Volume Oil Pump
-Billet Timing Set set at dead nuts
-ARP Head Bolts with bushings
-1” Lower/Upper intake Spacer
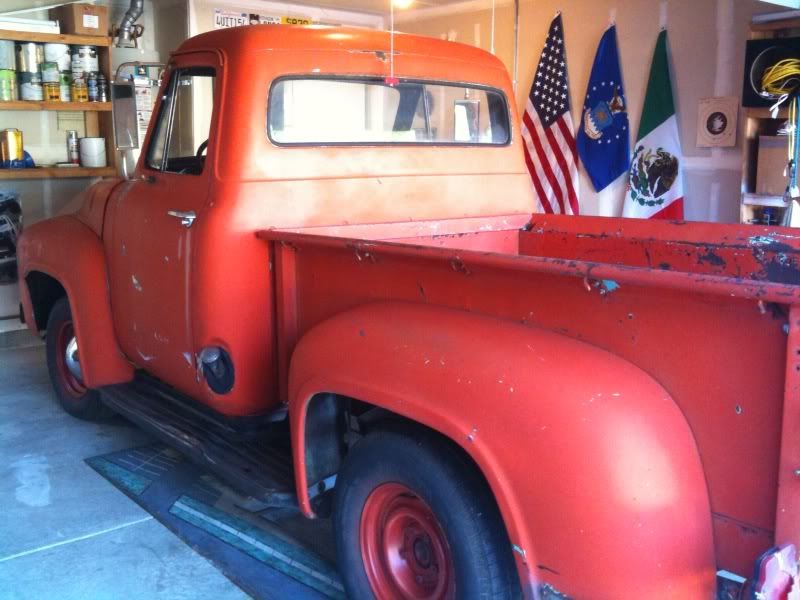
Truck when I first brought it home
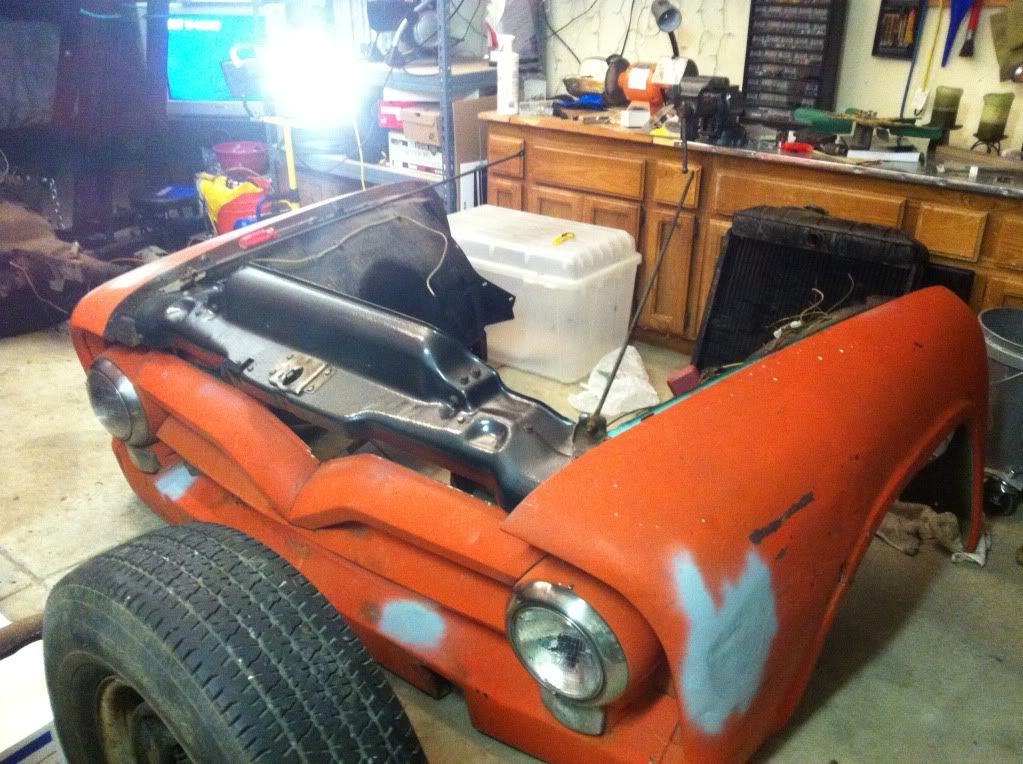
I started with the front, the whole front clip came off together fairly easy with a lot of PB soaking and some bolt snapping
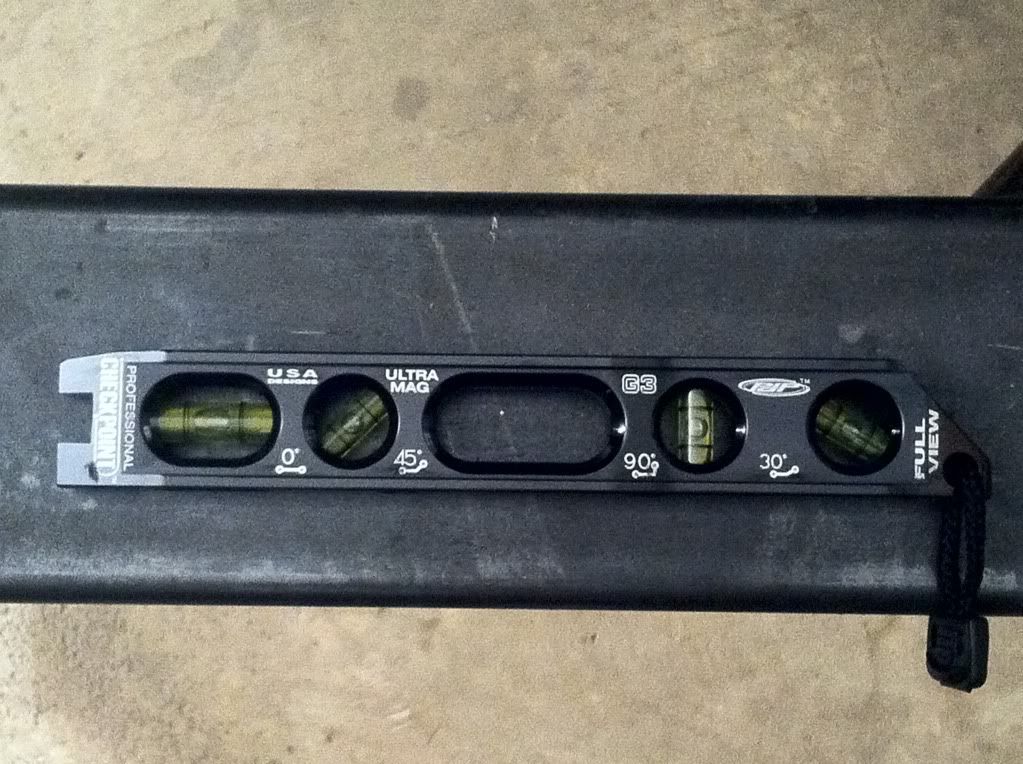
I got the front frame rails down to bare metal, had to remove the PO tranny crossmember for the chevy motor he had in it. I also spent plenty of time measuring before placing the new No Limit Cross Member and making sure my frame was level.

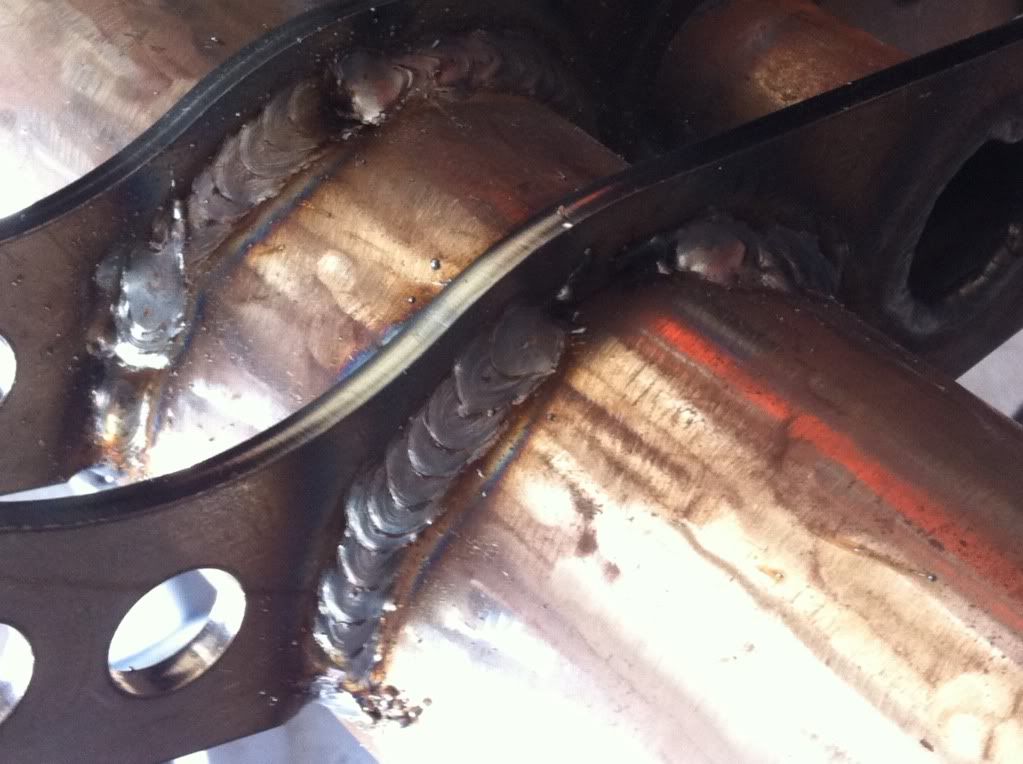
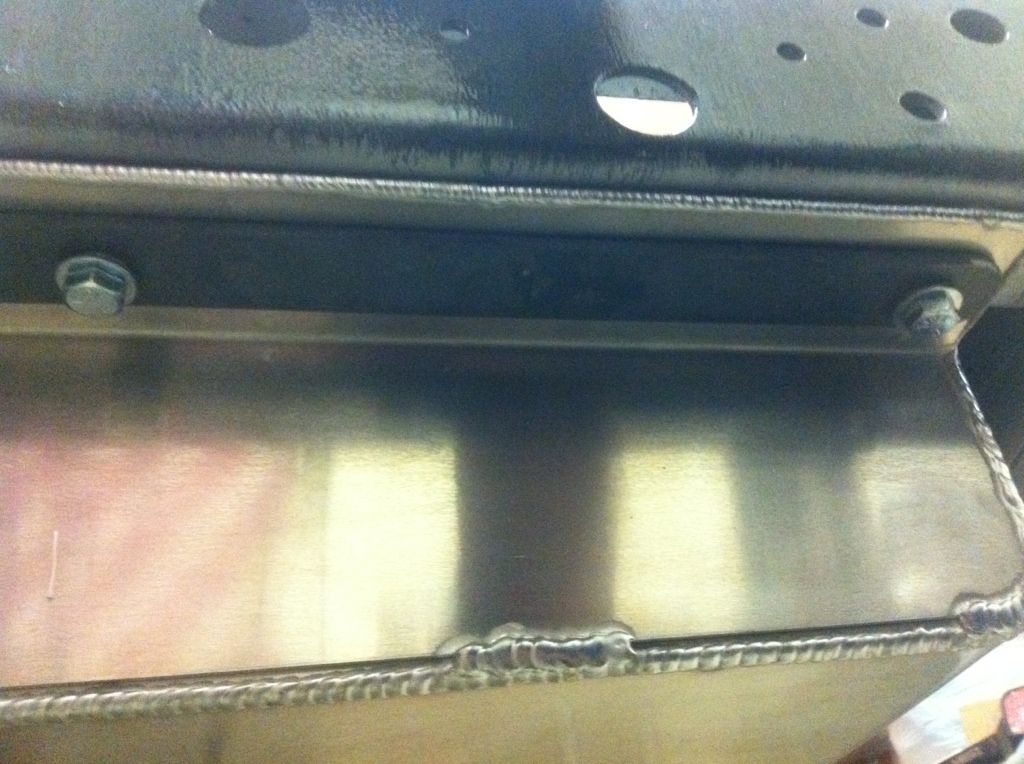
I then cut my boxing plates to fit and tacked everything together. Looking back I would have rounded in my boxing plates but it is all good.

Blended in my welds for the x-member and boxing plates
Then painted everything with Rust-O-Leum Black Hammered paint with brush

Then came the rest of the No Limit kit for the front

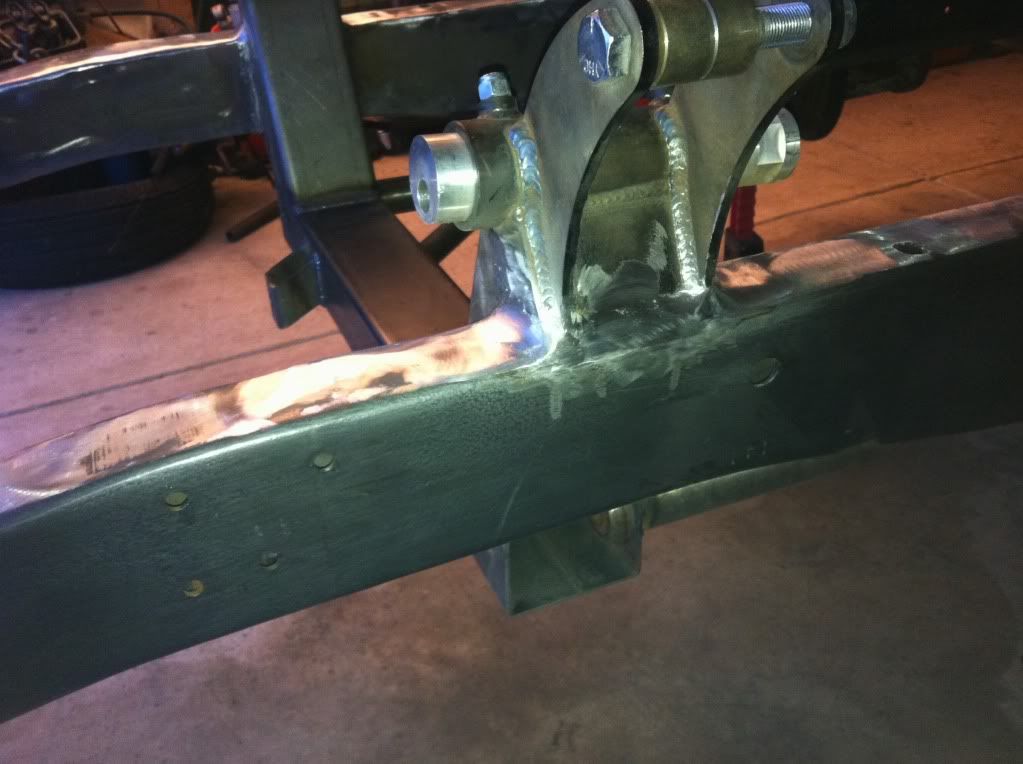
I then moved on to the No Limit Fatbar rear and rear end from a 97 explorer. Had to cut off all the old brackets
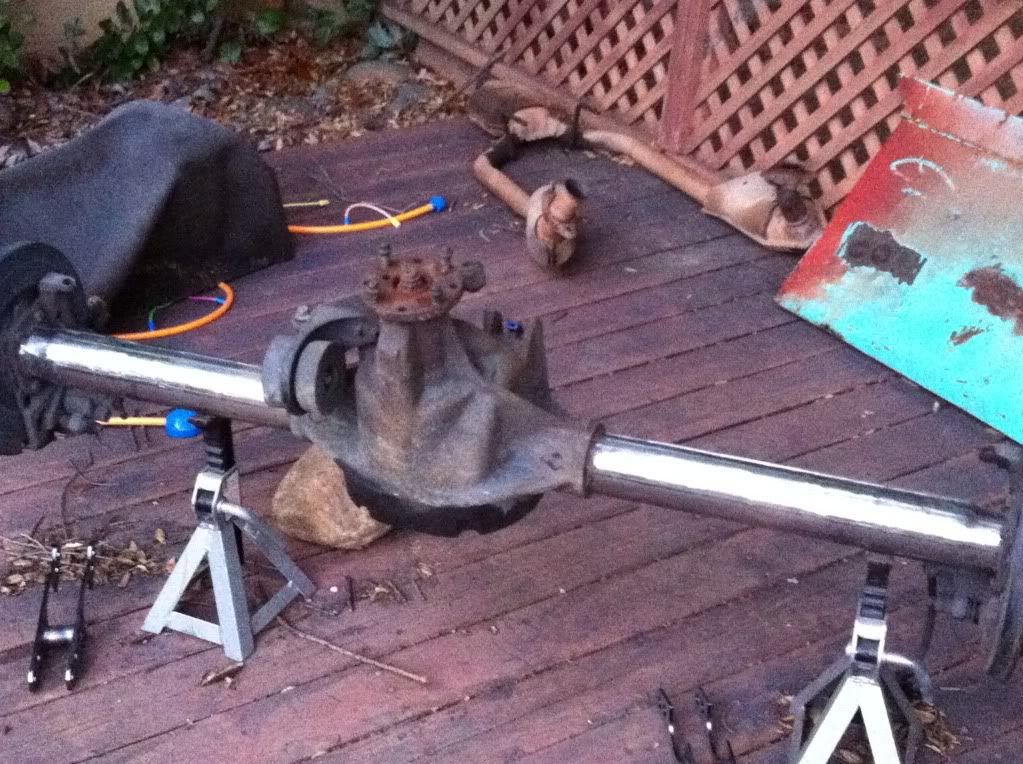
With all the rivets knocked out and old rear rolled out from underneath, assuring the frame was level I was ready for fabrication to continue.
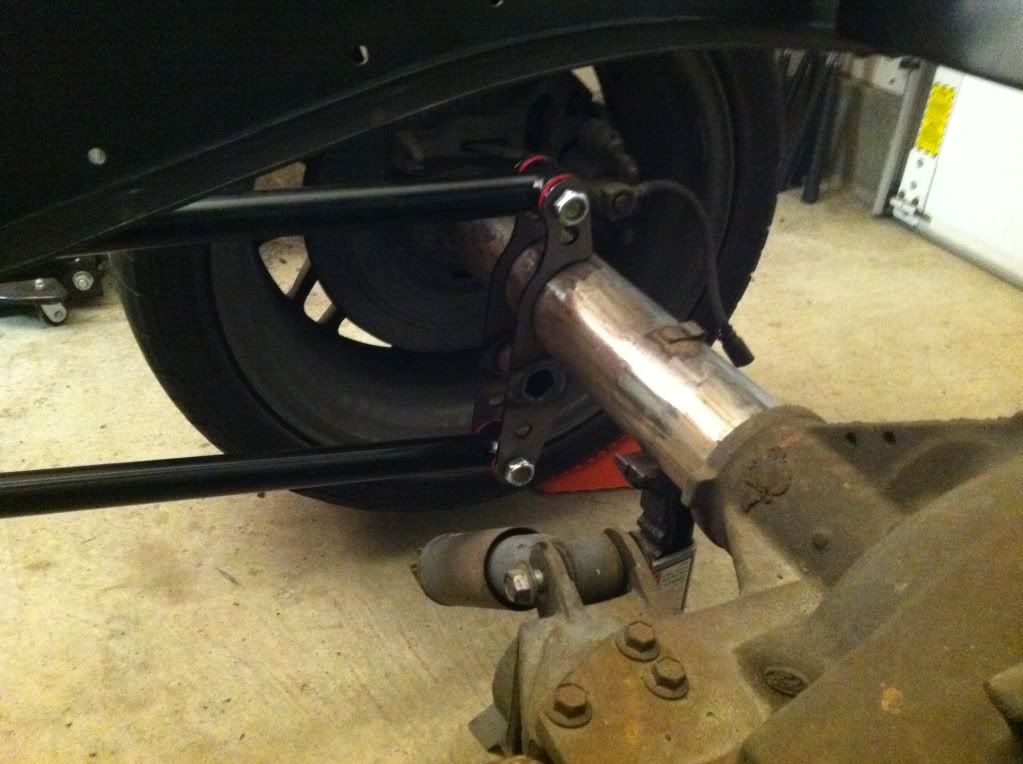
I then found my axle center line, and welded in the front fatbar brackets
Next came test fitting the rear end, I believe I set the rear 3degrees up and the motor 3 degree down. Might have been 4 but I 80% sure it was 3 up/down.
After tacking everything in, I welded it in
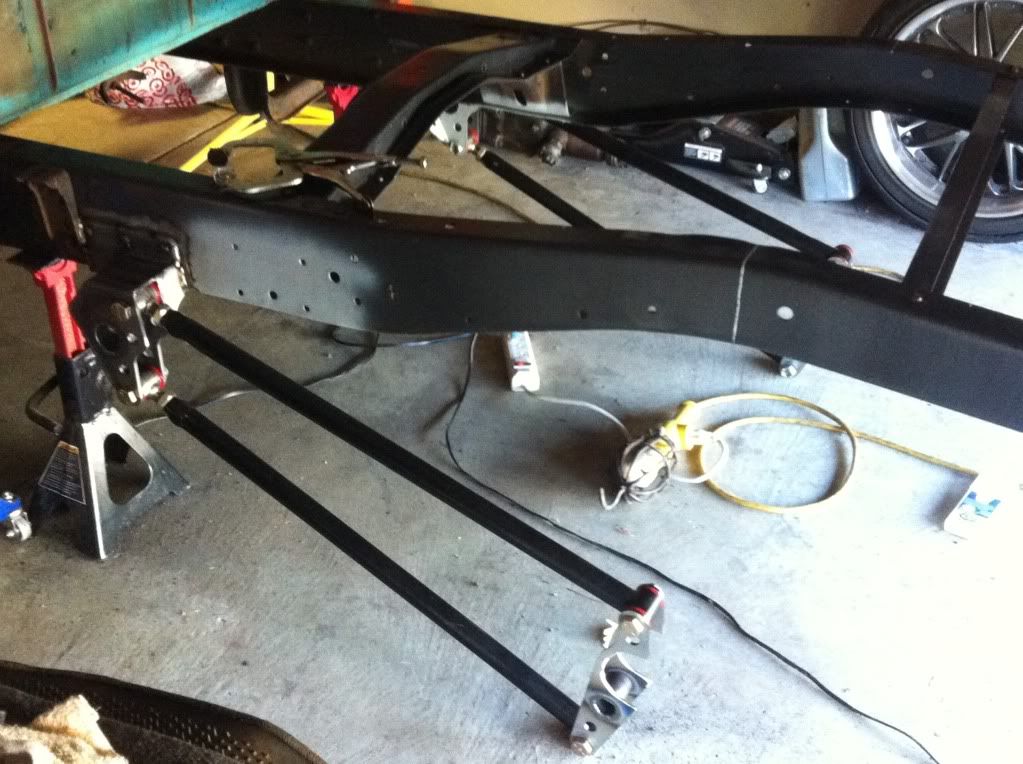
Welded in the rest of the brackets, fabbed an extension off the frame to sit the panhard level with the rear end then painted everything

With the rear complete I finally had a rolling chassis and on the ground once again, for now.
I then moved onto fabbing up some motor mounts for my 5.0. I did not take anything apart from the motor for this and I mocked up my CPP steering column to be sure that I had proper clearance all around. And once again, made sure that the chassis was level.
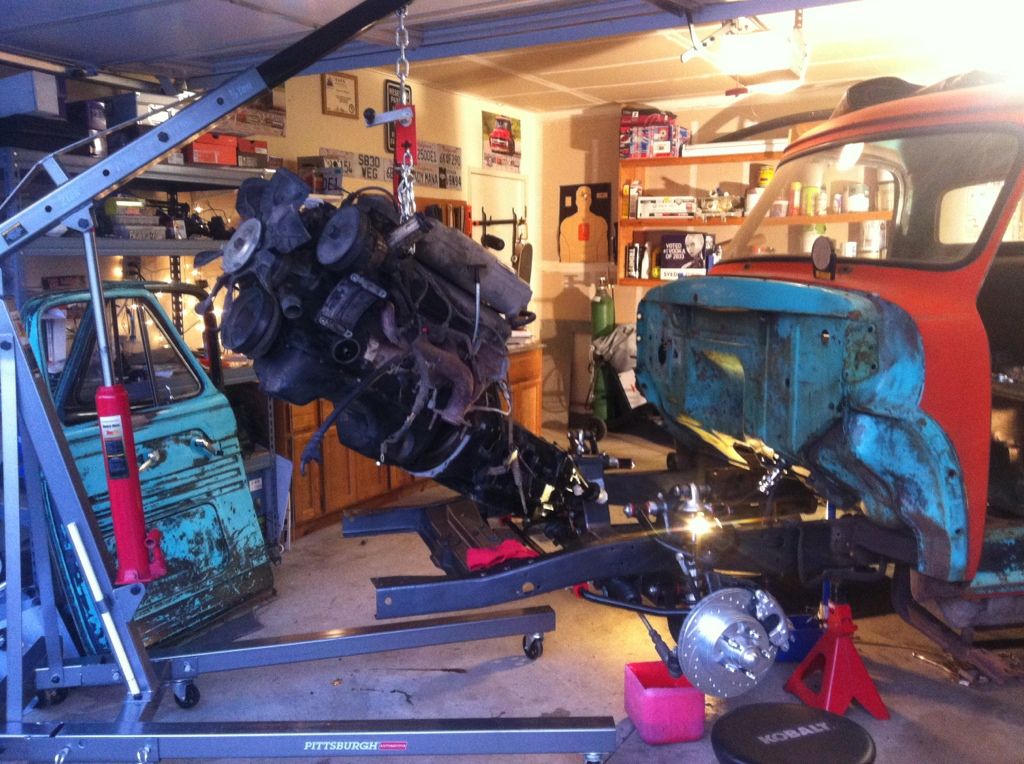
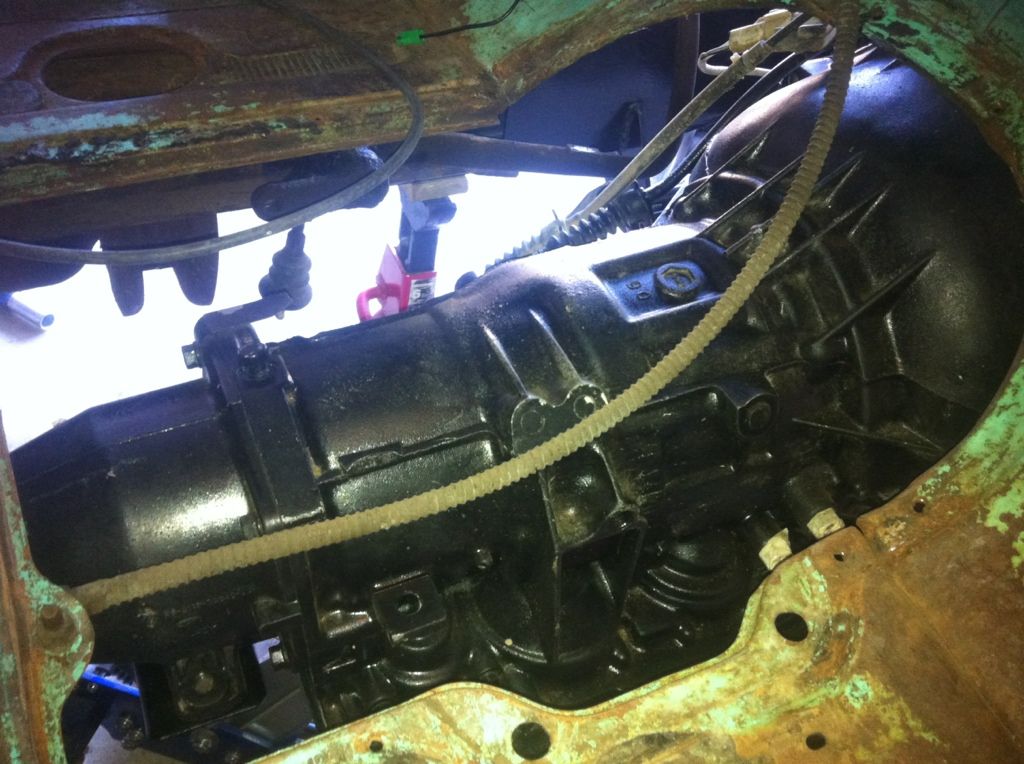
I used a No Limit trans x-member, channel locked it in place and lowered the motor as close to the IFS x-member as possible. And also made sure the tranny clears the panels.
I then lowered the motor slowly to the IFS cross member cut and grind fit my motor mounts and tacked in place.
I don't mind saying, I cut the tacks and redid everything again just for ease of mind and to make sure it was where I wanted and then welded in place. (And for those wondering… yes, one motor mount sits forward on one side of the engine then the other.) I validated by measuring distance from the front of the block to the motor mount bolt holes.

After the motor mounts where in place I drilled out the tranny cross member holes to the frame where I channel locked it. I used all polyurethane bushings for the motor mounts and the transmission mount.
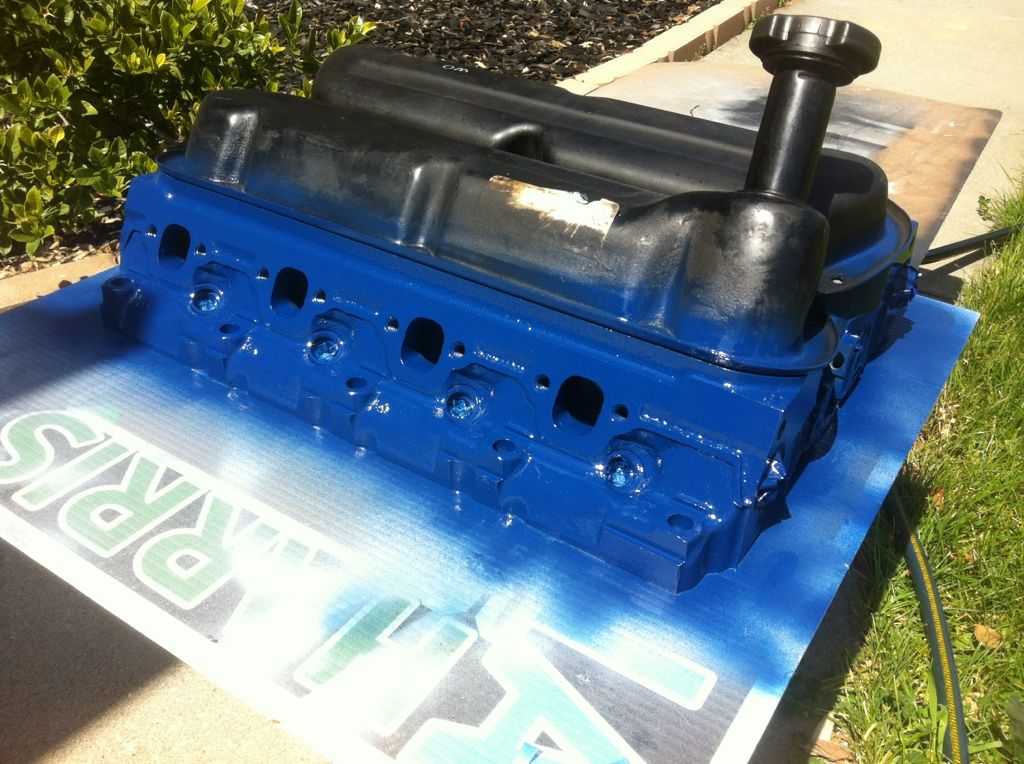
I then took the motor and transmission out, broke down the motor, cleaned and painted it.

I also did the same to the GT40 heads I purchased
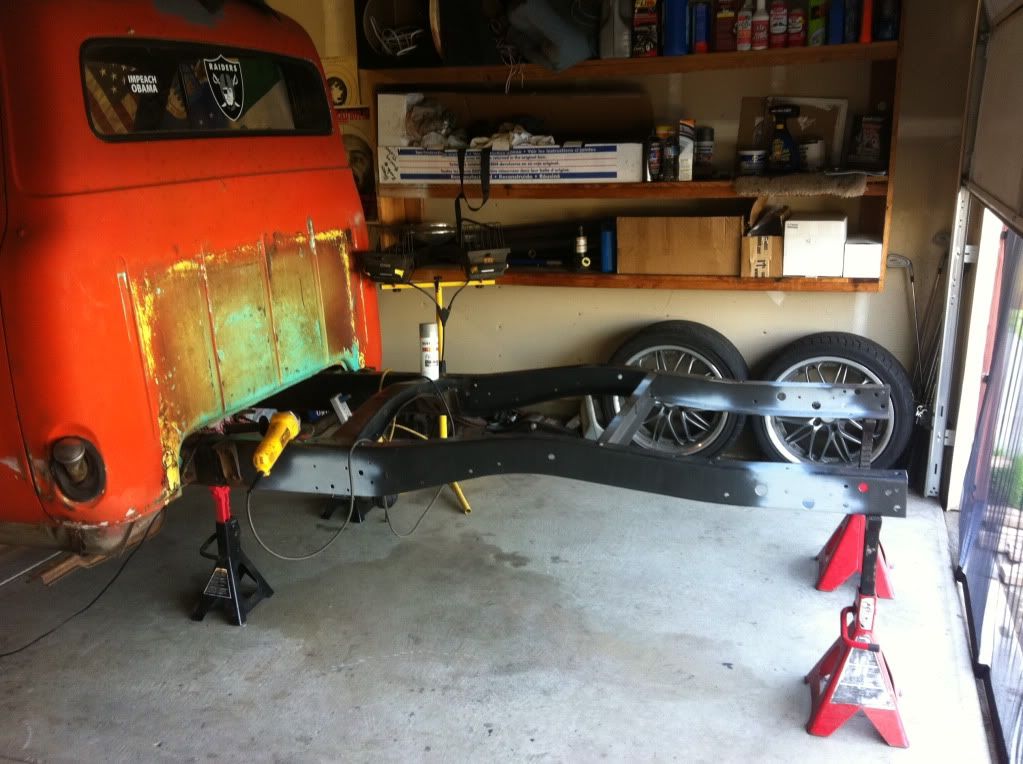
After that I moved on to the rest of the frame. Solo, I removed the cab. It took a while but creeping slowly with the jack and jack stands it was successfull, and semi-safe. Lol
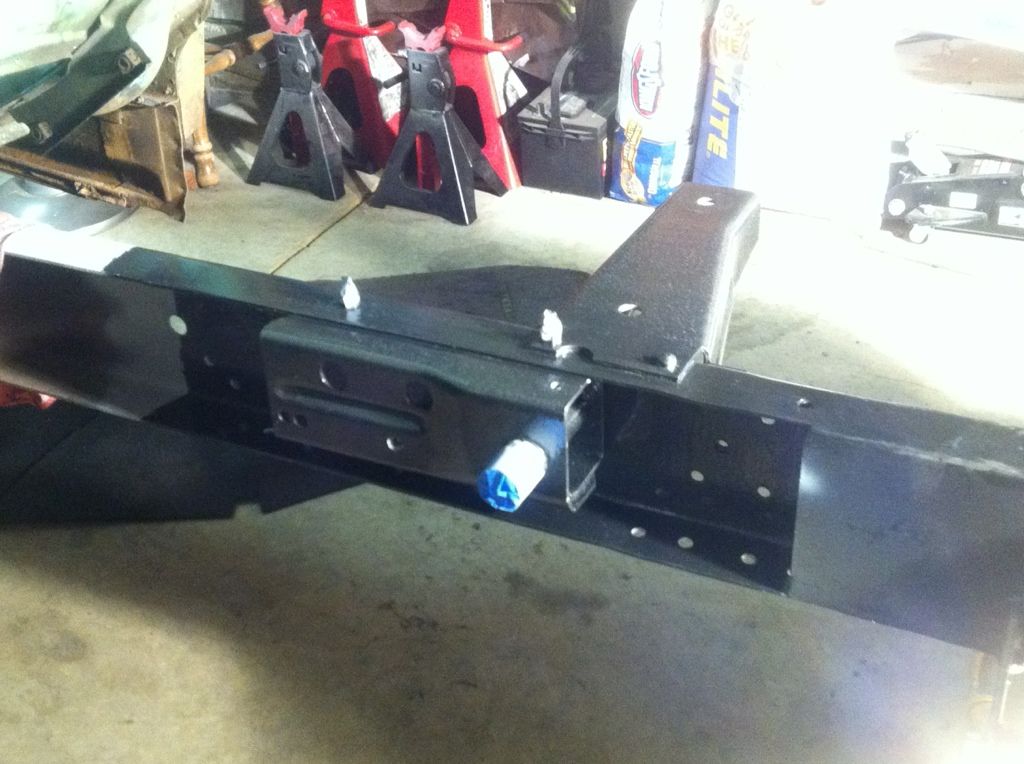
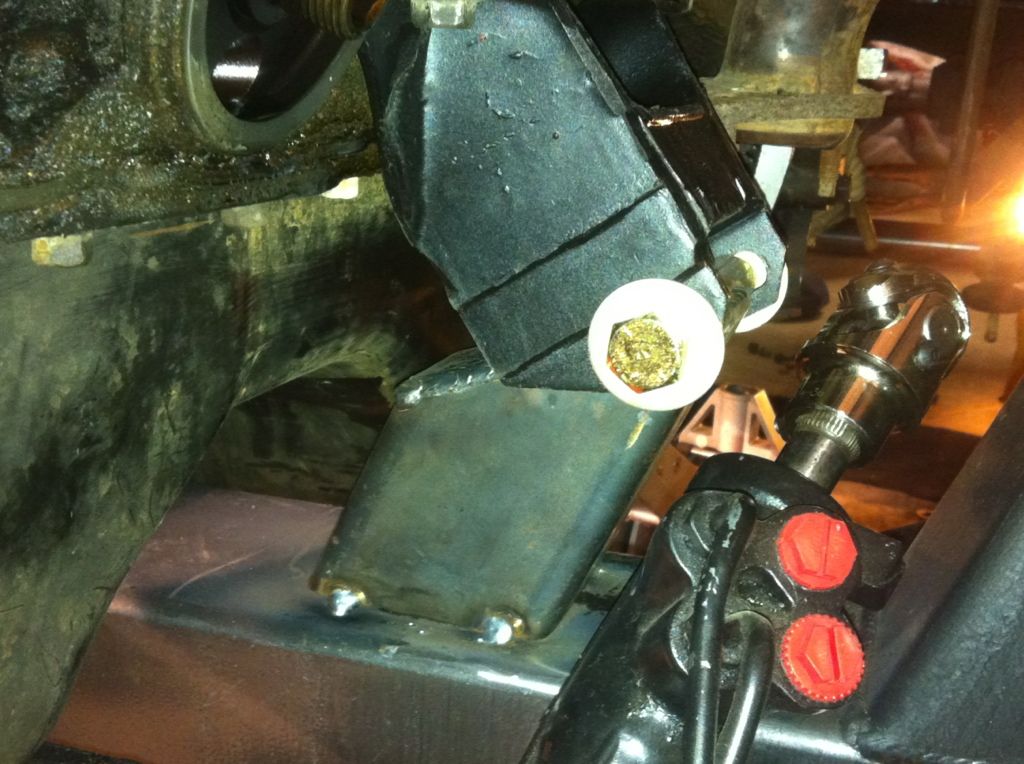
I then installed the No Limit brake kit, had to modify the support bracket to frame arm and remove/shorten the brake pedal as the instructions state.
<img

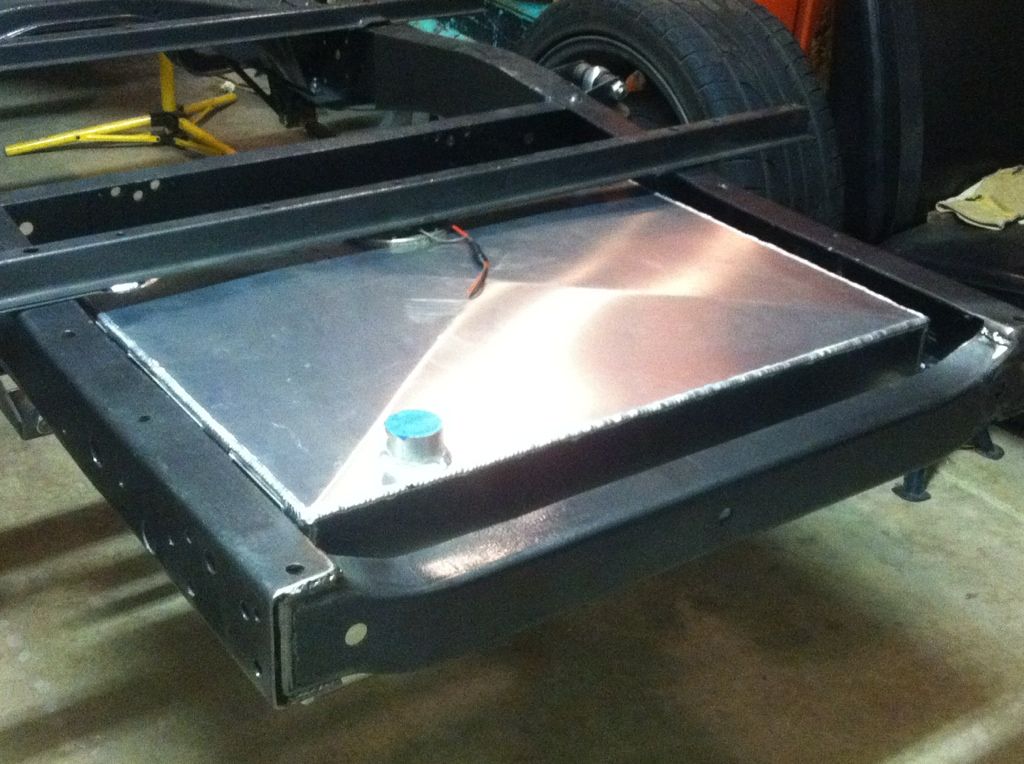
Next I proceeded to the rear x-member to fit my No Limit gas tank and installed it.
I have more work to post but for now this was all I had time for.
I want to say thanks to this site and many others that have helped me along the way. This is my first build, my skill is far from professional. Although I am not unfamiliar with tools as I spent 5 years working on Jet Engines in the USAF.Truck is still far from done but have enough components complete where I am starting to see a possible speckle of light at then of the tunnel.
1955 F100
No Limit Fatbar 4-link rear, with coil overs
-97 Explorer 8.8” rear with disc brakes and 5x4.5” pattern (pick n pull)
No Limit Wide ride IFS
-standard spindles (2<sup>nd</sup> camaro spindle)
-coil overs
- late model t-bird rack and pinion
- 12” slotted drilled rotors with 5X4.5 pattern
No Limit 21 gallon aluminum rear fuel tank with in tank mounted pump
CPP 30” column shift, tilt steering
-non key with GM 4.25” wiring connector
Classic Car and Truck Brake, Steering and Suspension Parts
CPP joints and shaft
Disc Brake, Steering and Suspension Products for classic Chevy and Ford cars and trucks
No Limit bolt on brake kit with remote MC
CPP Adjustable proportioning valve
Classic Car and Truck Brake, Steering and Suspension Parts
5.0 HO From a 93 Thunderbird
-Stock bottom end
-Edelbrock Performer RPM Upper/Lower intake
-GT40 Heads
-TrickFlow Stage 1 Cam
-FelPro Valve Stem Seals
-Stronger Trickflow Valve Springs
-High Volume Oil Pump
-Billet Timing Set set at dead nuts
-ARP Head Bolts with bushings
-1” Lower/Upper intake Spacer
Truck when I first brought it home

I started with the front, the whole front clip came off together fairly easy with a lot of PB soaking and some bolt snapping

I got the front frame rails down to bare metal, had to remove the PO tranny crossmember for the chevy motor he had in it. I also spent plenty of time measuring before placing the new No Limit Cross Member and making sure my frame was level.

I then cut my boxing plates to fit and tacked everything together. Looking back I would have rounded in my boxing plates but it is all good.


Blended in my welds for the x-member and boxing plates

Then painted everything with Rust-O-Leum Black Hammered paint with brush

Then came the rest of the No Limit kit for the front

I then moved on to the No Limit Fatbar rear and rear end from a 97 explorer. Had to cut off all the old brackets

With all the rivets knocked out and old rear rolled out from underneath, assuring the frame was level I was ready for fabrication to continue.

I then found my axle center line, and welded in the front fatbar brackets

Next came test fitting the rear end, I believe I set the rear 3degrees up and the motor 3 degree down. Might have been 4 but I 80% sure it was 3 up/down.

After tacking everything in, I welded it in

Welded in the rest of the brackets, fabbed an extension off the frame to sit the panhard level with the rear end then painted everything

With the rear complete I finally had a rolling chassis and on the ground once again, for now.
I then moved onto fabbing up some motor mounts for my 5.0. I did not take anything apart from the motor for this and I mocked up my CPP steering column to be sure that I had proper clearance all around. And once again, made sure that the chassis was level.

I used a No Limit trans x-member, channel locked it in place and lowered the motor as close to the IFS x-member as possible. And also made sure the tranny clears the panels.

I then lowered the motor slowly to the IFS cross member cut and grind fit my motor mounts and tacked in place.

I don't mind saying, I cut the tacks and redid everything again just for ease of mind and to make sure it was where I wanted and then welded in place. (And for those wondering… yes, one motor mount sits forward on one side of the engine then the other.) I validated by measuring distance from the front of the block to the motor mount bolt holes.

After the motor mounts where in place I drilled out the tranny cross member holes to the frame where I channel locked it. I used all polyurethane bushings for the motor mounts and the transmission mount.
I then took the motor and transmission out, broke down the motor, cleaned and painted it.

I also did the same to the GT40 heads I purchased

After that I moved on to the rest of the frame. Solo, I removed the cab. It took a while but creeping slowly with the jack and jack stands it was successfull, and semi-safe. Lol

I then installed the No Limit brake kit, had to modify the support bracket to frame arm and remove/shorten the brake pedal as the instructions state.
<img

Next I proceeded to the rear x-member to fit my No Limit gas tank and installed it.


Last edited by SVT-F100; 03-29-2018 at 01:18 AM. Reason: Removed broke link
#2
02-21-2014, 01:33 AM


#5
02-21-2014, 07:32 AM
Tuned
#7
02-21-2014, 11:49 AM
Senior User
Join Date: Apr 2010
Location: Rio Rancho , New Mexico
Posts: 362
Likes: 0
Received 0 Likes
on
0 Posts
Trending Topics
#8
02-21-2014, 01:57 PM

#9
02-21-2014, 10:17 PM

Fantastic job,I wish I had those skills and talent. You're saving yourself a boatload of money,as I know first hand. I just had a shop re-do my front end and they charged me almost 4x over what they estimated,my bad was not getting the estimate in writing. So I was stuck once they cut out the old Volare the PO chopped up in there. Keep up the great work,L8R ZFLASH
#10
02-22-2014, 10:52 AM
Posting Guru
Join Date: Apr 2013
Location: Rimrock AZ
Posts: 1,170
Likes: 0
Received 0 Likes
on
0 Posts
#13
02-23-2014, 02:39 AM
Rim Rock and Topmoo, thank you. Even though still far I wonder what I will do next when this is done... lol
ZFlash, sorry to hear about your bad experience. It is unfortunate that people out there do business like that but common even though not the best practice.
To get my wife to sign off on the project I told here I would save a lot of money doing much of the work myself. But I will be honest... What you see above and what I have left to post has taking me 3 years to do. The majority of my time has not been in the work but the research and learning how to embark on each stage I have tackled.
jbon,
When I was researching the front ends it came down to TCI, CPP and NoLimit.
I wanted to buy the biggest package, with the most parts at one time from one vendor.
And during that time No Limit had a badass F100 (Silver Bullet) killing it at all the GoodGuys road races across the US. With that in mind they had/have a chassis package that covered brakes, front end, fat bar four link etc...
And last because this was my first big build I wanted to be sure I had confidence in my vendor. I visited CPP in person and they were cool but too busy for me. Felt rushed when I was there. When I went to No Limits shop the owner (Rob) came out, took the time to talk with me and explain to me areas that I need to pay extra attention to. It sealed the deal with my confidence. Yeah, there instructions are not known for being the best etc. but over the last three years they have answered my questions and I still contact them today when needed.
#14
02-23-2014, 02:58 AM
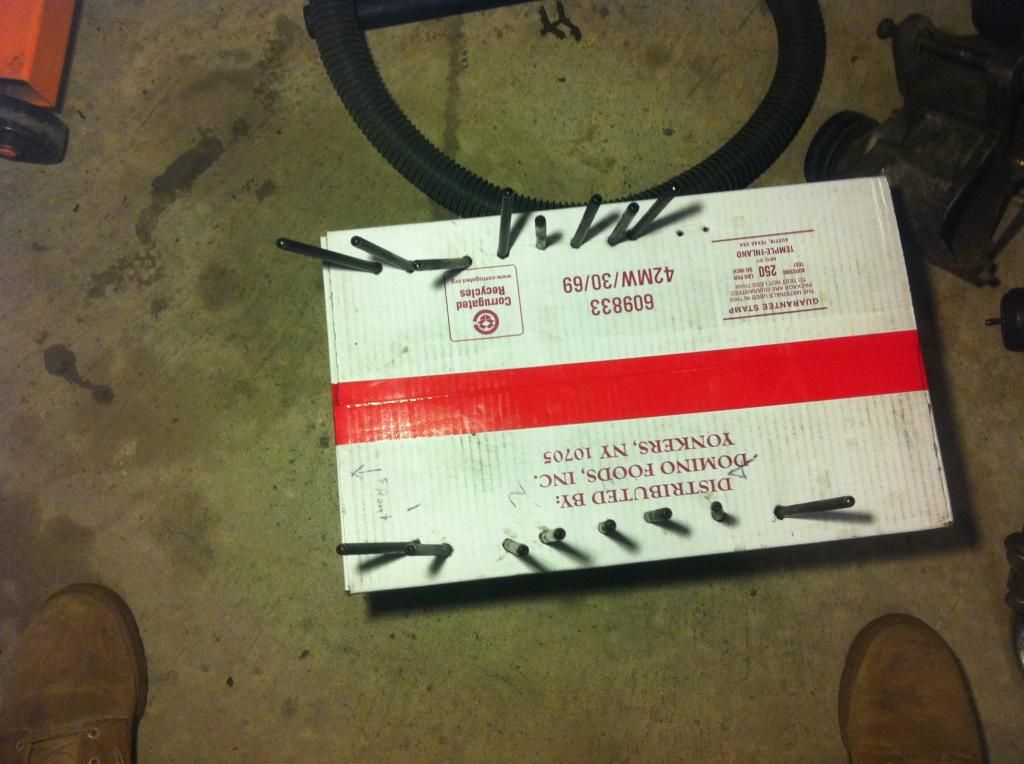
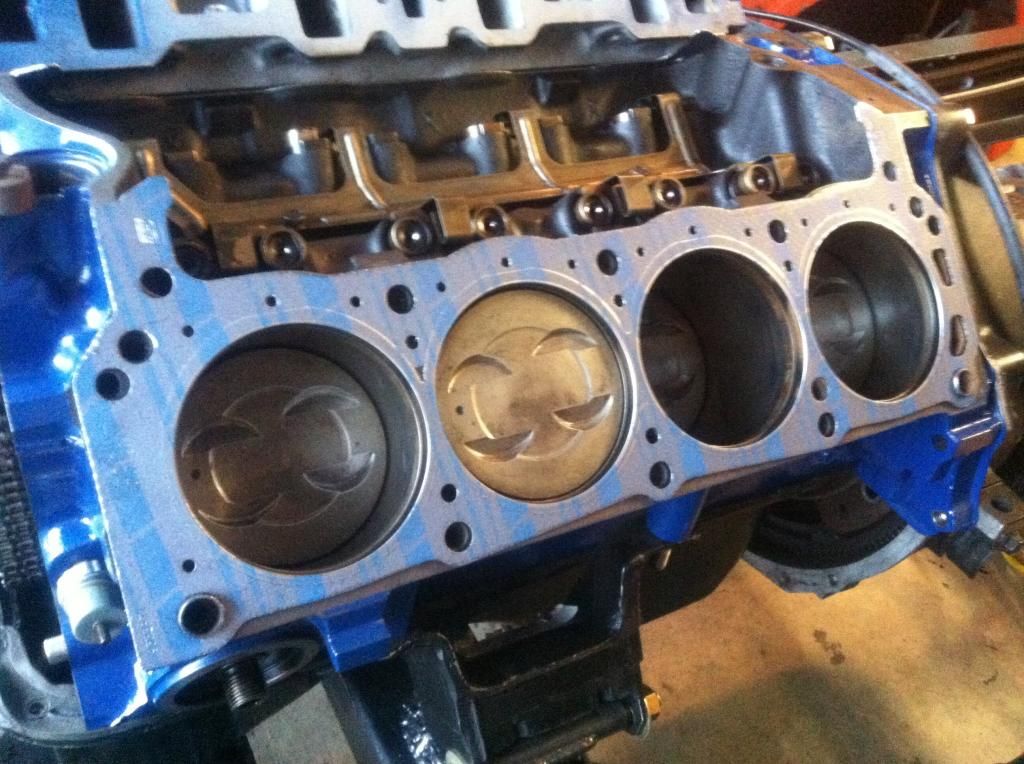
After cleaning and painting my motor I changed the cam to a TFS1 and installed a new timing set at dead nuts (0 degrees).

I reused my push rods and kept them in the same positions as I read that they wear and should be kept in the same position if reused.
I used felpro head gaskets from Napa. These specifically stated to use no sealent.
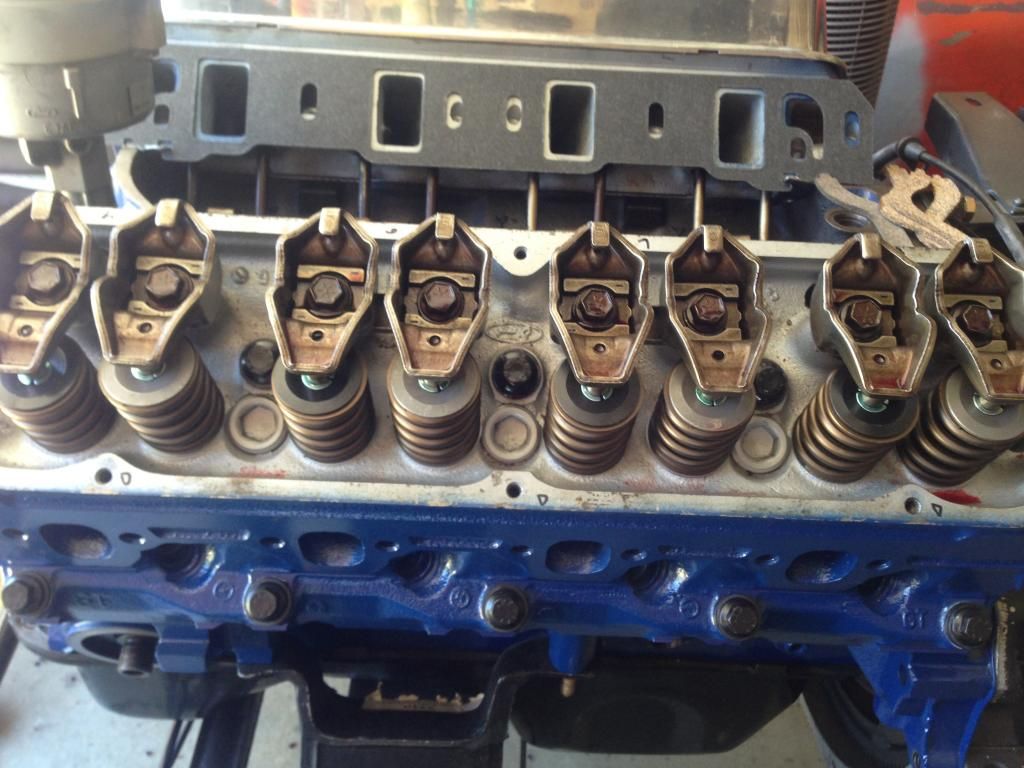
Here are the new valve springs, new locks and new valve seals that you can't see as they are inside the springs. I opted to go with the metal valve seals with the springs.

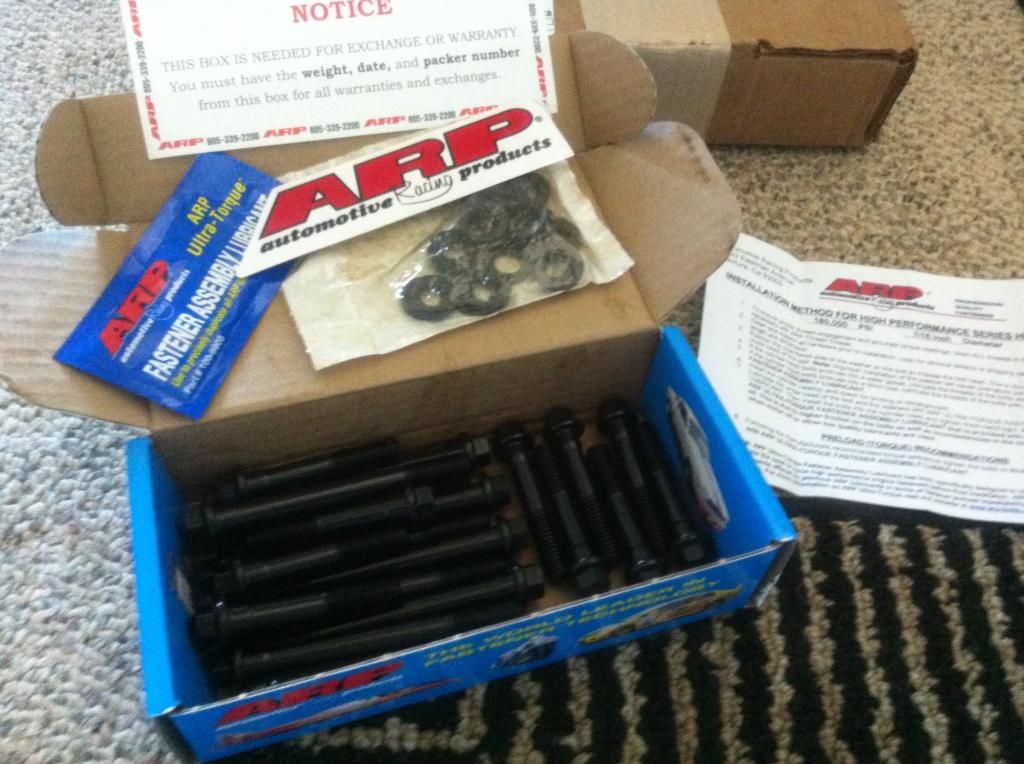
I used ARP bolts on the GT40 heads with lube provided. I also used opted to use the spacer bushings. (In my research to use or not use the bushings, I read that the bushings are not necessary but for the price I seen it as cheap insurance and bought them).
Next I will post pictures of my March performance style track front runner. Peace out...

I reused my push rods and kept them in the same positions as I read that they wear and should be kept in the same position if reused.

I used felpro head gaskets from Napa. These specifically stated to use no sealent.

Here are the new valve springs, new locks and new valve seals that you can't see as they are inside the springs. I opted to go with the metal valve seals with the springs.

I used ARP bolts on the GT40 heads with lube provided. I also used opted to use the spacer bushings. (In my research to use or not use the bushings, I read that the bushings are not necessary but for the price I seen it as cheap insurance and bought them).


Next I will post pictures of my March performance style track front runner. Peace out...
#15
02-23-2014, 05:57 AM
Senior User
Join Date: Sep 2013
Location: Florida
Posts: 477
Likes: 0
Received 0 Likes
on
0 Posts
