55 F100/5.0 EFI build
#61
 03-28-2014, 03:33 PM

Senior User
Join Date: Sep 2013
Location: Florida
Posts: 477
Likes: 0
Received 0 Likes
on
0 Posts
WOW !!!
Man.... that is early Christmas  I really like the look of the Radiator with your engine it really blends nicely
  That's good that you were able to go to NAPA and take care of those two hard lines into your radiator, looks like it installed perfectly...... Cool !!! great documentation, one day you can look back on the build and smile a little... Good times
I really like the look of the Radiator with your engine it really blends nicely That's good that you were able to go to NAPA and take care of those two hard lines into your radiator, looks like it installed perfectly...... Cool !!! great documentation, one day you can look back on the build and smile a little... Good times
#62
03-29-2014, 03:30 PM
Fleet Mechanic
Join Date: Dec 2012
Location: Scottsdale, AZ
Posts: 1,257
Likes: 0
Received 0 Likes
on
0 Posts
#63
03-30-2014, 11:14 PM


Doug of montana dont be discourages big dog. Even though I am spitting out posts and pix left and right these are all from over 3.52 years of build that I am only getting to post now. I am more far along then what the build is but want to keep it chronological... I am almost catching up to where I actually am. As far as the radiator I feel yeah. I was quoted that price and was like WOW!!!. I ended up getting that champion raditator and the chrome overflow for like 290 or 300. It was a great deal at the good guys car show I attended. Just take your time and look for the best priced options my friend.
Thanks BJMayberry, I got some pix coming as tonight after this.
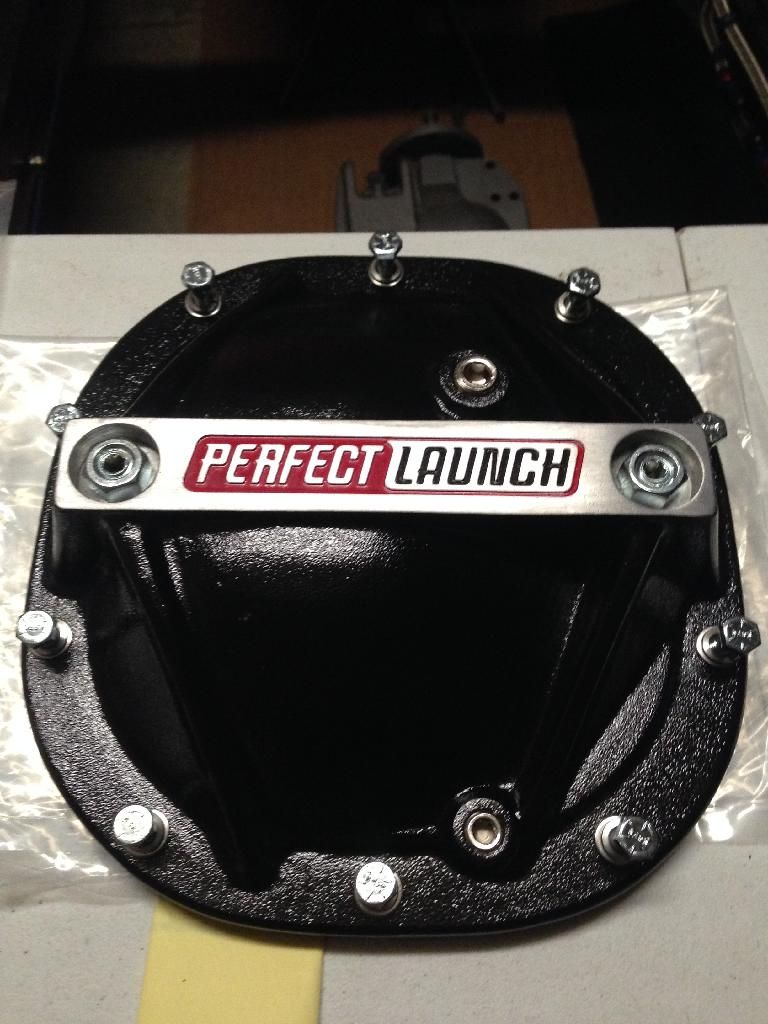
Jrock I will post a picture of it outside of the package it is an 8.8" rear diff cover. Pretty sweet.
Thanks BJMayberry, I got some pix coming as tonight after this.
Jrock I will post a picture of it outside of the package it is an 8.8" rear diff cover. Pretty sweet.
#64
03-30-2014, 11:16 PM
Jrock here is that rear diff cover it is sweet looking and inside has the two things that are supposed to help with something for the bearings. Will find out more once I install.
And here are the pictures of the inner fenders all cut out now.
Next is to hammer paint them and move the build on down the line.

And here are the pictures of the inner fenders all cut out now.


Next is to hammer paint them and move the build on down the line.
#65
03-30-2014, 11:23 PM


#66
03-30-2014, 11:41 PM
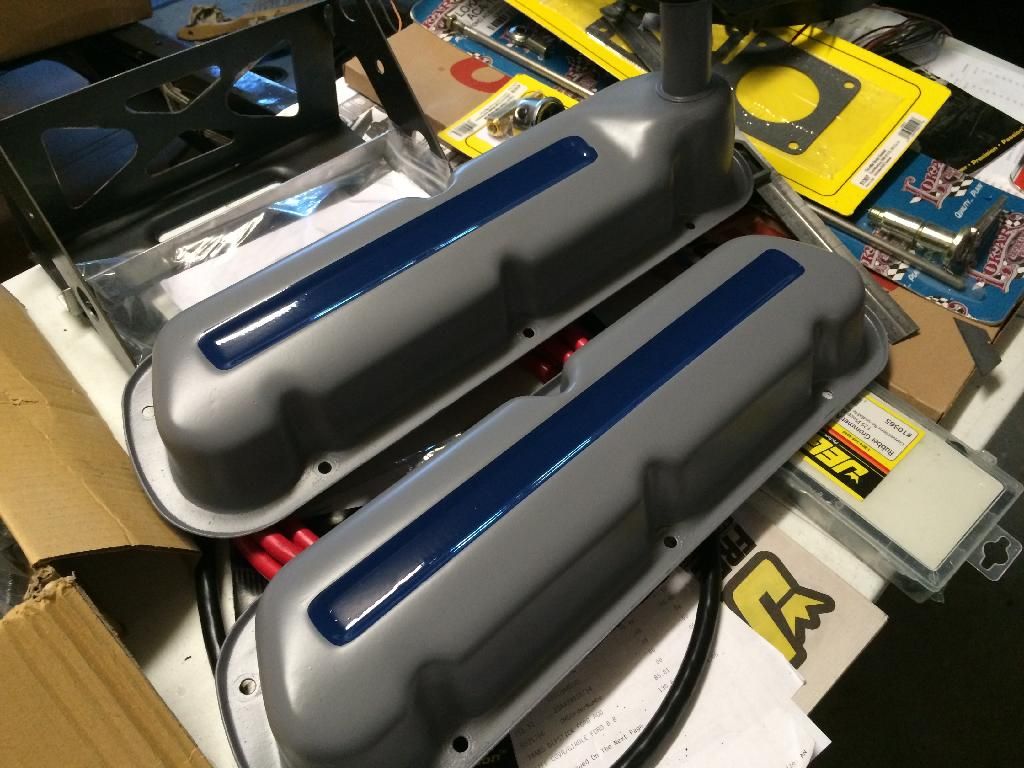
Here is some sad news... The awesome valve covers I bought for my motor that can be seen in previous pictures are bad ***. I actually had to buy the largest phenolic spacer for my performer intake to fit them. It worked and all was gravy until...
Well, I intend on running a heater and AC at some point in time, so I went to install the heater tubes on my motor to knowck it out now while I can and low and behold they would not fit with the the aftermarket edelborck valve covers.
So my options were to cut the tube supports fab up and reweld or bite the bullet and revert to the OEM covers...
I ended up biting the bullet, I just want to get the cabron started...
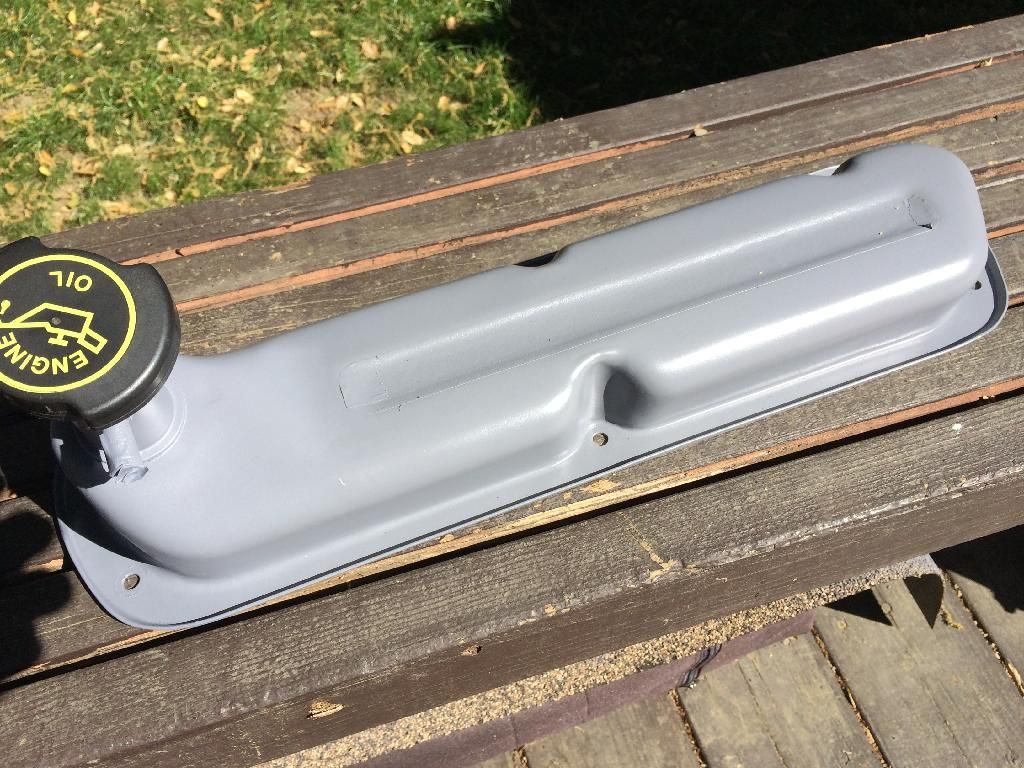
Since the OEM covers had a stamped indent I used that to give the a little flavor. I cleaned then with a Brillo pad then thinner and then painted the indent with the same paint as my motor (old school Ford blue) and then once dried a couple days later I taped off and painted the rest with a VHT brand paint of matte grey. They are not as shiny as the previous ones but not bad. Later picture will show how they look on the motor.
Well, I intend on running a heater and AC at some point in time, so I went to install the heater tubes on my motor to knowck it out now while I can and low and behold they would not fit with the the aftermarket edelborck valve covers.
So my options were to cut the tube supports fab up and reweld or bite the bullet and revert to the OEM covers...
I ended up biting the bullet, I just want to get the cabron started...
Since the OEM covers had a stamped indent I used that to give the a little flavor. I cleaned then with a Brillo pad then thinner and then painted the indent with the same paint as my motor (old school Ford blue) and then once dried a couple days later I taped off and painted the rest with a VHT brand paint of matte grey. They are not as shiny as the previous ones but not bad. Later picture will show how they look on the motor.


#67
03-30-2014, 11:54 PM
Senior User
Join Date: Sep 2013
Location: Florida
Posts: 477
Likes: 0
Received 0 Likes
on
0 Posts
 Very Cool Man
  and I Love the differential cover "BADA%&" ........
#68
03-30-2014, 11:56 PM
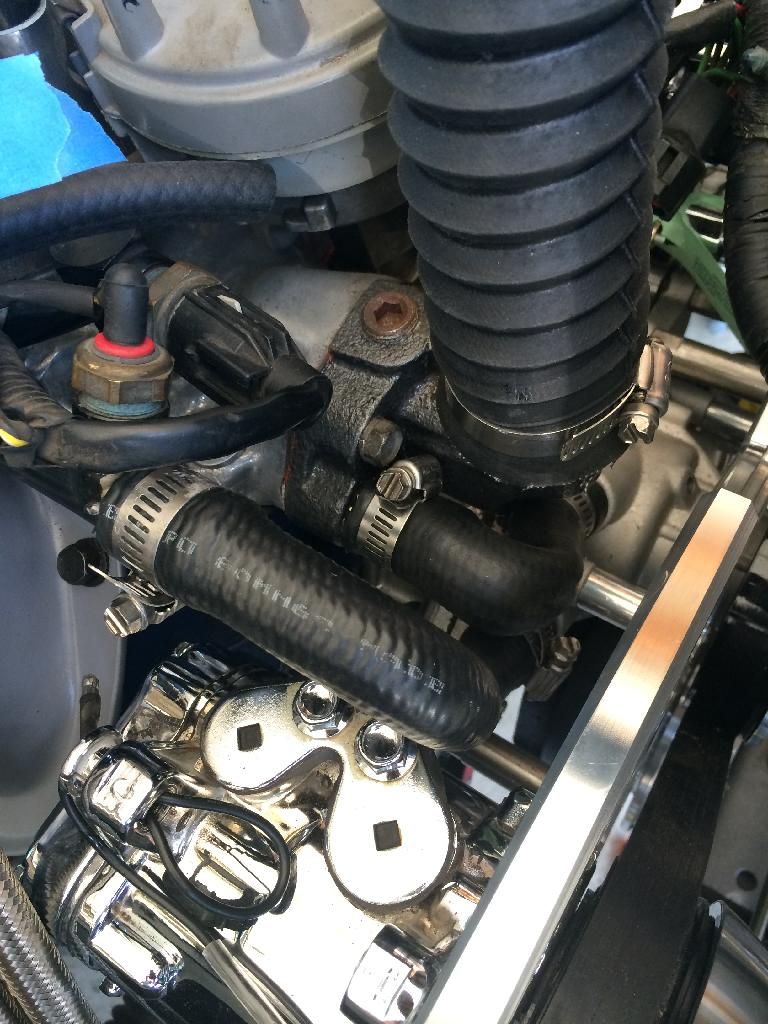
Next on the to do list was getting some hoses for the water pump to intake and then recirculating to bypass no heater yet.
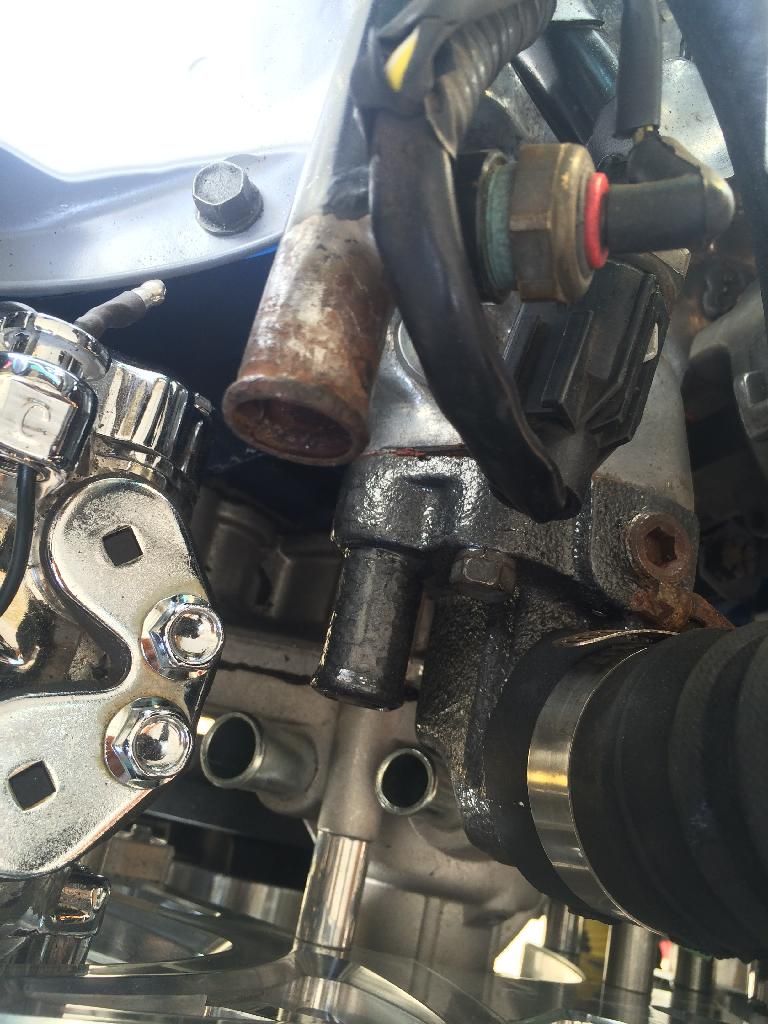

A quick trip to local napa auto parts I was able to get three hoses that all worked. I had to trim and modify but they worked out clean. I secured them with some hose clamps from the local Ace hardware.


A quick trip to local napa auto parts I was able to get three hoses that all worked. I had to trim and modify but they worked out clean. I secured them with some hose clamps from the local Ace hardware.


#69
03-31-2014, 02:29 AM
My next challenge was that the t-bird throttle body did not fit the Edlebrock performer intake that I had. I could have reverted back to the OEM but with my GT40 heads and my TF stage 1 cam I would have restricted a lot of my power. I learned that I can make this set up work by using the 94-95 mustang throttle body adapter and purchased one from Jegs.
I removed all the studs that were on the intake and installed three of the ones that were supplied with the kit. Only only one of the holes on the throttle body adapter had threads. So I decided to drill out the threads on the intake and use a bolt from through the intake to the adapter.
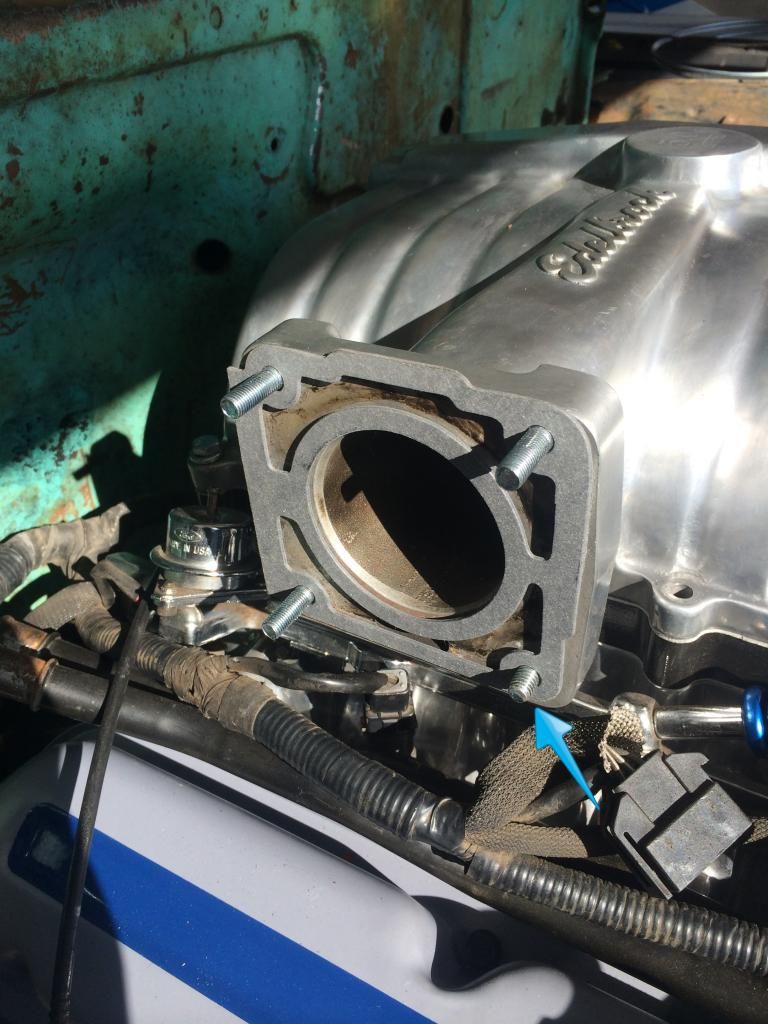
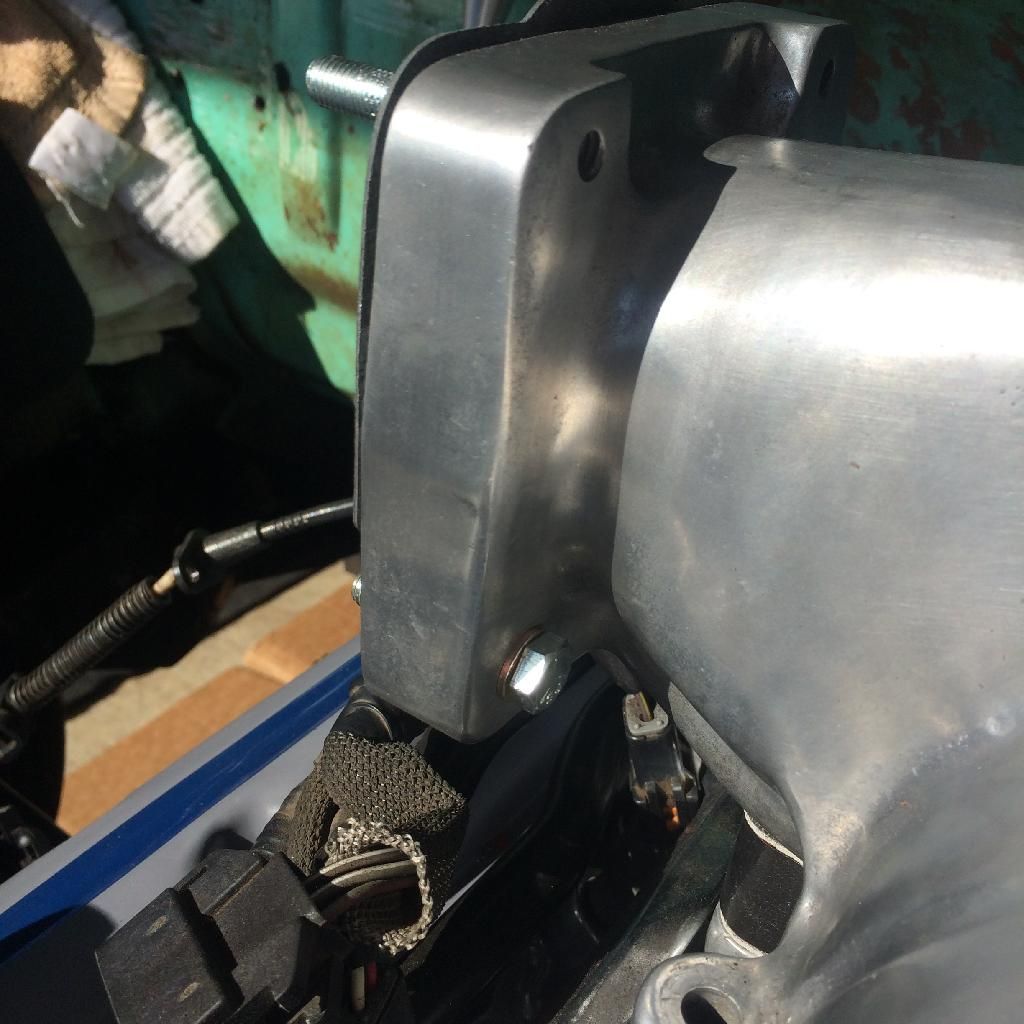
I removed all the studs that were on the intake and installed three of the ones that were supplied with the kit. Only only one of the holes on the throttle body adapter had threads. So I decided to drill out the threads on the intake and use a bolt from through the intake to the adapter.


#70
03-31-2014, 02:43 AM
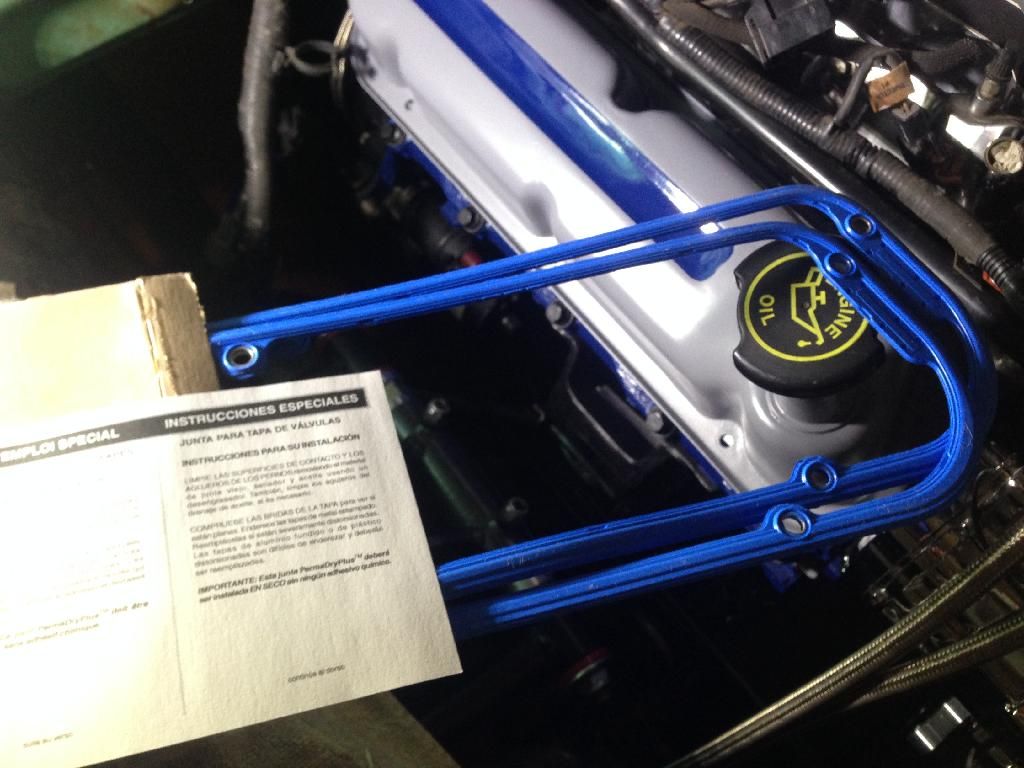
Forgot to post earlier but I used the felpro gaskets below to install my valve covers.
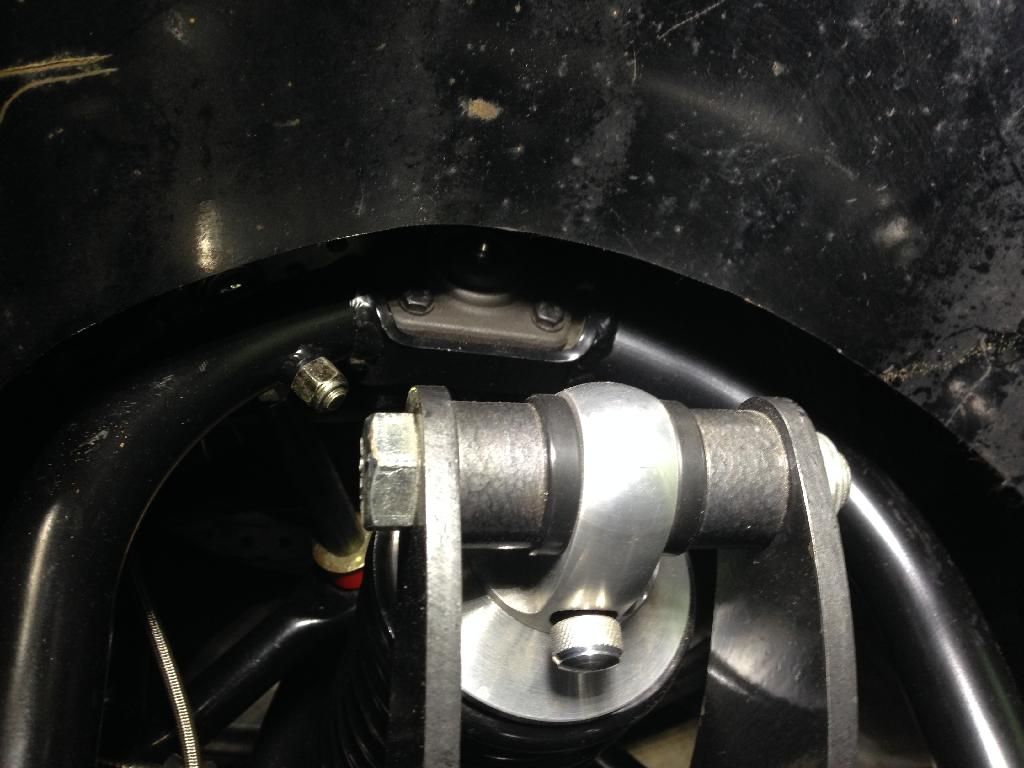
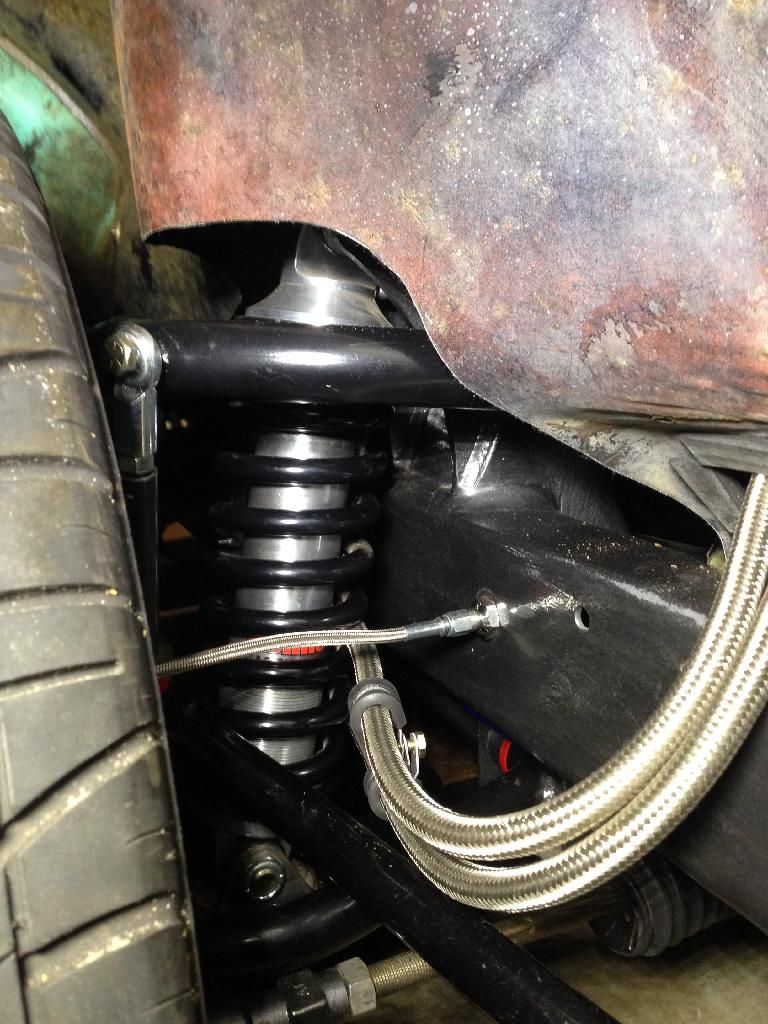
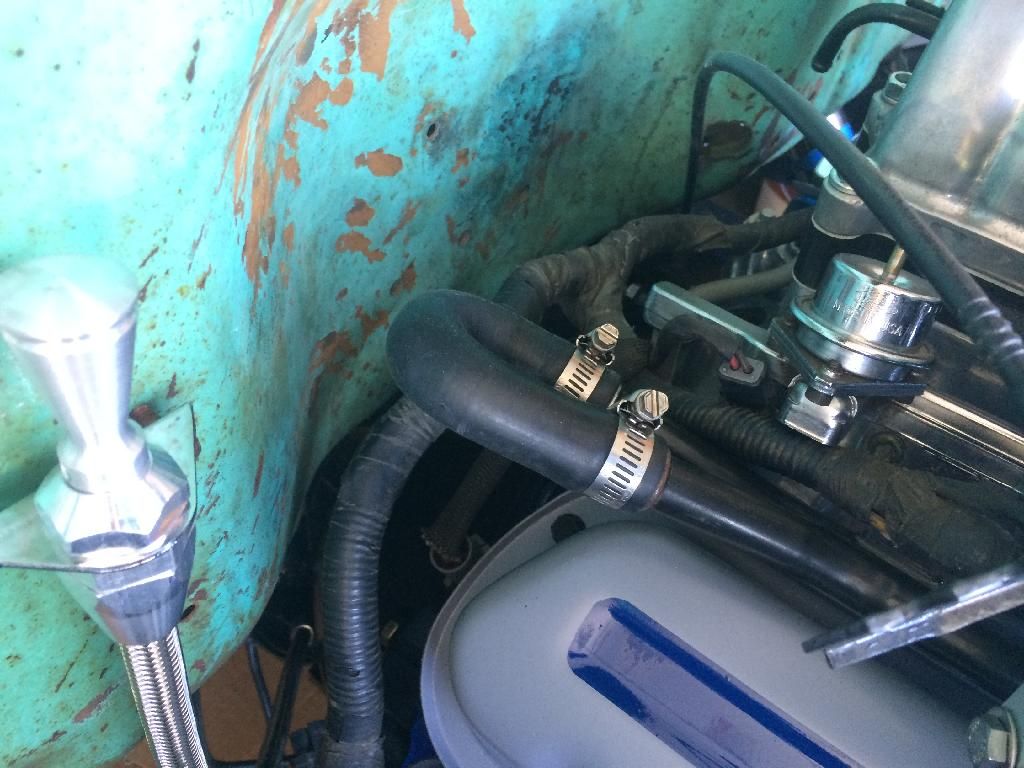
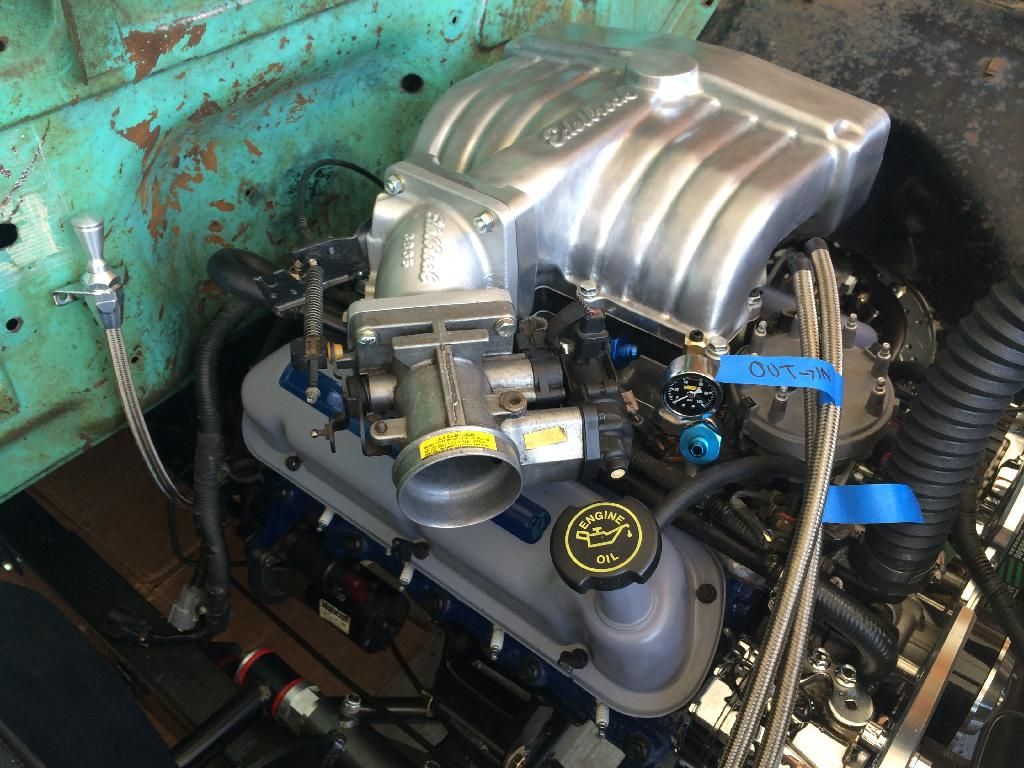
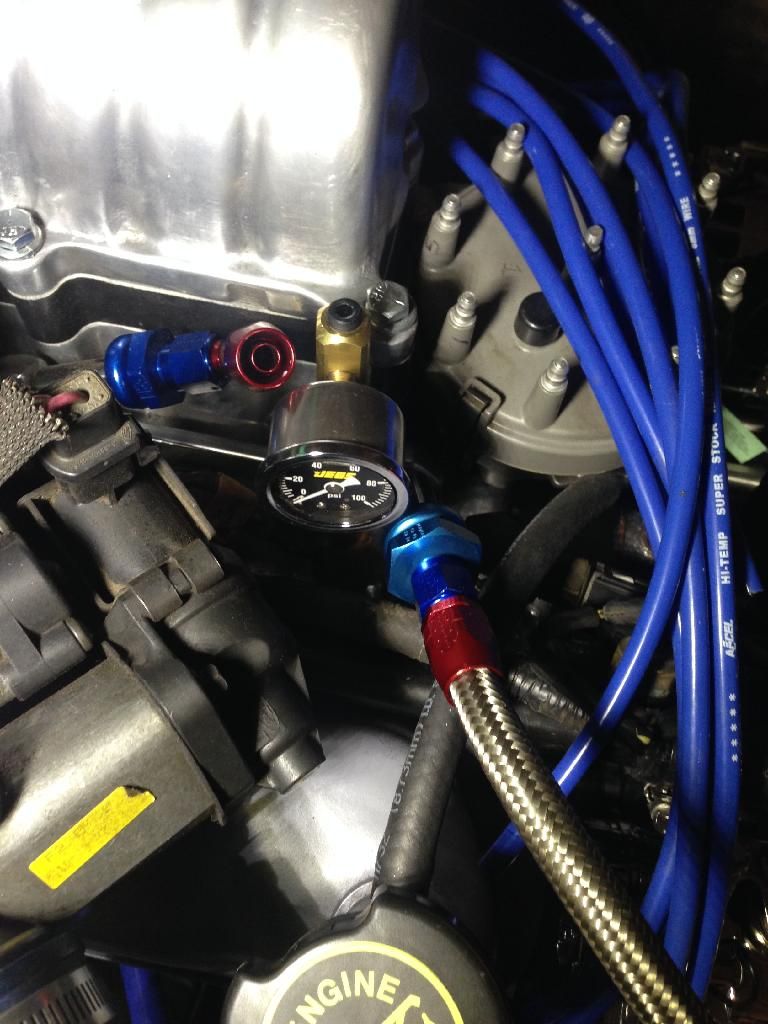
With the intake, valve covers, throttle body adapter and throttle body in place next was cutting and connecting the AN fittings. I used a straight 6AN for the fuel pressure in line and a 60 degree angle 6an fuel line for the return. This was to make sure that the fuel line does not hit the fuel pressure indicator. At this point it is only mocked up.
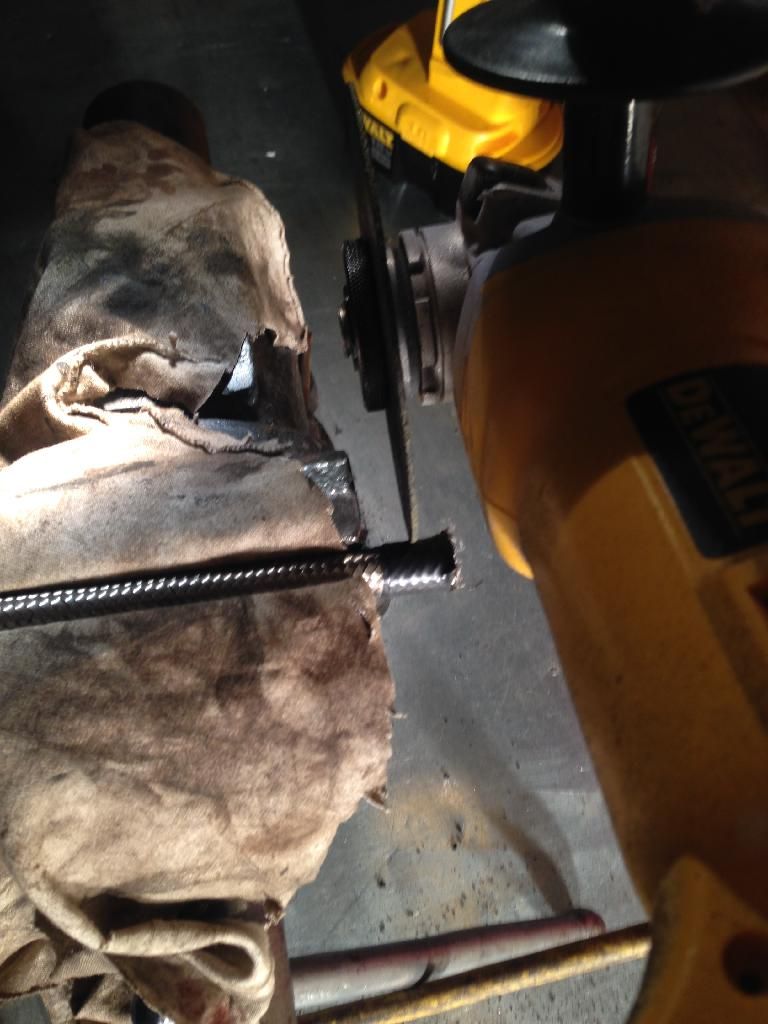
Once I figured out the length I used electrical tape and cut the end with a cut of wheel and then cleaned out the inside.
I then used a flathead to assure all the wires were in the fitting and pushed on the half side of the AN fitting.
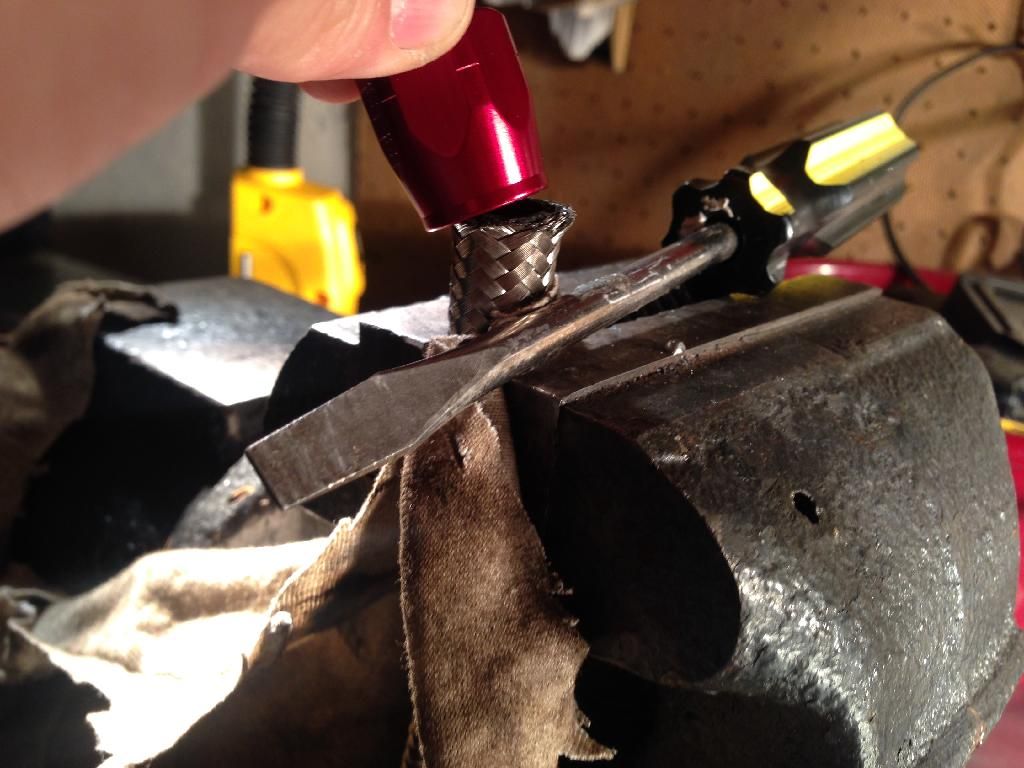
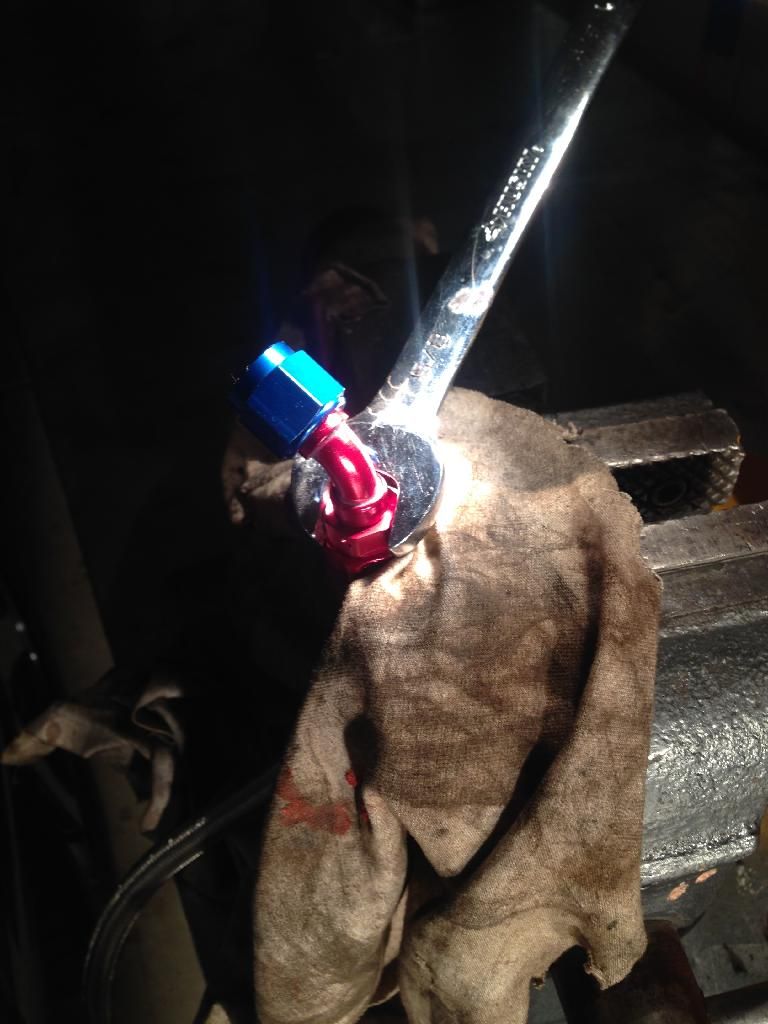
Next I used a mallet to get the half to the right position
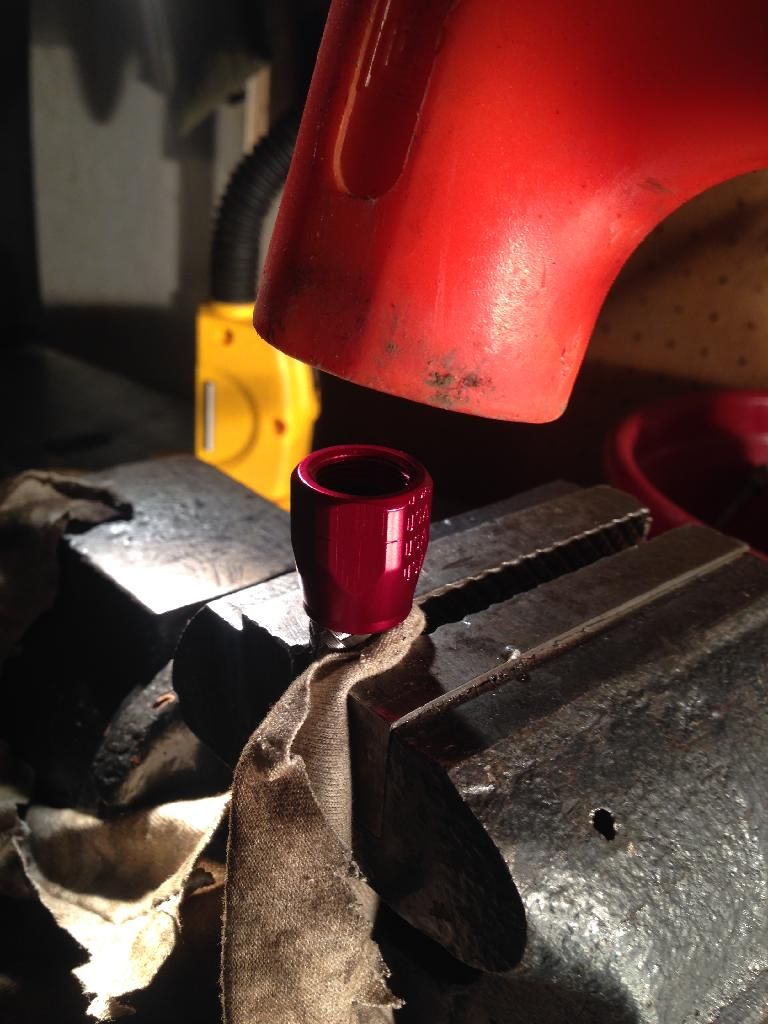
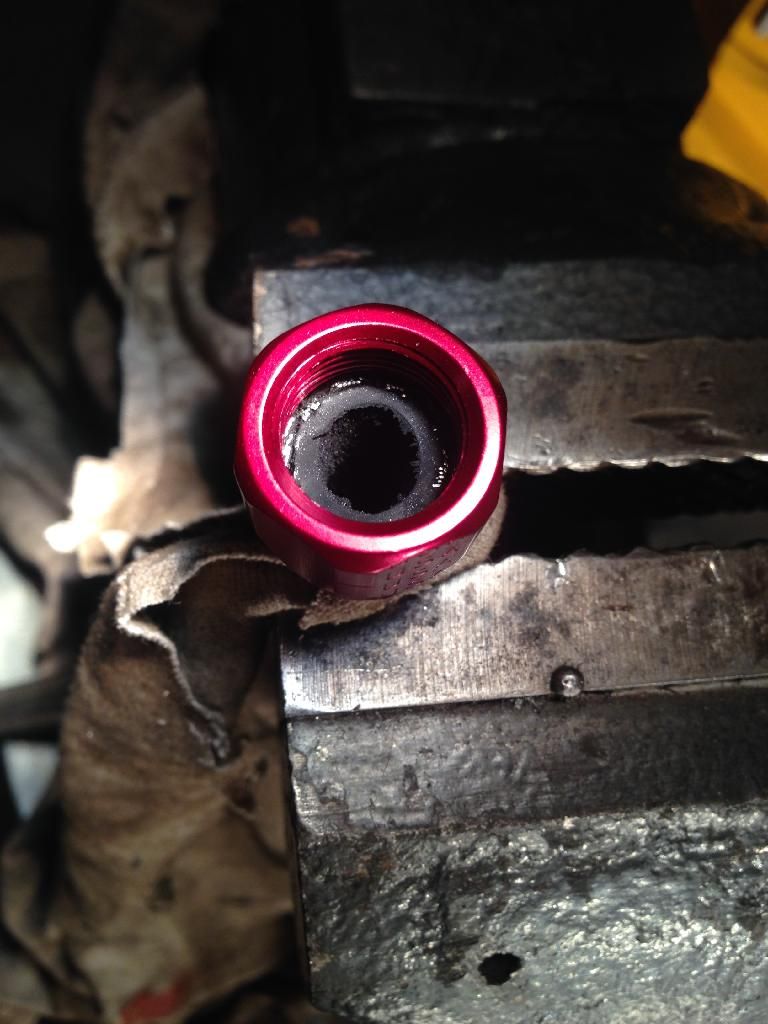
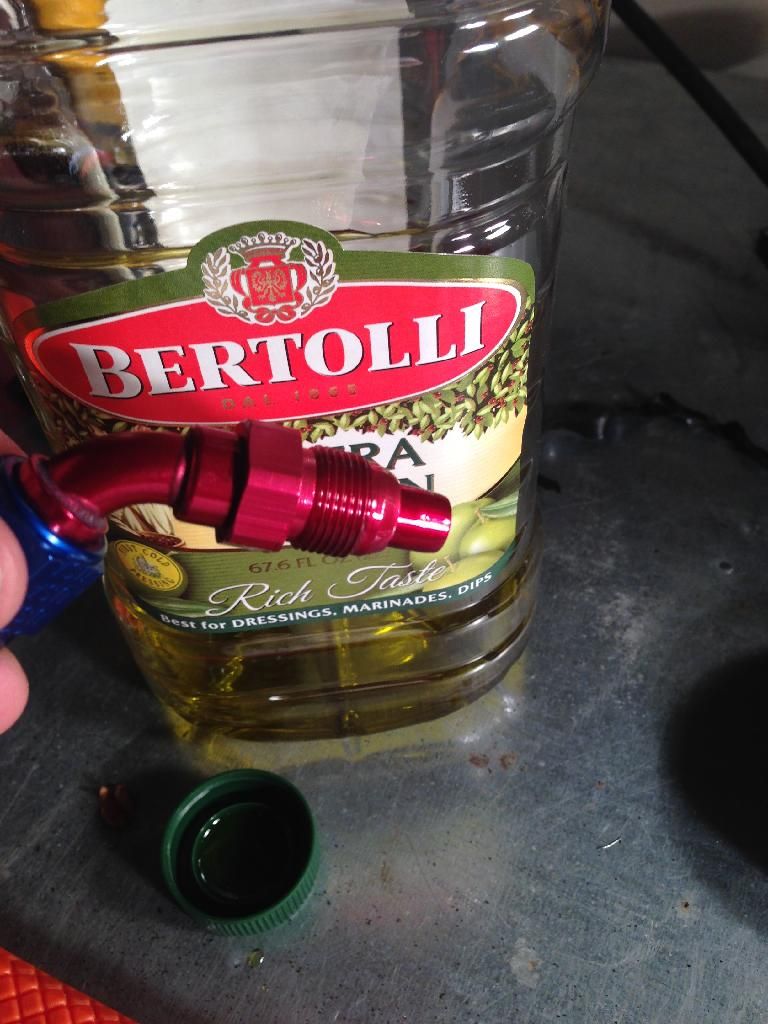
I used a little bit of olive oil pushed in the fitting and then started threading in with a normal wrench.
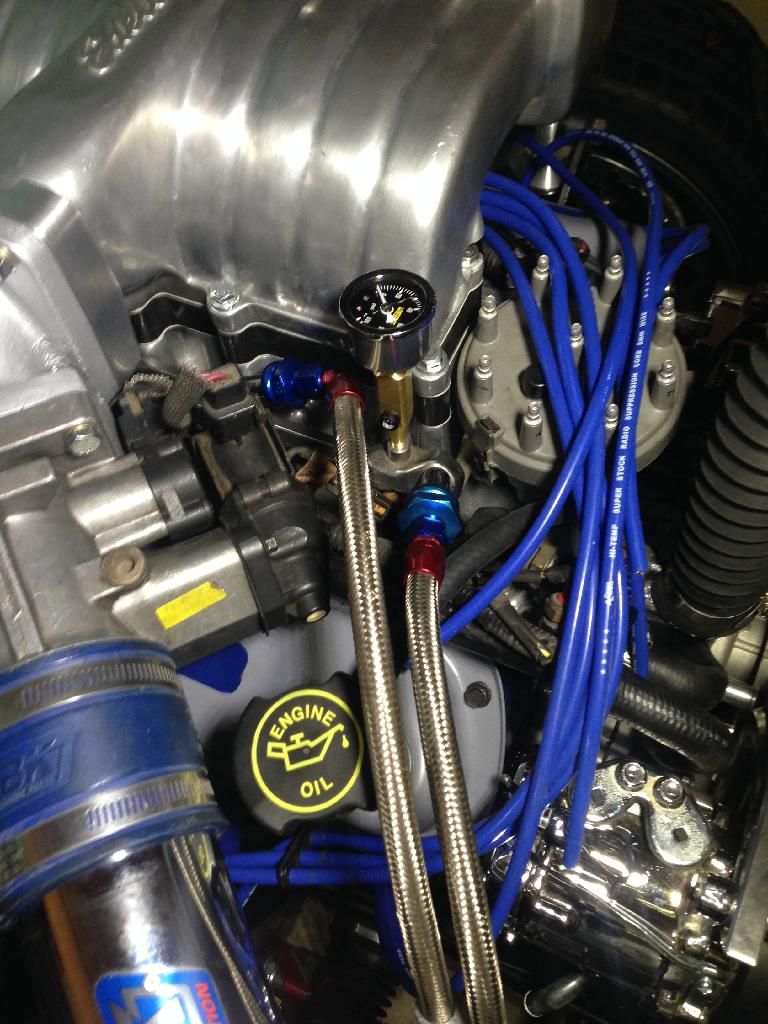
Here is a shot of the line connected. For the fuel pressure indicator, I removed the shrader valve (very simple) and then screwed on the allen head blocks and placed the indicator on the top as so it would be out of the way.

With the intake, valve covers, throttle body adapter and throttle body in place next was cutting and connecting the AN fittings. I used a straight 6AN for the fuel pressure in line and a 60 degree angle 6an fuel line for the return. This was to make sure that the fuel line does not hit the fuel pressure indicator. At this point it is only mocked up.

Once I figured out the length I used electrical tape and cut the end with a cut of wheel and then cleaned out the inside.

I then used a flathead to assure all the wires were in the fitting and pushed on the half side of the AN fitting.

Next I used a mallet to get the half to the right position


I used a little bit of olive oil pushed in the fitting and then started threading in with a normal wrench.


Here is a shot of the line connected. For the fuel pressure indicator, I removed the shrader valve (very simple) and then screwed on the allen head blocks and placed the indicator on the top as so it would be out of the way.

#72
03-31-2014, 07:30 AM
Tuned
SVT.. thanks for the words of encouragement! I had forgotten that you are relating a 3.5 year journey in these posts. I spent yesterday degreasing all my spring shackles and rebuilding the starter for my flathead-6. Saturday bought a gallon of black Pitt-Guard and a gallon of Part B, epoxy mastic. I'm hoping in the next couple weeks to start encapsulating the frame and running gear. Your work looks great and yes, I'll look into that Champion radiator!
#73
04-01-2014, 12:08 AM
Senior User
Join Date: Sep 2013
Location: Florida
Posts: 477
Likes: 0
Received 0 Likes
on
0 Posts

#74
05-27-2014, 11:21 PM
Senior User
Join Date: May 2014
Location: Carlisle, Pa
Posts: 194
Likes: 0
Received 0 Likes
on
0 Posts
SVT, my build is eeriey similar to yours. I just started posting photos. Check it out.
https://www.ford-trucks.com/forums/1...her-build.html
https://www.ford-trucks.com/forums/1...her-build.html