Fixing a broken radiator overflow nipple
#1
 02-11-2014, 05:10 PM

I thought I'd do a little write-up (with pictures) on fixing a broken radiator overflow nipple since I couldn't find one here.
I think the radiators are all the same on 1995, 1996, and 1997 F250 and F350 trucks with the 7.3L Power Stroke. (Now people can find this from Google.) I made this repair on a 1996 F250. I don't know whats better, the fact that this is a cheap fix, or the fact that you don't have to pull the radiator to do it.
Things you will need:
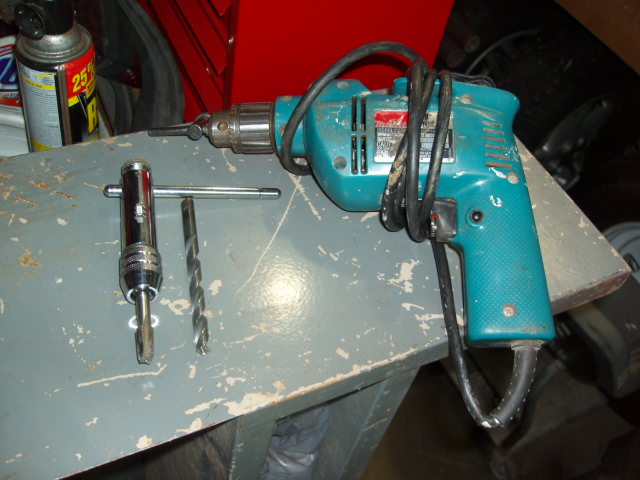
1. 21/64" drill bit
2. 1/8" NPT thread tap
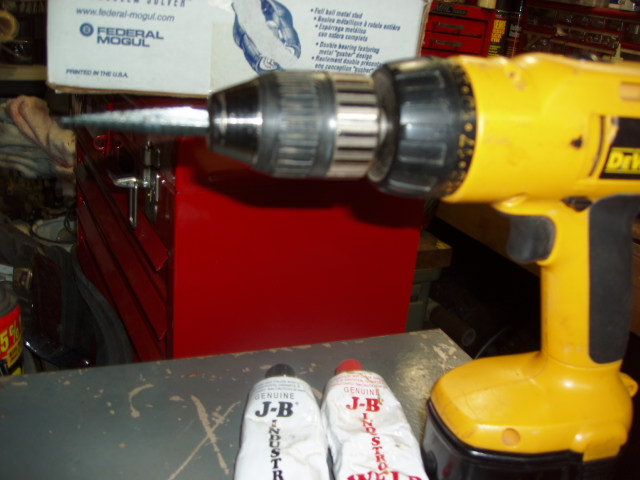
3. brass barbed hose fitting for 3/8" ID hose x 1/8" NPT male threads
It should look like this:
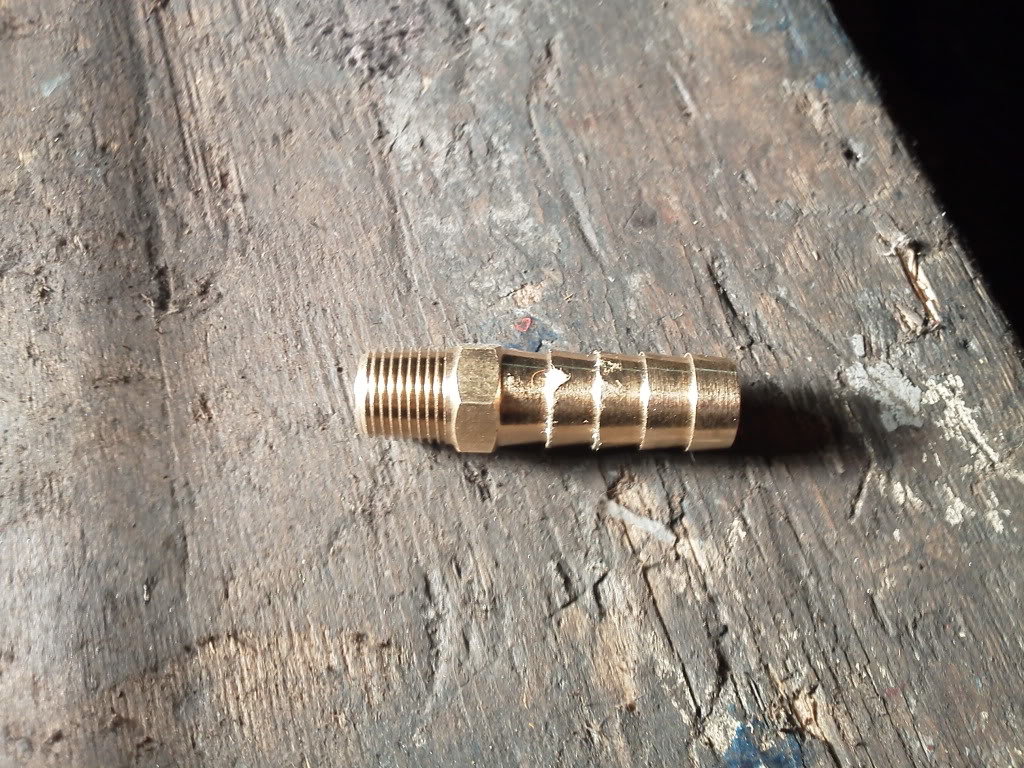
4. thread tape that is rated for antifreeze. I used this: Blue Monster� PTFE Thread Seal Tape
5. (optional) new 3/8" ID hose
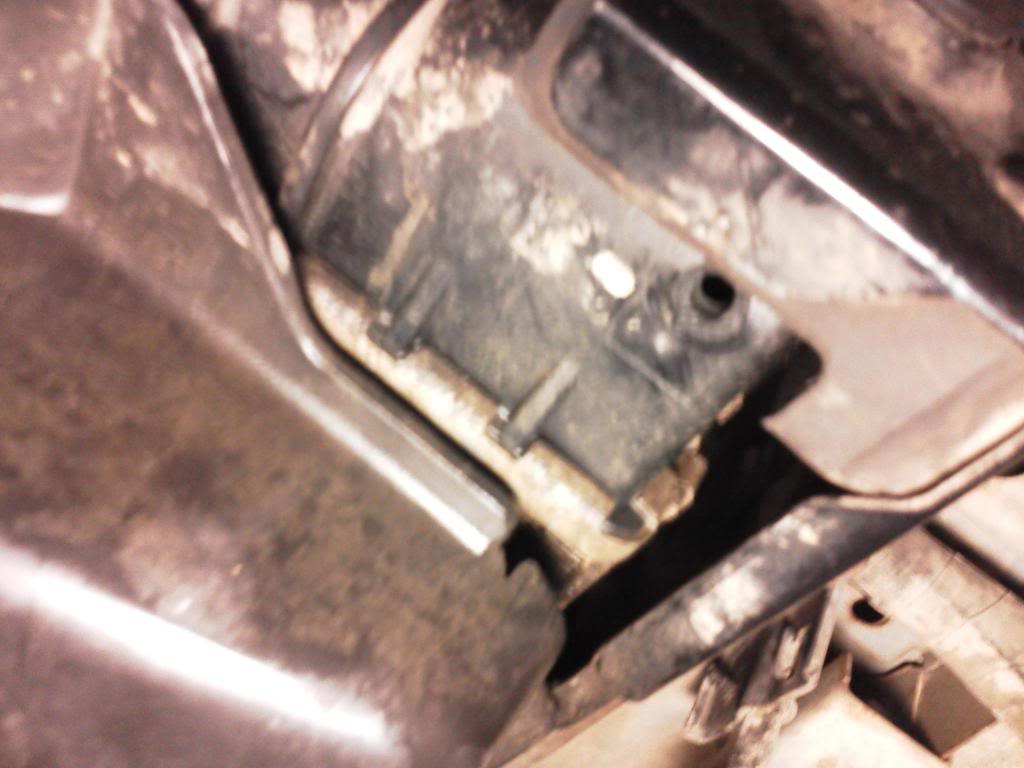
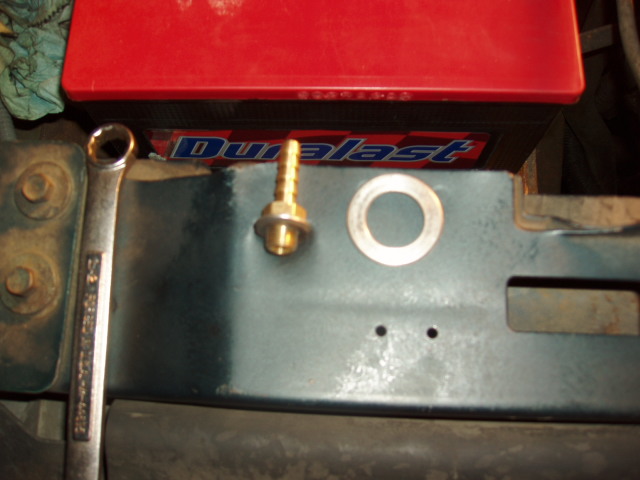
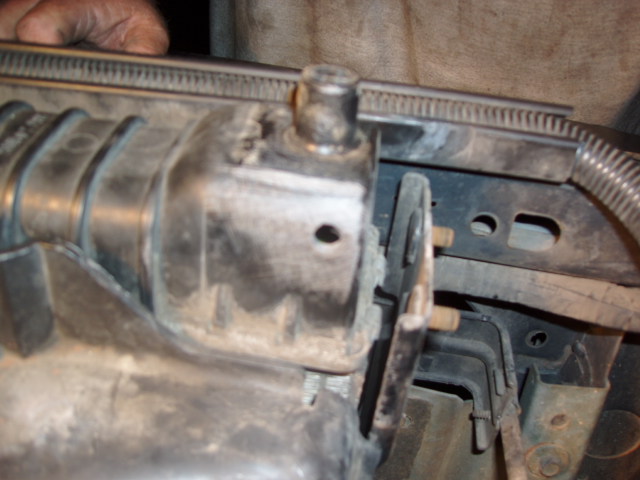
Here is how mine looked when I broke it:
Step 1:
Move necessary hoses and wires out if the way to give clearance for your drill.
Step 2:
Drill out the hole where the nipple broke off with the 21/64" drill bit. Be very careful to drill the hole straight.
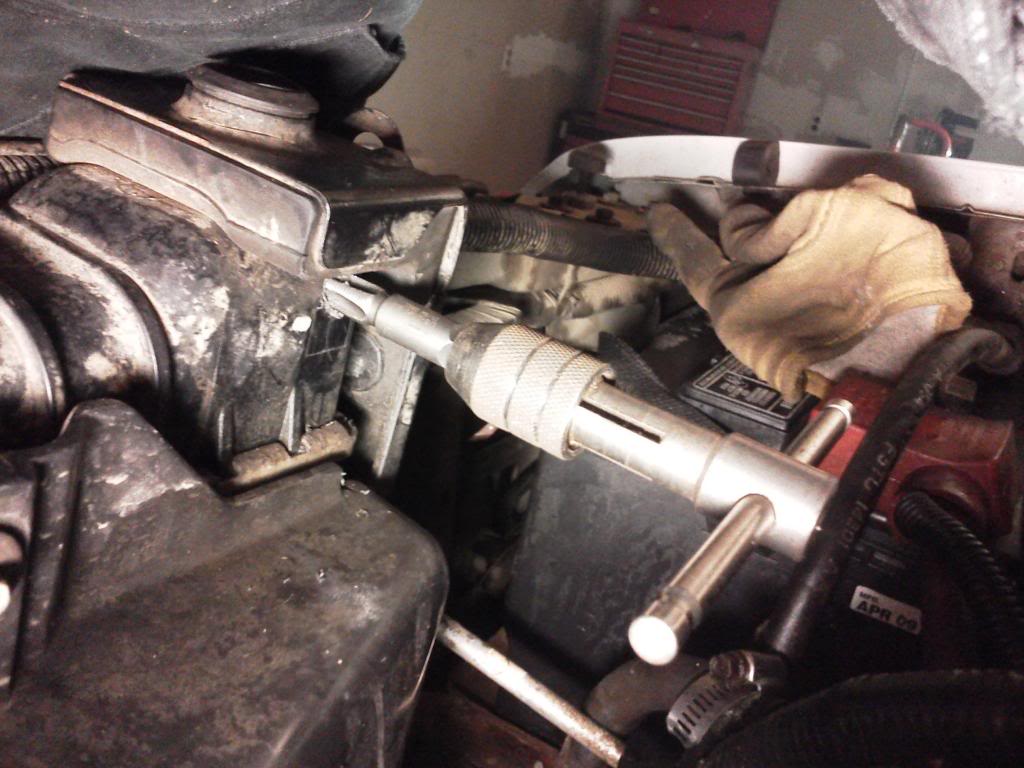
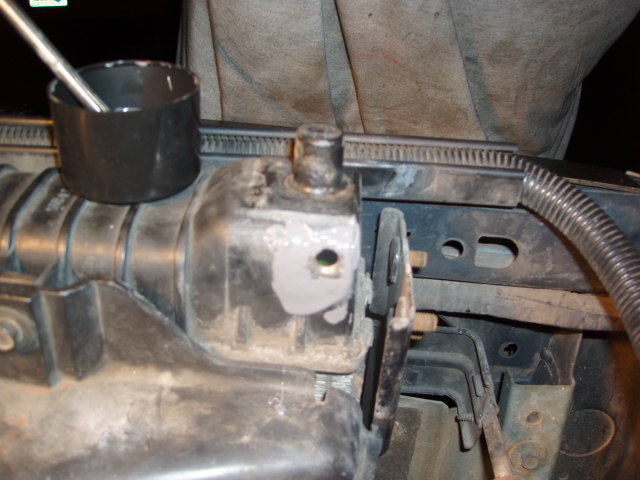
Step 3:
Use the 1/8" NPT thread tap to tap the hole. You must pay close attention to tap the hole straight. The top of the hole starts into the upper radius of the molded plastic so you have to be patient. In the picture you can see what I mean.
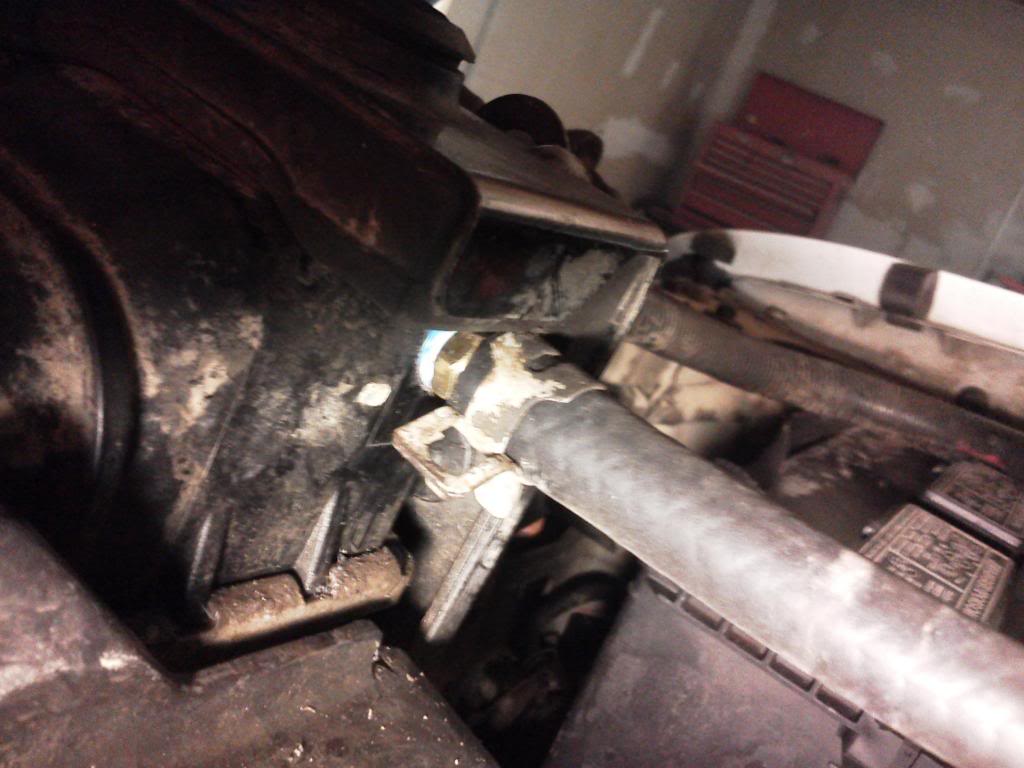
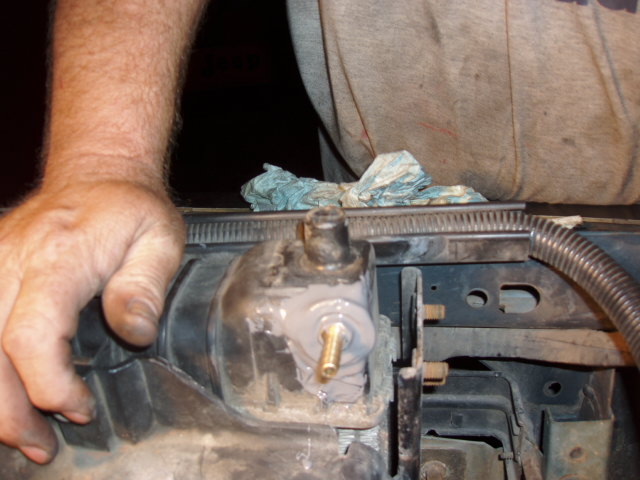
Step 4: Put the thread tape on the brass fitting. Use your patience to get threaded into the tapped hole. Lastly, attach your hose and test it for leaks. Here is how it should look when you are done:
For best results, don't break off the factory nipple. I accidently caught my elbow on the hose and snapped mine clean off.
I think the radiators are all the same on 1995, 1996, and 1997 F250 and F350 trucks with the 7.3L Power Stroke. (Now people can find this from Google.) I made this repair on a 1996 F250. I don't know whats better, the fact that this is a cheap fix, or the fact that you don't have to pull the radiator to do it.
Things you will need:
1. 21/64" drill bit
2. 1/8" NPT thread tap
3. brass barbed hose fitting for 3/8" ID hose x 1/8" NPT male threads
It should look like this:

4. thread tape that is rated for antifreeze. I used this: Blue Monster� PTFE Thread Seal Tape
5. (optional) new 3/8" ID hose
Here is how mine looked when I broke it:

Step 1:
Move necessary hoses and wires out if the way to give clearance for your drill.
Step 2:
Drill out the hole where the nipple broke off with the 21/64" drill bit. Be very careful to drill the hole straight.
Step 3:
Use the 1/8" NPT thread tap to tap the hole. You must pay close attention to tap the hole straight. The top of the hole starts into the upper radius of the molded plastic so you have to be patient. In the picture you can see what I mean.

Step 4: Put the thread tape on the brass fitting. Use your patience to get threaded into the tapped hole. Lastly, attach your hose and test it for leaks. Here is how it should look when you are done:

For best results, don't break off the factory nipple. I accidently caught my elbow on the hose and snapped mine clean off.
#2
02-11-2014, 05:45 PM
Postmaster
Join Date: May 2011
Location: Monroe City in
Posts: 3,447
Likes: 0
Received 0 Likes
on
0 Posts
#3
02-11-2014, 07:07 PM
Post Fiend
#4
02-11-2014, 08:04 PM
Post Fiend
I did the same thing once. Hopefully yours lasts longer than my attempt at it. I did it on someone elses truck once b/c they couldn't afford a radiator at the time. It worked for a few days and started leaking a little bit again. I scuffed up the area and put epoxy around it and it held until he could get another radiator.
#5
02-11-2014, 09:31 PM

Someone should fashion a three-sided "square C" shaped piece of steel that you can bolt to that passenger-side rad mount, that would surround the fitting for the reservoir hose. That way, when your (or your mechanic's) knee inevitably slips off the top of the rad in that direction, it will conveniently deflect away, perhaps bruising your kneecap nicely, but at least protecting this fitting.
#6
02-11-2014, 09:49 PM
Postmaster
Join Date: May 2011
Location: Monroe City in
Posts: 3,447
Likes: 0
Received 0 Likes
on
0 Posts
#7
02-12-2014, 07:32 AM
I keep a stock of those nipples, we fix those all the time.
However, I always JB Weld them in. Still tap and thread in, just coat the threads with JB and it's worked quite well.
However, I always JB Weld them in. Still tap and thread in, just coat the threads with JB and it's worked quite well.
__________________
'96 7.3 F-350 Reg Cab 4x4 - bought new.
'04 6.0 E-350 custom 4x4
'08 6.4 F-550 Reg Cab 6 spd 4x4
'17 6.7 F-250 KR ccsb 4x4
'96 7.3 F-350 Reg Cab 4x4 - bought new.
'04 6.0 E-350 custom 4x4
'08 6.4 F-550 Reg Cab 6 spd 4x4
'17 6.7 F-250 KR ccsb 4x4
Trending Topics
#8
02-12-2014, 09:31 AM
Now, that's a good idea! If this starts to leak, then I will try using JB weld also.
#9
04-07-2014, 12:09 PM
#10
07-06-2014, 12:07 PM

Senior User
Join Date: May 2014
Location: Taylor Mill, KY
Posts: 142
Likes: 0
Received 0 Likes
on
0 Posts
Thanks for this post.
I slipped removing the old down pipe on my 7.3 and snapped it clean off.
I'm gonna try this on mine. I was wondering if that was enough material to thread it for a 1/8 npt. I'll use the JB weld as well.
Then when I get back to work I'm making a guard for mine as well so this doesn't happen again.
I slipped removing the old down pipe on my 7.3 and snapped it clean off.
I'm gonna try this on mine. I was wondering if that was enough material to thread it for a 1/8 npt. I'll use the JB weld as well.
Then when I get back to work I'm making a guard for mine as well so this doesn't happen again.
#11
07-07-2014, 03:40 AM
Senior User
Join Date: May 2014
Location: Taylor Mill, KY
Posts: 142
Likes: 0
Received 0 Likes
on
0 Posts
Did this fix to mine tonight.
Used a 1/8 npt brass nipple. On that I put a sealing washer(rubber on one side-this also needed opened up just a bit to slide down to the base of the nipple) from water tight conduit hardware. Then after that was installed I placed a 1/8" thick washer that fit loosely around the sealing washer. This was just to hopefully give it more sealing area and depth for JB Weld.
used this slender step bit to open up the sealing washer
Drilled the existing hole to a "R" drill and tapped it with a 1/8"NPT pipe tap. Take your time and drill your hole straight as well as tapping it straight and don't run the tap into the hole all the way.You don't have but 3/16 " of material and it is right on the rounded top of the radiator. Test fit your nipple and make sure you can screw it in all the way to the sealing washer or plain washer. My brass nipple had about 1/16" of a shoulder at the base, that's why I used a washer so more threads would be in contact with the plastic and to give the piece more support.
Next I scuffed the area with some 80 grit sand paper and then applied the JB Weld to the area as well as the threads on the nipple and screwed the piece into place till the washer was pressed up against the radiator.
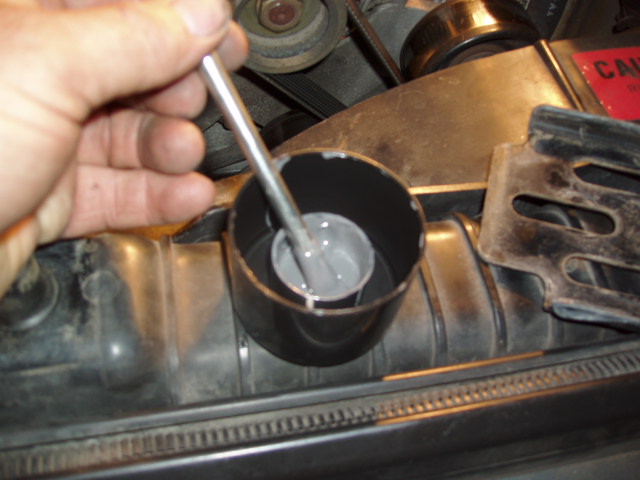
A spray can lid makes a nice JB Weld mixing bowl.
I then placed the larger washer around the whole assembly and J B Welded the whole thing together.
I'm pretty confident this will hold better than new. I'll fire it up Monday night when I go to work and the JB Weld has had time to cure good. I'll find out when I head across country with it later this week if it will hold.
Thanks again to the guys that started this thread and added other info. You hopefully saved me from buying a new radiator. I hope I in turn help someone else in need.
Used a 1/8 npt brass nipple. On that I put a sealing washer(rubber on one side-this also needed opened up just a bit to slide down to the base of the nipple) from water tight conduit hardware. Then after that was installed I placed a 1/8" thick washer that fit loosely around the sealing washer. This was just to hopefully give it more sealing area and depth for JB Weld.

used this slender step bit to open up the sealing washer

Drilled the existing hole to a "R" drill and tapped it with a 1/8"NPT pipe tap. Take your time and drill your hole straight as well as tapping it straight and don't run the tap into the hole all the way.You don't have but 3/16 " of material and it is right on the rounded top of the radiator. Test fit your nipple and make sure you can screw it in all the way to the sealing washer or plain washer. My brass nipple had about 1/16" of a shoulder at the base, that's why I used a washer so more threads would be in contact with the plastic and to give the piece more support.

Next I scuffed the area with some 80 grit sand paper and then applied the JB Weld to the area as well as the threads on the nipple and screwed the piece into place till the washer was pressed up against the radiator.
A spray can lid makes a nice JB Weld mixing bowl.


I then placed the larger washer around the whole assembly and J B Welded the whole thing together.

I'm pretty confident this will hold better than new. I'll fire it up Monday night when I go to work and the JB Weld has had time to cure good. I'll find out when I head across country with it later this week if it will hold.
Thanks again to the guys that started this thread and added other info. You hopefully saved me from buying a new radiator. I hope I in turn help someone else in need.
#12
07-08-2014, 03:38 AM
Senior User
Join Date: May 2014
Location: Taylor Mill, KY
Posts: 142
Likes: 0
Received 0 Likes
on
0 Posts

#13
09-11-2014, 02:29 PM
Senior User
Join Date: May 2014
Location: Taylor Mill, KY
Posts: 142
Likes: 0
Received 0 Likes
on
0 Posts


#14
09-11-2014, 03:54 PM
^^^^^ Fenders for your Comanche, eh? Made of marble? Must be kinda heavy...  .
.
We were right behind you, well, sorta, tour out west mid-August, '95 ECLB same color. Is that Utah? Colo? We were down several similar roads in AZ/UT/CO. Even the Interstates are breathtaking. Same good luck for us, 5150 miles and ZERO issues. Looks like you lived out of the truck as well. I'd kill for a high-roof fiberglass topper like that for our EC truck.
.We were right behind you, well, sorta, tour out west mid-August, '95 ECLB same color. Is that Utah? Colo? We were down several similar roads in AZ/UT/CO. Even the Interstates are breathtaking. Same good luck for us, 5150 miles and ZERO issues. Looks like you lived out of the truck as well. I'd kill for a high-roof fiberglass topper like that for our EC truck.
#15
09-11-2014, 11:11 PM
Senior User
Join Date: May 2014
Location: Taylor Mill, KY
Posts: 142
Likes: 0
Received 0 Likes
on
0 Posts
That road in the picture runs kind of parallel with the co and utah border about 100 miles north of Telluride, co. I meet up with my jeep buddies in Ouray , CO every year. I try to take different routes o
home every year. I did the utah to idaho and out montana a couple of years back. This year I cut kver to eastern co and up till nebraska then back down to kansas then back home.
the cap I have on there was a soveinir from a Texas trip 5years ago. Home made custom interior makes fora great camping truck. I have been playing in the utah colorado areas for vacations since 1989.