When you click on links to various merchants on this site and make a purchase, this can result in this site earning a commission. Affiliate programs and affiliations include, but are not limited to, the eBay Partner Network.
If there was one take-away from the Julie Debates, it was that the dealer brochures were issued early and frequently don't reflect production. Colors etc shown in the brochures don't match production.
That the muffler was used only with 6's indicates to me the fewer, larger pulses must have created a noise under some conditions.
Well, all of it really is about my build in a macro sense. My intent is to do an upgrade to "Extra" specs, but don't want to overlook a feature that would be out of line with that. Admittedly I've made changes that M-H would not have done. Such as the 4.11/1 gear sets that were an option and could have been specified by the customer. And sleeved fuel and brake lines that add fire safety and eliminate abrasion. Stu
Just for curiosity sake I flipped through my Canadian books since we didn't get a six cylinder engine till late 1956.
No electric wipers listed till 1952 and only on F-7/8 trucks.
Wiper silencer listed 1951-54 - 7RA-17595
1953-55 trucks are all vacuum unless F-700 or bigger.
If there was one take-away from the Julie Debates, it was that the dealer brochures were issued early and frequently don't reflect production. Colors etc shown in the brochures don't match production.
Wagner's Ford truck book illustrates some differences between promos and production models as well.
How in the world have i missed this thread. I also have seen this truck with my own eyes and it looks even better in real life. It is a true work of art, in more than one way. First, what MH had done to make it AWD, then what Stu has done to bring it back to life. Stu has gone out of his way to thank people that have helped him and I will take this moment to thank him. He has helped me out with MH parts that make the 215 upper radiator pipe seem as easy to find as a bag of chips. I also have had the pleasure of asking him any odd MH question that I can think of and it hasnt seemed to bother him yet. My MH builds will follow in his footsteps, probably not to this level, but what he has taken on will prove to be priceless to the masses that will follow. Thanks for everything Stu!
Thanks Mark. Glad to help. Those of us with R3-4s, R32-4s, and M254s are a very small group...seven of us if I'm remembering right. That includes Chuck of course who knows more than all of us together. And hopefully here soon we'll have a member add to his count. That's a hint, guys!
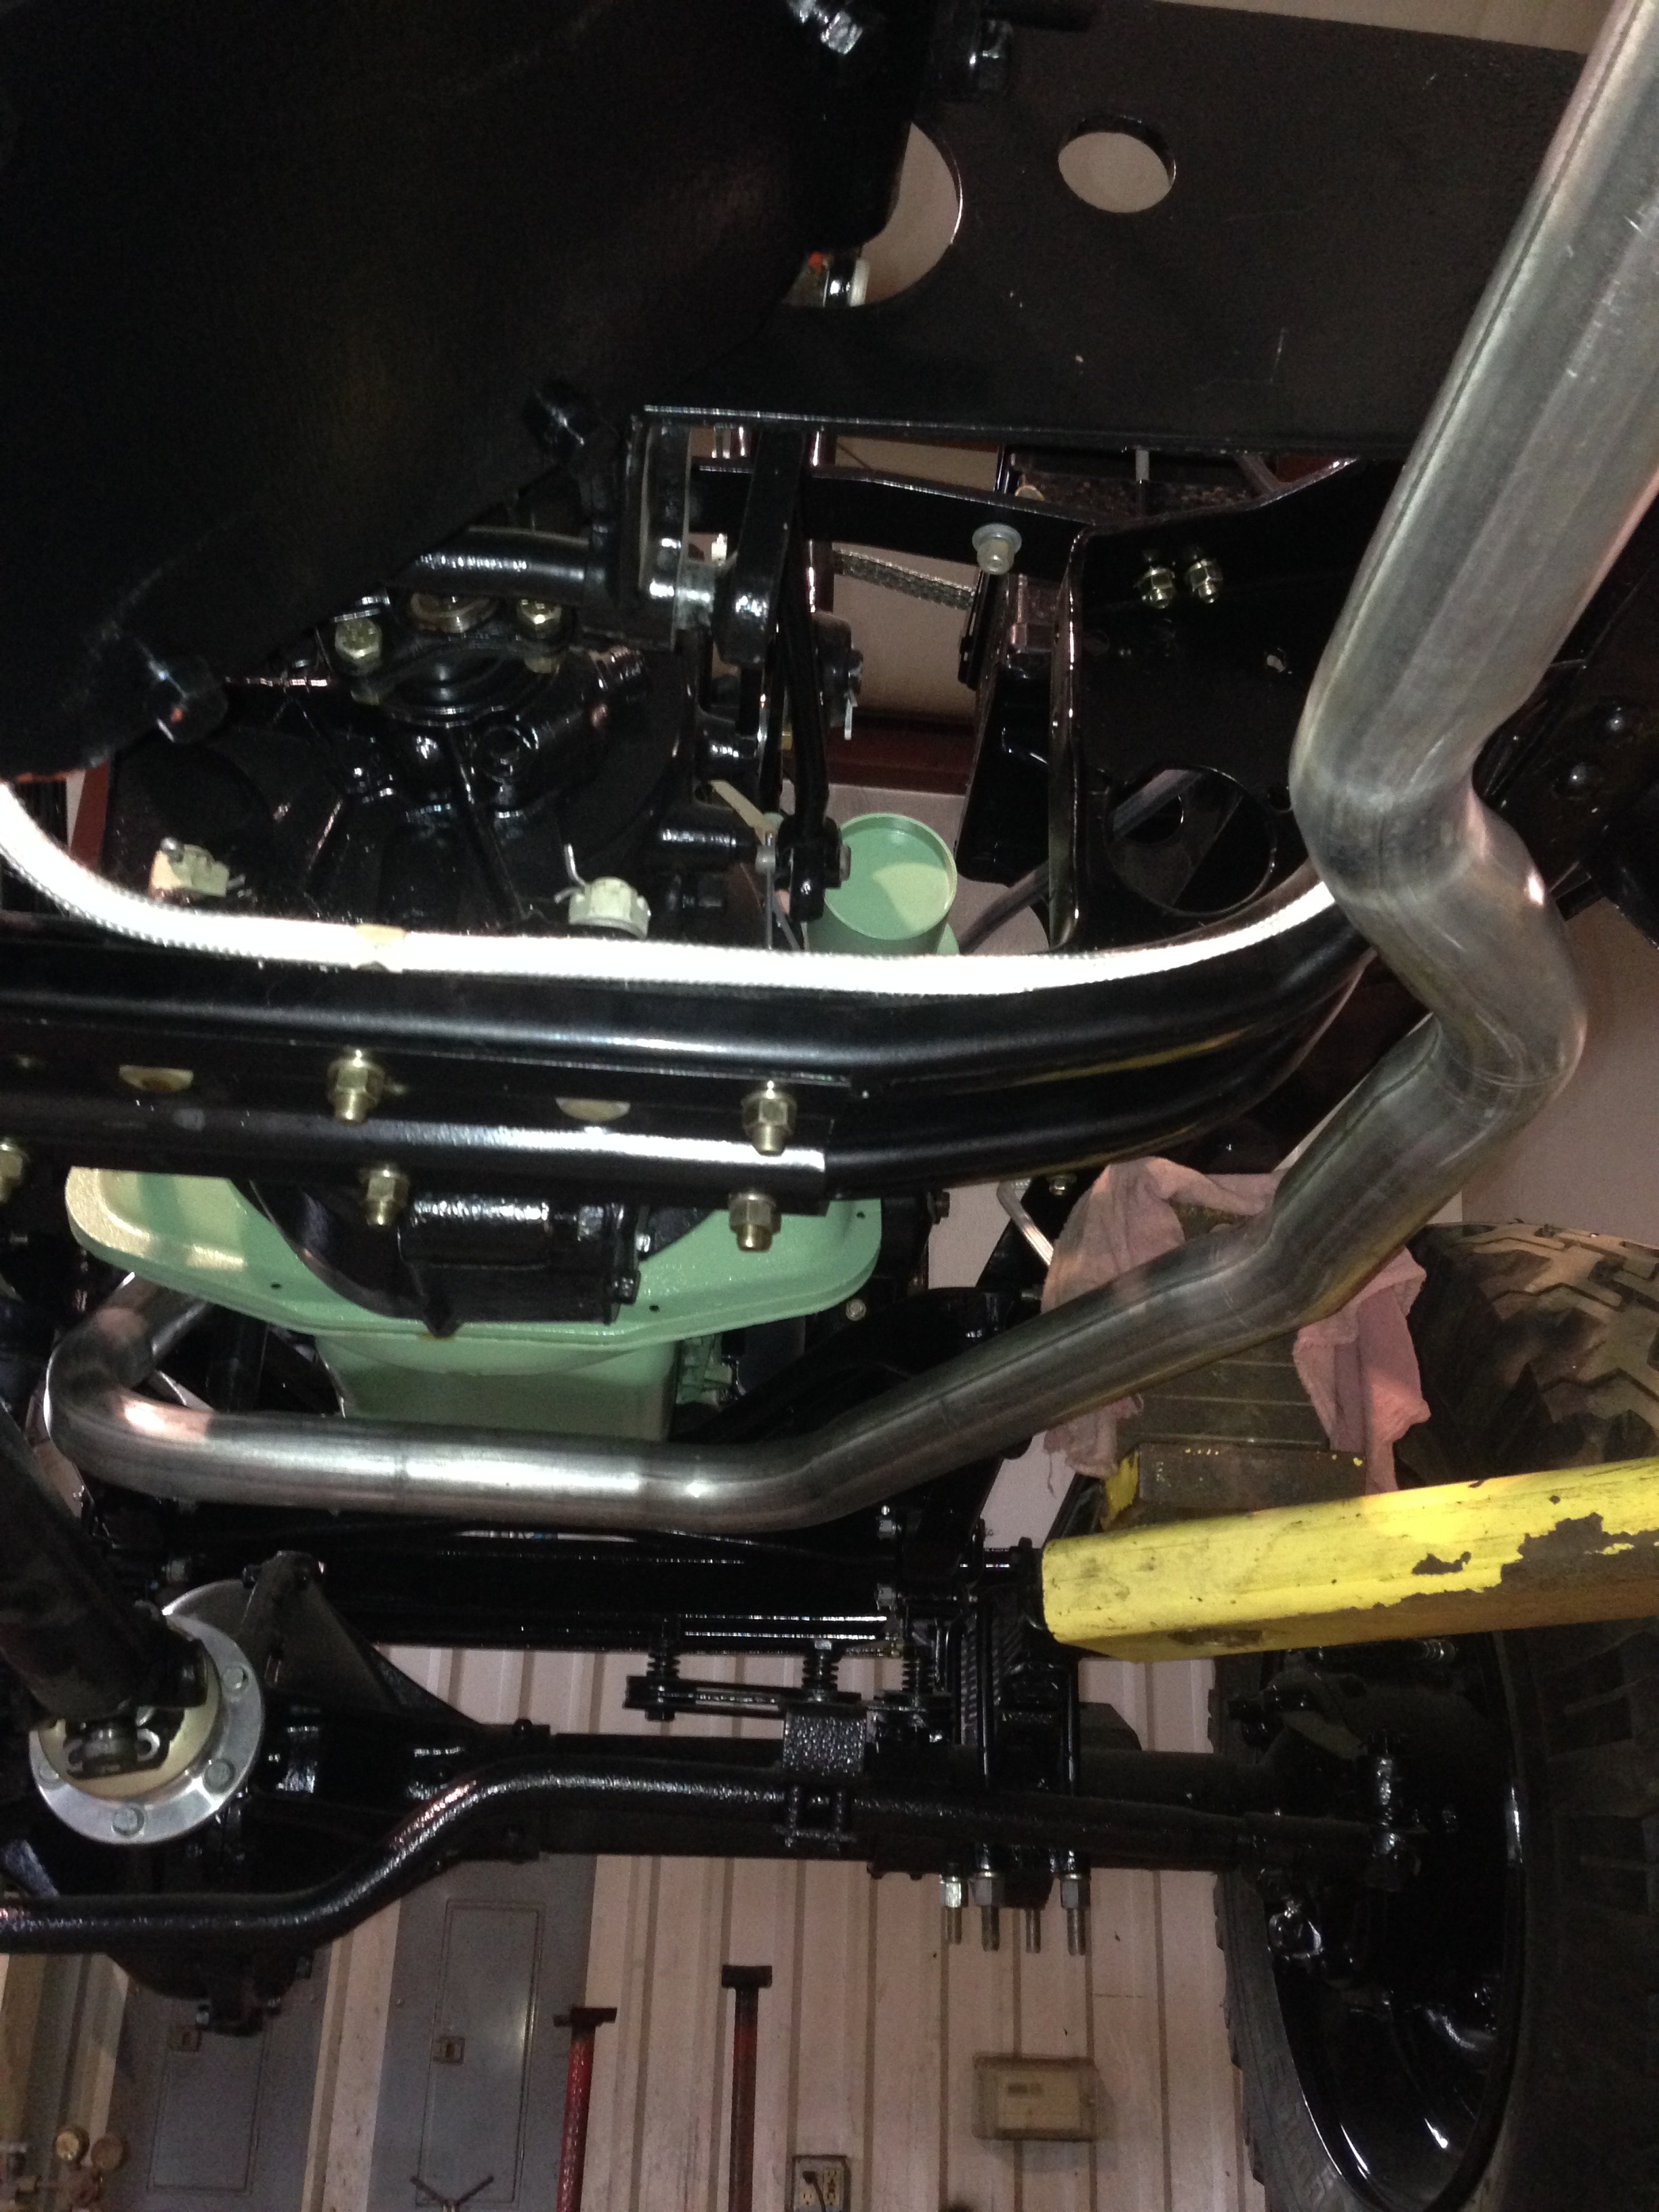
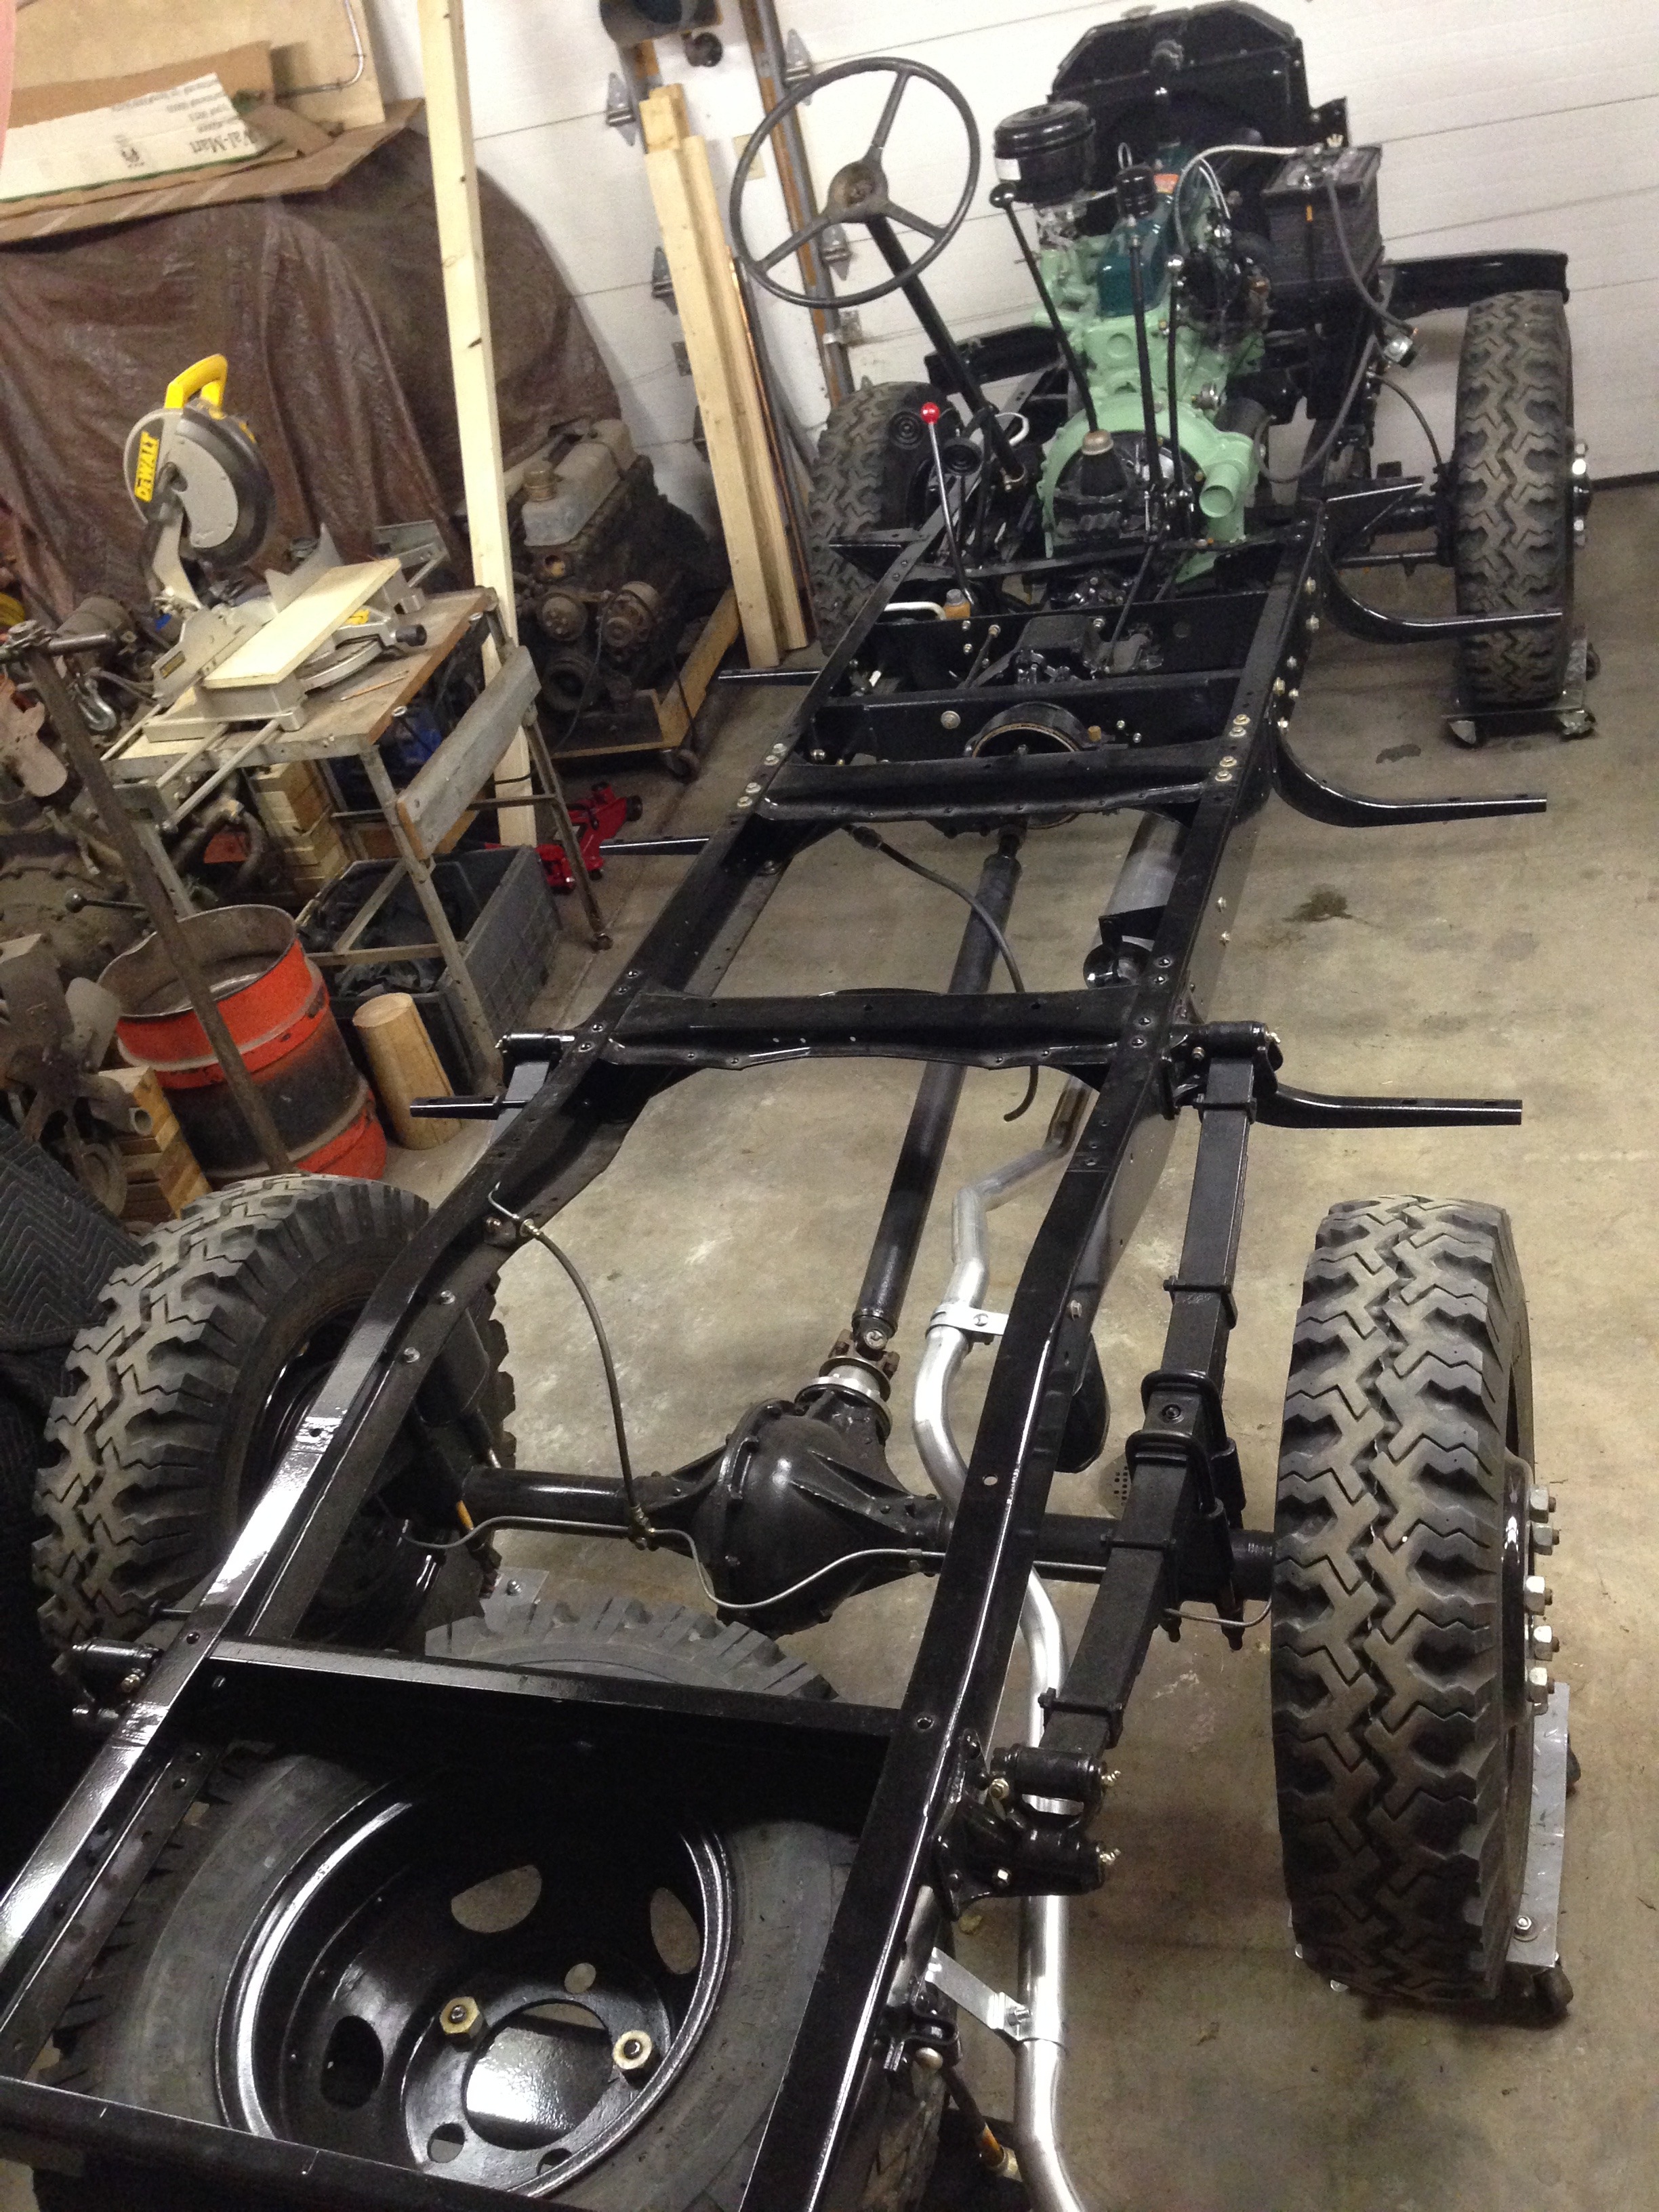
Since it's back to the top I might as well add a few shots of the rear exhaust and muffler installed. I haven't gotten any pics of that other truck's upper pipe so when the weather allows I'll haul the chassis into Rob's to have him bend a pipe following the logical path. That will then begin the bodywork phase. Those with sharp eyes will see that I've had to move the muffler back to clear the transfer case and adapt hangers to work based on existing frame mounting holes. Stu
I was swapping texts with Josh earlier this week and he asked why I hadn't updated my build thread recently. Especially now that Turtleman has joined the group with an exact brother (couldn't be a sister) to my truck. I had no excuse. So here is a continuation from where I think I stopped before.
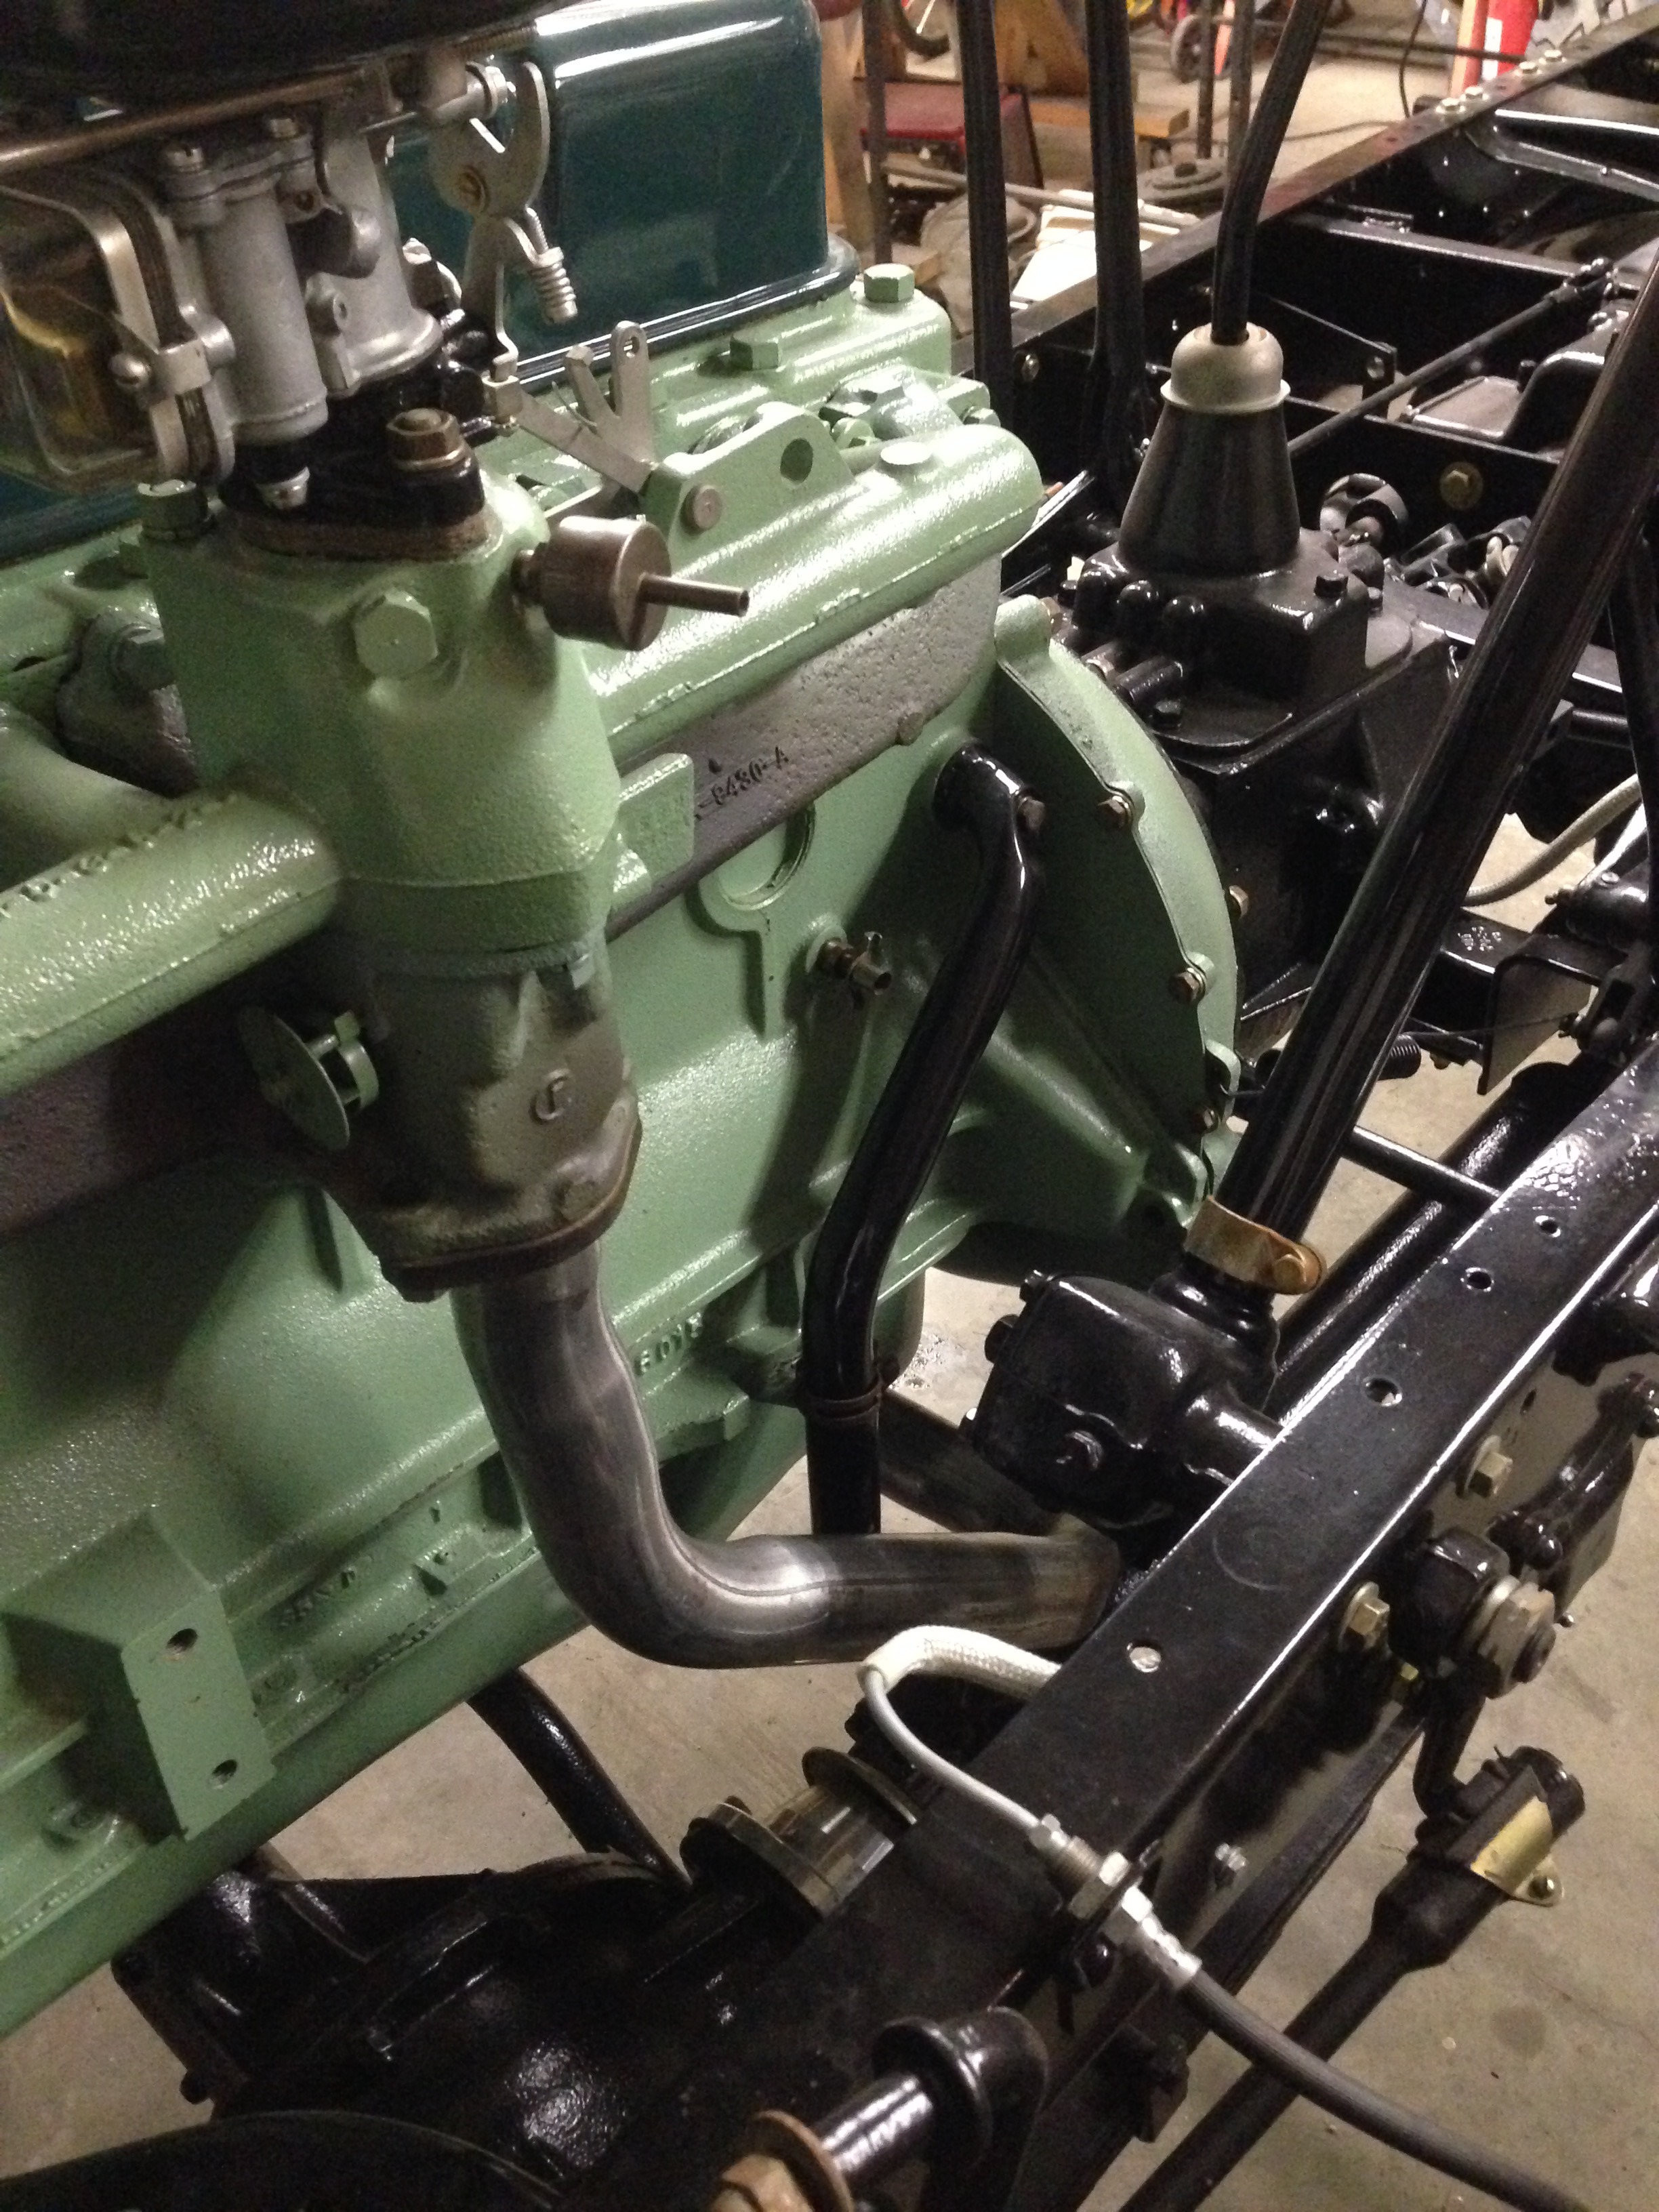
The exhaust header pipe is unlike a stock 215 pipe. I pictured earlier how the stock pipe I had made hit my front differential. Much research failed to give me the codes used by M-H to chart the correct bends, so my buddy Rob and I eyeballed it. Here are pics of the final installation. Stu
From here I'd like to link a video of my engine builder buddy Ty doing the test fire. Photobucket is fighting me and I'll have to do it later if it allows. Unless somebody has a better suggestion. Maybe YouTube except I've never done that.
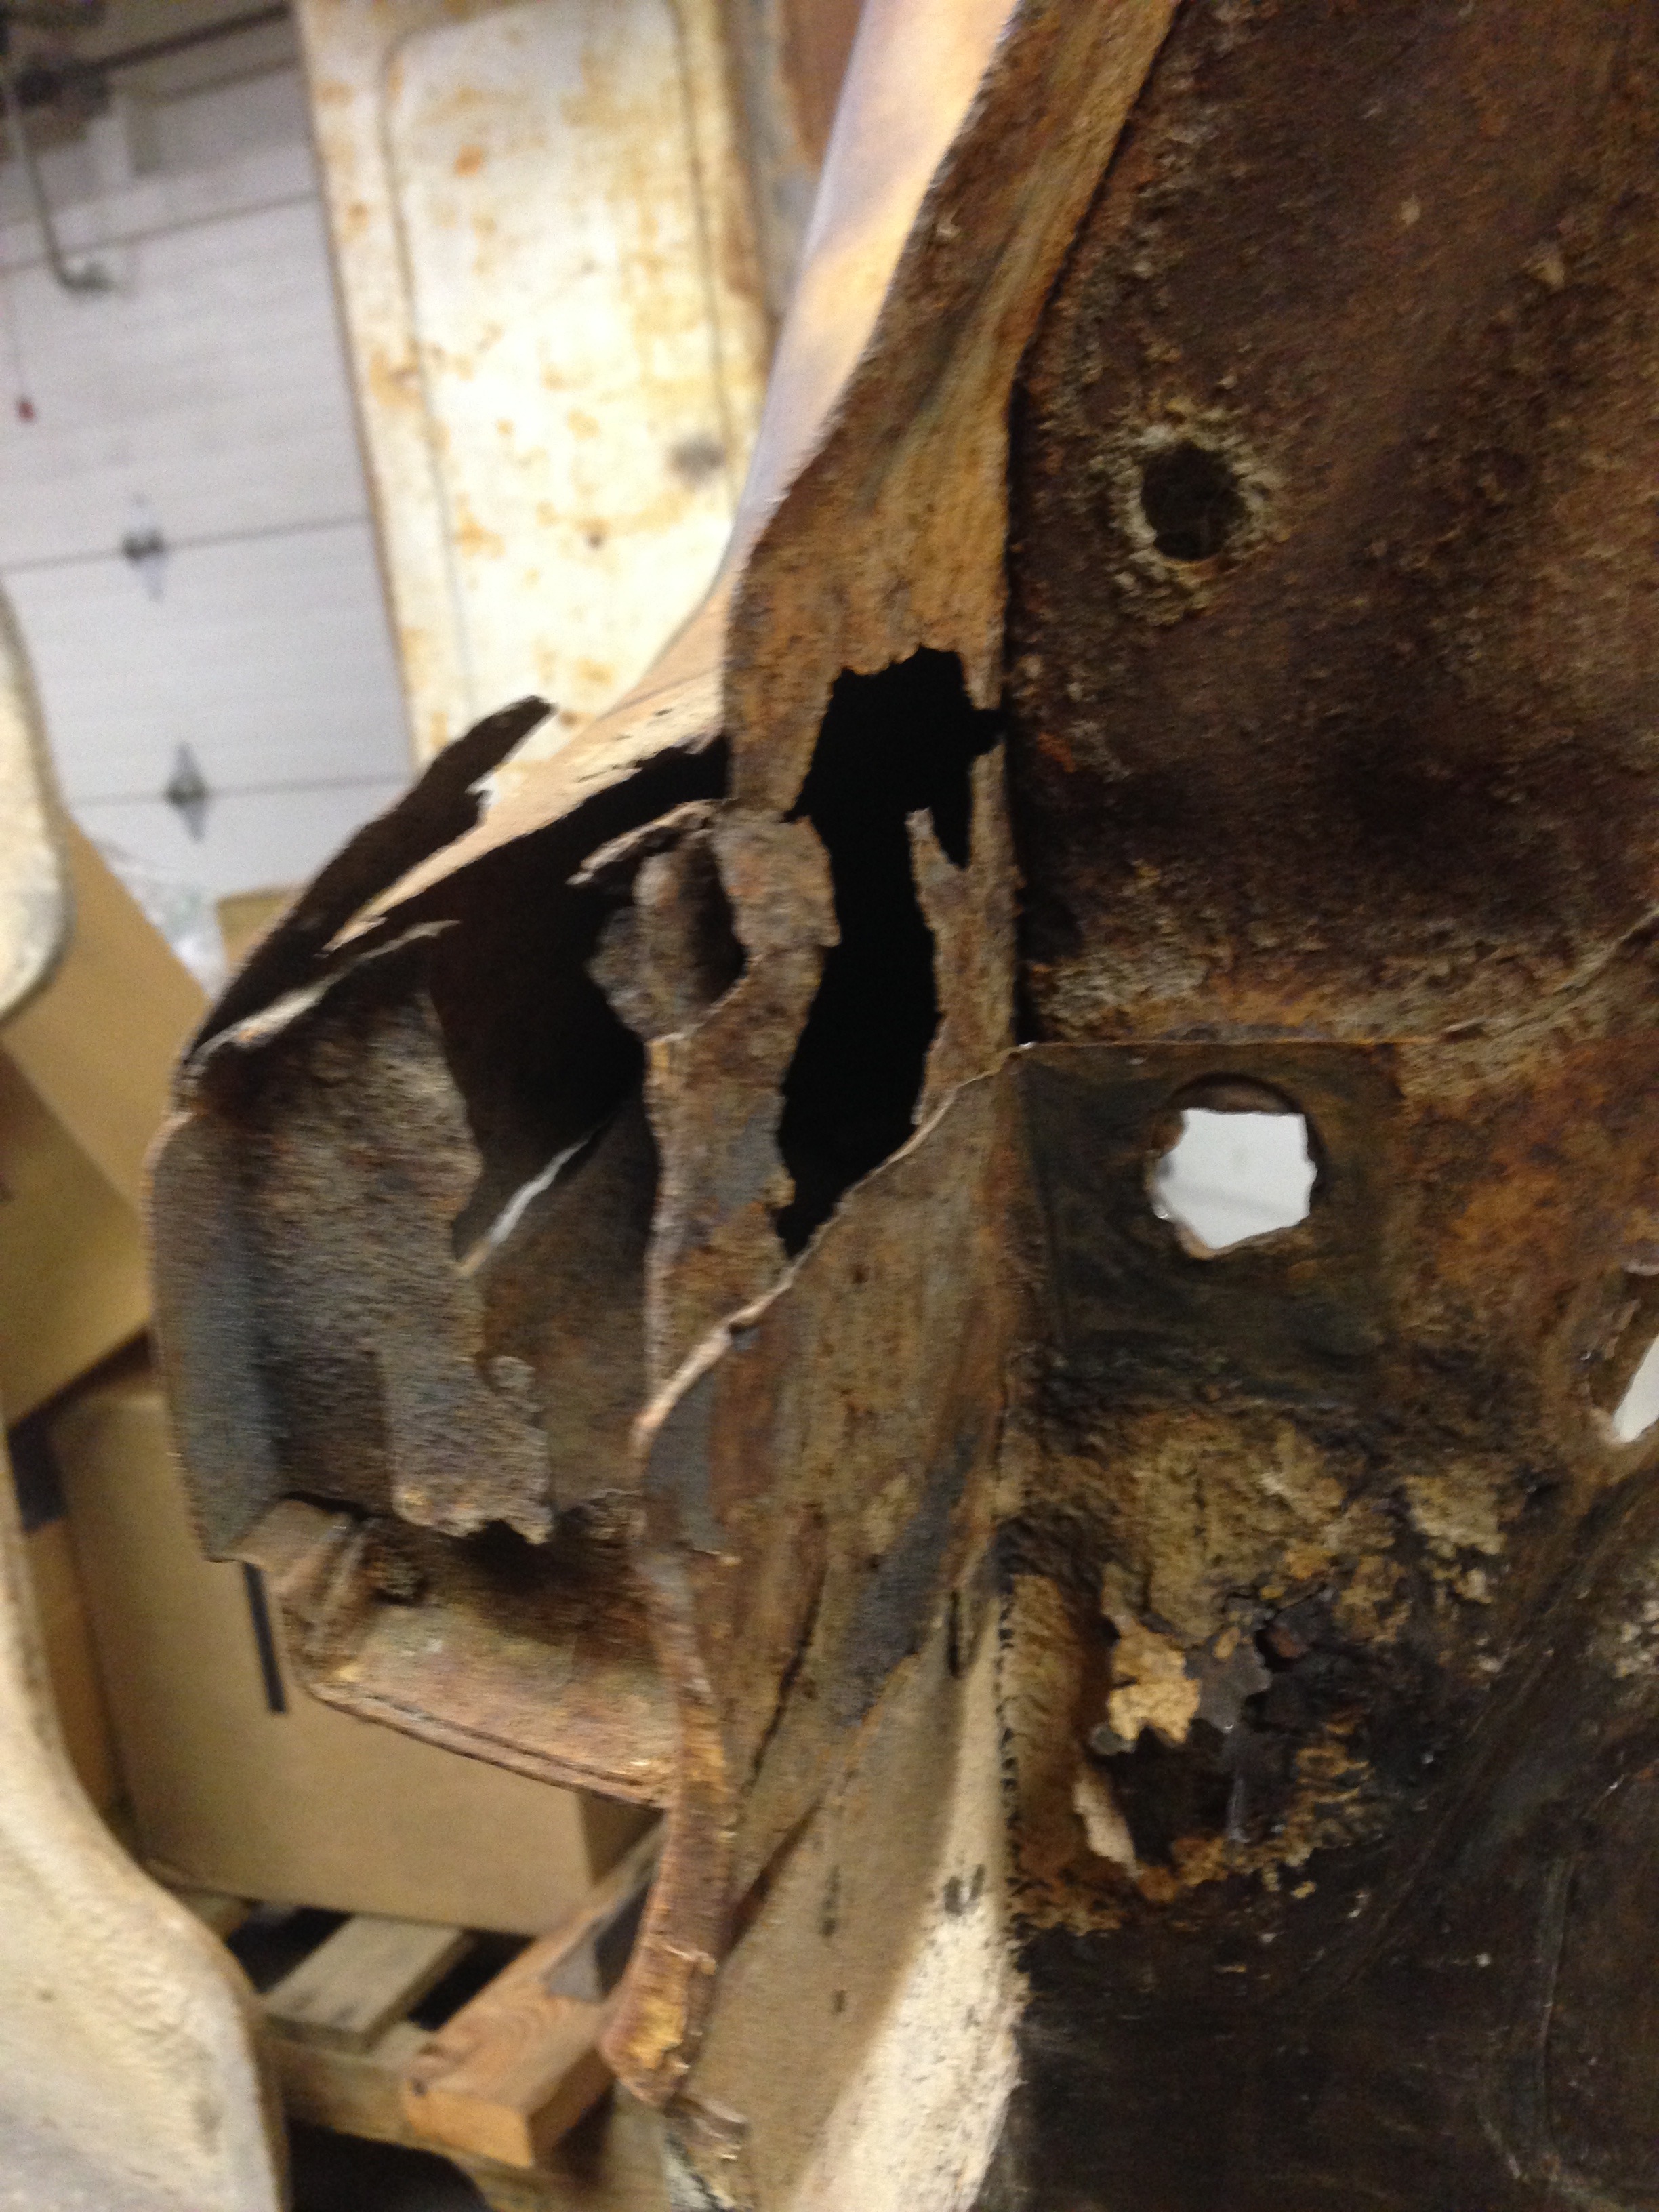
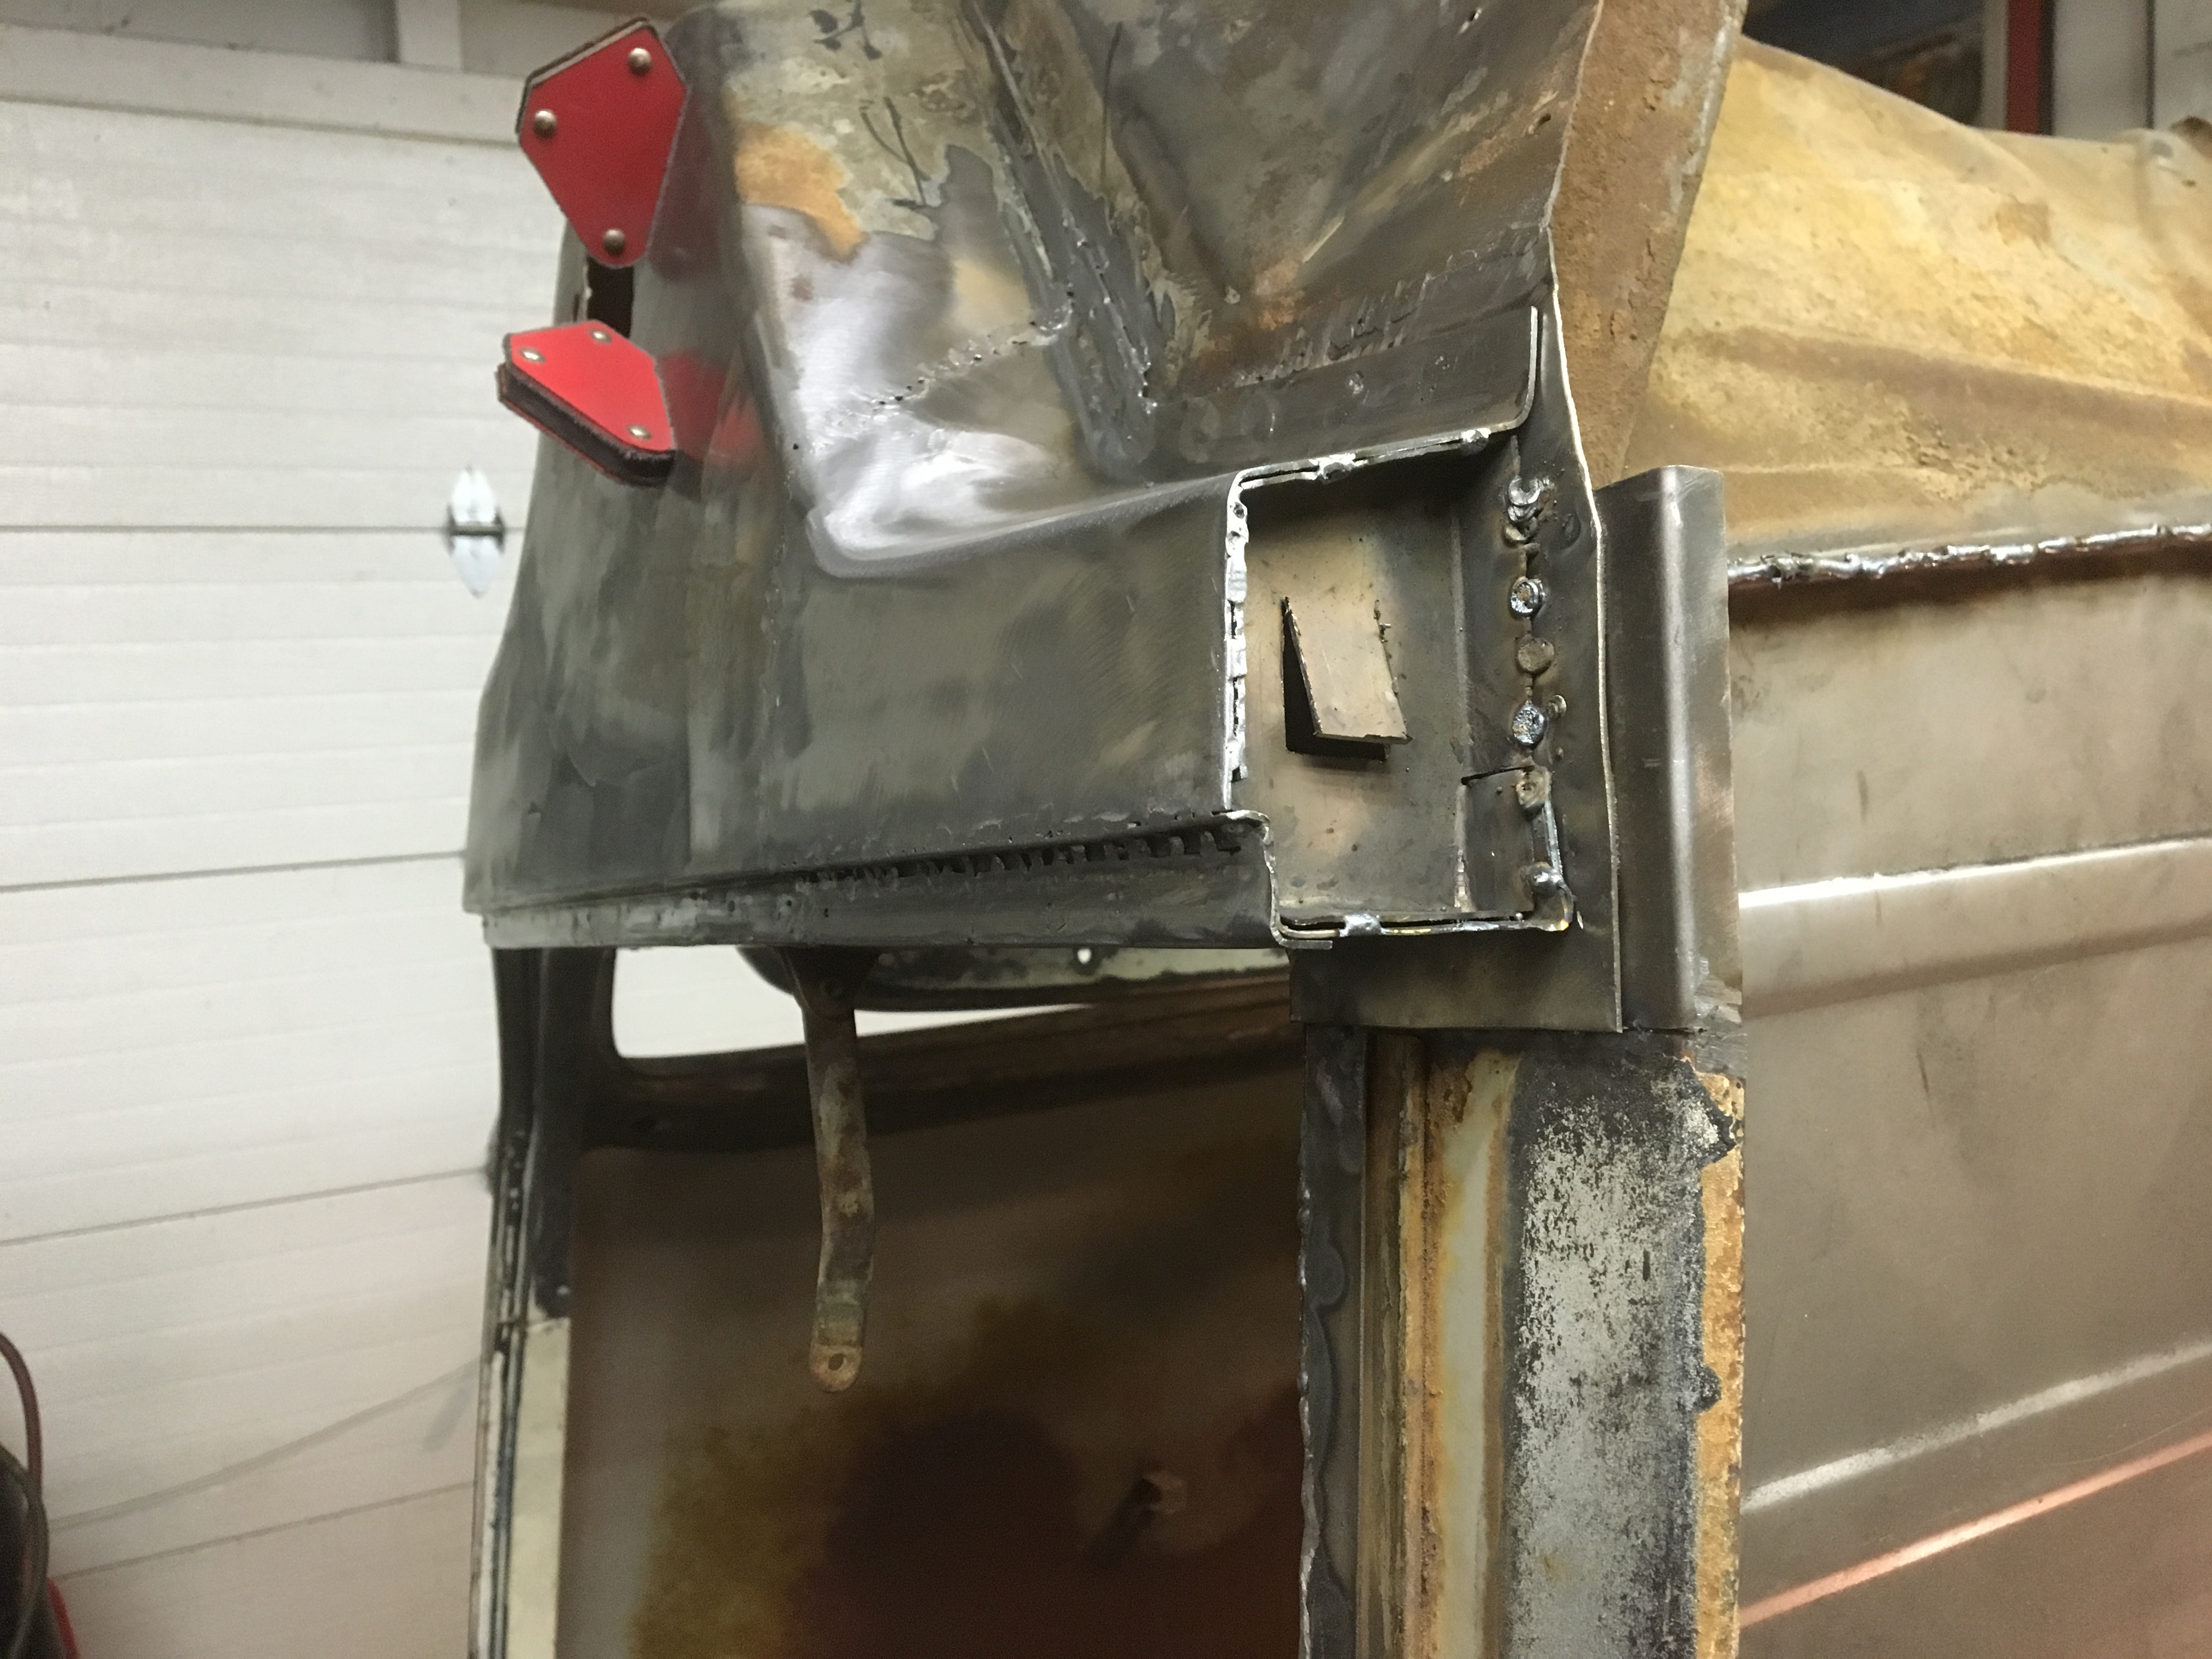
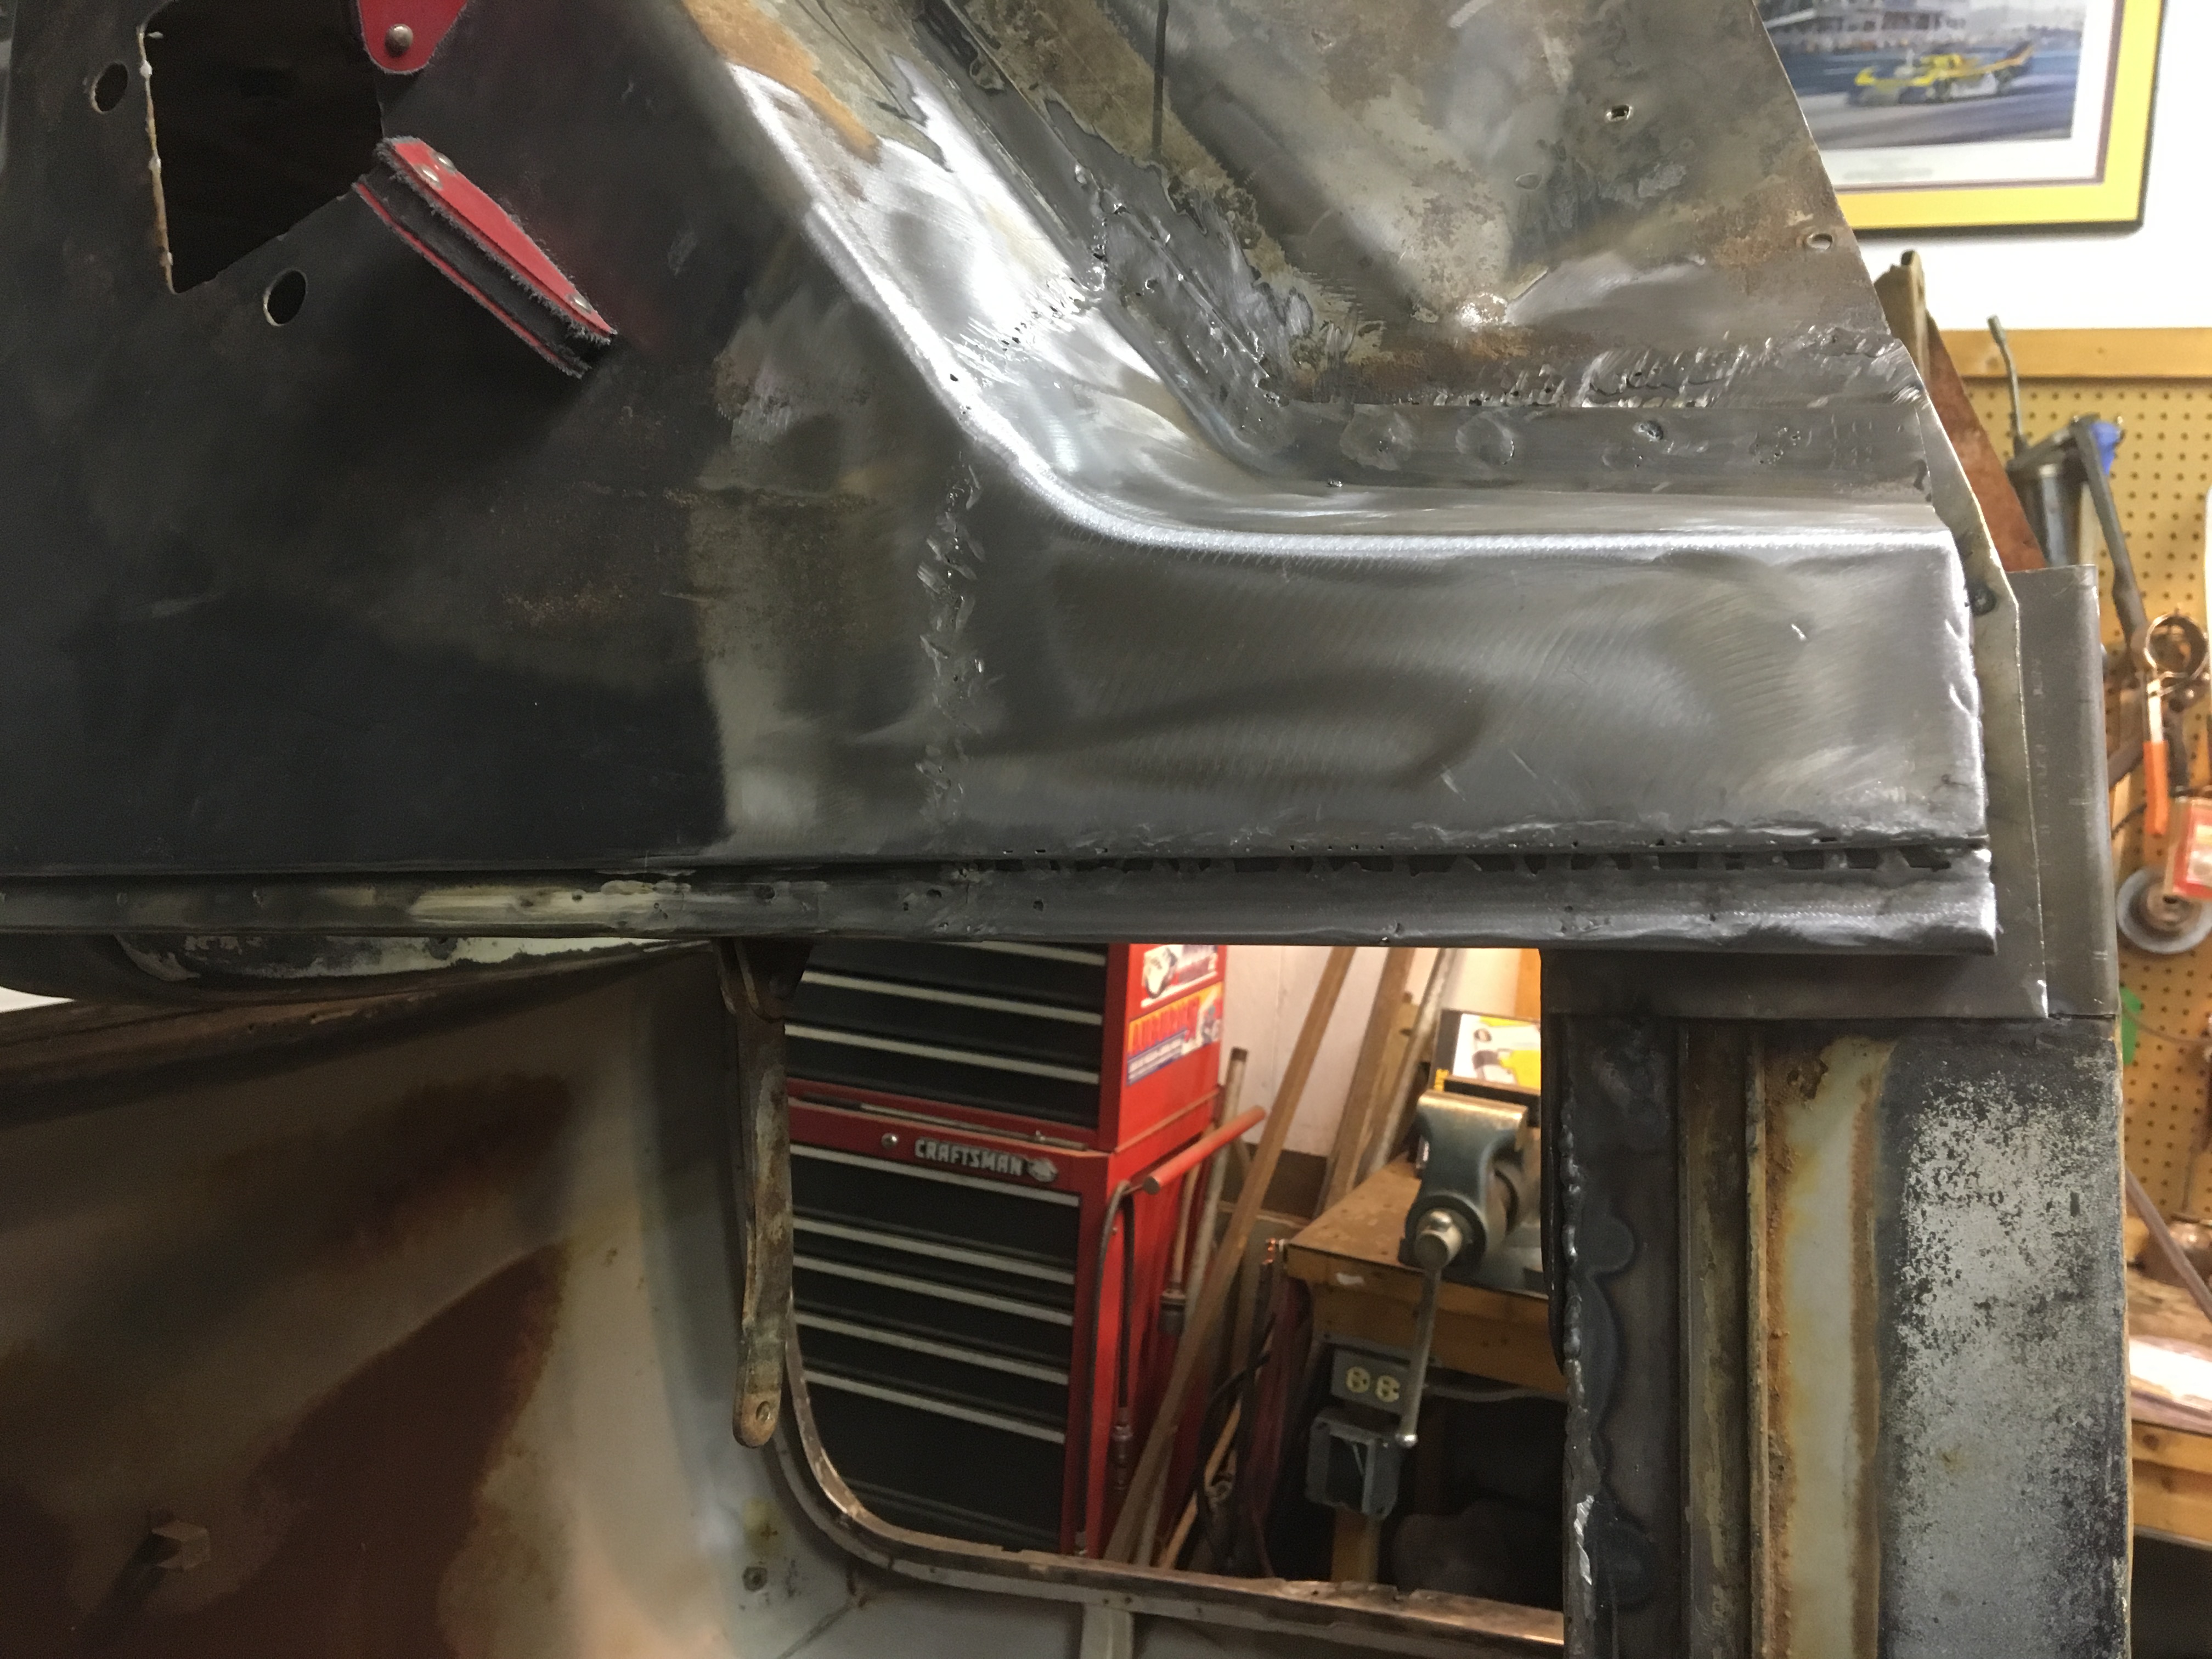
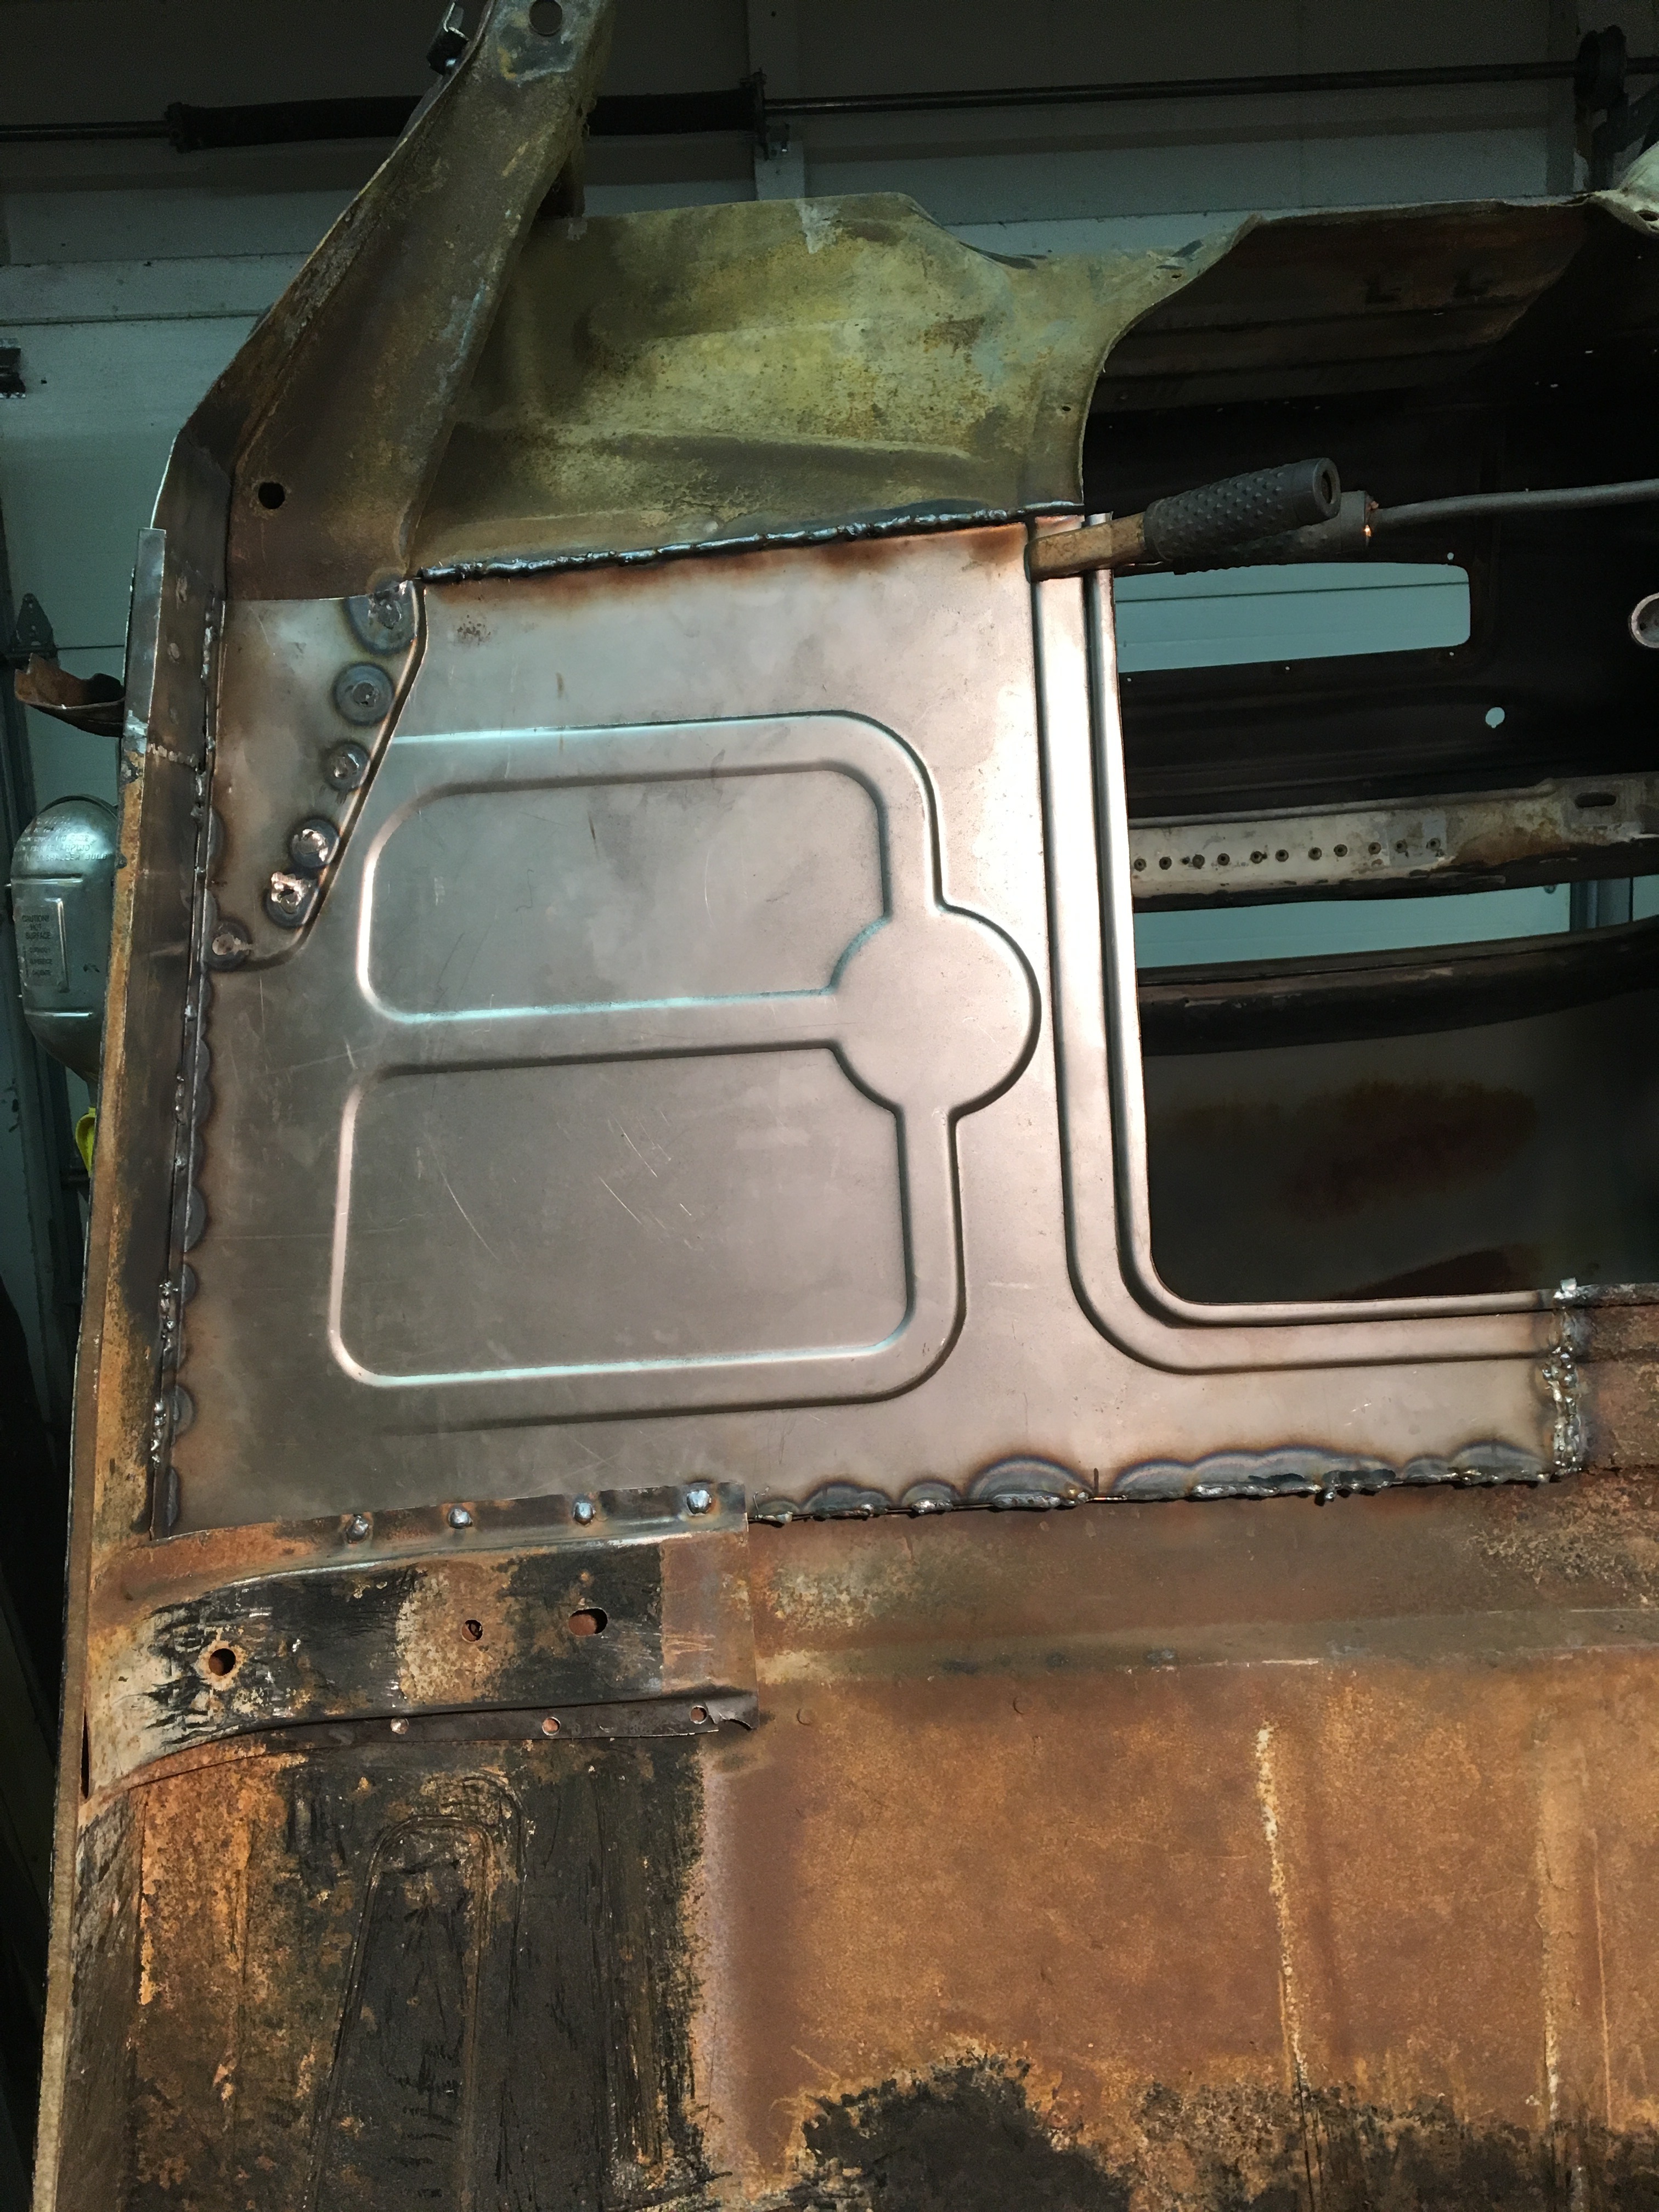
From here it's gonna be pictures of front cab corners and passenger floor replacement. That will bring me to my present ham fisted effort at the rear cab corners. I've learned that replacing rear cab corners is more involved than just stitching in Reamer's wonderful new outers. But I'm getting there. Will report back with pics of front corners and floor. Stu
On youtube, there's a arrow pointing up with a line under it, that's the icon for uploading a video. EDIT: I forgot to mention it's on the top right of the screen
Stu,that chassis looks awesome!!! You've done a wonderful job so far and kudos to those who've helped you along. It's very inspiring reading through your thread and looking at the photos and thinking my truck could some day look that good, Thank you! As you probably already know I'm compiling quite a list of questions for you but all in due time. For now just keep the updates coming!!
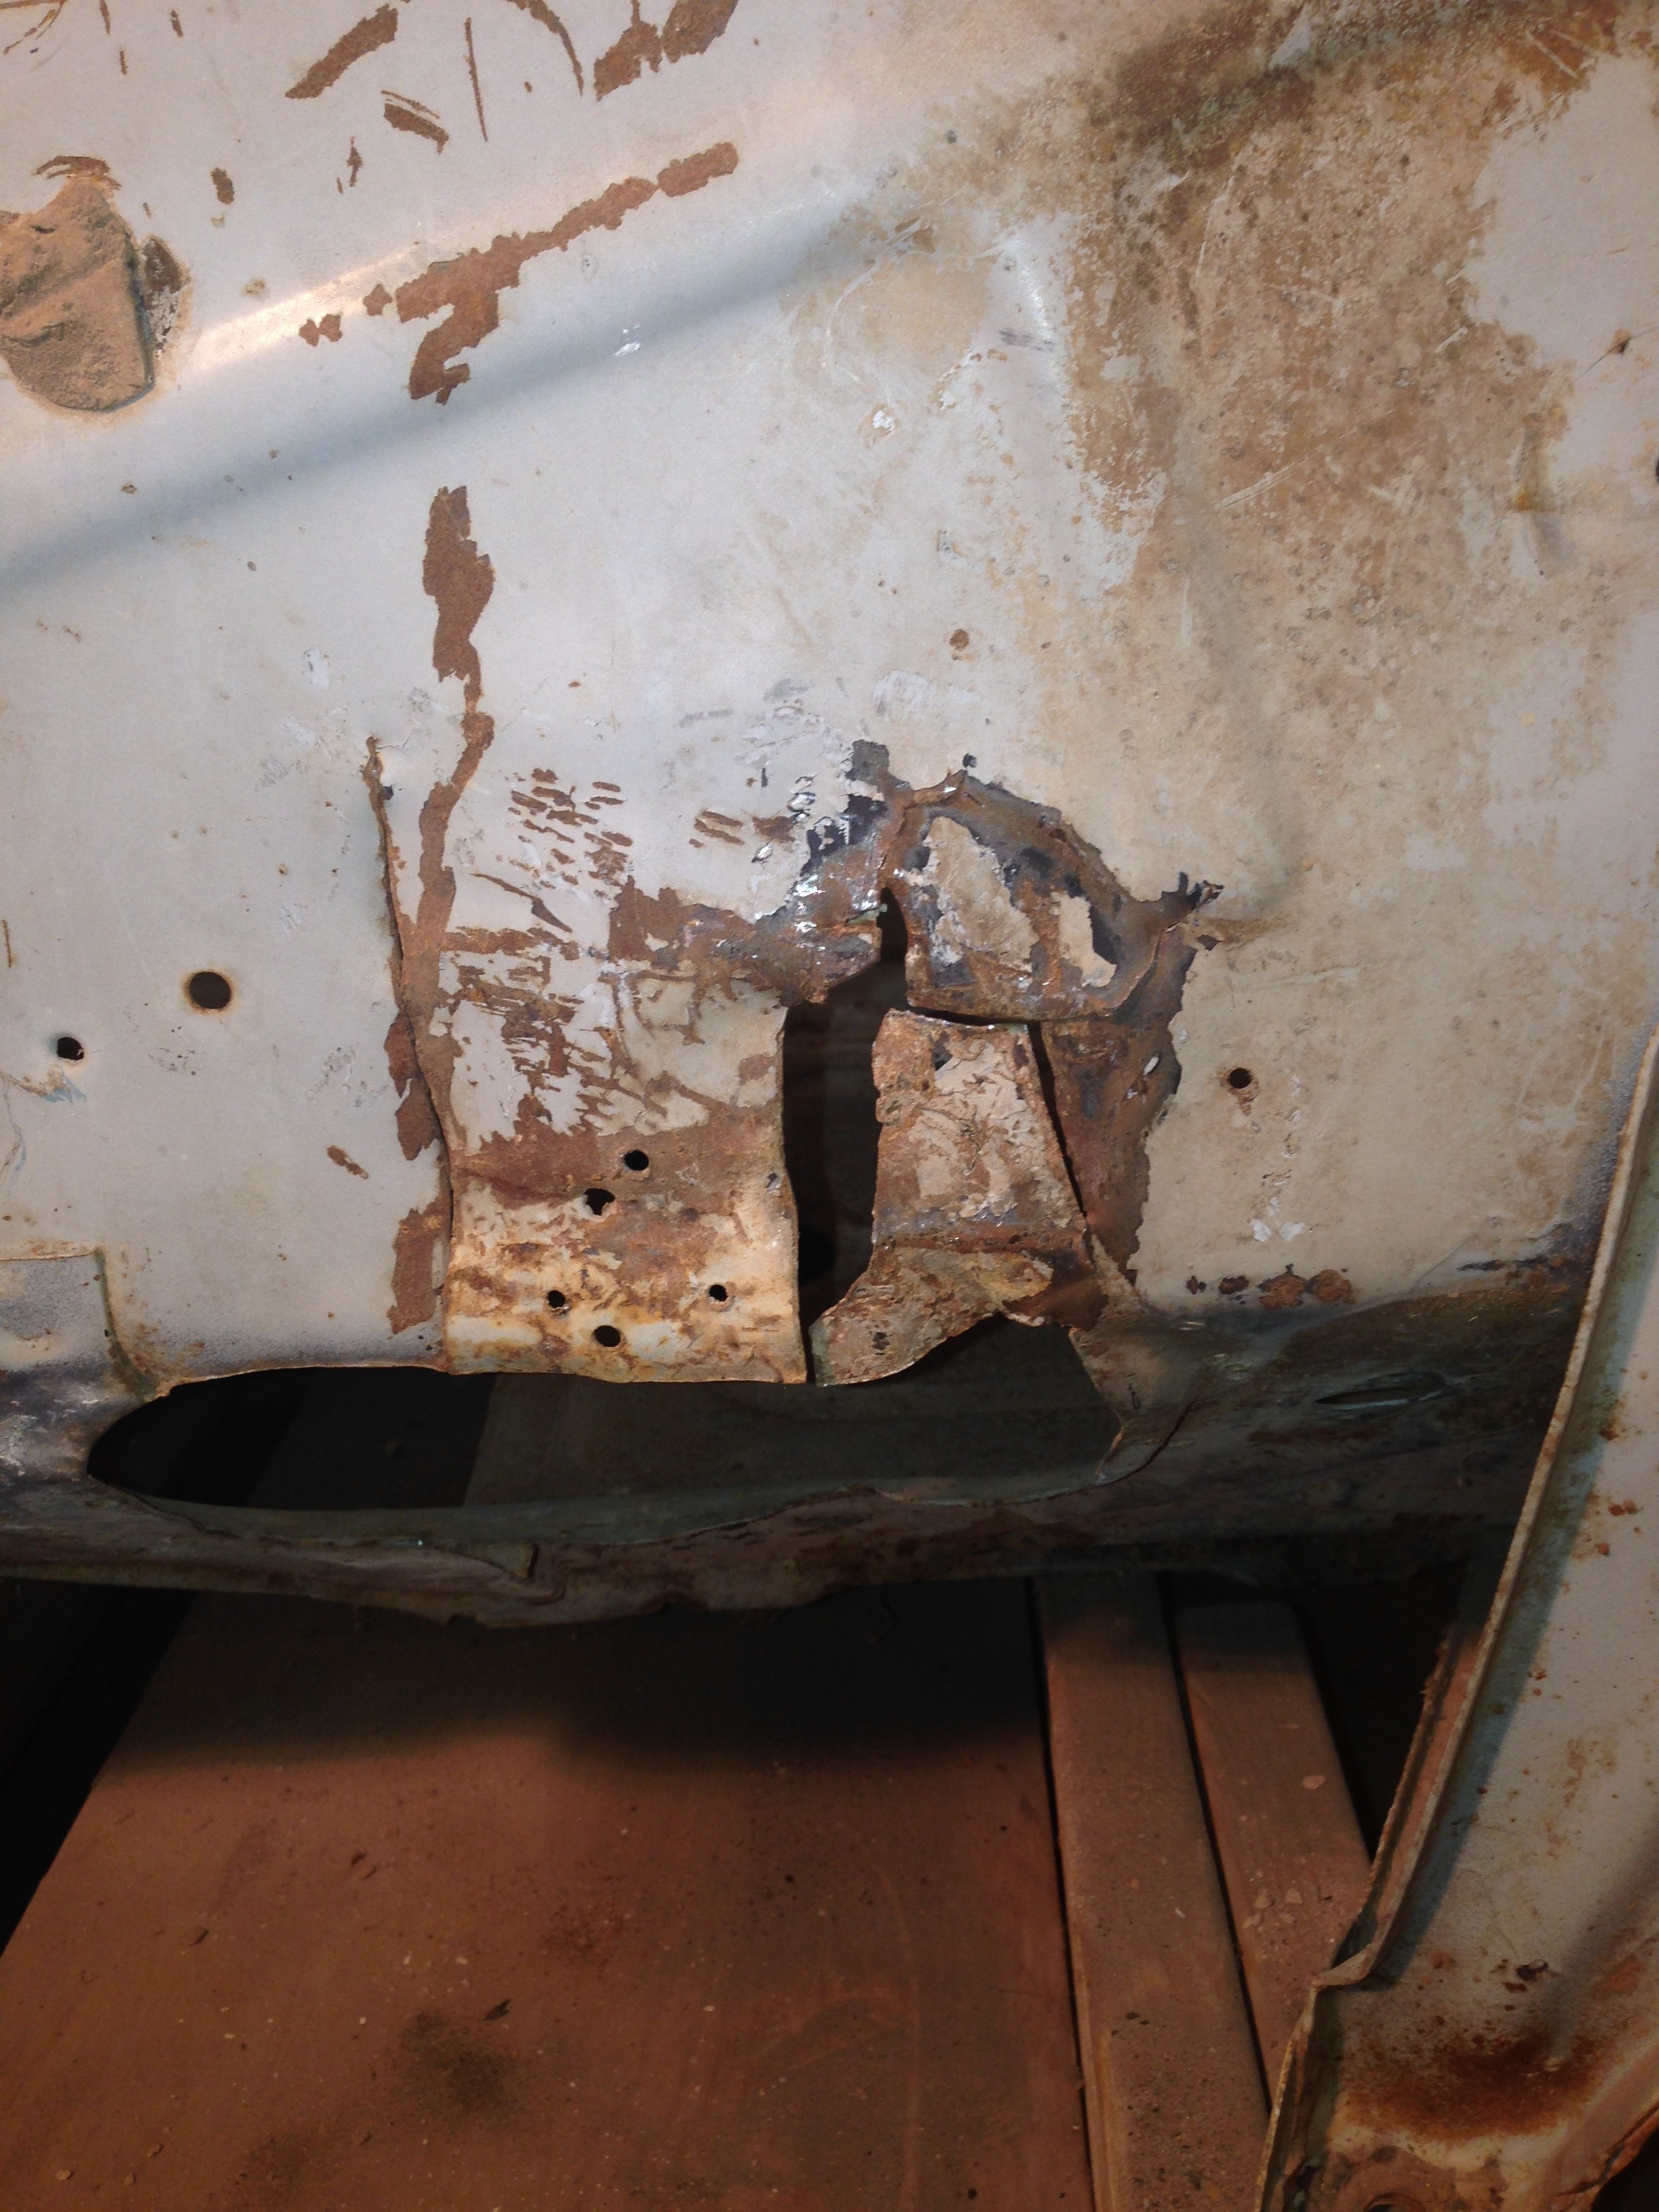
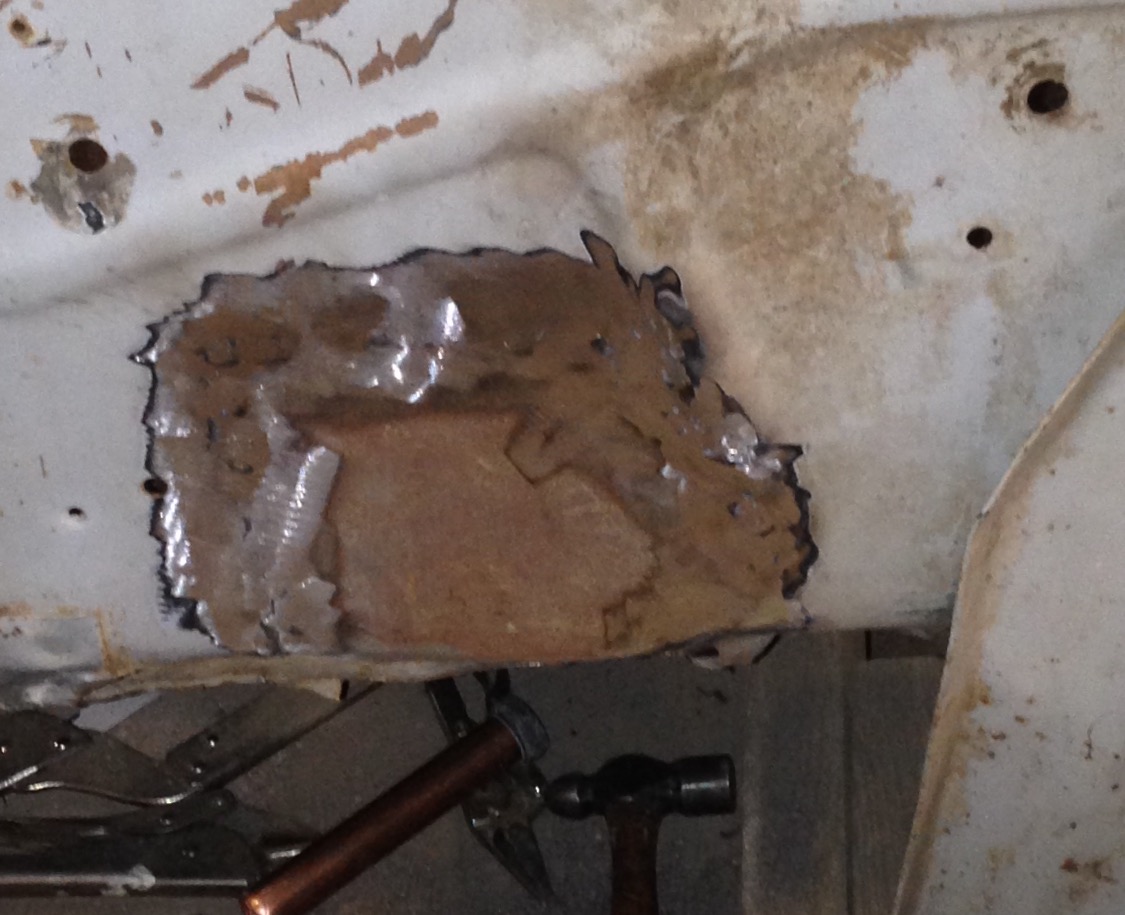
Thanks guys. From here forward it's like any other truck that's lived a hard life. The first fix was to deal with the hole created for the GM big truck steering column. Why it was swapped is anybody's guess.
Then it was on to the front corners.
I'm not finding a good pic of the inner A pillar patch, but it's seen here with the whole repair.
Great work Stu. Strap a seat to the frame and take it for a drive!!
Looks like you got the video thing down. Interesting name you gave it though
I'm always amazed at the metal work you guys do. I would love to learn that skill, but I don't think I have the knack or patience for that work. One of these years when I get free time, I hope to at least try this.
 01-07-2014, 11:04 PM