Build Progress - '49 F-1
#91
 11-16-2014, 08:53 PM

Hi Dave, I've been following your #2 build with great interest! Like most things I'm unfamiliar with, I'm just afraid of making an expensive/non reversible mistake! To me it will be a big step removing those huge original motor mounts! I officially retire Tuesday, so from then on it's FULL STEAM AHEAD!
#92
11-20-2014, 09:54 AM
So this morning I cleaned up the front end of the frame and got everything all plumb and level in preparation for installing the Jag IFS I purchased a couple months ago. I think everything is ready. I also am ready for the install of the Explorer rear end and Dakota springs. Hoping within the next couple weeks to have a roller!

#93
11-20-2014, 11:54 AM
#94
11-20-2014, 02:51 PM
#95
11-24-2014, 07:47 PM
So the Jag IFS is up under the frame and very near ready to weld in place.

I'm curious, anyone watching this thread that has done this... did you use stick or wire feed? I can't see how to get my wire feed nozzle down in between the outside of the frame and the cross-member to get a bead there,
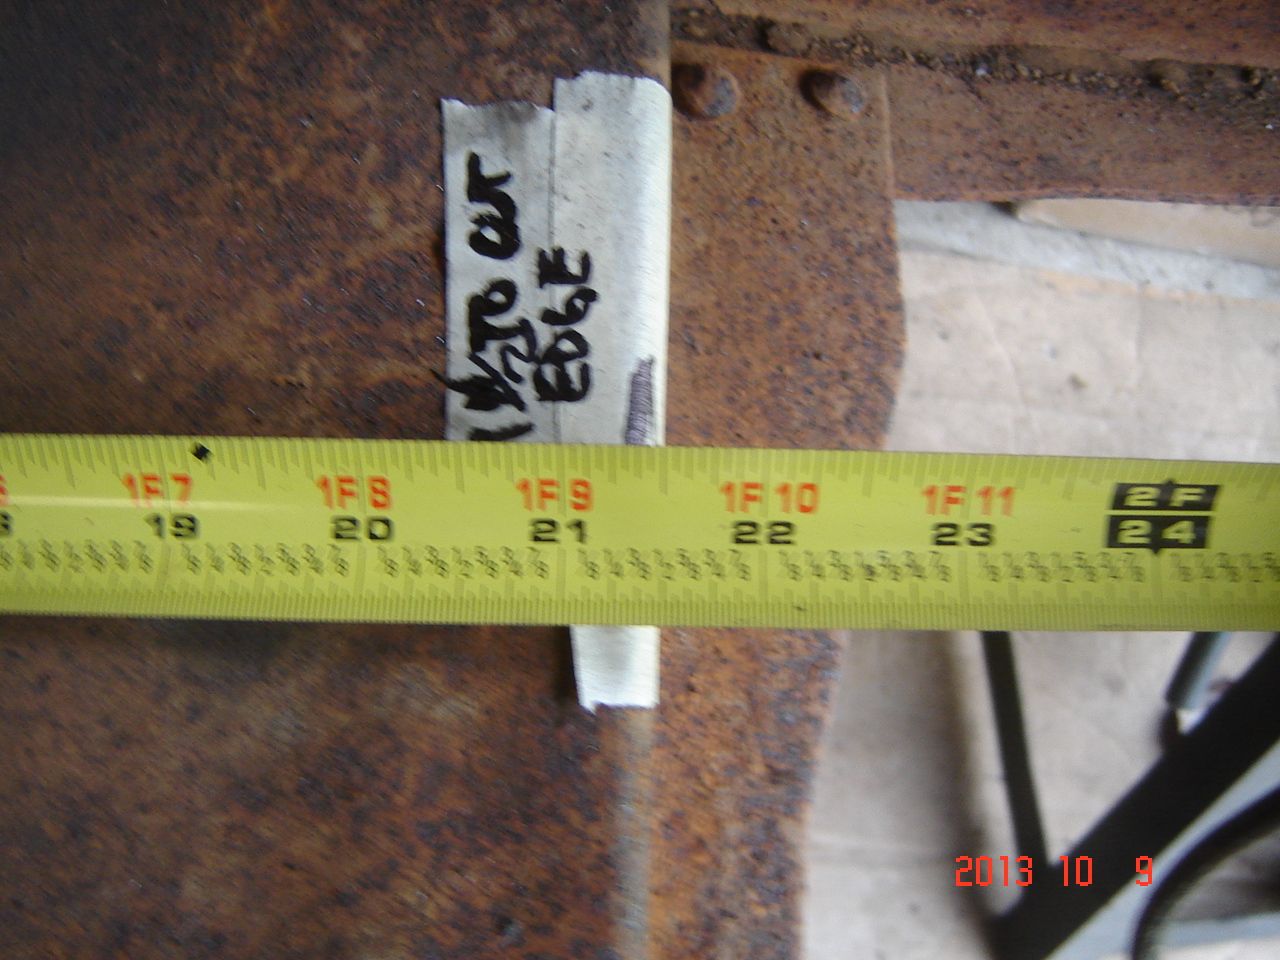
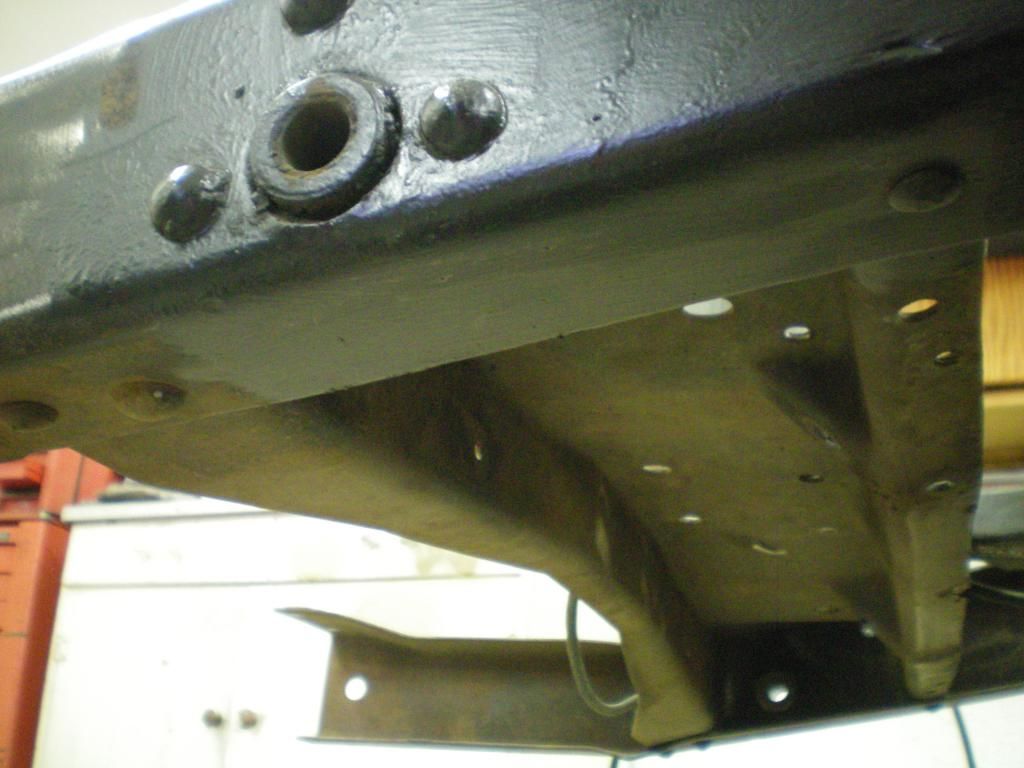
Frame lower flange is cut to enable heating and bending down to get a right fit for welding. Thinking of drilling a couple more holes for plug welds.
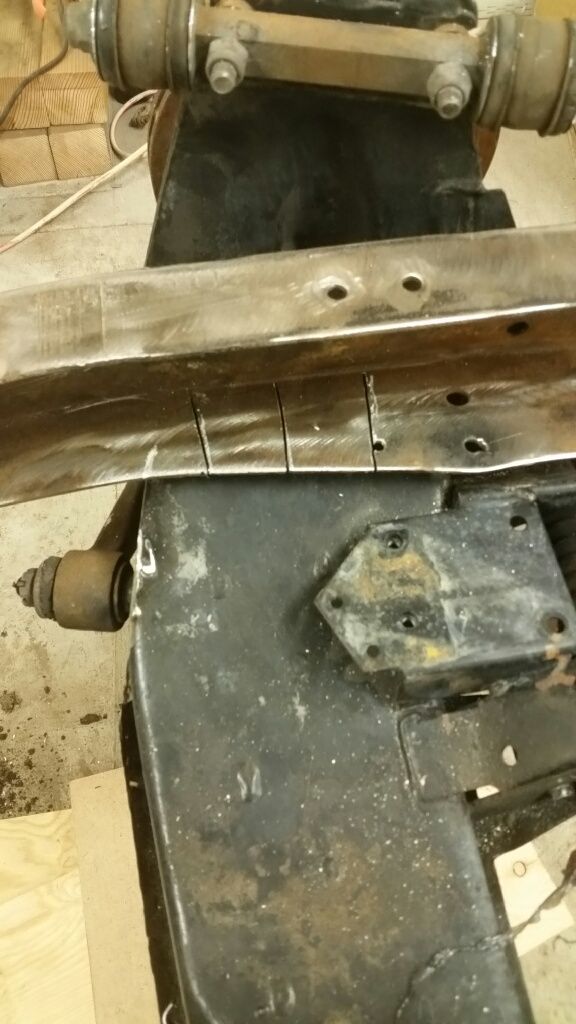

I'm curious, anyone watching this thread that has done this... did you use stick or wire feed? I can't see how to get my wire feed nozzle down in between the outside of the frame and the cross-member to get a bead there,
Frame lower flange is cut to enable heating and bending down to get a right fit for welding. Thinking of drilling a couple more holes for plug welds.

#96
11-25-2014, 06:59 AM
Cargo Master
Not saying its wrong, but the crossmember looks a little forward of where mine ended up, I was able to use the factory holes for plug welds. Mine could be off but I should be close since I mocked up my sheetmetal to verify position. Again I dont want to say it is wrong since you are doing a different year truck but I would double check.
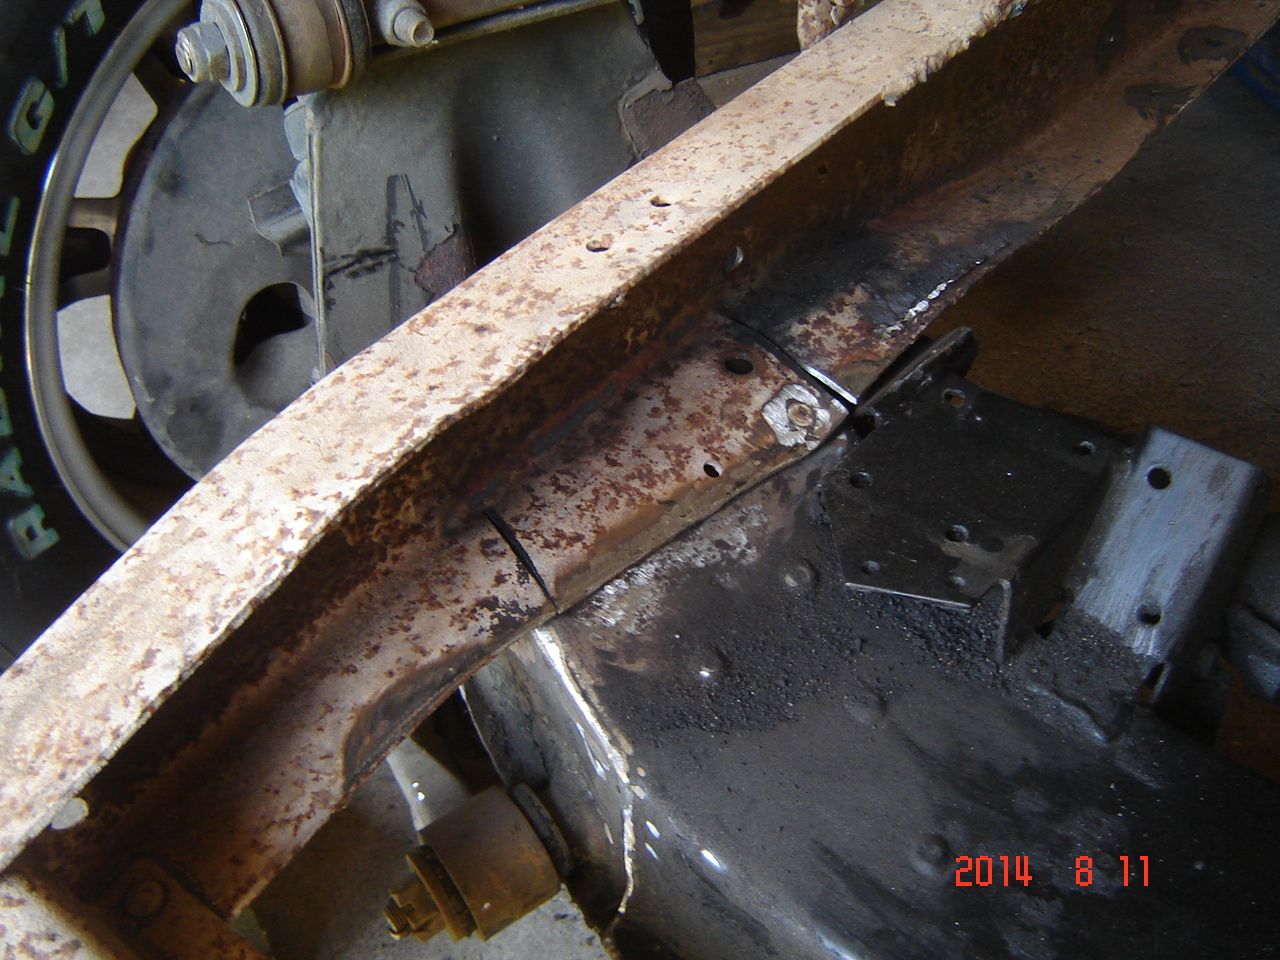
I am at 21 1/2" from the rear inside edge of the jag engine mount pad to the front edge of the frame crossmember.
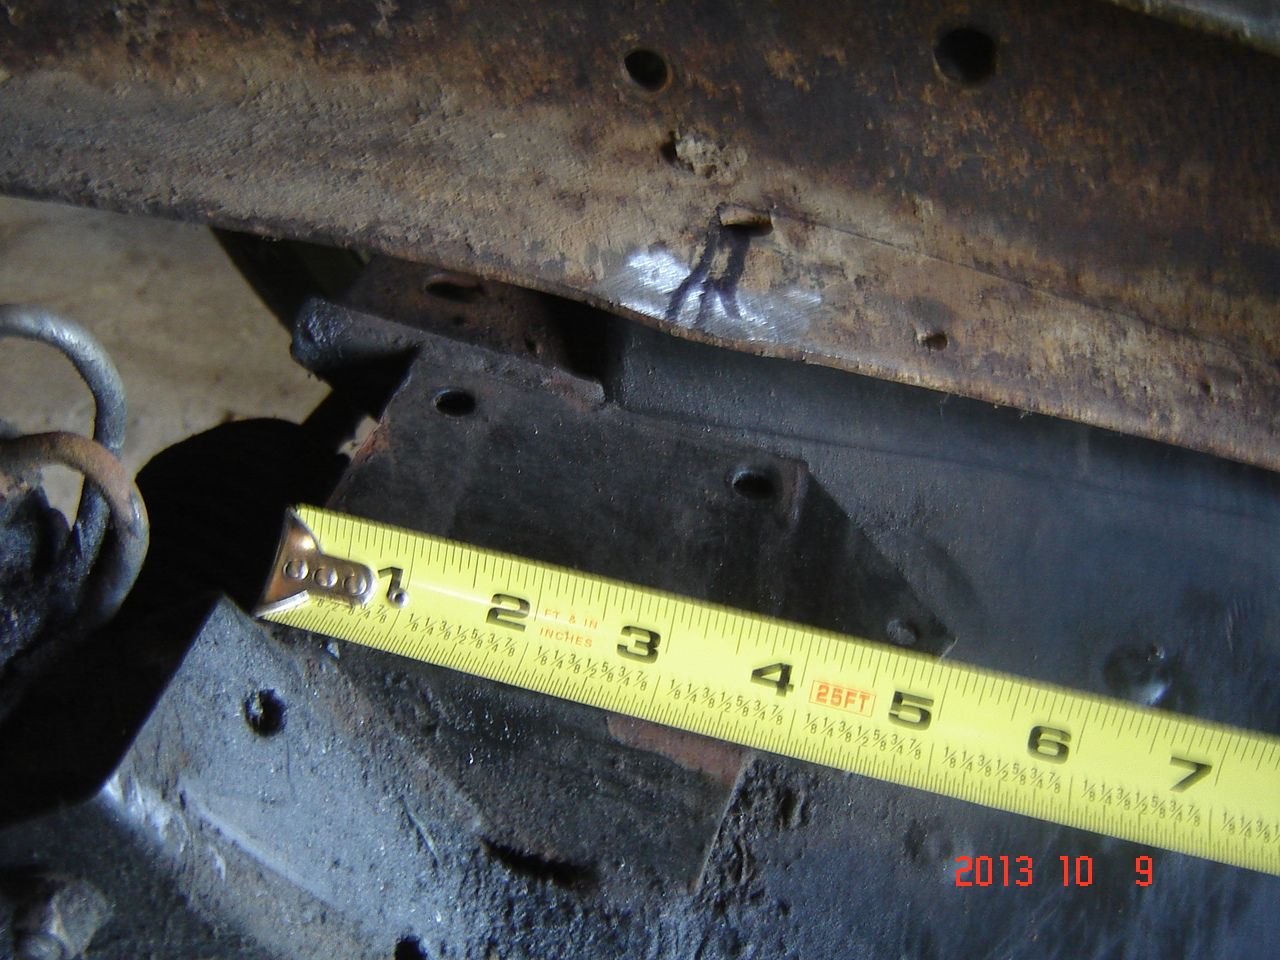
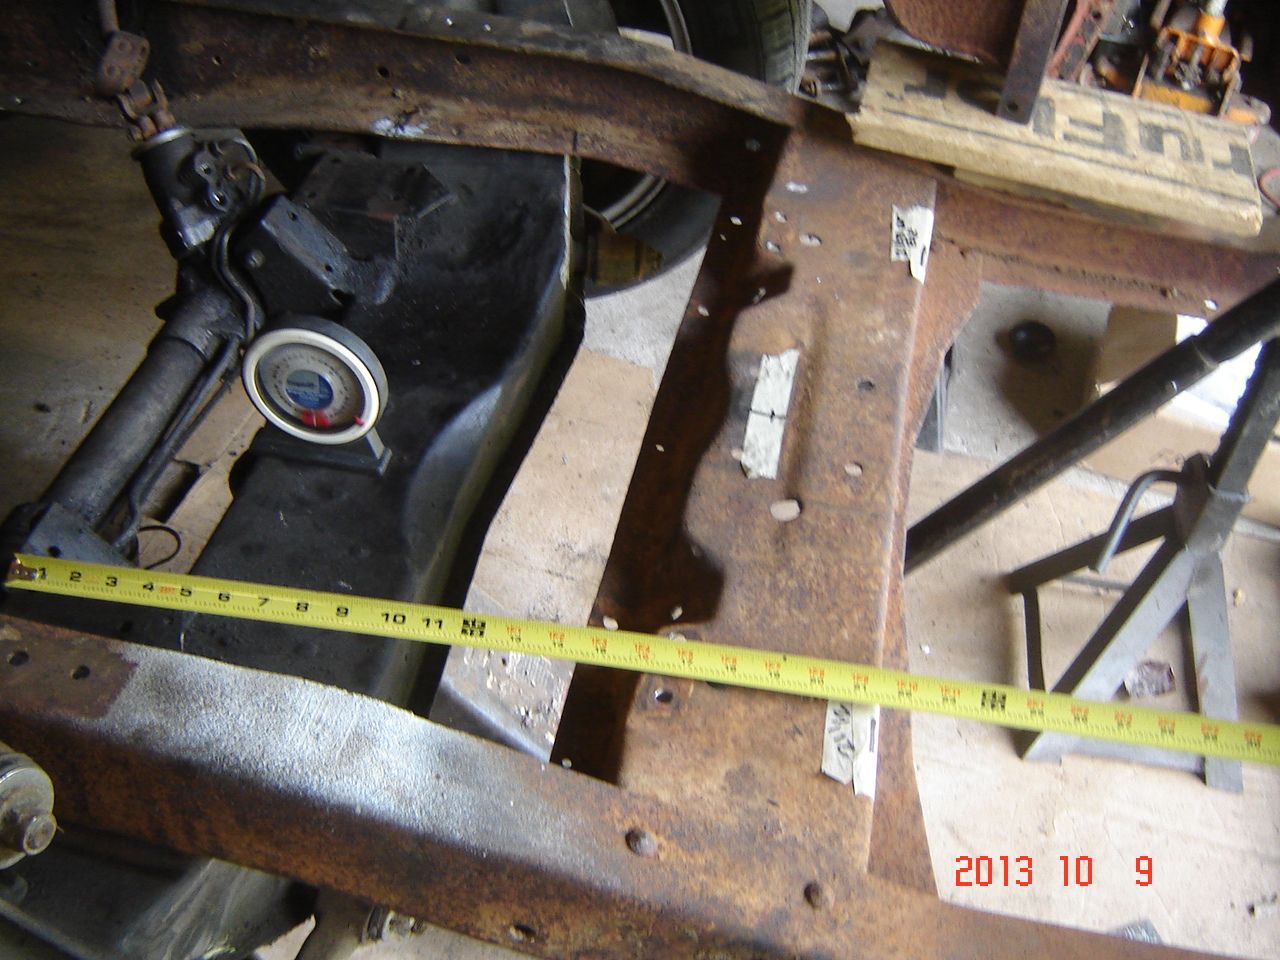


I am at 21 1/2" from the rear inside edge of the jag engine mount pad to the front edge of the frame crossmember.


#97
11-25-2014, 07:35 AM
Dave, I'll definitely check my measurements this morning before I do anything serious. I think the same frame was used through '52. I've read where the wheelbase is 114" and I think I'm real close to that. I was kind of worried about that big of a gap between the bottom of the frame and the front of the cross-member, but I presume (NOT assume!) that with the bent down lower flange and gussets welded in between the outside of the frame and cross-member, that I'll end up with a nice solid attachment. Thanks much for looking and for your advice!
#98
11-26-2014, 12:59 PM
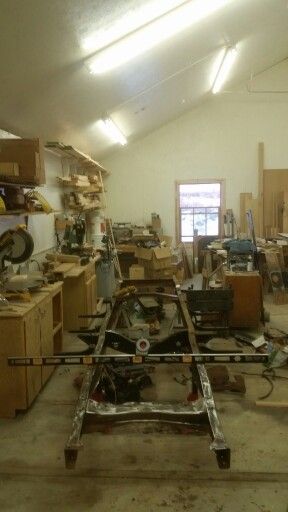
OK! I've finally, 15 months after getting this truck, started to go back together with something!  With the help of a neighbor, I reset the Jag IFS and made copious measurements/adjustments. Heated and bent the lower frame flange to match the cross-member and started welding. Yes, I was holding my breath for a bit there at the start. I have yet to make the gussets that will go between the outside of the frame and cross-member, but it will all come in time. Here's what it looks like now...
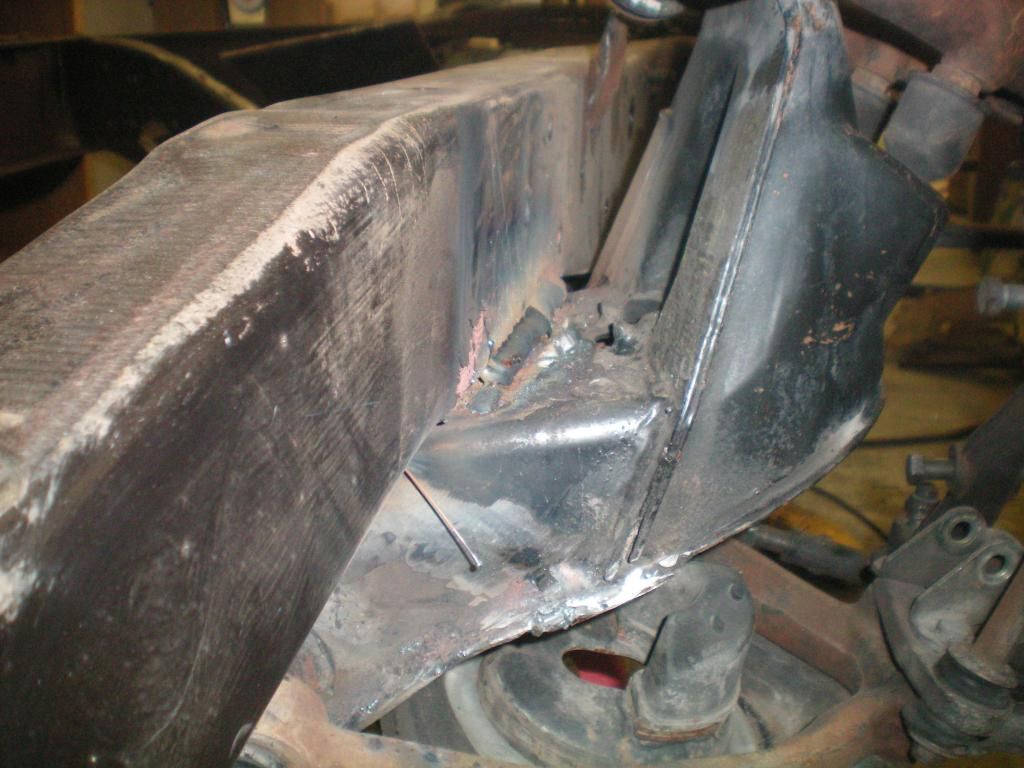
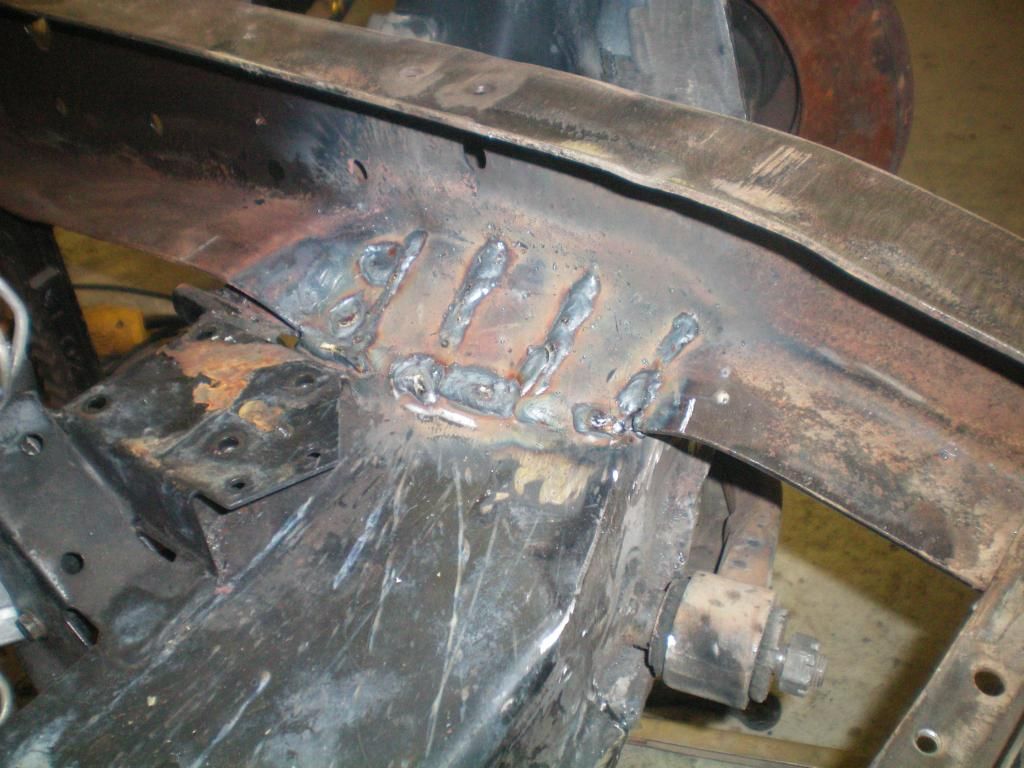
With the help of a neighbor, I reset the Jag IFS and made copious measurements/adjustments. Heated and bent the lower frame flange to match the cross-member and started welding. Yes, I was holding my breath for a bit there at the start. I have yet to make the gussets that will go between the outside of the frame and cross-member, but it will all come in time. Here's what it looks like now...

#99
12-22-2014, 03:18 PM
So I'm ready to bolt the sway bar up under the frame and if I have things in the correct position, it appears that the rear rivet holding the radiator support is in the perfect place for one of bolts holding the sway bar brackets. Can anyone confirm this before I go grinding off a couple rivets and mounting the brackets/sway bar in the wrong place?
Also wondering do others who have done this go ahead and remove the front spring shackle mount that is riveted to the frame?
I'm also trying to locate the rear spring mounts. These and the springs are from a Dakota. I read elsewhere here on a build thread where one of the rear running board support holes is in just the right location for one of the hanger holes. I'm wondering if I am using the correct hole? (lower rear)
The rear hanger looks like I'll need to attach some tubing or healthy channel to the bottom of the frame rail to accommodate the two bottom bolts of the hanger??
This truck will definitely NOT be lowered other than what the Jag IFS will force upon me, so I'd like to keep a little rake to the truck, when not loaded (it will be a daily driver). Any input from anyone would be much appreciated!

Also wondering do others who have done this go ahead and remove the front spring shackle mount that is riveted to the frame?
I'm also trying to locate the rear spring mounts. These and the springs are from a Dakota. I read elsewhere here on a build thread where one of the rear running board support holes is in just the right location for one of the hanger holes. I'm wondering if I am using the correct hole? (lower rear)

The rear hanger looks like I'll need to attach some tubing or healthy channel to the bottom of the frame rail to accommodate the two bottom bolts of the hanger??

This truck will definitely NOT be lowered other than what the Jag IFS will force upon me, so I'd like to keep a little rake to the truck, when not loaded (it will be a daily driver). Any input from anyone would be much appreciated!

#101
12-22-2014, 07:20 PM
#102
12-23-2014, 05:30 PM
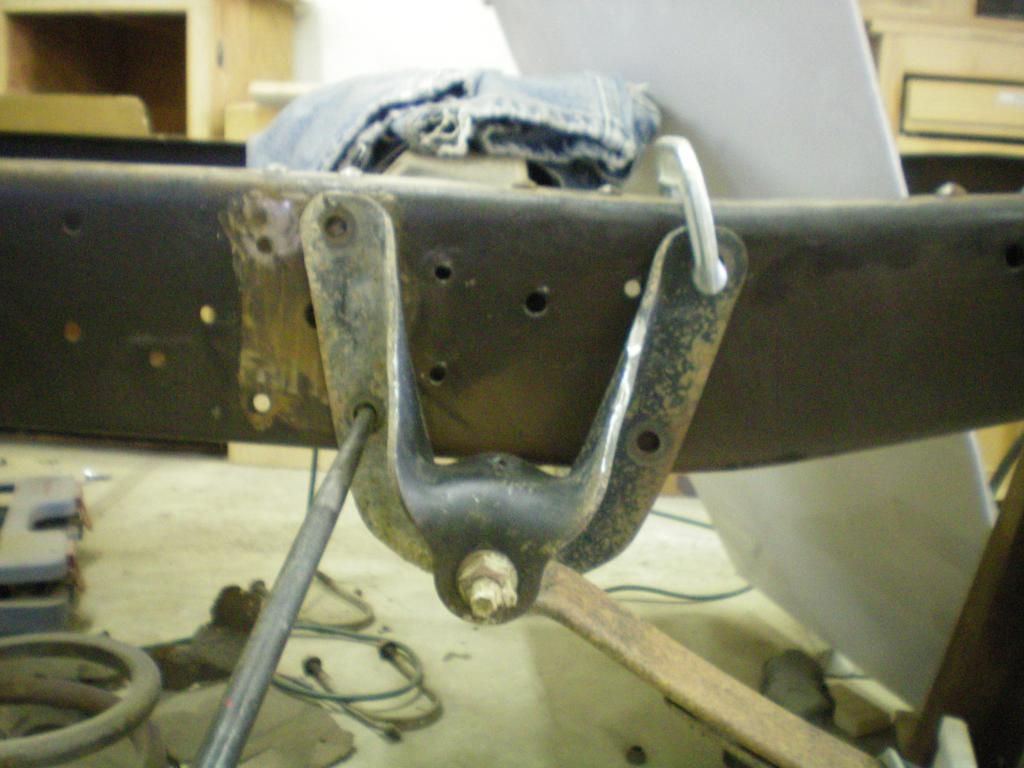
So today ground off the rivets that held the front spring front shackle and knocked them both out. Also ground off the rear lower rivet on each side that attaches the radiator cross member to the frame. This is the location for the front hole of the Jag IFS sway bar bracket. Got the brackets in place, and welded the nuts.
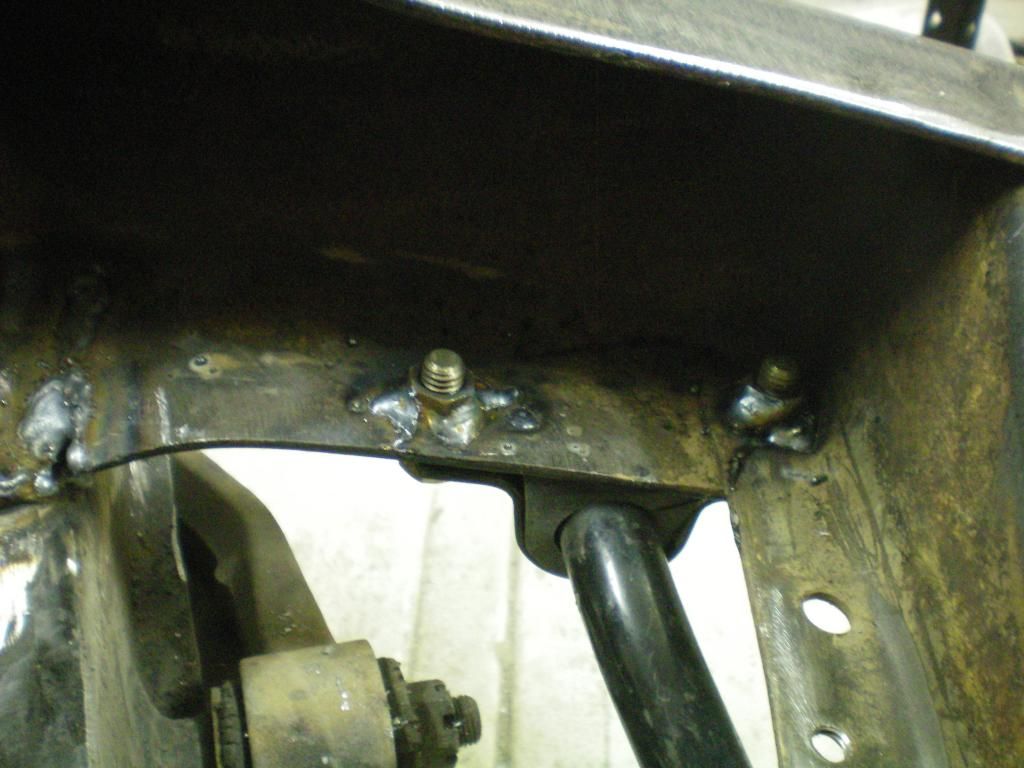
After welding the nuts it was time to start attaching the frame boxing steel. I made mine out of 1/4" maybe a little overkill, but as they say "mo is better!) Got the passenger side tacked in. Feels so dang good to be making forward progress!
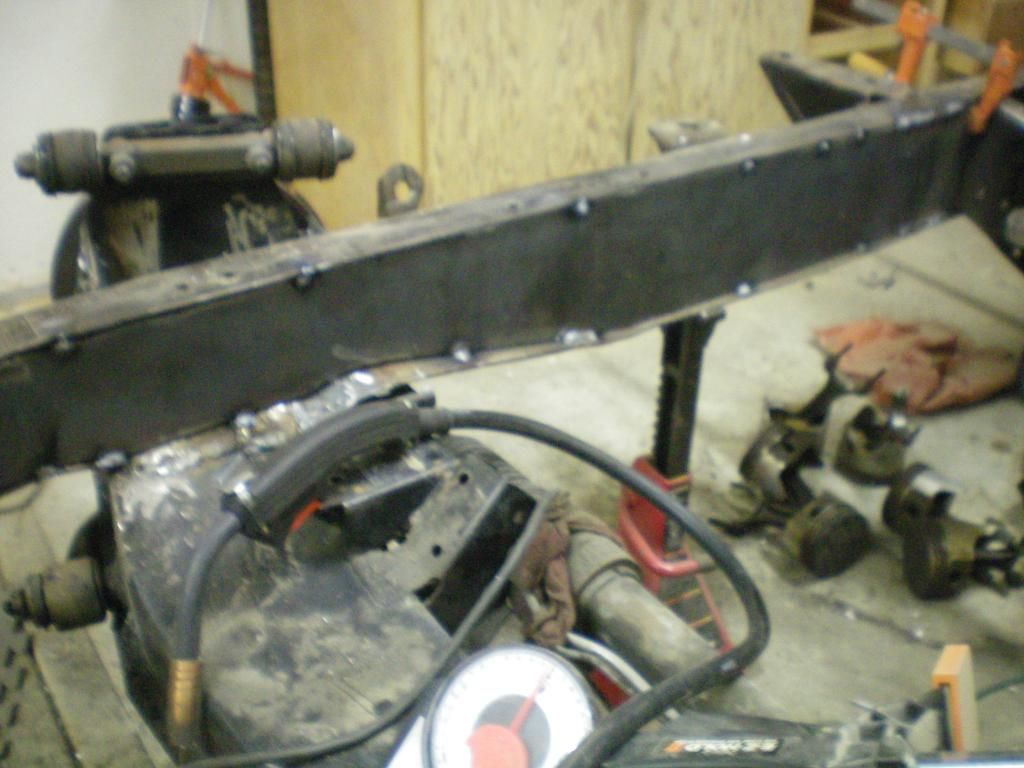
Oh, don't worry about those pistons and rods... they aren't going in anything, just havn't disposed of them yet!
#103
12-23-2014, 06:58 PM
Cargo Master
Looks good!
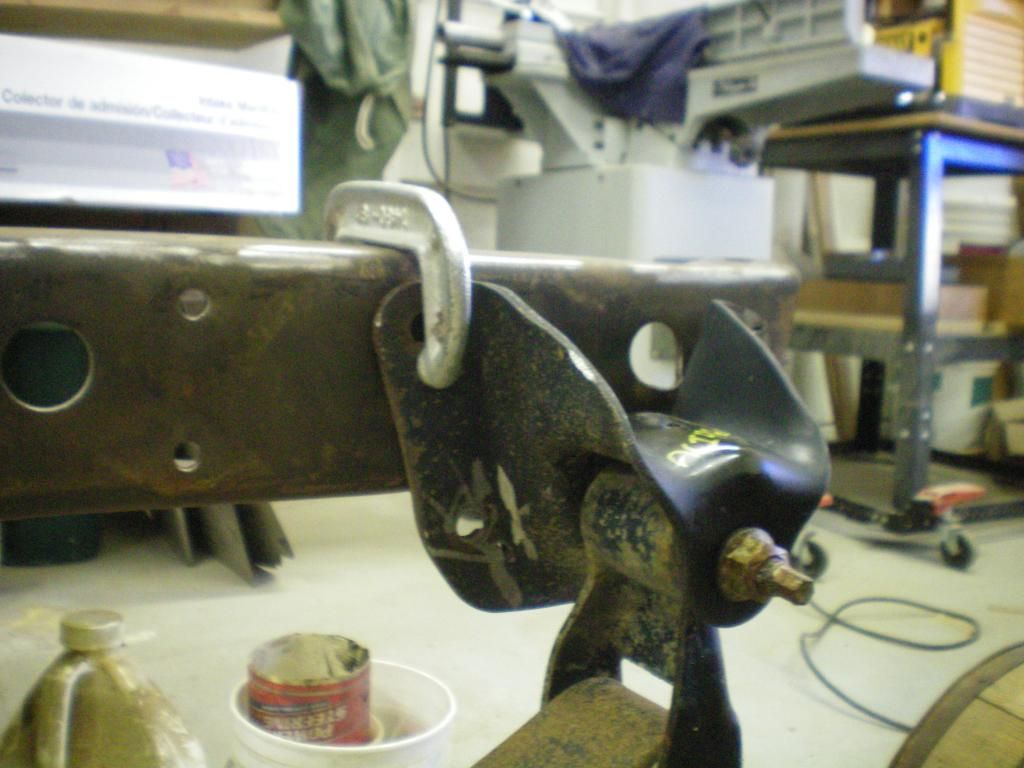
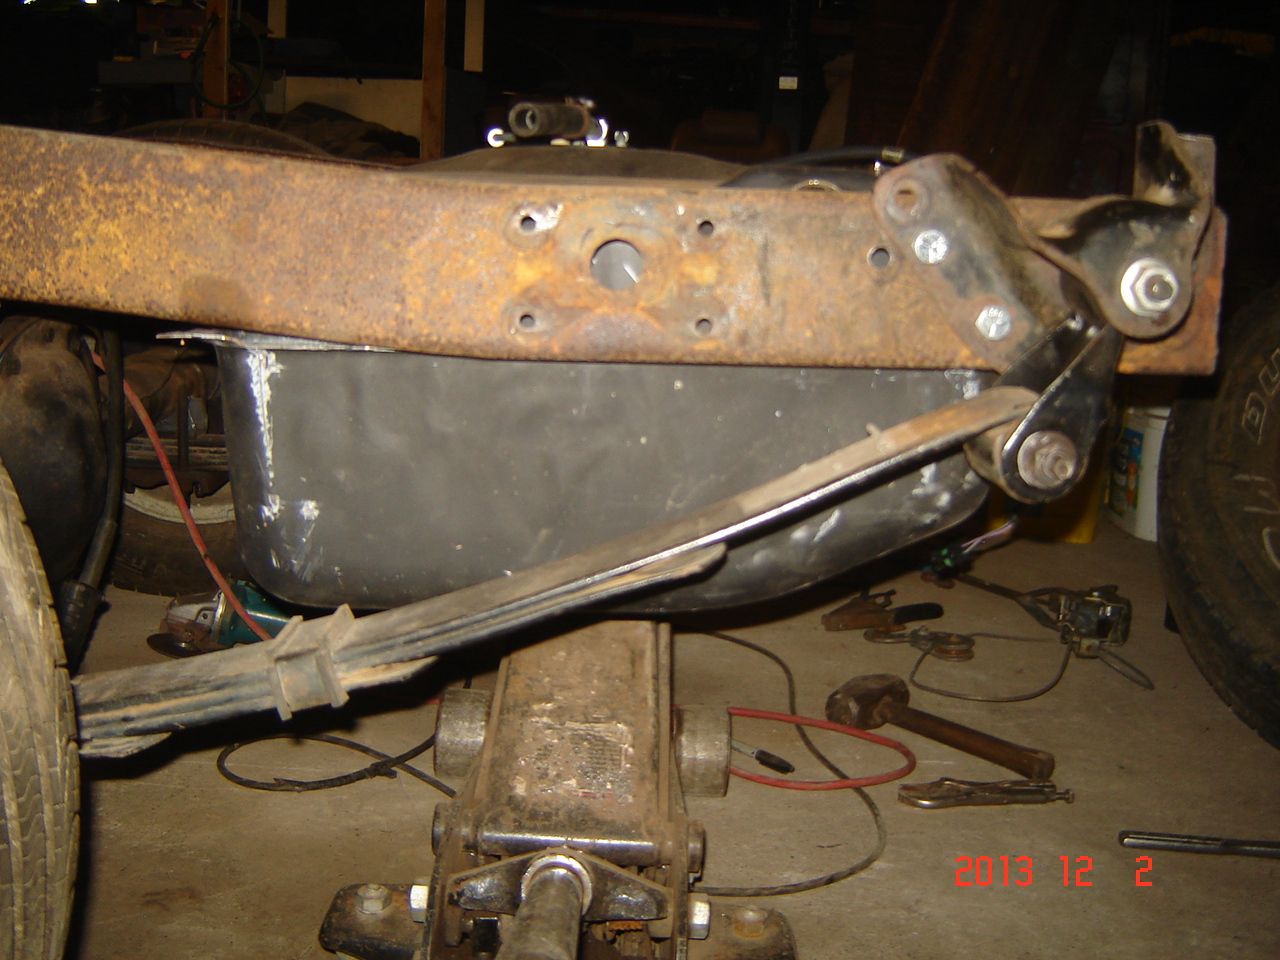
Ditto on removing the crossmember rivet, it is perfect for one of the sway bar mounts, pics are in both my build threads.
On my truck #1 build I used Dakota hangers and springs, this was the front location
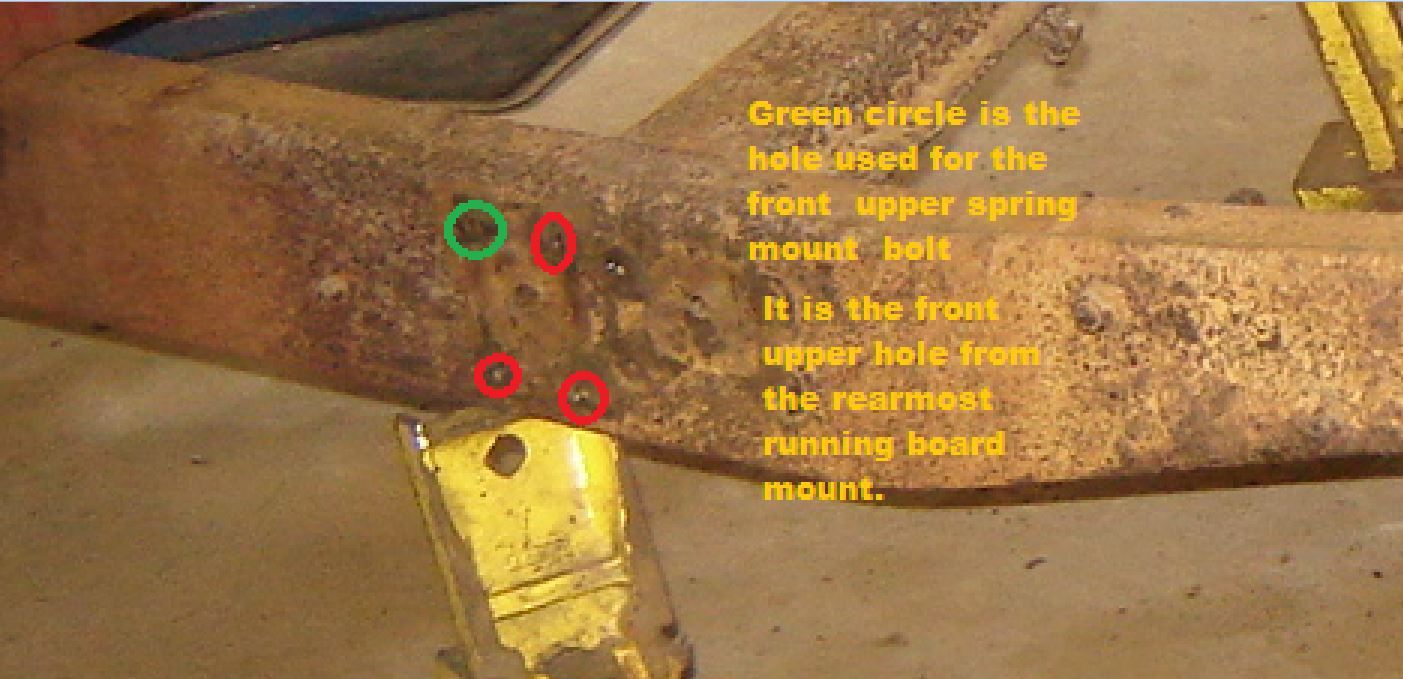
Used a factory hole to relocate the running board mount, drilled the other 3 holes.
After many trials (see build #1 for options) I ended up mounting the rear hangers like this.

Added an extra bolt, and the old bolt hole was welded up. Trimmed down the rear of the hanger it wouldnt stick up into the bed floor.
You should clamp the rear hanger where you think you want it and if possible set the bed down on the frame so you can see where the ride height is. I set mine so it will be slightly higher in the back unloaded, and loaded should go to here.

Ditto on removing the crossmember rivet, it is perfect for one of the sway bar mounts, pics are in both my build threads.
On my truck #1 build I used Dakota hangers and springs, this was the front location

Used a factory hole to relocate the running board mount, drilled the other 3 holes.

After many trials (see build #1 for options) I ended up mounting the rear hangers like this.

Added an extra bolt, and the old bolt hole was welded up. Trimmed down the rear of the hanger it wouldnt stick up into the bed floor.

You should clamp the rear hanger where you think you want it and if possible set the bed down on the frame so you can see where the ride height is. I set mine so it will be slightly higher in the back unloaded, and loaded should go to here.

#104
12-23-2014, 08:19 PM
Dave, thanks for posting those pics again. They reinforce that I'm doing this correctly. I guess I need to find a set of wheels and tires for this truck so I can set the bed height. They will be the single biggest cost on this project .. so far... I also need to come up with the clamps for attaching rear springs to the axle. Didn't get them when I snaked the axle out from under an Explorer. I did spy a couple under another Explorer at a junk yard an hour from me, but I was unable to get the u-bolt nuts loose with just a ratchet. Maybe I'll get back over there next week with my son and see if I can pry them loose with penetrating oil and a cheater bar.
Last week my wife asked me a couple questions... "When will that be done and how much more is it going to cost??" I didn't have an answer either way, LOL Anyone else every had those questions asked??
Last week my wife asked me a couple questions... "When will that be done and how much more is it going to cost??" I didn't have an answer either way, LOL Anyone else every had those questions asked??
#105
12-23-2014, 09:03 PM
Cargo Master
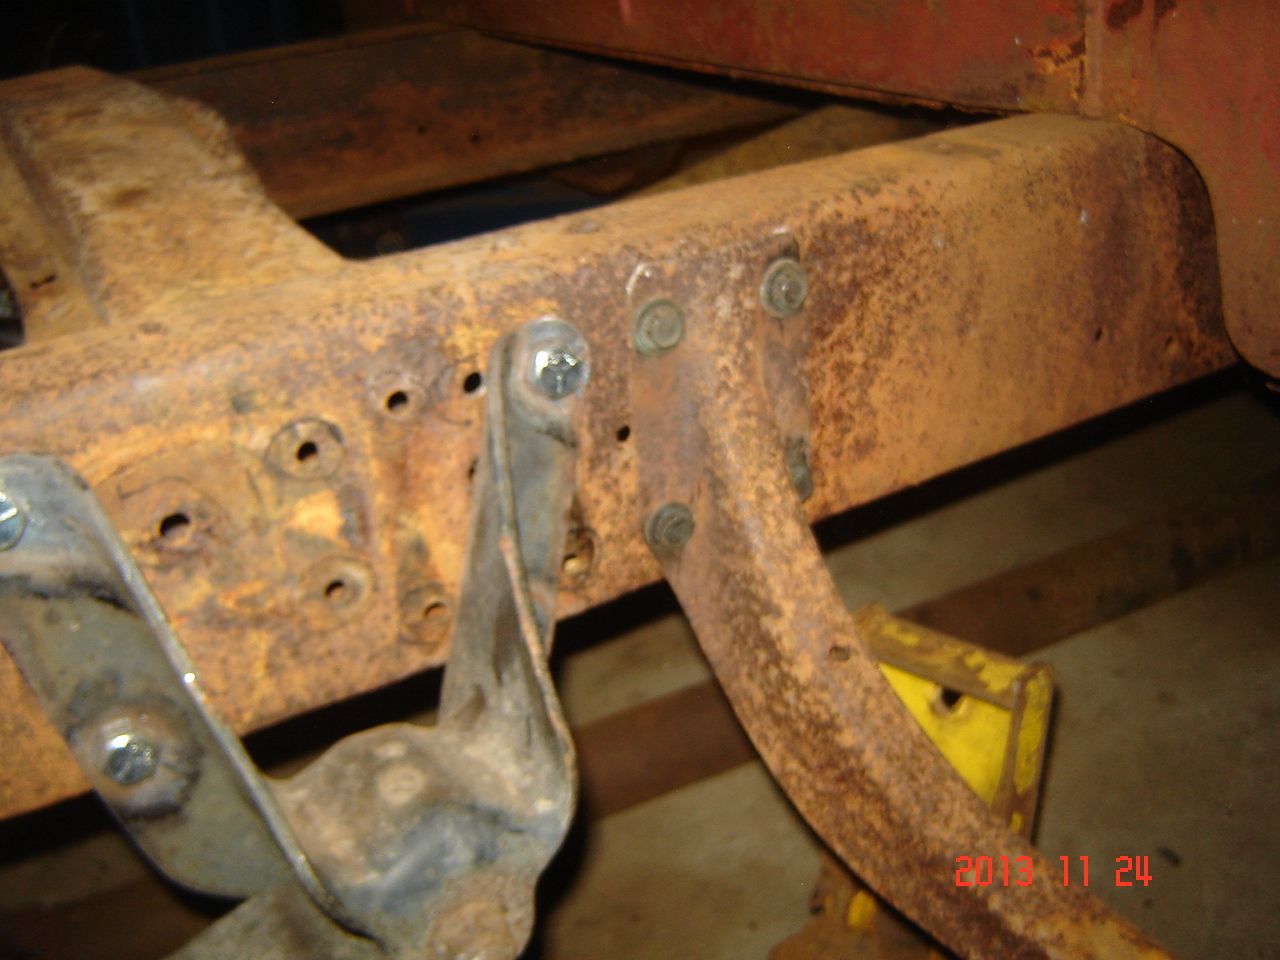
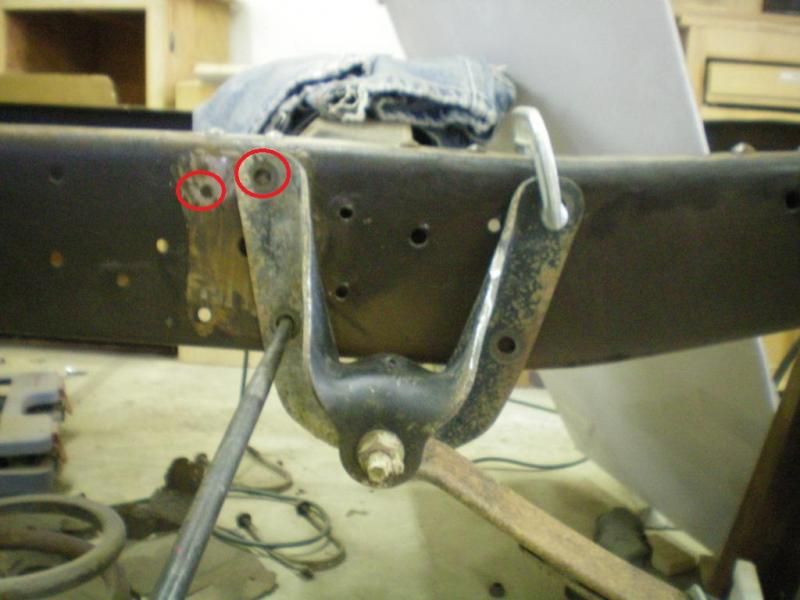
I set mine up a little different than you have pictured, I lined up these two spots circled in red.
I already know I am going to be over the $5K budget I had set for each truck, but not double so I am doing ok Nobody asks what it will cost, but I always am asking myself when I will be done. Wife doesnt care as long as she gets to drive!

I already know I am going to be over the $5K budget I had set for each truck, but not double so I am doing ok
Nobody asks what it will cost, but I always am asking myself when I will be done. Wife doesnt care as long as she gets to drive!

